Toyota 4Runner, Tacoma, and Tundra: How to Remove Spare Tire
Get to know where the spare tire is before you need it, and you'll be that much more prepared out on the trail.
This article applies to the Toyota 4Runner (1984-2002), Pickup (1984-1995), Tacoma (1996-2015), and Tundra (2000-2015).
You go to remove the spare tire from your Toyota truck, but you cant seem to get it loose. Well there is a simple mechanism that you need to use to lower your spare from its position underneath the vehicle. The following steps will carefully outline how to get it down so that you can change your tire and be on your way again.

Material Needed
- Spare removal kit (located in your vehicle)
Step 1 – Locate the tool kit
In order to remove the spare tire, you need to winch it down from its current position. There is a special spare tire removal kit located under the rear seat in your SUV, crew cab, or extended cab truck. On regular cab trucks it is against the rear wall behind the seat. The spare is attached to a winch that is operated from a crank on the rear of the vehicle.
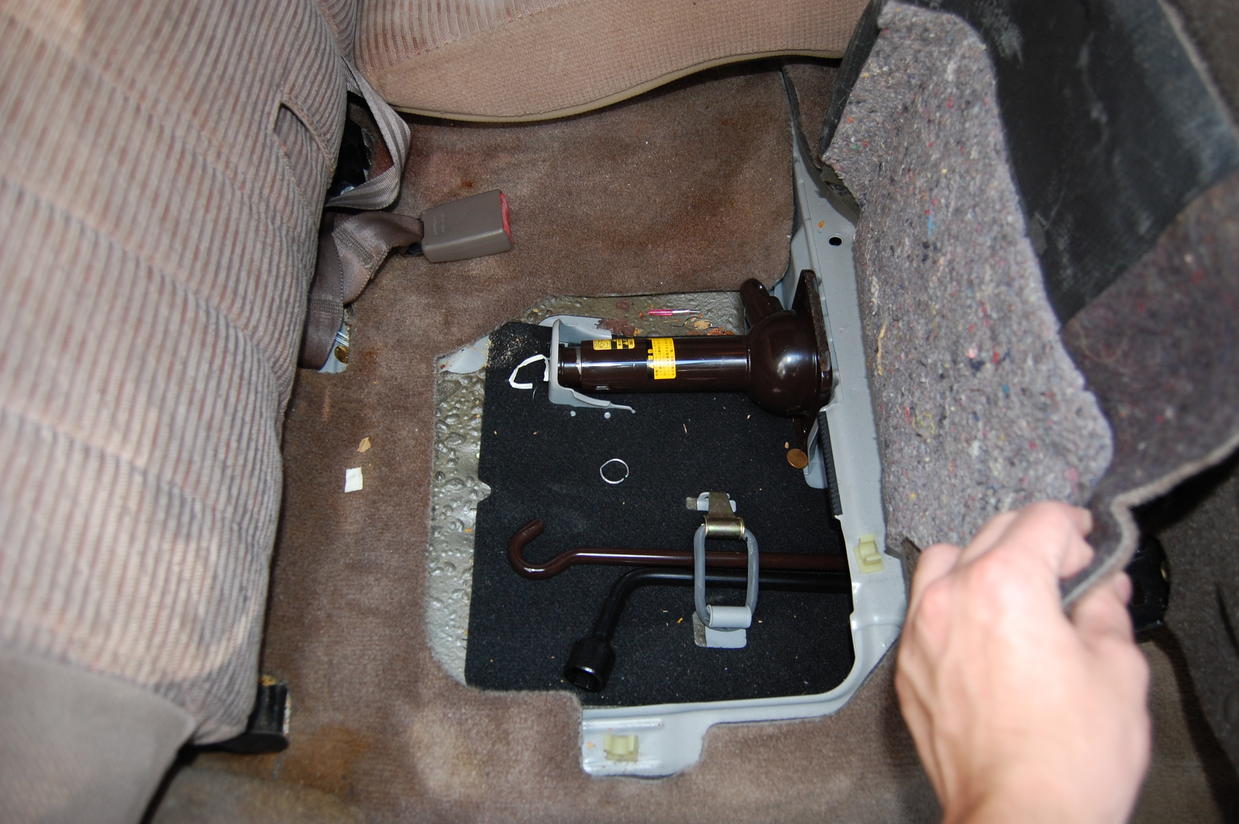
Figure 1. 4Runner, extended cab and crew cab trucks have a kit under the rear seat. 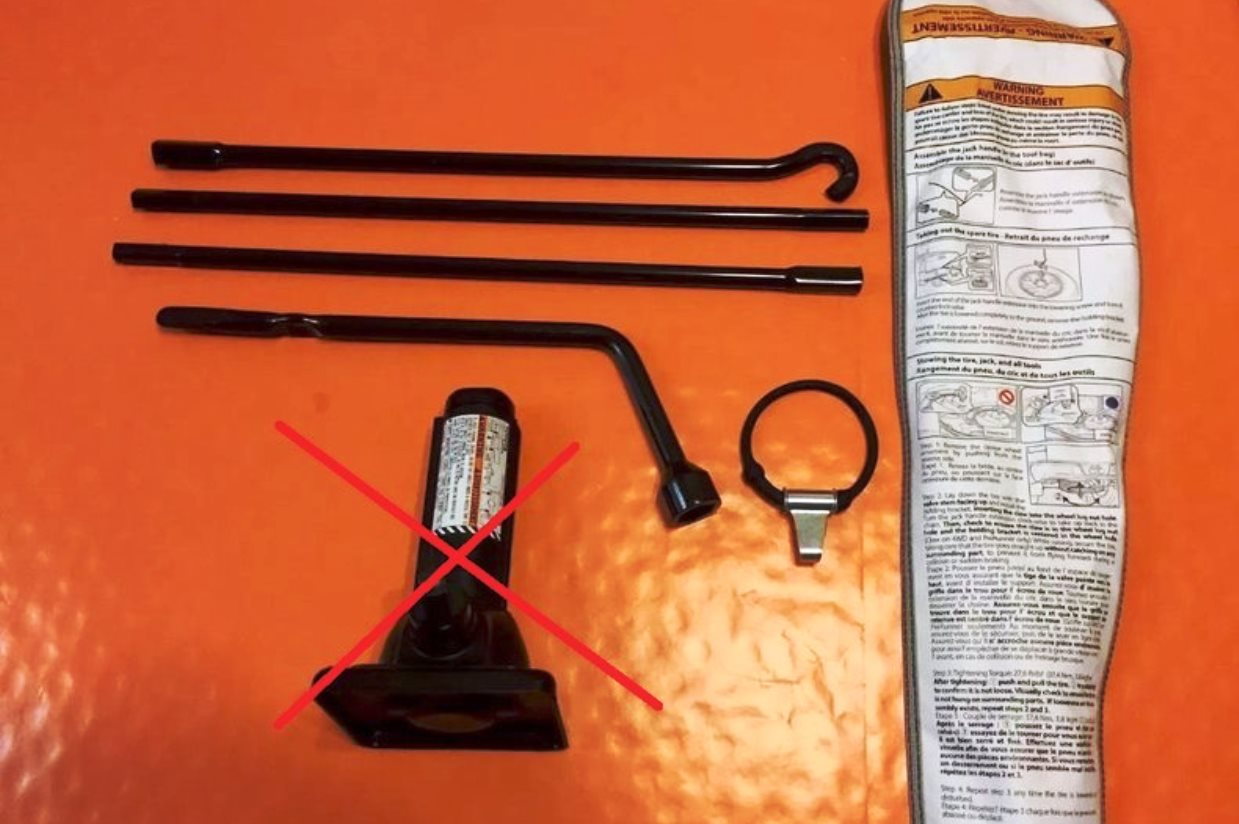
Figure 2. Typical Toyota factory tool kit.
Pro Tip
If you cannot locate your tool kit, there are options to create a tool that will work. You can use a rolled steel bar from the hardware store and bend a crank into the end of it. Then you must weld 1/4" flat bar into the end to engage the slot on the crank.
Step 2 – Assemble the rod
The kit will include multiple pieces that need to be assembled together. This rod will turn the crank in the rear of the vehicle that operates the winch.

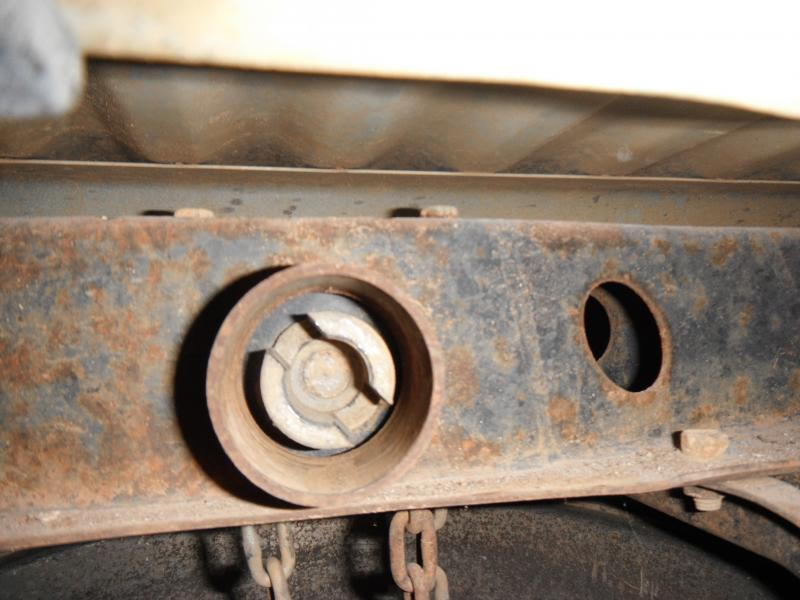
Step 3 – Locate the crank and turn it
Open the lift gate on the rear of your vehicle and inspect the bumper. There should be a hole in your bumper near the latch that opens the lift gate. Insert the rod into this hole and turn it until you feel it engage. Begin to operate the crank and check under the vehicle to make sure the spare is lowering.
Pro Tip
If you are having trouble turning the crank, try spraying the assembly with PB Blaster. Give it some time to set in, then try to remove the spare again.
Step 4 – Remove the tire
Lower the spare until it reaches the ground. Remove it from the winch and use the crank to reset the winch to its original position.
Related Article and Site
- How to Change a Tire - YotaTech.com
- If You Have a Flat - TTGuide.com