Toyota Tundra: Lift Kit Reviews and How-to
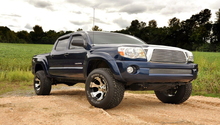
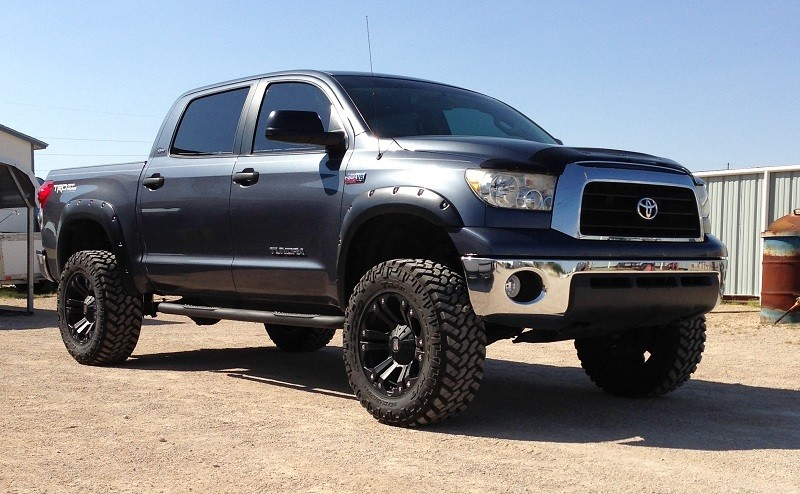
Although the stock Tundra is a large truck in stock trim, most agree that a slight ride height adjustment is needed for aesthetic appeal. A variety of lift kits are available on the market and, if you are handy with a wrench, it can be installed at home for a fraction of the cost.
This article applies to the Toyota Tundra (2000-present).
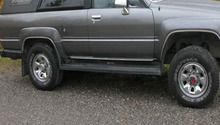
Part of owning a full-size pickup truck, such as the Toyota Tundra, is the ability to modify it to your liking. One of the most popular upgrades for any truck is a suspension lift kit. Although there is usually no argument that a lifted truck is more aesthetically appealing than a truck that sits at a stock ride height, a huge benefit from lifting your Tundra is an increase in versatility and the ability to overcome obstacles, especially while driving off-road. The marketplace is saturated with lift kits that range from mild to wild to give your truck the height and stance that your heart desires. Installation of a lift kit is not overly complicated, but is quite time consuming and requires moderate mechanical skills. So if you are finally ready to bite the bullet and are shopping for a lift kit, this guide will provide an overview of the installation procedure as well as a review of several lift kits available for 2000 to present Toyota Tundra trucks.
Table of Contents
How to Install Lift Kit

Materials Needed
- Floor jack and jack stands
- Metric wrench and socket sets
- 3/8" and 1/2" drive ratchets and extensions
- 1-1/16" and 1-3/16" wrench and sockets
- Hammer
- Rubber mallet
- Hex (Allen) key set
- Air gun (optional)
- Vise grips
- Pipe wrench
- Needle nose pliers
- Cut-off saw
- Drfit (punch)
- Wheel chocks
- Snubber or bungee chord
- Ball joint separating tool
- Torque wrench (capable of 250 ft/lbs)
The following generic lift kit installation procedure is shown on a 2007+ Tundra; however, lifting a first generation Tundra is very similar.
Step 1 – Rear lift kit installation
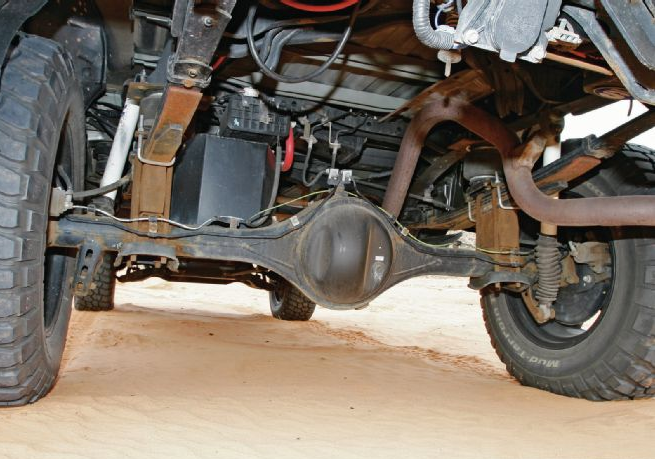
Most prefer to begin with the rear of the truck when installing a lift kit, as it is much easier to install compared to the front-end. Most kits simply place spacer blocks between the leaf springs and rear axle to raise the vehicle.
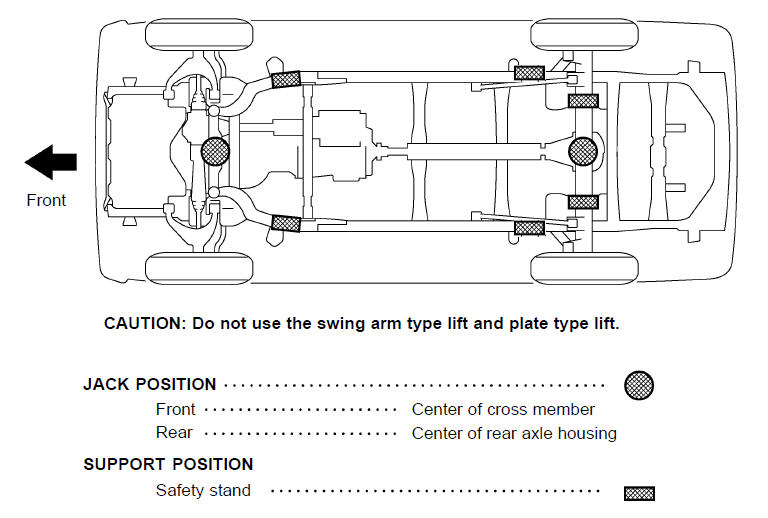
- Begin by chocking the front wheels and lifting the rear of the truck with a floor jack. Place jack stands on each side of the frame in front of the rear axle before letting the jack down. The rear axle should now hang free. Note that the rear-end will need to be lowered to install the lift blocks, so be sure the jack stands are adjusted high enough to allow the axle to drop down once disconnected.
- Remove the rear wheels. (This is optional, but will allow additional room for lowering the rear axle.)
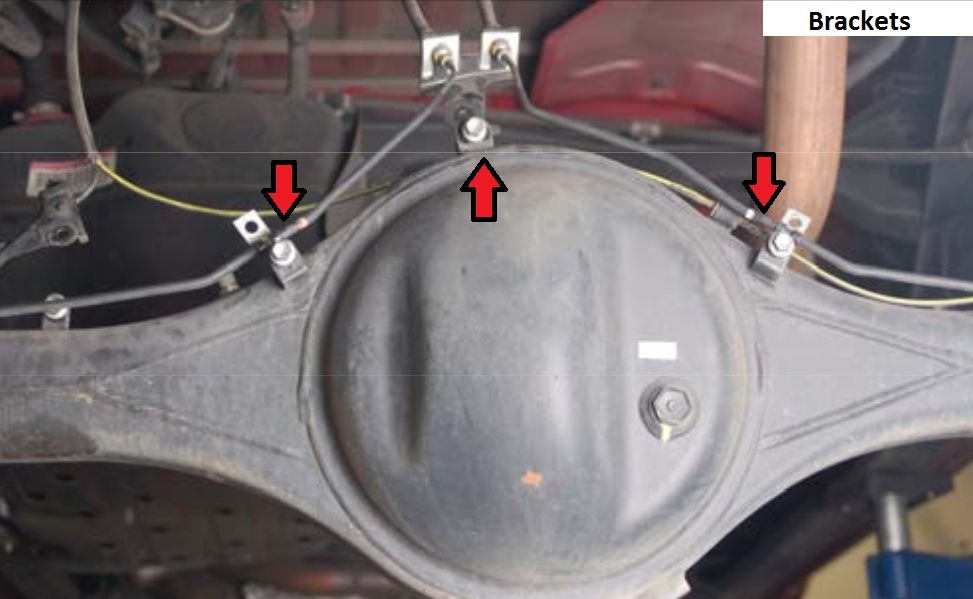
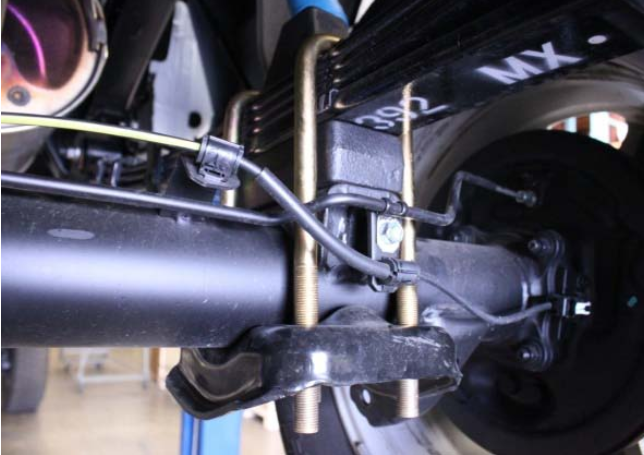
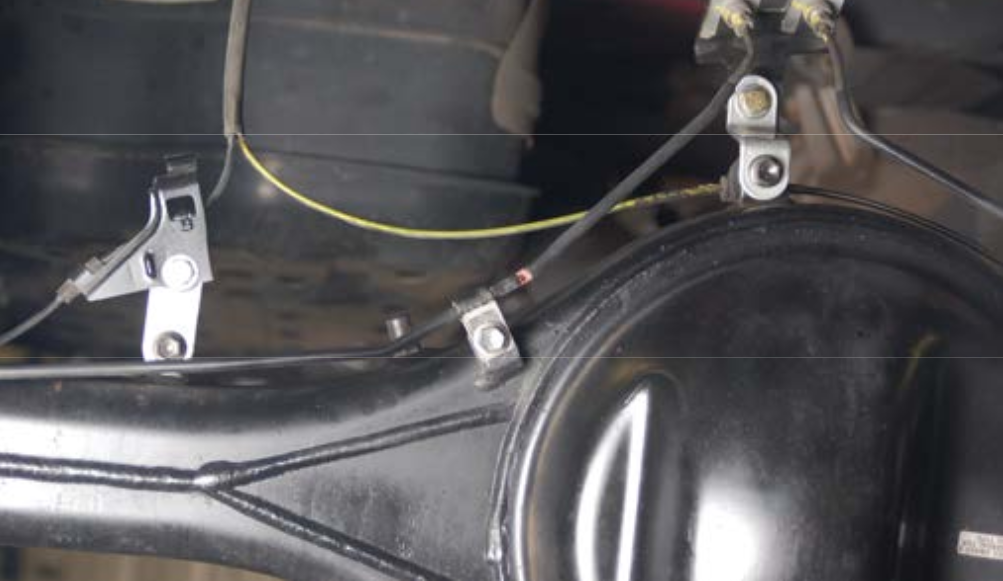
- Using a 12mm wrench or socket, remove the bolts securing the hard brake lines, ABS wire, and parking brake cables from their support brackets.
- Disconnect the shock absorbers using a 17mm wrench and socket, and set the shocks aside.
- Place a floor jack under the rear differential for support before removing the U-bolts. With the U-bolts removed, the jack can be lowered to allow for the required space to install the lift blocks between the axle and leaf springs.
- Place the lift blocks onto the factory spring pads and ensure they have the correct orientation as noted in the manufacturer's instructions.
- With the blocks in place, lift the rear axle until the pads butt up against the leaf springs. Be sure the spring pins align with the recess holes in the lift blocks.
- Install the longer U-bolts and hardware.
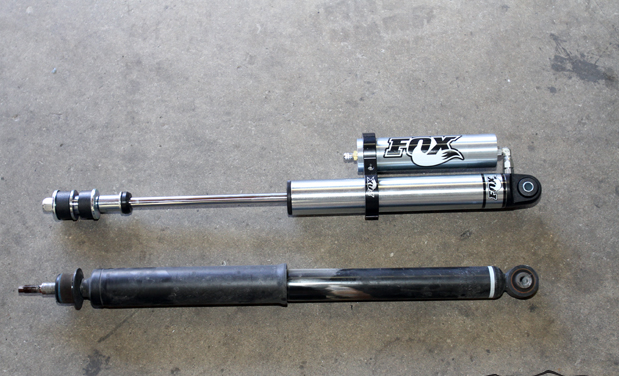
- Depending on the particular lift kit being installed, the factory shocks can still be used. Similarly, some kits include shock extensions or entirely new shock absorber units. In any case, install the shocks onto their factory mounting points.
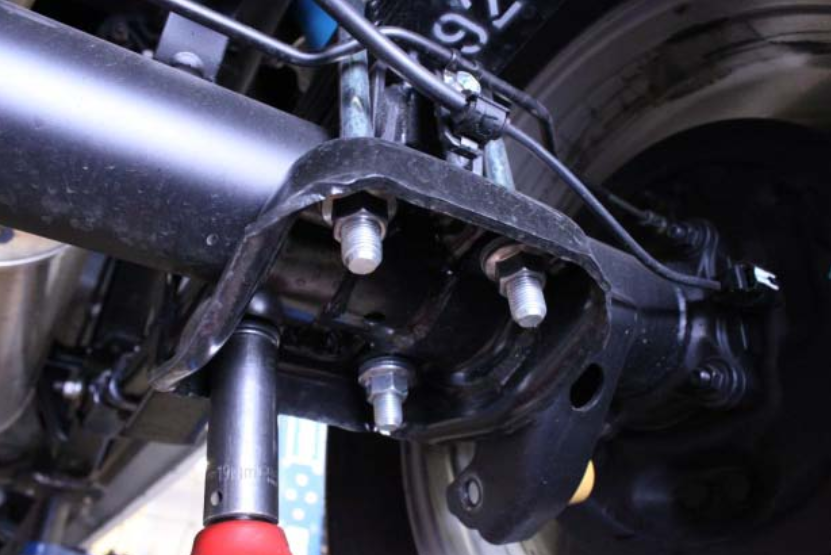
- Most kits provide brackets for the ABS wire, parking brake cables, and hard brake lines that are lengthened to cope with the additional ride height of the truck. Install the new brackets per the manufacturer's instructions.
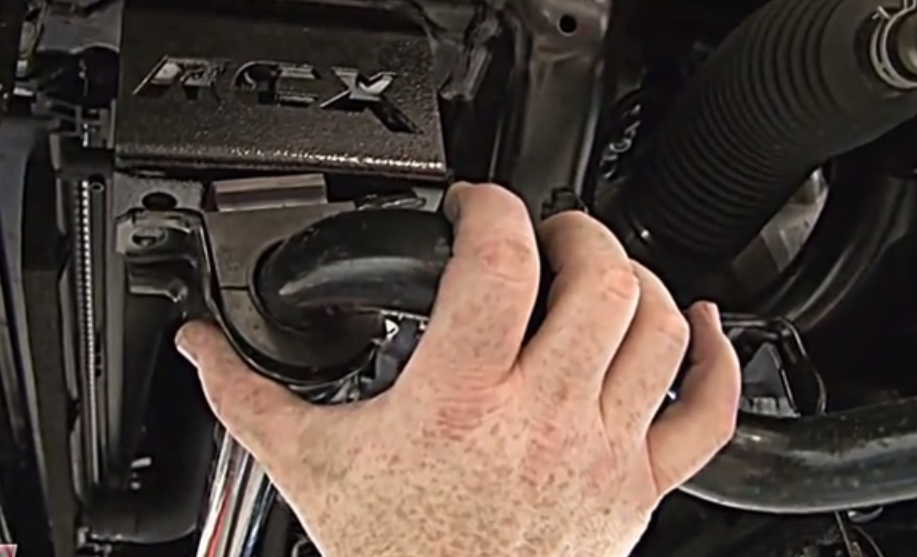
- Depending on the lift kit used, the driveline carrier bearing spacers may be needed. Simply remove the carrier bearing and install the spacers between the bearing and bearing mount.
- Install the rear wheels before lowering the rear of the truck off of the jack stands. With the truck sitting on the ground, inspect that the brake lines, cables, and ABS wiring are free from any moving parts. Remember to take into account suspension travel when checking for proper clearance.
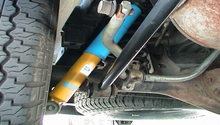
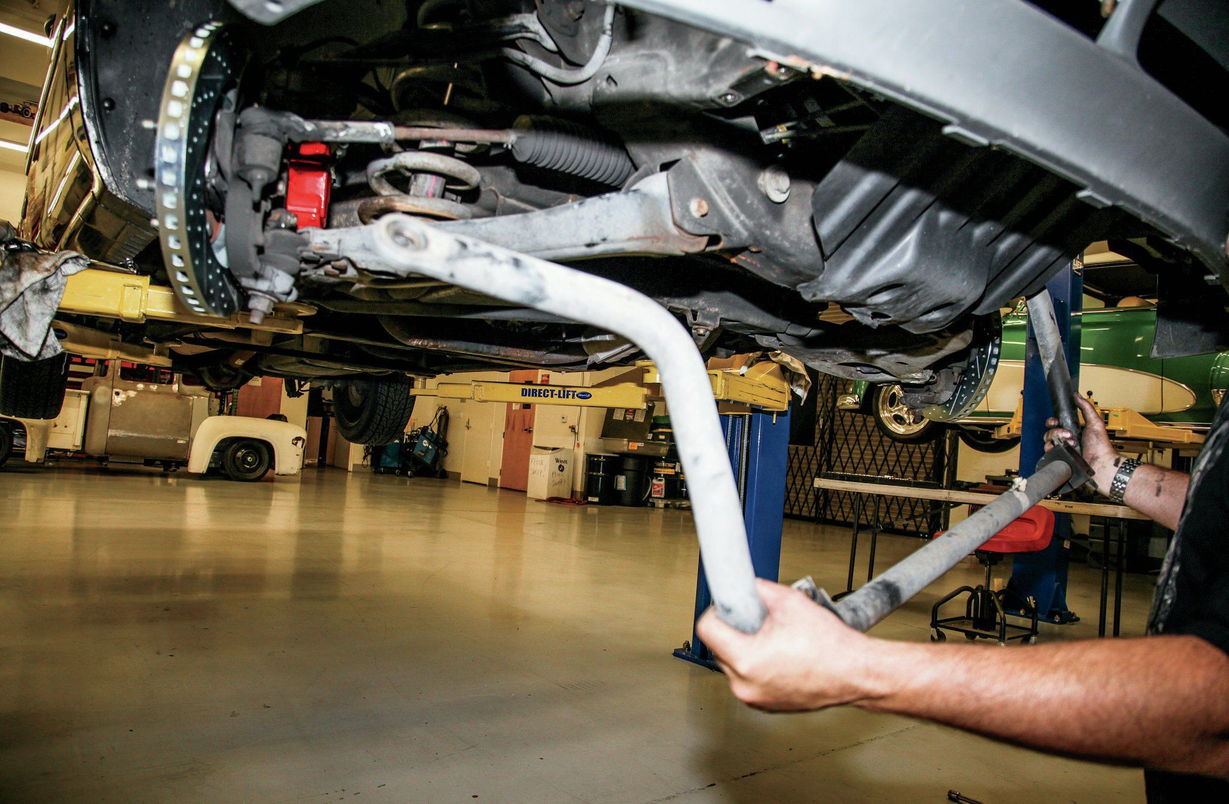
Step 2 – Front suspension disassembly
Installation of a lift kit on the front suspension is much more involved than on the rear, and often requires disassembly of steering, suspension, and brake components.
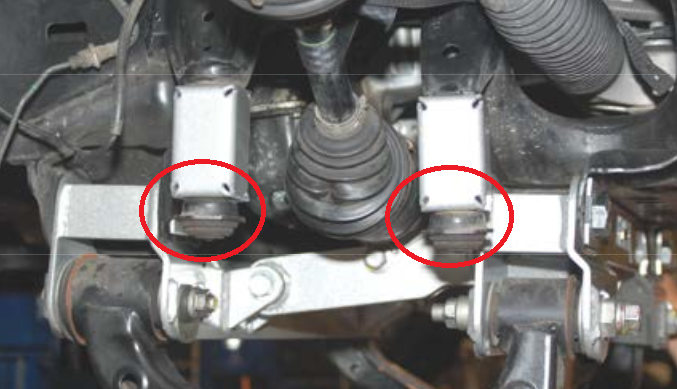
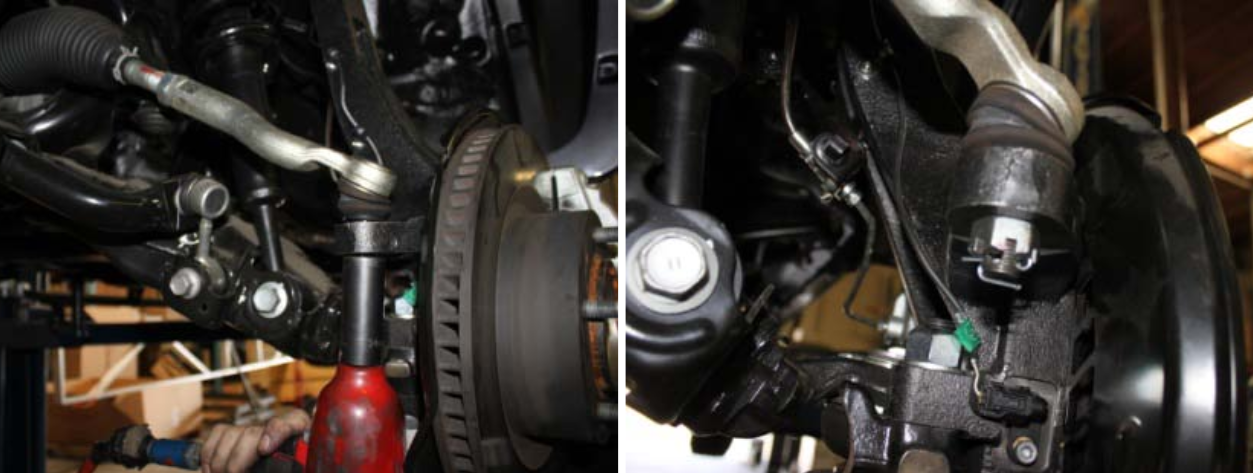
- Chock the rear wheels and jack the front of the truck up. Position jack stands on the frame rails aft of the front wheels (see Figure 1) before lowering the truck onto the jack stands.
- Remove the front wheels.
- Unbolt the ABS wire bracket from the upper control arm using a 10mm wrench. Similarly, remove the brake line bracket from the knuckle using a 12mm wrench.
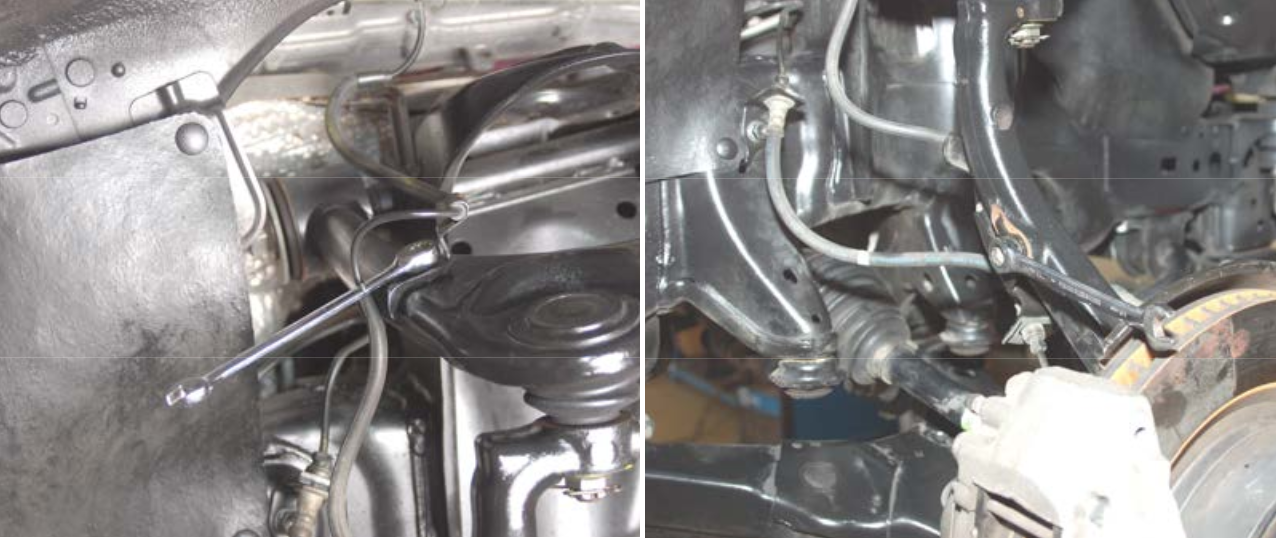
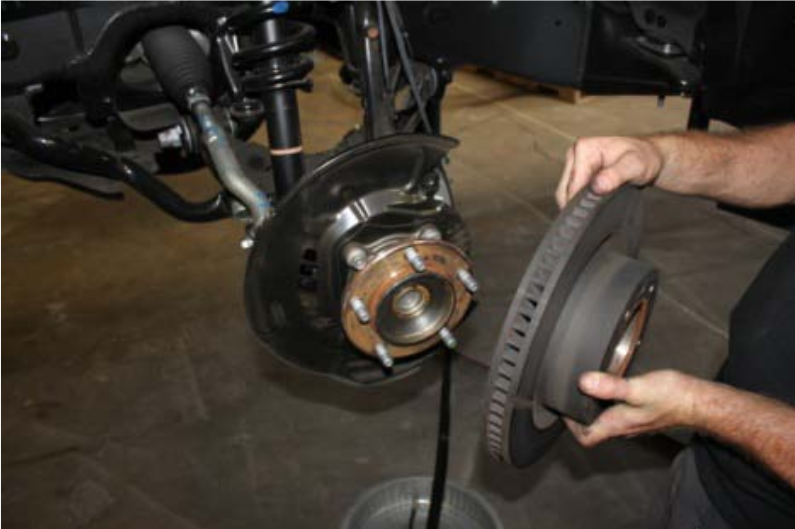
- Remove the brake caliper mounting bolts using a 17mm wrench and lift the caliper off of the rotor. Remove the brake rotor from the hub. Be sure to support the caliper using a snubber or bungee chord. Do not let the caliper hang from the brake line.
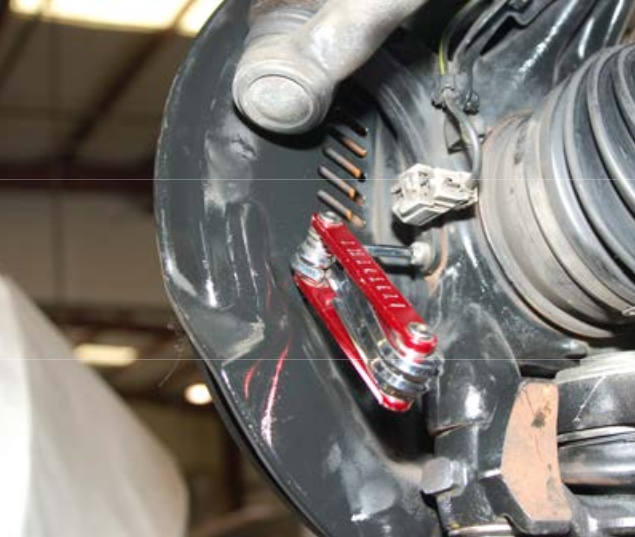
- Remove the ABS sensor from the knuckle by removing the hex (Allen) fastener. Also, remove the ABS sensor bracket from the knuckle.
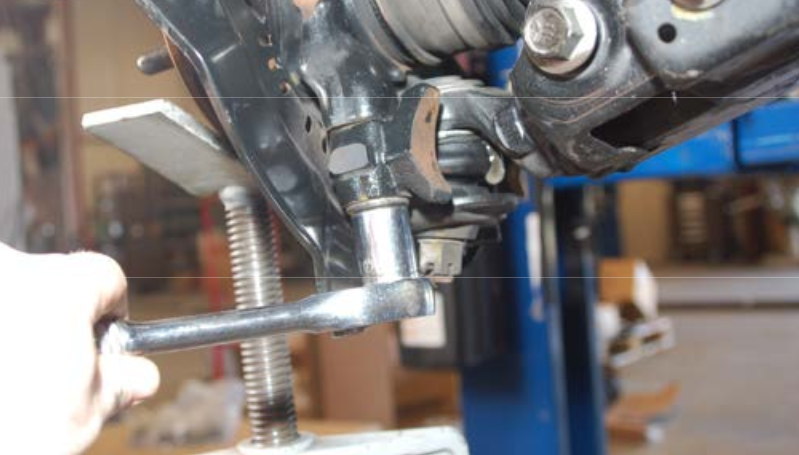
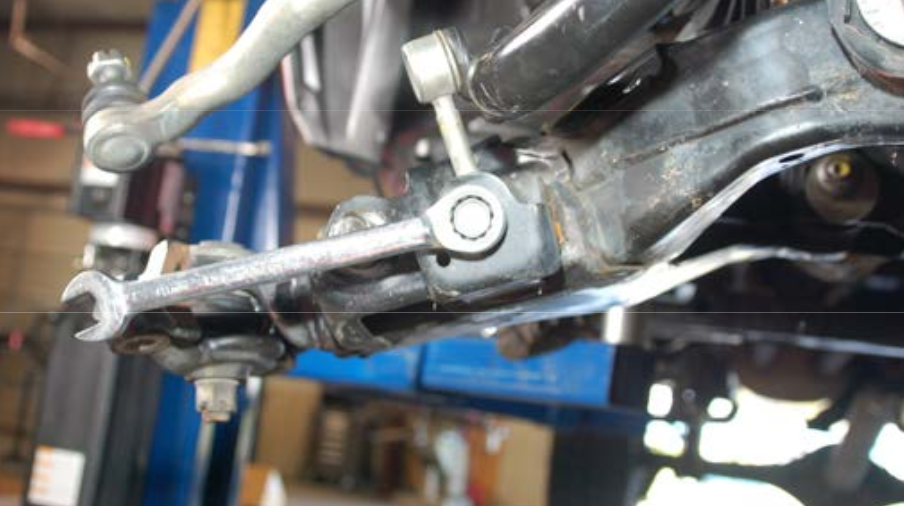
- Loosen the tie-rod end from the inner tie-rod using a 1-1/16" and 1-3/16" wrench. Remove the cotter pin from the tie-rod end and loosen the nut using a 24mm wrench before separating the tie rod from the knuckle.
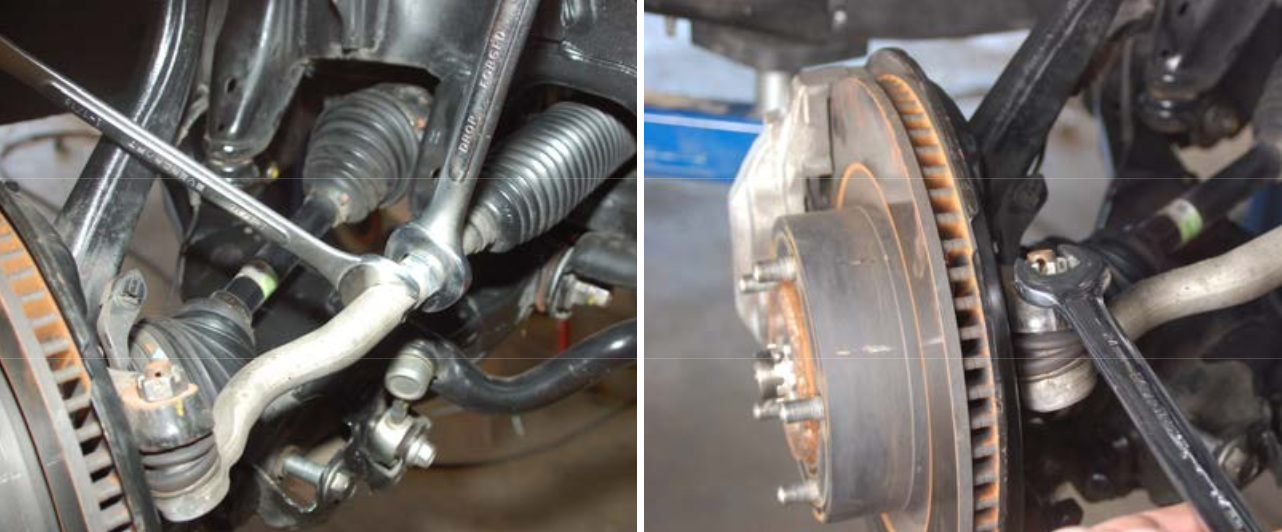
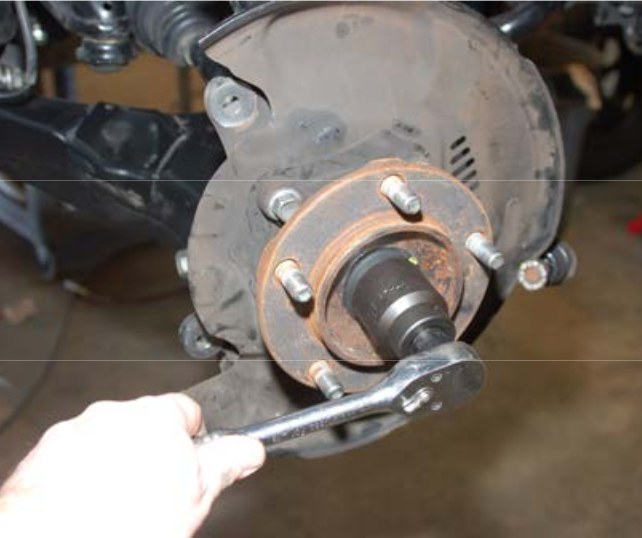
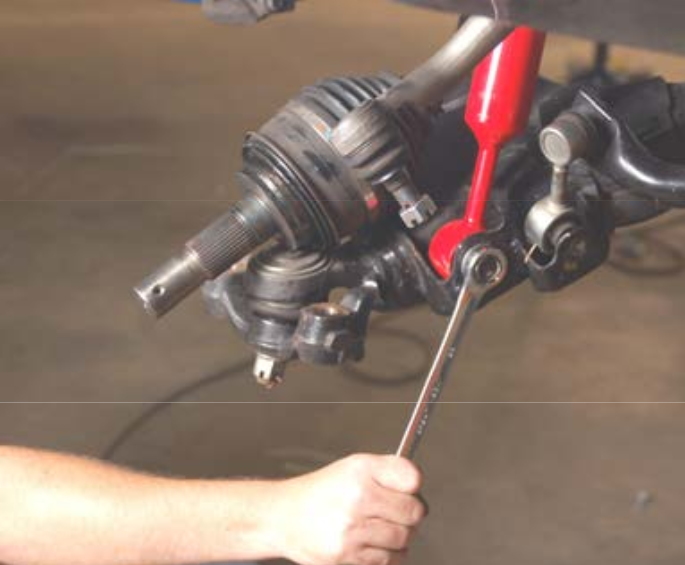
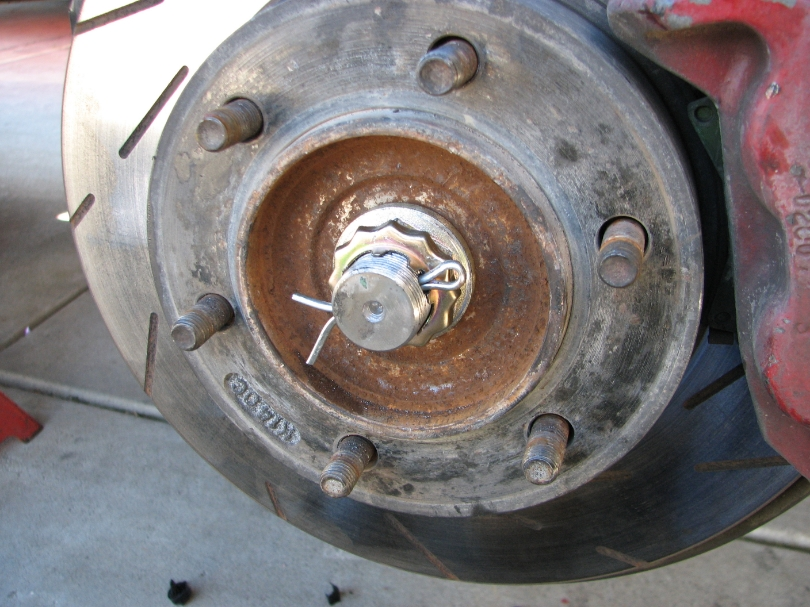
- On four-wheel drive models, the axle must be separated from the knuckle. Remove the cotter pin before removing the axle nut using a 39mm socket.
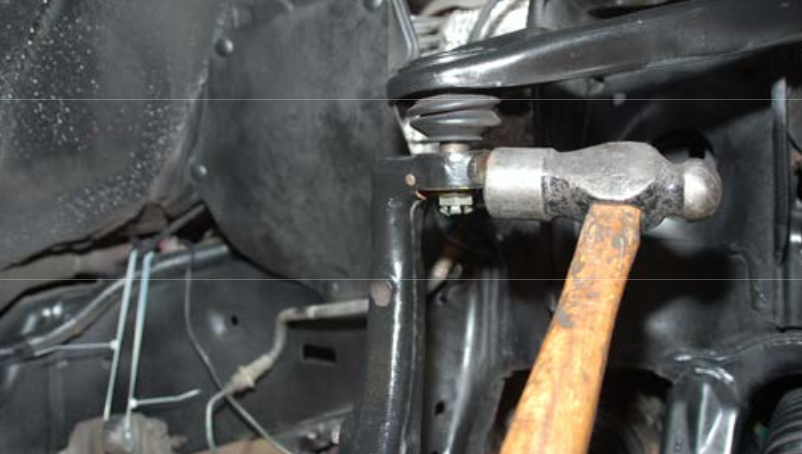
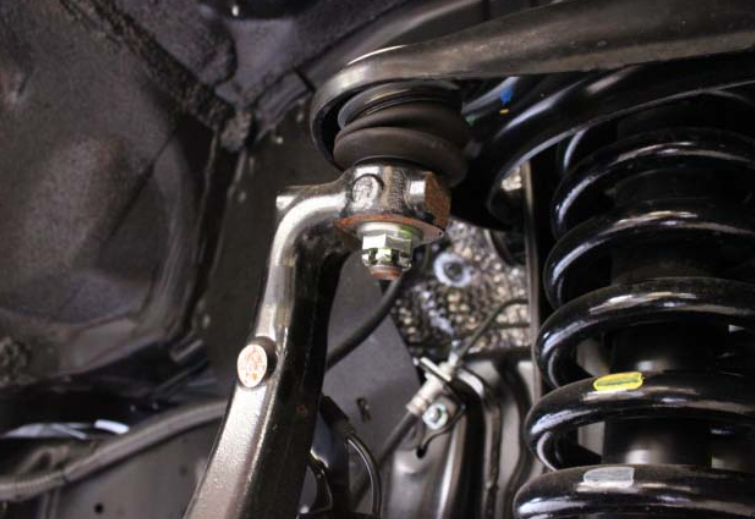
- Remove the cotter pin and remove the upper ball joint nut using a 19mm wrench. Support the knuckle with a jack stand or floor jack before separating the knuckle from the ball joint.
- With the upper ball joint separated from the control arm, the control arm bolts can be removed and the control arm set aside.
- Remove the (2) lower ball joint bolts using a 22mm wrench and remove the knuckle/hub from the vehicle. If equipped with four-wheel drive, tap the end of the axle with a rubber mallet to free it from the hub bearing before removing the knuckle.
- Disconnect the anti-roll bar from the lower control arm using a 19mm wrench.
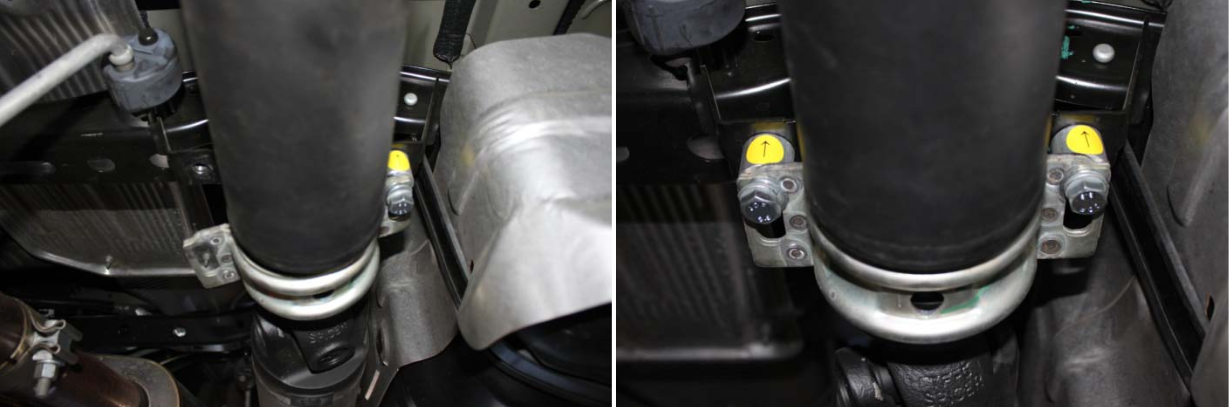
- Disconnect the lower strut mount using a pair of 22mm wrenches and the upper strut mount nuts using a 14mm wrench. Remove strut from vehicle.
- Remove the lower control arm bolts with a 24mm wrench and remove the control arms from the truck.

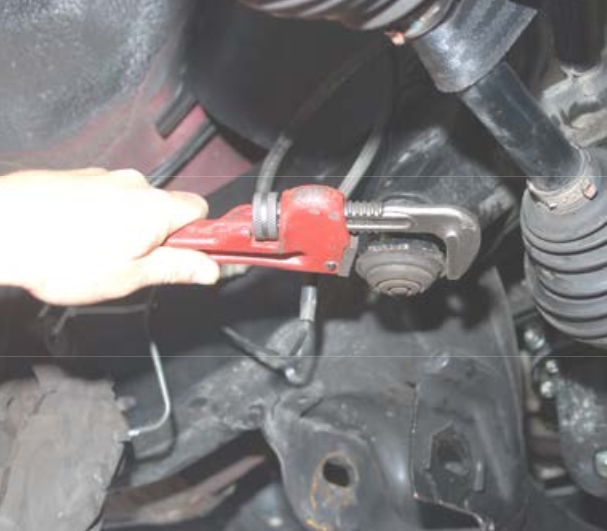
- With a pipe wrench or vise grips, remove the (4) stock bump stops.
- Remove the sway bar from its support brackets using a 17mm wrench and set sway bar aside.
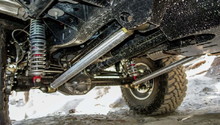
Step 3 – Front lift kit installation
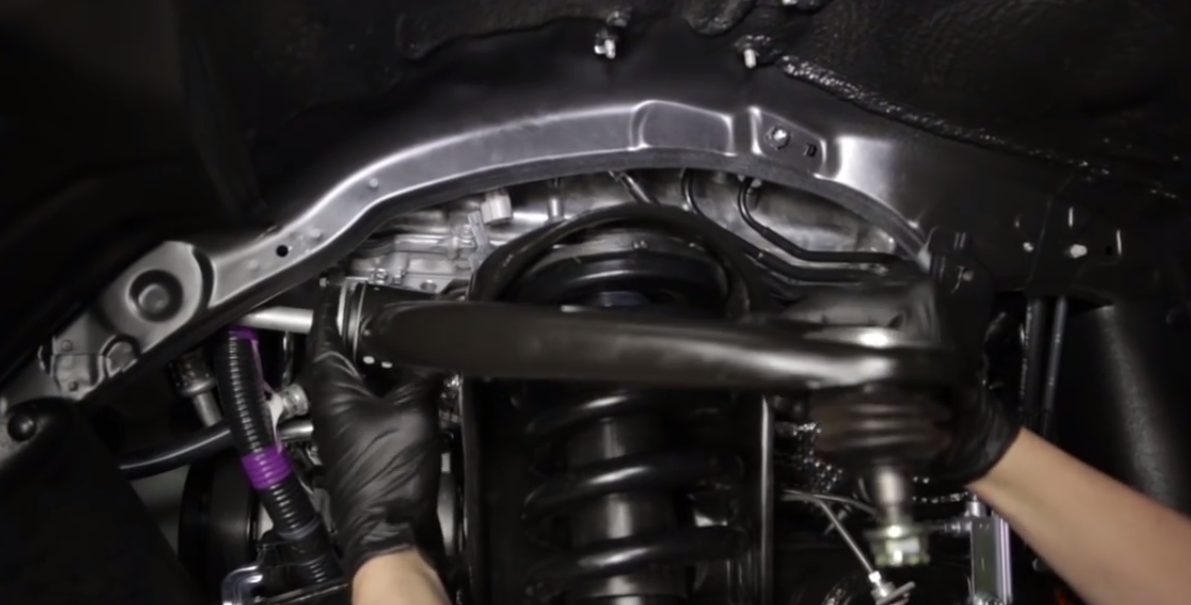
With the stock front suspension components removed, you can begin reassembling the truck with the lift kit components. Note that the following procedure outlines the installation of a kit that uses a replacement cross-member and may not be applicable to all lift kits.
- Swap out the stock tie-rods with the new tie rods included in your kit. Some kits simply require you to switch the left and right tie-rods, whereas others include new units.
- On four-wheel drive models, support the differential with a jack stand or jack, and remove the (10) support bracket bolts. Slightly lower the differential to allow for cross-member installation.
- Install the rear cross-member using the manufacturer's supplied hardware (if applicable). Leave the bolts loose for the time being.
- Install the supplied passenger side, driver side, and central differential bushings and sleeves into the differential mounts before installing the front cross-member piece.
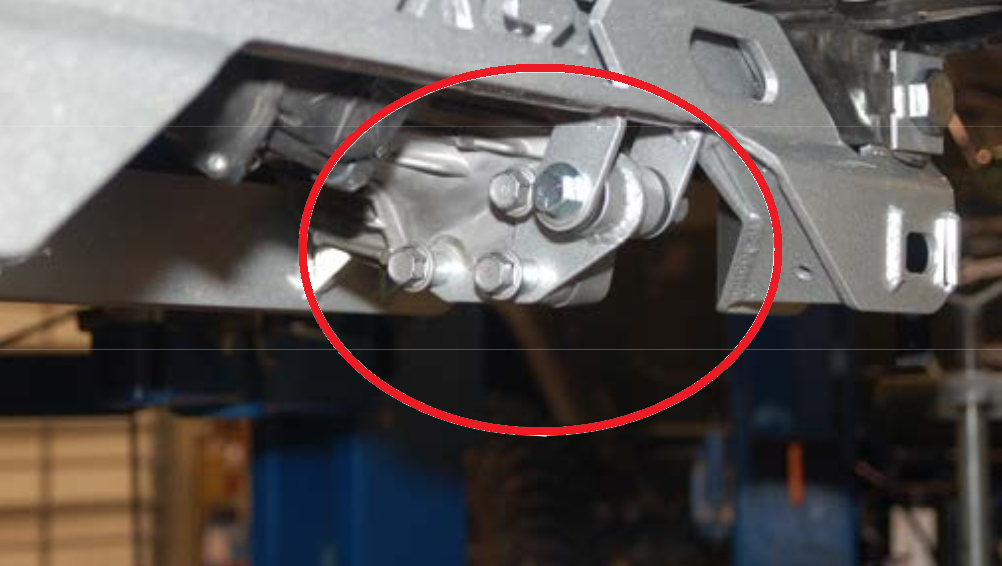
- With all the necessary bushings, sleeves, and cross-members in place, tighten all differential mounting fasteners as well as all cross-member bolts to the manufacturer's torque specifications.
- Attach the lower control arms to the cross-member. Some kits will utilize the stock control arms and components.
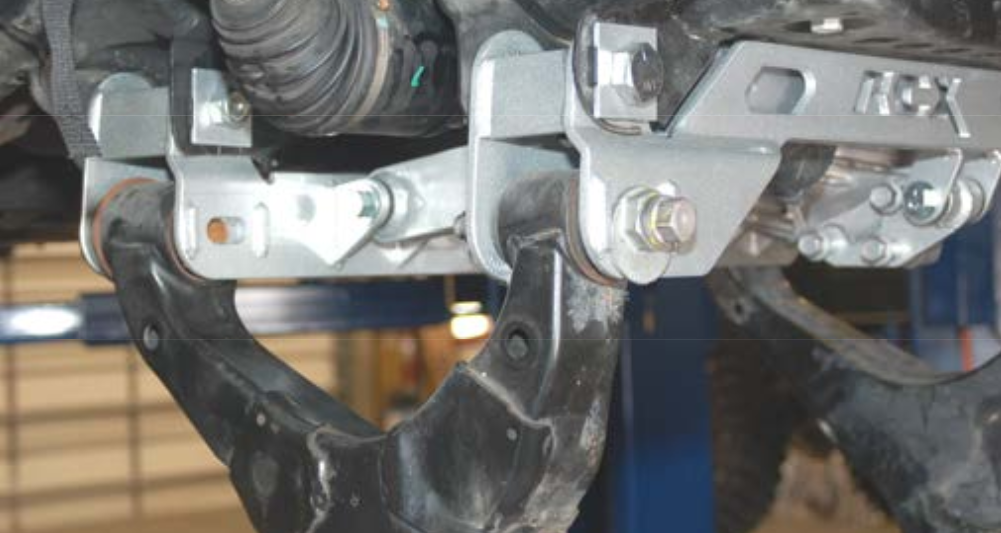
- Install the new bump stops at the factory bump stop locations (if applicable).
- Install the anti-roll bar using the new extended roll bar mounting brackets. Attach the anti-roll bar drop links to the lower control arms and tighten.
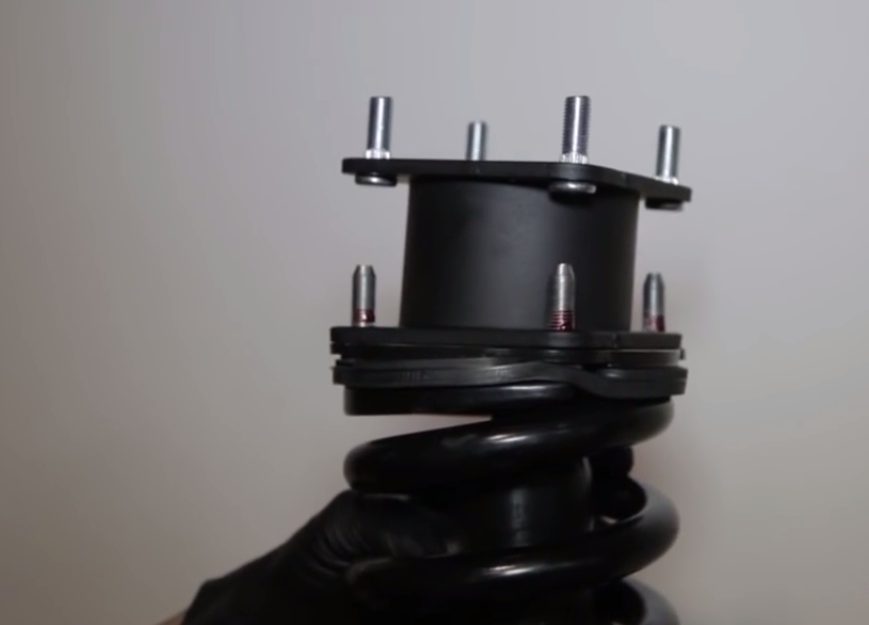
- If applicable, install strut spacers onto the top of the struts before installing the struts onto the vehicle. More often than not, struts will retain all factory mounting hardware and will attach at the stock mounting locations.
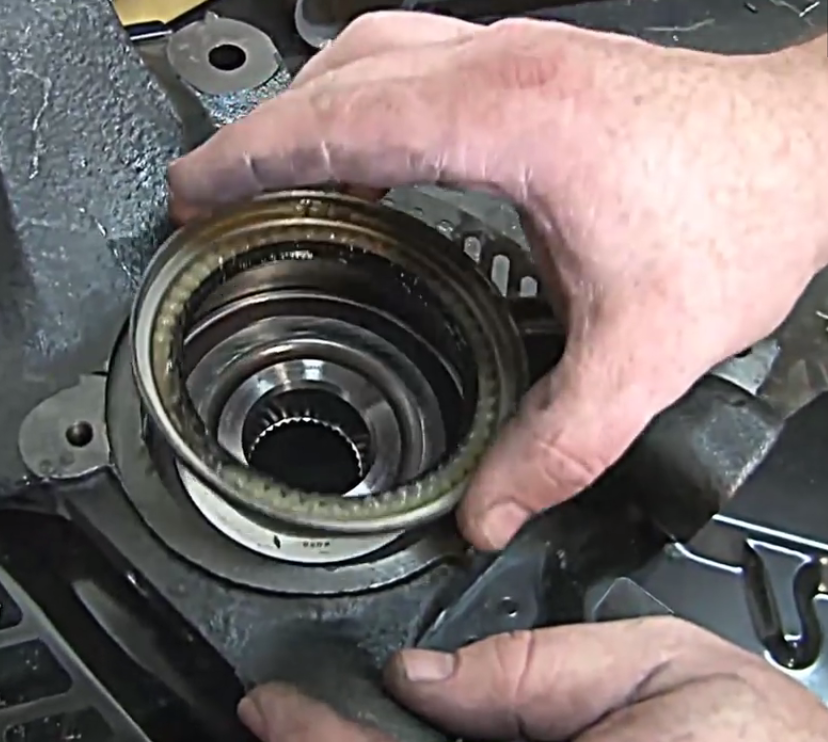
- Remove the hub assembly from the stock knuckles and place them onto the new knuckles. Take note of the orientation of the oil seals and be careful when swapping them to the new knuckles to avoid damage.
- Install the upper control arms before placing the new knuckles onto the vehicle. Be sure to align the upper ball joints and axle shafts (4WD models). Tighten the upper ball joints with a 19mm wrench. Install cotter pins.
- If your kit includes new steering stops, install them along with the lower ball joint bolts using a 22mm socket.
- On four-wheel drive models, install the axle nuts and torque the axles to 249 ft/lbs. Be sure to install the cotter pins after tightening.
- Install any new brake line or ABS wire brackets. Also, be sure to place the ABS sensors back into the knuckles.
- Install the tie-rod ends onto the knuckles and tighten the nuts before securing with cotter pins. Similarly, be sure the tie-rods ends are properly tightened to the inner tie rods.
- Install the brake rotors onto the hubs before sliding the brake calipers into place. Tighten the caliper bolts to approximately 75 ft/lbs.
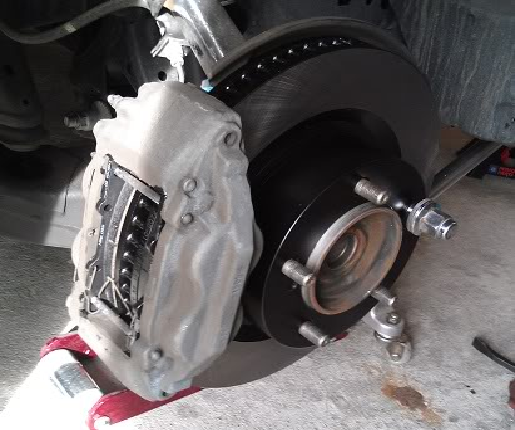
- Be sure all brake lines and ABS wiring are secured in their brackets before installing the wheels and lowering the truck off of jack stands.
Step 4 – Wheel alignment
After installing a lift kit of any kind, it is recommended to have a wheel alignment before driving the truck any significant distance. Additionally, it is important to re-check that all steering and suspension components are tight after 400 to 500 miles of driving.
Featured Videos: Lift Kit Install
-
Rough Country 6" Lift Kit Installation
-
ReadyLIFT Tundra Lift Kit Installation
Lift Kit Review
Choosing a lift kit can be a complicated ordeal, as kits come in all sorts of shapes and sizes. Perhaps the first order of business is to decide how much of a lift you are looking for. After deciding on the ride height, you must consider the type of driving that you intend on doing with your truck, and if it would be beneficial to purchase a kit that utilizes some of the stock suspension components or replaces everything with high-end off-road components. As if these details were not enough to mull over, take into account the budget you have sat aside for such a modification because things can get expensive in a hurry. Entry level kits can often be purchased and upgraded a little bit at a time, or you can go for the full shebang and install a top of the line kit with competition level performance. Below is a review of several suspension lift kits that are available on the market, but by no means should you limit yourself to the selections listed, as the marketplace has a vast selection when it comes to suspension lift kits
Rough Country |
Skyjacker |
BDS |
ReadyLIFT |
ProComp | |
|---|---|---|---|---|---|
Price |
$1,249.95-1,299.95 | $450-2,300 | $2,000-3,800 | $339-2,399 | $1,700-2,900 |
Lift Height |
4.5-6" |
2-6" |
4.5-7" |
3-8" | 4"-7" |
Included Components |
Knuckles, strut spacers, cross-members, rear shocks, lift blocks, skid plate, hardware and fasteners | Your choice of adjustable shocks, lift blocks, leaf springs, cross-members, knuckles, skid plate, hardware and fasteners | Fully customizable kits including adjustable struts, remote reservoir coilovers, lift blocks, leaf springs, cross-members, knuckles, skid plate, hardware and fasteners | Basic lift blocks and strut extentsions, or full on kits with Knuckles, cross-members, rear shocks, lift blocks, skid plate, hardware and fasteners | Kits including knuckles, strut spacers, cross-members, front and rear shocks, lift blocks, optional adjustable struts, hardware and fasteners |
Ride Quality |
Harsh | Firm | OEM | Firm | Firm |
Adjustable Shocks |
No | Optional | Optional | No | Optional |
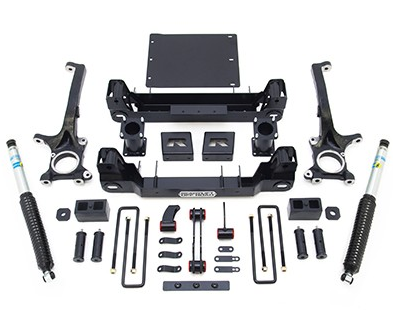
Best Value: Rough Country
Rough Country
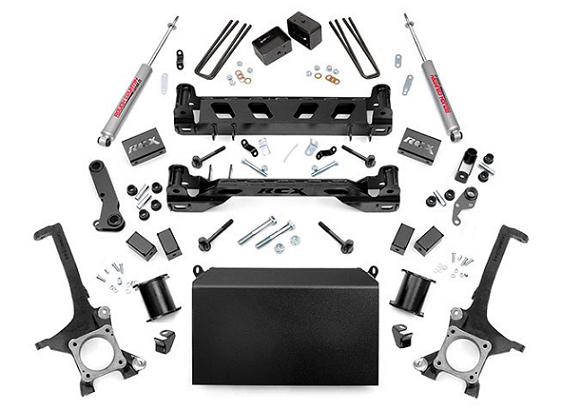
Price – $1,249.95-1,299.95
Lift Height – 4.5-6"
Included Components – Knuckles, strut spacers, cross-members, rear shocks, lift blocks, skid plate, hardware and fasteners
Ride Quality – Harsh
Adjustable Shocks – No
Rough Country lift kits are just about the cheapest option of adding a little altitude to your Tundra. Compared to other kits, Rough Country kits have limited options that offer either a 4.5" or 6" lift. Feedback seems to be a bit mixed on these kits, as some individuals have received brackets with sub-par welds and bolt holes that do not align with factory mounting points. Additionally, the consensus is that these kits are some of the harshest riding kits on the market. With a price tag of hundreds of dollars cheaper than their competitors, it is understandable that the components may not be as high of a quality of others. That being said, Rough Country has a lifetime warranty on their kits and their customer service team will stand behind their products to ensure the customer is happy. Overall, this kit includes some components that are not offered in other kits at a higher price point, which gives this kit the nod as the best value. Recommended for owners wanting to lift their truck without breaking the bank.
Skyjacker
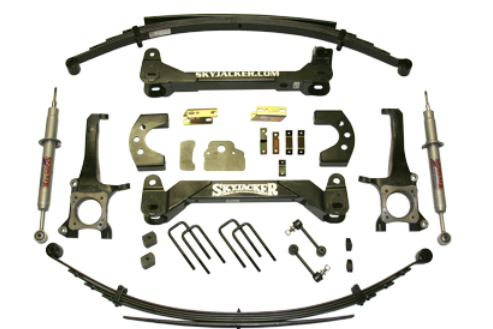
Price – $450-2,300
Lift Height – 2-6"
Included Components – Your choice of adjustable shocks, lift blocks, leaf springs, cross-members, knuckles, skid plate, hardware and fasteners
Ride Quality – Firm
Adjustable Shocks – Optional
Skyjacker suspension has a lot to offer owners looking to lift their Tundra. Kits are available to lift the truck from as little as 2" to a full on 6" lift. Reviews seem to vary on the Skyjacker kits, but most agree that if you are going to buy one, you are best off spending the money on the optional adjustable struts (coilovers) and larger leaf springs. Ride quality is reported to to be a little on the firm side, but a lifted truck is a rugged off-road machine, not a plush riding Cadillac. Many compare the Skyjacker kits to the Rough Country kits, and most agree that the overall quality, options, and ride of the Skyjacker are worth the additional costs. With that in mind, the kits offered from Skyjacker fall somewhere in the middle of the lift kit spectrum and better kits are available, but at a premium cost. Recommended for owners wanting a well-rounded kit with the ability to select optional upgraded components.
BDS
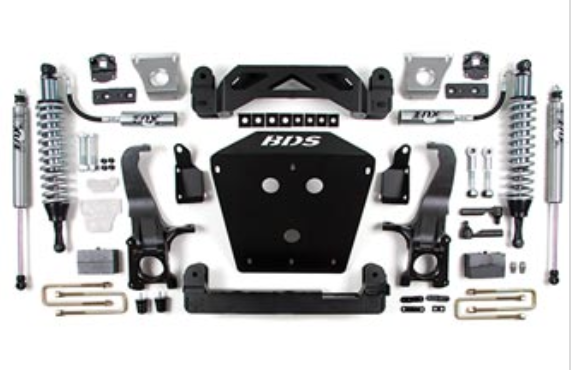
Price – $2,000-3,800
Lift Height – 4.5-7"
Included Components – Fully customizable kits including adjustable struts, remote reservoir coilovers, lift blocks, leaf springs, cross-members, knuckles, skid plate, hardware and fasteners
Ride Quality – OEM
Adjustable Shocks – Optional
When arguments rage deep into the night about the best lift kits that are available on the market, BDS's name is often in the mix. BDS has put a lot of engineering into their lift kits to achieve a ride quality that rivals the OEM setup, while also having the ability to conquer trails and mud holes. A quick look at the component list that includes CNC machined steering knuckles, FOX remote reservoir shocks, beefy cross-members, and a behemoth skid plate shows that these kits are no joke. Although BDS kits are impressive, quality comes at a price, and these kits rank among some of the most expensive kits available. While a BDS kit is quite an investment, most owners will rest easily knowing that the job was done right the first time. One of the most common statements made by owners that have installed budget lift kits is that they wish they would have chosen a higher quality kit. Nothing is worse than skimping on parts time the first time around, only to find out later that you are not happy with your purchase and decide to upgrade again. A wise man once said to buy the best parts that you can afford, as it will be cheaper in the long run. If your budget allows, give a BDS kit a serious look. Recommended for those looking for a high quality kit with little worry of its cost.
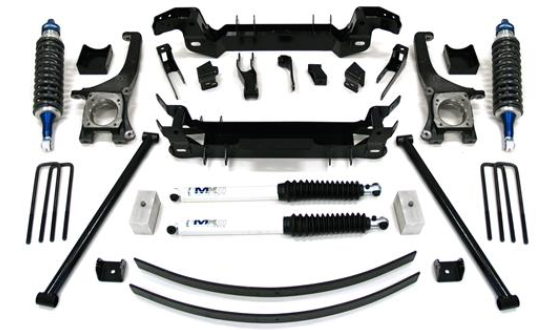
ReadyLIFT
Price – $339-2,399
Lift Height – 3-8"
Included Components – Basic lift blocks and strut extentsions, or full on kits with Knuckles, cross-members, rear shocks, lift blocks, skid plate, hardware and fasteners
Ride Quality – Firm
Adjustable Shocks – No
A close second to BDS are the lift kits available from ReadyLIFT. ReadyLIFT incorporates many of the same component features as the BDS kits, but utilize the inferior OEM shocks or slightly improved Bilstein units. ReadyLIFT markets their kits as having the easiest installation procedure of any lift kits available and claim there is no cutting or modifications needed as with other kits. If your are looking for extreme height, they offer an 8" kit that is sure to eclipse all other lifted Tundras. ReadyLIFT also claims to retain the stock ride quality; however, many owners state that a new set of coilover shocks are necessary if you are looking for better ride quality. Overall, this is a great company with various kits available to suit needs of any truck enthusiast. Recommended for owners wanting a quality kit under $2,500.
ProComp
Price – $1,700-2,900
Lift Height – 4-7"
Included Components – Kits including knuckles, strut spacers, cross-members, front and rear shocks, lift blocks, optional adjustable struts, hardware and fasteners
Ride Quality – Firm
Adjustable Shocks – Optional
Since the early 90's ProComp has been manufacturing various components for off-road enthusiasts. When the new Tundra came to market, ProComp was the first to release a lift kit to give owners the ride height and off-road capabilities that was missing for the Japanese manufactured truck. The ProComp kits are available with or without shock absorbers for lift heights of 4", 6" and 7". While there is nothing overly special about the main components of the ProComp kits, owners have praised some of the small details such as brake line extensions, lengthened bump stops, and anti-roll bar extension brackets that are not always up to par in some competitors kits. One standout feature of any ProComp kit is that it includes a limited 5 year/60,000 mile warranty on all powertrain components. A complicated issue when lifting any vehicle is the excessive wear that may occur in drivelines, differentials, and tranfer-cases, so it is nice to see a kit that is guaranteed to work without a fuss. Recommended for owners wanting a quality kit with additional warranty protection.
Related Discussions
- 2000 Tundra Lift Kit - YotaTech.com
- Tundra Lift- YotaTech.com
- Tundra Lift Thoughts- YotaTech.com
- Lift Kits??? - YotaTech.com