Toyota Tundra: How to Paint Rims Using Plasti Dip
Applying some no-commitment color to your rims could be just the way to spice them up.
This article applies to the Toyota Tundra (2000-Present).
What's Plasti Dip? Well, without getting too deep into the science end of things, it's sort of a non-permanent rubberized paint. You can spray it on like paint and it'll look like a thick coat of paint, but if you decide later that you don't like the color, you can peel it off and go right back to stock. The non-permanent part is both the greatest strength and biggest weakness of Plasti Dip. It isn't going to be as heavy duty a coating as say a powder coat, but it also doesn't cost nearly as much, you can apply it easily in an afternoon, and if you mess it up or get sick of it you can peel it right off.
If you're looking for a way to add a little individualism to your truck without laying out a lot of cash or committing to a chance that can't be easily reversed, why not throw a little Plasti Dip on your rims?

Materials Needed
- Safe jacking equipment (jack, jack stands, wheel chocks, etc.)
- Plasti Dip in your chosen color (or kit)
- Masking stuff (newspaper, painter's tape, garbage bags)
Step 1 – Safely jack up your vehicle
A lot of people say that you can Plasti Dip your rims with them still on the truck. This is true. You can also take a shower with your clothes on. Neither is recommended.
If you were going to use actual paint on the rims, we'd also recommend that you remove the tires before painting. But since this is Plasti Dip, we should be able to get away with masking off the tires and/or peeling off any Plasti Dip overspray, but definitely don't do this with the wheels still on unless you are going for a this-person-doesn't-care-how-their-truck-looks look.
Let's do this right and get the best results possible by taking the wheels off the truck for the painting process. Jack the truck up and secure it on stands.
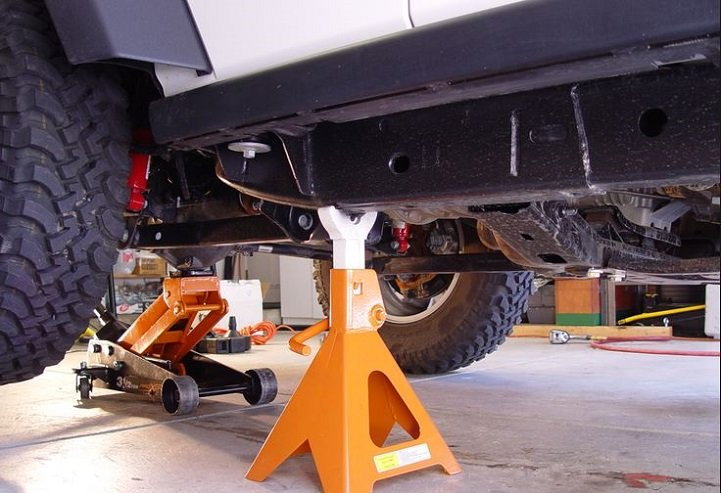
(Related Article: How to Jack Up Your Truck - YotaTech.com)
Step 2 – Remove the wheel to be painted
Pick a wheel, any wheel. You can paint just one at a time if you like, but it's probably easier to prep all four, then paint all four and let them dry at the same time.
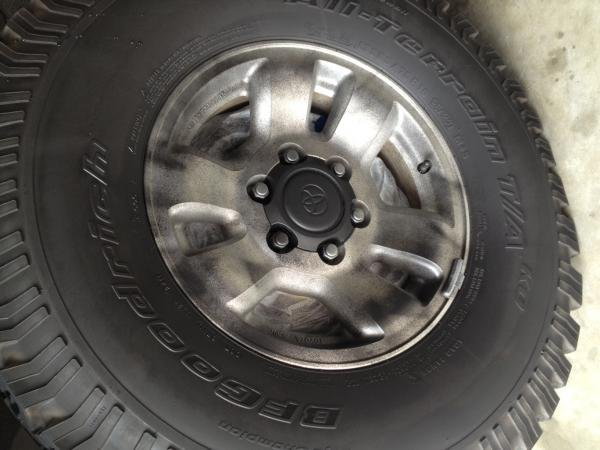
Step 3 – Clean and mask
Any painting job, even Plasti Dip, is only as good as the prep work you put in beforehand. Since you're doing this right, meaning you've removed the wheels from the vehicle before painting them, now you just need to make sure you've got them as clean as you can.
Having the wheels off the car helps because you can turn the tire to see it from all angles. Ever gotten your wheels perfectly shined up while they were on your truck, then driven somewhere and realized you didn't see a bunch of brake dust still on your wheel because now the wheel has rotated and revealed more dirt as well as dust to you?
Yeah, you have. Everyone's done that, and that's what we're trying to avoid here, both in the cleaning process and the painting process.
Clean each rim thoroughly, including the tire, and then use some newspaper (for example) to make sure you don't spray Plasti Dip on your driveway or grass.
Pro Tip
To avoid overspray sticking to the tires, coat the tires in tire shine. The tire shine gel will protect the tire from the coating. Then it's just a matter of washing it off when you're all done.
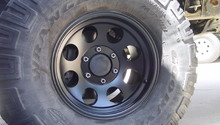
Step 4 – Spray on the Plasti Dip
You're going for at least four coats here, but as many as six might be needed. If you go too thin, the Dip will be harder to peel off and won't look as good. When it comes to painting with Plasti Dip, shake the cans vigorously because the texture of the material hardens within the can. The first coat should be pretty light, just enough to see the initial color begin to adhere. Subsequent coats should get progressively thicker to ensure good coverage. By starting light and working your way up, you build the color on to the surface and avoid runs in the paint. Plasti Dip does have some self-leveling properties, so if it doesn't look perfect at first, it may be alright. Patience is a virtue.
Take your time and either turn the rim around to all angles or walk around it to view it from all angles. Make sure everything is covered, and spray the edges of the rim thoroughly. Make sure you get plenty of the dip on your tire. You'll peel that off later when it dries.
Step 5 – Peel off overspray
Now all you have to do is peel the unwanted overspray on your tire off. The dip should come apart easily at the place where the rim joins the tire bead, making a nice seam at the rim's edge. It will help if you did a good job cleaning your tire. Now just put your wheels back on and admire the new look!
Related Discussions
- Plasti-dipped Rims - YotaTech.com
- Anybody Plasti-dip Chrome Bumper and Grille, Long Term Durability? - YotaTech.com
- Painting the Wheels with Duplicolor Wheel Paint? - YotaTech.com
-
Painting Wheels - YotaTech.com