Toyota Tacoma: How to Replace Steering Rack Bushings
Read on to see how you can replace your steering rack bushings in an afternoon, in your own driveway, using common tools.
This article applies to the Toyota Tacoma (1996-2015).
Suspension components are never bolted directly to the vehicle frame, as this would transmit every roadway jolt up through the floor and through the driver's seat as well as the steering wheel: the harshness and vibration would be something akin to that home-built, go-cart you drove as a kid.
For ride quality, suspension attachment bolts are inserted through rubber doughnuts called "bushings," which allow some compliance or flex between the suspension part and the frame. The size and stiffness of the rubber is tuned to adjust the compliance in the bushings and provide for a very smooth feel with soft steering (high compliance) or a stiff feel with tight, sporty steering (low compliance). The Tacoma steering rack is also mounted with rubber bushings to absorb vibration that would otherwise travel up the steering column to your hands. Tacomas have higher compliance bushings that, coupled with age, allow the steering rack to move a bit, resulting in vague steering and perceptible wandering.

Materials Needed
- Replacement bushing kit
- Floor jack
- 2 Jack stands
- 2 wheel chocks
- Metric socket wrench set
- 1/2" breaker bar
- Needle nose pliers
- Channel lock pliers
- Hammer
- Razor knife
- Large C-clamp
- Silicone marine grease
- PB Blaster
- Mechanic's gloves
Tacoma Gen 1 (1996-2004)
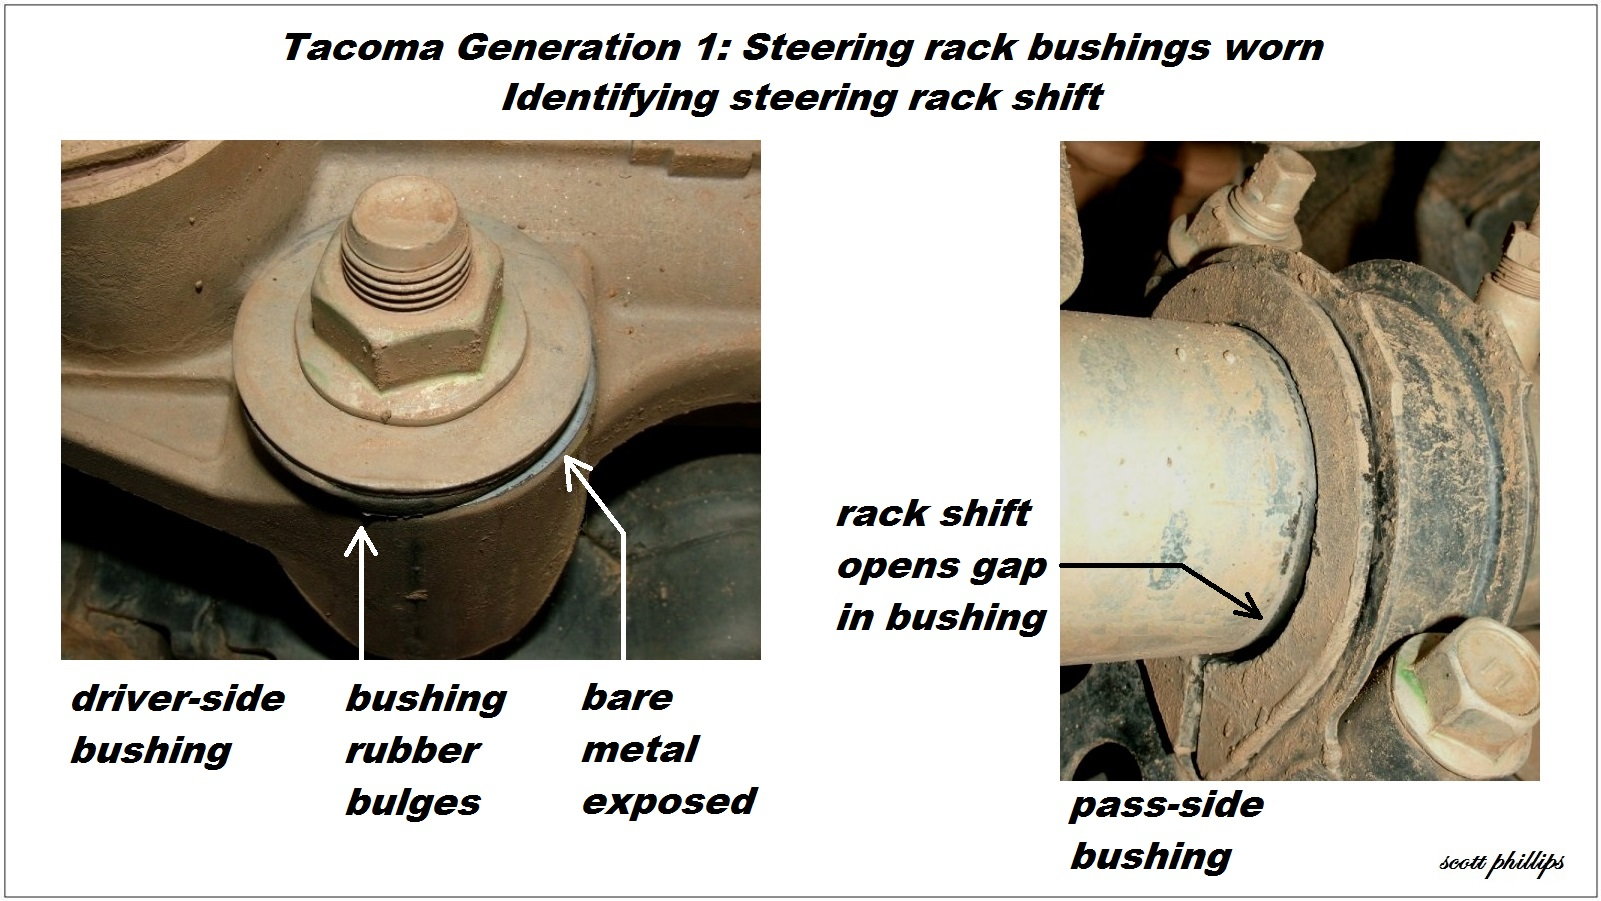
Step 1 – Verify the bushings are worn
- Park the Tacoma on a flat surface.
- Set the parking brake and chock the wheels.
- Turn the key to unlock the steering, with the engine off.
- Have an assistant move the steering wheel slightly left and right.
- The bushing rubber will flex and bulge, so you can see and feel the steering rack shift inside the bushings.
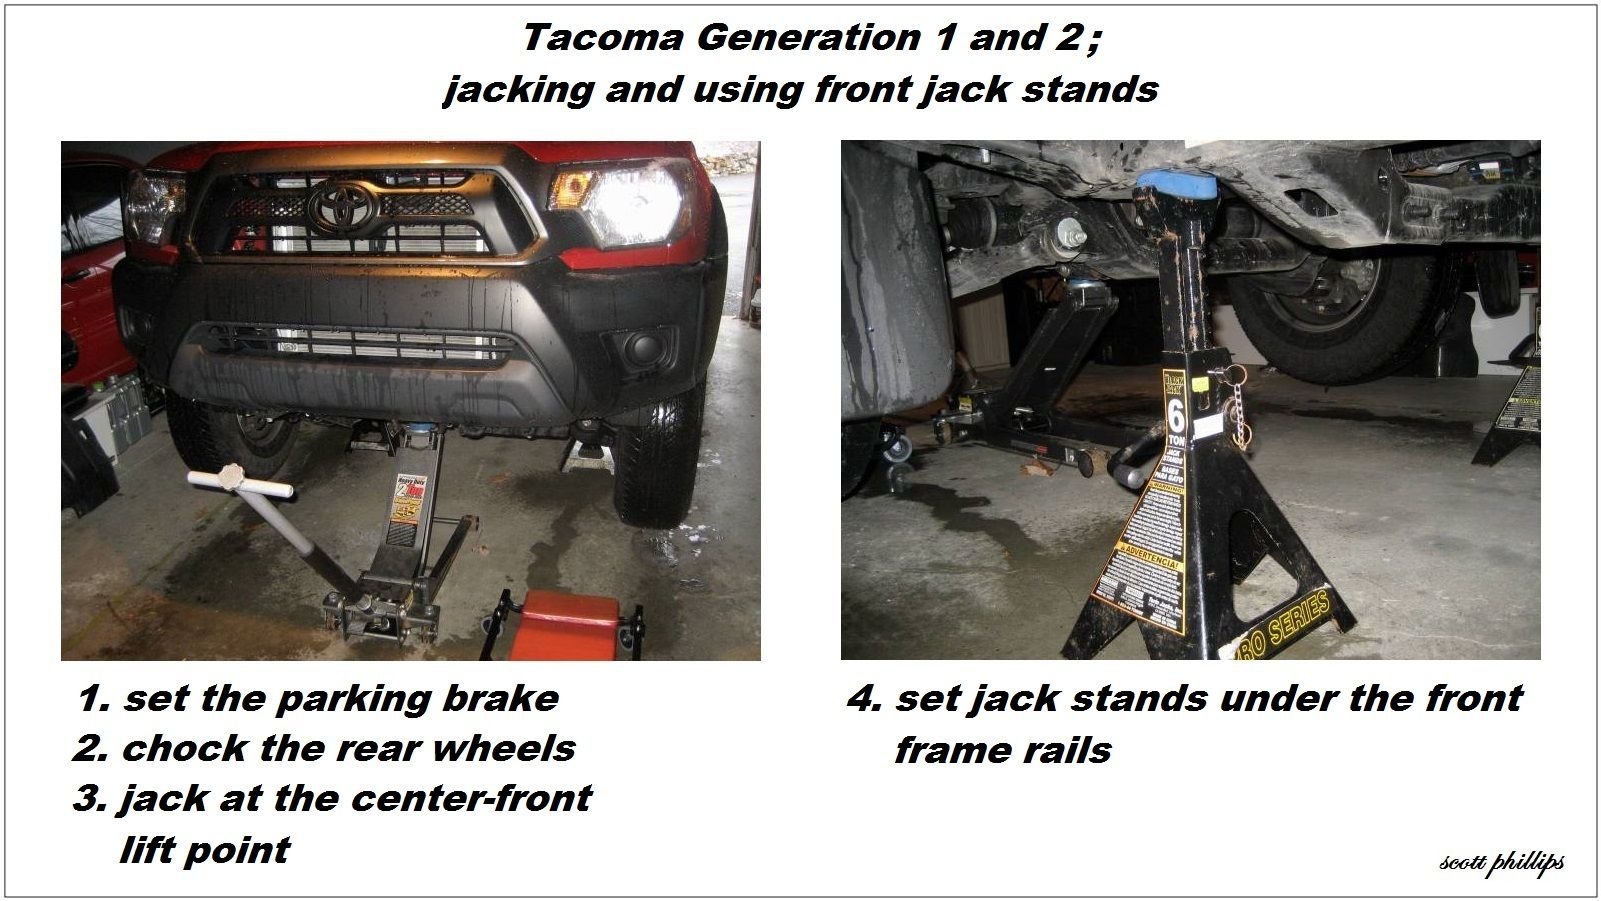
Step 2 – Set front end on jack stands
- Park the Tacoma on a flat, level concrete surface.
- Set the parking brake and chock the rear wheels.
- Jack the front at the center lifting point.
- Set jack stands under the front frame rails.
Pro Tip
Never go under a vehicle unless you are certain that it is secure. Have an assistant or have a phone in your pocket.
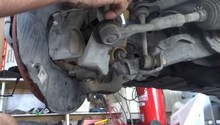
Step 3 – Disconnect the driver-side tie rod end
This is to allow the steering rack freedom to move while you replace the bushings.
- Lock the steering wheel in the center position.
- At the driver-side steering knuckle, pull the cotter pin out of the tie rod end with needle nose pliers.
- Remove the castle nut.
- Tap on the steering knuckle with a hammer to release the tie rod end. Do not strike hard on the top of the tie rod ball stud, as this will mushroom the top and damage the threads.

Pro Tip
Some owners have successfully replaced the rack bushings without separating the tie rod end. They leave the steering unlocked to allow the wheels to turn and the rack to move, but this is not the recommended procedure.
Step 4 – Loosen and lower the steering rack
- Remove any skid-plates, as needed.
- Be prepared to support the 50-lb weight of the steering rack.
- Remove the nuts and bolts from the driver-side, center and passenger side attachment points.
- Lower the steering rack enough to access the bushings.
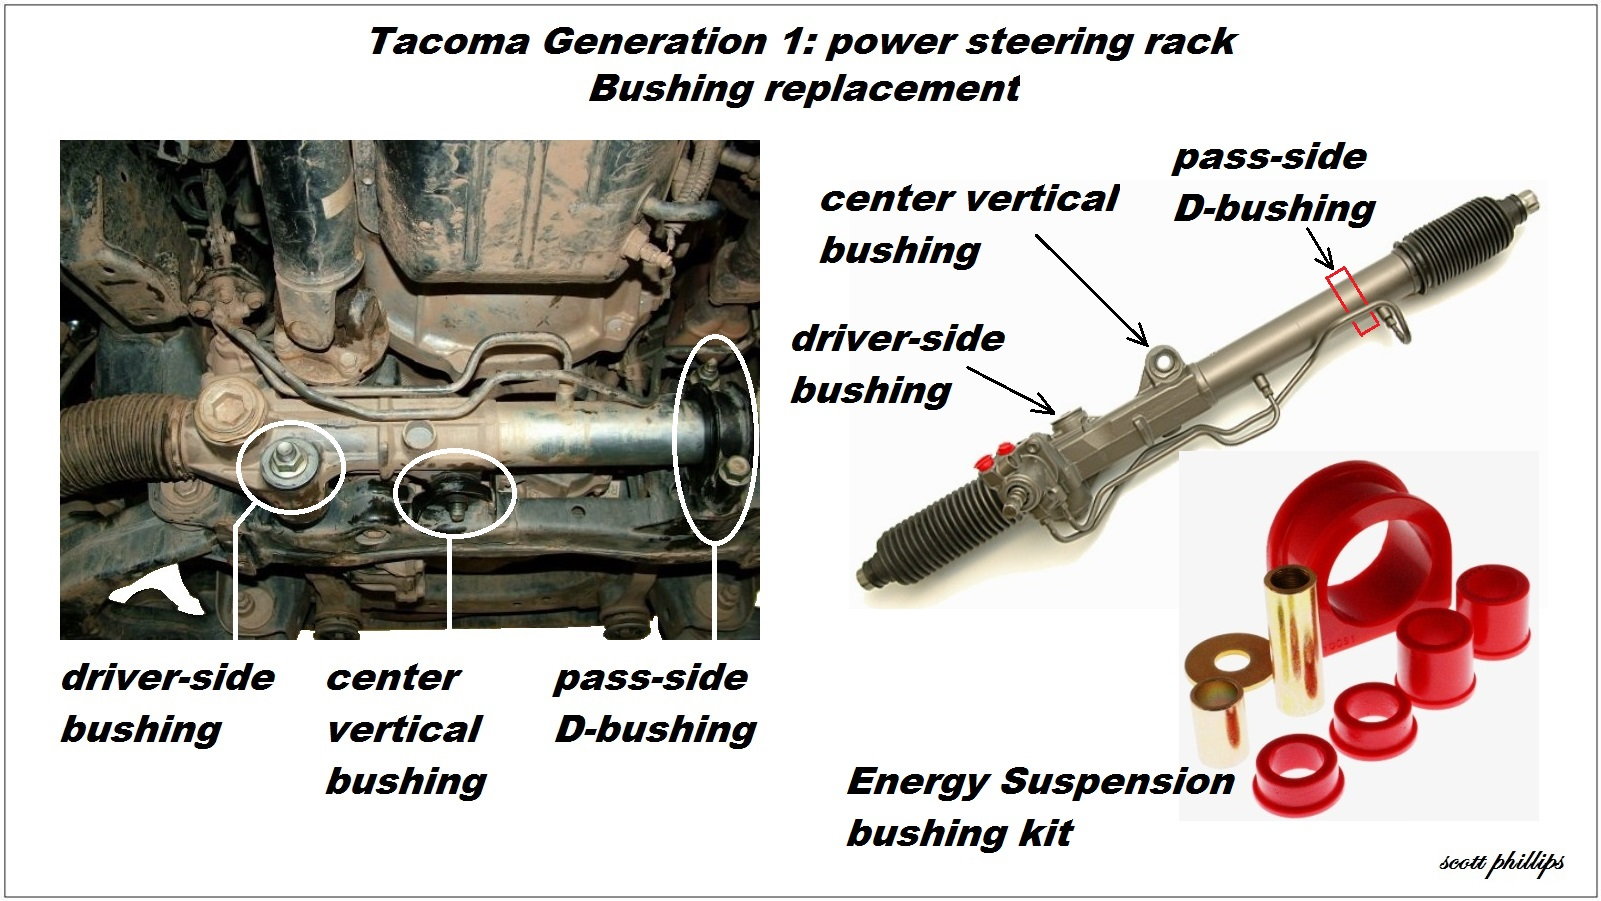
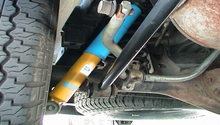
Step 5 – Replace the bushings
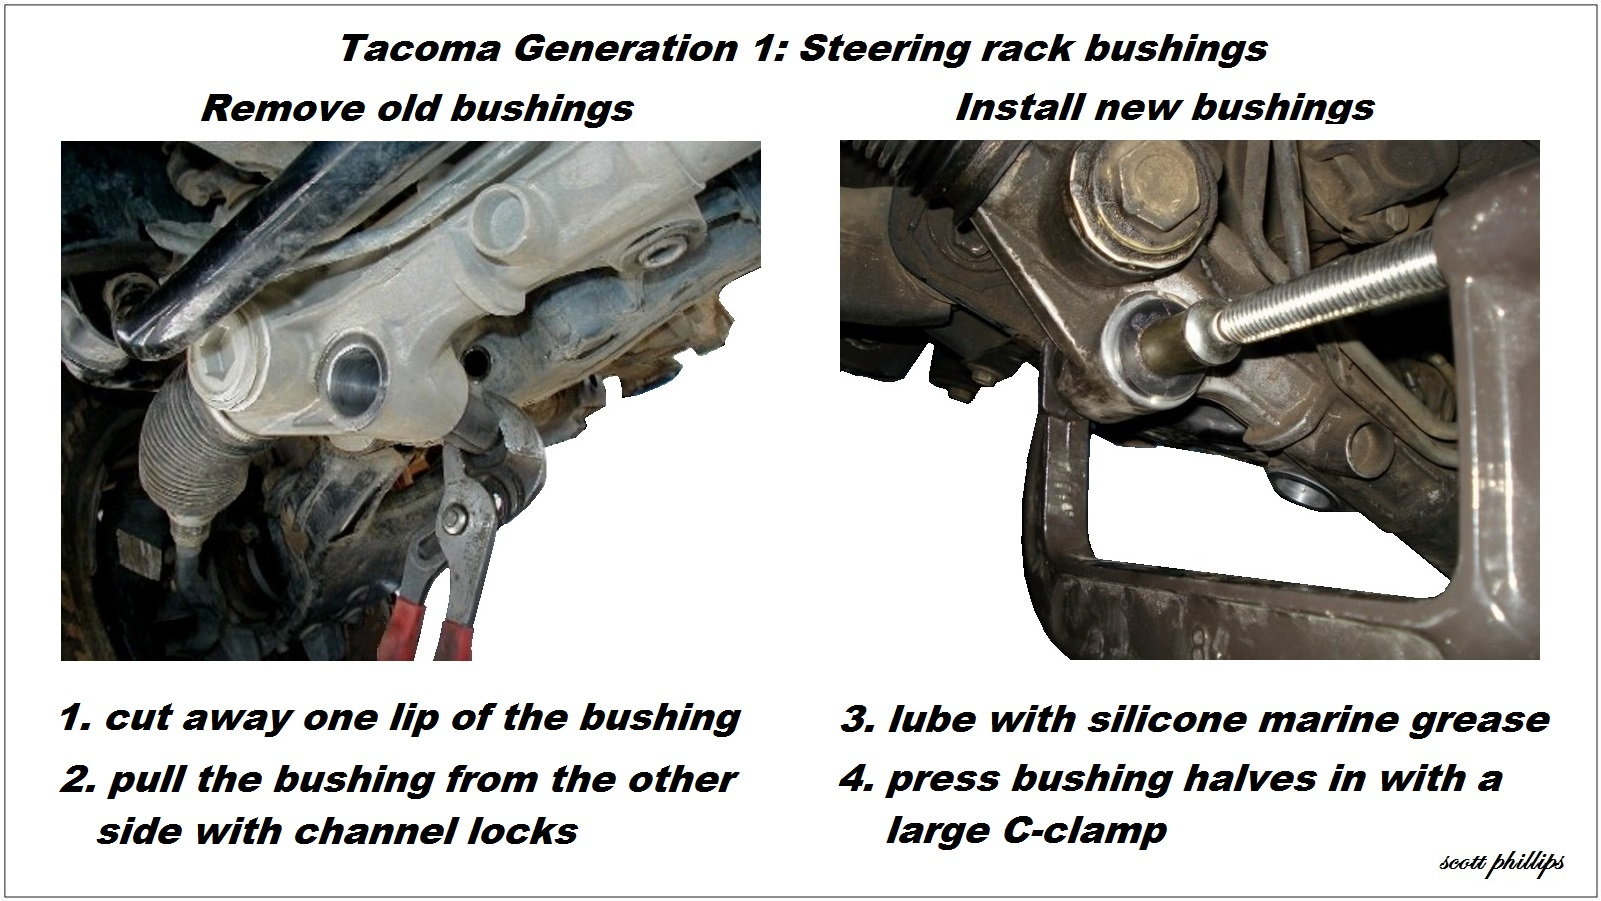
Driver-side and center, pressed-in bushings:
- Cut the bushing lip away at one end.
- Grip the other end with channel locks or locking pliers and pull the old bushing out.
- Lightly lubricate the new bushing with silicone marine grease.
- Press both halves of the new bushing, and the bushing sleeve, into place with the large C-clamp.
- The large washer goes between the driver-side bushing and the frame crossmember.
Passenger-side D-bushing:
- Spread the bushing where it is split and slip it off.
- Lightly lubricate the new D-bushing with silicone marine grease and slip it on.
Pro Tip
Never use petroleum-based grease on polyurethane bushings, as it will attack and weaken the polyurethane.
Step 6 – Reinstall the steering rack
- Fit the rack into place and tighten the driver-side, center and passenger-side nuts and bolts.
- Reconnect the driver-side tie rod end.
- Reinstall the skid-plates, as needed.
Notes on Tacoma Gen 2 (2005-2015)
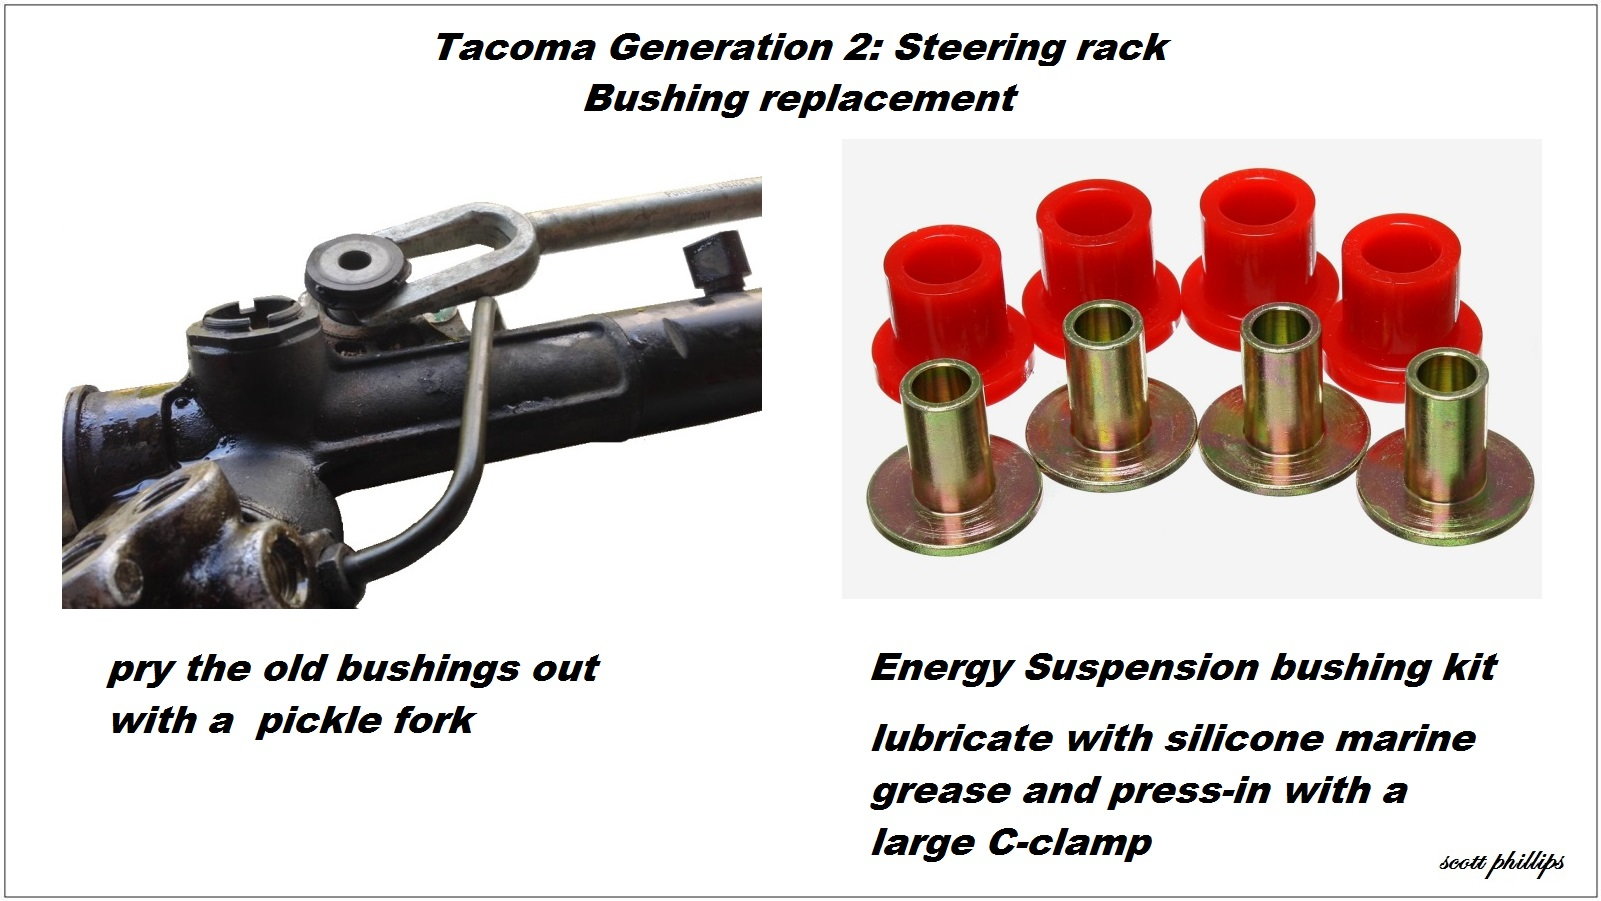
- The generation 2 steering rack is fastened with two attachment points, using pressed-in bushings.
- Toyota does not provide replacement bushings separately, but they are available from Moog and Energy Suspension.
- The steering rack must be completely removed to replace the bushings.

- Pry the old bushings out with a pickle fork.
- Lightly lubricate the new bushings with silicone marine grease.
- Press them in with a large C-clamp.
Related Discussions
- Steering Rack Bushing Replacement - YotaTech.com
- Replace Steering Rack Bushings - YotaTech.com
- Steering Rack Movement and Sound - YotaTech.com