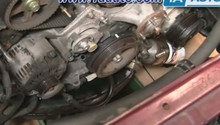
Toyota 4Runner, Tacoma, and Tundra: How to Replace Timing Belt and Water Pump
The timing belt is integral to engine operation, but needs replacement at strict intervals to prevent catastrophic engine damage. Similarly, the water pump lies directly in the center of the timing belt setup, so if either the timing belt or water pump is due for service, your best bet it to change them both out while the front of the engine is disassembled.
This article applies to the Toyota 4Runner (1996-2002), Tacoma (1995-2004), and Tundra (2000-2004).
Timing belts are often used in overhead cam engines to keep the valvetrain in sync with the movement of the crankshaft. Timing belts tend to run a bit quieter than a traditional timing chain setup and are considered to be a more efficient design, but in turn require regular replacement intervals to ensure trouble-free operation. Toyota recommends the timing belt be replaced every 60k miles to avoid belt deterioration and prevent potential engine damage.
Since timing belt replacement is rather labor intensive, it is common to replace the water pump and timing belts rollers whenever servicing the timing belt. Similarly, if the timing belt-driven water pump has kicked the bucket and requires replacement, the timing belt will need to be removed anyway, so it is best to swap in a new one. Fortunately, timing belt/water pump kits are readily available that include all necessary components to get the job done right. If you are handy with a wrench, this job can often be quickly accomplished at home for a fraction of the cost than the local service center would charge. This article will outline the timing belt and water pump replacement procedure for Toyota Tundras, 4Runners, and Tacomas fitted with the 5VZ-FE 3.4L V6 engine.

Materials Needed
- Floor jack and jack stands
- Drain pan
- Metric socket and wrench set
- 3/8" and 1/2" ratchets, extensions, and breaker bars
- Pliers
- Flat head screwdriver
- Phillips screwdriver
- Specialty crankshaft pulley holding tool
- Impact gun
- Rubber mallet or dead blow hammer
- Torque wrench
- Razor blade
- Acetone
- Medium strength Threadlocker (blue)
This article outlines the timing belt and water pump replacement procedure for the Toyota 5VZ-FE 3.4L V6 engine as equipped in Tundra, 4Runner, and Tacoma models. Note that there may be minor differences among the vehicles in which this engine is fitted.
Step 1 – Lift vehicle
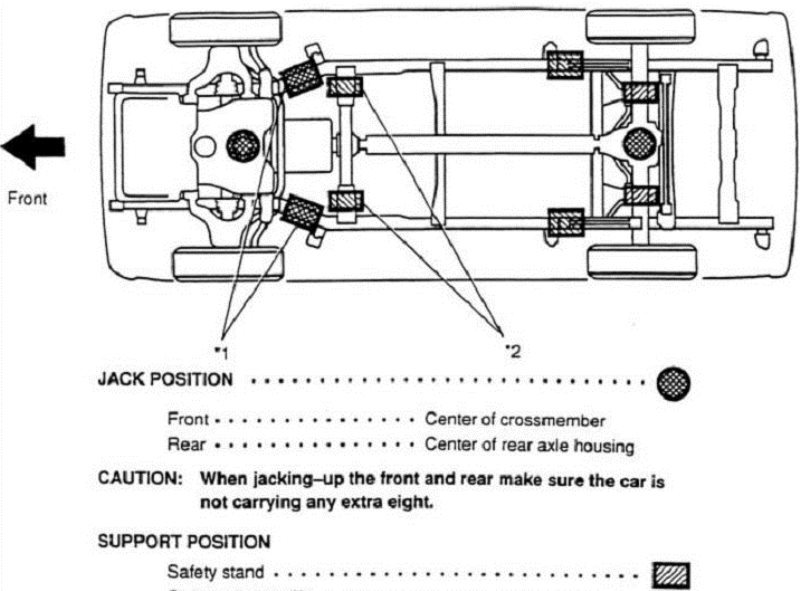
Before beginning the timing belt replacement procedure, lift the vehicle and support it with jack stands. Similarly, the front end of the vehicle can be pulled up onto lift ramps to allow for adequate working room under the engine bay.
Step 2 – Drain cooling system and remove fan
The cooling fan is attached to the front of the engine and must be removed to access the drive accessories, water pump, and the timing belt.
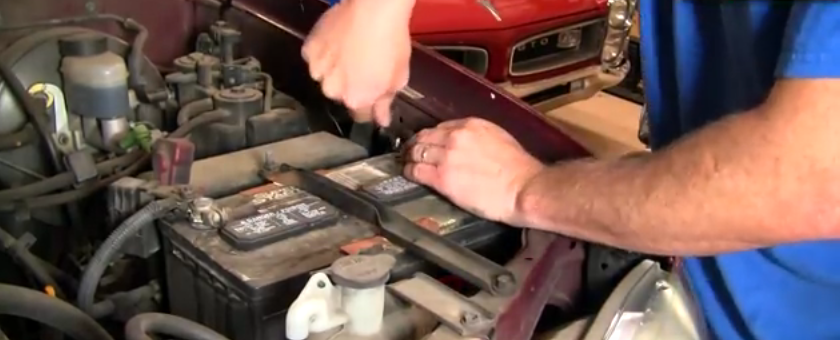
- For safety purposes, disconnect the battery.
- Remove the skid plate(s) to allow for access to the underside of the engine.
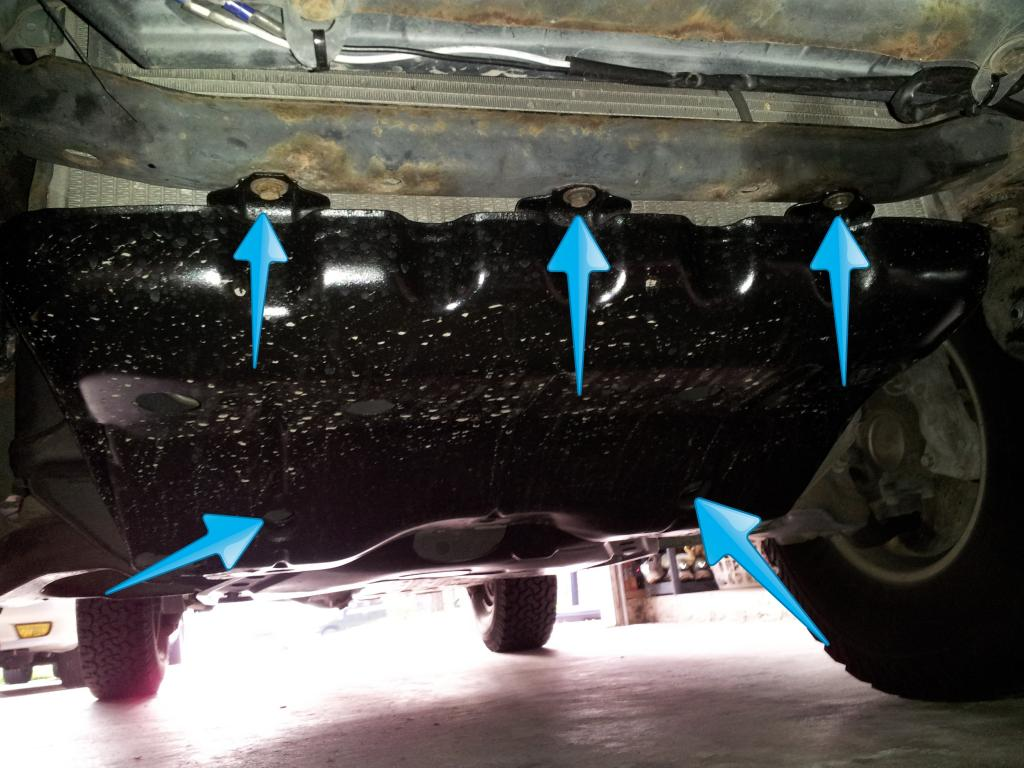
- Locate the radiator drain plug at the bottom of the radiator and drain the coolant into a suitable catch pan. Drain plugs do not typically need to be removed to allow coolant to drain. Simply loosen the plug until coolant begins to flow. Additionally, there is an engine block drain cock located on the passenger side of the engine that can be accessed by removing the wheel well liner.
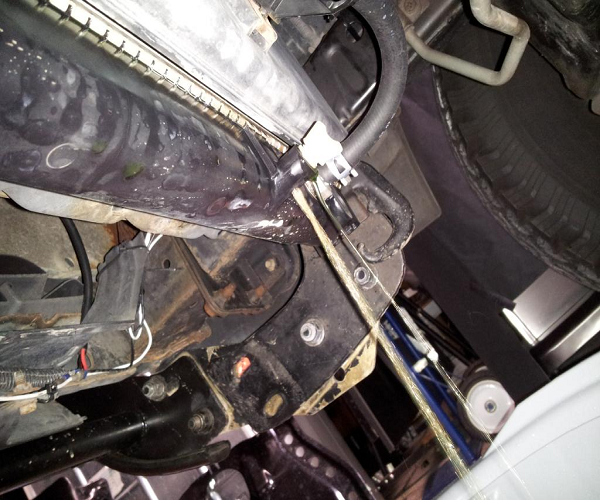
Figure 4. Draining coolant at radiator drain plug. 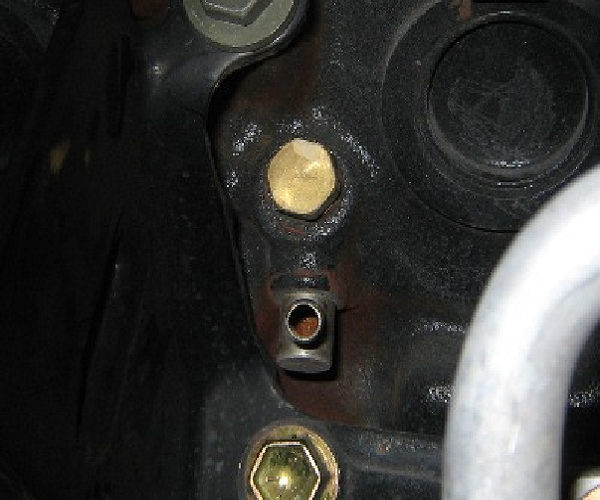
Figure 5. Engine block drain cock.
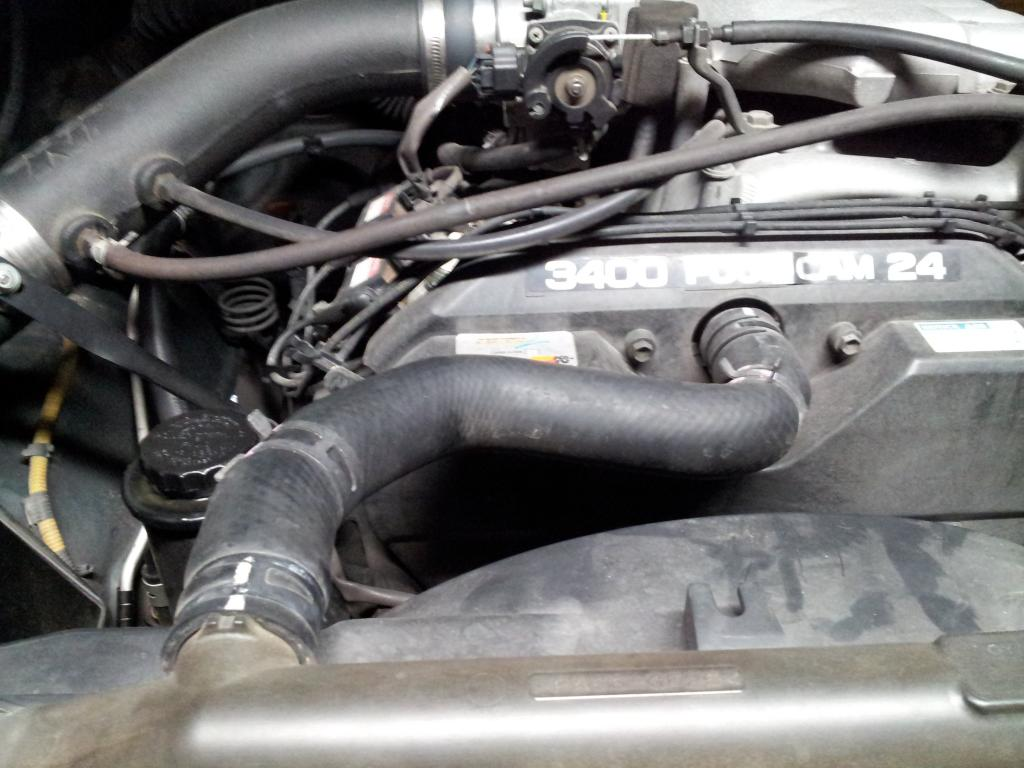
- Remove the upper and lower radiator hoses. Compress the hose clamps with a set of pliers and slide them off of the outlets to allow for hose removal.
-
Next, loosen the fan shrouds. The lower portion of the shroud is often held in place by a couple of metal clips and retaining tabs. Remove the bolt at each corner of the shroud to free it. The shroud can be easily lifted out after removing the radiator or cooling fan.
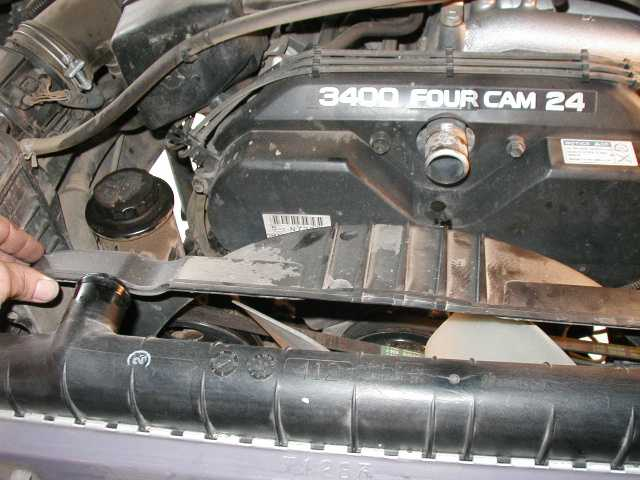
Figure 7. Fan shroud removal. - While not necessary, some prefer to remove the radiator for better access to the front of the engine. For additional details on removing the radiator, see How to Replace Radiator.
-
Remove the (4) nuts holding the fan to the pulley using a 12mm wrench before removing the fan assembly and shrouds.
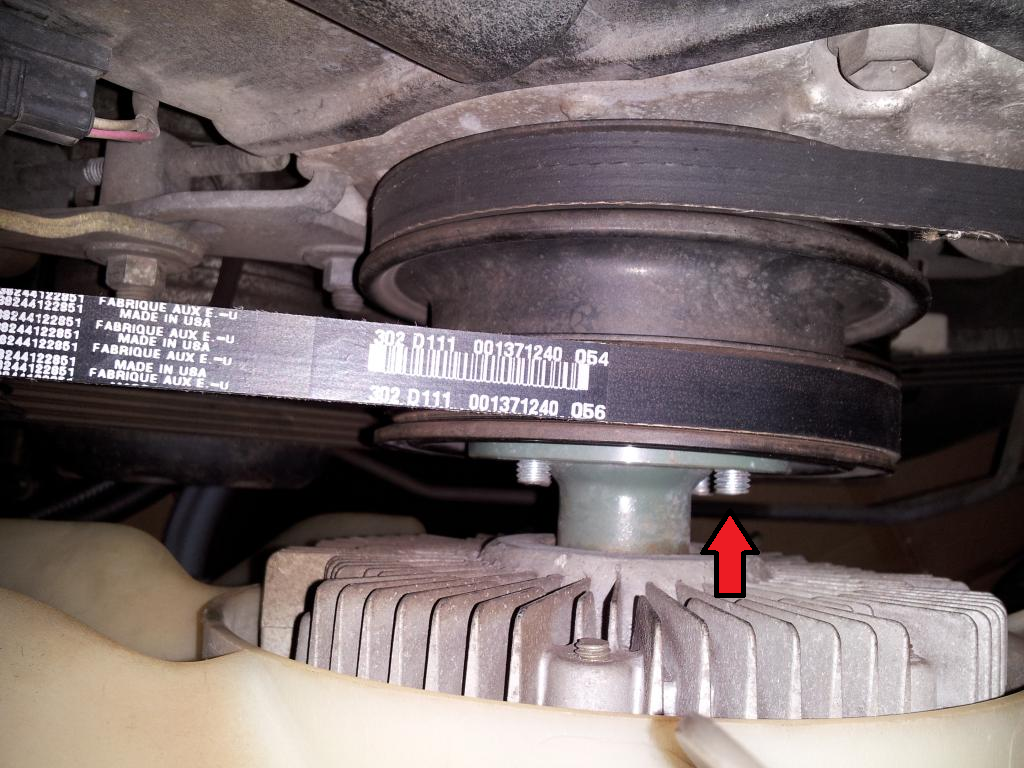
Figure 8. Fan removal.
Step 3 – Remove accessory belts and timing belt covers
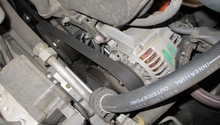
Next you will need to remove the accessory belts and timing belt covers. Familiarize yourself with the belt routing (Figure 9).
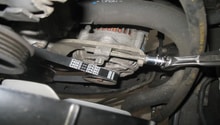
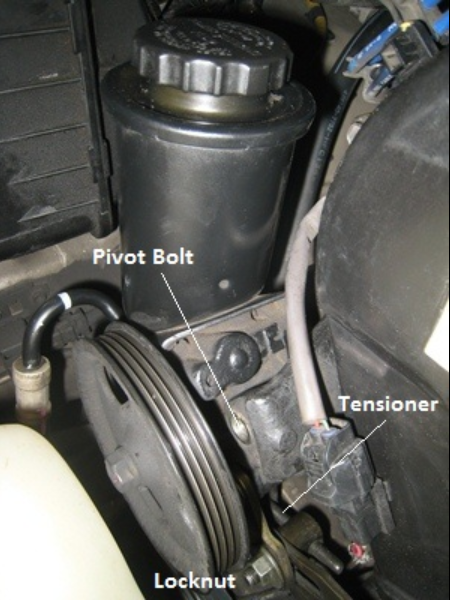
- Loosen the power steering pump pivot bolt using a socket through the hole in the pump pulley. Next, loosen the tensioner lock nut and turn the adjuster counter-clockwise to loosen the belt tension until the power steering belt can be slipped off.
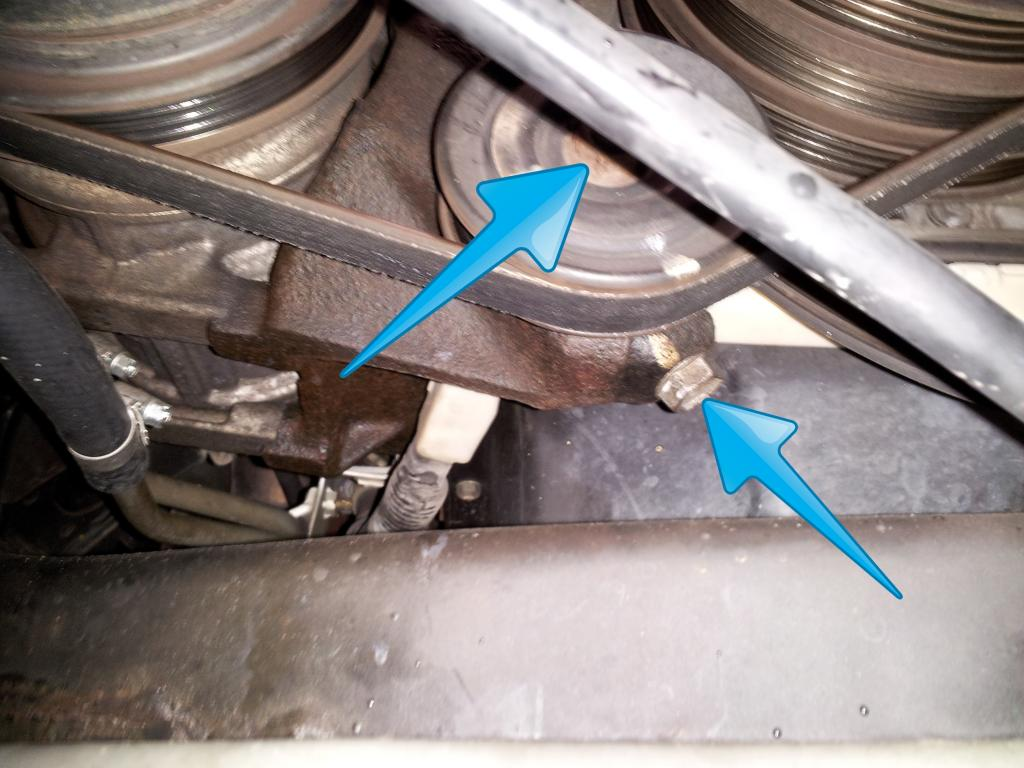
- On the underside of the vehicle, loosen the A/C tensioner pulley nut and bolt to relieve the A/C belt tension. With the belt loose, remove it from the vehicle.
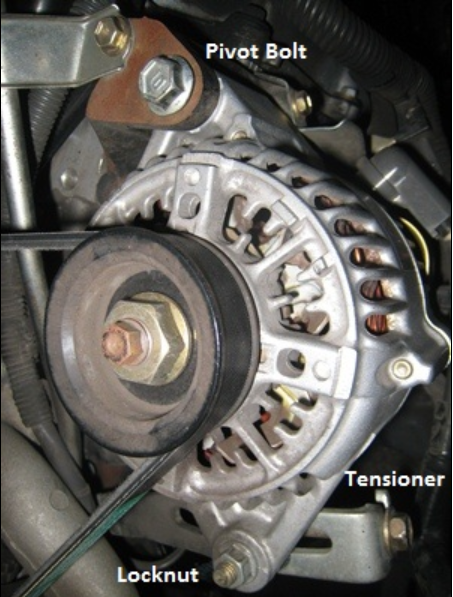
- To remove the alternator belt, loosen the pivot bolt and lock nut before turning the tensioning bolt counter-clockwise to relieve belt tension. With the belts removed, the fan belt pulleys at the fan bracket can also be removed.
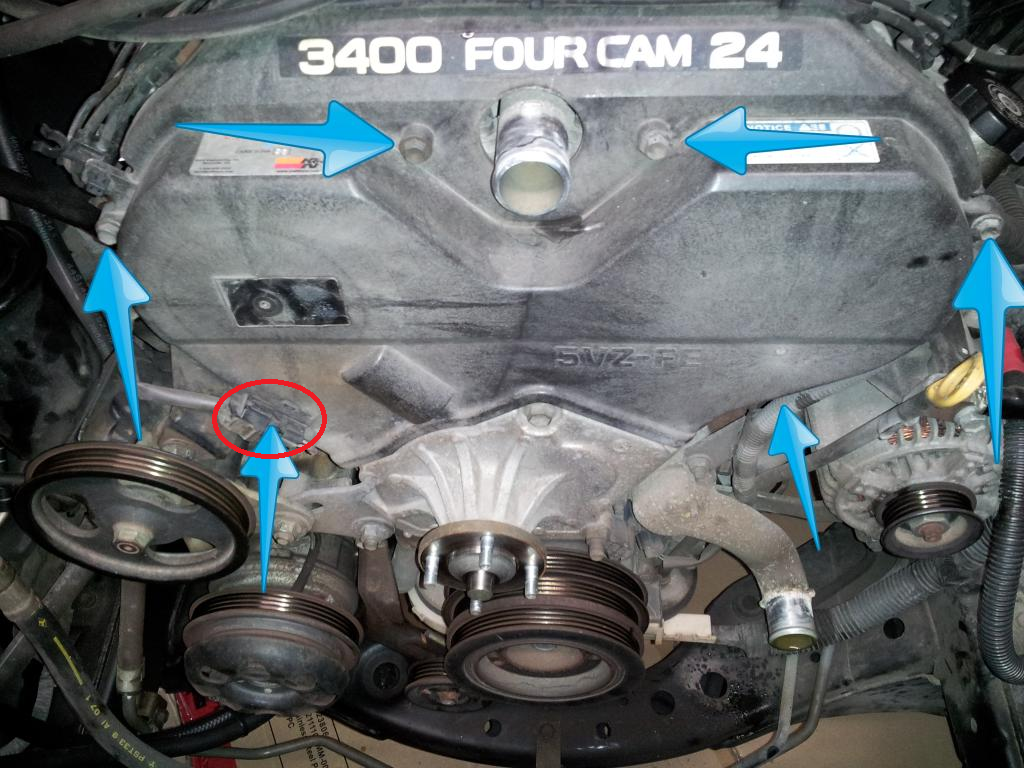
- Remove and disconnect the camshaft sensor from the timing belt cover. Additionally, remove the clips from the top of the cover that hold the spark plug wires in place before removing the (6) timing belt cover bolts and removing the cover from the front of the engine.
Pro Tip
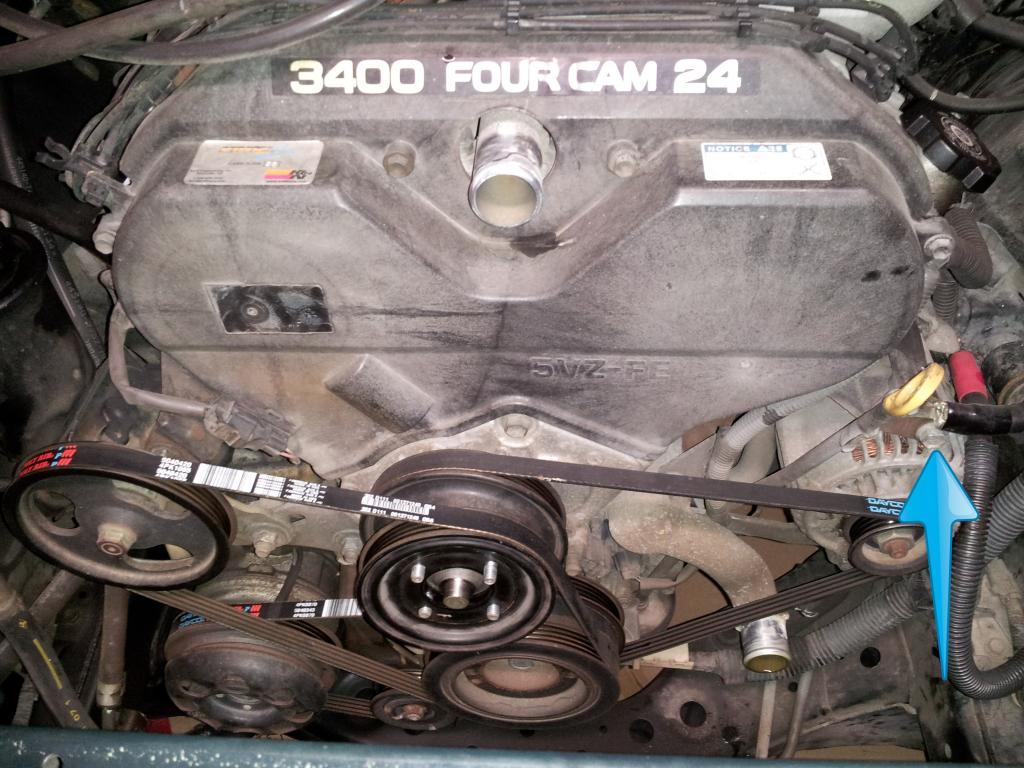
In some cases, the oil dipstick tube may need to be removed to access the timing belt cover. This can be done by simply removing the fastening bolt from the alternator bracket (see arrow in Figure 8) and wiggling the dipstick tube back and forth to remove it from the oil pan.
Step 4 – Remove timing belt
- Remove the fan bracket from the front of the engine. To remove the fan bracket, the PS pump pivot bracket and tensioner bolt need to be removed. The fan bracket is attached to the engine using a combination of bolts and nuts.
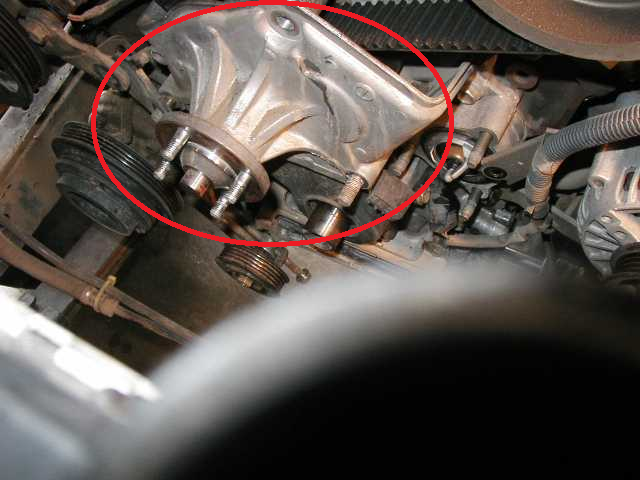
Figure 14. Removing fan bracket. 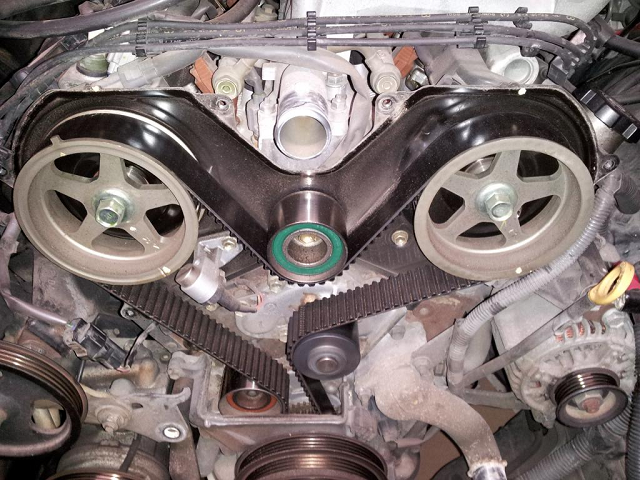
Figure 15. Front of engine with fan bracket removed.
- Using an impact gun or long breaker bar with a 19mm socket, remove the crank pulley bolt.
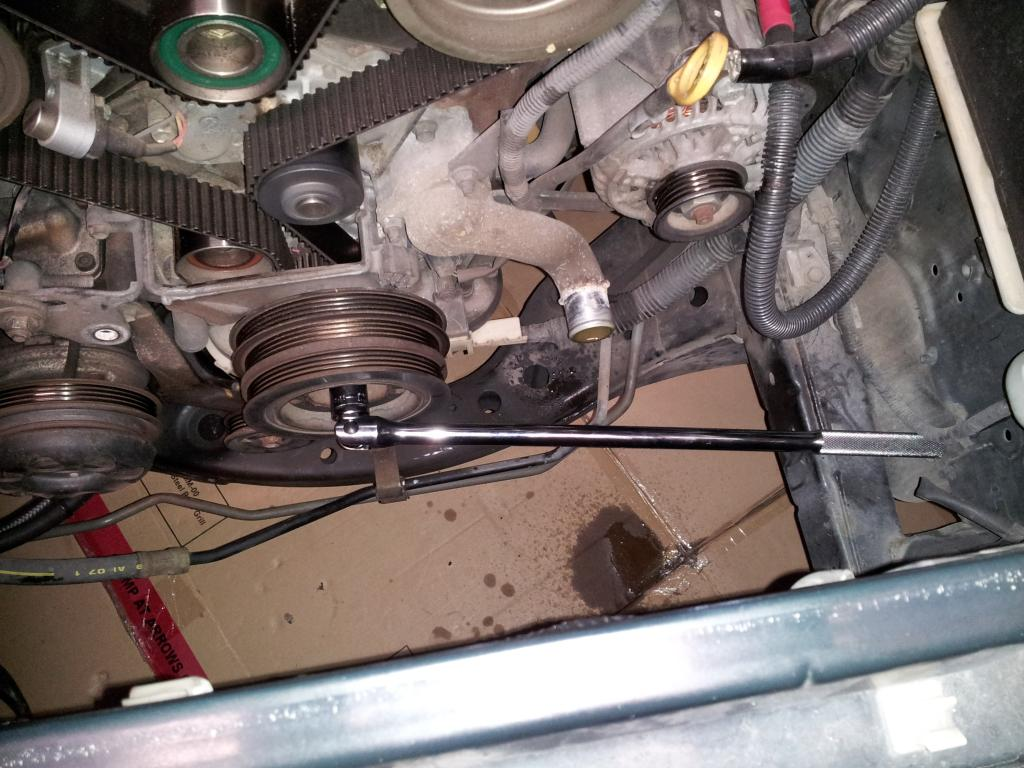
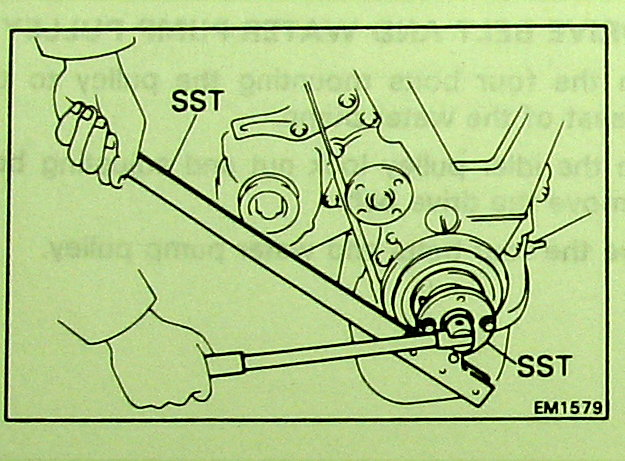
- Remove the harmonic balancer (vibration dampener). Toyota recommends using their special 2-prong crank pulley wrench when removing the crank pulley bolt and balancer, but most find the tool unnecessary until re-installing the balancer after timing belt replacement.
- Remove the lower timing belt cover to expose the crankshaft sprocket. Remove the (2) bolts holding the starter wire bracket to the cover before removing the (4) lower belt cover bolts and removing the cover from the engine. Be sure to retrieve the crankshaft washer and note its orientation.
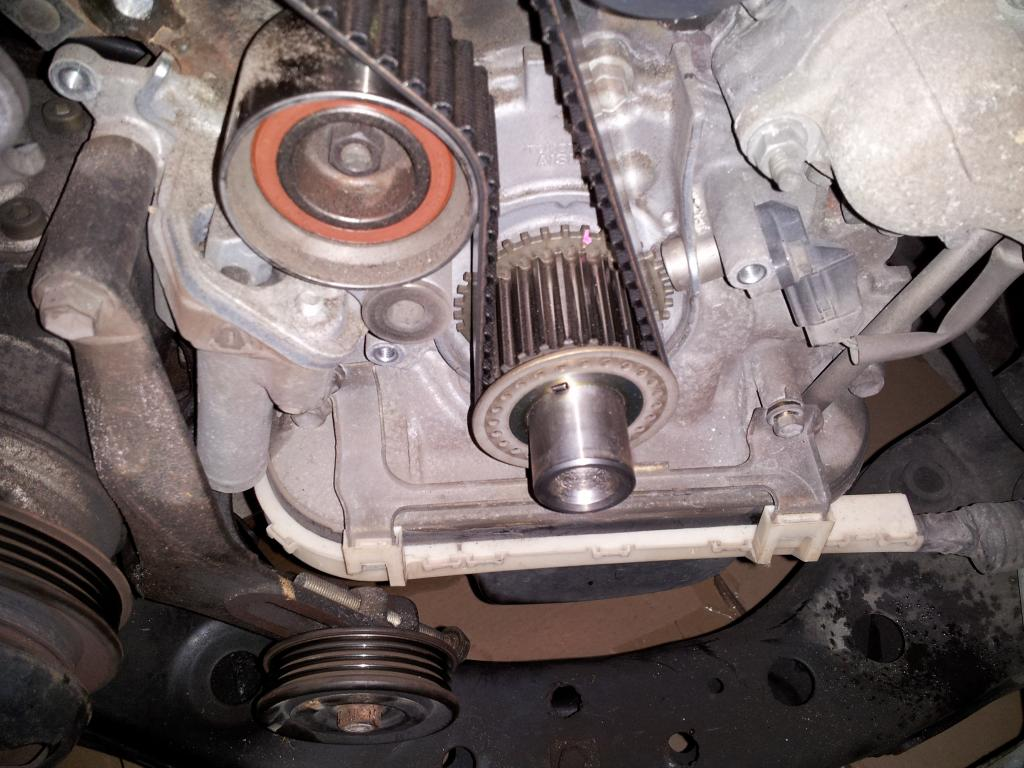
- Install the crankshaft pulley bolt into the crankshaft and turn the engine clockwise to align to timing marks. Rotate the engine until the notch/dot on each camshaft sprocket and crank sprocket align with their corresponding marks on the engine as shown.
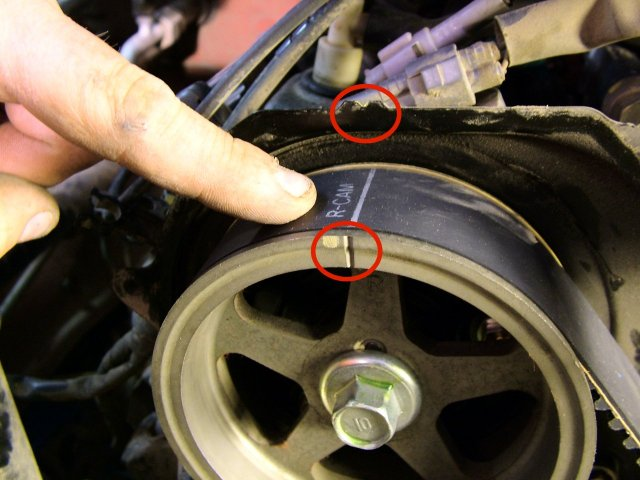
Figure 19. Camshaft timing marks. 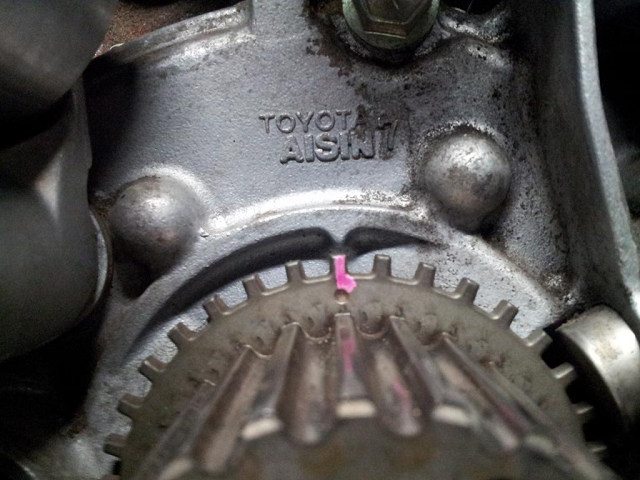
Figure 20. Crankshaft timing mark.
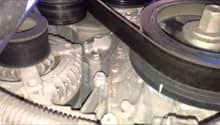
- Remove the (4) A/C compressor bolts and lay the compressor aside. The (5) compressor bracket bolts and bracket also need to be removed to access the timing belt tensioner. Remove the (2) bolts holding the tensioner unit in place before removing the tensioner unit to relieve timing belt tension.
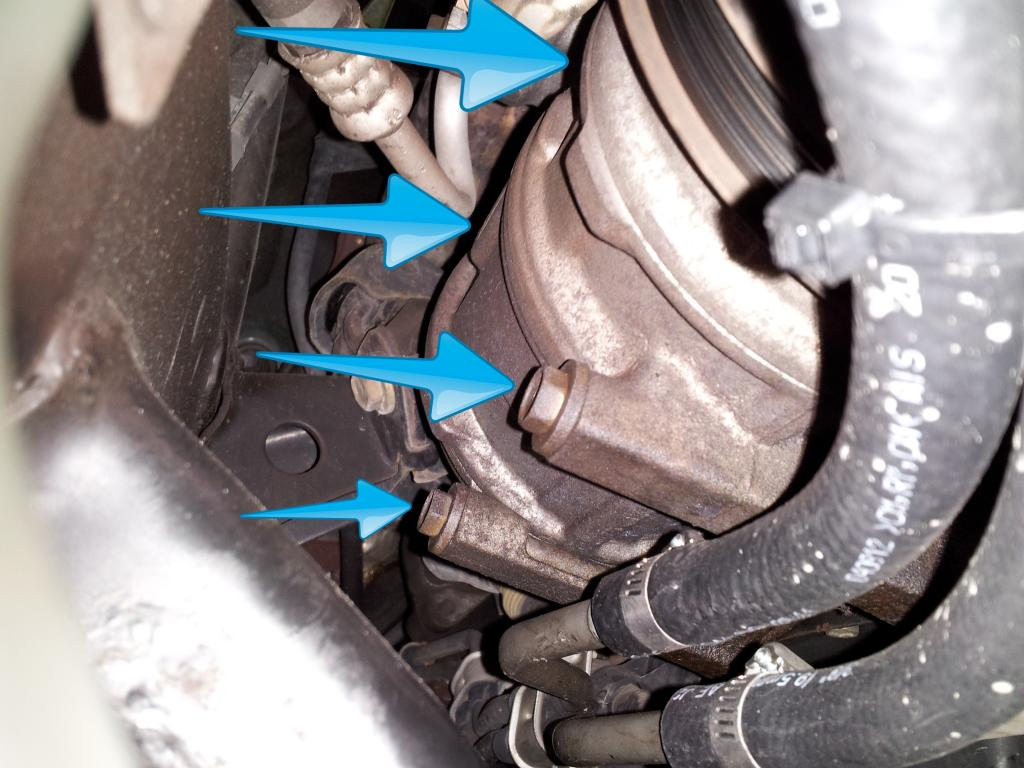
Figure 21. A/C compressor bolts. 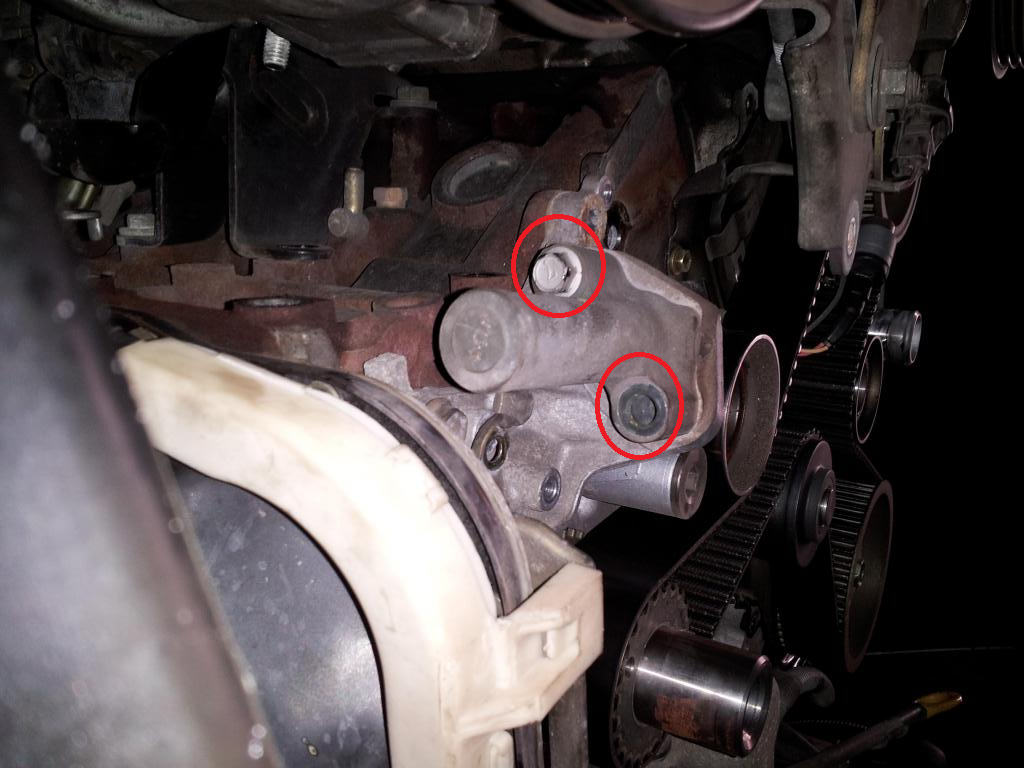
Figure 22. Tensioner unit bolts (viewed from underside of vehicle).
- Remove the timing belt from the engine.
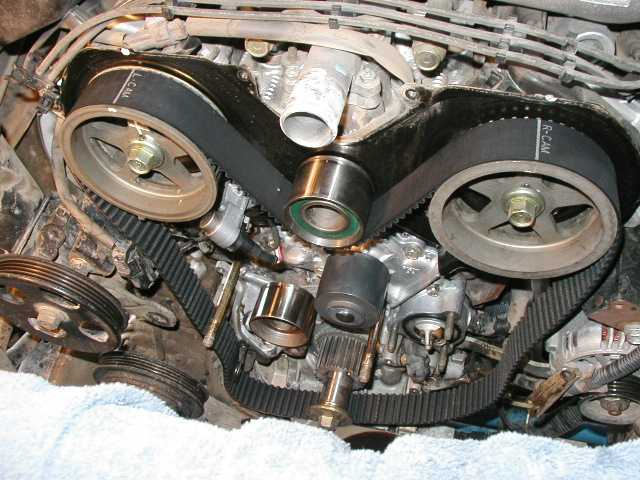
Pro Tip
When replacing the timing belt, it is a good idea to replace the idler and tensioner rollers as well as the water pump. Parts kits are available that include all of these items.
Step 5 – Replace water pump
- Disconnect the small water hose (oil cooler hose) that leads to the thermostat side of the water pump.
- Remove the (3) bolts holding the thermostat housing to the water pump before removing the water pump from the engine. The water pump and thermostat housing will likely be stuck in place, but can be freed by giving them a firm tap with a rubber mallet or dead blow hammer.
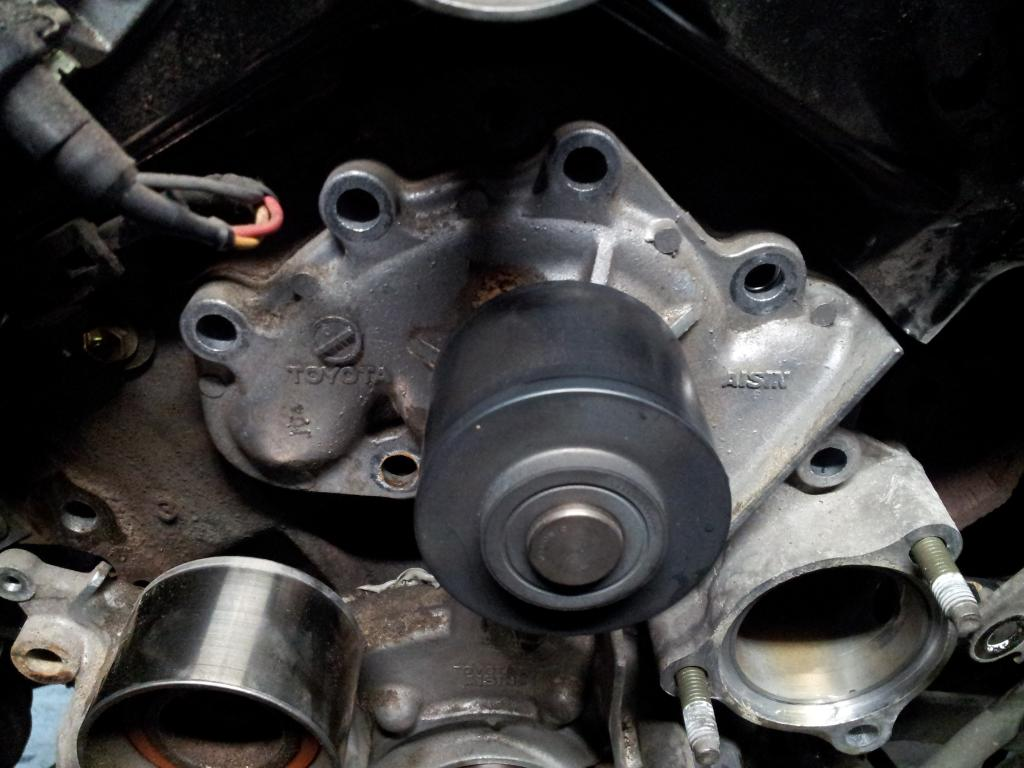
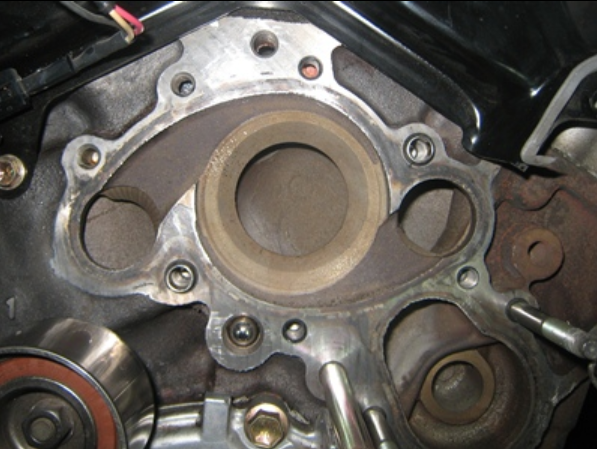
- Clean all residual gasket material from the water pump mating surface of the engine. Place the new gasket onto the locating dowels before installing the water pump. Do not use any silicone or gasket maker, as the gasket is a metal/synthetic hybrid that is intended to be installed dry. Torque the water pump bolts to 14 ft/lbs in a criss-cross pattern.
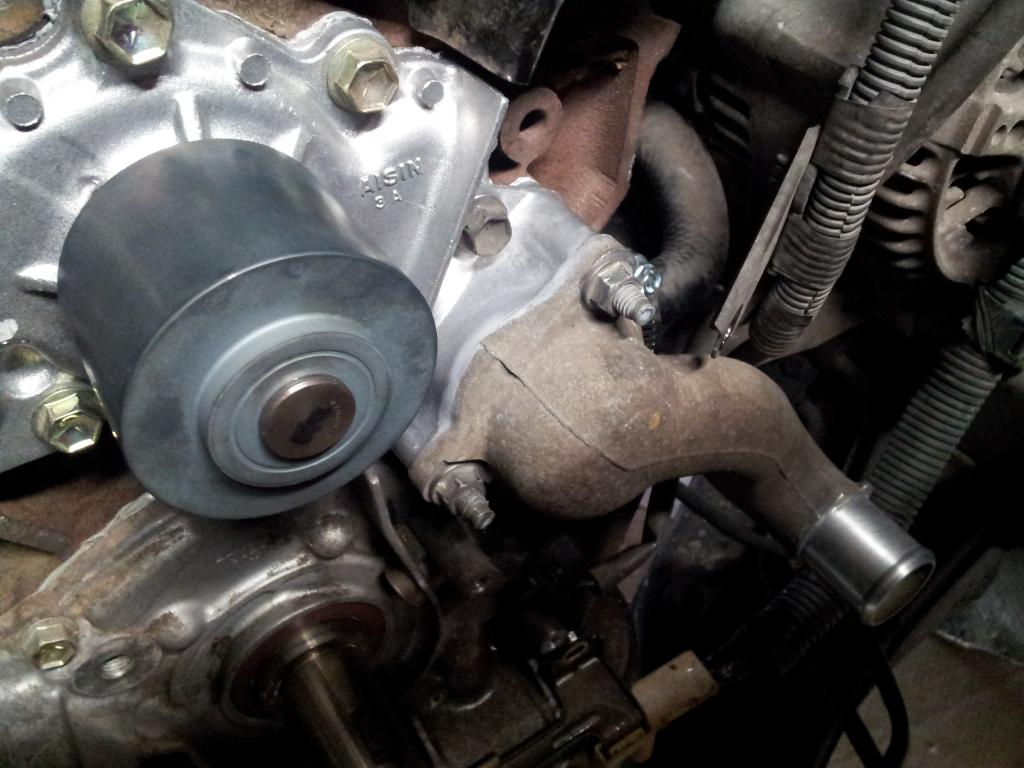
- Install the rubber seal and thermostat into the water pump with the jiggle valve facing downward. Install the thermostat housing and torque the bolts to 14 ft/lbs. Reattach cooling hose (oil cooler hose) to water pump.
Step 6 – Replace timing belt
- If applicable, replace the tensioner and idler rollers. Apply medium strength Threadlocker (blue) to the tensioner and idler bolts before tightening them to 30 ft/lbs.
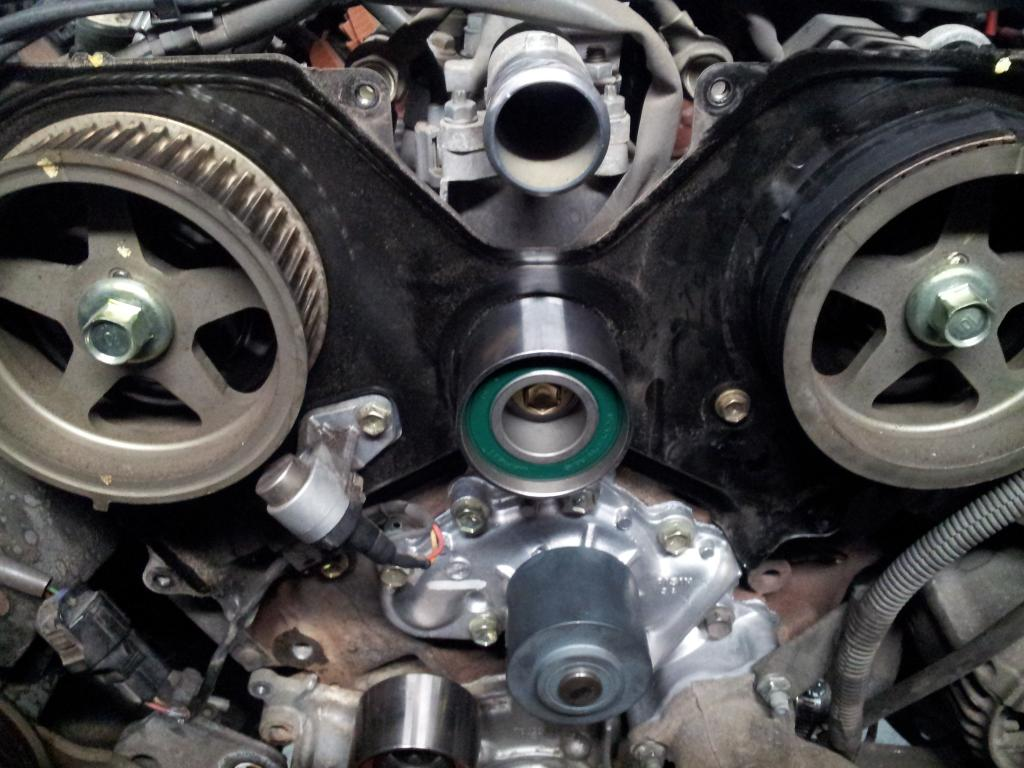
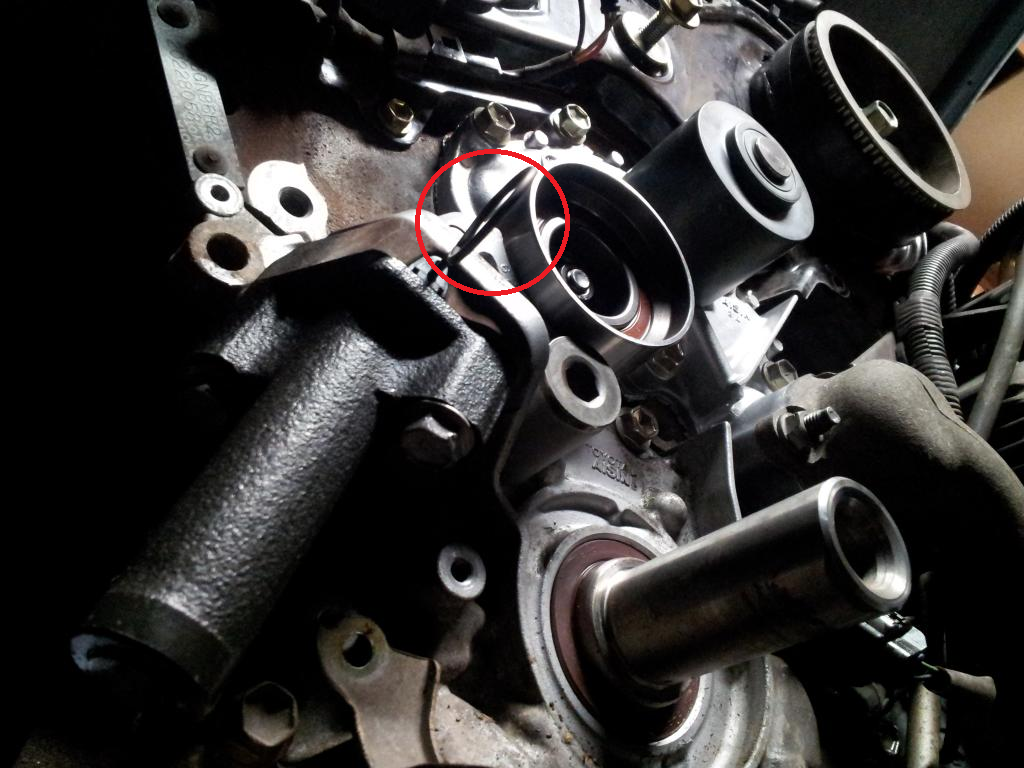
- If using the old belt tensioner unit, compress it in a bench vice or similar. Once compressed, insert a small screwdriver, hex key, or nail to act as a stop against the tensioner mechanism. Install the tensioner unit to the engine, but do not pull the locking pin to release the tensioner yet.
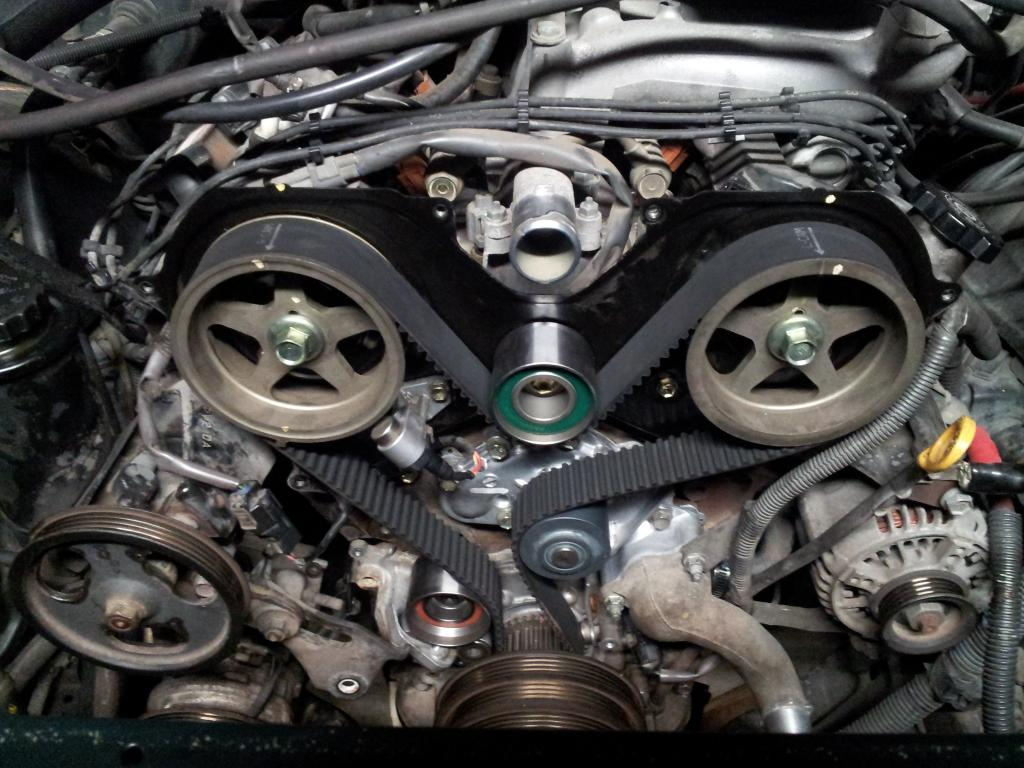
- Install the new timing belt. With the belt in place, be sure that timing marks on the camshaft/crankshaft sprockets align with their corresponding timing marks on the engine as well as the timing marks indicated on the new belt.
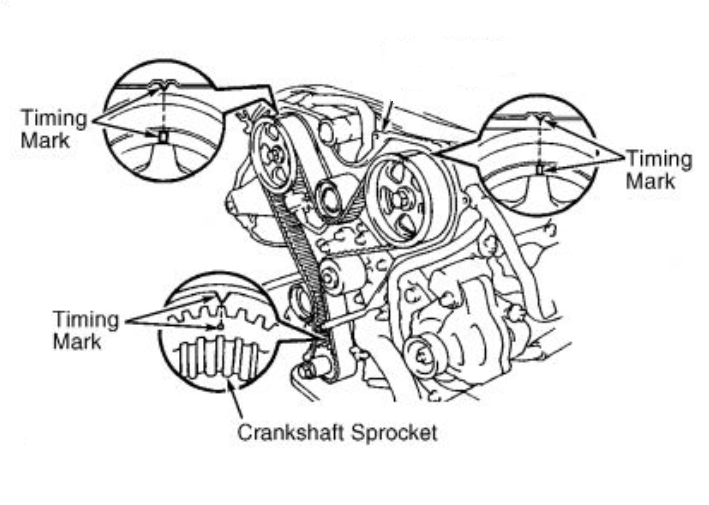
Figure 29. Timing mark alignment. - With all timing marks aligned, pull the tensioner pin to apply tension to the timing belt.
Step 7 – Reassembly
With the new water pump and timing belt installed, reassembly is the reverse order of the removal procedure.
- Install the alternator bracket and alternator. Torque fasteners to 27 ft/lbs.
- Install the timing belt guide (washer) onto the end of the crankshaft.
- Install the lower timing belt cover and torque the bolts to 80 in/lbs. Re-install the starter wire bracket to the timing belt cover.
- Install the crankshaft pulley using the special service tool and torque to 217 ft/lbs. Toyota recommends installing a new crankshaft bolt.
- Install the fan bracket and power steering pump tensioner. Torque the fan bracket fasteners to 35 ft/lbs, but leave the PS pump pivot bolt loose until after installing the PS pump belt.
- Install the upper timing belt cover and torque the bolts to 80 in/lbs. Re-connect the camshaft sensor as well as the spark plug wire brackets.
- Install the oil dipstick tube.
- Install the fan pulley and fan. Tighten the fan nuts to 50 in/lbs.
- Install the alternator belt and tighten the pivot bolt (38 ft/lbs) and tensioner nut (25 ft/lbs) once belt deflection is 1/4" to 1/2".
- Install the A/C compressor belt and torque the pulley bolt to 22 in/lbs. Tighten the tensioner bolt with belt deflection approximately 1/4".
- Install the power steering belt and tighten the pivot bolt (32 ft/lbs) and tensioner nut (32 ft/lbs) with belt deflection at 1/4" to 1/2".
- Install the fan shrouds.
- Install the upper and lower radiator hoses before filling the cooling system with coolant.
- Reconnect battery cables.
Step 8 – Start engine
With all engine components re-installed, start the engine and allow it to reach operating temperature. Check for any coolant leaks and top off the cooling system as necessary. If everything checks out, install the skid plate(s) and lower the vehicle off of jack stands.
Featured Video: How to Change Timing Belt on Toyota V6
Related Discussions
- 5VZ-FE Running Warm After Timing Belt - YotaTech.com
- 04 Tacoma V6 5VZ-FE Timing Belt Replacement Help - YotaTech.com
- How to: Change Drive Belts 3.4L 5VZ-FE - YotaTech.com

