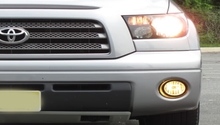
Toyota 4Runner and Tacoma: How to Convert Marker Lights to Turn Signals
Tired of looking at those ungainly, massive turn signal lights on the front of your Tacoma or 4Runner? Here's how to convert your side marker lights into turn signals and clean up the look of your ride.
This article applies to the Toyota 4Runner (1984-2002) and Tacoma (1996-2015).
Let's face it. The turn signals on the front of your Tacoma or 4Runner are just too much. Especially if you've added on a big front bumper, trail lights, or any other kinds of essential off-road gear. You could just tear them off, but it's highly unlikely that Johnny Law would appreciate that, and neither would that guy driving your way when you're trying to turn. The civilized solution to this problem is simple: convert your useless marker lights into turn signals, so you can stay within the confines of the law and your fellow driver's good graces. Here's how to get it done.

Materials Needed
- Phillips screwdriver
- Diagonal cutters
- Wire stripper
- Crimping tool
- 1/8" drill bit
- 9/16" drill bit
- Flat head screwdriver
- Utility knife
- Q-tips
- Electrical tape
- Wire crimps
- (2) 1982/83 Honda Accord corner light sockets (or 1157 dual filament bulbs, which will work but require some drilling and silicone)
Step 1 – Remove corner light
Open the hood and move to the first corner light you want to remove. Remove the Phillips screw holding it in place. Grab the corner light and pull it straight forward, and don't be alarmed if it feels a little snug. Once loose, disconnect the connector by squeezing the tab, twisting, and pulling it out of the socket.
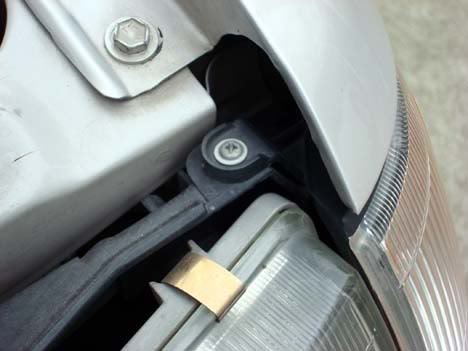
Figure 1. Remove the screw from the corner light. 
Figure 2. Pull the corner light straight forward. 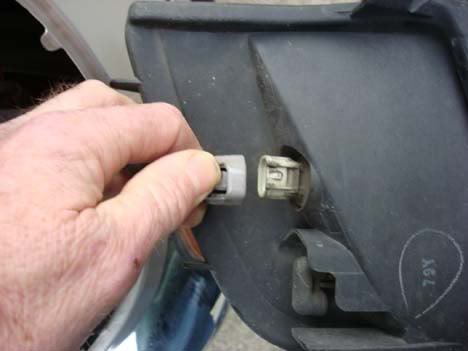
Figure 3. Squeeze the connector and pull it out.
Step 2 – Modify socket hole
Measure to a point approximately 1" above the socket hole and mark the center with a pen. Drill a pilot hole with a 1/8" drill bit, then a 9/16" hole. Trim the edges of the new hole so they are smooth. Using a Q-tip, clean up any loose plastic shavings. Press the Honda Accord light socket into the new hole until the rubber grommet is secure.
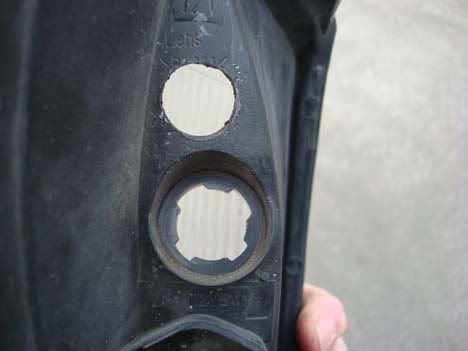
Figure 4. Drill out the new location for the new light. 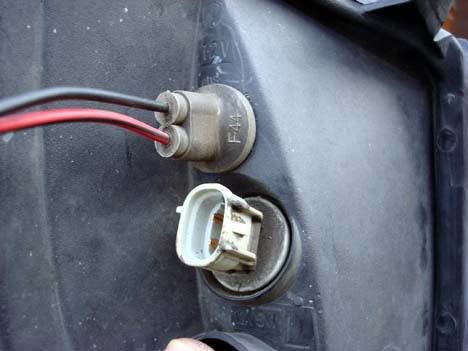
Figure 5. Push the new light socket into place.
Step 3 – Convert the marker lights
Unscrew and remove the front turn signals. Disconnect the plug from the back of the turn signal by pressing down on the release tab while pulling on it. Pry the clip on the "L" shaped plastic piece out of its mounting hole and pull the wires up through the corner light opening, so they are easy to work on. Remove the tape covering the wires. Cut the green wire and strip around 1/2" from the end. Crimp one end of the blinker wire, then insert the second end and the red wire from the new blinker and crimp. Repeat with the white/black and black wires. Test the lights to ensure they are working properly. If they aren't, check to make sure that the bulb isn't seated too deep and that all wires are securely crimped.
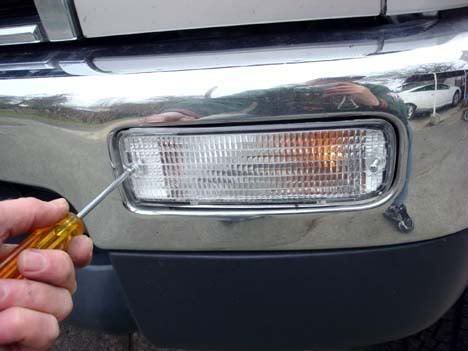
Figure 6. Remove the front turn signals. 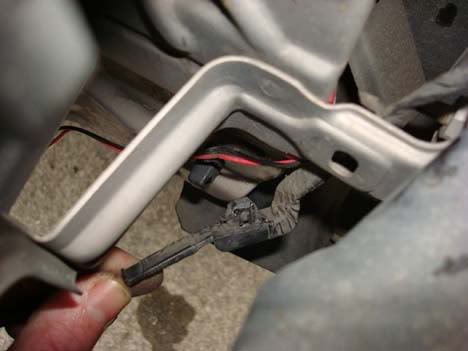
Figure 7. Remove the wires from the "L" shaped bracket. 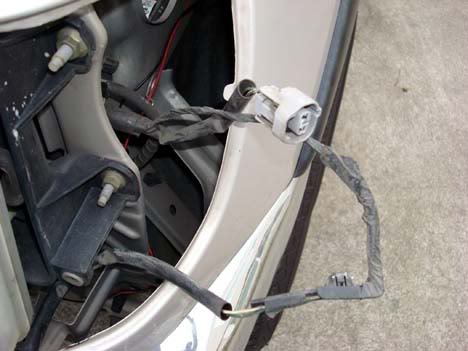
Figure 8. Pull the wire loom up through the marker light opening. 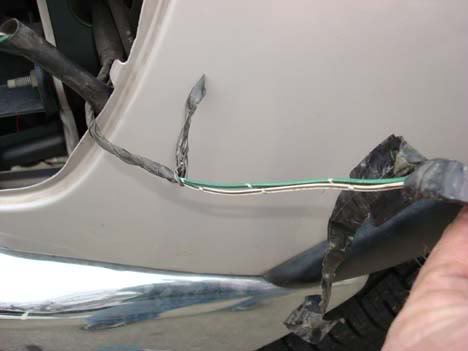
Figure 9. Remove the tape around the wires. 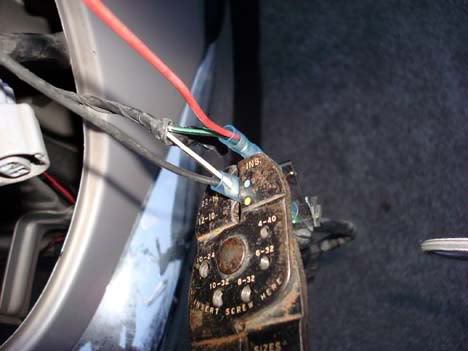
Figure 10. Crimp the wires together.
Step 4 – Reinstall lights
Once everything is working properly, re-tape the wiring with some electrical tape and re-route the wiring back through the corner light opening. Reconnect the wiring harnesses. Reinstall the bumper lights (if you are keeping them) and the corner lights.
Related Discussions
- Corner Blinkers 96-2002 4Runner and Tacoma - YotaTech.com
- Marker Lights into Turn Signals - YotaTech.com