Toyota 4Runner 1996-2002: How to Replace Your Headlights
Whether you're replacing a busted headlight or upgrading to a sweet aftermarket set, here's how to remove and install your 4Runner headlights.
This article applies to the Toyota 4Runner (1996-2002).
Headlights play an integral part in the functionality of any vehicle. Without them, we'd be driving blind once the sun sets, and no one wants that. It's super important to keep your headlights in working order. As soon as a bulb burns out, you need to replace it.

Materials Needed
- Flat-bladed and Phillips-head screwdrivers
- Ratchet with 10mm socket and extension
Bulb Replacement
Step 1 – Disconnect electrical connector
Open the hood and reach into the engine compartment behind the headlight. Pull the electrical connector straight off.

Step 2 – Remove the bulb from housing
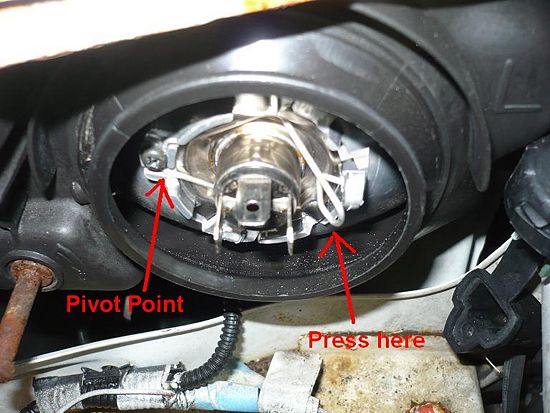
Pull off the dust boot (if equipped) to access the bulb. Disconnect the wire retaining clip by pressing it in and upward. Pull the bulb from the socket.
Step 3 – Install a new bulb
Reverse the removal procedure to install the new bulb. Remember to reinstall the dust boot before plugging in the electrical connector.
Headlight Assembly Replacement
Step 4 – Remove the grille
There are several clips located around the edges of the grille that need to be disengaged. Make sure you have done all of them before you pull the grille from the vehicle. Be careful not to snap the grille clips when disengaging them. Work slowly and carefully.

Step 5 – Remove the outside lens
There is a fastener above each headlight on the outer corner. Remove it and pull off the outside corner lens, disengaging the clip at the bottom. Disconnect the electrical connector and remove it to access the two headlight housing mounting bolts located behind it.

Step 6 – Remove the headlight housing
If your model is equipped with a headlight fascia, remove the bolt from the front using the 10mm socket. Remove the housing retaining bolts from around the perimeter of the headlight: two on the side, one near the top, and one at the bottom. Pull the headlight from the vehicle and disconnect the electrical connector to remove it.
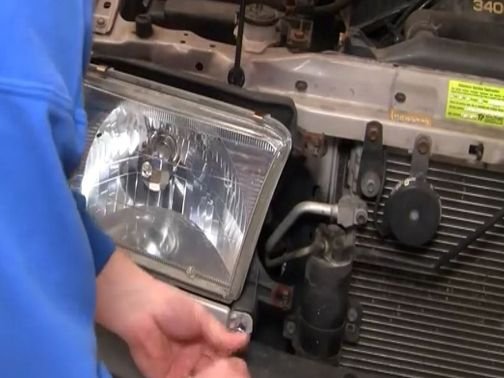
Figure 5. Remove the fascia bolt from the front of the housing. 
Figure 6. Remove headlight from the vehicle.
Step 7 – Install the new headlight
Reverse the removal process to install the new headlight and corner light. Install the grille by popping the tabs back into place.
Featured Video: How to Install/ Replace Headlight and Bulb
Related Discussions and Site
- How Do You Remove a Headlight Assembly? - YotaTech.com
- Headlight Upgrade - YotaTech.com
- Replacing Headlight Assembly - Toyota-4Runner.org


