Toyota 4Runner 1996-2002: How to Replace Front Sway Bar Links
Does the front of your truck feel wobbly as you take turns? It's quite possible that one or more of the components are worn and need replacement.
This article applies to the Toyota 4Runner (1996-2002).
Trucks like Toyota 4Runners and Tundras take a lot of wear and tear, especially when used off-road. The vehicle's suspension is comprised of many different components. Each of these components is subject to abuse by the elements and debris, as well as normal road use. Off-road use introduces another layer of abuse, especially where roads are harsher. Sway bars and sway bar links play a role in how tight the front end of the truck feels during cornering and handling. The sway bar links are responsible for the amount flex each side has under load. When these components wear down, the handling starts to feel loose and disengaged or even "sloppy." Like any other component on your vehicle, it will either need servicing or replacement.

Materials Needed
- PB blaster or WD-40
- 17mm wrench
- 1/2" breaker bar
- Torx-40 bit or Allen key
- Ratchet wrench with various sockets
- Floor jack with jack stands
- Mallet or hammer
- Impact gun
- Tire iron
- Torque Wrench
Step 1 – Raise and support the vehicle
Most of the work will be done under the front end of the car. The vehicle will need to be lifted and secured. Make sure you are on level ground.
- Loosen the lug nuts with tire iron or impact gun.
- Raise vehicle with floor jack.
- Secure at jack points or beam with jack stands.
- Remove lug nuts and set wheel aside.
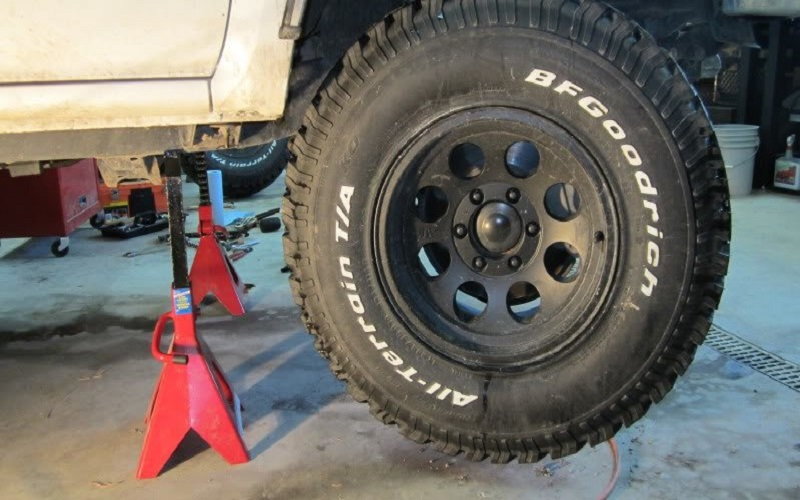
Figure 1. Truck on stands. 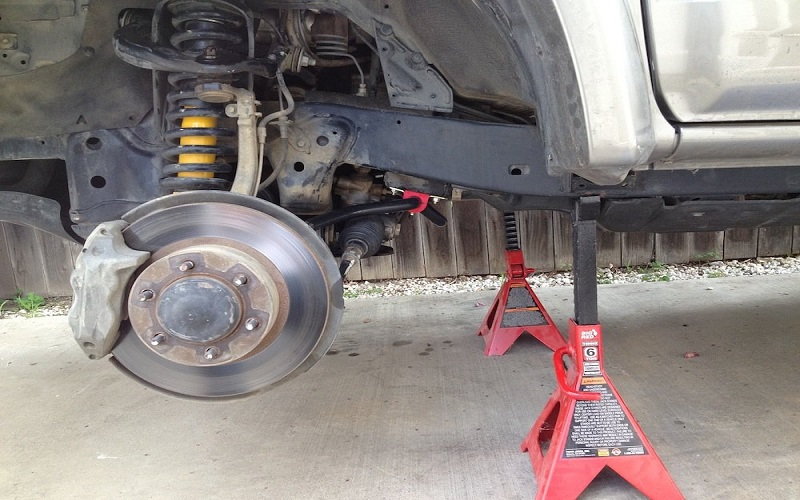
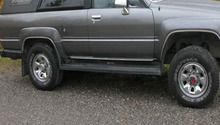
Figure 2. Wheels removed.
Pro Tip
Spray the bolts on the old sway bar link with PB blaster or WD-40 and let soak. If you're doing both sides, make sure to soak the opposite side as well.
Step 2 – Remove old sway bar links
Now that the bolts have soaked for some time, they can be removed and the sway bar links taken out.
- The top bolt can be removed with a ratchet wrench or breaker bar.
- Use Torx-40 bit to hold bottom stud while using a 17mm wrench to remove bolt.
- Remove the old sway bar link.
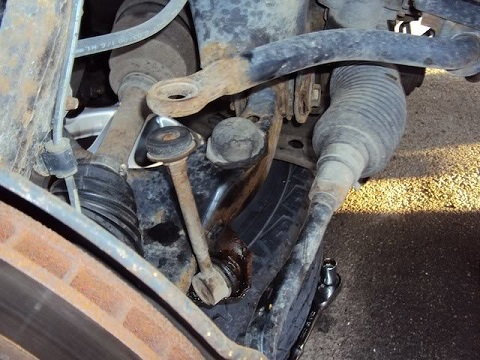
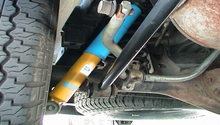
Figure 3. End link undone. 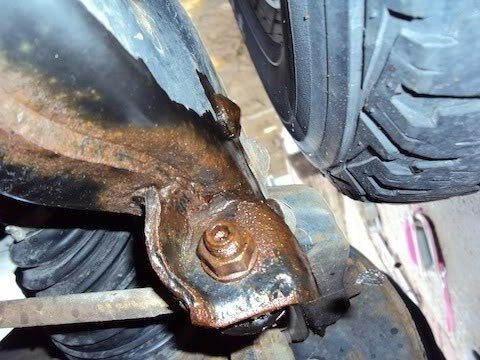
Figure 4. End link on control arm.
Pro Tip
An Allen key can be used to hold the bottom stud in place while you loosen the bolt with the wrench, if you do not have the Torx-40 bit.
Step 3 – Install new sway bar link
Out with the old, in with the new!
- Install the bottom stud first using the Allen key as well as wrench to tight and torque to spec.
- Install lower washer and bushing on the top stud of new link.
- Align the top stud of the link to allow it to pass through the sway bar.
- Reinstall wheel and lug nuts.
- Lower the truck down slowly.
- Secure the top stud with upper washer and bushing.
- Tighten and torque bolt to specs.
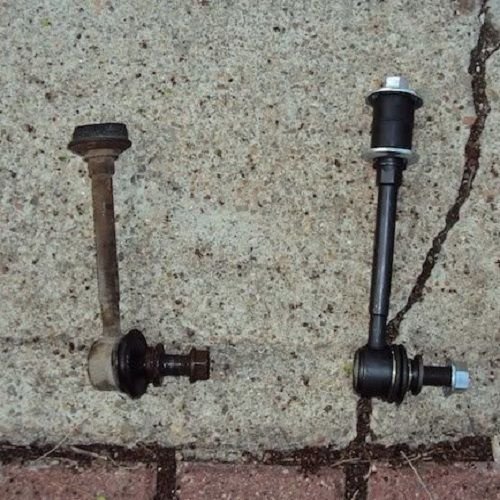
Figure 5. Old vs. new. 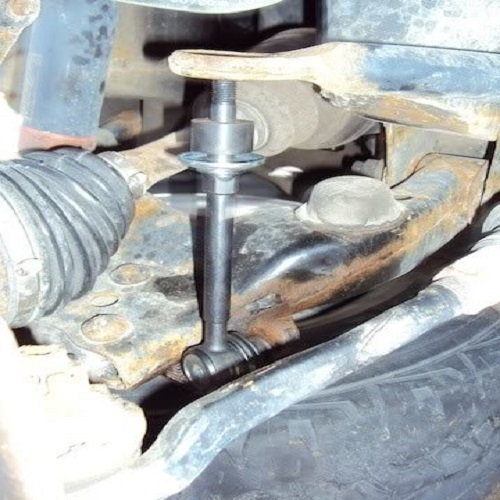
Figure 6. End link being installed in place.
Pro Tip
Before lowering the vehicle, you do have the option of swapping out the other side just as well.
Featured Video: How to Replace Sway Bar Bushings
Related Discussions
- How to Replace Sway Bar Link - YotaTech.com
- What Size Bushings for Sway Bar Links - YotaTech.com
- Sway Bar Link Bushings - YotaTech.com
- Tech Article on Sway Bar Link - YoaTech.com
- Broken Sway Bar Link - YotaTech.com