Toyota 4Runner 1996-2002: Aftermarket Modifications
The Toyota 4Runner is a solid dependable vehicle, but there is always room for improvement if you want to go off-roading. Welcome to the world of aftermarket modifications.
This article applies to the Toyota 4Runner (1996-2002).
Even though the 4Runner is great the way Toyota made it, aftermarket companies found ways to make it even better. Whether you want to make your 4Runner look better, feel more comfortable, or drive a lot stronger, there is a way for each and for all. This guide will shine some light on some of the general, popular modifications for the Toyota 4Runner. If you know you want to modify your Toyota, but you don't know where to start, this guide will help you get started.
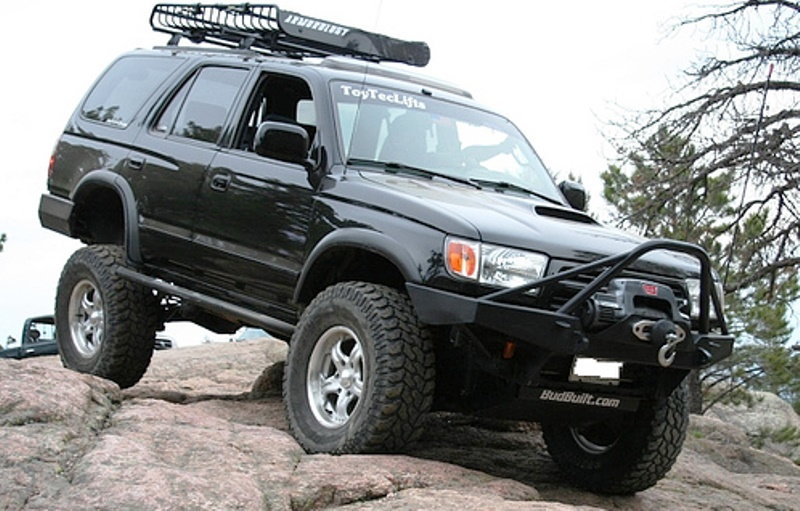
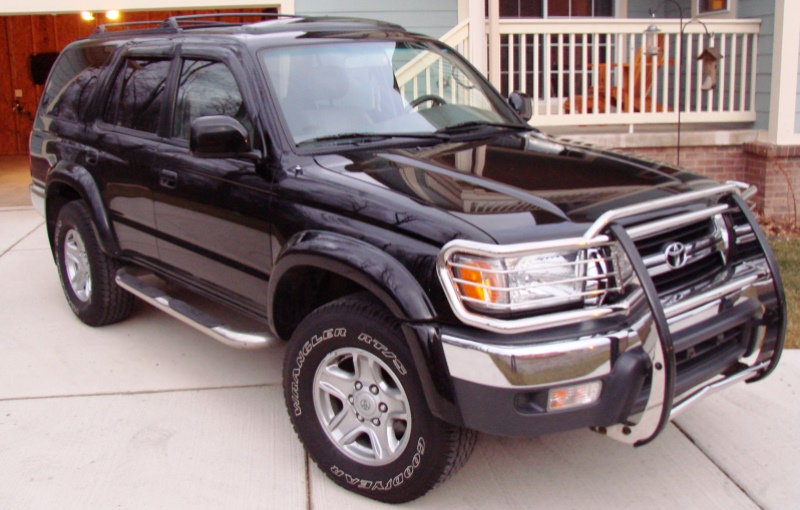
#1 Grill Guard
DIY Cost – $164-1,200
Professional Cost – $350-1,600
Skill Level – Moderate; depending on the product, this job may require drilling.
If you think the Toyota 4Runner looks mean now, wait until you add a grill guard to it. The grill guard is a popular modification for off-roading, as it protects your front end from rock and tree damage. However, many 4Runner enthusiasts prefer the mean looks of the grill guard, regardless of the purpose. When you drive a rugged car like the 4Runner, nothing will give you more pleasure than to make it even more rugged. This modification can go well with other mods like a roof rack and similar products. If you want your 4Runner to look intimidating, while protecting your headlights and grill, this modification is well-worth the money. Recommended for its rugged looks.
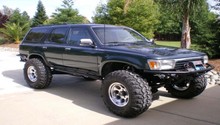
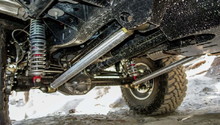
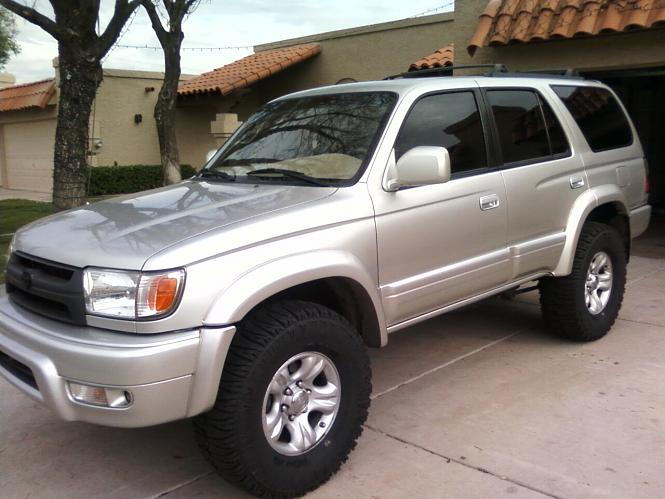
#2 Mild Suspension Lift
DIY Cost – $350-1,100
Professional Cost – $500-2,000
Skill Level – Moderate; this job requires the removal of various components.
If you are going to go off-road, or just like the look, you need aggressive tires, and in order to fit them, you most likely need a lift kit on your 4Runnner. The good news is many people have already done this and there are plenty of online sources to talk you though it step by step. The 3" is about the max you can go without serious fabrication work, but that still allows you to run the popular 33" diameter off-road all terrain tires. The least expensive method is with simple spacers on top of the springs and will only cost a few hundred dollars, but be sure to get an extended rear brake hose. Kits are available with all you need, better springs, longer shocks, spacers etc, and they start at about $1,100. Links at the end of the article have all the details. Recommended if you are going to add bigger tires.
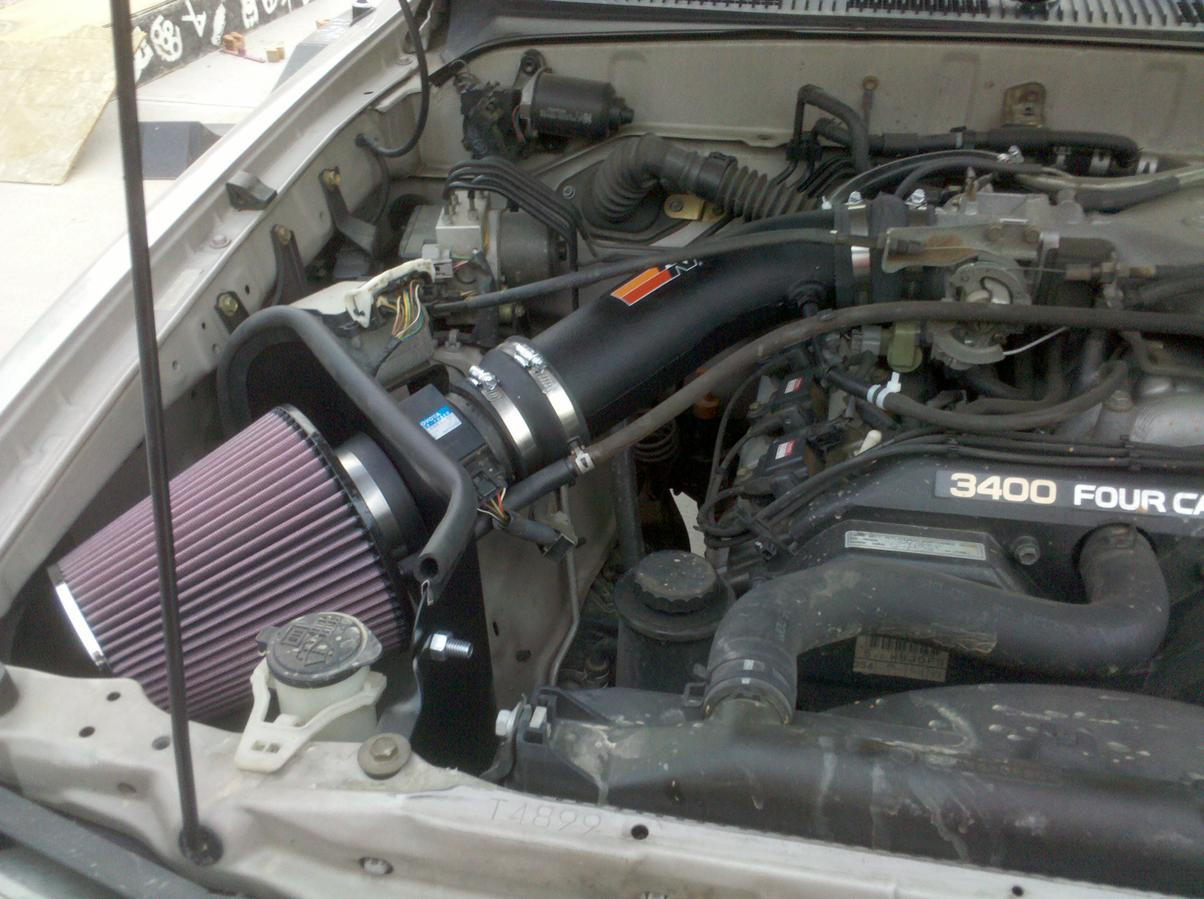
#3 Air Intake or Snorkel
DIY Cost – $149-300
Professional Cost – $300-500
Skill Level – Moderate; this job requires the removal of various components.
A cold air intake kit is designed to draw air from outside of the engine bay, while a snorkel is made more for off-roading in wet areas and sucks in air from up near the roof; both will give you an increase in power thanks to the cleaner, colder air. A lot of manufacturers claim an 11 hp increase, a better sound, and best of all, better fuel economy. Sometimes, life just smiles at you; you don't only get a faster Toyota, but one with less fuel consumption. This can be done at home, you just need to follow instructions, remove the old air box, install the kit in place, and connect a few pipes and hoses. Snorkels typically require a hole cut in the fender, so be sure you really want one before doing anything irreversible. Recommended for its horsepower increase, sound and better fuel economy.
Related Discussions
- Complete 4Runner Lift Kit- YotaTech.com
- Modification Guide - YotaTech.com
- Performance Systems - YotaTech.com
- Beginner's Thoughts on Body/Suspension Lift - YotaTech.com
- ARB Safari Snorkel Install - YotaTech.com