Toyota 4Runner 1984-1995: How to Replace Your Map Light
Perhaps the map lights in your Toyota 4Runner are not as bright as you would like. Read on to replace them.
This article applies to the Toyota 4Runner (1984-1995).
Map lights are something that you underestimate the value of until they're gone. Drop something underneath your seat, and your map light is out? You're hosed. If you value your pride, then you won't let that happen to you. Map lights can burn out, or you may just want brighter lights than the stock lights. We'll tell you how to replace it, and provide some guidance on bulb replacements for brightness, longevity, and other factors.

Materials Needed
- Flat head screwdriver
- New light bulbs
- Safety glasses
- Electrical tape (optional)
- Needle nose pliers (optional)
- Credit card (optional)
When working on or around glass light bulbs, put on your safety glasses in case the bulbs shatter.
Step 1 – Remove the small cover
Use the flat head screwdriver and gently pop off the center piece. It should pop out easily. The plastic surround for the map lights can be easily scratched if you get careless. Try wrapping the end of the screwdriver with electrical tape or similar, which will act as a buffer and prevent gouging and scratches.

Pro Tip
To avoid damaging the covers, try using a credit card to pry them off.
Step 2 – Remove large cover
Use your flat head screwdriver to loosen the bigger cover. The cover unsnaps from the back (the opposite side of the switches) and swings out as well as forward. Grab the back of the cover and pull it. It will pop open.
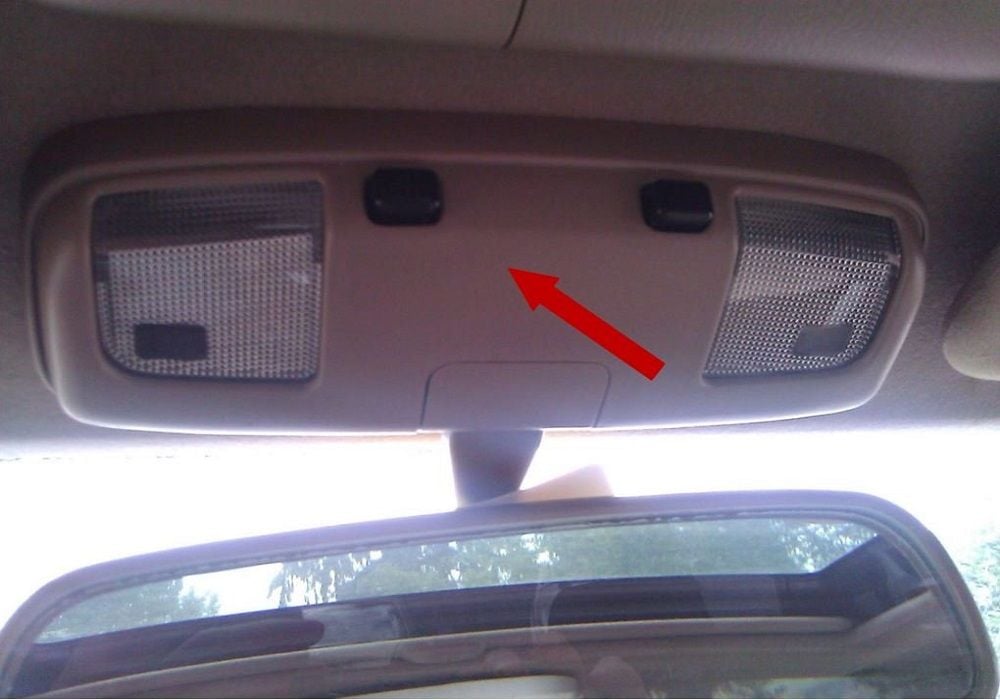
Figure 2. Large cover. 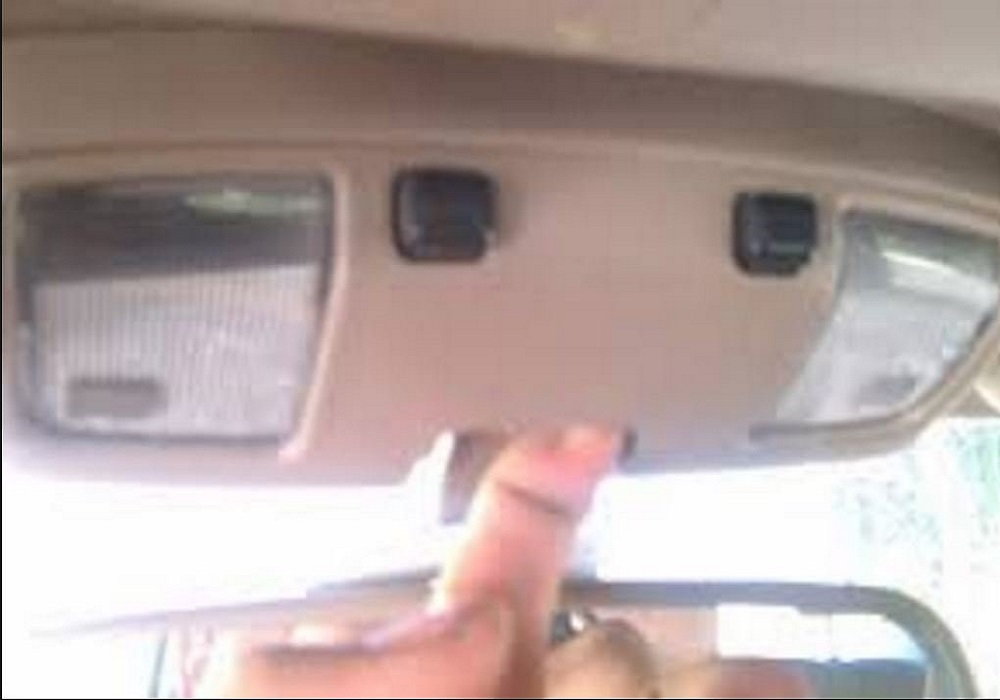
Figure 3. Grab the back of the cover.
Pro Tip
The two screws you will notice after you remove the covers have nothing to do with replacing the bulbs.
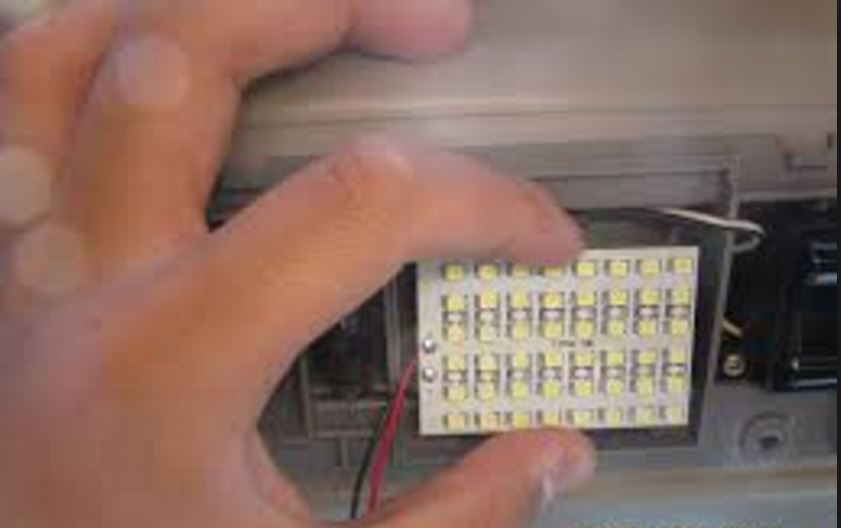
Step 3 – Remove the bulbs
This should be easy, but some owners report difficulty in removing the bulbs from their sockets. Here are a few handy suggestions:
- Place electrical tape on both sides of the bulb to make it easier to pull them out with your fingers.
- Loosely crumple some masking tape into a ball, sticky side out. Push the ball onto the exposed part of the bulb. Loosen bulb with your fingers.
- Wrap the jaws of a needle nose pliers with three layers of electrical tape. Grab the bulb with the pliers as close to the base as possible and pull the bulb out.
Step 4 – Install the new bulbs
This should be easy, too, but in case you have difficulty, use the needle nose pliers wrapped in electrical tape to install the new bulbs. Grab the new bulb near the base with the needle nose pliers and gently insert the bulb into the base.
Step 5 – A few words about bulb replacements
It is easy to buy the wrong bulbs. Make sure you buy the correct bulb replacements before beginning the installation. You have many brands and types from which to choose. Also, it may be possible to replace the stock incandescent bulbs with LEDs. Check out the plug-and-play LEDs available. Generally, LEDs give less heat than incandescent bulbs, last longer, and use less power. Because they use less power, you can perhaps avoid a dead battery if you happen to leave your map lights on overnight.
Pro Tip
Some owners report that some LEDs, because of their small size, do not supply as much light as incandescent bulbs.
Related Discussions
- Map Light Removal - YotaTech.com
- Interior Light Replacement - YotaTech.com
- Map Light Bulb Replacement - YotaTech.com
- Replacing Interior Lights with LED - YotaTech.com