Toyota 4Runner 1984-1995: How to Replace Your Headlights
Replacing a broken headlight doesn't have to be a hassle. All you need are the right parts and the right knowledge. This article will show you what you need to get it done.
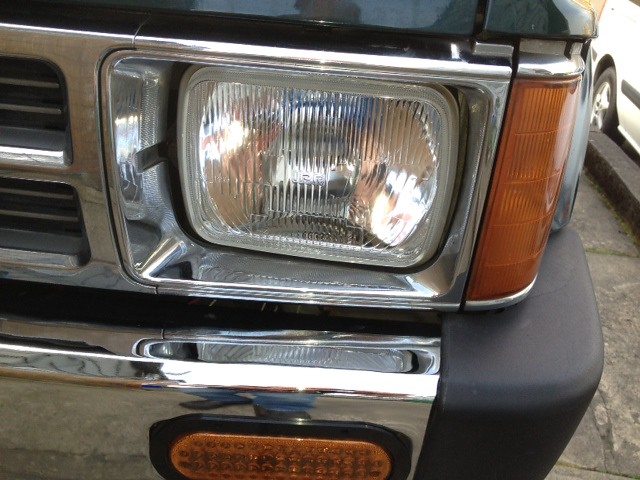
This article applies to the Toyota 4Runner (1984-1995).
Working headlights are essential for driving your 4Runner. While it may seem daunting at first, it is quite simple to replace them yourself without having to pay the price added by the dealership. Keep reading if you're interested in replacing your 4Runner's headlights yourself.

Materials Needed
- Replacement headlight assembly
- Extra 4Runner grille clips
- Long Phillips screwdriver
- Flathead screwdriver
- Ratchet w/ socket set
Step 1 – Remove the turn signal lights and grille
The main difficulty with replacing the 4Runner's headlights is because it's not particularly obvious how you're supposed to get to them. Luckily, it's actually quite simple. Start with the turn signal lights next to your headlights. There should be screws hidden in the gaps above and below the turn signal lights. Once these are loosened you should be able to pry the turn signal light out and away from the headlights.

The grille is held on by a series of clips that need to be pried loose. Use a flathead screwdriver if you need help prying them, but be careful as these clips are known to break. To be on the safe side, you'll want to have some extra clips handy. Also, be careful as you are removing the last clips at the bottom of the grille so you don't drop the grille and accidentally dent it.

Step 2 – Remove the headlight assembly
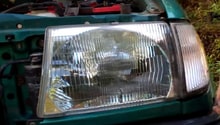
You should now be able to access the bolts around the headlight assembly. There will be two bolts on the side where the turn signal lights were, one bolt at the top, and another at bottom hidden by the grille. Slowly pull the headlight assembly out. As soon as you have enough clearance to reach the back of the headlight assembly, go ahead and disconnect the electrical connector. Then, set the headlight aside. If you need to, you can remove the bulb by pulling off the cover on the back of the assembly and pushing in the spring holding the bulb in; then, just pull the bulb out.

Figure 3. Remove the bolts on the side of the headlight. 
Figure 4. Disconnect the electrical plug before you remove the headlight.
Step 3 – Install the new headlight assembly
Installing the new headlight assembly is pretty much just the reverse of the previous step. Once you have the bulb in and locked into place, reconnect the electrical connector then start sliding it back into the vehicle. Once the headlight assembly is in place, you'll want to stop and quickly check to make sure that the lights are functioning before putting everything back together. Then, tighten down the bolts around the headlight assembly.
Line up the grille and push in the clips as you reattach it to the 4Runner. Then, finally slide the turn signal lights in next to the headlights and tighten down the screws.
Related Discussions
- 1st Gen 4Runner: Removing the headlight? - YotaTech.com
- 1995 4Runner Lamp for Headlight Replacement - YotaTech.com
- Removing headlight assembly on 2nd gen - YotaTech.com
- 91 4Runner headlight replacement - YotaTech.com