Toyota 4Runner 1984-1995: How to Replace Spark Plugs and Wires
You don't want to wait until your engine misfires before changing the spark plugs. This article will show you how to get it done, saving yourself some money in the process.
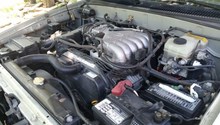
This article applies to the Toyota 4Runner (1984-1995).
If it has been a really long time since your spark plugs have been changed, then it's better to be safe than sorry. Old plugs and wires lead to misfires, which leads to engine knock and detonation. Spark plug failures can lead to serious damage to your 4Runner's engine. This is one of those things that's fairly easy to check and replace yourself. It's also a good idea to change your spark plug wires at the same time.

Materials Needed
- Replacement spark plugs and wires
- Spark plug gap tester
- Ratchet w/ extension
- 5/8" spark plug socket
- Spark plug boot puller or needle nose pliers
- Anti-seize
- Dielectric grease
For spark plugs it's recommended you either go with the NGK BP5REY or the Denso W16EXRU. These work great on the 22R and 22RE engines. For spark plug wires you should go with either original Toyota or Denso wires.
Step 1 – Remove the old spark plug
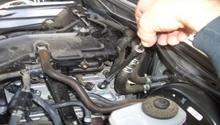
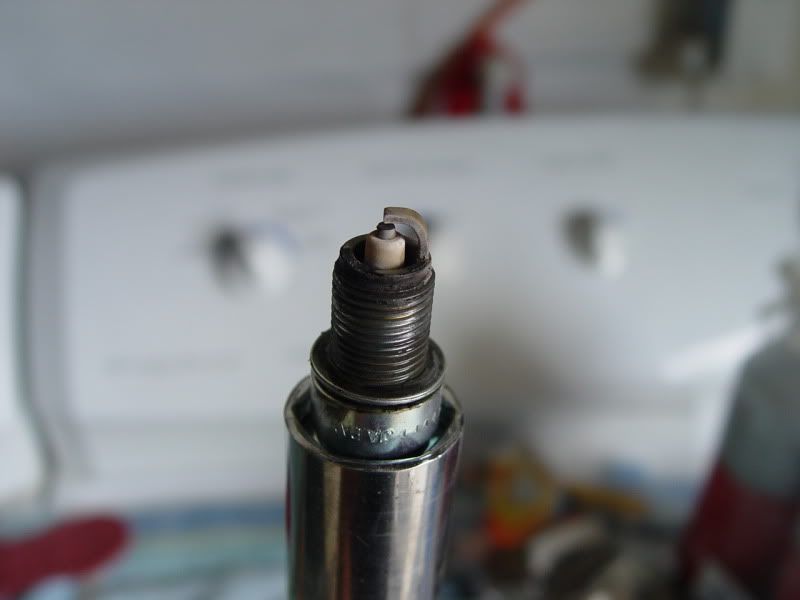
Use your boot puller or pliers to pull the wire sleeve off the spark plug. These are made to fit tightly over the spark plug so be careful removing it. Next, fit a spark plug socket and an extension to your ratchet and use it to unscrew the spark plug. Now is a good opportunity to inspect it. Don't be surprised if it looks burned up. That just means it's time for a change.

Step 2 – Check the gap on the new spark plug
You should always check the gap on your new spark plugs to make sure they meet Toyota's recommended specifications which is around 0.032. This is where a gap checker comes in handy. Slide the gap checker in between the electrodes and adjust it until you no longer can adjust it. If the gap doesn't meet the correct size, you can tap the electrode tip until it's at the correct gap size.
Pro Tip
Some brands of spark plugs will tell you not to adjust the gap. In this case you should listen to the manufacturer because it usually means the electrodes are too fragile to be adjusted.
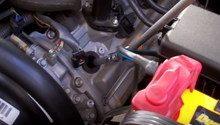
Step 3 – Install new spark plug
Before you install your new spark plug, it's a good idea to apply some anti-seize to the threads. This will make it easier to remove later on. To install it, simply screw it in by hand then tighten it with a ratchet to about 20 ft./lbs.
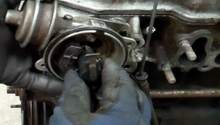
Step 4 – Replace the wire
It's a good idea to replace the wires one at a time because each one is a different size. Follow the spark plug wire to the distributor which will have a ring of spark plug wires. Unplug the wire the from the distributor like you did with the spark plug. Then, compare it with your new wires. Find the wire of matching size and plug it into the distributor. Before you pull the sleeve over the spark plug, you should apply some dielectric grease. This will ensure a good electrical connection between the wire and the plug.

Repeat Steps 1 through 4 for each spark plug and wire. Once you've plugged in the last spark plug wire, follow the center distributor wire to the ignition coil. Unplug it and replace it with a new wire. After that, you've officially finished changing your spark plugs and wires.

Featured Video: Toyota Pickup Plugs and Wires
Related Discussions
- Spark Plug Wires: Genuine vs. Aftermarket - YotaTech.com
- Best Plug Cap Rotor & Wire Combo for 22RE - YotaTech.com
- Spark Plugs for 22RE - YotaTech.com
- Spark Plug Gap 22RE - YotaTech.com