Toyota 4Runner 1984-1995: How to Repair Rear Window
A broken rear window in your 4Runner can be a headache to deal with. Fortunately, it’s an easy fix, and the replacement parts are abundant and affordable. To learn how you can make this fix yourself at home in just under an hour, read on.
This article applies to the Toyota 4Runner (1984-1995).
There are a million reasons why the rear window in your Toyota 4Runner stopped working. The two most common reasons are a busted relay or a burned out motor. It’s a headache to deal with, but fortunately the actual fix is pretty straightforward. Not only that, getting the parts is easy and affordable. To learn how you can get this project done yourself at home, read on.

Materials Needed
- DPDT switch if necessary ($10)
- Motor if necessary ($44)
- Jumper cables
- Wrench
- Plastic/trim pry tool
- Soldering kit
Step 1 – Determine if it's the relay or window motor
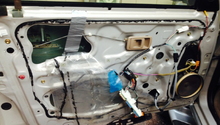
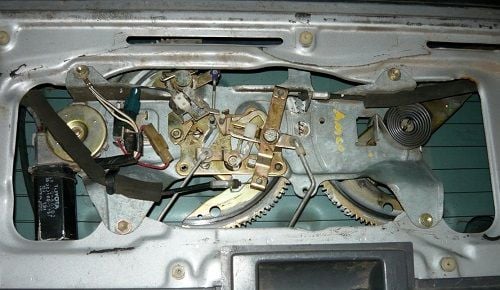
You will need to access the innards of the rear hatch to start off. Using your plastic trim removal tool, wedge it behind the trim panel cover and work your way around, gently popping the panel free of the mounting clips. Set the trim panel aside once it is free. To test out the motor, use jumper cables and attach an end to each lead on the motor. If the motor moves, the relay is bad. If it doesn’t move, then the motor is bad.
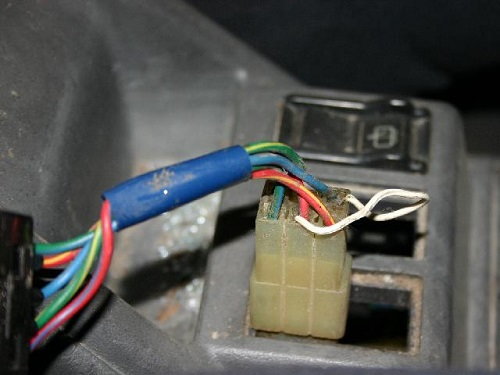
Step 2 – Repairing the relay
If the relay is bad, you need to bypass it. (Replacement units aren't cheap, and if you’re going this route, you might as well have it done by a professional.)
To perform a bypass, wire a DPDT polarity reversing switch in the relay’s place and get rid of the box entirely (unless you use the windshield wiper). The switch is ON-OFF-ON and momentary, so when you let go of the switch, it turns back off. This will help you avoid leaving the window in the going up position and burning it out.
The way the switch works is when +12v is applied to the window, it goes up, and when -12v is applied it goes down, so by reversing the polarity you are reversing the direction of the motor.
Wire a switched 12v + lead and a ground to the other side. Now, cross the bottom left over to the top right, and bottom right to the top left. Wire the top 1 to the window motor (doesn't matter which way, but test it before soldering so you know if up = up, or up = down. If you find that it's backwards, just mount the switch upside down).
Step 3 – Replacing the window motor
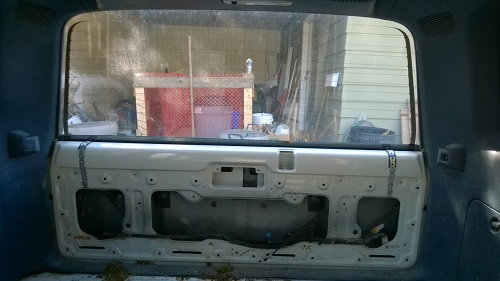
If your window motor is broken, the good news is it’s pretty easy to fix; what’s more, the motor is fairly easy to find. It’s actually the same as what’s used for the driver side power window in the Camry, and is a direct fit. Simply access the motor, take the panel off the rear window and you’ll see there are three bolts holding it in place. Take them off and the motor will pop out. Slide the new motor in, ensure a snug fit, and replace the bolts. Confirm wires are all connected and give it a test.
Related Discussions and Site
- 4runner Rear Window Repair Walkthrough - YotaTech.com
- Rear Window Replacement 2nd Gen 4Runner - YotaTech.com
- Budget 4Runner Rear Window Motor Replacement - YotaTech.com
- Rear Window Relay Fix 2nd Gen 4Runner - YotaTech.com
- Rear Window Switch Broken How Do I Fix - YotaTech.com
- 86 4runner Rear Window — Won’t Work, Help, Switch Tailgate Key - YotaTech.com
- How to Fix and Replace Your 1st Gen Rear Window - Reddit.com