Log In
Register
Forums
Site Information
The Rules
Meet The Staff
Announcements, Tips & Tricks, Site Feedback, Test Section, & Contact Us
Announcements
Tips & Tricks
Site Feedback
Post Your Tests Here
Contact Us
Product-Gear Reviews
Product Reviews
Tech Write-Ups (Staging Area & More Articles In The Wiki)
Staging Area For Tech Article Submissions
Appearance
Electrical
Maintenance & Repair
Off Road Enhancements
Performance Enhancements
Toyota SUV & Truck Tech
Newbie Tech Section
General Vehicle Related Topics (Non Year Related)
General Electrical & Lighting Related Topics
Tires & Wheels
Pre 84 Trucks
84-85 Trucks & 4Runners
86-95 Trucks & 4Runners
95.5-2004 Tacomas & 96-2002 4Runners
03+ 4Runner/GX470, & 05+ Tacomas
2010+ 4Runner
Toyota RAV4 Forum
2016+ Tacomas
Early Land Cruisers
FJ Cruiser
99+ Tundra, 00+ Sequoia, 98+ Land Cruiser/LX470
93-98 T100s
Prerunner & All 2WD Rigs
Looking For A Mechanic/Fabricator/Shop
Maintenance & Repair Archives
Off Road Tech, Fab Shop, Solid Axle Swaps, Tool Time, & Engine Swaps
Offroad Tech
The Fab Shop
Solid Axle Swaps, All Years
Tool Time
Engine Swap Talk
Trip Planning, Trail Reports, Land Usage, 4Wheeling 101, Camping Gear, Off-Road Gourmet, & More
Off Road Trip Planning, Expeditions, Trips, & Events
Trip-Trail Reports & Photos
Land Usage & Off Road Responsibility
4Wheeling 101
Camping, Expedition, & Overlanding Gear
The Off-Road Gourmet
First Aid / General Medicine
Sportsman Section
Electronics
Computer Talk
Photography/Cameras
Vehicle Audio & Home Entertainment
GPS & Communication
Alarm Systems
RC Vehicles
Other Modes Of Tranportation
Other Makes Cars/Trucks
Cycling
Motorcycles
Snow Sports
Watercraft
Vendors
Diode Dynamics
YotaWorks
Gobi Racks
Vendors Build-Ups (Build-Up Section)
YotaTech Classifieds
Axles - Suspensions - Tires - Wheels
Engines - Transmissions
Vehicles - Trailers (Complete)
Vehicles - Parting Out
Tools
Misc Stuff (Vehicle Related)
Misc Stuff (Non Auto Related)
Buying & Selling Advice - Feeler/Gauging Interest
Items Wanted
Hot Deals - Free Stuff - Craigslist
Seller - Buyer Ratings For Members
The Classifieds GraveYard
Toyota Aftermarket & OEM Parts Suppliers
YotaTech Knowledge Base
FAQ
Tech Write-Ups
Tech Write-Up Archives
4Runner History
Regional Forums
4ROC
News
Gallery
Tools
Car Payment Calculator
Tire Rim Calculator
Vin Decoder
Recalls
Technical Service Bulletins (TSBs)
Members List
Live Feed
Marketplace
Vendor Directory
Become a Vendor
Site Store
New Posts
How-Tos
Log In
Register
Threads
Google
Threads
Posts
Advanced
Log In
Forgot your Password?
By logging into your account, you agree to our
Terms of Use
and
Privacy Policy
, and to the use of cookies as described therein.
or
Login with Facebook
Recent
Commented
Albums
My Pictures
My Post Pictures
Big Little Bear
September 22, 2015
460
0
Sort:
Default
Default
Most Recent
R/D
0
2018/10/07 14:41:20
140137
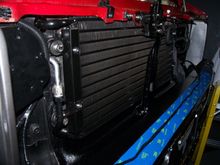
Nice straight fins
0
2018/10/07 14:42:33
140137
0
2018/10/07 14:43:57
140137
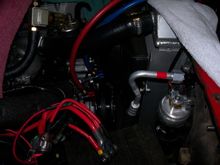
New Evaporator four seasons 54154 New pressure switch 35758 New expansion valve 38616
0
2018/10/07 14:44:26
140137
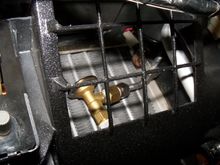
Evaporator fittings coming through firewall. New Rubber Grommets from Toyota
0
2018/10/07 14:52:32
140137
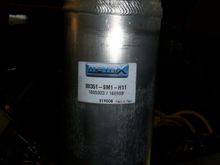
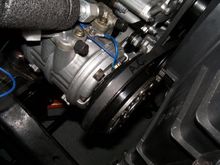
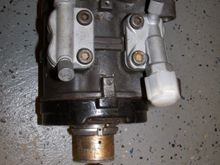
Another hard find on Ebay Rebuilt Compressor four seasons 57318 rebuilt with R134a seals
0
2018/10/07 14:55:02
140137
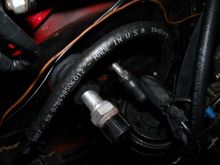
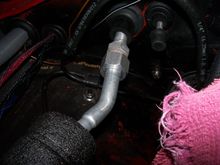
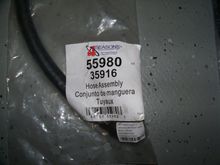
New Low Pressure Line @ Compressor four seasons 55980 same for 84 toyota
0
2018/10/07 14:57:35
140137
New Low Pressure Line @ Evaporator firewall
0
2018/10/07 14:58:13
140137
Existing High pressure Line reconnected @ firewall
0
2018/10/07 15:04:18
140137
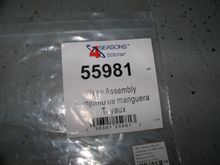
High Pressure ( discharge) Line four seasons 55981 @ Condenser to Compressor
0
2018/10/07 15:05:47
140137
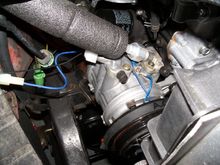
Compressor did not come with a Clutch.. So New Clutch four seasons 47578
0
2018/10/07 15:10:12
140137
0
2018/10/07 15:11:56
140137
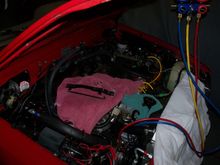
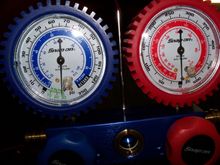
After I replaced Everything including New O RINGS RATED FOR R134A I went by the FSM pulled vacuum and charged the System.
0
2018/10/07 15:12:09
140137
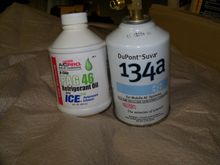
Also with the 134 charge you must use the correct oil compatible with the compressor and the 134. The compressor came shipped with oil which I drained and flushed out with the PAG46 Then I used a digital postal scale to get the correct amount of oil by weight into the compressor following the FSM for a new system with every component replaced . The amount of oil will vary depending on what is replaced in the system, so follow the FSM.
0
2018/10/08 02:26:42
140137
These are the part numbers for the discharge and suction lines that worked for me
0
2018/10/08 02:43:45
140137
0
2018/10/08 02:43:58
140137
I also installed the updated 134 quick disconnect fittings onto the compressor manifolds but before I charged the system I also replaced the Schrader valves behind those fittings
0
2018/10/08 02:46:33
140137
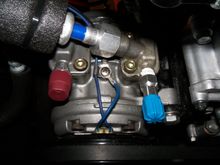
The old compressor I'll rebuild and keep as a spare. The Manifolds you see here are from the new compressor and as you can see they point in the wrong direction to the rear whereas they needed to point to the passenger side so I used my old ones.
0
2018/10/08 02:51:37
140137
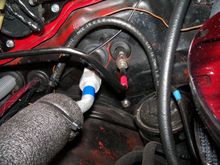
Another pic of the high and low connections to the evaporator @ the firewall
0
2018/10/08 02:57:49
140137
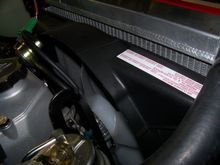
I did not have any cooling issues with the dual core radiator but I found a new plastic type fan shroud on Ebay that might help and it gives the engine bay it a cleaner look
0
2018/10/08 03:00:42
140137
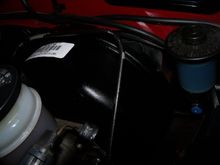
I replaced the Brake Booster with a new one. All the boosters I found On Ebay seem to be for 2WD. I have had some good luck with Cardone Parts So The correct part number for a 4WD brake booster is 53-5175. I located one at Auto Zone online. This was one of the last things under the hood that was not replaced yet. My brakes work but Recently I have been experiencing a slow sinking pedal only at a stop. With no leaks at the wheels or anywhere visible I'm guessing booster or MC ?
0
2018/10/08 03:05:16
140137
So Last Summer I came across an Ebay seller who had these in his garage for thirty years. I picked them up for 125
0
2018/10/08 03:57:02
140137
0
2018/10/08 03:59:15
140137
0
2018/10/08 03:59:44
140137
Mock up just to get a glimpse of what it would look like
0
2018/10/08 04:00:29
140137
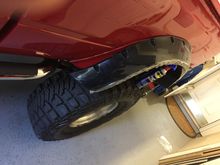
And sure enough my timing was good for a change
0
2018/10/08 04:12:56
140137
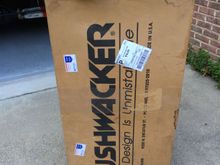
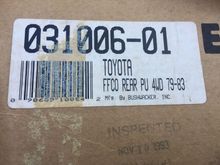
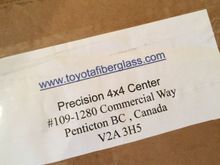
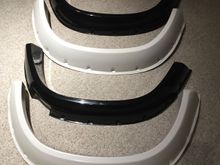
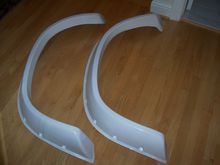
The Black set is the rear factory Bushwackers and the White fiberglass flares are the front set from Corey at Precision 4X4 Center . WOOHOOO! Thank you Corey!
0
2018/10/08 04:14:15
140137
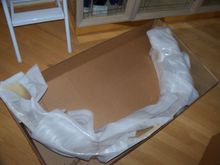
Well packed
0
2018/10/08 04:41:35
140137
First thing I noticed was how much more stout these Fiberglass Flares are compared to the Flimsy factory plastic Bushwackers
0
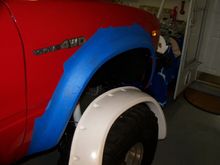
2018/10/08 04:42:34
140137
First thing I did was to remove the inner fender splash shield, Mud Flap, and shove a towel down into the fender area behind where the mud flap was to keep metal shavings out when drilling. Then blue tape the entire area to protect the paint
0
2018/10/08 04:46:19
140137
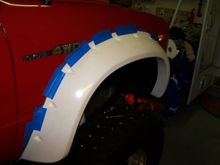
I test fit it to find the sweet spot then Taped it in place
0
2018/10/08 04:50:57
140137
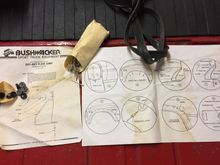
I decided I would not use the Bushwacker Method of
0
2018/10/08 04:52:51
140137
I decided I would Not use the Bushwacker method of using pop rivets
0
2018/10/08 04:54:11
140137
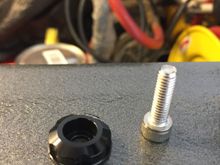
Instead I found these aluminum fender washer and and stainless bolt combo on ebay. They are a little pricey @ 20+ for 12
0
2018/10/08 04:57:10
140137
0
2018/10/08 05:10:32
140137
0
2018/10/08 05:11:59
140137
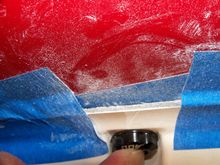
With using these fender washers I found that I wanted them to go as low in the pocket as they could and not be sitting too much out of the pocket
0
2018/10/08 05:12:32
140137
In order to achieve this on some not all of the pockets had to have a little material removed with a dremmel
0
2018/10/08 05:19:19
140137
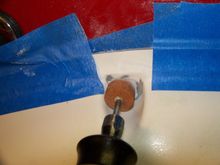
I used the washer to start the hole then continued without it
0
2018/10/08 05:21:03
140137
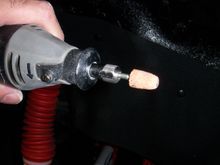
After each drilled hole I cleaned up and deburred the backside of the fender so That the stainless washers and nuts would lay flush
0
2018/10/08 05:33:36
140137
First
Page
10 of 12
Last
Go To
Page
1
...
6
7
8
9
10
11
12
10 of 12
Go To
GO
Go to page
of 12
pages
1
...
6
7
8
9
10
11
12