When you click on links to various merchants on this site and make a purchase, this can result in this site earning a commission. Affiliate programs and affiliations include, but are not limited to, the eBay Partner Network.
Rebuilding a stock carb on a 87 Toyota pickup, I have a couple questions, only one of the four bolts had a lock washer, should they all have lock washers? Also the armature is rusty, should I apply grease,oil or paint it?
Last edited by rubronthroad; 10-17-2019 at 05:50 PM.
Can I assume you're talking about the (4) bolts in the air horn? I think one of them has the carb tag but they all should have a small lock washer. What "armature" are you talking about? The air horn, main body, and throttle body can all go into your can of carb cleaner to soak. Anything else, like your choke opener, has a diaphragm inside and cannot be soaked. You'll need to sand, scrub with vinegar, or CLR to get the rust off.
Can I assume you're talking about the (4) bolts in the air horn? I think one of them has the carb tag but they all should have a small lock washer. What "armature" are you talking about? The air horn, main body, and throttle body can all go into your can of carb cleaner to soak. Anything else, like your choke opener, has a diaphragm inside and cannot be soaked. You'll need to sand, scrub with vinegar, or CLR to get the rust off.
Thanks Tim, I was referring to the hold down bolts
Take pictures of the throttle/choke linkage before you start. Once you take it apart you can get a 12v battery and test the solenoid fuel cut-off, the outer control vent, and the choke heater then. All the rust on the throttle linkage will get soaked in your carb can and you can scrub it later. Remove the Idle-up and the choke breaker diaphragms along with the choke assembly.
One thing you want to avoid is soaking any aluminium parts in vinegar or CLR or allowing it to soak. If left too long it will completely melt/dissolve aluminium. So use the vinegar or CLR on steel parts only. Another tip, a wire brush in your drill motor will be your new best friend for rust removal. Use it to clean and polish your parts and screws. Definitely don't paint the linkage and it won't stick to the cast aluminium body. I just used a wire wheel and cleaned as much rust and grime off as possible. Patina is the new in thing anyways.
Thanks for all the advise Tim, yes I am taking pictures and drawing diagrams as I go, I don�t want a head ache when it comes
time to put things back together, don�t want to get in the weeds to much, I will be using some purple cleaner stuff, will get a pic of it, got the kit from Autozone,I will be careful what I soak, I will post again,this may take a few.
Once you take it apart you can get a 12v battery and test the solenoid fuel cut-off, the outer control vent, and the choke heater then
so are you saying I have to take the components off to test them properly?
It's just easier because you'll need to remove the harness with the OCV, FC solenoid, and choke heater. Remove the heater and the OCV first so you can let them dangle while you unscrew the FC solenoid. That way you don't twist up the wires trying to get it out. Also, when you get ready to put the FC solenoid back in, put the flat washer on and then push the O-ring gasket all the way up past the threads. That way you shouldn't tear the O-ring putting it back in.
Another thought is the carburetor kit you choose. Walker makes a basic kit (15827A) that's cheap but it doesn't have specific O-rings for the venturis (they should be oval O-rings) nor does it have a power valve. If your PV cleans up and functions then there's no need to replace it. I had an old GP Sorensen kit from 10 years ago that had the complete set but I can't find it being sold now. The same part # shows less parts and doesn't look complete. The Standard motor products kit (1626B) looks to be the most complete kit I can find today. RockAuto has both in stock.
I would recommend you tear it down including the venturis and see what you need. Especially if you don't know the history of the carb or you haven't cleaned them in the recent past. But you may wind up having to use the standard small O-rings for the venturis if they don't include the oval ones. Maybe they stopped making them oval. I don't know. Just be careful putting the venturis back in the body as they'll shear off the o-rings if you don't use a guide to help them. I used a large flat head to hold the o-ring in place as I tap the venturis back in. Also helps to use some silicone spray on any O-rings as you reassemble.
One last tip, don't tighten your air horn screws down completely until you have everything back together and you are certain the throttle linkage is correct. You may have to remove the air horn to rearrange the throttle linkage. It's an easy mistake to make....twice....
I just got back from picking up the GP Sorensen kit #96-615B and it does have the oval O-rings for the venturis and the power valve. That's the kit I'd recommend for a complete rebuild.
It's just easier because you'll need to remove the harness with the OCV, FC solenoid, and choke heater. Remove the heater and the OCV first so you can let them dangle while you unscrew the FC solenoid. That way you don't twist up the wires trying to get it out. Also, when you get ready to put the FC solenoid back in, put the flat washer on and then push the O-ring gasket all the way up past the threads. That way you shouldn't tear the O-ring putting it back in.
Another thought is the carburetor kit you choose. Walker makes a basic kit (15827A) that's cheap but it doesn't have specific O-rings for the venturis (they should be oval O-rings) nor does it have a power valve. If your PV cleans up and functions then there's no need to replace it. I had an old GP Sorensen kit from 10 years ago that had the complete set but I can't find it being sold now. The same part # shows less parts and doesn't look complete. The Standard motor products kit (1626B) looks to be the most complete kit I can find today. RockAuto has both in stock.
I would recommend you tear it down including the venturis and see what you need. Especially if you don't know the history of the carb or you haven't cleaned them in the recent past. But you may wind up having to use the standard small O-rings for the venturis if they don't include the oval ones. Maybe they stopped making them oval. I don't know. Just be careful putting the venturis back in the body as they'll shear off the o-rings if you don't use a guide to help them. I used a large flat head to hold the o-ring in place as I tap the venturis back in. Also helps to use some silicone spray on any O-rings as you reassemble.
One last tip, don't tighten your air horn screws down completely until you have everything back together and you are certain the throttle linkage is correct. You may have to remove the air horn to rearrange the throttle linkage. It's an easy mistake to make....twice....
Thanks for all the helpful tips, I got the rebuild kit from Autozone, haven�t looked at it
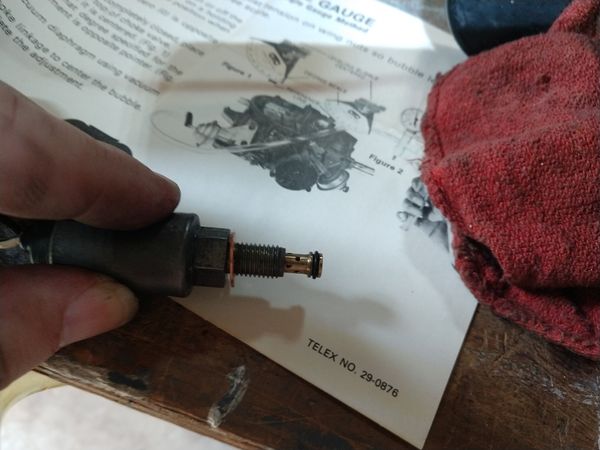
I believe I told you wrong concerning the FC solenoid O-rings. After pulling another FC solenoid from a spare carb I have it had the O-ring installed on the tip of the solenoid, which is the way I originally thought it should be installed. I say this because the diagram is not clear at all. There should be a small skinny O-ring on the tip and the only washer installed past the threads is the brass washer. With a little silicone spray the FC solenoid should slide right in without pushing the O-ring off the tip. If it doesn't go in then you probably have the wrong O-ring installed.
Thanks Tim, I was wanting to check the vacum diapragms(?) looks to be three of them, not having luck finding the specs on that
anyone have those?
No specs needed. Just use a vacuum bleeder. Pump them up to about 15 inHg and make sure they actuate the linkage and hold pressure. A very slow bleed off is Ok as it's usually your vacuum bleeder hose/fitting and not the diaphragm. If it bleeds off as fast as you can pump it then it's toast.
52433150[/url]]No specs needed. Just use a vacuum bleeder. Pump them up to about 15 inHg and make sure they actuate the linkage and hold pressure. A very slow bleed off is Ok as it's usually your vacuum bleeder hose/fitting and not the diaphragm. If it bleeds off as fast as you can pump it then it's toast.
Thanks Tim, I will check it out and take some pics
The "bad" vacuum diaphragm is your Auxiliary Accelerator Pump. Not surprising. You'll get a new one with your kit along with a diagram. I'd soak all your screws in some penetrating oil before trying to tear it down. Especially the screw in the middle of your air horn next to the air cleaner stud.
The Outer vent control is just stuck. Once the 3 screws are removed there should be nothing else holding it on. Try using a gasket scraper and drive it between the body and the spacer. It should pop off.
 10-17-2019, 02:25 PM