When you click on links to various merchants on this site and make a purchase, this can result in this site earning a commission. Affiliate programs and affiliations include, but are not limited to, the eBay Partner Network.
It wasn�t exactly cheap. But it�s exactly what I wanted. It was around 750 dollars. But again. It�s directly bolt on and built to my specifications. I couldn�t be happier. And I never wanted overheating to be an issue.
Cheap insurance. I had a four row built for my old lowered Chevy dualy back in the early 90s by harbor radiator in Costa Mesa and it cost around that back then. Never had cooling issues again pulling my boat to the river in 120 plus degree heat.
Post more pics, I love that ARB. I've got a nice FROR bumper, but those ARBs really look good on this generation. Those Four-Trek mounts are sweet, but I also like the ones dropzone posted. Thinking of some options for mounting my hi-lift to my roll bar.
Quote
I just don't know if I am happy with my bumper up front or not. It might be moved in the future when I get a custom luggage rack made to go around my truck cap.
Small upgrade but an upgrade none the less. I found these headlight protectors on Ebay. I am a sucker for classic 80's Toyota Truck nostalgia so decided to put them on. On the process of putting them on I had to take the original OEM headlights bezel off and the headlights were so old that the glass separated from the main body of the drivers sides light. Since I already had the grill off to get to the bezel I decided to upgrade my lights as well. I originally ordered some LED lights off Amazon but I ended up not going with them because i either needed to A) Buy another wiring harness or B) Hack up the stock wiring to get them to work. I decided to go with another route and return them. On top of the cluster-fack of the wiring I really just wanted a light that I could go to the store and get a replacement same day. So the LEDS were out. I ended going with a Rampage H4 Headlight Conversion through LCE Performance. Simple and easy conversion that uses the original wiring. So now I have some night and bright headlights and some old school headlight grills. Not everyone will like them, and some say they don't do anything. But its my truck so they can suck it.
Big news, the pickup currently has some competition when it comes to upgrade money. I finally finished my 4 year apprenticeship and am now a journeyman Instrumentation and Controls technician and a power plant so I decided to treat myself to a brand new 2018 4Runner TRD Off-Road Premium. I completely love this rig and I am glad I bought it. So for now the pickup will be on the sidelines till I through a lift and some tires on the 4Runner. I'll eventually start a build blog for the 4Runner as well.
Big news, the pickup currently has some competition when it comes to upgrade money. I finally finished my 4 year apprenticeship and am now a journeyman Instrumentation and Controls technician and a power plant so I decided to treat myself to a brand new 2018 4Runner TRD Off-Road Premium. I completely love this rig and I am glad I bought it. So for now the pickup will be on the sidelines till I through a lift and some tires on the 4Runner. I'll eventually start a build blog for the 4Runner as well.
Boy those 2 look good sitting next to each other. Happy for you.
Finally getting around to starting the next fun little project on my truck. I am installing stock power windows. I have the motors, panels, and switches. Just need to nail the wiring before starting. Has anybody done anything similar?
Many people that do it try to have the donor rig there for parts and routing & part location. I know there are several good write ups here. You might have to reference a few of them depending...
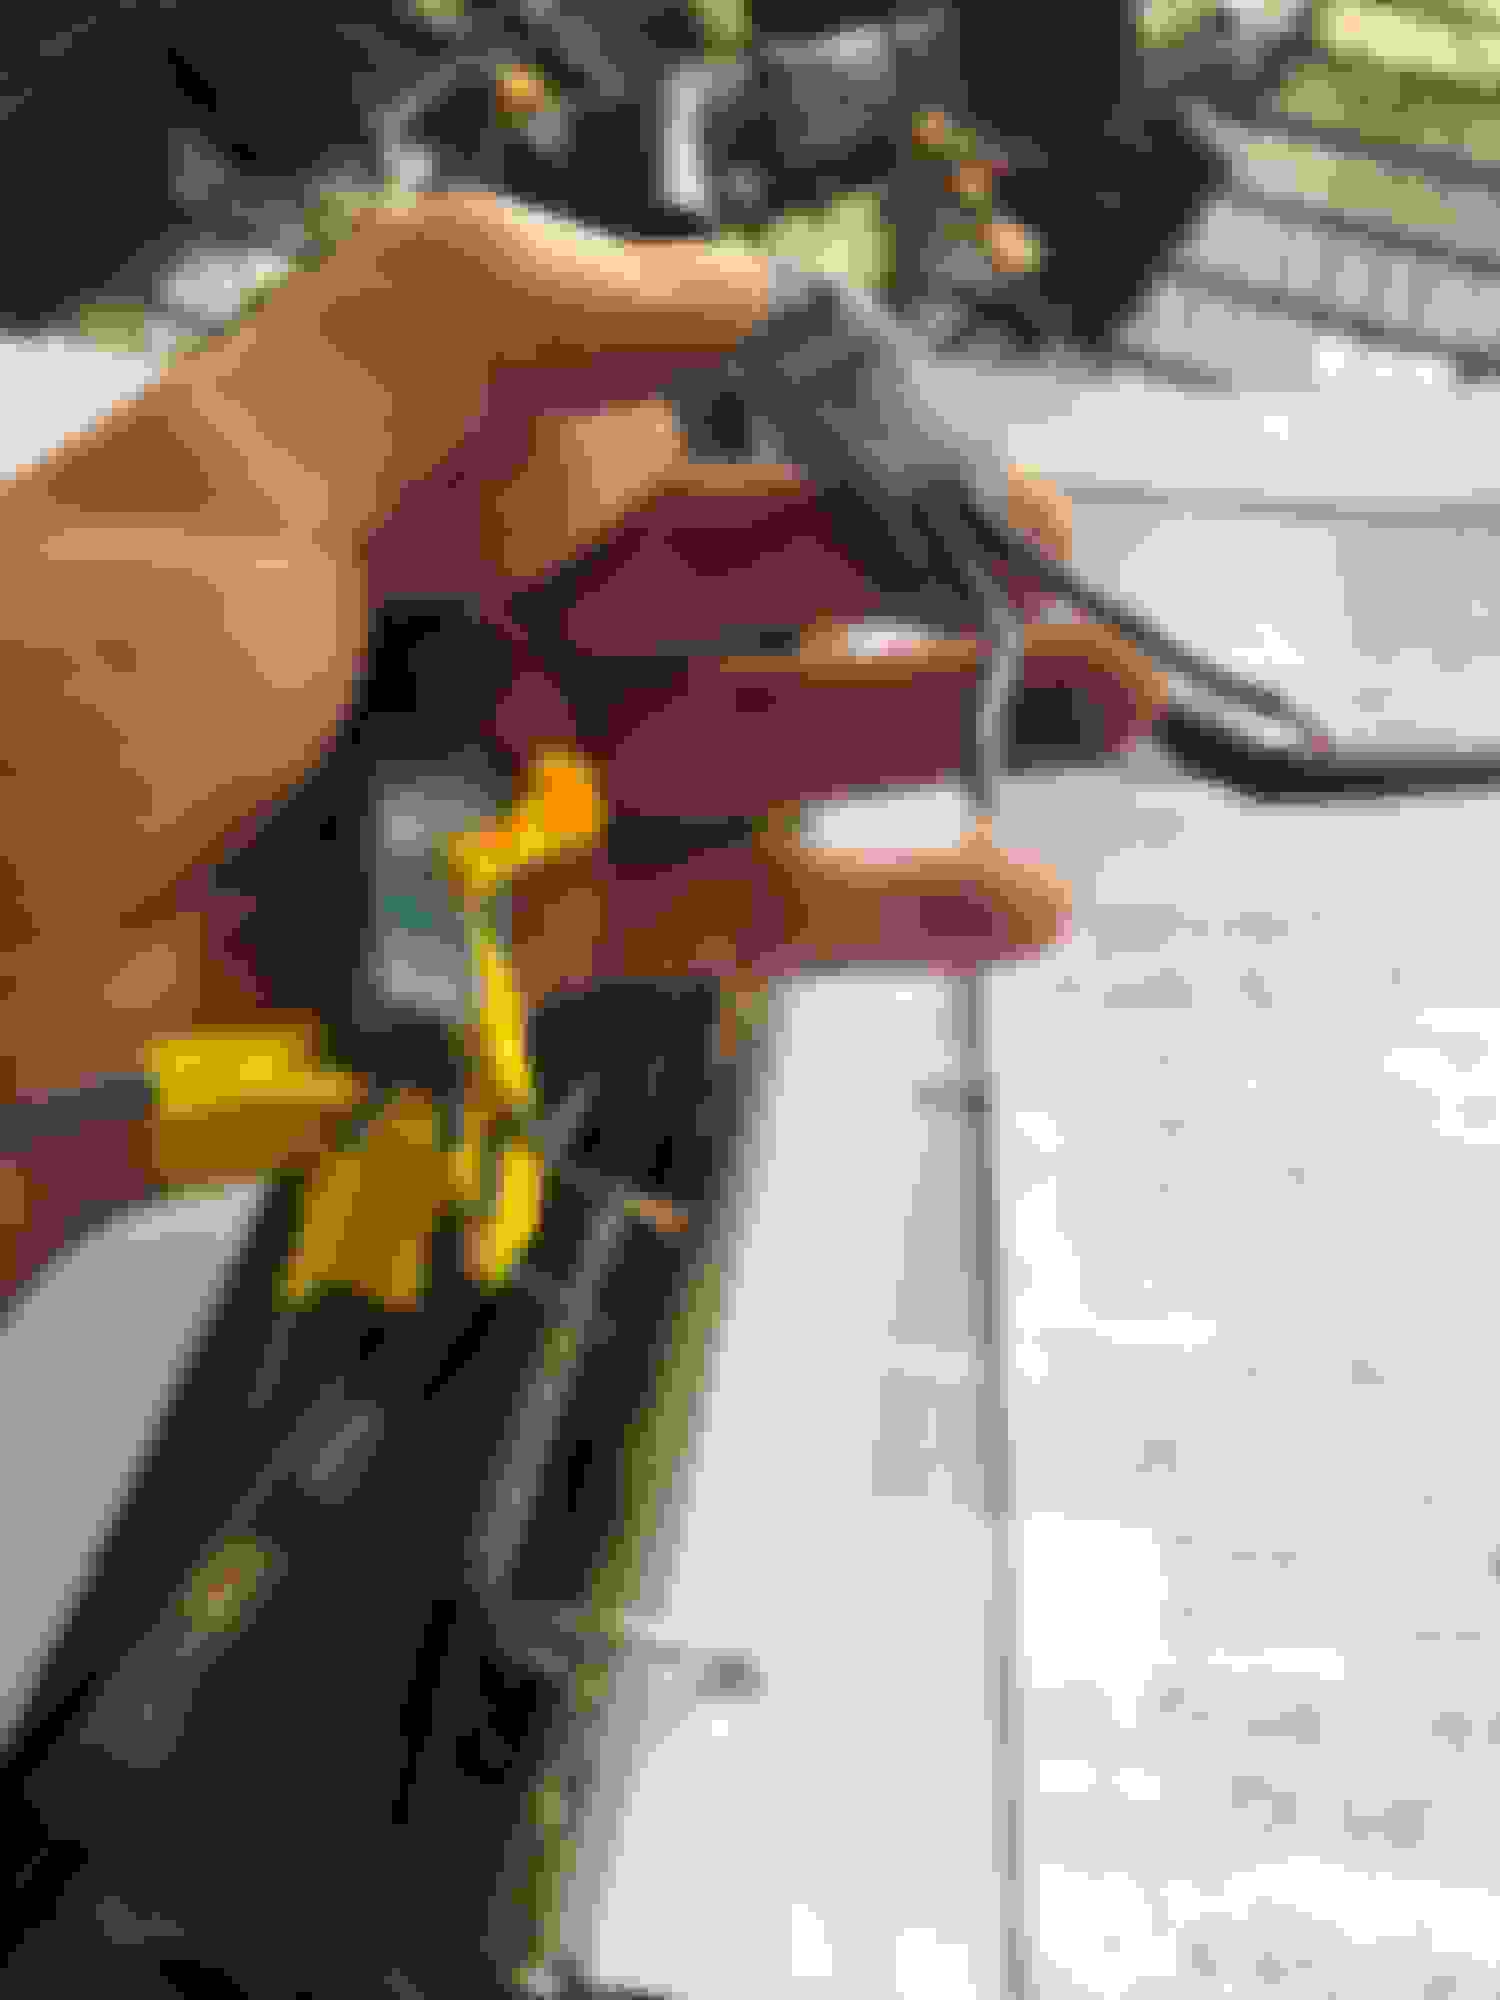
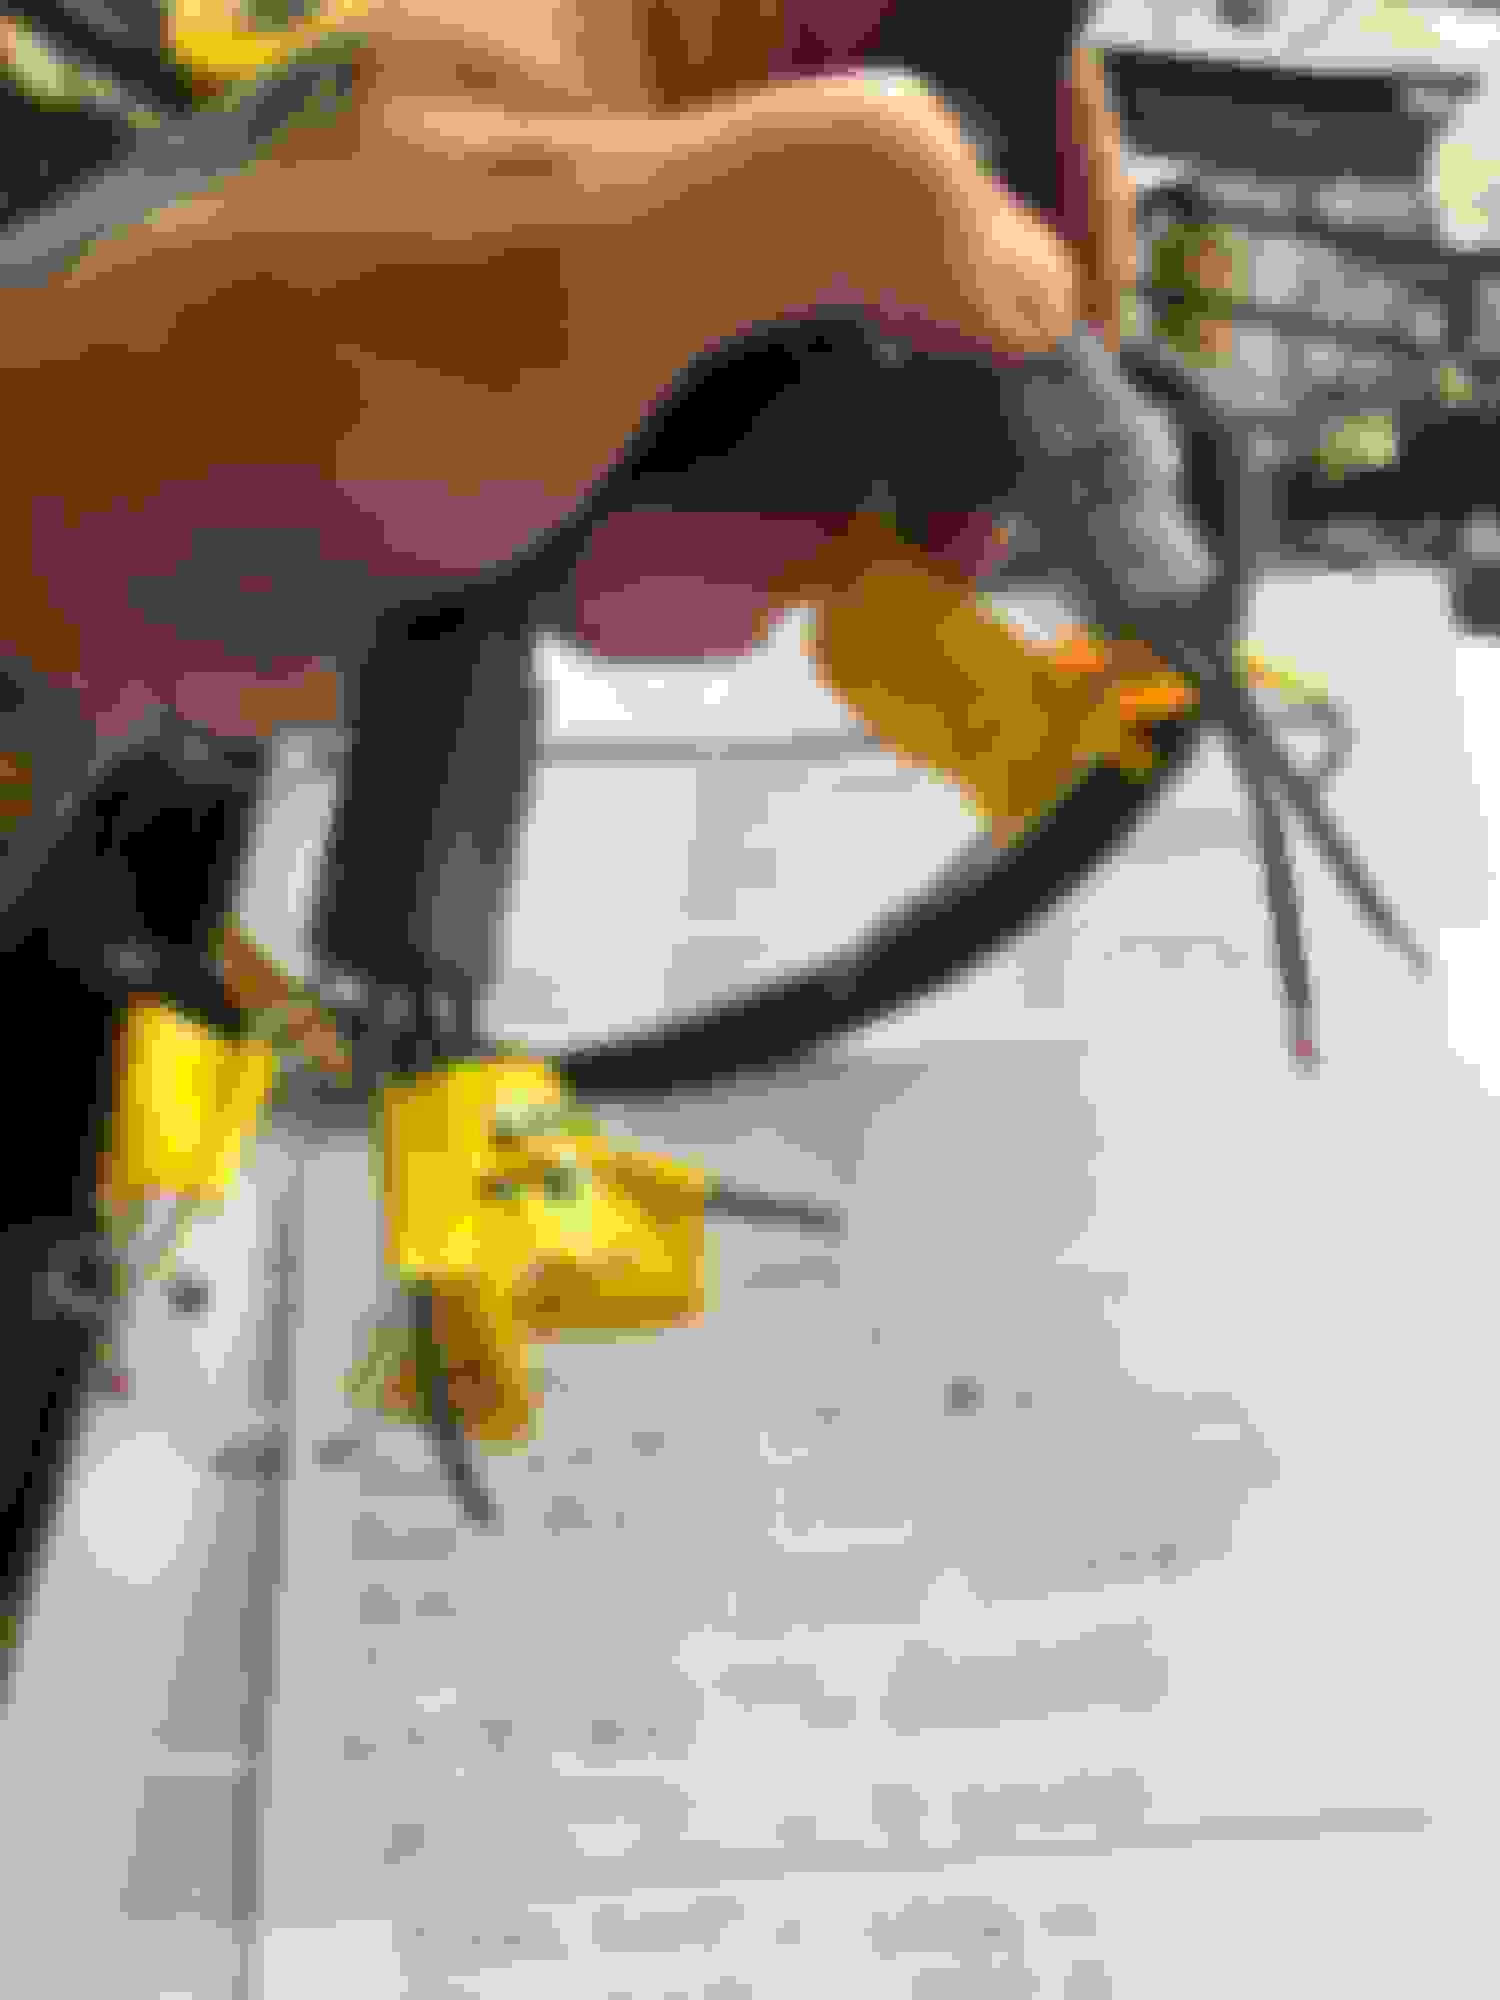
So after sitting on the parts for a few years and never really looking through the box I have started my quest to install power windows in my 1985 Toyota. I bought these parts off another forum a few years ago and never really took them out of the box to look. Merely looked inside and closed it back up. I got a good deal on them. I think I paid 100 dollars for everything. In the process I came to the realization that the donor rig also had power locks! Score! Unfortunately I only recieved the window parts with my parts purchase. Which isn't that big of an issue and I will buy an after market lock kit and modify it to work with the stock wiring. I layed everything out and was glad to find that the wiring was cut after the plugs so I can easily sodder new wires and have disconnects if I ever need to remove the doors. The wiring was cut after the wiring came into the body behind the kick panel/fuse box area. So far this is what I have gotten from looking at the schematics I have at the house. I have a few wires I cant seem to figure out where they go. I have the FSM at work I need to look at again but I decided to post what I've found so far so maybe someone else that has done this can help. Still have two wires on the driver and passenger side plugs that I have no idea where they go. Help?
Passenger Side
Driver Side
Edit:
Found out the blue - yellow and blue wires on plug 2 of driver and passenger are for the door lock solonoids
Last edited by yellowtoytruck; 05-20-2018 at 06:49 PM.
BTW, nice find on the power windows. Now you have me going back to my salvage yard again tomorrow, he has a I believe 86 or 87 4runner but I can't remember if it has power windows. If it does I'll be doing the same as you are in my 84
So the power window swap has been put on hold for right due to Arizona Summer and a non-a/c garage.
However, since the is on hold I am continuing to accrue parts for my axle upgrades. Here is the plans for my truck.
1. Axle picture above will be going into the rear. It is a V6 Axle housing from an 88 Toyota Pickup. It is 3" wider that the stock 1985 4cy axle.
2. I will be keeping the drum brakes in the rear. They are larger than the current drums and I have had no issues with them.
3. I will be upgrading the axle gear ratios to 4.88s with electric lockers front and rear from Harrop.
4. I will be buying a high pinion differential housing from Marlin Crawler for the front.
5. I will be using a Front Ranger Off Road IFS Hub swap for the front end. This will allow me to match the 3" addition in the rear without using spacers. This will also allow me to use Tacoma Rotors and Calipers.
6. I will also be upgrading the master cylinder and the brake booster for additional stopping power.
My switches finally arrived for my upcoming upgrades. I am using a paranoid fabrications 1st gen Tacoma switch bracket that I modified a little to fit. With the switch bracket installed there was still a small gap on the radio bezel so I cut a small piece of aluminum and taped it to the bottom of the bezel to see if it would work filling in the gap. It worked great on the test fit so I will be permanently attaching it to the bezel with some JB weld epoxy and painting it black. I will be pulling the switch bracket back off and will paint that black as well.
With the suggestion of a few off roaders on a Facebook group I will be adding a locker safety switch most likely on the gauge pillar I have on my A-Pillar. This is to prevent friends and dogs alike from hitting the switch by accident. I want to avoid grendading my new electric lockers.
Last edited by yellowtoytruck; 10-24-2018 at 10:44 PM.
Reason: Adding more pictures
Took a few more steps toward my axle upgrades. I had some extra time so I decided to tear down the rear axle so I can bring the diff to get gears and my electric locker added in.

 02-12-2018, 07:59 PM