Yes, another buildup thread
#104
Thanks guys, but as we all know these projects are never actually finished.
After much adieu, the cases are finally asembled. Here is the front case separated into its respective pieces.

Getting the crawl box and adapter assembled. Unfortunately i had a bit of a problem involving a snap ring i needed to install, and after 3 hours and a broken pair of pliers, a quick trip to my buddy's shop and about 6 seconds of work and it was in, i need to buy some new tools
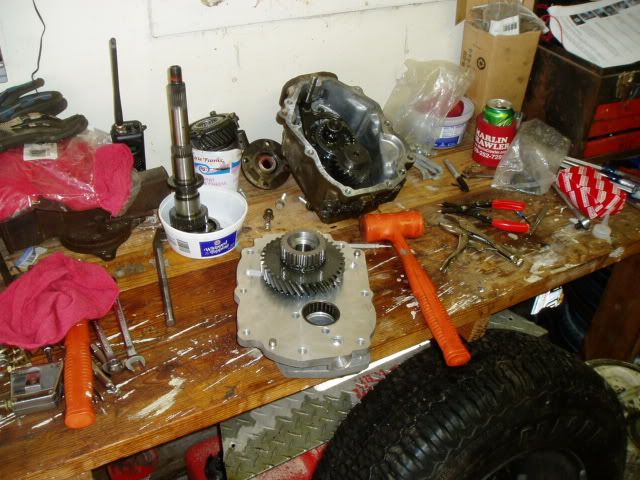
And after encountering a manufacturing flaw from Marlin, here is the final assembled t-case setup
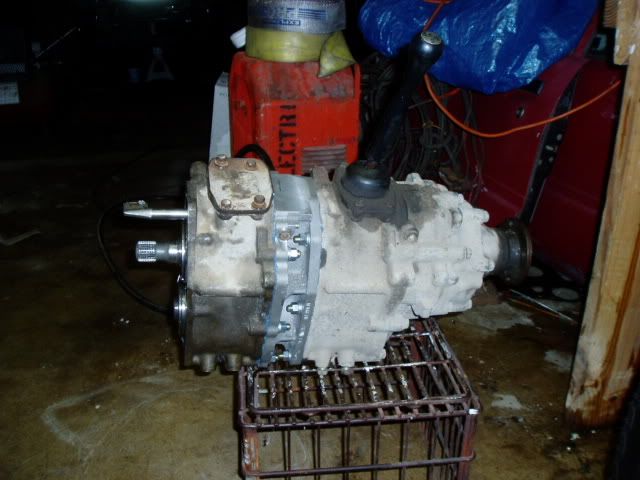
I pick up my driveshaft tommarow, and need to cut one more hole in the floor for the third shifter. It needs to be wheelable by this weekend, and it looks like that wont be a problem.
After much adieu, the cases are finally asembled. Here is the front case separated into its respective pieces.

Getting the crawl box and adapter assembled. Unfortunately i had a bit of a problem involving a snap ring i needed to install, and after 3 hours and a broken pair of pliers, a quick trip to my buddy's shop and about 6 seconds of work and it was in, i need to buy some new tools


And after encountering a manufacturing flaw from Marlin, here is the final assembled t-case setup

I pick up my driveshaft tommarow, and need to cut one more hole in the floor for the third shifter. It needs to be wheelable by this weekend, and it looks like that wont be a problem.
#106
VERY nice work Joez. You have me motivated now to tackle my engine and get it all clean and painted. That thing should be a piece of cake to tow. Where did you get your plate to mount the IFS box? I've heard there is a different plate for the older rigs?
I need one bad.
I need one bad.
#107
I used the $18 marlin sleve kit for mine, and will plate the frame whenever i finally get arround to it with some 1/4" plate. Had i known better, though, i would have bought the FROR mount kit, which comes with the sleves and plates already cut for the framerail. IIRC its only about $70.
I got the cases in today, but no pictures yet. Unfortunately i had a problem with a weak weld on my shift rail, i didnt have the heat up anywhere near what i needed and i managed to break off the little piece of stock that you weld to box in the shift rail. I knew it wasnt going to be to strong when i was putting it in, but i though "how much side load is it going to ever even see?" Today i answered that question when i slipped on my gear lube soaked driveway and used the shifter to break my fall. Needless to say, i also broke my bad weld. Oh well, ill just have to redo it tommarow morning, wont take but a few minutes to do right.
I got the cases in today, but no pictures yet. Unfortunately i had a problem with a weak weld on my shift rail, i didnt have the heat up anywhere near what i needed and i managed to break off the little piece of stock that you weld to box in the shift rail. I knew it wasnt going to be to strong when i was putting it in, but i though "how much side load is it going to ever even see?" Today i answered that question when i slipped on my gear lube soaked driveway and used the shifter to break my fall. Needless to say, i also broke my bad weld. Oh well, ill just have to redo it tommarow morning, wont take but a few minutes to do right.
#109
I know, many people have. That will come once i get the welder and 220 setup in the garage, as i havent had to time to take care of that yet.
That said, it finally has 4 wheel drive and the dual cases in. I was able to fix my dumb mistake without having to pull the cases, which was a big timesaver.
Having that 3rd shifter sure is nice, but i already would like more gearing. A 4.7 in the rear case would be REAL nice.

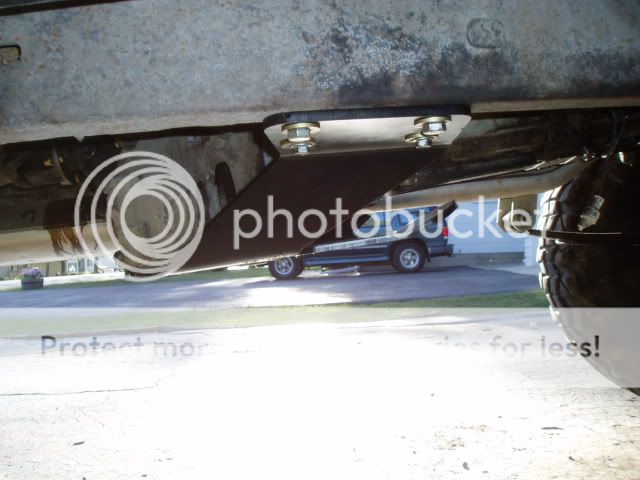
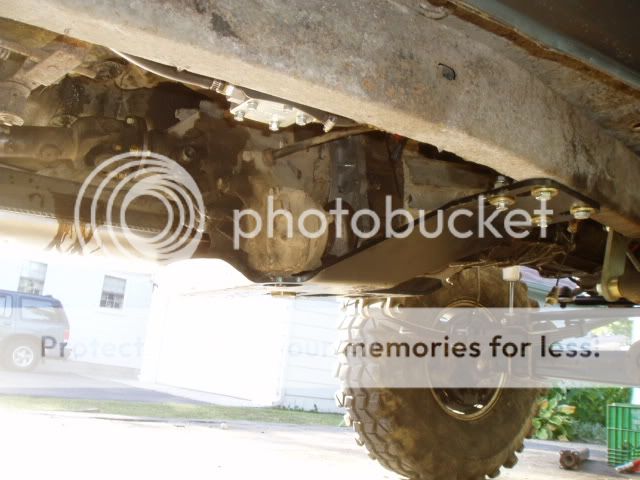
Now onto the driveshaft. I know square tube doesnt make the greatest driveshaft in the world, but if you do take your time you can make it pretty straight and vibration free at higher speed, and is a great way to make a nice long travel driveshaft for cheap. I have $55 plus my time in this one, and have ~13" of useable travel. I used 2 1/2", 1/4" wall reciever tubing i bought in a 24" section, and 2", 1/4" wall for the inner piece.
Step one, cut your donor driveshaft appart, and get the grinder out. Its time to make a round peg fit in a square hole.
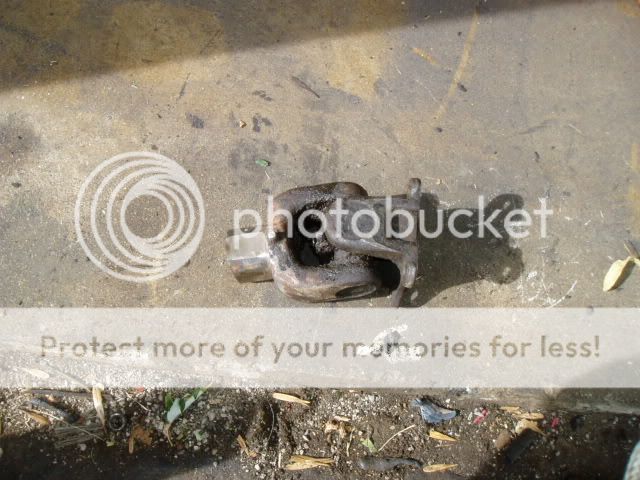
Then, take your time and get everything lined up and as square as you can before you weld it. Another tip is to grind the yoke just barely enough to fit in the tubing, i had mine tight enough that i had to hammer it in. When you are satisfied with the positioning, weld it up.

Here is the reciever tube i used, came in a 24" length, and i cut it down to 21 1/2". It even came powdercoated.

Repeat the process with the second yoke, and weld it up.

No pictures of it installed, as it was dark by the time i got finished out there, and none of the pics came out. I must say though, this makes for one HEAVY driveshaft. I dont know what it weighs, but it was a pain to put in, thats for sure.
And now that the t-cases are done, i can add their remains to the corner with the rest of my spare drivetrain parts

That said, it finally has 4 wheel drive and the dual cases in. I was able to fix my dumb mistake without having to pull the cases, which was a big timesaver.
Having that 3rd shifter sure is nice, but i already would like more gearing. A 4.7 in the rear case would be REAL nice.


Now onto the driveshaft. I know square tube doesnt make the greatest driveshaft in the world, but if you do take your time you can make it pretty straight and vibration free at higher speed, and is a great way to make a nice long travel driveshaft for cheap. I have $55 plus my time in this one, and have ~13" of useable travel. I used 2 1/2", 1/4" wall reciever tubing i bought in a 24" section, and 2", 1/4" wall for the inner piece.
Step one, cut your donor driveshaft appart, and get the grinder out. Its time to make a round peg fit in a square hole.

Then, take your time and get everything lined up and as square as you can before you weld it. Another tip is to grind the yoke just barely enough to fit in the tubing, i had mine tight enough that i had to hammer it in. When you are satisfied with the positioning, weld it up.

Here is the reciever tube i used, came in a 24" length, and i cut it down to 21 1/2". It even came powdercoated.

Repeat the process with the second yoke, and weld it up.

No pictures of it installed, as it was dark by the time i got finished out there, and none of the pics came out. I must say though, this makes for one HEAVY driveshaft. I dont know what it weighs, but it was a pain to put in, thats for sure.
And now that the t-cases are done, i can add their remains to the corner with the rest of my spare drivetrain parts


#110
Just found this pic flipping through my buildup folder on my computer, and thought it was pretty cool. The K5 is on 2" of lift and on its 33" street tires since im back in school now and doing alot of commuting. Its amazing how big the Toy looks, even behind the fullsize.


#112
Well, it got wheeled today. It spit a couple power steering lines, but other than that faired well. Didnt really try anything to hard, as it was already late in the day when we got on the trails, and neither of us had a winch. I did come close to laying it on its side, though. Not many pictures, and the ones that were taken didnt come out to well, but oh well. The guy i was wheeling with is NOT a photographer, as he missed tons of great shots, and messed up the 4 he did take. But, what are you going to do.
I do have some issues i need to address, i need to relocate my front shock mounts and will need longer shocks, the bed needs bobbing, and power steering lines need to be taken care of as well. Other than that it did fine, even drove it home all the way on the interstate for close to an hour, cruised right along at 60-65 mph, and even got ~12 mpg, which is up from the 8-9 it was getting.
I would definately like lower gearing as well. A 4.7 for the rear case will have to wait, though, at least for a few months.

#113
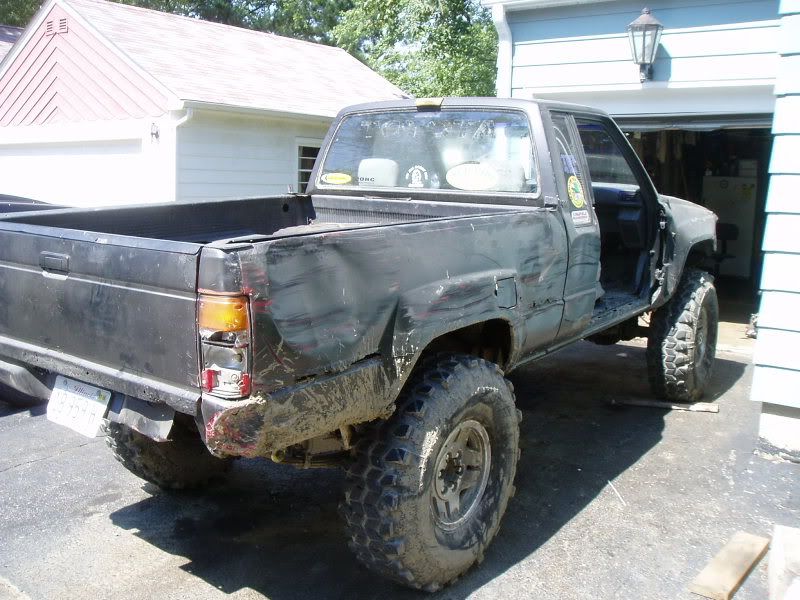
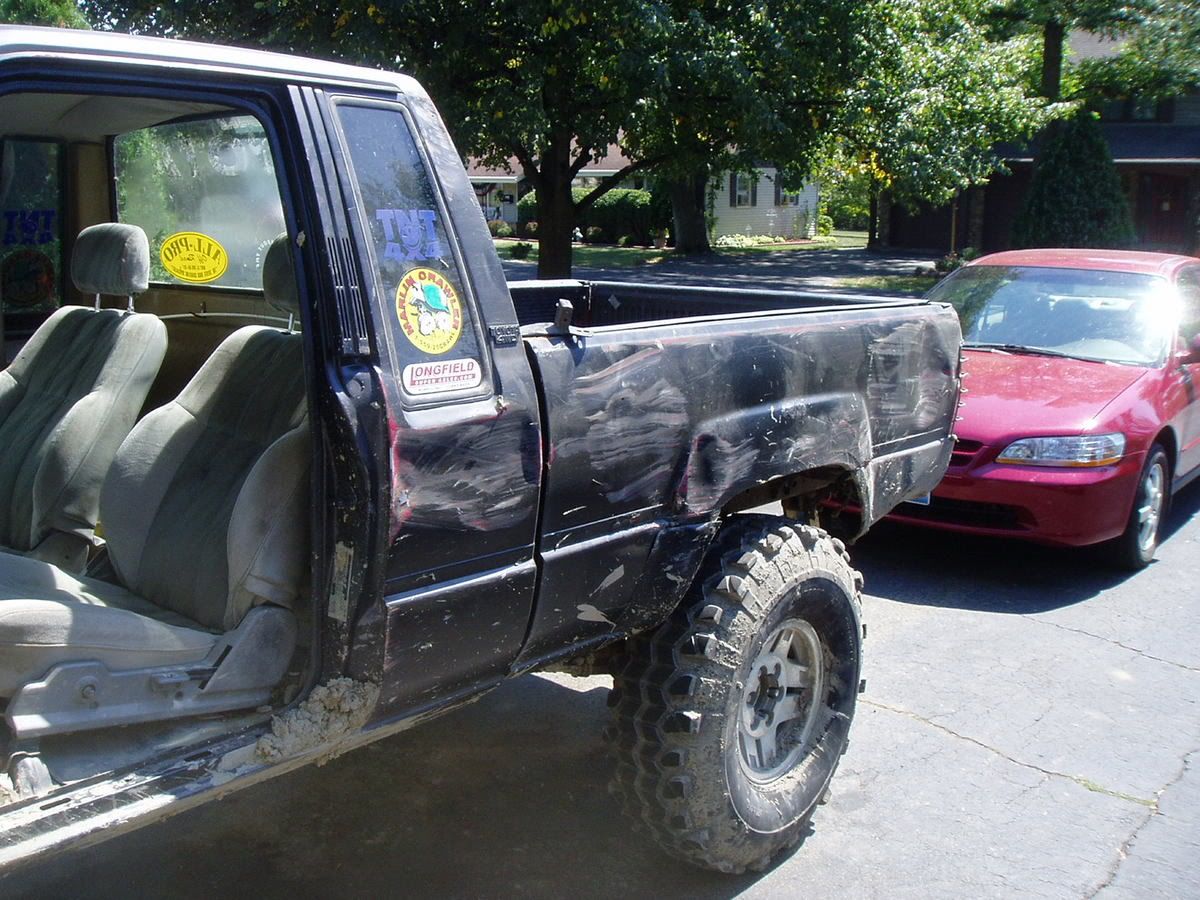
I knew i was going to have trouble with the long wheelbase, but not this much

I managed to make it through the first 1/2 of the day with only one dent and a busted tail light, but after the crowd thinned out we moved onto the harder trails. A couple quick highlights:
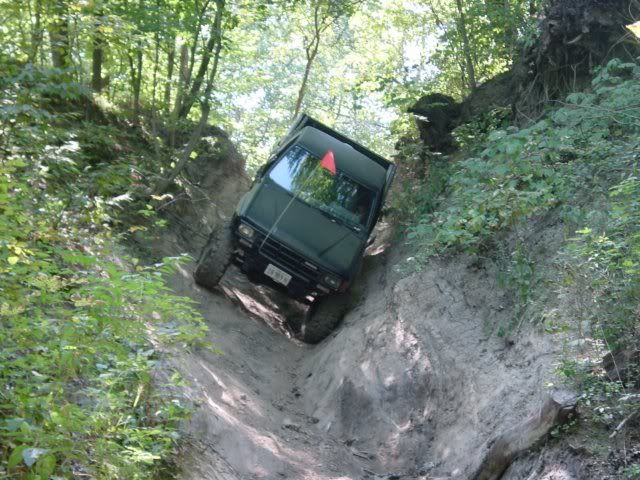
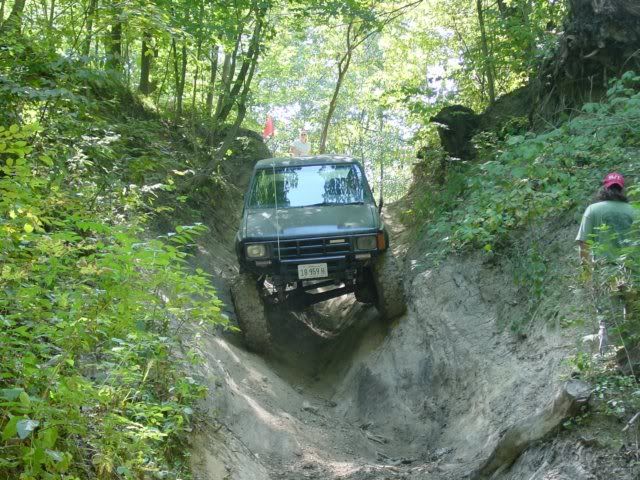


I pitched it over hard quite a few times with a rear tire in the air, the rear suspension doesnt flex worth squat, so that will be next to adress, along with bumpers, cage, bobing the bed, and a possible narrowing. Although at this point i might just ditch the bed, as i can already see it isnt going to last long with the tight trails we have arround here. The front end is fine, i need to open up the spring clamps, as i wanted to see how it would work with them on before i cut them off, but other than that its good. Didnt even take any real damage.
Still alot more work to do, this is still just the beginning

#115
We were at the Cliffs for the second half of the United We Ride event, i didnt make it to Rockport.
The K5, it wasnt as bad as you would think, primarily because of the tires. I had the Q78's mounted up on 5.5" wide rims with 3.75" of backspacing. With those on and just the lockrights, if i was light on the throttle it would turn extremely sharp, at least compared to the toy. It took its fair share of body damage, though, and at the cliffs i had to stay on the green trails. It does good for what it is, but it still wheels like a turd.
The K5, it wasnt as bad as you would think, primarily because of the tires. I had the Q78's mounted up on 5.5" wide rims with 3.75" of backspacing. With those on and just the lockrights, if i was light on the throttle it would turn extremely sharp, at least compared to the toy. It took its fair share of body damage, though, and at the cliffs i had to stay on the green trails. It does good for what it is, but it still wheels like a turd.
Last edited by joez; 09-07-2005 at 04:16 AM.
#120
Originally Posted by joez
Cant say that i do, ive never put them on a scale.
Chris


