
Plate Bumper Build... "3rd gen 4runner"
 03-11-2011, 09:27 PM
#1
Registered User
Thread Starter
Join Date: Jan 2009
Location: China Grove/Charlotte
Posts: 5
Likes: 0
Received 0 Likes
on
0 Posts
Plate Bumper Build... "3rd gen 4runner"
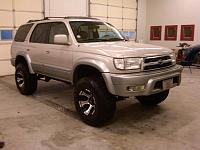
So after looking at all of the available plate bumpers... arb, shrockworks, cbi...etc. I decided that I did not totally like any of them (imho). I just did not like them enough to drop 1000+dollars... that sounds better. There are many nice looking plate bumpers for 3rd gen 4runners, but I just wanted to build my own... well that was about 3 days ago
So....
1 -Started out with a few very rough pro-e cad renderings (pro engineer 4.0, its what we use for CAD at UNC Charlotte)... this was basically to get an idea of what style/give me a starting point.
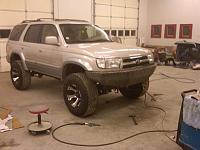
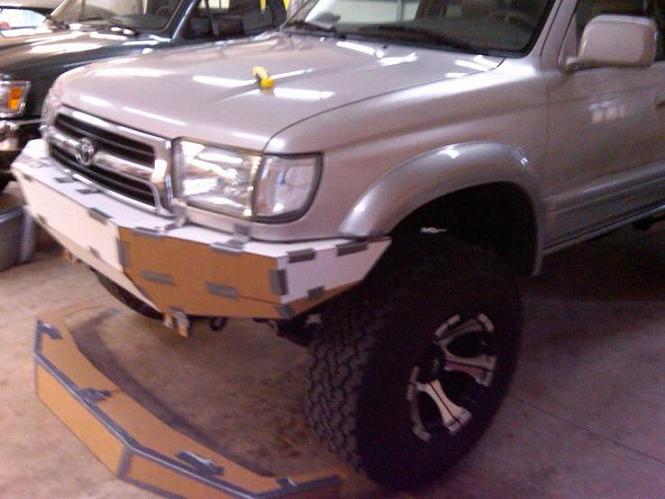
2 - I then took the dimensions from my choice of the three cad drawings, and constructed the entire bumper out of cardboard.
3 -Picked up a 4'x8' sheet of 3/16'' steel....(I only had my 4runner the day I needed to pick up the steel, so therefore I had to cut it into 2 4'x4' sheets.... )
)
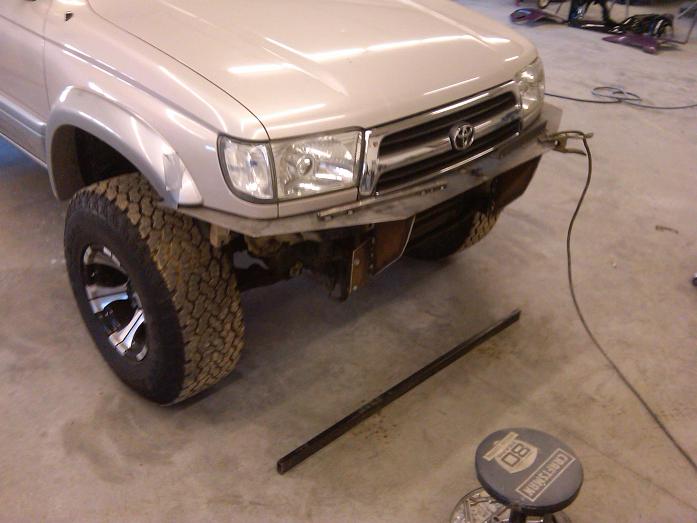
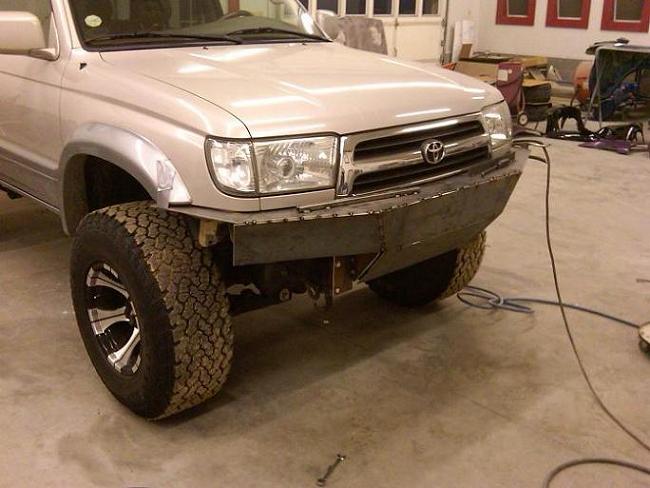
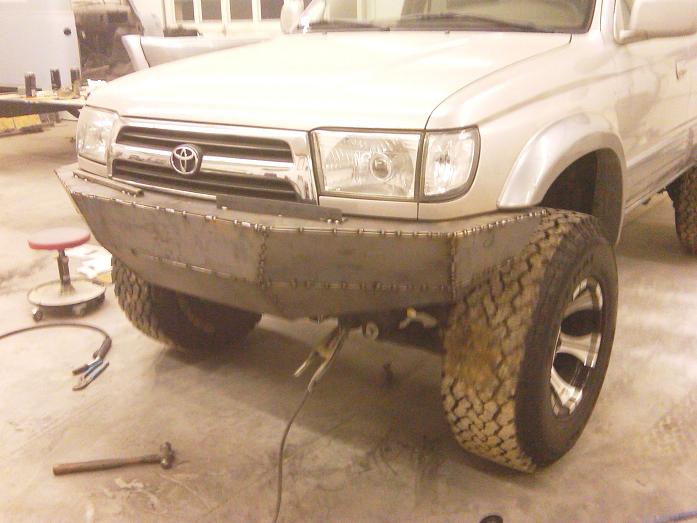
4 -After 10 cut off disks, 3 monsters, and 10 hours... I had used the modified cardboard templates to trace and cut the various segments out of the plate steel...and it tacked up well(1" welds about every 6 inches).
The before...
card board...haha

tacked' up
I am going to remove it to finish the welds up, mount the factory fog lights in them, and then sandblast/prep/paint... it will be the silver metallic, the color as seen on the flares... I will post some more pictures when its fully completed.
So....
1 -Started out with a few very rough pro-e cad renderings (pro engineer 4.0, its what we use for CAD at UNC Charlotte)... this was basically to get an idea of what style/give me a starting point.
2 - I then took the dimensions from my choice of the three cad drawings, and constructed the entire bumper out of cardboard.
3 -Picked up a 4'x8' sheet of 3/16'' steel....(I only had my 4runner the day I needed to pick up the steel, so therefore I had to cut it into 2 4'x4' sheets....
) 4 -After 10 cut off disks, 3 monsters, and 10 hours... I had used the modified cardboard templates to trace and cut the various segments out of the plate steel...and it tacked up well(1" welds about every 6 inches).
The before...

card board...haha
tacked' up
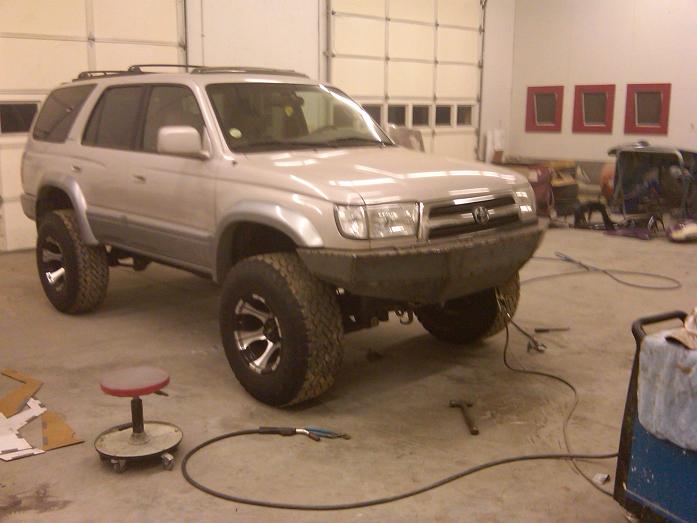
I am going to remove it to finish the welds up, mount the factory fog lights in them, and then sandblast/prep/paint... it will be the silver metallic, the color as seen on the flares... I will post some more pictures when its fully completed.


Trending Topics
03-12-2011, 02:31 PM
#8
I'm mulling over building my own bumpers and I'm wondering how you mounted yours? Did you come up with the mounts first, then make the cardboard template, and the fab it up? Just wondering where the starting point would be, I would assume mounts/brackets.
03-12-2011, 08:54 PM
#9
Registered User
Join Date: Oct 2010
Location: shelton,wa
Posts: 130
Likes: 0
Received 0 Likes
on
0 Posts
the only cad i have is in my sick head
 03-12-2011, 10:11 PM
#10
Registered User
Thread Starter
Join Date: Jan 2009
Location: China Grove/Charlotte
Posts: 5
Likes: 0
Received 0 Likes
on
0 Posts
Hey guys,
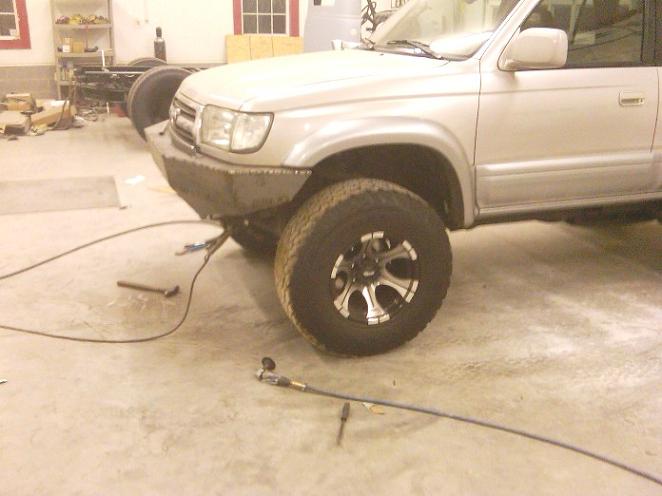
I did not take as many pictures as I wanted. I just got on a “roll” fabricating and didn't stop to take pictures until I literally “had” to take off my gloves and shake out my hands/forearms… cutting all of the pieces out of sheet steel with an angle grinder for a couple hours will wear you out, haha…When I remove it to finish the light mounts and winch mount I will take some pictures of the frame/bumper mount. Since I have a 2"body lift, the mount for the bumper was extremely low, and I was not going to simply bolt it to the factory mounts with a 100+ pound bumper hanging 8” above the frame … so I plated the entire frame from the ifs brackets forward, and made new mounts from 3/8" and 3/16" plate... again sorry for the lack of pictures but I have simply been busting ass after work. I’ve only had a few days to build, prep, and paint it due to school.
I did not take as many pictures as I wanted. I just got on a “roll” fabricating and didn't stop to take pictures until I literally “had” to take off my gloves and shake out my hands/forearms… cutting all of the pieces out of sheet steel with an angle grinder for a couple hours will wear you out, haha…When I remove it to finish the light mounts and winch mount I will take some pictures of the frame/bumper mount. Since I have a 2"body lift, the mount for the bumper was extremely low, and I was not going to simply bolt it to the factory mounts with a 100+ pound bumper hanging 8” above the frame … so I plated the entire frame from the ifs brackets forward, and made new mounts from 3/8" and 3/16" plate... again sorry for the lack of pictures but I have simply been busting ass after work. I’ve only had a few days to build, prep, and paint it due to school.
03-12-2011, 10:59 PM
#11
Registered User
Thread Starter
Join Date: Jan 2009
Location: China Grove/Charlotte
Posts: 5
Likes: 0
Received 0 Likes
on
0 Posts
I've spent about $200 so far, I will get a total after paint... should be ~$350
Here is a quick picture I found off the internet and sketched in the bracets I added to the fron of the frame, hope this helps a little guys
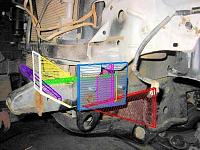
Here is a quick picture I found off the internet and sketched in the bracets I added to the fron of the frame, hope this helps a little guys
 10-19-2011, 09:50 AM
#12
Registered User

Join Date: Nov 2010
Posts: 1
Likes: 0
Received 0 Likes
on
0 Posts
Bumper Building
I was on the fence about building my own bumper or buying a tube type (cheaper) until I saw your bumper thread. This is awesome. Definitely going to do something like this only mine will be winch friendly. Your bumper is definitely sick though.


Thread
Thread Starter
Forum
Replies
Last Post
RedRunner_87
95.5-2004 Tacomas & 96-2002 4Runners (Build-Up Section)
84
06-01-2021 01:51 PM
FS[PacSouthWest]: 2- 8"3rd members:4.88 ratchet lockers,new setup kit, rear axle rebuild kit,diff armor
jerusry
Axles - Suspensions - Tires - Wheels
1
10-19-2015 05:28 PM


