
DIY soft top finally under way!
 11-07-2007, 12:24 PM
#41
Registered User

Join Date: Oct 2007
Location: Lexington, SC
Posts: 632
Likes: 0
Received 0 Likes
on
0 Posts
Really good job!!! I want to do the exact same thing. I especially like the steel rail on the side. I would defiantely do that, but i will end up using probably some Conduit to make teh hoops  Do you have any pics of the snap rail that is in the front. Everything else is really straight forward, i am wanting to know how to seal it at the truck cab
Do you have any pics of the snap rail that is in the front. Everything else is really straight forward, i am wanting to know how to seal it at the truck cab
 11-30-2007, 04:14 PM
#42
Registered User
Join Date: Oct 2007
Location: devon,united kingdom
Posts: 131
Likes: 0
Received 0 Likes
on
0 Posts
i had a local upolster make me up a soft top for my truck. i made the hoop myself then they made the top. the top is fully removeable which is great in the summer.
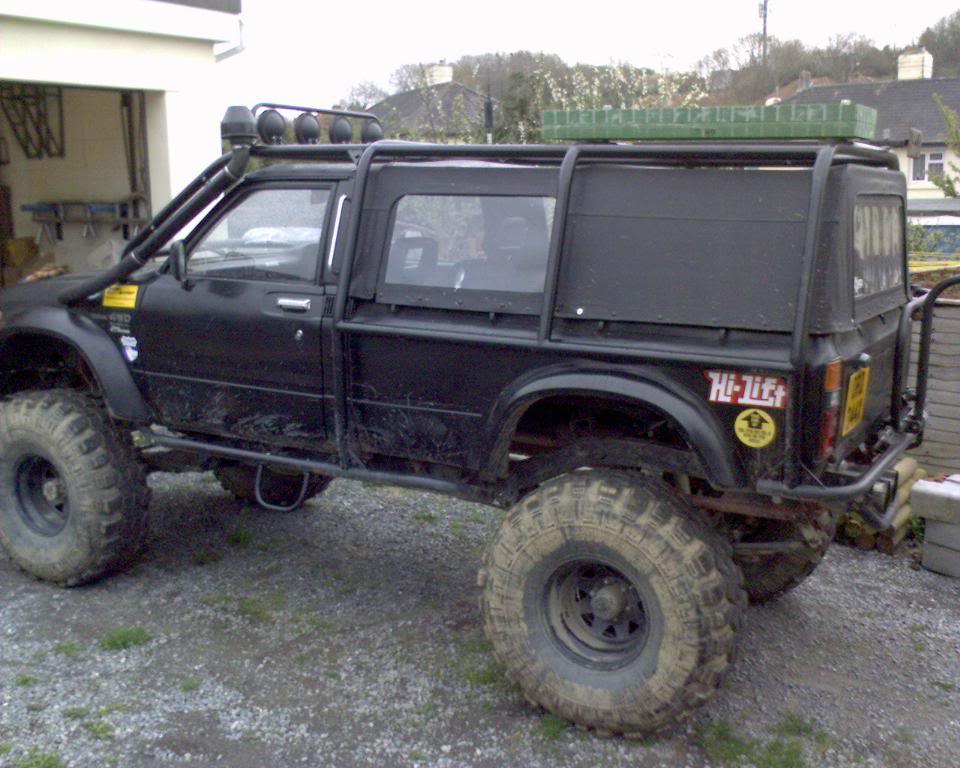

mtm
mtm
 02-28-2008, 06:13 AM
#45
Registered User
Thread Starter
Join Date: Apr 2006
Location: Houston, TX
Posts: 184
Likes: 0
Received 0 Likes
on
0 Posts
Sorry, my top is STILL not complete. I'm getting back to work on it this week. I recently learned how to use a sewing machine myself. Now I can do it all on my own time. I sort of have to start over from scratch with what I have so far because there are some problems with the straps. I'll keep everyone posted as I make more progress....
03-04-2010, 03:28 PM
#46
Registered User
Thread Starter
Join Date: Apr 2006
Location: Houston, TX
Posts: 184
Likes: 0
Received 0 Likes
on
0 Posts
pretty much done
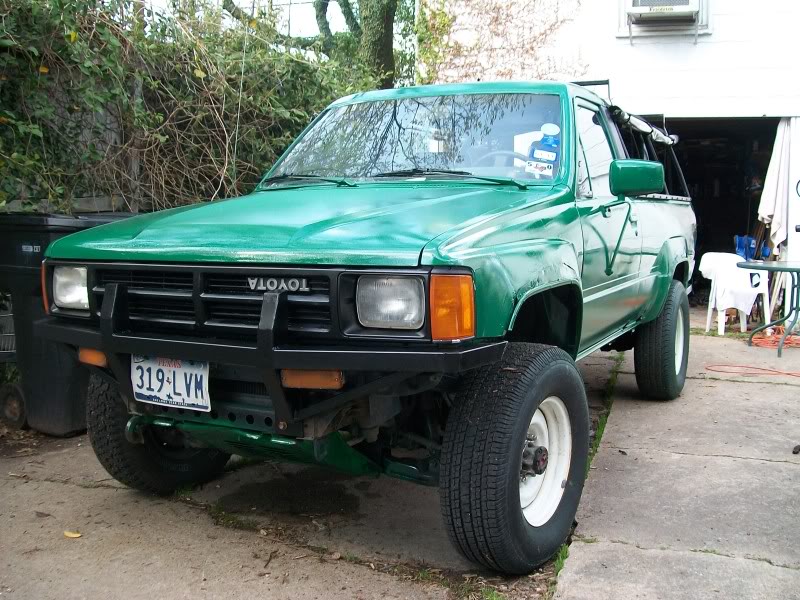
It's been a long time since I've posted on this site. I've been driving around with just a canopy top for over two years. It hasn't been too bad with rain and cold surprisingly. I finally decided to reconstruct the fabric part and finish the thing. I haven't put the rear on yet (maybe I never will, it's a TON of work). I've gotten pretty handy with a sewing machine, though. Check it out!
[IMG]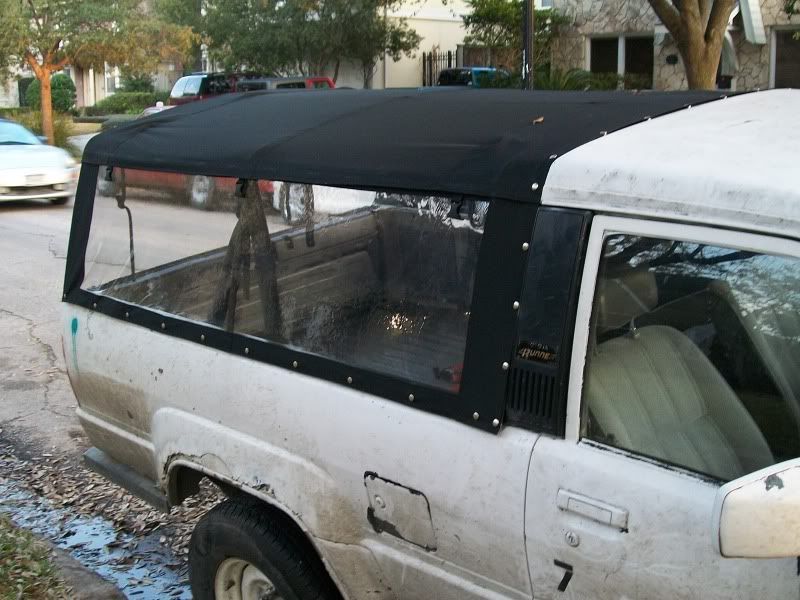 [/IMG]
[IMG]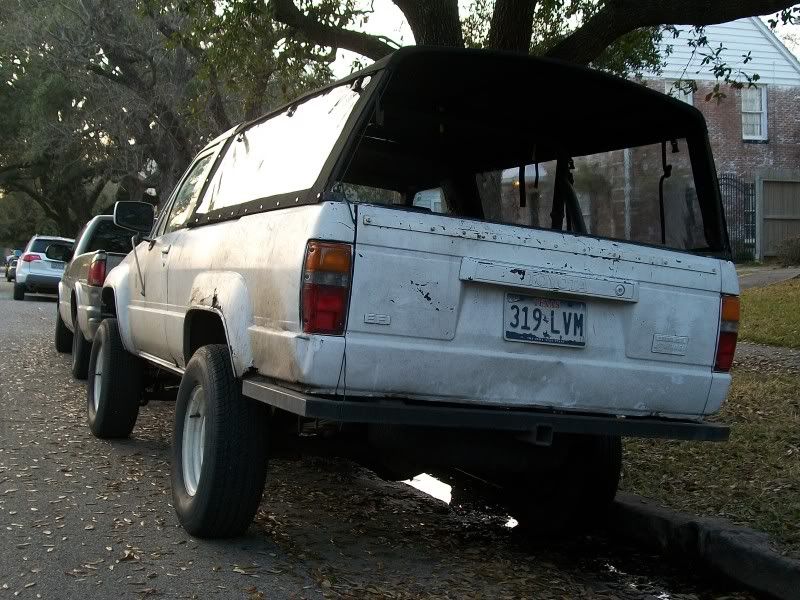 [/IMG]

Also check out the bumpers I built a year or two ago. I like 'em!
[IMG]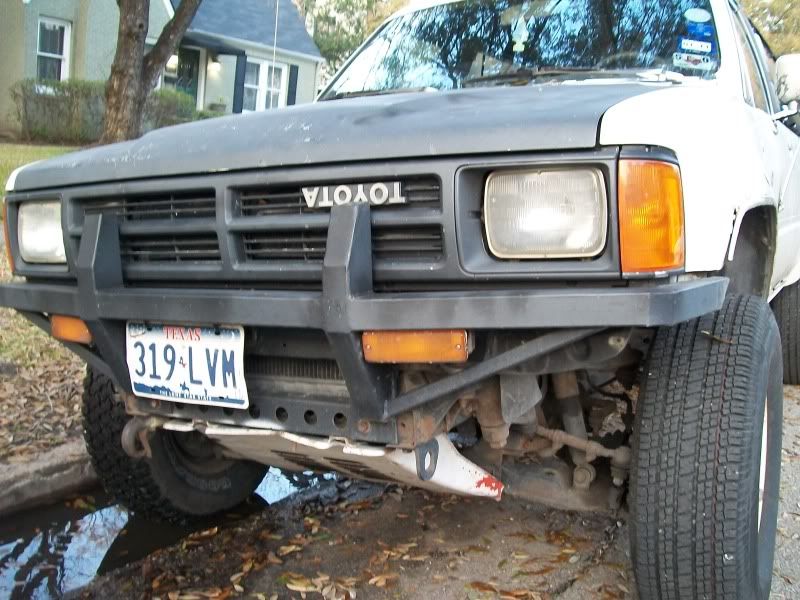
[IMG]<a href="http://s77.photobucket.com/albums/j49/marty4runner/?action=view¤t=2.jpg" target="_blank"><img src="http://i77.photobucket.com/albums/j49/marty4runner/2.jpg" border="0" alt="rear bumper"></a>[/IMG]
[IMG]
[/IMG][IMG]
[/IMG]Also check out the bumpers I built a year or two ago. I like 'em!
[IMG]
[IMG]<a href="http://s77.photobucket.com/albums/j49/marty4runner/?action=view¤t=2.jpg" target="_blank"><img src="http://i77.photobucket.com/albums/j49/marty4runner/2.jpg" border="0" alt="rear bumper"></a>[/IMG]
Last edited by marty4runner; 03-04-2010 at 03:31 PM.
03-09-2010, 12:33 PM
#48
Registered User
Thread Starter
Join Date: Apr 2006
Location: Houston, TX
Posts: 184
Likes: 0
Received 0 Likes
on
0 Posts
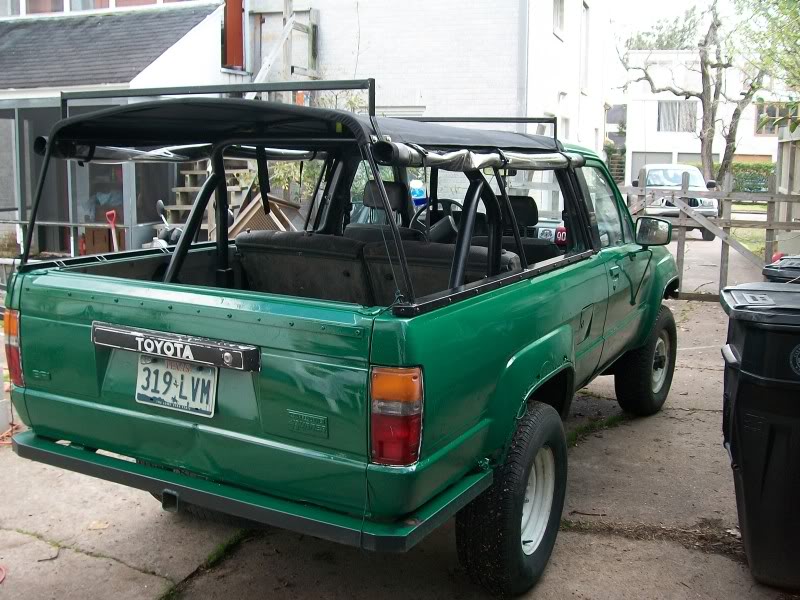
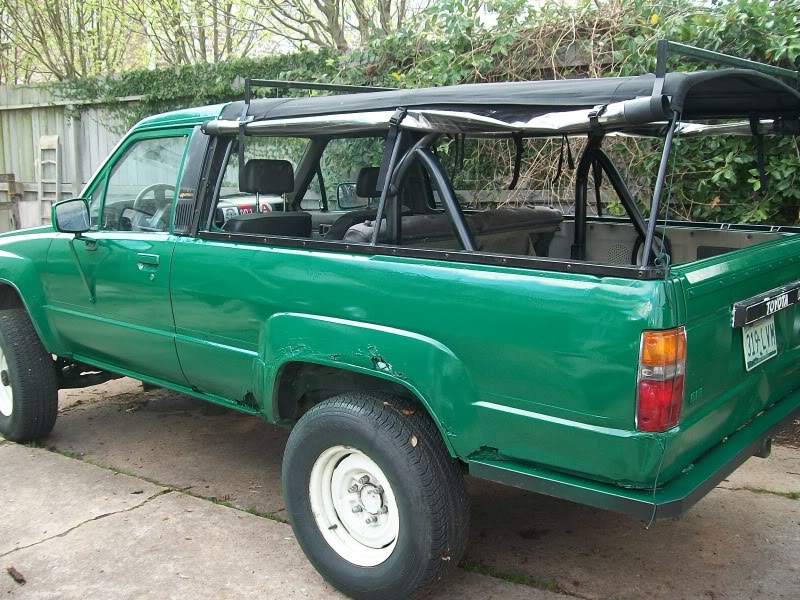
Roof rack, new paint!
The roof racks are finally on! I decided to use real auto paint this time (not rattle can). I bought a paint gun and a gallon of nice green. Check it out! I love the top. I would do a couple things differently if I were to make it again but I'm real happy with it. Check it out!

 03-10-2010, 11:14 AM
#51
Registered User
Thread Starter
Join Date: Apr 2006
Location: Houston, TX
Posts: 184
Likes: 0
Received 0 Likes
on
0 Posts
03-11-2010, 05:29 AM
#53
Registered User
Thread Starter
Join Date: Apr 2006
Location: Houston, TX
Posts: 184
Likes: 0
Received 0 Likes
on
0 Posts
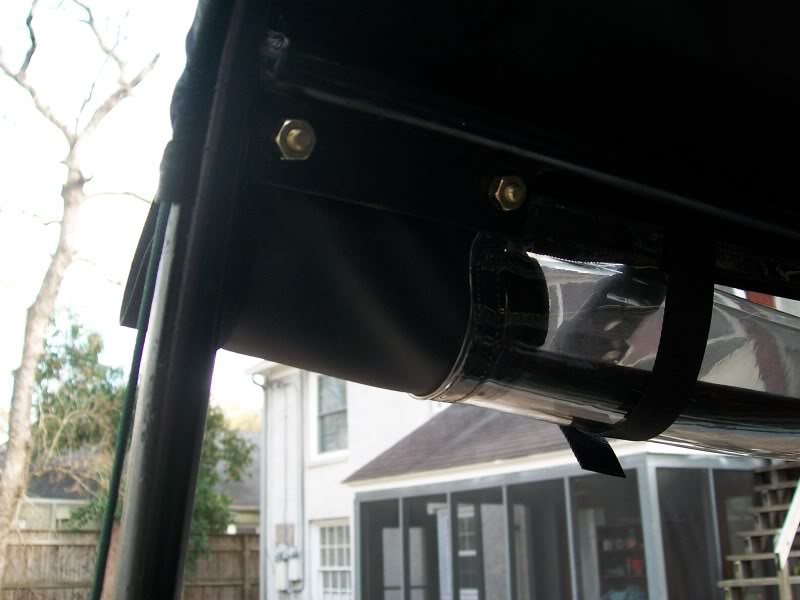
There are 4 plates (1" flat bar) welded to each corner of the top's frame with two holed drilled in each. There is a matching plate that the rack is welded to that bolts into a frame plate. The bolts go through grommets that I put in the soft top. When the bolts are tightened down, the canvas material is sandwiched between the two plates.
03-18-2010, 11:45 AM
#54
Registered User
Join Date: Nov 2009
Location: Central Sierra Nevadas (Oakhurst)
Posts: 504
Likes: 0
Received 2 Likes
on
2 Posts
Gotcha. Do you by chance have some close up pics of that area?
Edit: Never mind. My computer didn't load them the first time. Thanks!
Edit: Never mind. My computer didn't load them the first time. Thanks!
Last edited by Mountain Cop; 03-19-2010 at 06:11 AM.

 05-30-2010, 02:46 PM
#59
Registered User
Join Date: Jan 2009
Location: anson, texas
Posts: 263
Likes: 0
Received 0 Likes
on
0 Posts
i feel like a total idiot i had a can back soft top, and got rid of it for next to nothing..., and as far as having axcually owned one u hit it pretty spot on with ur design... good job, and the back window was attached in an off way i wish i had pics to show u, but it wasnt entirely attached if that makes sense and it used a string in the back to tighten it up so it was more watertight...
06-07-2010, 08:38 AM
#60
Registered User
Thread Starter
Join Date: Apr 2006
Location: Houston, TX
Posts: 184
Likes: 0
Received 0 Likes
on
0 Posts
yeah, I wish I had been able to see good pictures, or better yet, an actual Can-Back top in person when building my top. It would have helped a lot. I thought about making more of these and selling them, but with my limited production abilities, in order to make it worth my time to sell them, I would have to charge more than a Can-Back. It seems like fabricating the frame then taking it to an awning maker to sew the top would be a good bet. I'm sure it wouldn't cost much as the design should be pretty simple and straightforward for an experienced awning sewing person.


