
Ardent's Rear Bumper Build
 03-22-2009, 09:22 PM
#1
Registered User
Thread Starter
Join Date: Mar 2008
Location: CO
Posts: 546
Likes: 0
Received 0 Likes
on
0 Posts
Ardent's Rear Bumper Build
Okay. So let me start by saying that this is the first bumper I've built, and I had fun doing it. I think it turned out well, and I wanted to share my ideas. I am completely open to suggestions/comments about anything, just don't be mean. 

Alright, so here's my original design as drawn by me with Google Sketchup:
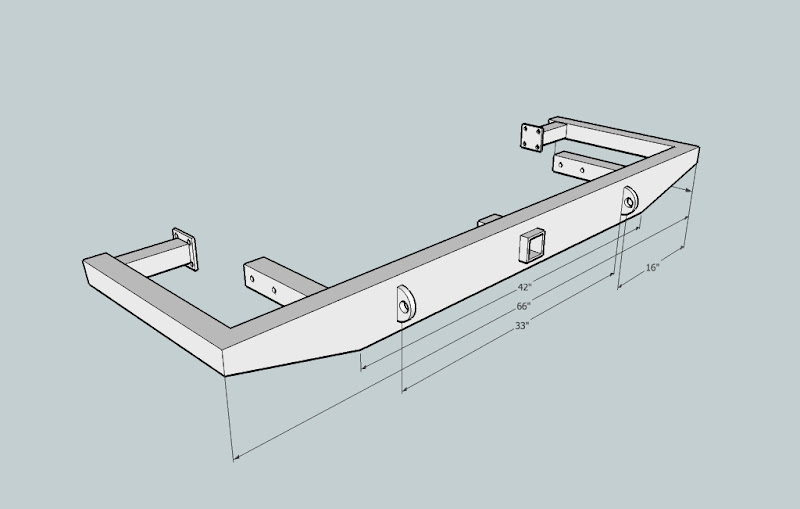
You'll see that I varied a bit from the original design as I had to rework some things.
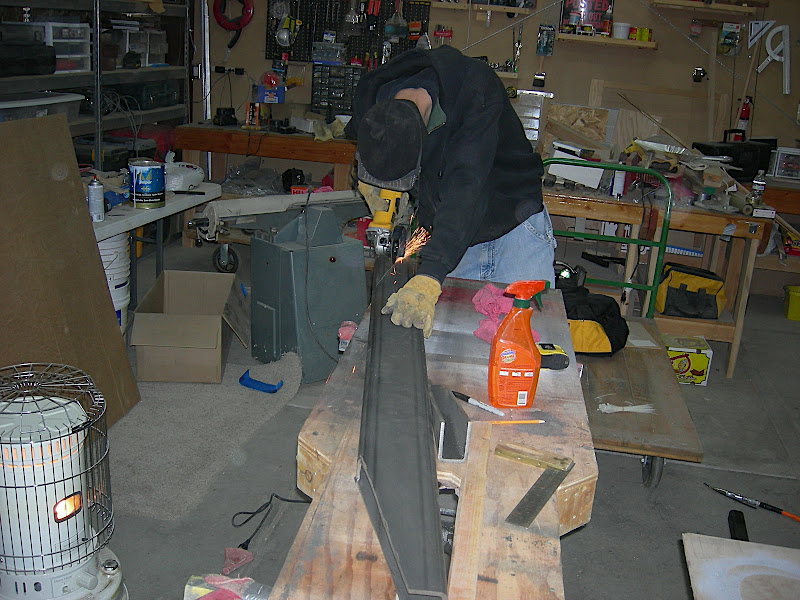
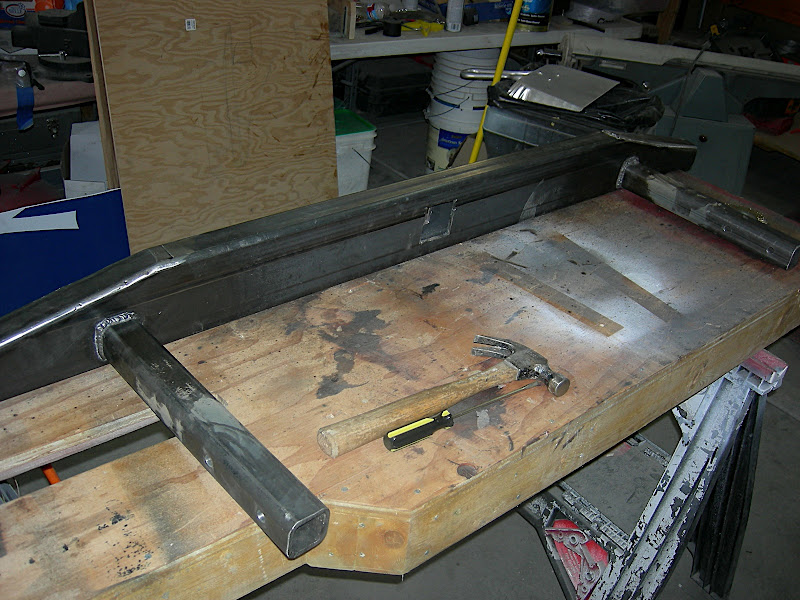
So I started with 2x5 tube .25 wall (I know really thick, should have gone with 3/8". But now I won't have to buy sandbags in the winter!) I started by cutting the two angles:
Next step was cutting the hole for the receiver. My wife helped:

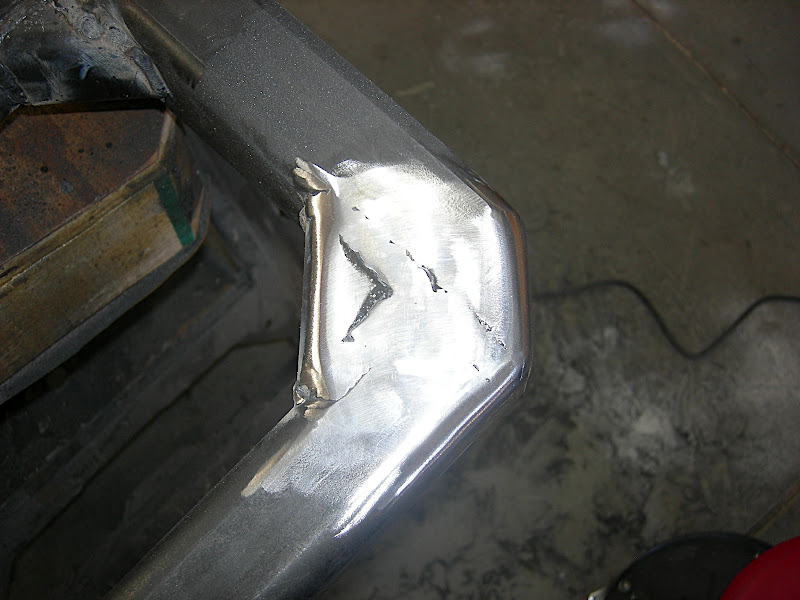
Next, I capped the angled cuts:
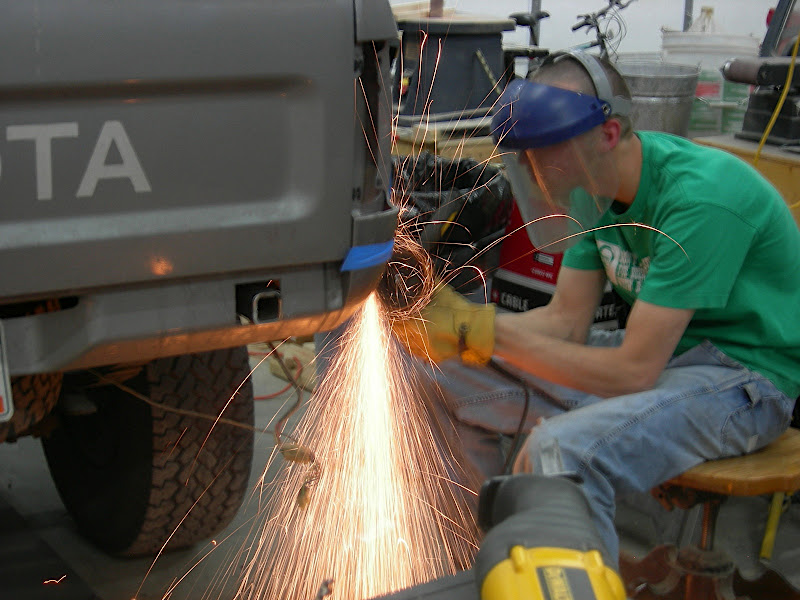
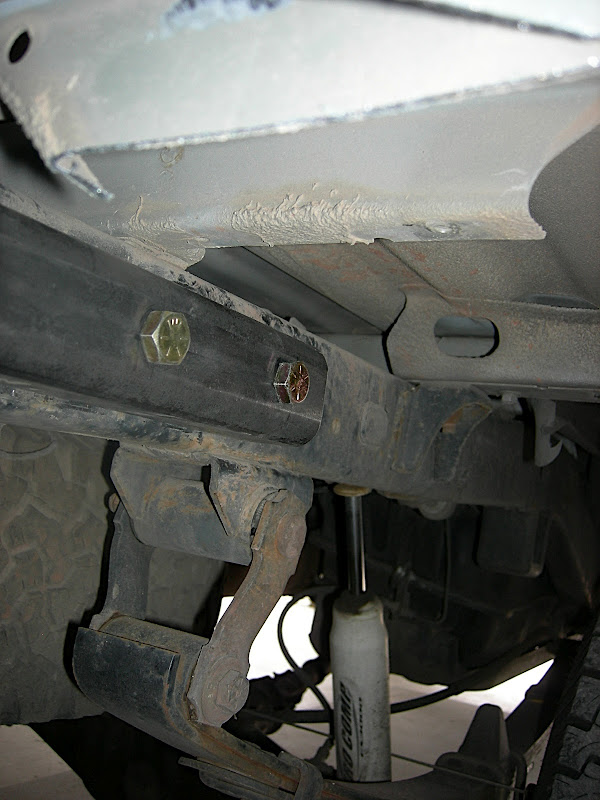
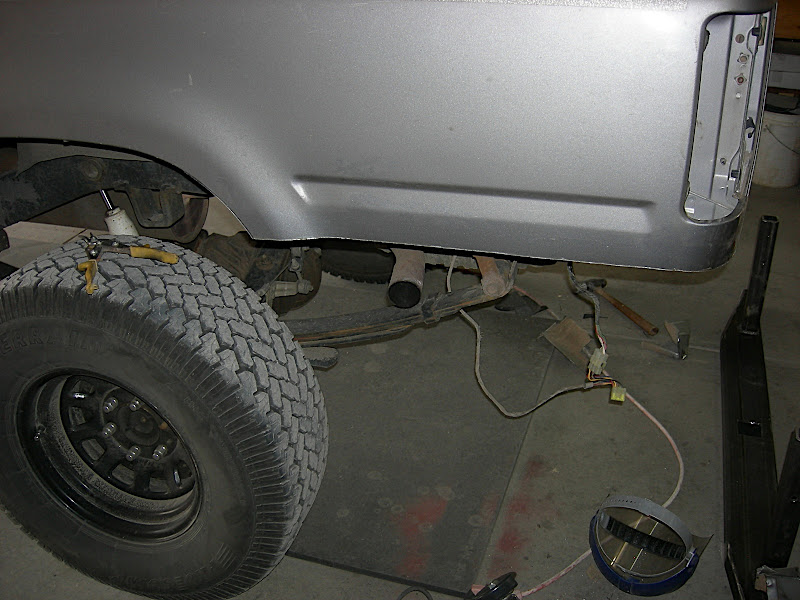
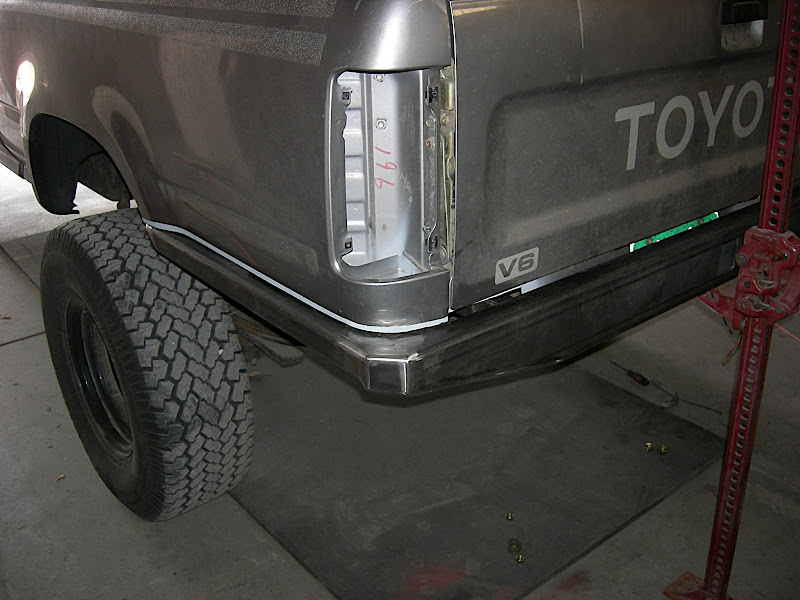
Then I cut away the rear corners of the body to make room. This picture also shows where I ran the "brackets" through the valance, and on the outside of the frame. The brackets are 2x2" .25" wall tube.
Then I put it in place, centered it, and tacked the brackets on. The pulled it off and finished the welds.
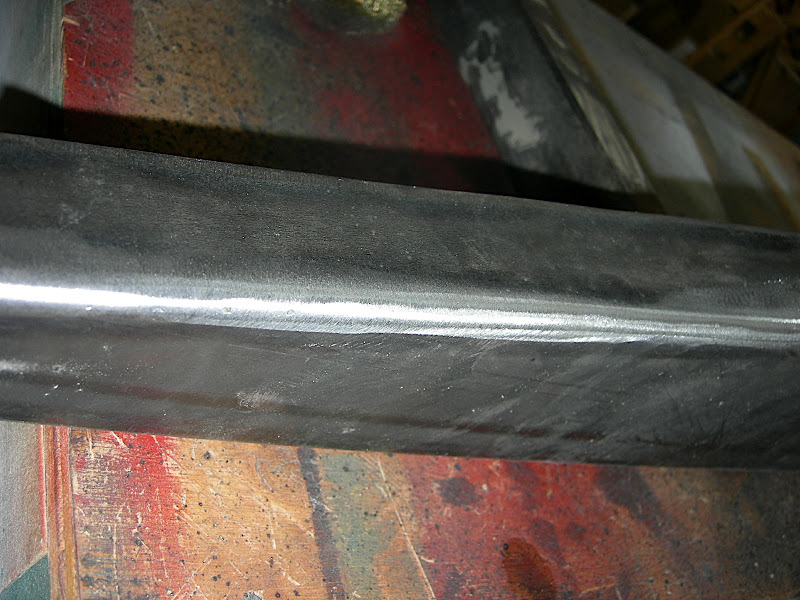
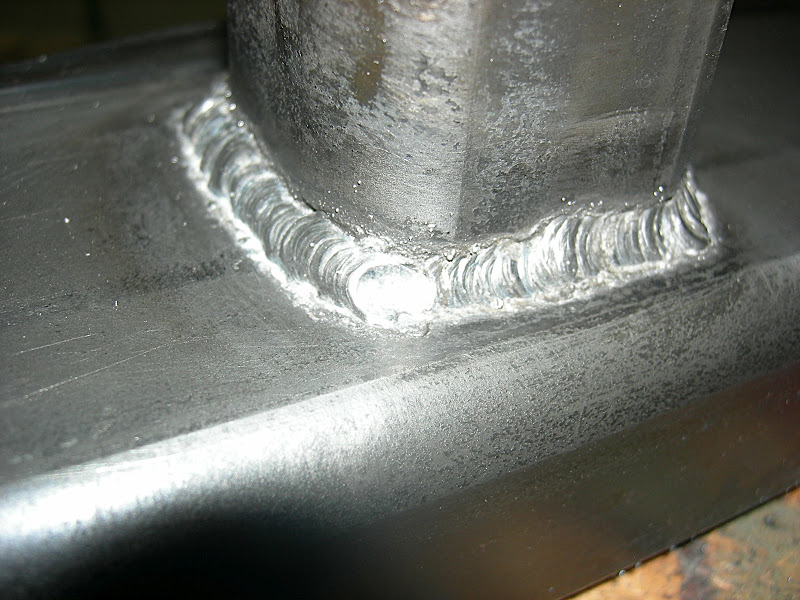
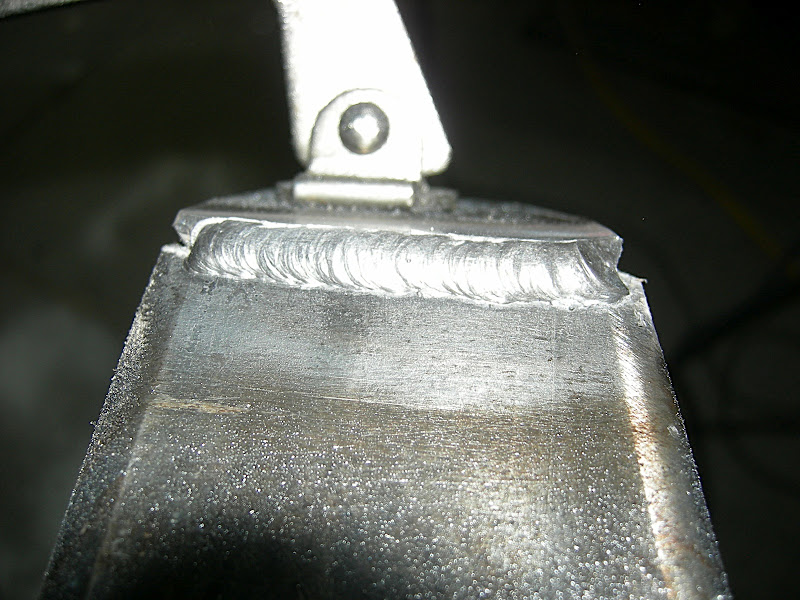
Here's a close-up of one of the welds. Feel free to provide feedback. I'm using a Lincoln HD80, 110V flux core welder.
Now that the bumper could hold itself up, it was time for some more trimming...
Next came the rockers
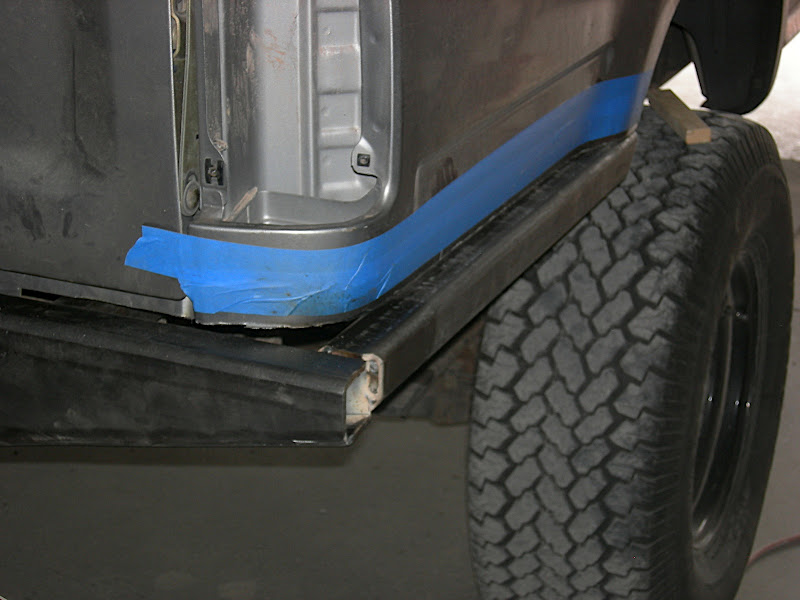
So then we decided that it would be too harsh to have a straight 90 at the corners so we

I can run a bead!! (Sometimes)
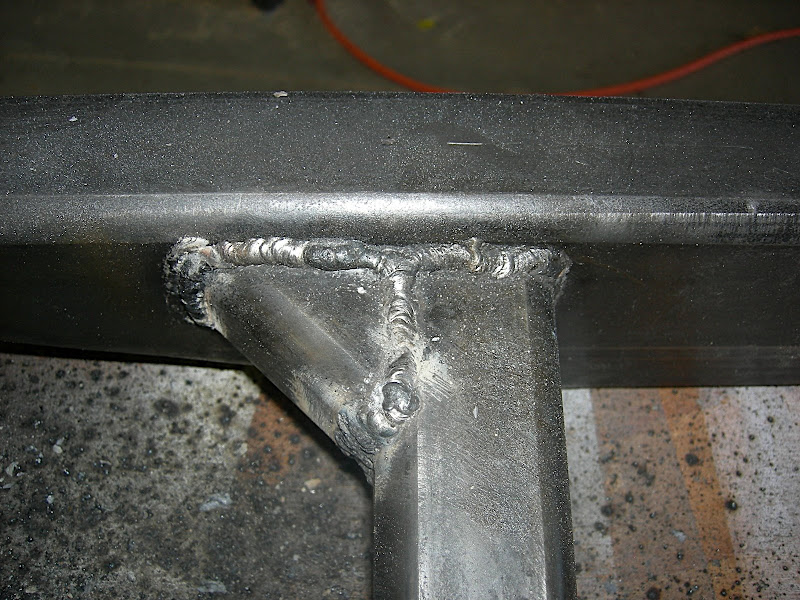
Then came the gussets on the inside of the two rockers, and the outside of the brackets.
Nothing a little bondo wouldn't fix:
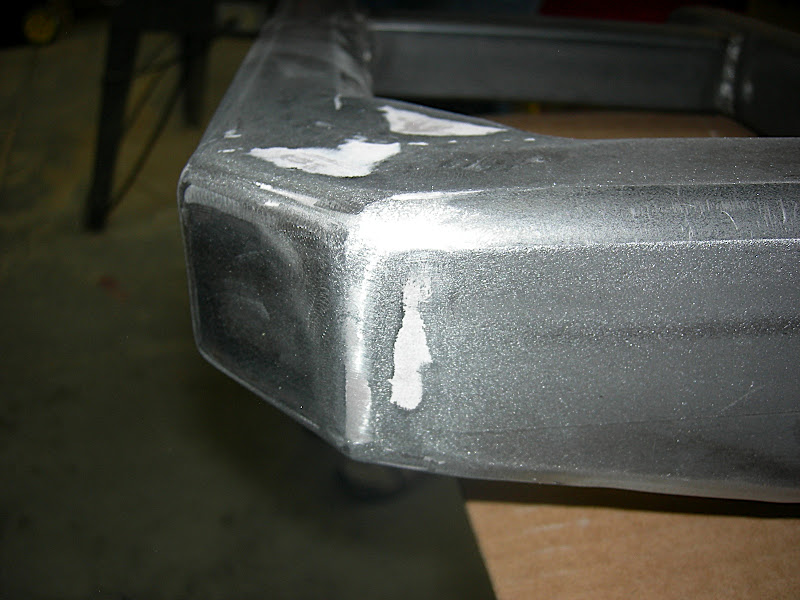
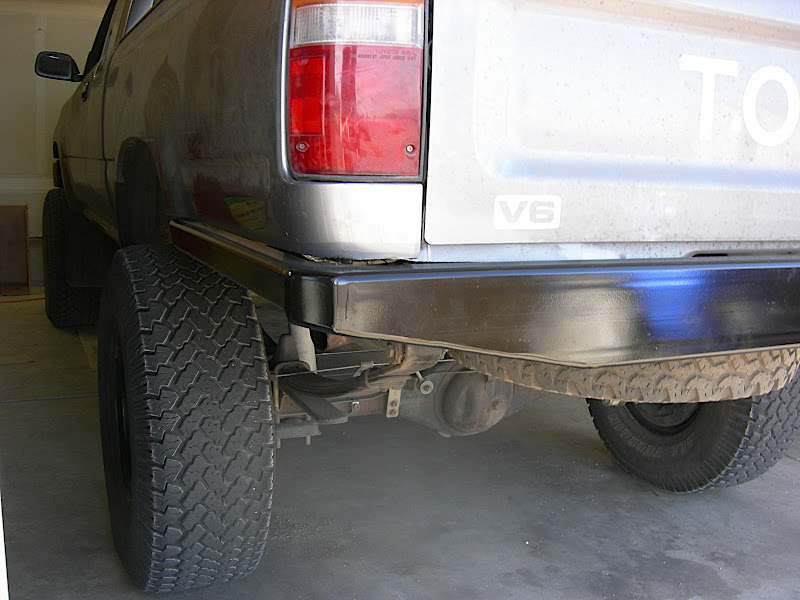
One last fit before paint:
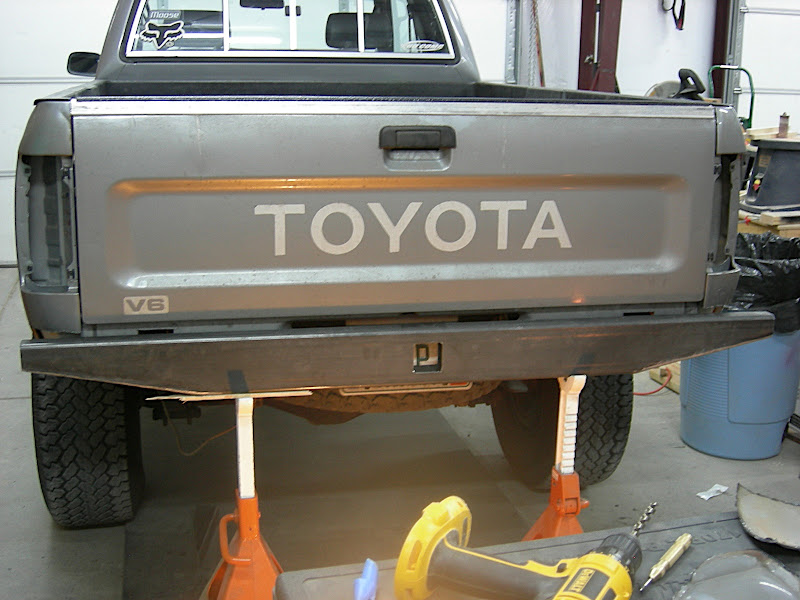
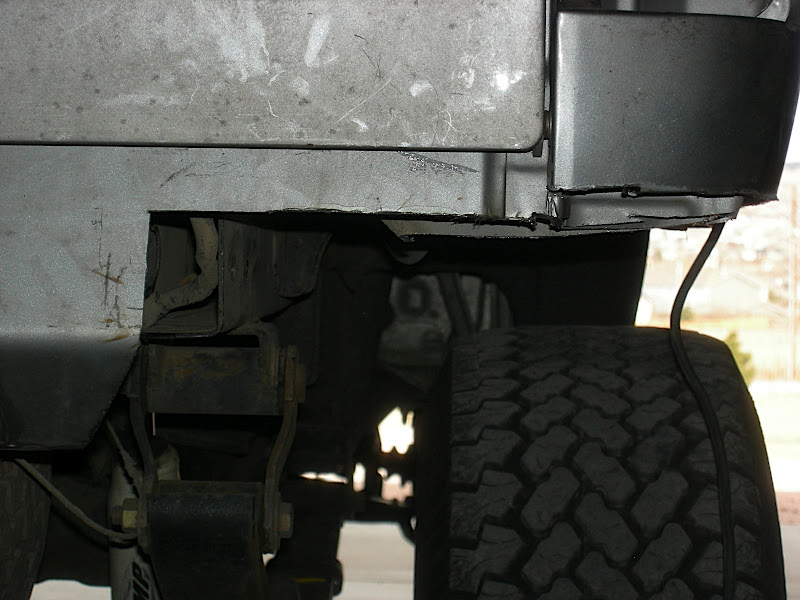
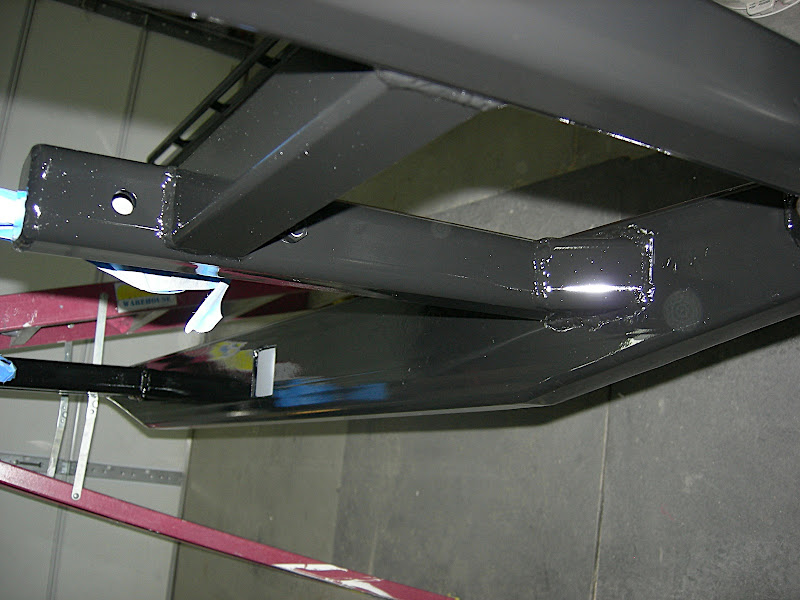
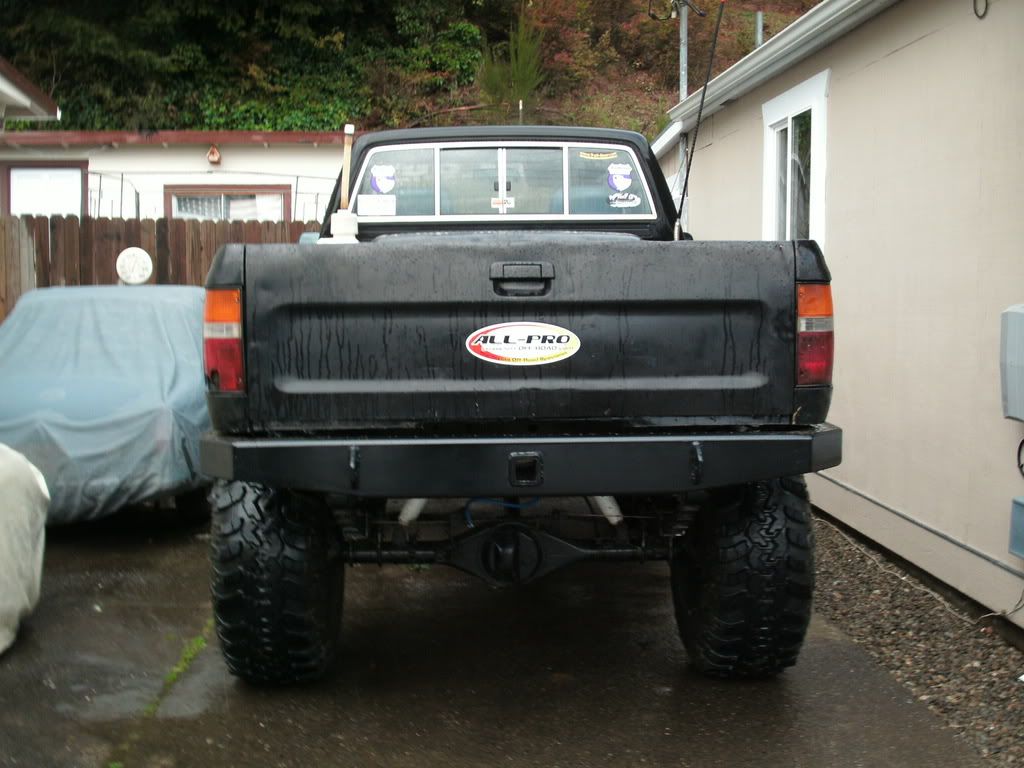
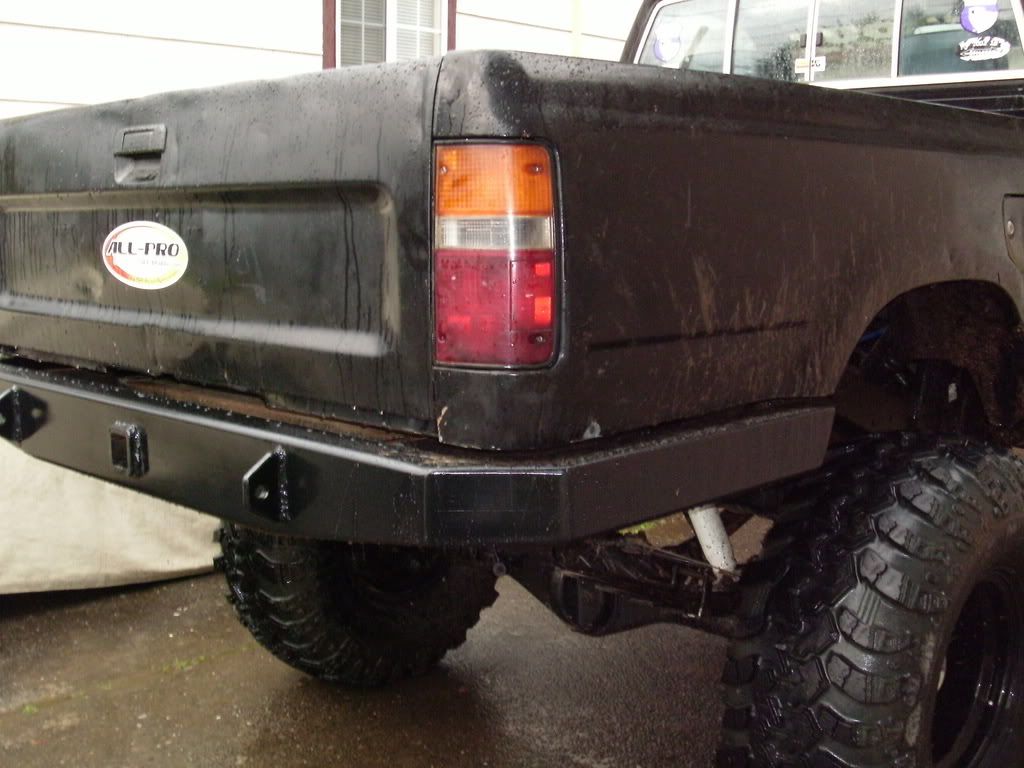
Degreased, primed and painted. This picture also shows the support I ran between the rocker and the bracket:
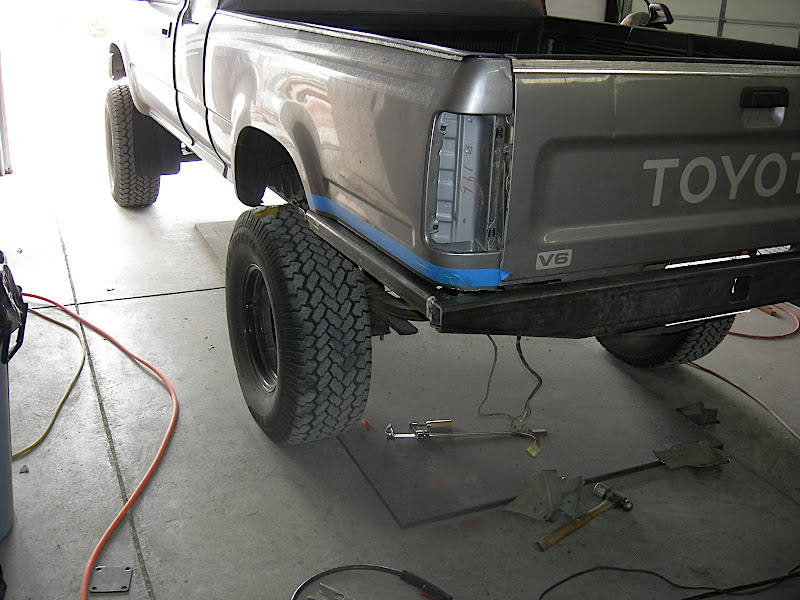
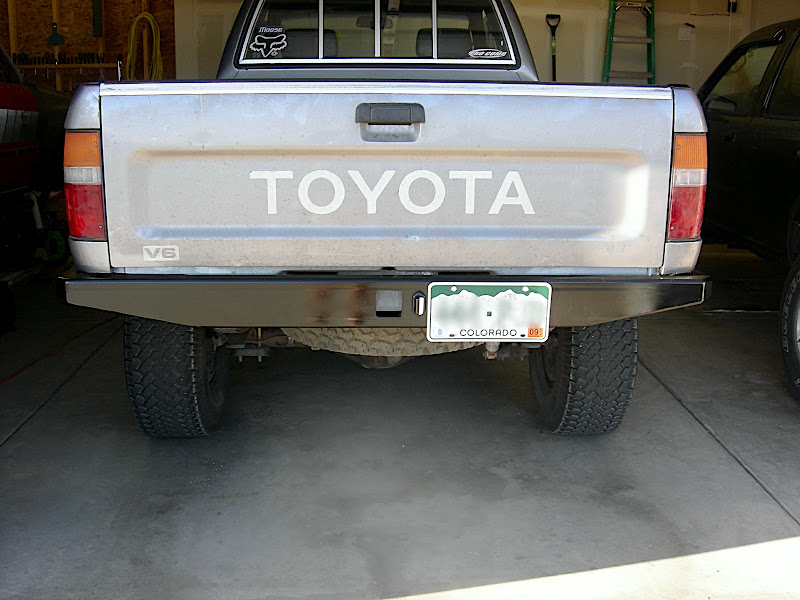
Back home:
So all that's left is the d-rings and the hitch. I think i might have my buddy help me with those as he has a much stronger welder.
Thanks for looking and let me know what you think! I'm going to bed...
Alright, so here's my original design as drawn by me with Google Sketchup:
You'll see that I varied a bit from the original design as I had to rework some things.
So I started with 2x5 tube .25 wall (I know really thick, should have gone with 3/8". But now I won't have to buy sandbags in the winter!) I started by cutting the two angles:
Next step was cutting the hole for the receiver. My wife helped:
Next, I capped the angled cuts:
Then I cut away the rear corners of the body to make room. This picture also shows where I ran the "brackets" through the valance, and on the outside of the frame. The brackets are 2x2" .25" wall tube.
Then I put it in place, centered it, and tacked the brackets on. The pulled it off and finished the welds.
Here's a close-up of one of the welds. Feel free to provide feedback. I'm using a Lincoln HD80, 110V flux core welder.
Now that the bumper could hold itself up, it was time for some more trimming...
Next came the rockers
So then we decided that it would be too harsh to have a straight 90 at the corners so we
I can run a bead!! (Sometimes)
Then came the gussets on the inside of the two rockers, and the outside of the brackets.
Nothing a little bondo wouldn't fix:
One last fit before paint:
Degreased, primed and painted. This picture also shows the support I ran between the rocker and the bracket:
Back home:
So all that's left is the d-rings and the hitch. I think i might have my buddy help me with those as he has a much stronger welder.
Thanks for looking and let me know what you think! I'm going to bed...
Last edited by Ardent; 03-24-2009 at 08:13 AM.


 03-23-2009, 08:27 AM
#5
Registered User
Thread Starter
Join Date: Mar 2008
Location: CO
Posts: 546
Likes: 0
Received 0 Likes
on
0 Posts

Trending Topics
03-23-2009, 09:18 AM
#8
Registered User
Thread Starter
Join Date: Mar 2008
Location: CO
Posts: 546
Likes: 0
Received 0 Likes
on
0 Posts
91- Yeah, I like yours too. Just a bit of a twist on it. Where did you put your license plate though? I had to buy a cheap plate light so that I don't get pulled over at night. Also, did you do anything to reinforce the body at the wheel wells?
519- B-day huh? I'm afraid that the shipping to VA would break the bank, sorry.
Thanks for the kind comments!
519- B-day huh? I'm afraid that the shipping to VA would break the bank, sorry.
Thanks for the kind comments!
Last edited by Ardent; 03-23-2009 at 09:19 AM.
03-23-2009, 09:31 AM
#9
Registered User
91- Yeah, I like yours too. Just a bit of a twist on it. Where did you put your license plate though? I had to buy a cheap plate light so that I don't get pulled over at night. Also, did you do anything to reinforce the body at the wheel wells?
Thanks for the kind comments!
Thanks for the kind comments!
i built a license plate mount and welded it to some angle iron, that acts like a stinger. it goes in where your drop hitch would go.
no, i was debating on it but it seams fine. the inner fender thingy holds it in place pretty good.
 03-23-2009, 10:02 AM
#12
Registered User

Join Date: Jan 2009
Posts: 175
Likes: 0
Received 0 Likes
on
0 Posts
Just an idea, why don't you drill out the spot welds holding your rear roll pan (valance) and just remove it completely. Then you could take your stock license plate lights and mount them to a license plate frame made from angle iron (Toyota1's idea), and use the trailer plug harness to power it up (which would make it removable for wheeling). Awesome build BTW.....
03-23-2009, 10:12 AM
#15
Registered User
Thread Starter
Join Date: Mar 2008
Location: CO
Posts: 546
Likes: 0
Received 0 Likes
on
0 Posts
Just an idea, why don't you drill out the spot welds holding your rear roll pan (valance) and just remove it completely. Then you could take your stock license plate lights and mount them to a license plate frame made from angle iron (Toyota1's idea), and use the trailer plug harness to power it up (which would make it removable for wheeling). Awesome build BTW.....
Thanks again!
 03-23-2009, 10:14 AM
#16
Registered User
Thread Starter
Join Date: Mar 2008
Location: CO
Posts: 546
Likes: 0
Received 0 Likes
on
0 Posts
03-23-2009, 10:17 AM
#17
Registered User
Join Date: Mar 2008
Location: Outside of Statesboro, Ga
Posts: 378
Likes: 0
Received 0 Likes
on
0 Posts
03-23-2009, 10:25 AM
#18
Registered User
Thread Starter
Join Date: Mar 2008
Location: CO
Posts: 546
Likes: 0
Received 0 Likes
on
0 Posts
 03-23-2009, 10:34 AM
#19
Registered User
Join Date: May 2008
Location: Eugene Oregon
Posts: 70
Likes: 0
Received 0 Likes
on
0 Posts
Dang that looks good. Some of the welds need more juice so they lay a little flatter not so much with the round lack of penetration so next time just crank that thing up and go lik hell... all in all your build is rad!!! oh another thing you might want to check out industrail source or air gas for welding supplies they can be pretty competitive with prices and if you say your in school and they will usually give you a nice discount!
03-23-2009, 11:28 AM
#20
Registered User
Thread Starter
Join Date: Mar 2008
Location: CO
Posts: 546
Likes: 0
Received 0 Likes
on
0 Posts
Dang that looks good. Some of the welds need more juice so they lay a little flatter not so much with the round lack of penetration so next time just crank that thing up and go lik hell... all in all your build is rad!!! oh another thing you might want to check out industrail source or air gas for welding supplies they can be pretty competitive with prices and if you say your in school and they will usually give you a nice discount!


