
habanero's 1996 4Runner Build-Up Thread
 08-02-2021, 11:07 AM
#4201
Contributing Member
Thread Starter
Thats weird. I havent heard any issues like this with the Tacoboxes. But then again, very few of us still frequent the forums. most of the people use the facebook groups, which to me, are like a wild west wasteland for trying to find good info. Hopefully you can get this figured out. Is the trans a marlin unit or your stocker?
EDIT: Also, while youre there digging into things........ https://www.pirate4x4.com/threads/to...-swap.2000978/
EDIT: Also, while youre there digging into things........ https://www.pirate4x4.com/threads/to...-swap.2000978/
That pirate thread is interesting, thanks. I'll have to look at it some more when I get some time.
 08-03-2021, 05:48 PM
#4202
Contributing Member
Thread Starter
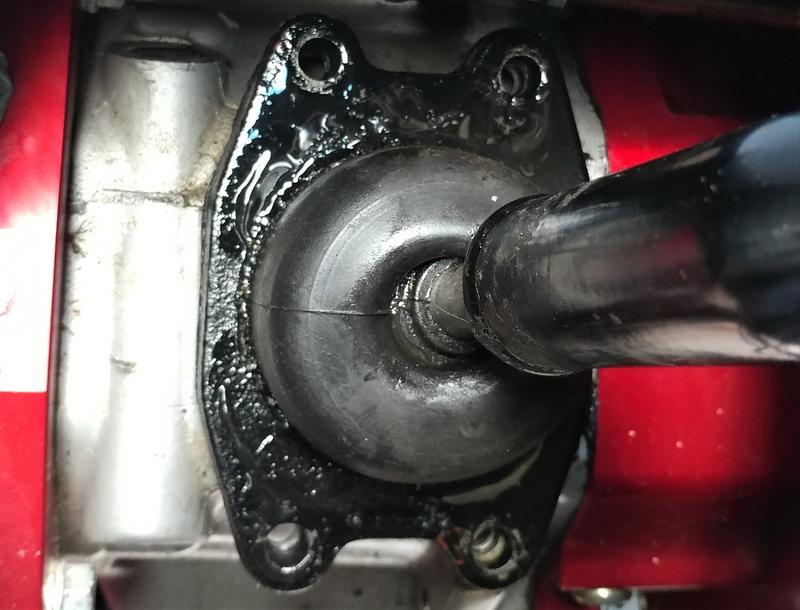
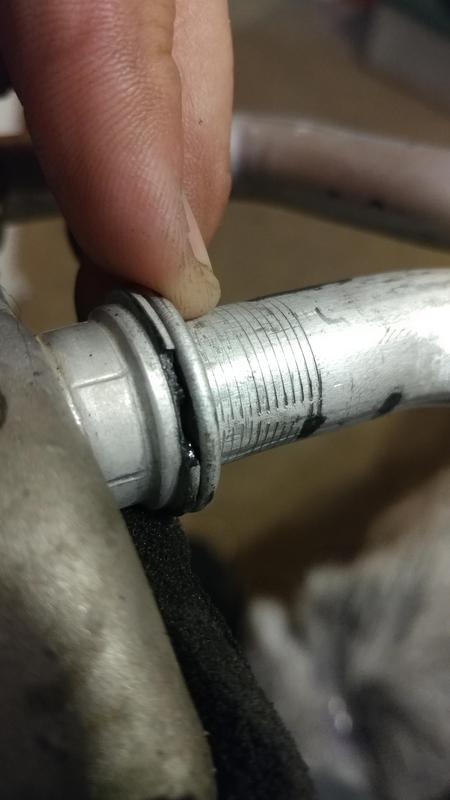
Separated the taco box from the transmission. The tacobox had about a half gallon of oil in it (!), much of which came from the transmission. The transmission did not lose any oil during our 2 day 4th gear 60 or less mph drive home. That points all the fingers to high-speed fluid transfer.
But why? And exactly how?
The seal looks terrific. Best as I can tell it just can't deal with the 5th gear highway speeds. Just gotta figure out why.
Marlin's sales team response was to install a new seal. I'm not sure how in the he...ck that's supposed to help. The seal that's in there has what? 4,000 miles on it? It's not damaged, either. As much as I wish that was the solution, I don't believe that's gonna do it.
Been doing as much reading as I can find. I saw a post by theesotericone that mentions using silicone on the splines under the coupler or the taco box will steal trans fluid from the transmission. Gonna think on that one. Is that where I'm losing oil, via the splines under the coupler? Is the seal holding and it's just migrating under the coupler?
I also saw a post by Big Mike (Marlin) that said the extra space in the transmission tail housing utilized by the taco box for oil caused the manual trans trucks to pull oil from the transmission. Again, past the transmission output coupler housing seal...or through the splines housed by the coupler itself? That really is the only places it can be coming from.
I really need to do some more searching, this can't be the only 3.4 m/t 4Runner that's had this problem, the truck just isn't that special....except for to me.
Last edited by habanero; 08-04-2021 at 05:57 PM.
08-04-2021, 06:34 PM
#4203
Contributing Member
Thread Starter
Drained the transmission, found metal bits. Bah! Pulled the starter, inspection plate, clutch slave and bracket, and the 4 bolts for the transmission mount before I ran out of daylight and blood (mosquitoes, ugh).
Gonna send the transmission back to Marlin with coupler, coupler housing, and seal still on it- see what they think in person, and also have them rebuild it. Looking at the timeline it looks like I'll be re-installing the transmission in December assuming they can get the supplies they need.
Well, at least I'm used to freezing my rear off while working on the truck out in the driveway. Marlin still seems to think all it needs to stop the taco box from stealing the transmission fluid is a new seal and to use silicone on the coupler housing (which I did the first time too).
At least I'll get more time to drive it before the next big trip, and I'll know to check the transmission too, before it gets noisy. Crossing fingers some kind of magic happens and the taco box stops getting greedy with the transmission's fluid.
Also, some time ago I asked about the terrible fuel smell that would come from around the charcoal canister when wheeling in a steep downhill manner. That didn't happen this time with the 'new' tank from Mighty Mouse. I believe the culprit was the fuel tank vent valve...
Fuel Shut Off Solenoid 77380-26010. It sure was nice not getting gassed to death! I think I still have mine around here somewhere, I'll have to see if I can figure out if it's stuck open.
Last edited by habanero; 08-04-2021 at 06:36 PM.
08-05-2021, 06:00 AM
#4204
Registered User

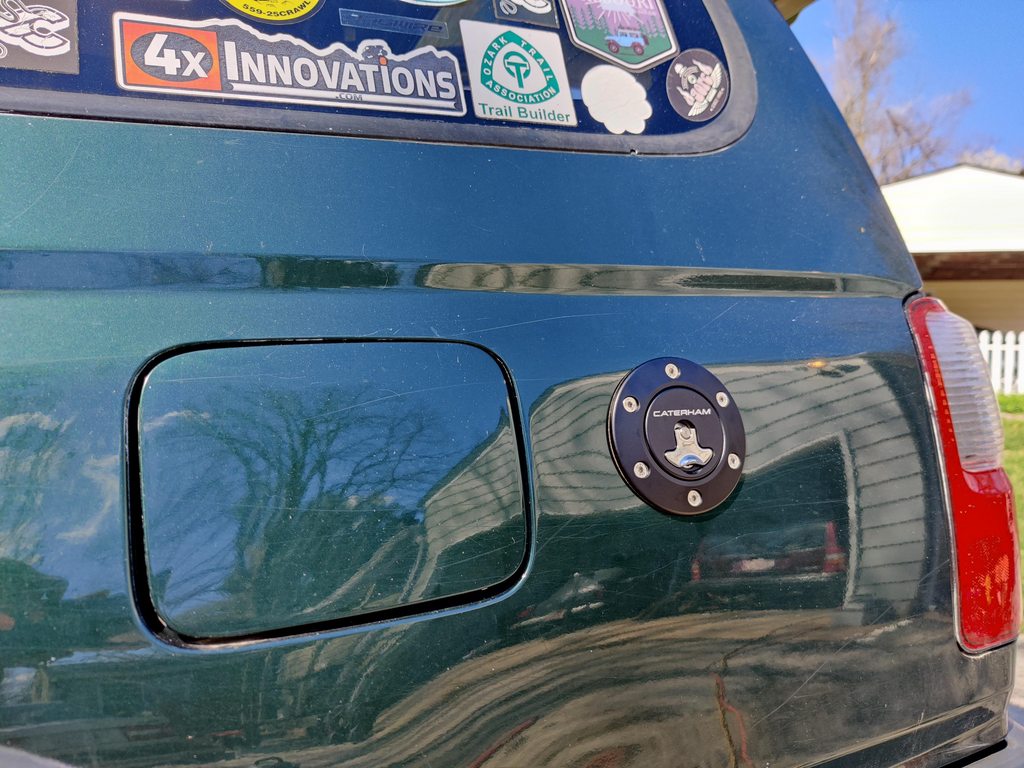
There was the unfortunate gas tank venting incident with my new aux tank. We had stopped along the Kokopelli Trail (between Fruita and Moab). And heard a bit of a hissing noise coming from my aux tank filler. Without thinking it through, I flipped the lever on it:
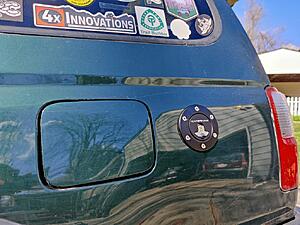
Which vents it, and it the tank was pretty full, so it spewed out a cup of gas or so before I had the presence of mind to flip the lever back down. And... all over Hab's legs and feet.
OK, new important safety tip for me. When the gas cap is hissing, DON'T FLIP THE LEVER! Hah.
On the plus side, the aux tank was a lot easier to deal with than the roof mounted gas cans. Just fill normally (well... slowly, for some reason) at the pump, when the main tank gets low just flip a switch and transfer fuel over to it. The aux tank was supposed to hold 15 gallons, about the most I could ever fit in it is about 13.5 for whatever reason. Sill, extends the range very nicely, holds the weight down low.
The following users liked this post:
chuckles89 (08-09-2021)
08-05-2021, 08:53 AM
#4205
Contributing Member
Thread Starter
If he'd have warned me I'd have moved out of the line of fire! I mean fuel,
I was at least 6' from it so at least I didn't get a direct shot to the torso.
Transmission is out and finishing up draining whatever will come out.
I really dislike guide pins. I also really dislike hitting my head on the corner of the cross members. That always smarts.
I was at least 6' from it so at least I didn't get a direct shot to the torso.
Transmission is out and finishing up draining whatever will come out.
I really dislike guide pins. I also really dislike hitting my head on the corner of the cross members. That always smarts.
Last edited by habanero; 08-05-2021 at 08:57 AM.
08-06-2021, 09:13 AM
#4207
Contributing Member
Thread Starter
When it hurts to much to even say words, but I sure do think them!!
Went to Home Depot, got a 38 gallon HDX tote. Put a leftover bit of board from the bathroom remodel in the bottom for strength, packed it to the gills with stuff, ziptied the lid on.
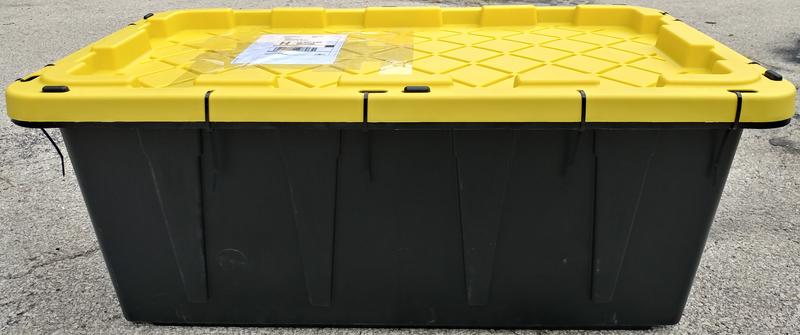
The transmission is packaged for the shipping, just waiting for an extra couple of hands to get home from work to help get it into the car.
I was able to gently put the transmission in the box, but the box is too awkward to lift my ownself.
Marlin says they're going to inspect it and see what needs to be done, rather than simply doing a full rebuild. I really appreciate they're trying to help me out and trust their judgement either way.
Customer service has been excellent. They've answered all my emails and are trying to help me get this thing figured out. I'll do what they suggest and hopefully whatever happened gets sorted and it doesn't happen again,
but you know the slightest drip from the taco box will make me paranoid as heck about checking ALL THE THINGS!
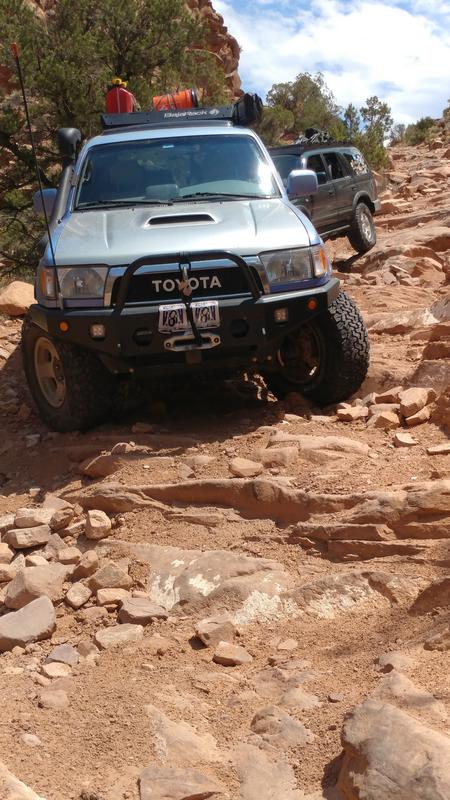
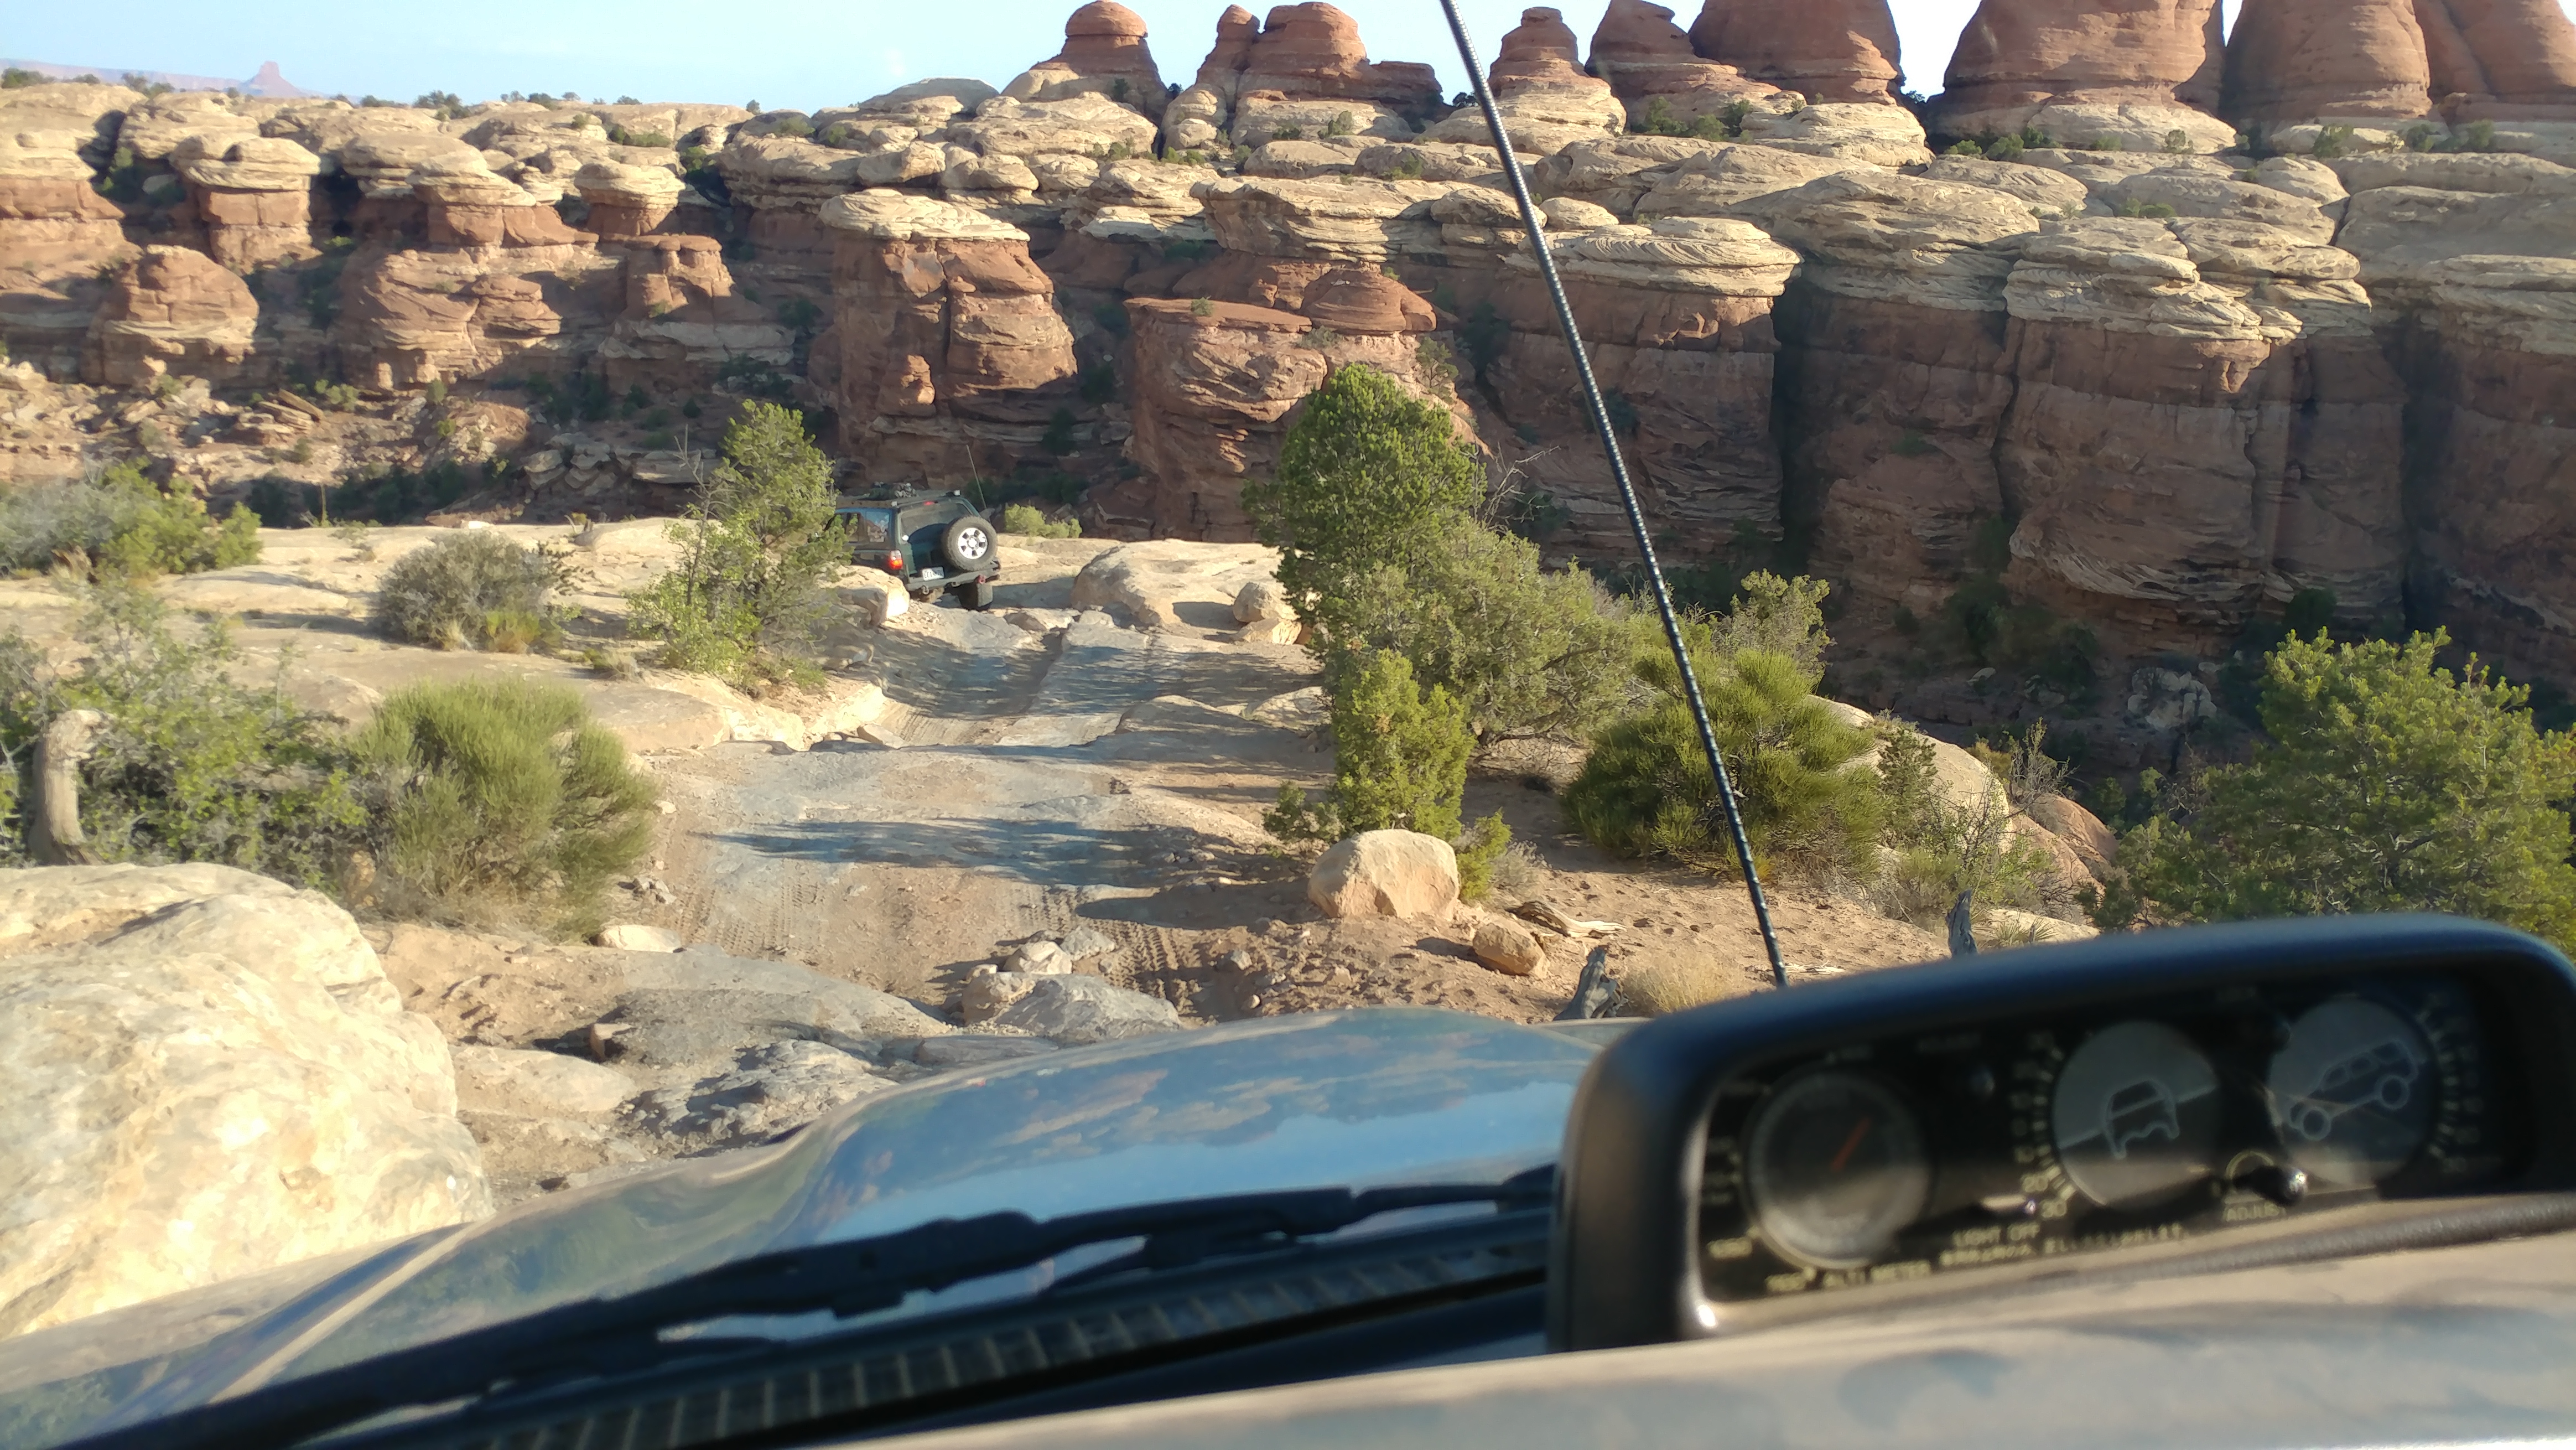
Here's some trip pics. We did McInnis canyon/Kokopelli trail,

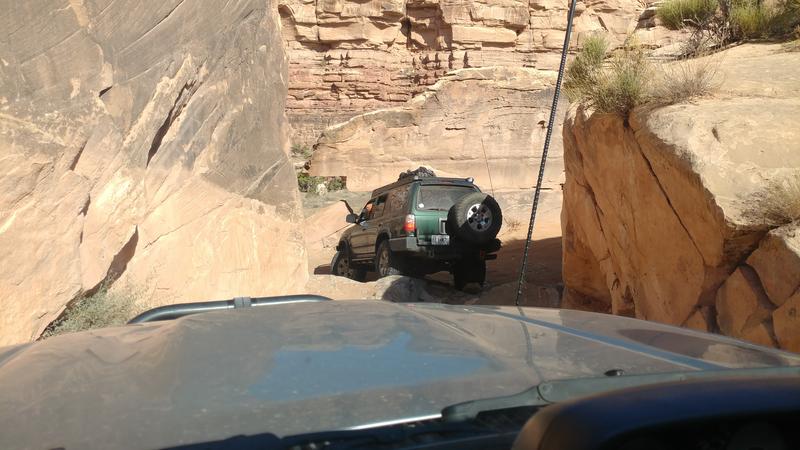
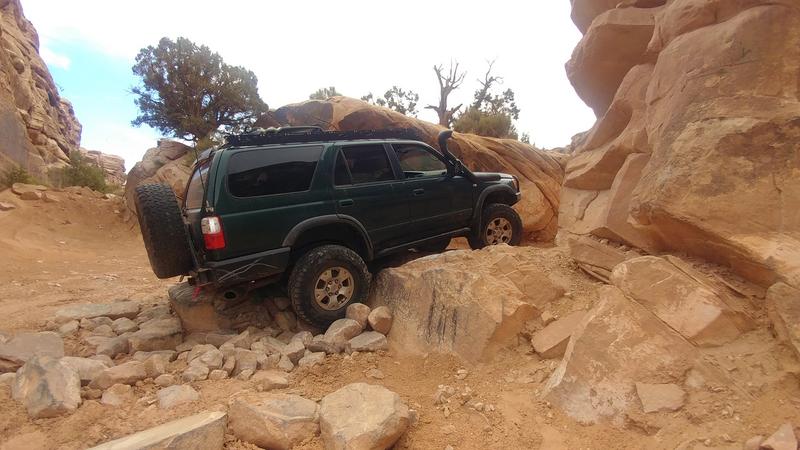
Rose Garden Hill downwards,
The Maze District, the view from Panorama Point

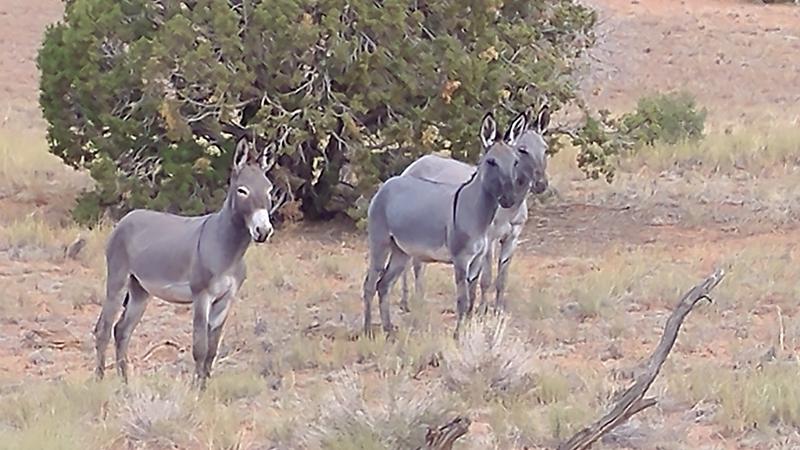
and wild burros on the way out
Elephant Hill

and over to the Joint Trail (hiking) trailhead.
I had some plans for Leadville, but will save them for next year.
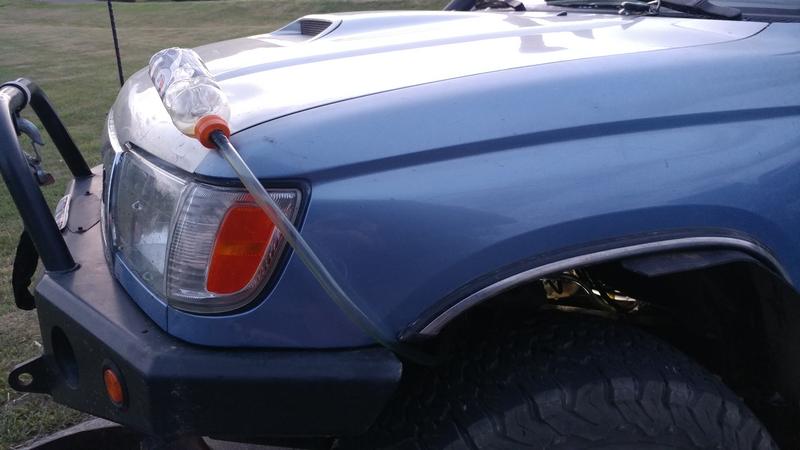
Once I finally figured out the transmission situation I kicked myself a million times and also made a funnel out of stuff I had in the truck. Gatorade bottle from the trash with the bottom cut off and a hole cut into the lid, electrical tape to create a decent seal, extra siphon hose (I use a jiggle-type siphon to get gas out of the cans on the roof and into the truck). I already had a half-gallon of 75w90 since I keep fluids on hand for these trips.
Went to Home Depot, got a 38 gallon HDX tote. Put a leftover bit of board from the bathroom remodel in the bottom for strength, packed it to the gills with stuff, ziptied the lid on.
The transmission is packaged for the shipping, just waiting for an extra couple of hands to get home from work to help get it into the car.
I was able to gently put the transmission in the box, but the box is too awkward to lift my ownself.
Marlin says they're going to inspect it and see what needs to be done, rather than simply doing a full rebuild. I really appreciate they're trying to help me out and trust their judgement either way.
Customer service has been excellent. They've answered all my emails and are trying to help me get this thing figured out. I'll do what they suggest and hopefully whatever happened gets sorted and it doesn't happen again,
but you know the slightest drip from the taco box will make me paranoid as heck about checking ALL THE THINGS!
Here's some trip pics. We did McInnis canyon/Kokopelli trail,
Rose Garden Hill downwards,
The Maze District, the view from Panorama Point
and wild burros on the way out
Elephant Hill
and over to the Joint Trail (hiking) trailhead.
I had some plans for Leadville, but will save them for next year.
Once I finally figured out the transmission situation I kicked myself a million times and also made a funnel out of stuff I had in the truck. Gatorade bottle from the trash with the bottom cut off and a hole cut into the lid, electrical tape to create a decent seal, extra siphon hose (I use a jiggle-type siphon to get gas out of the cans on the roof and into the truck). I already had a half-gallon of 75w90 since I keep fluids on hand for these trips.
The following 2 users liked this post by habanero:
75w90mantraN (08-13-2021),
chuckles89 (08-09-2021)
08-09-2021, 01:07 PM
#4208
Contributing Member
Thread Starter
96 4Runner 320,123 miles
Yesterday I pulled the intermediate steering shaft, the one with 2 u-joints, out of an '02. It was a combination of a noise and the missing rubber in the seal that goes in the firewall insert.
Neither the seal or the intermediate shaft is available for the 96, you can still get the seal for 98+ 4Runners Toyota 45292-35090
I wasn't sure how the two would be different or if the 'new' one would swap in but I figured I'd give it a try.
Straightened the steering wheel, tied it so it wouldn't rotate, disconnected the battery (air bag), took the lower panel off, took the instrument cluster and key surround off, unplugged whatever needed it, removed the steering shaft pinch bolt, the firewall cover and bucket nuts for the steering shaft, the 4 nuts holding the steering column to the truck. The main body on the column will want to rotate, I bungeed it to the steering wheel to keep it from rotating separate of each other. I also had to remove the pinch bolt above the rag joint too.
The intermediate steering shaft removes from inside the truck, the bucket will get installed and don't forget to at least throw the plastic bucket cover on the shaft before adding the steering column.
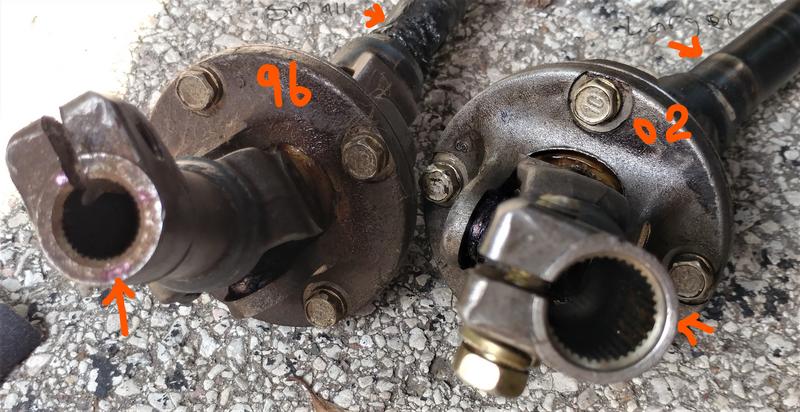
There were 2 differences.
One, the 96 doesn't have the slip joint and the steering shaft diameter is smaller. This is reflected in the intermediate shaft, with a smaller diameter splined hole for the 96 and a larger one for the 02. I would not be able to use the steering wheel side of the intermediate shaft from the '02 if I wanted to keep my steering column, which I did (and we'll not even talk about wiring issues if I had swapped wheels).
Two, the 96's lower shaft is also a smaller diameter where the seal rests on it. Both are otherwise the same so I can, use the '02's lower shaft.
4 little bolts hold the 2 sections of the intermediate shaft together. When you unbolt them pay attention to how it comes apart so you can get it back together again. The inside contains a plastic disc with a spring built in, and another wavey spring. The disc and spring combo in the '02's were a lot...springier...than the 96's but surprisingly the 96's u-joints were in much better shape than the '02's.

I ended up using the guts from the '02 and the shafts from the '96. No more floppy shaft.
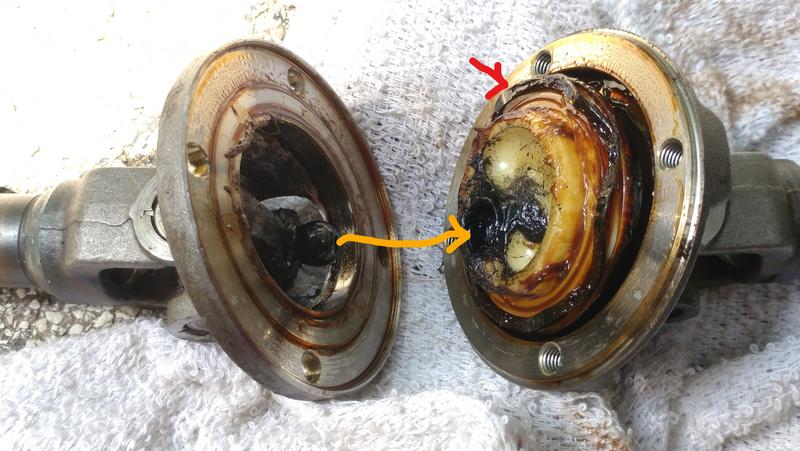
Red arrow shows wavey spring. It fits on the side with the non-threaded bolt holes.
Orangey arrow shows that the ball fits in the little spot that has a spring inside. There is one on each side.
For the bucket seal I reinforced the '02's seal with FIPG, put the donut that was the 96's seal on to make up for the bigger seal hole, and called it done.
There is only one way the lower intermediate shaft fits into the rack. There is a missing spline on one side that goes opposite the pinch bolt side. That side has a large flat area.
Make sure you get your steering wheel on straight and don't let anything rotate too much.
I didn't take pics of the steering column removal, but it's not all buttoned up so still can if anyone wants.
Yesterday I pulled the intermediate steering shaft, the one with 2 u-joints, out of an '02. It was a combination of a noise and the missing rubber in the seal that goes in the firewall insert.
Neither the seal or the intermediate shaft is available for the 96, you can still get the seal for 98+ 4Runners Toyota 45292-35090
I wasn't sure how the two would be different or if the 'new' one would swap in but I figured I'd give it a try.
Straightened the steering wheel, tied it so it wouldn't rotate, disconnected the battery (air bag), took the lower panel off, took the instrument cluster and key surround off, unplugged whatever needed it, removed the steering shaft pinch bolt, the firewall cover and bucket nuts for the steering shaft, the 4 nuts holding the steering column to the truck. The main body on the column will want to rotate, I bungeed it to the steering wheel to keep it from rotating separate of each other. I also had to remove the pinch bolt above the rag joint too.
The intermediate steering shaft removes from inside the truck, the bucket will get installed and don't forget to at least throw the plastic bucket cover on the shaft before adding the steering column.
There were 2 differences.
One, the 96 doesn't have the slip joint and the steering shaft diameter is smaller. This is reflected in the intermediate shaft, with a smaller diameter splined hole for the 96 and a larger one for the 02. I would not be able to use the steering wheel side of the intermediate shaft from the '02 if I wanted to keep my steering column, which I did (and we'll not even talk about wiring issues if I had swapped wheels).
Two, the 96's lower shaft is also a smaller diameter where the seal rests on it. Both are otherwise the same so I can, use the '02's lower shaft.
4 little bolts hold the 2 sections of the intermediate shaft together. When you unbolt them pay attention to how it comes apart so you can get it back together again. The inside contains a plastic disc with a spring built in, and another wavey spring. The disc and spring combo in the '02's were a lot...springier...than the 96's but surprisingly the 96's u-joints were in much better shape than the '02's.
I ended up using the guts from the '02 and the shafts from the '96. No more floppy shaft.
Red arrow shows wavey spring. It fits on the side with the non-threaded bolt holes.
Orangey arrow shows that the ball fits in the little spot that has a spring inside. There is one on each side.
For the bucket seal I reinforced the '02's seal with FIPG, put the donut that was the 96's seal on to make up for the bigger seal hole, and called it done.
There is only one way the lower intermediate shaft fits into the rack. There is a missing spline on one side that goes opposite the pinch bolt side. That side has a large flat area.
Make sure you get your steering wheel on straight and don't let anything rotate too much.
I didn't take pics of the steering column removal, but it's not all buttoned up so still can if anyone wants.
The following users liked this post:
chuckles89 (08-10-2021)
08-10-2021, 07:45 AM
#4209
Contributing Member
Thread Starter
96 4Runner 320,123 miles
*feeling abused*
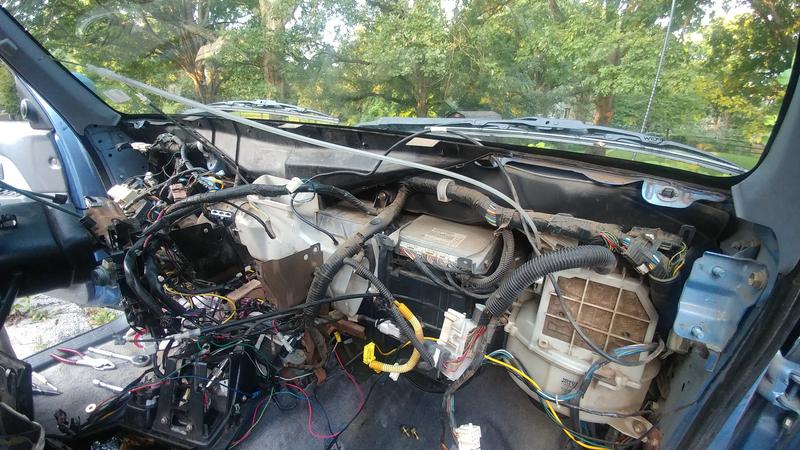
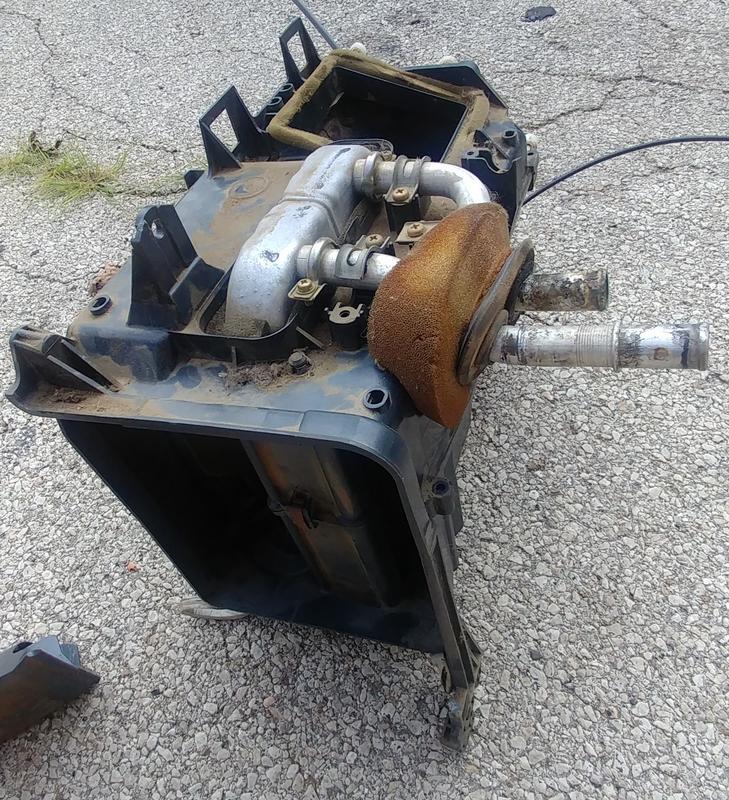
Got a little crazy, started pulling stuff apart. Been wanting to refresh the foam on the blend doors for awhile now, and flush the heater core. Looks like a need to clean the evap core again, there's some crud in that box too.
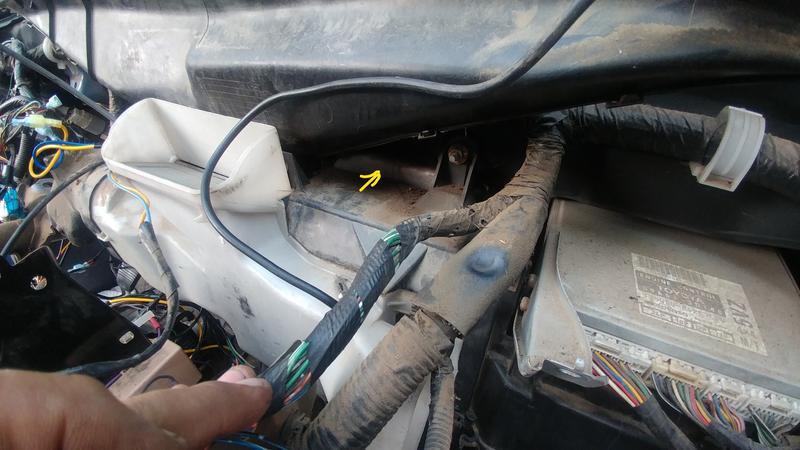
Yellow arrow marks the top of the heater core
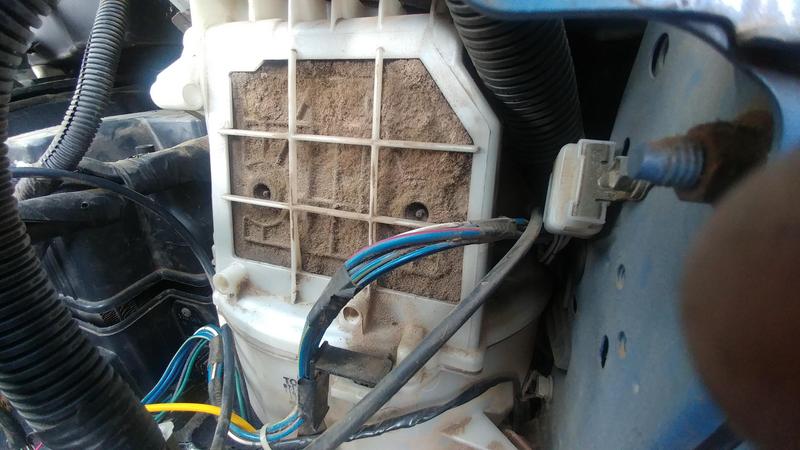
Most of the foam looks like this or missing bits
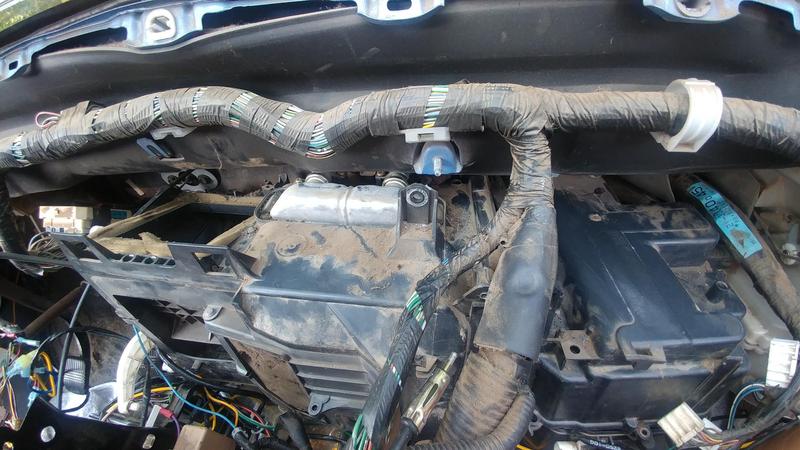
There's more heater core now
So this happened. Now I've got to foam up some blend doors, clean out the evap and box, and flush a heater core (yep, I know you don't have to pull it to flush).
*feeling abused*
Got a little crazy, started pulling stuff apart. Been wanting to refresh the foam on the blend doors for awhile now, and flush the heater core. Looks like a need to clean the evap core again, there's some crud in that box too.
Yellow arrow marks the top of the heater core
Most of the foam looks like this or missing bits
There's more heater core now
So this happened. Now I've got to foam up some blend doors, clean out the evap and box, and flush a heater core (yep, I know you don't have to pull it to flush).
The following users liked this post:
chuckles89 (08-20-2021)
08-10-2021, 02:32 PM
#4210
Registered User
Very nice write up, especially the pictures. Thank you!
BUT: you think those are bad, try cleaning out one that had been in Yuma, Az for most of it's life. The foam was a solid chunk, and the cores nearly so. Had to use a light pressure washer after soaking them for a few hours to get the dust, which was nearly a solid chunk, to loosen enough to wash out.
That dust is incredibly prevalent, and amazingly fine, so it gets into EVERYthing. Heck, the RADIO had a good solid layer of dust in it. You almost could turn the radio over and smack it to get a radio sized/shaped piece of rock out of it.
Nasty, miserable, HOT, dusty place. If you ever go off roading there, clean everything out again after you do!
Have fun!
Pat☺
The following users liked this post:
habanero (08-10-2021)
08-10-2021, 05:49 PM
#4211
Contributing Member
Thread Starter
Very nice write up, especially the pictures. Thank you!
BUT: you think those are bad, try cleaning out one that had been in Yuma, Az for most of it's life. The foam was a solid chunk, and the cores nearly so. Had to use a light pressure washer after soaking them for a few hours to get the dust, which was nearly a solid chunk, to loosen enough to wash out.
That dust is incredibly prevalent, and amazingly fine, so it gets into EVERYthing. Heck, the RADIO had a good solid layer of dust in it. You almost could turn the radio over and smack it to get a radio sized/shaped piece of rock out of it.
Nasty, miserable, HOT, dusty place. If you ever go off roading there, clean everything out again after you do!
Have fun!
Pat☺
BUT: you think those are bad, try cleaning out one that had been in Yuma, Az for most of it's life. The foam was a solid chunk, and the cores nearly so. Had to use a light pressure washer after soaking them for a few hours to get the dust, which was nearly a solid chunk, to loosen enough to wash out.
That dust is incredibly prevalent, and amazingly fine, so it gets into EVERYthing. Heck, the RADIO had a good solid layer of dust in it. You almost could turn the radio over and smack it to get a radio sized/shaped piece of rock out of it.
Nasty, miserable, HOT, dusty place. If you ever go off roading there, clean everything out again after you do!
Have fun!
Pat☺
We've been to Arizona a couple of times, and almost far south enough for Yuma, but always in the diesel VW wagon. If we ever do get down there with 4Runners I will definitely keep that in mind. The dust around Silverton CO is superfine in areas, until we got snorkels it was a guaranteed air filter replacement and maf cleaning on the way out.
08-15-2021, 01:01 PM
#4212
Registered User
Uck! Tarry crumbly foam is bad enough, at least most of it washed off with some mild scrubbing. There was some dust on everything, but nothing like that!
We've been to Arizona a couple of times, and almost far south enough for Yuma, but always in the diesel VW wagon. If we ever do get down there with 4Runners I will definitely keep that in mind. The dust around Silverton CO is superfine in areas, until we got snorkels it was a guaranteed air filter replacement and maf cleaning on the way out.
We've been to Arizona a couple of times, and almost far south enough for Yuma, but always in the diesel VW wagon. If we ever do get down there with 4Runners I will definitely keep that in mind. The dust around Silverton CO is superfine in areas, until we got snorkels it was a guaranteed air filter replacement and maf cleaning on the way out.
Heck, even just driving around in town, in the 87 4Runner OR the pickup, I'd have to clean it all out once a month or so. I was very glad to work nights (7PM to 7AM every night). If I had nothing going out at work, time to work on a vehicle

Being the boss helped too. Lots of paperwork, other than that, not USUALLY a lot to do at night.
If you get down there, take a look for the Aerostat Site. That's where I worked at the time. It's a mile or so off 95, about 1/2 way to Quartzite from Yuma. There should be a large, LARGE, white balloon in the air above it, unless it's down for maintenance, which is a lot more common since Lockheed took over the contract. Stupid Air Force...
Have fun!
Pat☺
The following users liked this post:
habanero (08-15-2021)
08-18-2021, 05:10 AM
#4213
Registered User
We saw an Aerostat a few years ago on a road trip we did to Big Bend/Carlsbad/etc. The one near Marfa. Kind of funny, from a long way off I saw this big silvery blob just hovering in the air. Can't be a plane, because it's not moving. What is it??? We got closer, it got larger, and we were pretty close before you could see what it really was.

08-18-2021, 12:40 PM
#4215
Contributing Member
Thread Starter
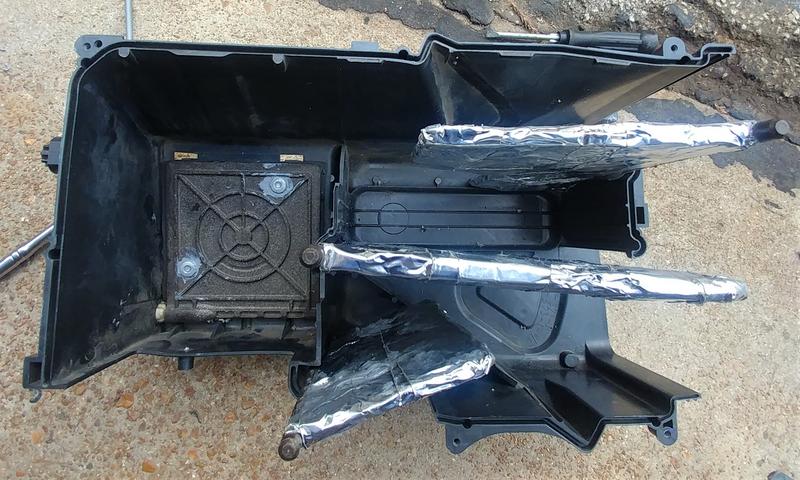
Surprisingly, no. There was a couple of pine needles in the blower wheel and LOTS of dust.
Does a cute little spider count?
Today I picked up the heater core o-rings Toyota #96761-19016 today, The blend doors have either foam or foam covered in aluminum tape (next to heater core). All that's left is installing the o-rings and re-foaming the rest of the duct-work.
I've already re-installed the blower motor housing and evap box (that wasn't fun with the evap core still part of the a/c system).
Pics at some point.
08-18-2021, 07:17 PM
#4216
Registered User
Join Date: Jan 2011
Location: exo-reality -wave if you see me; Front Range, CO
Posts: 667
Received 100 Likes
on
79 Posts
Curious how you refoamed those doors. And how they came out.
I've noted mine are like archaeological artifacts. "You can't afford to touch".
I've noted mine are like archaeological artifacts. "You can't afford to touch".
08-19-2021, 02:34 PM
#4217
Contributing Member
Thread Starter
I couldn't find much info on the foam so I used a sheet of craft foam cut and glued on, then a couple of cute little bolt and nut sets with big flanges on both ends (for their size) that I'll have to find the name for. Near the heater core I wrapped the re-foamed doors with aluminum tape as well. I don't trust that the foam would be okay with the heat. Guess I'll find that out! Will post how they hold up after a bunch of runs with heat, it may be a while.
Pics when I get organized, the heater box is 99% ready to be reinstalled. I still have to stick some weather sealing on the ductwork that needs it. Not much left of the foam there but for a couple of chunks and remnants of the tape.
Here's the bottom half of the heater core housing. You can kind of see the nut/bolt things in the square door (no foam on that side). There are 2 in every door. You can also see the aluminum taped doors...that was hard to do because I didn't want to take the doors out and stress the plastic posts so it was all done while still installed. The top posts just rest in the upper half so no stressed plastic there.
There's something big and flat sitting on the kitchen floor. Two of them, actually. My husband is up to something....
Last edited by habanero; 08-19-2021 at 02:47 PM.
The following 2 users liked this post by habanero:
chuckles89 (08-20-2021),
coopster (08-20-2021)
08-22-2021, 05:27 PM
#4218
Contributing Member
Thread Starter
Heater core with tubes carefully pulled
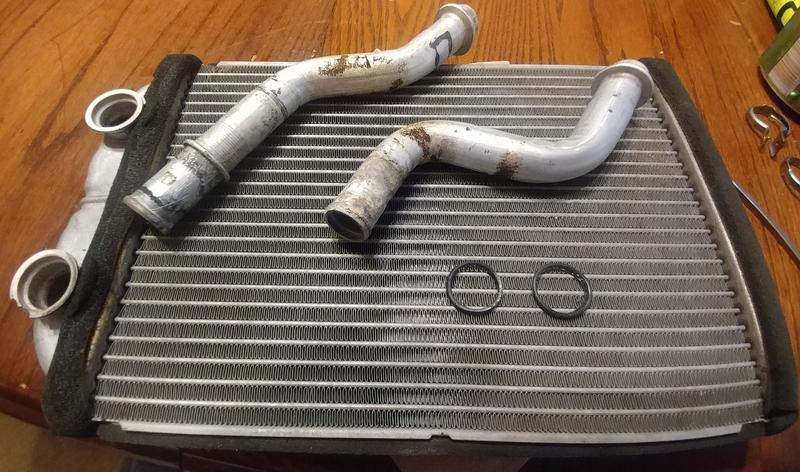
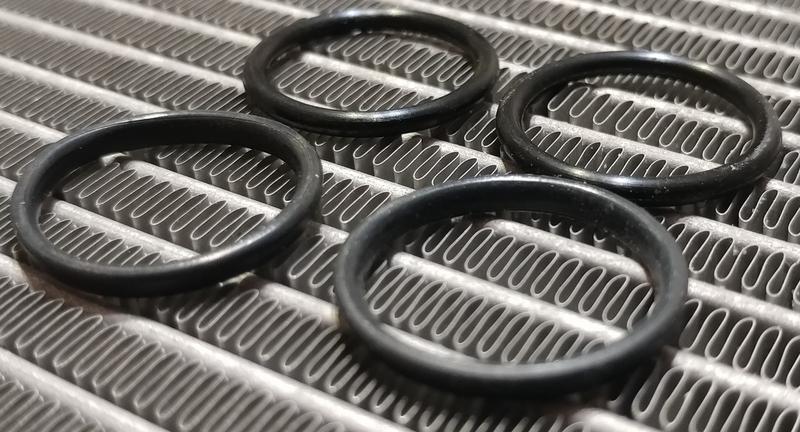
Heater Core o-rings #96761-19016 old ones (in front) didn't look as bad as a lot of the other o-rings and seals I've pulled off this truck
I'm a little worried about this.The aluminum lip should go all the way around and not be missing here. It was hidden under the retaining collar. The o-ring appears to sit below it and there is still a lot of it left for the collar.
Maybe the heater core has been replaced in the past? I bought the truck with 119,666 miles. Maybe it just degraded? The collar protects it pretty well. Given it hasn't been an issue all these years I figured I could roll with it.
Here is how the blend door actuator arms go together on the bottom of the heater core box. The footwell venting fits over the top of it and simply snaps on with a screw to hold it.
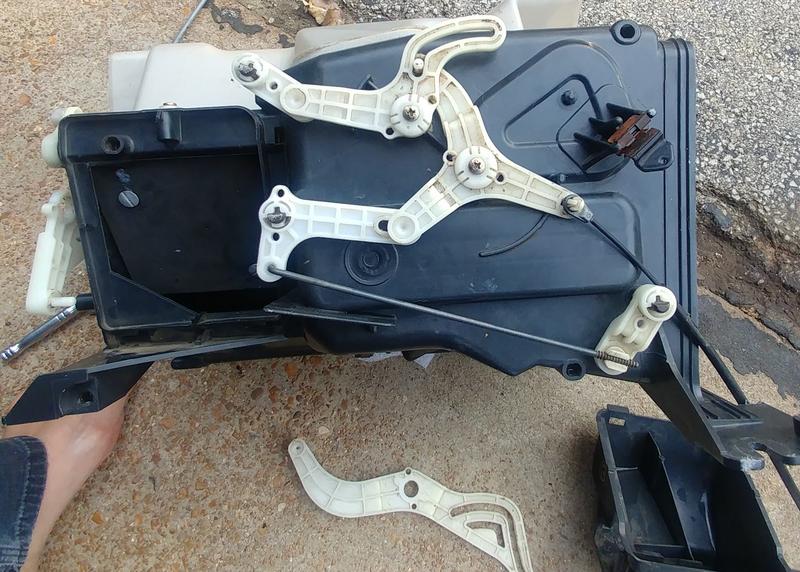
And here's the side of the heater core box blend door actuator arm routing
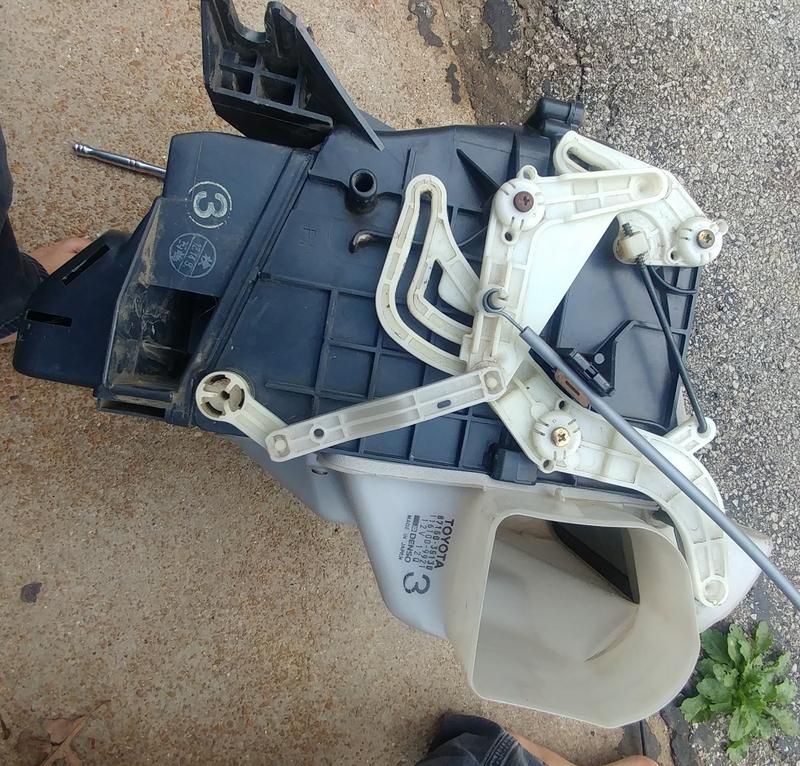
I did not enjoy fitting this back in there. Space is tight and it takes a bit of puzzling.

Heater Core o-rings #96761-19016 old ones (in front) didn't look as bad as a lot of the other o-rings and seals I've pulled off this truck
I'm a little worried about this.The aluminum lip should go all the way around and not be missing here. It was hidden under the retaining collar. The o-ring appears to sit below it and there is still a lot of it left for the collar.
Maybe the heater core has been replaced in the past? I bought the truck with 119,666 miles. Maybe it just degraded? The collar protects it pretty well. Given it hasn't been an issue all these years I figured I could roll with it.
Here is how the blend door actuator arms go together on the bottom of the heater core box. The footwell venting fits over the top of it and simply snaps on with a screw to hold it.
And here's the side of the heater core box blend door actuator arm routing
I did not enjoy fitting this back in there. Space is tight and it takes a bit of puzzling.
Last edited by habanero; 08-22-2021 at 05:42 PM.
The following users liked this post:
old87yota (08-29-2021)
08-22-2021, 05:52 PM
#4219
Contributing Member
Thread Starter
The defrost vent fits into place (big black v-shaped critter just under the windshield)
Next comes that big metal crash tube. When I was pulling the various things off of it I wrote on it what I removed in marker. That made it easy to put the right things in the right places.
This pic is actually before I took it out. Somehow I forgot to get a pic of it going back in
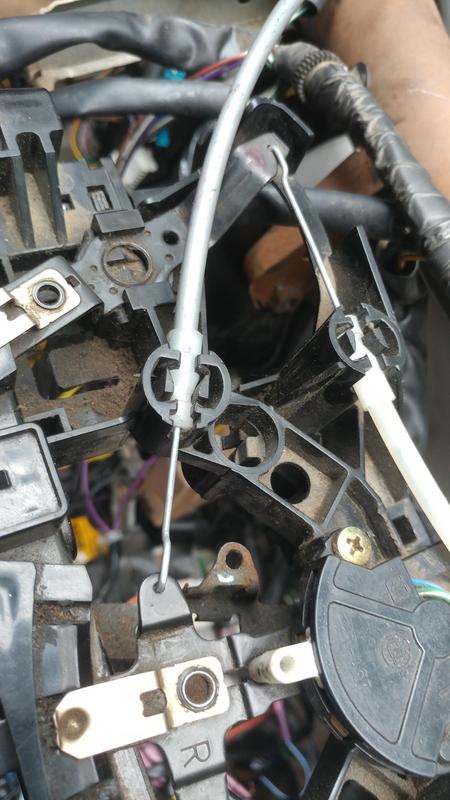
While I still had all the access I put the blend door actuator wires where they go in the controls.
There's two up top and one on the bottom.
Begin with keying the wire into the hole in the arm
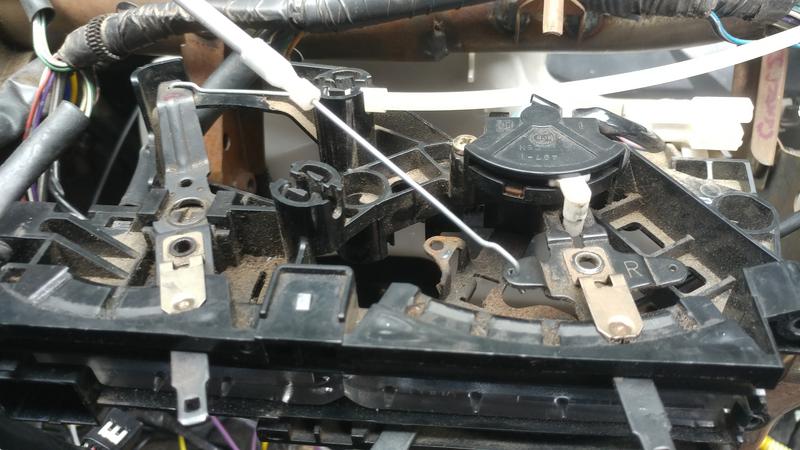
Bring wire down into the cable holder. I moved the levers as needed.
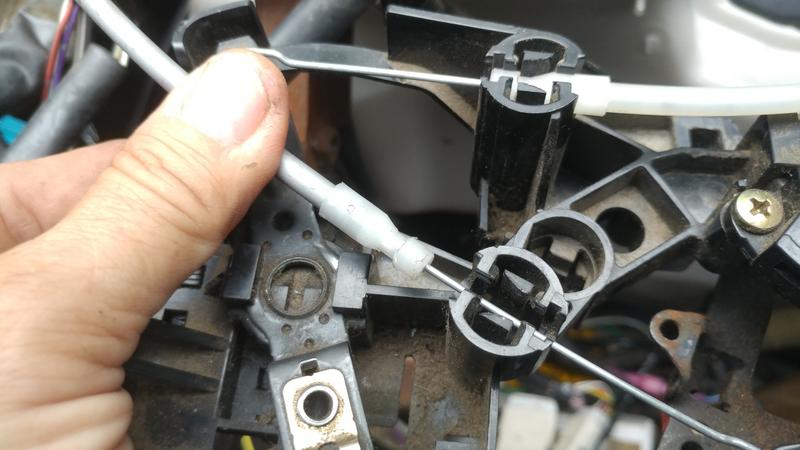
Push the cable into the holder

Until it fits into place and the retainers on either side of the cable latch on.
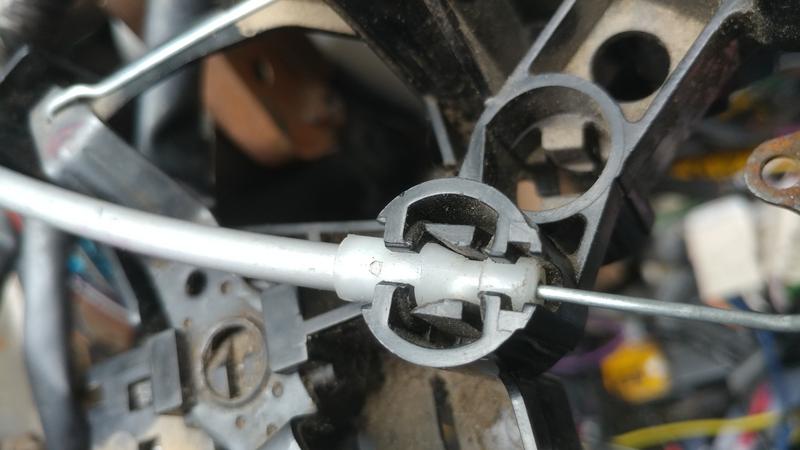
Tada!
Next comes that big metal crash tube. When I was pulling the various things off of it I wrote on it what I removed in marker. That made it easy to put the right things in the right places.
This pic is actually before I took it out. Somehow I forgot to get a pic of it going back in
While I still had all the access I put the blend door actuator wires where they go in the controls.
There's two up top and one on the bottom.
Begin with keying the wire into the hole in the arm
Bring wire down into the cable holder. I moved the levers as needed.
Push the cable into the holder

Until it fits into place and the retainers on either side of the cable latch on.
Tada!
08-22-2021, 06:01 PM
#4220
Contributing Member
Thread Starter
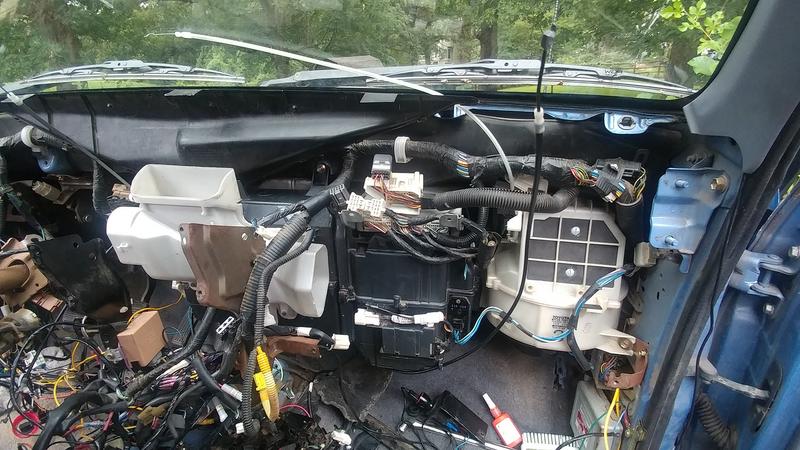
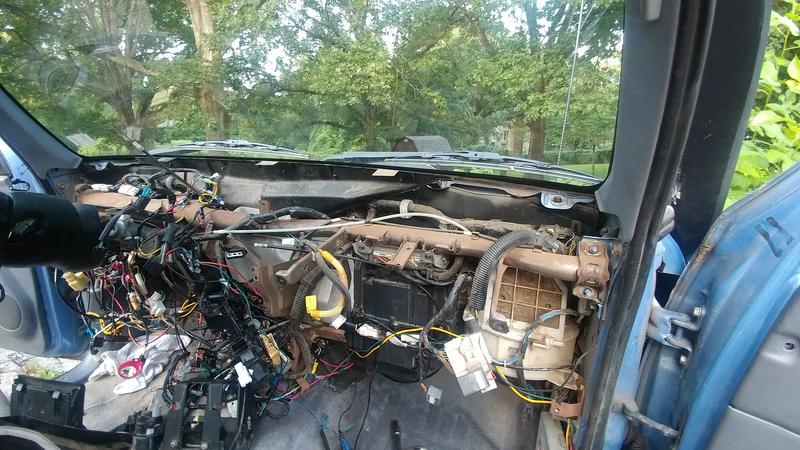
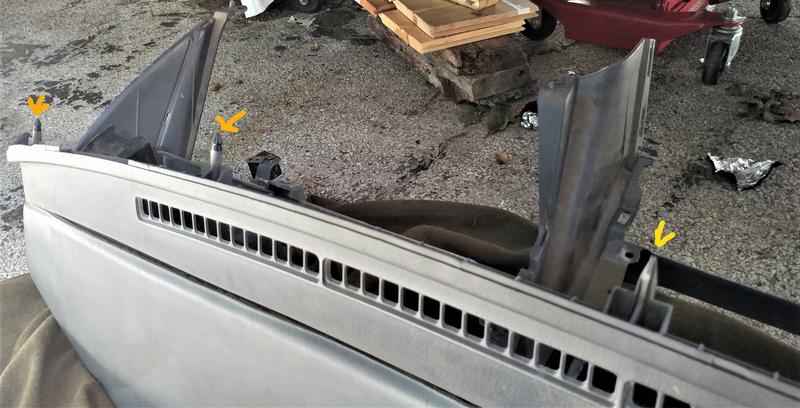
I bolted up the abs sensor that sits just before the heater core box and the center console supports (two) and triple checked for any wiring, nuts, bolts, etc. that needed to be plugged in, tightened, or moved
These are the retainers that hold the dash in the truck. Two came out with the dash and two I had to pull out of the keepers at the bottom of the windshield with pliers and reinstall in the dash
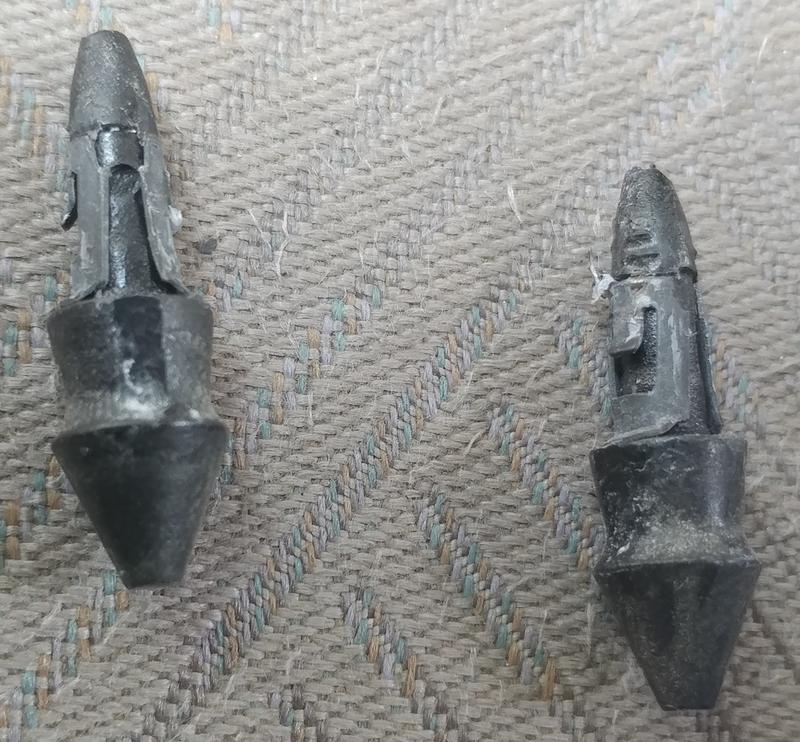
There are 4, two on either side (pic of the two on the left- orange arrows), with a plastic post in the middle (yellow arrow)
I left the airbag inside the dash, just unplugged it after disconnecting the battery.
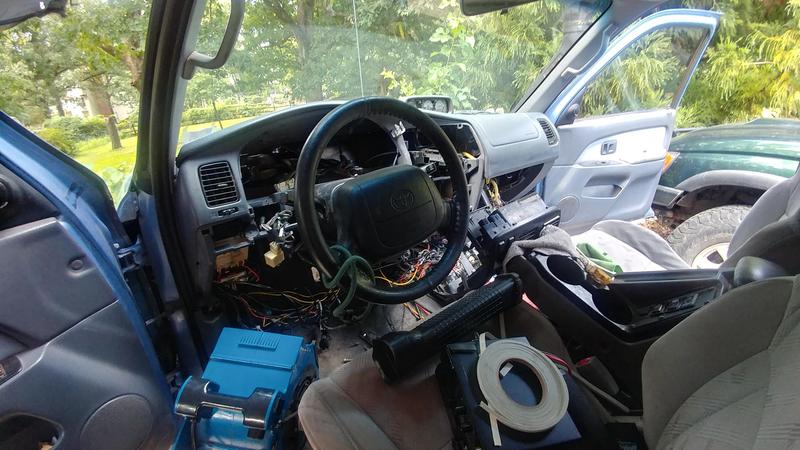
The dash pops back into place, with a few places that it keys into or goes over a stud. Everything should fit without force. Make sure all your wiring and junk goes where it's supposed to.
Some of the ductwork, the glovebox ceiling and door, the center console was worked on yesterday and a little today.
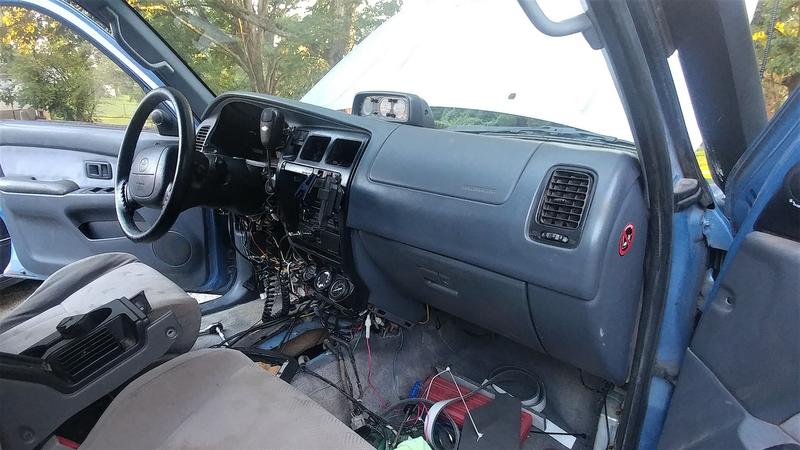
I prolly forgot steps so this is more show and tell than a write-up.
The dash part wasn't too bad, it's those boxes that required a lot of fiddling to get to fit in and then fit together like they are supposed to.
Oh! An important step- make sure the drain for the evap box is properly installed. Goes in on the firewall side, rubber gasket fits over drain at the bottom of the evap box in the footwell.
It's starting to look like a truck again.
These are the retainers that hold the dash in the truck. Two came out with the dash and two I had to pull out of the keepers at the bottom of the windshield with pliers and reinstall in the dash
There are 4, two on either side (pic of the two on the left- orange arrows), with a plastic post in the middle (yellow arrow)
I left the airbag inside the dash, just unplugged it after disconnecting the battery.
The dash pops back into place, with a few places that it keys into or goes over a stud. Everything should fit without force. Make sure all your wiring and junk goes where it's supposed to.
Some of the ductwork, the glovebox ceiling and door, the center console was worked on yesterday and a little today.
I prolly forgot steps so this is more show and tell than a write-up.
The dash part wasn't too bad, it's those boxes that required a lot of fiddling to get to fit in and then fit together like they are supposed to.
Oh! An important step- make sure the drain for the evap box is properly installed. Goes in on the firewall side, rubber gasket fits over drain at the bottom of the evap box in the footwell.
It's starting to look like a truck again.
Last edited by habanero; 08-23-2021 at 06:48 PM.
The following 2 users liked this post by habanero:
chuckles89 (08-24-2021),
old87yota (08-29-2021)


