
habanero's 1996 4Runner Build-Up Thread
 05-18-2019, 05:13 PM
#3841
Contributing Member
Thread Starter
96 4Runner, 306,xxx miles
The 4Runner didn't go anywhere today, but we did. The kid turned 16 on Thursday which makes him old enough for the local junkyards now. We dragged him out and made a day of it, much to his chagrin. Poor kid.
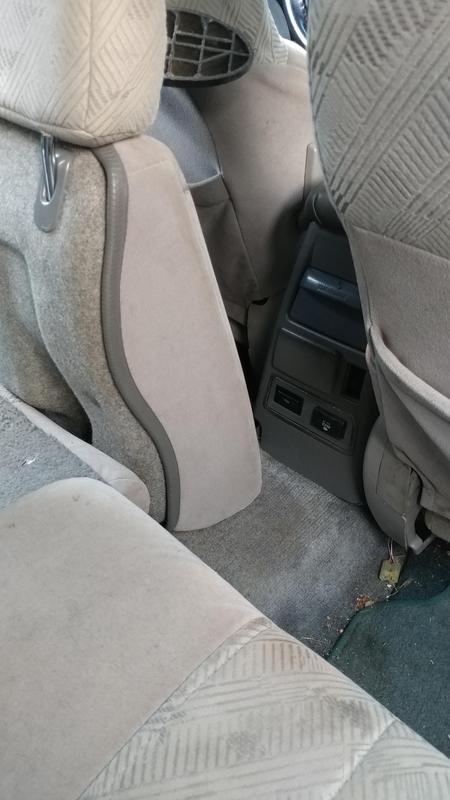
I did pretty good this time, my favorite nab was a GREY (not easy to find around here) center console out of an '01-02 sport for $15 with brackets, handbrake, everything to install. Broken rear cup holder, but I know how to fix those. Not the same color, a lighter grey, it matches the seats. I'll have to make or find a plate for my 4 switches too, they'll go right next to the brake lever in the weird cubby.
Why? Those coveted cup holders, mostly. Also, because I think I can.
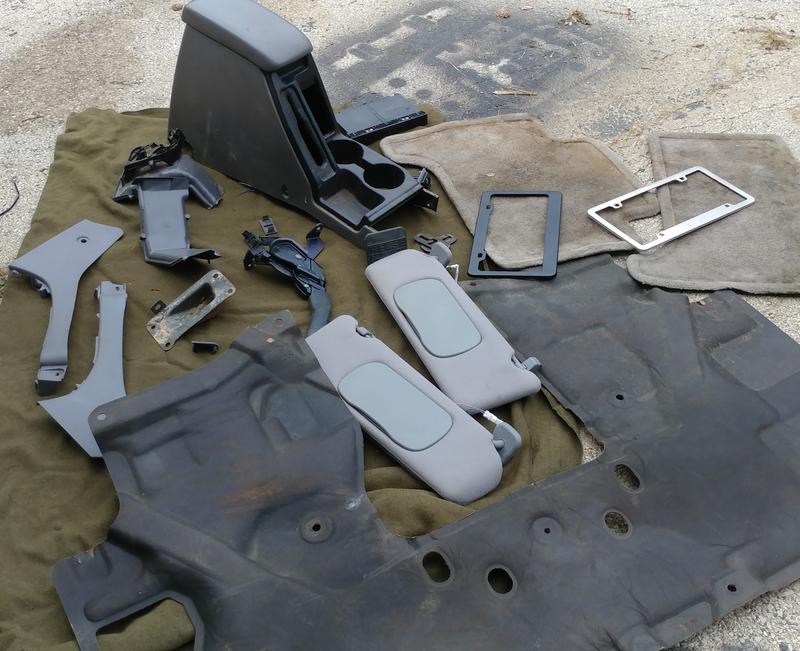
I replaced my blue plastic partly broken Clean Streams license plate frame with the black metal one that originally had 'NISSAN' stuck onto it in silver. The letters peeled right off.
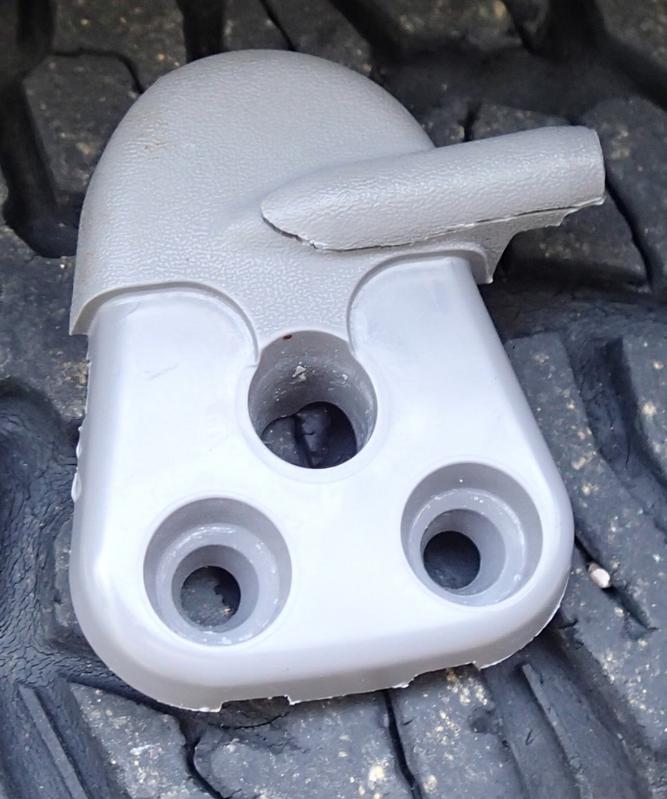
Found a set of visors out of an Avalon. They don't mount up exactly the same so we'll have to see how that goes- or if it goes at all. There may be shenanigans involved.
The Sport 4Runner I pulled the center console out of also had a hood blanket freebie so I grabbed that. The hood itself, and the scoop insert, were toast (in case anyone local was wondering).
It also had a pair of very dirty rear carpet mats. They were a freebie so I'll clean them and see what I get.
We drove the Tall Camry Highlander, no problem other than a squeally belt or two on start-up.
The 4Runner didn't go anywhere today, but we did. The kid turned 16 on Thursday which makes him old enough for the local junkyards now. We dragged him out and made a day of it, much to his chagrin. Poor kid.
I did pretty good this time, my favorite nab was a GREY (not easy to find around here) center console out of an '01-02 sport for $15 with brackets, handbrake, everything to install. Broken rear cup holder, but I know how to fix those. Not the same color, a lighter grey, it matches the seats. I'll have to make or find a plate for my 4 switches too, they'll go right next to the brake lever in the weird cubby.
Why? Those coveted cup holders, mostly. Also, because I think I can.
I replaced my blue plastic partly broken Clean Streams license plate frame with the black metal one that originally had 'NISSAN' stuck onto it in silver. The letters peeled right off.
Found a set of visors out of an Avalon. They don't mount up exactly the same so we'll have to see how that goes- or if it goes at all. There may be shenanigans involved.
The Sport 4Runner I pulled the center console out of also had a hood blanket freebie so I grabbed that. The hood itself, and the scoop insert, were toast (in case anyone local was wondering).
It also had a pair of very dirty rear carpet mats. They were a freebie so I'll clean them and see what I get.
We drove the Tall Camry Highlander, no problem other than a squeally belt or two on start-up.
Last edited by habanero; 05-19-2019 at 05:56 AM.

The following users liked this post:
old87yota (05-18-2019)
05-20-2019, 05:50 PM
#3842
Contributing Member
Thread Starter
96 4Runner 306,xxx miles
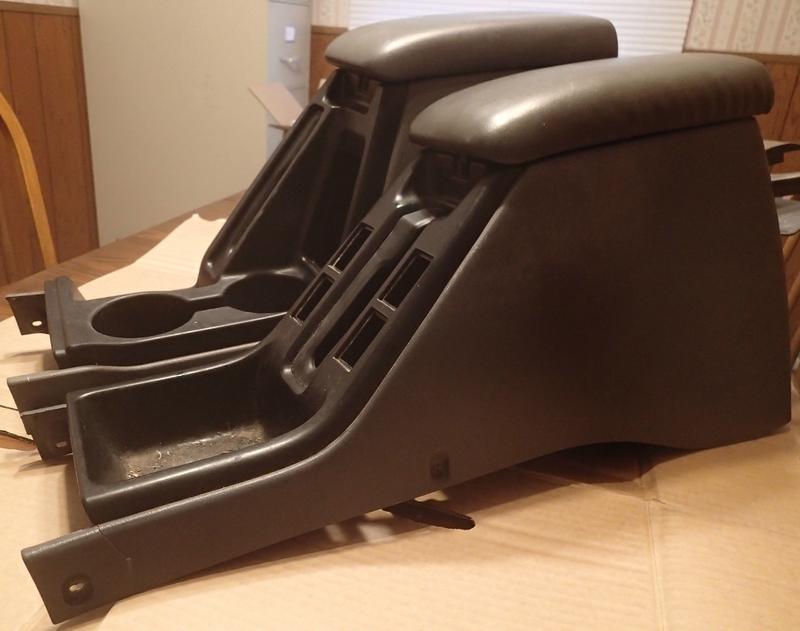
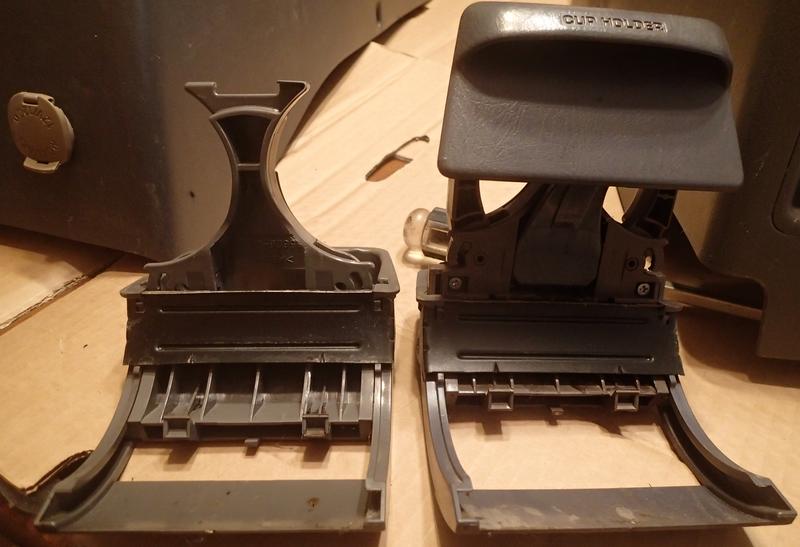
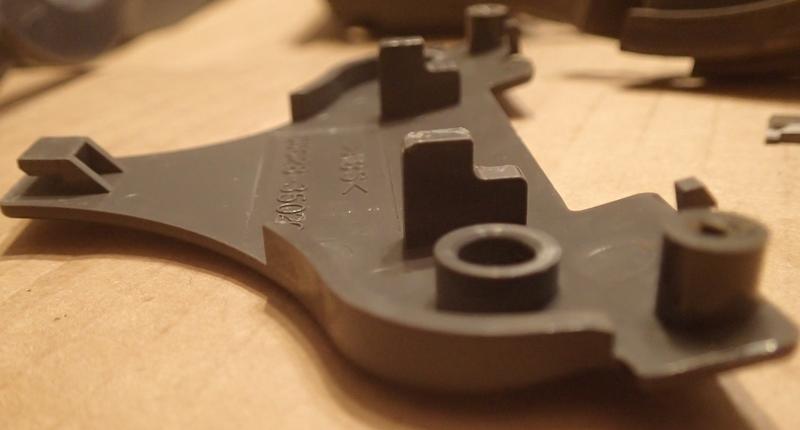
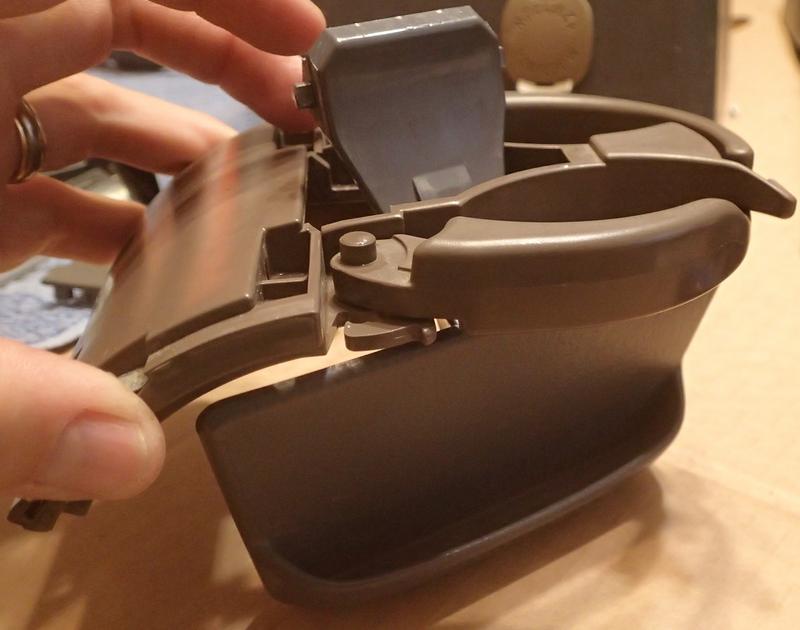
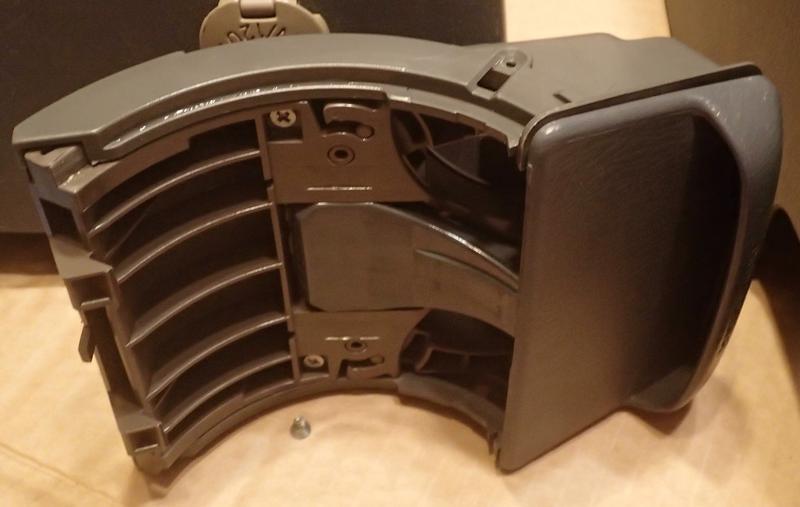
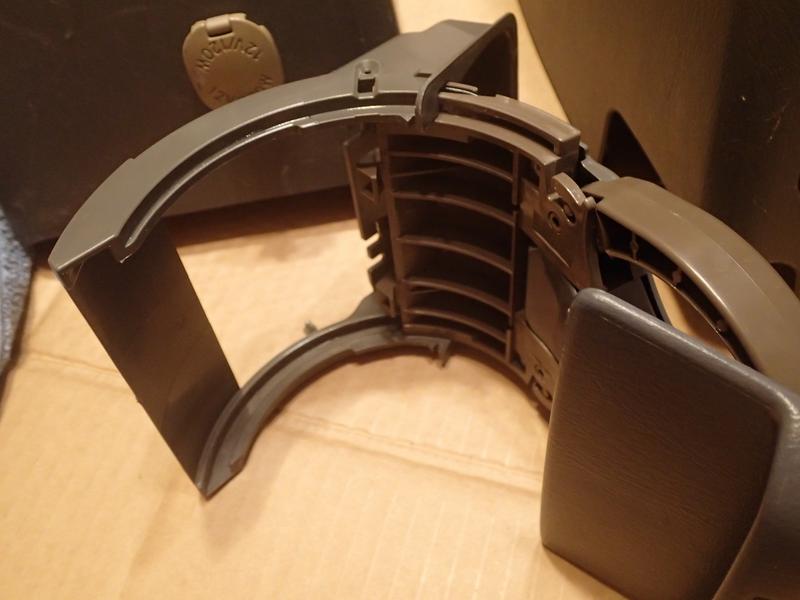
Comparison of the 96's center console with all the switch spots (closest) to the 99's with all the cup holders (in the back)....
Comparison of the 96's brake lever (bottom) and 99's (top)...
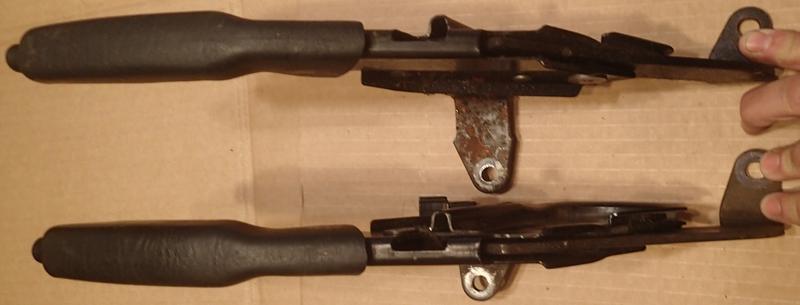
The back mount on the 96 is longer, the front mount on the 99's is longer....the difference supposedly allows for the 99's offset lever to work in the 96's tunnel. I did bend part of the brake cable guide slightly to keep the edge from rubbing the cable because it's not a straight shot. IF I don't like the way this turns out (slightly crooked) I'd need to take approx 1/4" off the right side of the tunnel to accommodate the 99's brake cable mount bucket as it's that much wider than the 96's. The holes match up so no drilling is necessary in either case.
Comparison of the 96's center console with all the switch spots (closest) to the 99's with all the cup holders (in the back)....
Comparison of the 96's brake lever (bottom) and 99's (top)...
The back mount on the 96 is longer, the front mount on the 99's is longer....the difference supposedly allows for the 99's offset lever to work in the 96's tunnel. I did bend part of the brake cable guide slightly to keep the edge from rubbing the cable because it's not a straight shot. IF I don't like the way this turns out (slightly crooked) I'd need to take approx 1/4" off the right side of the tunnel to accommodate the 99's brake cable mount bucket as it's that much wider than the 96's. The holes match up so no drilling is necessary in either case.
The following users liked this post:
chuckles89 (05-21-2019)
05-20-2019, 06:10 PM
#3843
Contributing Member
Thread Starter
96 4Runner 306,xxx miles
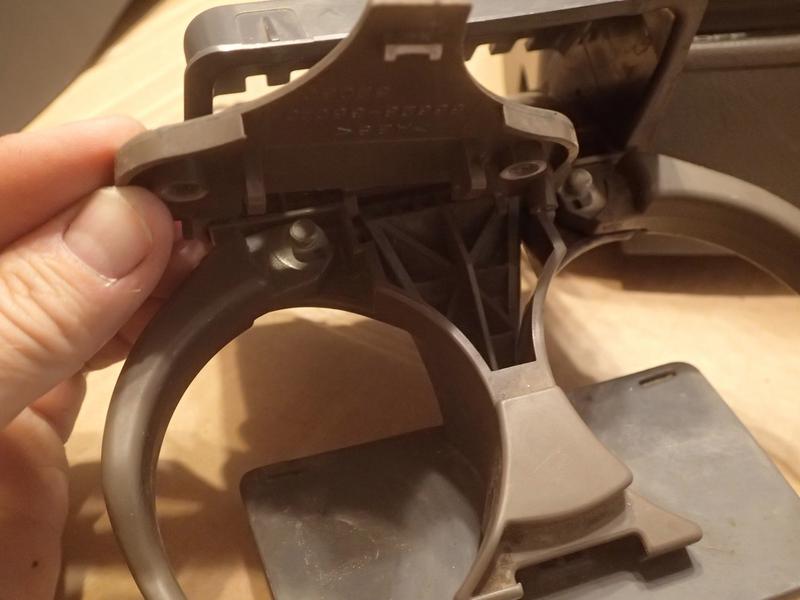
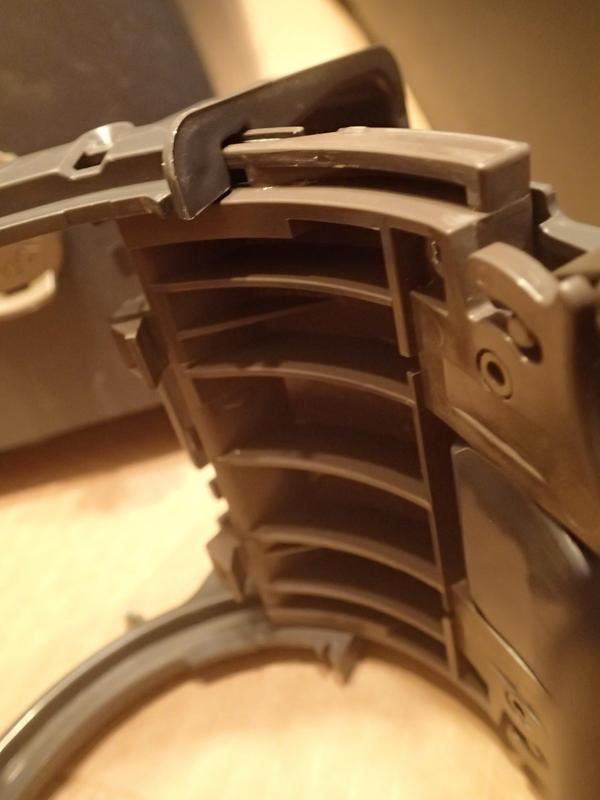
'New' console cupholder shenanigans to repair the broken cup holder using parts from the 96's- which has already been repaired.
This is gonna get colorful...
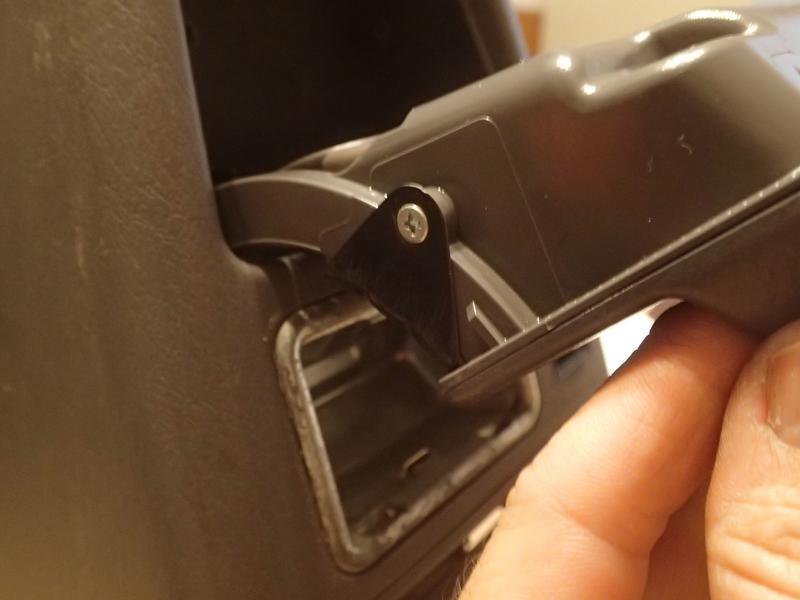
Unscrew these two little screws:
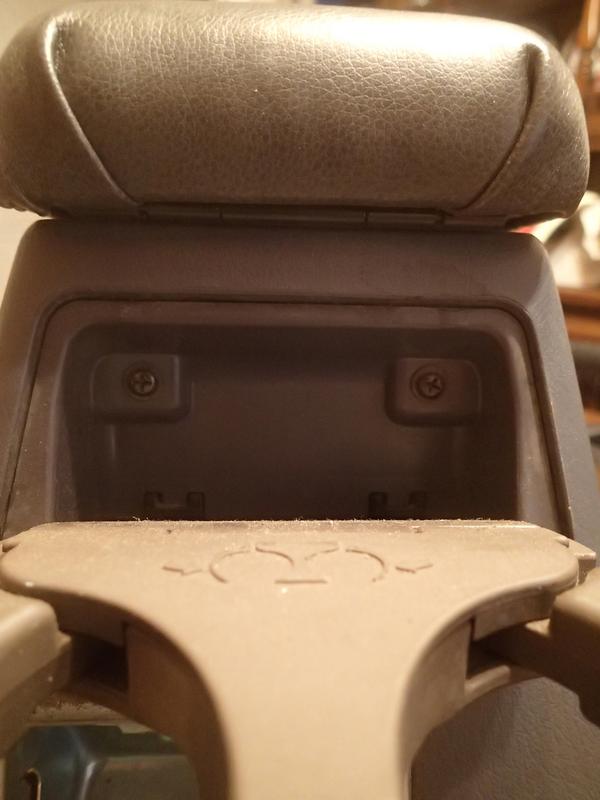
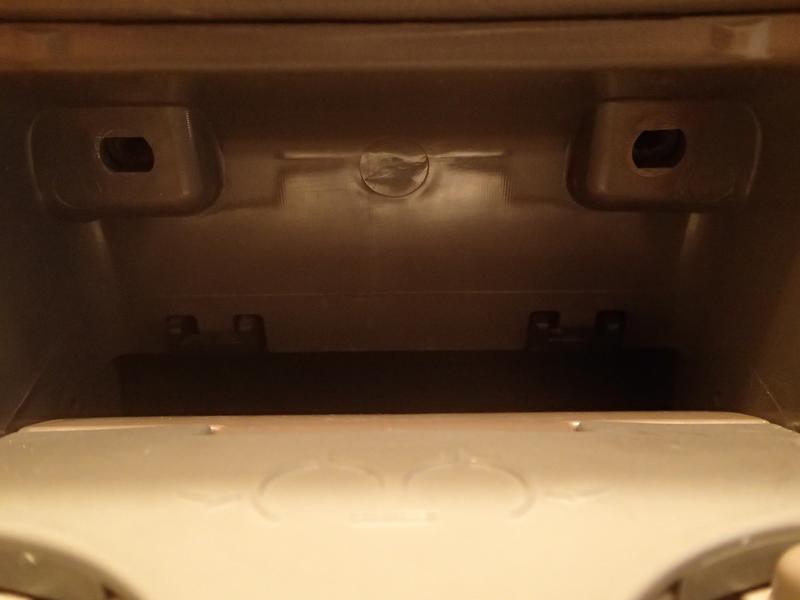
The assembly will pull up-out-forward from the center console. It is keyed into the center console so it has to be rolled up and forward to come out:

Tabs below fit into loops in center console above

Here's both assemblies:
'New' console cupholder shenanigans to repair the broken cup holder using parts from the 96's- which has already been repaired.
This is gonna get colorful...
Unscrew these two little screws:
The assembly will pull up-out-forward from the center console. It is keyed into the center console so it has to be rolled up and forward to come out:
Tabs below fit into loops in center console above
Here's both assemblies:
Last edited by habanero; 05-20-2019 at 06:43 PM.
05-20-2019, 06:11 PM
#3844
Contributing Member
Thread Starter
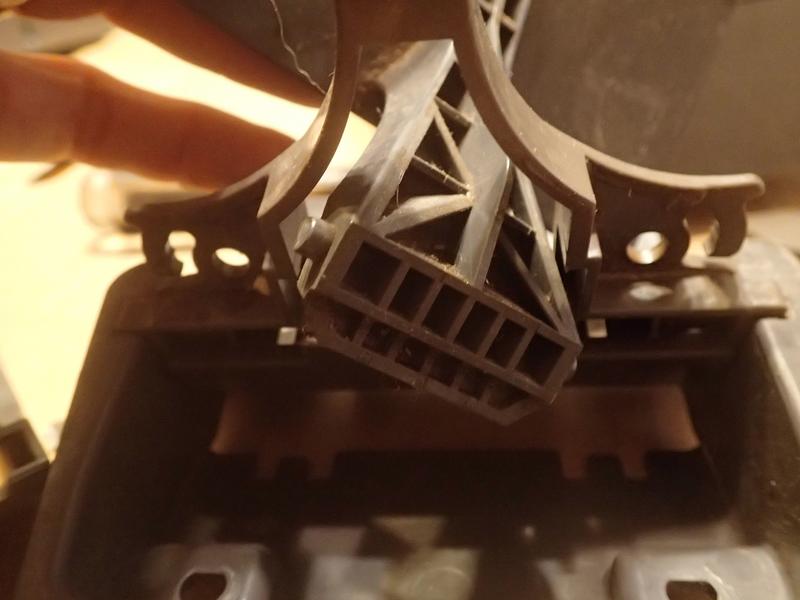
Cup holder continued...
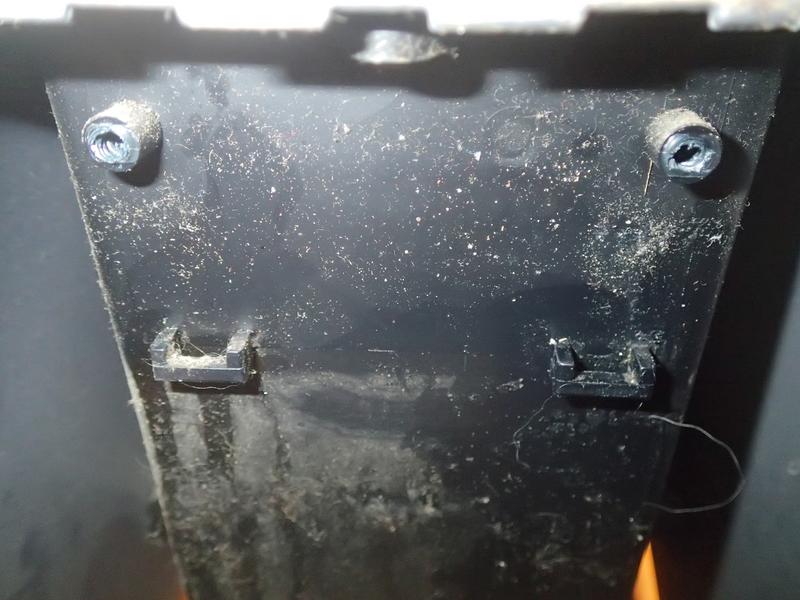
Let's get rid of the metal bracket...one little screw on either side
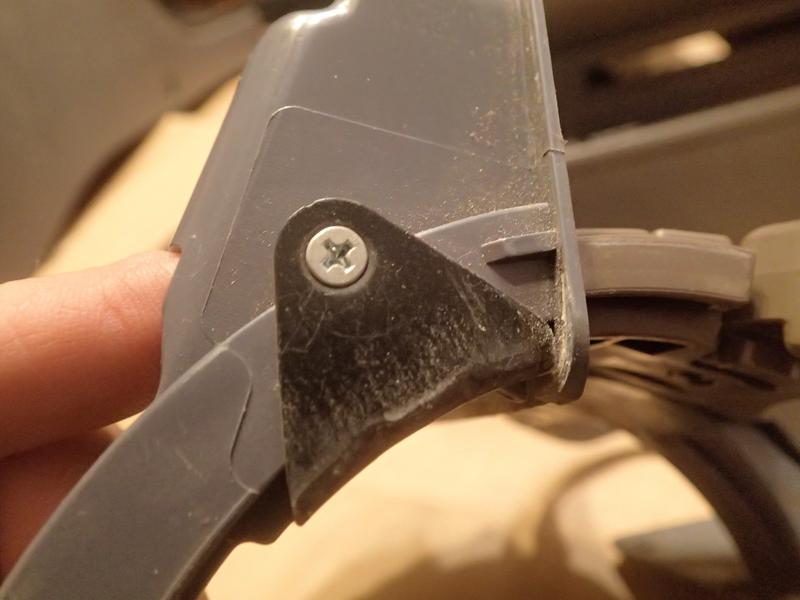
Now the assembly should slide out of the holder.
and then these two little screws next (pretend that metal bracket isn't there because it shouldn't be)
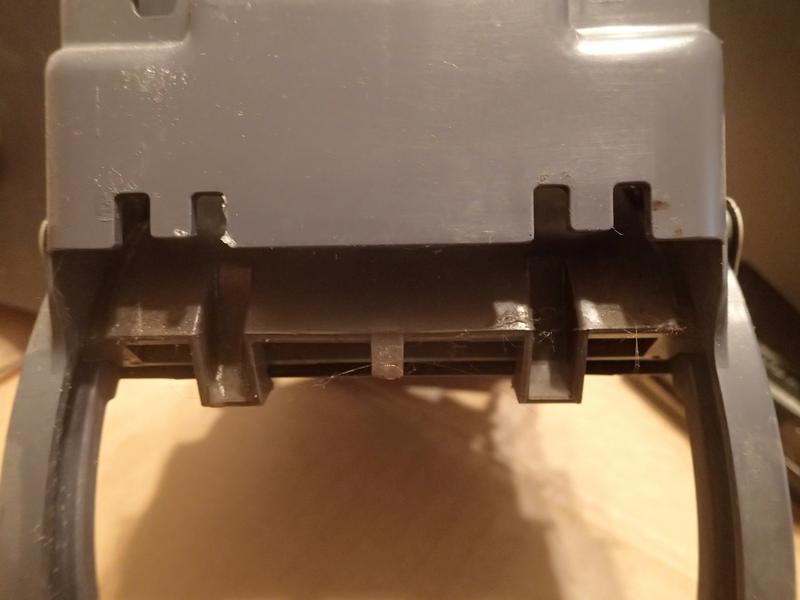
Next the little arm cover comes off. It's keyed in front (narrow) with a thin little bit of plastic and tiny tiny clips at the back (wide) side. Be gentle! Unclips at the back, pulls backwards out of the front.
And the arms can come off:
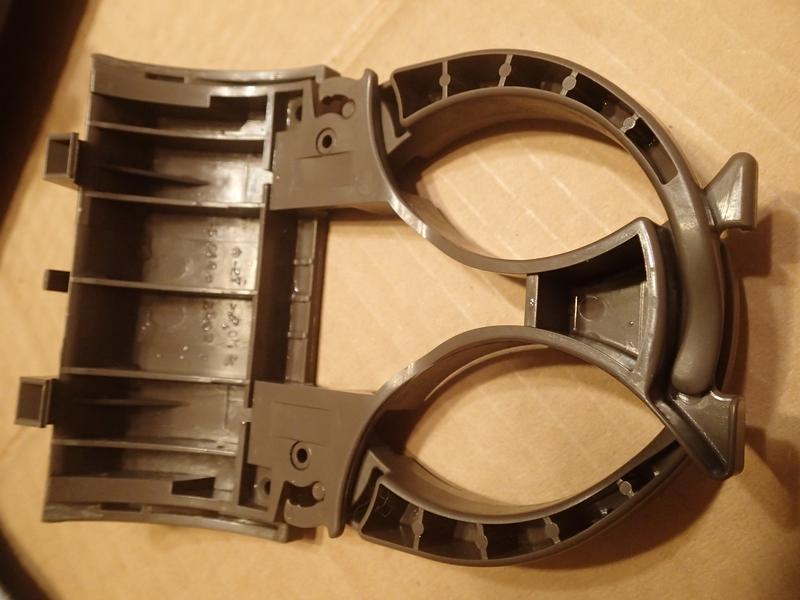
See the crack? Looks like I'll be using more parts off the old one than originally planned. The arms fit in like so:

Now you can pull out the Soda butt catcher? Cup perch? Drink foot stool?
It just sits in place, forward, twist, pull backward out of the assembly:
Let's get rid of the metal bracket...one little screw on either side
Now the assembly should slide out of the holder.
and then these two little screws next (pretend that metal bracket isn't there because it shouldn't be)
Next the little arm cover comes off. It's keyed in front (narrow) with a thin little bit of plastic and tiny tiny clips at the back (wide) side. Be gentle! Unclips at the back, pulls backwards out of the front.
And the arms can come off:
See the crack? Looks like I'll be using more parts off the old one than originally planned. The arms fit in like so:
Now you can pull out the Soda butt catcher? Cup perch? Drink foot stool?
It just sits in place, forward, twist, pull backward out of the assembly:
Last edited by habanero; 05-20-2019 at 07:06 PM.
05-20-2019, 06:12 PM
#3845
Contributing Member
Thread Starter
Cup holder guts
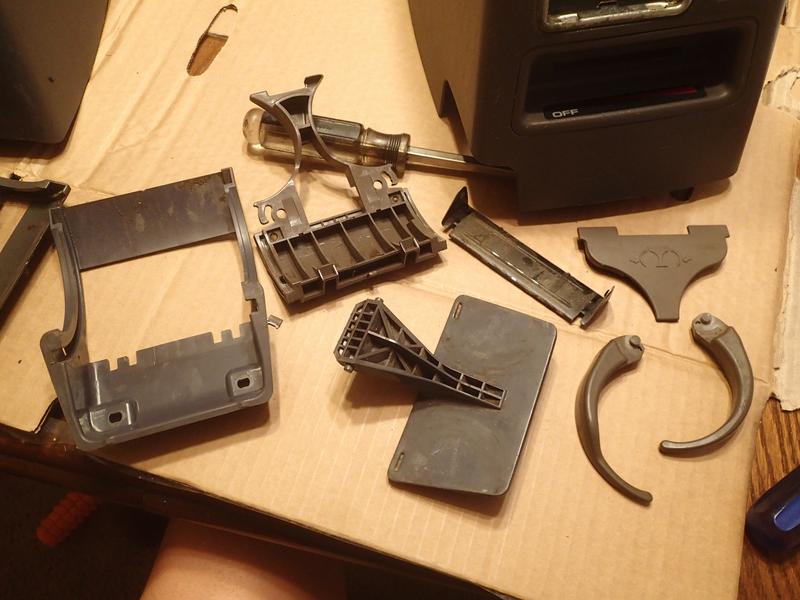
Cruddy camera pic....it's 3 different colors of fun!
Tomorrow we're going to put it all back together.
Cruddy camera pic....it's 3 different colors of fun!
Tomorrow we're going to put it all back together.
Last edited by habanero; 05-20-2019 at 07:00 PM.
The following users liked this post:
old87yota (05-20-2019)
05-20-2019, 06:12 PM
#3846
Contributing Member
Thread Starter
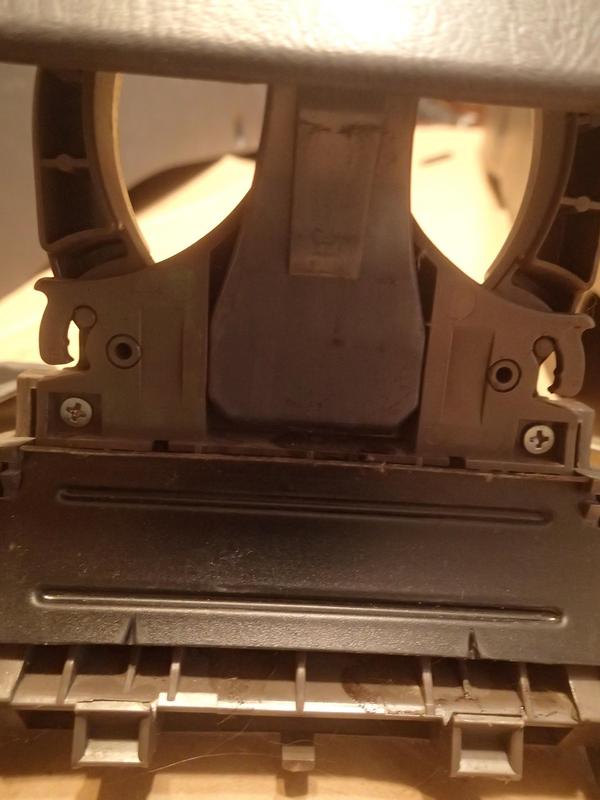
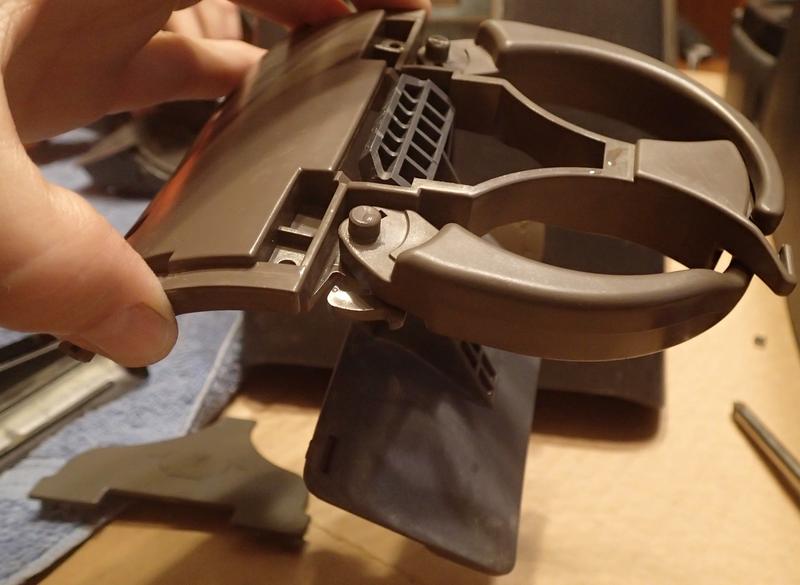
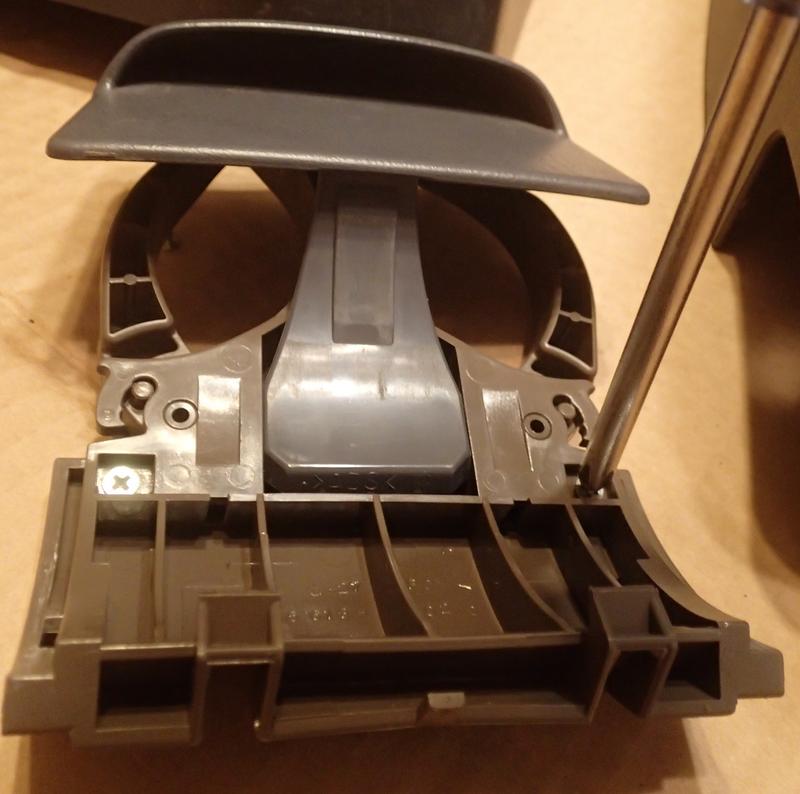
Putting it all back together is pretty much the reverse of taking it apart.
Add the butt catcher/door. It just sits there in place

Next comes the arms

Then the cover. Put the narrow side in first, then slightly bend and snap in the wide end. Very tiny plastic bits, be gentle. I don't have a pic of it outside of the console, but this is all before putting it in there.

And add the two tiny screws
Add the butt catcher/door. It just sits there in place
Next comes the arms
Then the cover. Put the narrow side in first, then slightly bend and snap in the wide end. Very tiny plastic bits, be gentle. I don't have a pic of it outside of the console, but this is all before putting it in there.
And add the two tiny screws
Last edited by habanero; 05-21-2019 at 05:29 AM.
The following users liked this post:
old87yota (05-20-2019)
05-20-2019, 06:13 PM
#3847
Contributing Member
Thread Starter
And slide the assembly into the slider
Time to add the metal bit. It fits together with the slot at the top for the plastic keeper.
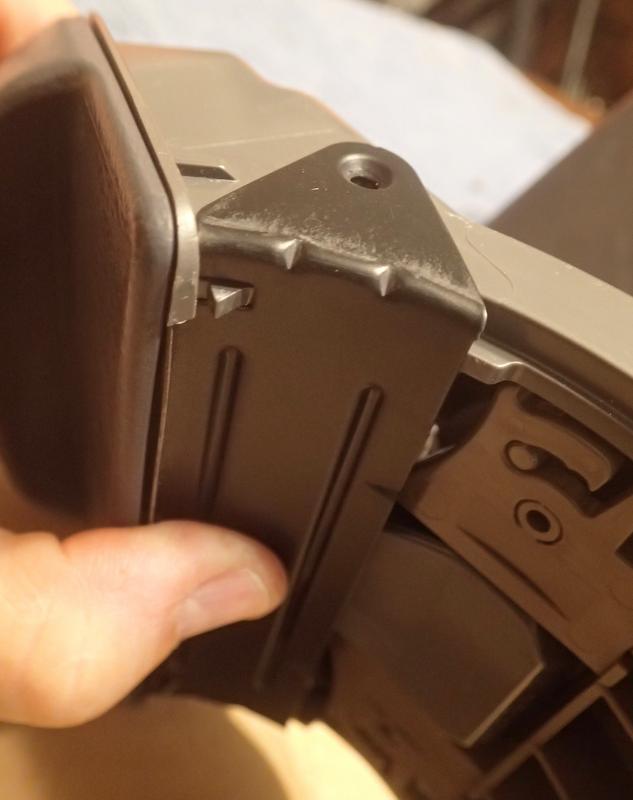
And screw in these tiny little screws, one on each side-
Time to add the metal bit. It fits together with the slot at the top for the plastic keeper.
And screw in these tiny little screws, one on each side-
Last edited by habanero; 05-21-2019 at 05:38 AM.
05-20-2019, 06:13 PM
#3848
Contributing Member
Thread Starter
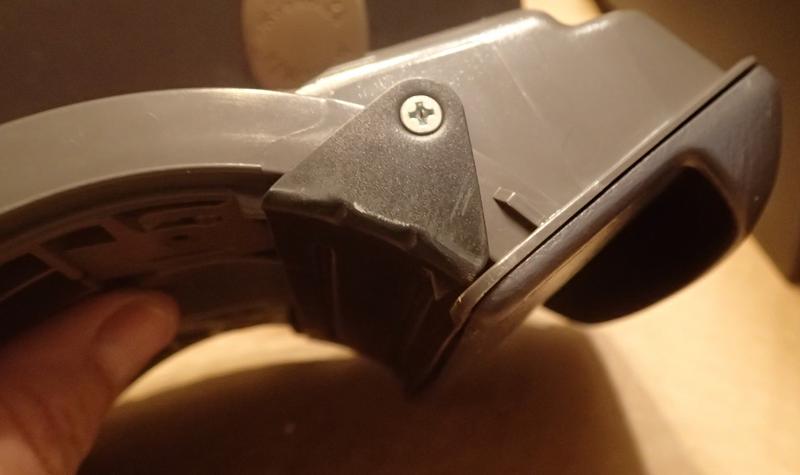
Extend the assembly so that you'll have access to the interior
and slide the assembly into the console. It's closed in this pic, but you do need to have it open to finish re-installing it.
Now we're back into keying the assembly back into the console.

And the screws...

And close the door and be finished. Good job!
The first time I did this was 10 years ago because the kids had broken the cup holder arms. The arms I found in the junkyard truck were much beefier than the wimpy original grey ones. This time someone had taken the arms out of the new-to-me console and on top of that the arm bracket was cracked.
and slide the assembly into the console. It's closed in this pic, but you do need to have it open to finish re-installing it.
Now we're back into keying the assembly back into the console.
And the screws...
And close the door and be finished. Good job!
The first time I did this was 10 years ago because the kids had broken the cup holder arms. The arms I found in the junkyard truck were much beefier than the wimpy original grey ones. This time someone had taken the arms out of the new-to-me console and on top of that the arm bracket was cracked.
Last edited by habanero; 05-21-2019 at 05:50 AM.
05-21-2019, 06:44 AM
#3849
Contributing Member
Thread Starter
Oof, JohnMC just pointed out a post on Bushducks...
I knew they'd had a big snow year but wow.
Animas ForksUncompahgre/Ouray970-240-5300Closed5/16/19
COMMENTS:
5/16/19 - It is important to note that this was a historic year of snowfall. San Juan county has discovered the valley to Animas Forks is FILLED with snow, up to 100' deep. And this is the access road for the Alpine Loop Essentially. Nothing is open for Memorial Day Weekend, and all trails are in doubt until Late July or August. Just don't want a lot of disappointed folks driving up there. San Juan County plans to make a valiant attempt to cross Hurricane Pass with dozers to bi-pass the area below Animas Forks but they have no idea what they will face right now. The issue is not just snow fall, but record breaking Avalanche runs that buried and destroyed everything.
2/19/19 - Closed by snow.
I knew they'd had a big snow year but wow.
Last edited by habanero; 05-21-2019 at 06:46 AM.
05-21-2019, 07:01 AM
#3850
Registered User
Join Date: Jan 2011
Location: exo-reality -wave if you see me; Front Range, CO
Posts: 667
Received 100 Likes
on
79 Posts
Yep. More snow than old timers could remember. (I'm an old timer, but not to CO).
And didn't get to go skiing not even once this year. Did get a refund on my pass however, so there's that!
/Off-topic: Great documentation on the console.
And didn't get to go skiing not even once this year. Did get a refund on my pass however, so there's that!
/Off-topic: Great documentation on the console.
05-21-2019, 04:03 PM
#3851
Registered User
I can't believe you've gone this long without a 99+ console!!
05-21-2019, 05:21 PM
#3852
Contributing Member
Thread Starter
And thanks!
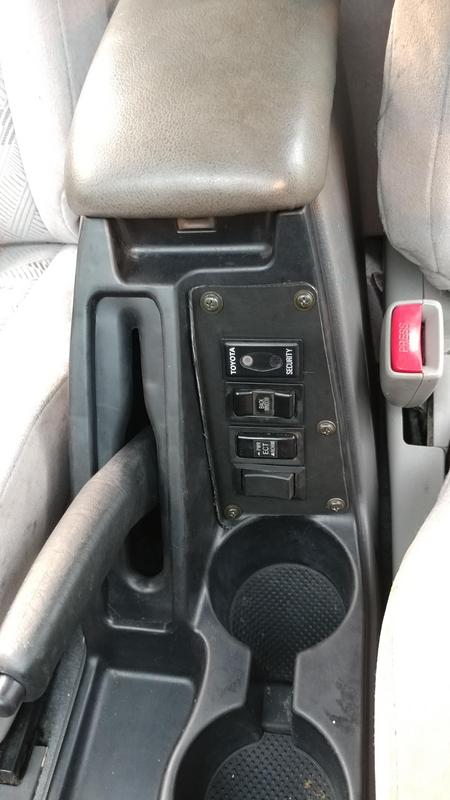
SWIIIIIITCHES, gotta have the switches!
And also this is the first tall grey center console I've seen that's not been destroyed or disappeared in the junkyard. Ever. For $15 for all of the console bits and brackets, the console, the brake lever, the hood blanket, and a couple of really stained rear floor mats I was very happy I grabbed it.
As for the switches....working on that.

The following users liked this post:
old87yota (05-21-2019)
05-22-2019, 06:16 AM
#3853
Contributing Member
Thread Starter
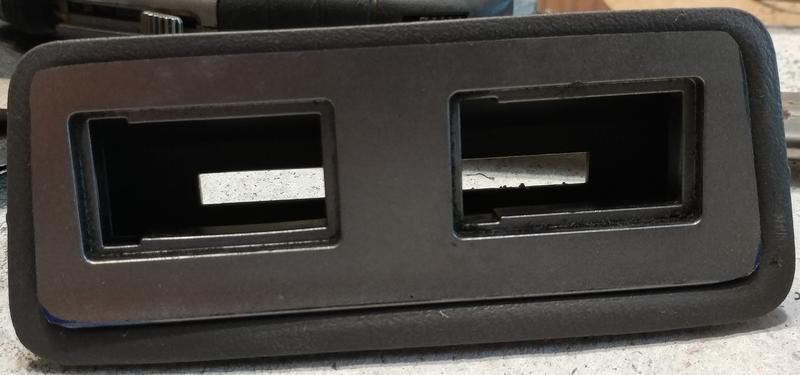
Still prepping the center console for install. I've got the switch panel for the front started but today we're working on the back section for a bit
This one had rear heat. I don't. Making use of the temp control....
Earlier this spring I pulled an inverter out of a Matrix. Inverter, switch, socket, and relay.
This morning I was thinking "will that thing fit in the console"? A few quick measures and a bit of switch panel tweaking and I do believe this is going to work....
The beginning-
The following users liked this post:
old87yota (05-22-2019)
05-24-2019, 06:54 AM
#3854
Contributing Member
Thread Starter
96 4Runner 306,214 miles
New to me hood blanket on. The sport hood requires 11 fasteners, part #90467-09006
New to me hood blanket on. The sport hood requires 11 fasteners, part #90467-09006
The following users liked this post:
old87yota (05-24-2019)
05-26-2019, 05:28 PM
#3855
Contributing Member
Thread Starter
Spent some time extending the wiring for the 4 center console switches and went to Grant's Farm. Have 12 more wires to deal with and then testing that the switches all do what they're s'posed to before they are re-installed.
The inverter switch and outlet are in the console now, but not wired up.
I'd like to put a dual usb switch where the fan switch is in the console, but haven't found a quick charge version that's shallow enough and fits in the 4Runner switch blank.
The inverter switch and outlet are in the console now, but not wired up.
I'd like to put a dual usb switch where the fan switch is in the console, but haven't found a quick charge version that's shallow enough and fits in the 4Runner switch blank.
05-27-2019, 05:59 PM
#3857
Contributing Member
Thread Starter
Thanks dropzone!
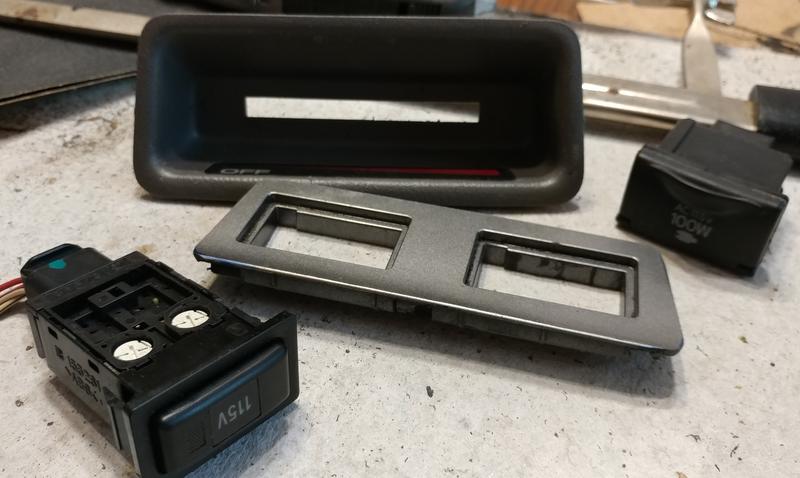
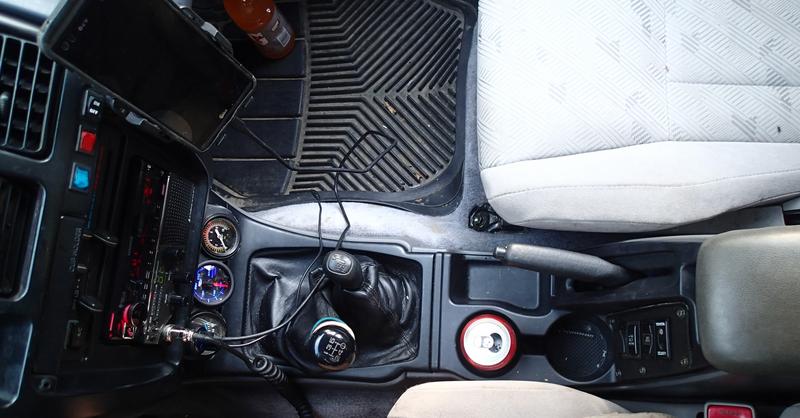
Today I finished up extending the switch wiring for the new center console and made sure it all works. Got the switch plate in along with the switches. Yep, obviously homemade with spare junk. It's plastic with a metal back for support. I used screws to hold it on because I wanted to be able to access the switches without the hassle of unscrewing all the parts of the console to get to them.
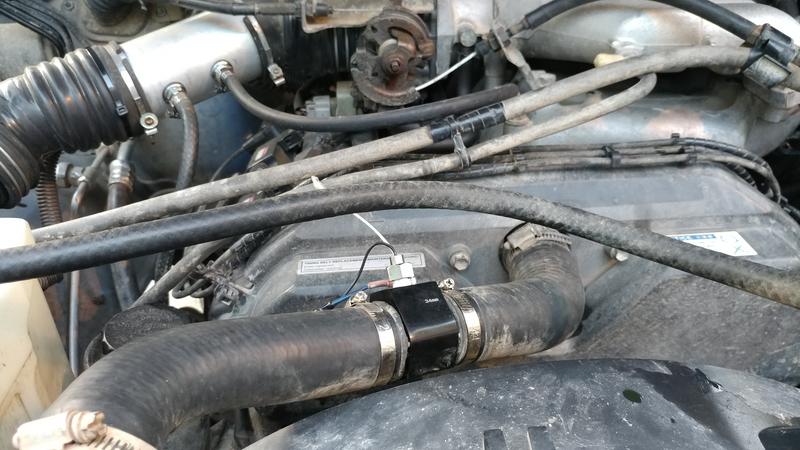
I'm also replacing my coolant temp gauge because it stopped working. This time I'm going with a 34mm temp sensor adapter and an electronic sensor. I'll have to finish installing that before I can button up the center console the rest of the way.
And the inverter plus switch in the back. If I ever find a matching cup holder door I'll nab it, but whatever. I'm still also thinking about putting a dual usb where the fan switch goes. Wiring all this up can be done without the console, though I'll have to unbolt it to finish plugging it all in. Last thing on my to-do list.
Today I finished up extending the switch wiring for the new center console and made sure it all works. Got the switch plate in along with the switches. Yep, obviously homemade with spare junk. It's plastic with a metal back for support. I used screws to hold it on because I wanted to be able to access the switches without the hassle of unscrewing all the parts of the console to get to them.
I'm also replacing my coolant temp gauge because it stopped working. This time I'm going with a 34mm temp sensor adapter and an electronic sensor. I'll have to finish installing that before I can button up the center console the rest of the way.
And the inverter plus switch in the back. If I ever find a matching cup holder door I'll nab it, but whatever. I'm still also thinking about putting a dual usb where the fan switch goes. Wiring all this up can be done without the console, though I'll have to unbolt it to finish plugging it all in. Last thing on my to-do list.
06-01-2019, 03:47 PM
#3858
Contributing Member
Thread Starter
96 4Runner 306,315 miles
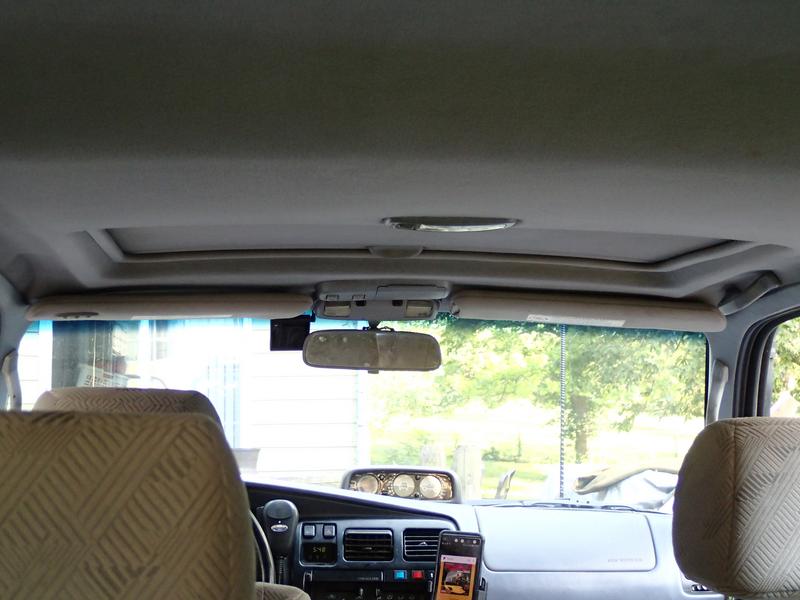
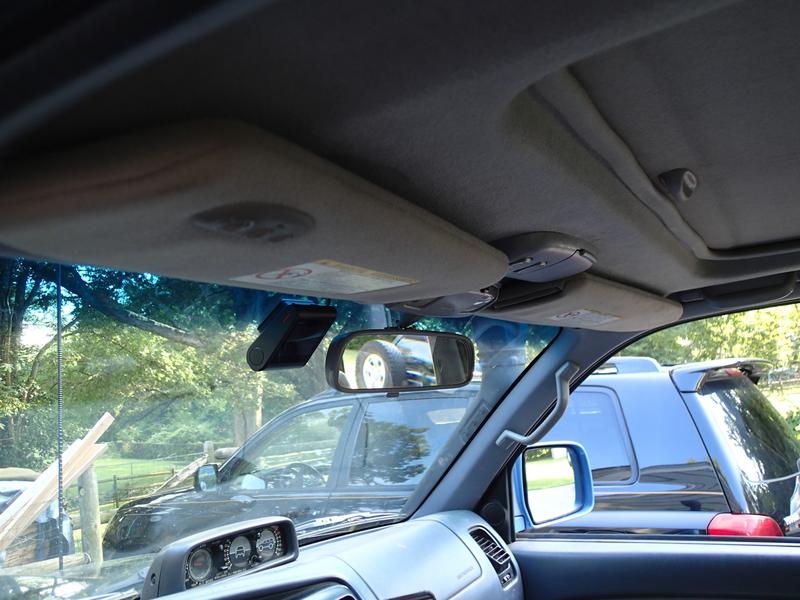
Got the new-to-me visors in. Dropzone gave me the clue of where to look for new visors. I believe they're out of an Avalon. There are at least a couple that look similar but one is way too big for the 4Runner. This one is close enough to do the job.
Of course I'd have rather found some grey plug n' play visors with the slide-outs and homelink but no love there over the years, just the one set of tan ones for the '99. I figured for only a few bucks it wouldn't be too bad if this experiment flopped.
With a bit of thought and some sweat I got these to work.
Step one was getting rid of the mounting plate, I didn't want to
A) drill new holes, and
B) it really wouldn't sit right or cover up the hole in the headliner entirely.
It required breaking off the retainers to remove it, then I had to remove enough material that the 4Runner's old mounting plate fit onto the shaft. To hold it in place I drilled 2 small holes near the top of the shaft, across from each other and not centered and added a washer, then ran a wire through the holes to hold it all together. All the while I was careful not to drill or damage the wires that come out of the post.
I'm not doing a how-to because this was not easy and there's prolly a better way- just a vague documentation.
So now I have the grey that matches the seats and center console with the blue-grey and the new visors and old mounting plate. The catch on the other side is a tight fit, I may have to woggle it out a bit if it gets too annoying. At least it won't fall out!
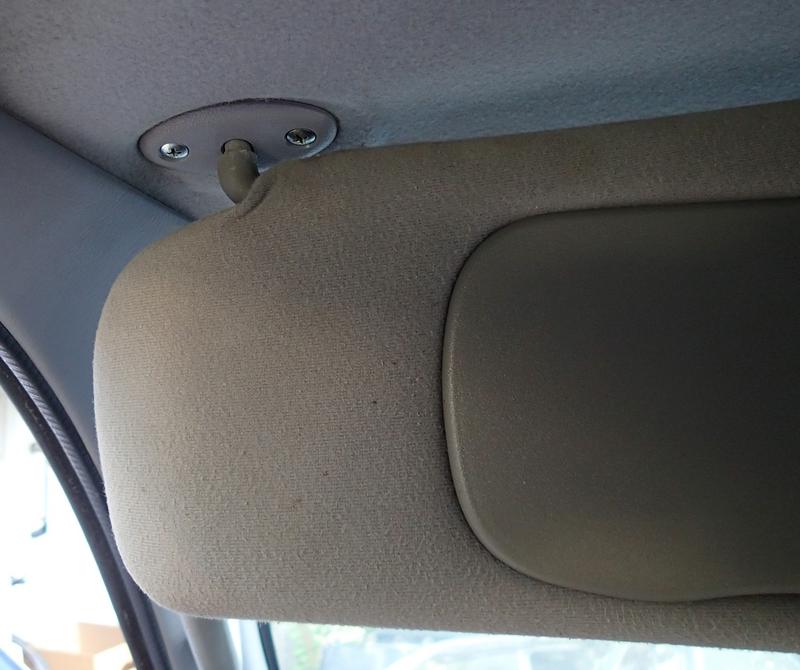
I used a vampire tap to get into the single hot wire for the reading lights, and one of the bolts that holds the metal mirror base to the body for ground.
I'm really not a vanity mirror kinda gal, but there they are.
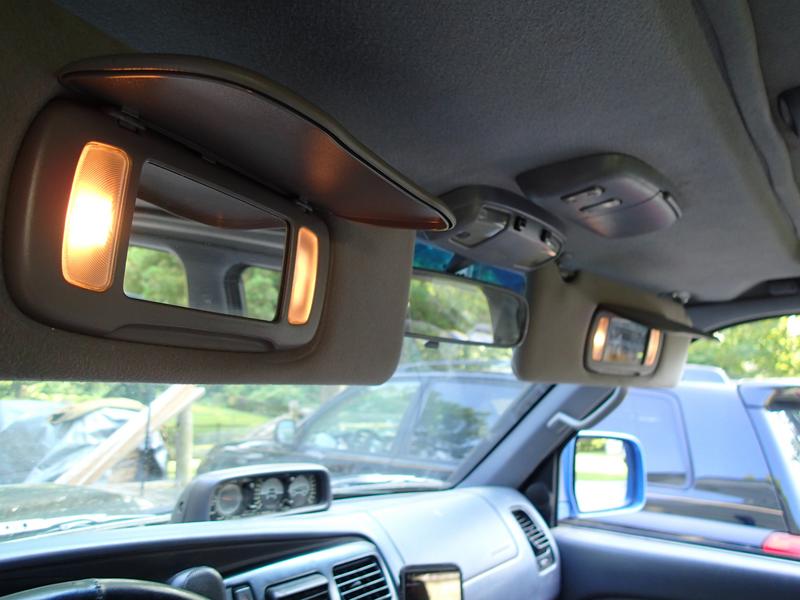
and a couple o' finished pics
I also got the gauge for the coolant temp wired up and done (middle one).
Nice of Toyota to make the old and new style parts fit together, no mods needed to make the center bezel, shifter boot surround, center console and side trims all fit together.
I do like that there is more room for wiring under the tall console vs the short one.
Got the new-to-me visors in. Dropzone gave me the clue of where to look for new visors. I believe they're out of an Avalon. There are at least a couple that look similar but one is way too big for the 4Runner. This one is close enough to do the job.
Of course I'd have rather found some grey plug n' play visors with the slide-outs and homelink but no love there over the years, just the one set of tan ones for the '99. I figured for only a few bucks it wouldn't be too bad if this experiment flopped.
With a bit of thought and some sweat I got these to work.
Step one was getting rid of the mounting plate, I didn't want to
A) drill new holes, and
B) it really wouldn't sit right or cover up the hole in the headliner entirely.
It required breaking off the retainers to remove it, then I had to remove enough material that the 4Runner's old mounting plate fit onto the shaft. To hold it in place I drilled 2 small holes near the top of the shaft, across from each other and not centered and added a washer, then ran a wire through the holes to hold it all together. All the while I was careful not to drill or damage the wires that come out of the post.
I'm not doing a how-to because this was not easy and there's prolly a better way- just a vague documentation.
So now I have the grey that matches the seats and center console with the blue-grey and the new visors and old mounting plate. The catch on the other side is a tight fit, I may have to woggle it out a bit if it gets too annoying. At least it won't fall out!
I used a vampire tap to get into the single hot wire for the reading lights, and one of the bolts that holds the metal mirror base to the body for ground.
I'm really not a vanity mirror kinda gal, but there they are.
and a couple o' finished pics
I also got the gauge for the coolant temp wired up and done (middle one).
Nice of Toyota to make the old and new style parts fit together, no mods needed to make the center bezel, shifter boot surround, center console and side trims all fit together.
I do like that there is more room for wiring under the tall console vs the short one.
Last edited by habanero; 06-01-2019 at 03:48 PM.
06-08-2019, 06:38 AM
#3859
Contributing Member
Thread Starter
99 4Runner 228,408
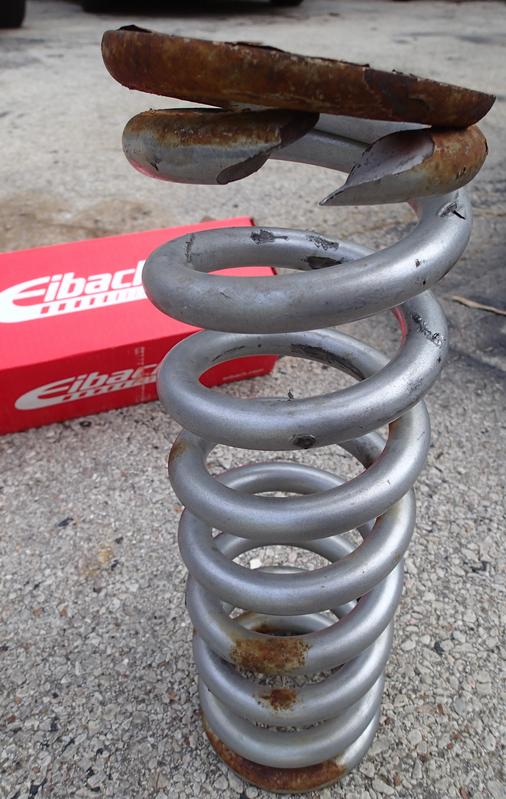
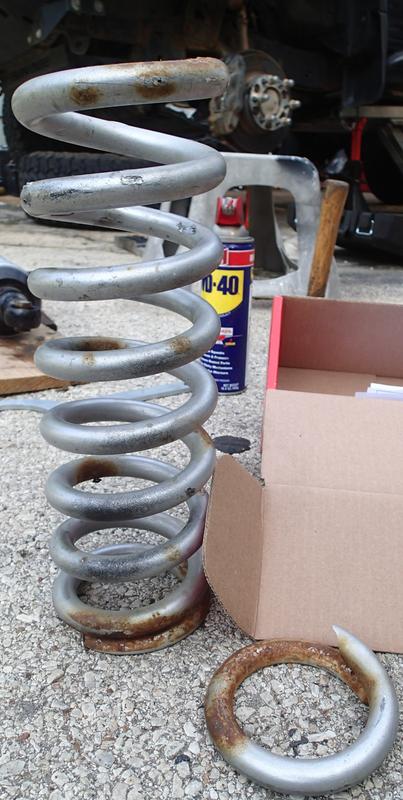
One of the Eibach coil springs on the hubby's 4Runner broke, so he replaced it. It was part of a Radflo set-up.
Oops.

(set upside-down)

One of the Eibach coil springs on the hubby's 4Runner broke, so he replaced it. It was part of a Radflo set-up.
Oops.
(set upside-down)
The following users liked this post:
old87yota (06-09-2019)
06-15-2019, 06:06 AM
#3860
Contributing Member
Thread Starter
96 4Runner 306,535 miles
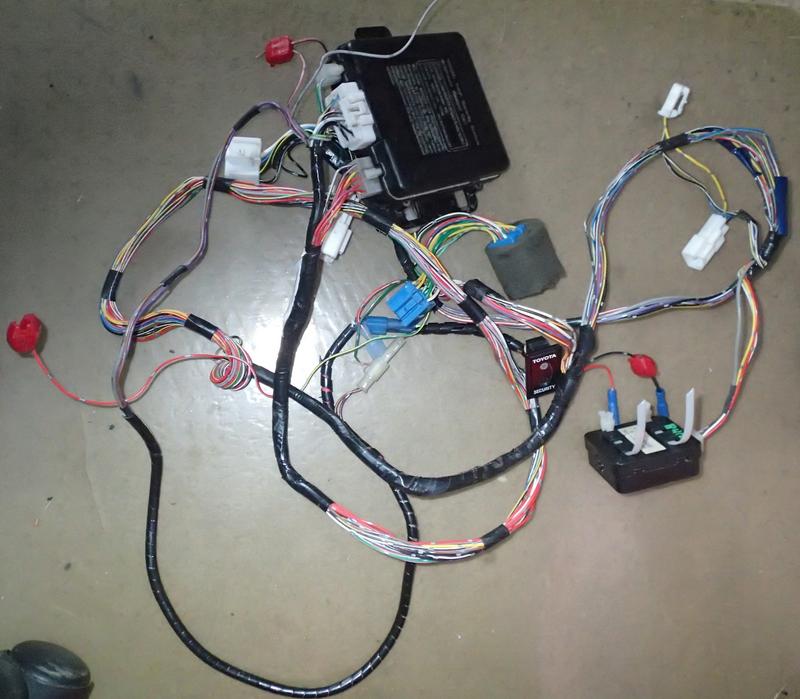
I pulled an RS3000 out of a 97 4Runner the other day because it had the fob there in the truck. I've been wanting a blinking light to help ward off some of the predators and saw an opportunity.
It was easy to remove, take off front driver's door sill, small kick panel on the side of the foot area, and the panel under the steering wheel. Take pics of the wires that have taps, and a pic of the green/yellow wire that is added to a connector. You'll want to take the connector it's in, too, or at least remove the wire including the pin from it- you will need the pin, but only on the one side, the truck already has the other pin installed in the connector. There is a solid red and a solid black wire that runs to the firewall grommet. It's the chirper wiring, which I cut, then pulled the chirper out of the engine bay.
I just started from the alarm ecu under the seat and unplugged or cut tapped wires as I went. Some of the bigger blue connector wiring may be stuffed into the body cavity.
https://www.parksoffroad.com/tacomam.../alarminfo.htm
http://www.cgl.ucsf.edu/home/tef/RS3000/RS3000_EWD.pdf
Pics with a little info following....it's a slow stormy day with slow stormy interwebs connections.


