When you click on links to various merchants on this site and make a purchase, this can result in this site earning a commission. Affiliate programs and affiliations include, but are not limited to, the eBay Partner Network.
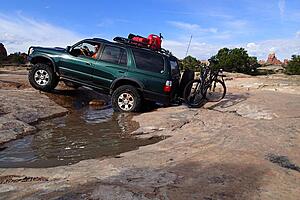
Got a call from the machine shop, the defunct bearing spun on the axle and messed the axle up. No worries, I had two spares down in the basement. Got the axle back today and it's in the truck. Changed the rear diff fluid too which looked fine.
The bell crank on that side (right) is....cranky....so I've b'lasted it to help loosen it up and plan to grease it. It's common for the bell cranks on these to freeze up. The other side is fine, will get a re-grease.
Got too dark AND I had to make dinner, will have to finish tomorrow.
Parts list for the 96's axle (same for either side):
Bearing 90363-40020-77
Bearing Retainer (x2) 42423-20010 metal 'collars', make note of the gaps between the components on the original axle, they need to be there. These parts have to be placed in the correct position- the inner-most one is sometimes pressed too far down, leaving no place for seal 90310-50006 to ride on = oil leak.
Axle Shaft Oil Seal 90313-48001 dust shield on the axle shaft, this is the first time I've replaced this part on an axle. It probably didn't need it.
Axle Shaft Oil Seal 90310-50006 seal that fits inside the housing, the notorious seal of leaking-ness usually caused by clogged diff breather or bad bearing or bad bearing retainer spacing
Bearing Housing O-Ring 90301-88077
And, just for reference as mine was fine and didn't need replacing,
ABS rotor 43517-35010
IF I had to get the axle from Toyota It would have run $415 - $600 for just the axle shaft depending on where I had to buy it. There was a design change for 3.4 w/abs 16" wheel 3rd gen axles....I can't remember exactly when.....late '00?...... and the only one available is the newer style.
While the newer style axle will work fine with the early 3rd gens it does require different components. I would have had to get a different bearing and dust seal, they are not interchangeable.
96-00
bearing 90363-40020-77
01-02
bearing 90363-4006
OBVIOUSLY I WOULD RUN TO THE JUNK YARD AND PULL AN AXLE OUT OF A 96-00 FIRST CHOICE OR EVEN THE 01-02 AXLE SECOND CHOICE BEFORE I'D BUY A NEW AXLE.
The end.
Seems like it might fit the bill and not break my wallet.
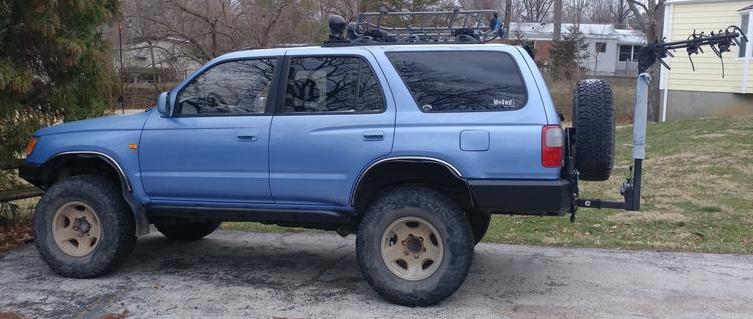
I looked at a bike rack like that Amazon one but it doesn't move far enough out of the way for my tire's swing arm.
What I should have done was have the tire swing-out built to open to the driver's rather than passenger, then the length of the bike rack's arm wouldn't have to clear the tire. Unfortunately that didn't occur to me at the time.
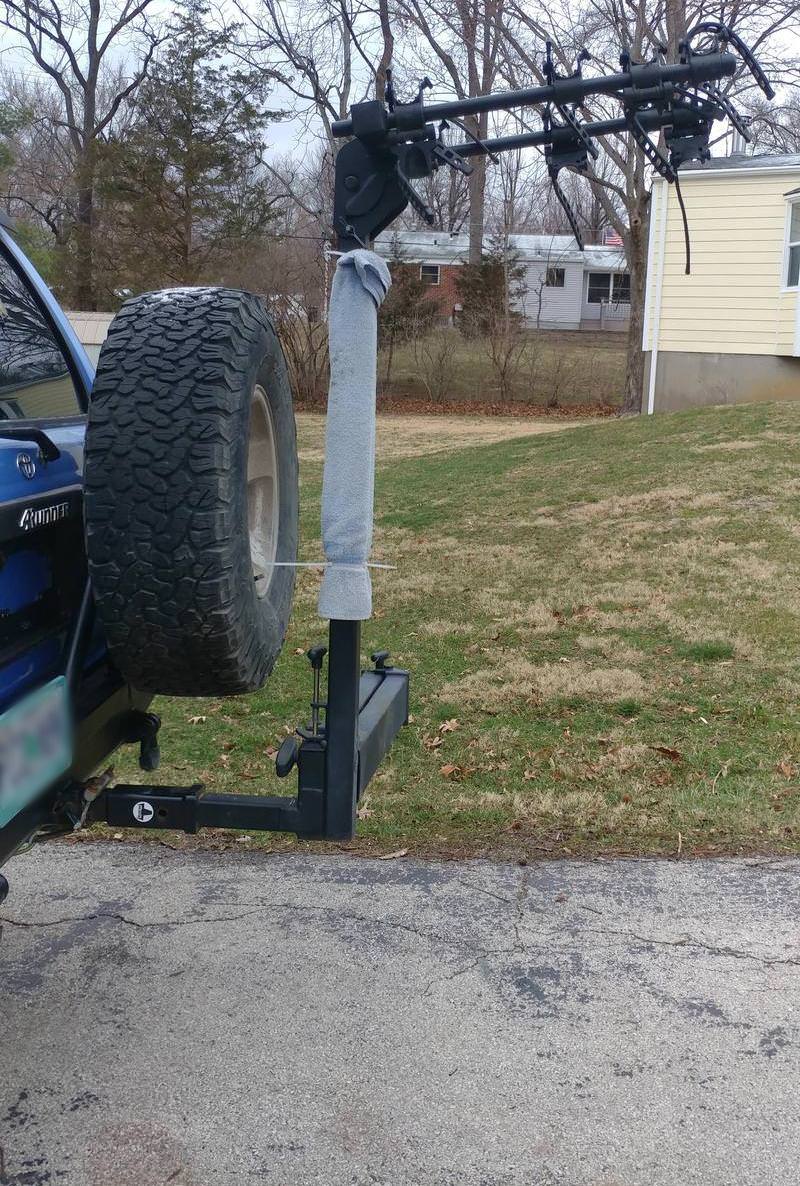
My solution....
SportRack Ridge Swing 4 Bike Rack- 2" Hitches #SR2415
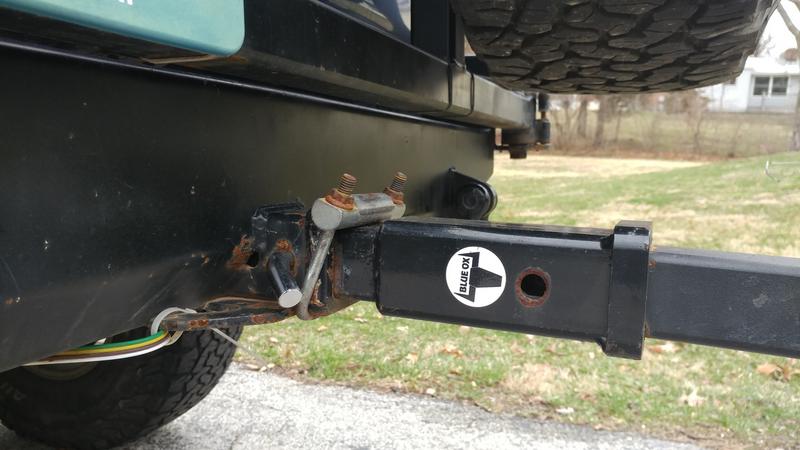
Blue Ox Hitch Extender for Tow Bars - 2" Hitches 6 3/4 or 8 3/4" Extension #BX88265
Roadmaster Quiet Hitch for 2" Trailer Hitches #RM-061
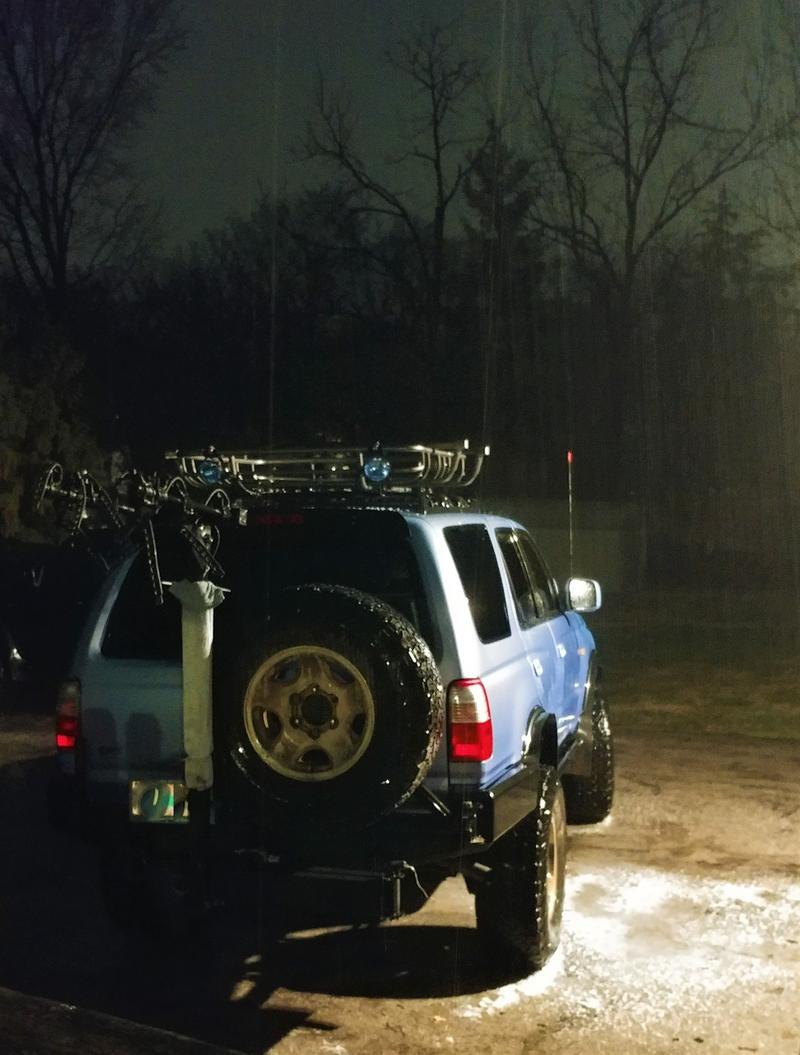
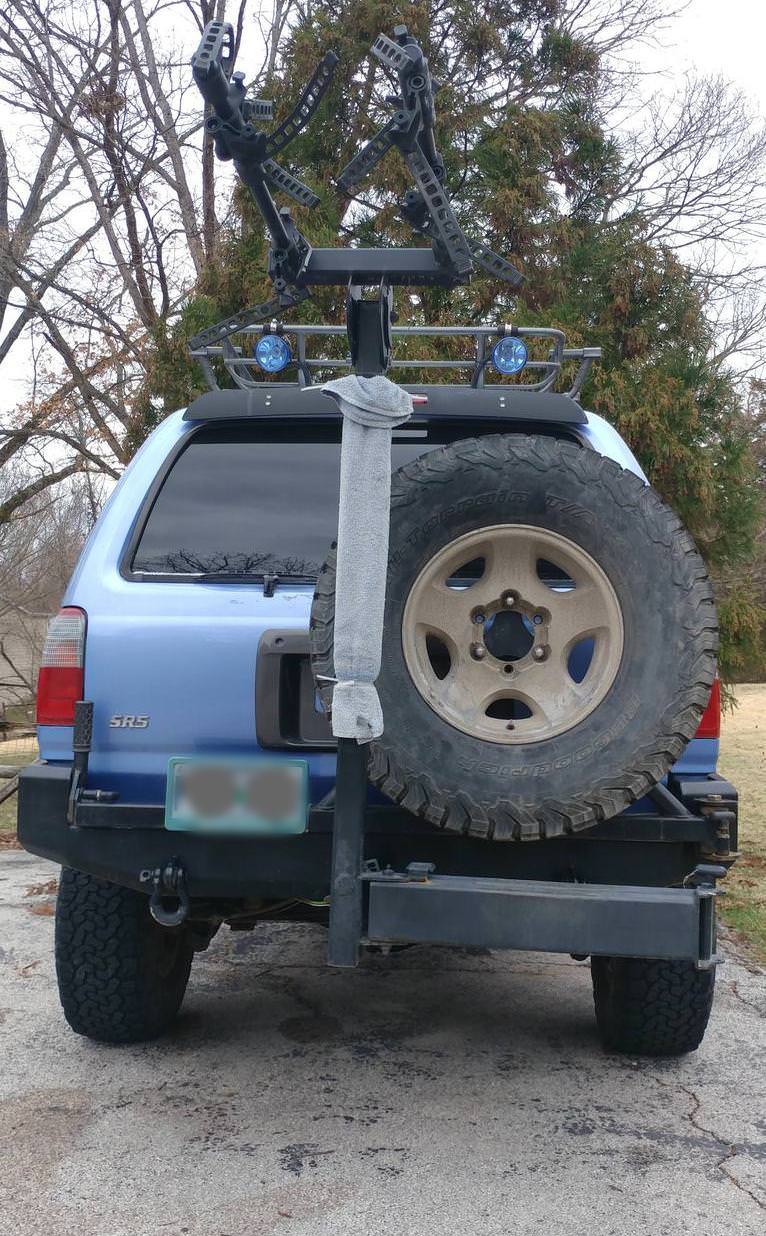
And some welding....I had the mast raised 1' strictly for bike tire clearance while off-road. The arms are not quite 6' off the ground. The swing-arm I had each section extended 10" for a total of 20". It was sleeved for durability. It's also HEAVY.
I did manage to bend the arm part of the rack outward an inch or so on Mineral Creek when I caught a rock.....the rack certainly messes with the departure angle. 21" from the bumper and 21" from the ground.
Modified rack on my truck:
Husband's truck with the same lift in the rear and a Thule Parkway with drop extension flipped upwards for clearance. It has to be flipped downwards for the tire swing-arm to open.
Let no one ever say you can't find a solution! That's pretty clever. I'd never noticed how high the bikes are from your pics. Thank Hab. Saved for future reference.
You're welcome. If only I'd thought to have the tire swing open to driver....would have saved a lot of weight on the rack if I hadn't had to extend its swing. Still would have extended the mast, though.
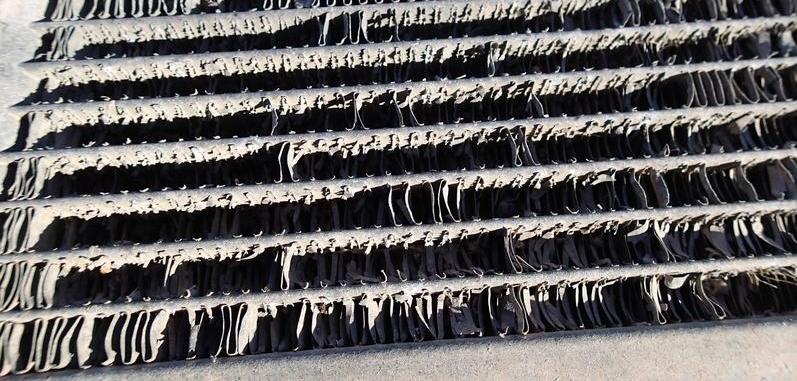
Air filter was dated 7/2016 so I stuck in a new one and wrote the date on it. Light still coming through it pretty good but not as good as the new one. The 99's was filthier and got changed too. Time flies, didn't realize it'd been that long. It does get pulled and checked on gas fill-ups as part of the fluid n stuff check and occasionally I hit it with the blow gun.
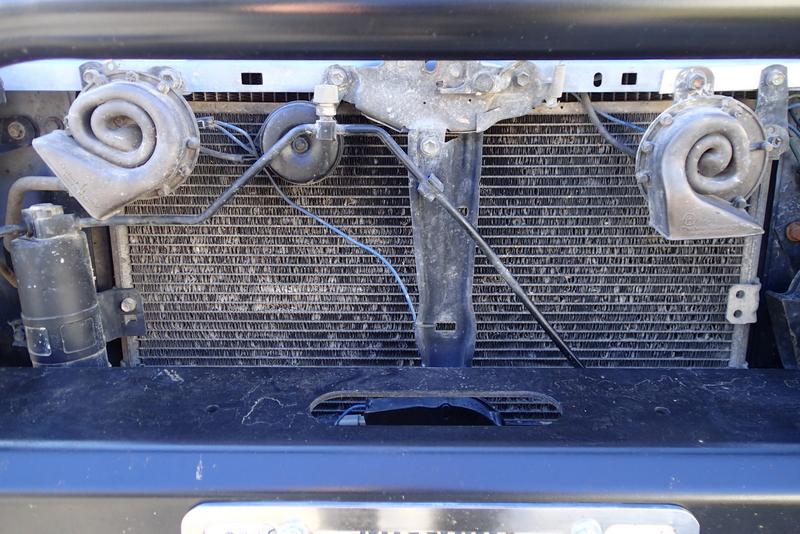
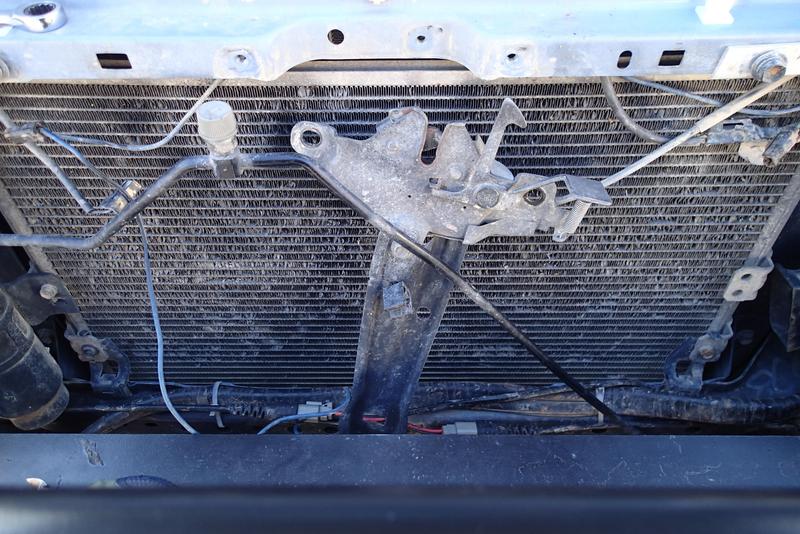
Next up (still): Stuff winch into bumper and change a/c condenser and receiver dryer.
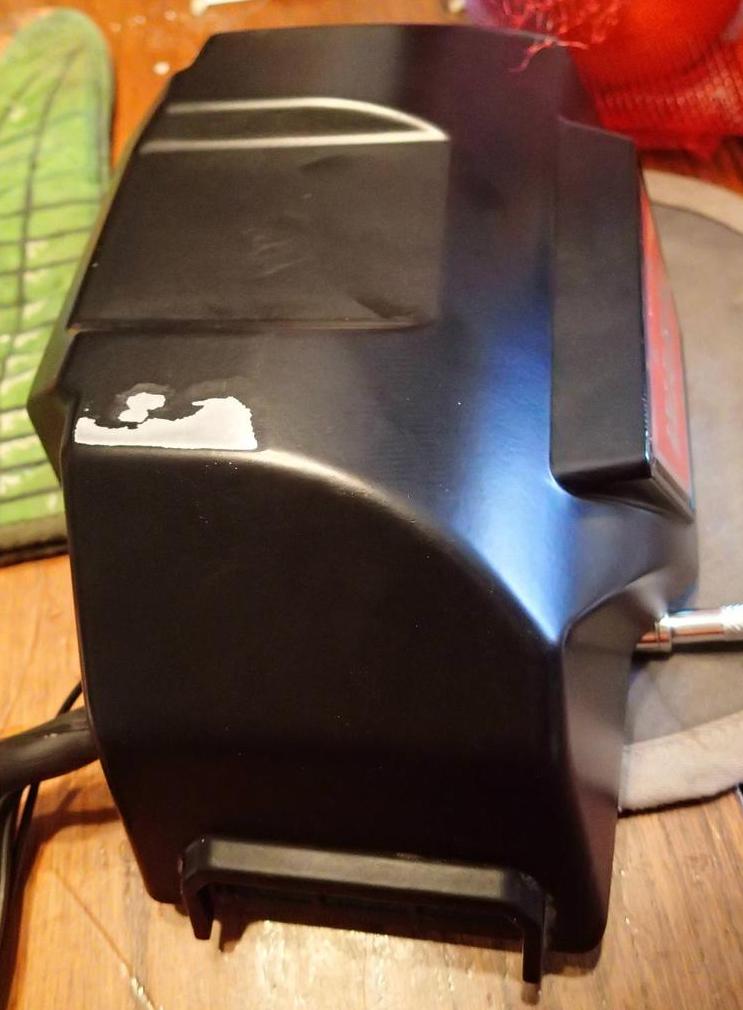
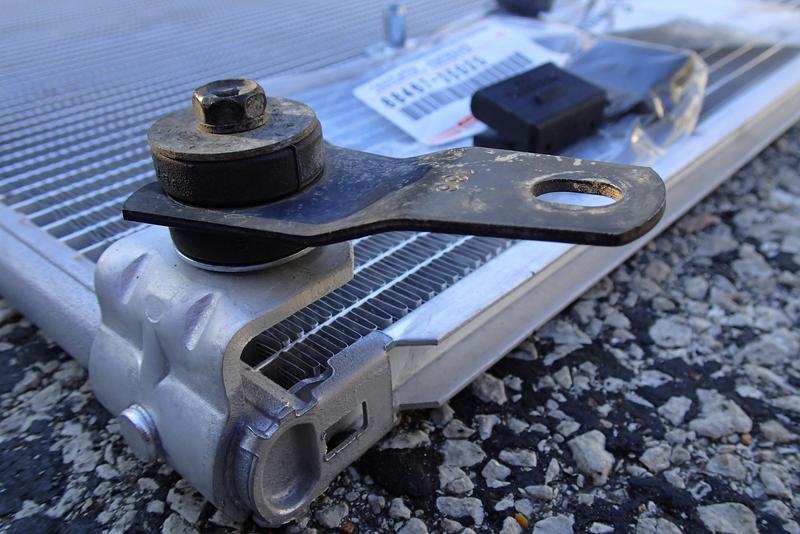
This is how the upper brackets fit, for when you move them to the new condenser:
I replaced the upper rubber isolator bushings and the sleeves, the old slides out and the new into its place.
2 Condenser Assembly Grommet 90099-32128.
2 Condenser Assembly Collar 88895-89102
and the lower isolator bushing, use pliers to compress and pull out the old one, the new one pushes into place:
2 Condenser Assembly Lower Insulator 88467-35020
^ that's what the bottom of the condenser uses to sit on the support, no need to unbolt the lower brackets from the condenser to remove it from the truck, only later to move the brackets to the new condenser.
I got an a/c o-ring kit from Auto Zone because it was on the way home from work. Sure Bilt #LXORING-1 and more specifically 10.8mm x 2.4mm fit very nicely. Needed 2 for the condenser lines.
Had the a/c recharged with what came out of the truck plus some extra because of a leaking high side valve which was replaced. Oil was also added and the system was pressure tested for leaks. Done.
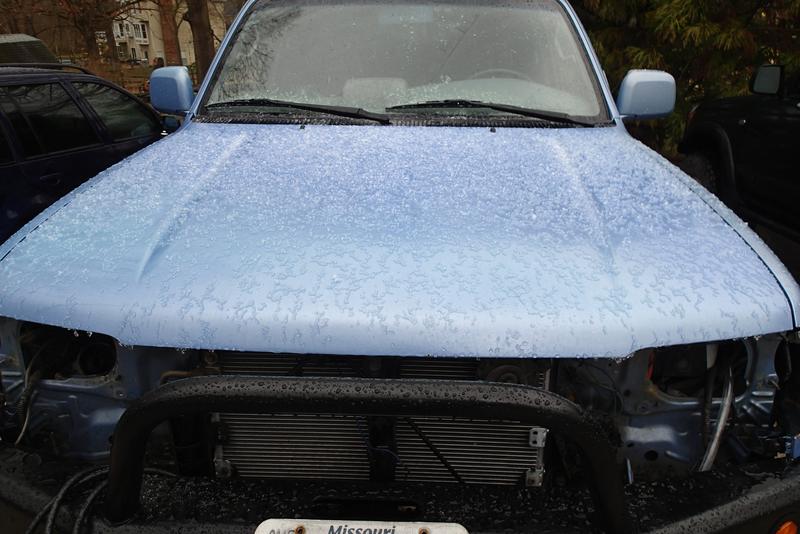
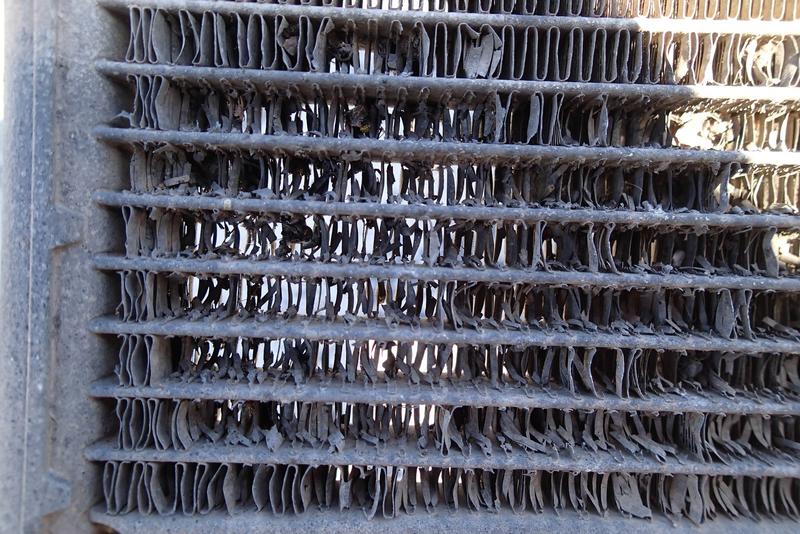
Of course it hailed tonight, and me with the grille still off. Ran out after the 1st wave and popped the grille back in. Lucky it was not a lot of cute little small marble sized hail and angled away from the front of the truck. Still, it's kinda been that kind of day.
Heavy rain has already washed a lot of it away...
Looking forward to a nice relaxing morning of building some new trail at Cliff Cave park tomorrow and finally ordering the tile for the bathroom. The kid says the bathroom will be done in 40 years. I may be dead before then so hopefully it will be sooner than that!
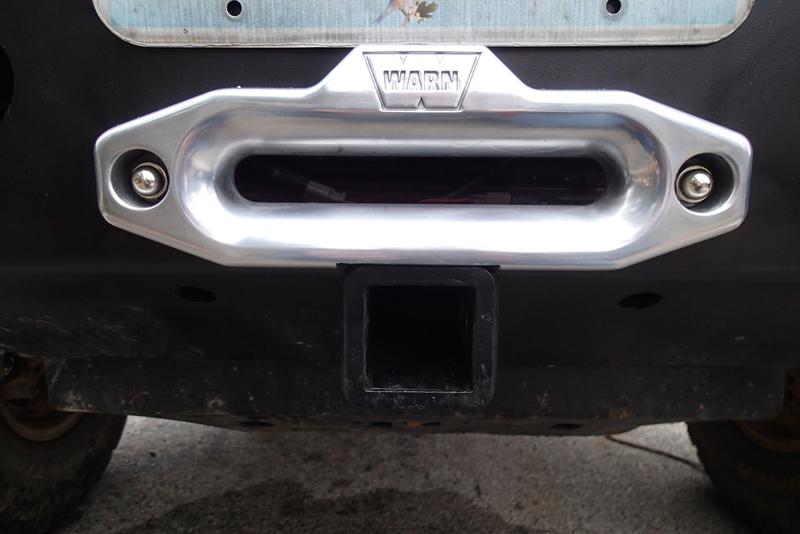
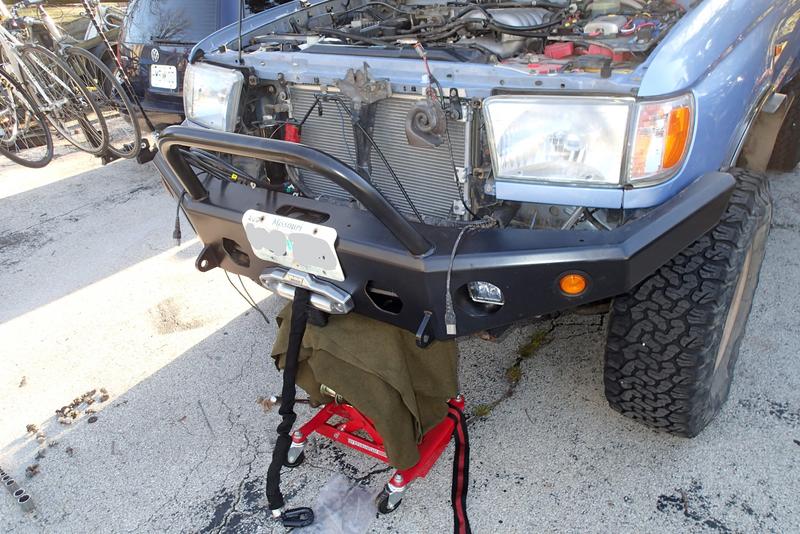
Step 1 of my version of stuffing a ridiculously big winch in the bumper:
Spent a lot of today carefully making a 1" x 3 1/2" x 1/4" divot in the bottom of the hawse fairlead using my dremel, a file and a chisel. It had to clear the front receiver but I didn't want to take too much off because heat dissipation. It does have the giant goofy warn doo-dad at the top so there is a lot of bulk to it anyway. I had to enlarge the bolt holes in the bumper to fit Warn's bolts too. Using the little holes for the bottoms of my bigger holes rather than centering on the smaller holes brought the fairlead up a touch so I didn't have to take material from the receiver collar too. The opening is still well away from the bumper opening's edges so the cable should be fine.
My husband did something similar to his but took a little off the collar on the receiver. I like that we think out and do things our own way.
We changed our minds about having the one winch on the portable cradle for a few reasons.
1. It takes up too much space inside the truck where we tie it down for trips.
2. It eats up too much approach or departure angle when installed in the bumper.
3. To use it on the rear bumper we'd either have to have an extension of leave the swing-out open and remove it after we were done with it.
The advantage to portable was being able to use one winch between 2 trucks and with a choice of front or rear on both. It was also stored inside so not exposed to the elements. It was also less permanent weight on the truck.
Fuel economy has improved quite a bit. Things that changed: New rear wheel bearing, freed up bell crank, swapped the 99's charcoal canister. Swapped the canister back for the next tank of gas.
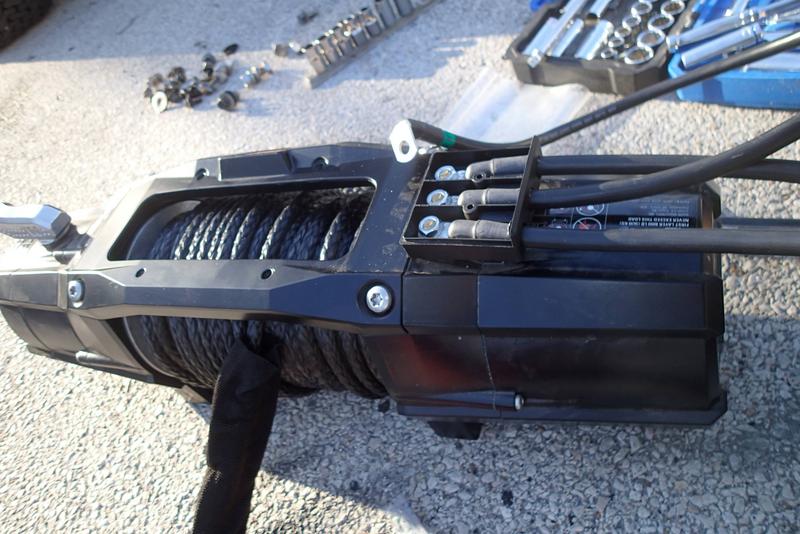
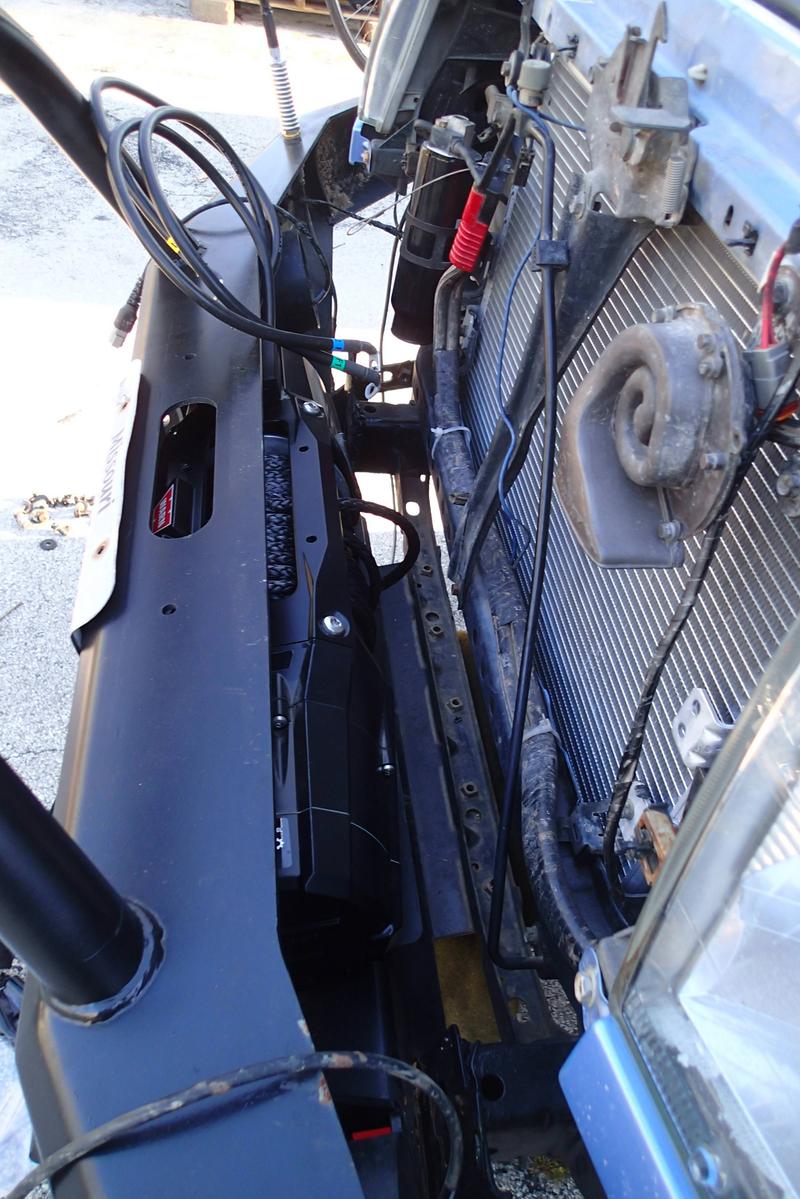
Also still working on stuffing the winch in the bumper. Step 2:
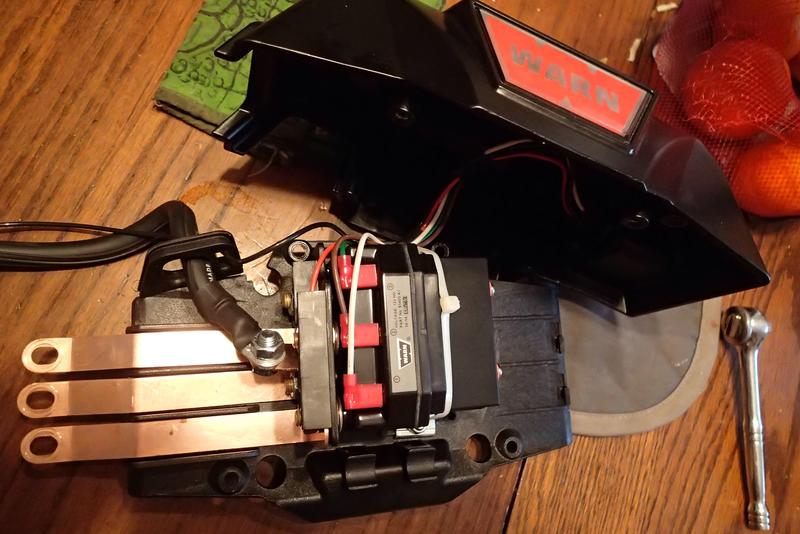
Remove the solenoid pack and stick winch in bumper
STILL working on where to go with the solenoid pack for the winch. Looking at putting it under the right headlight. Today I removed the washer tank so I wouldn't accidentally puncture it.
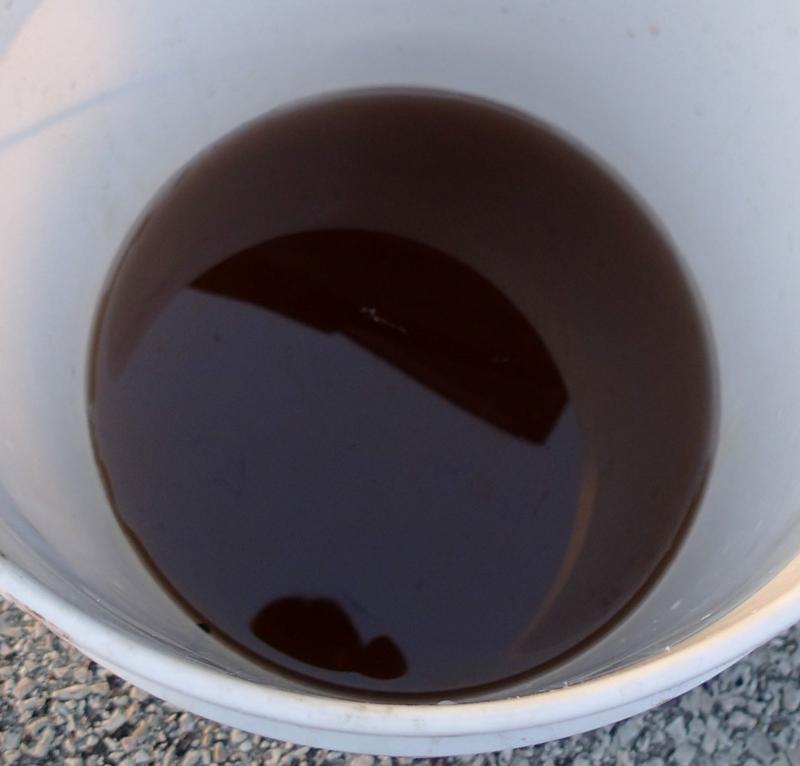
So....when was the last time you dumped your old washer fluid out and replaced it? I'm thinking maybe a new seal wouldn't be a bad thing because that stuff down there is supposed to be....
BLUE!
When was the last time you used your washers?? So much brown goodness.....
Cleaning out the washer fluid from time to time (every 15 or so years, right?) will help prevent crap from getting into the pump and hoses and clogging the system.
I use mine enough where it says "fresh" between fill ups.
When was the last time you used your washers?? So much brown goodness.....
Cleaning out the washer fluid from time to time (every 15 or so years, right?) will help prevent crap from getting into the pump and hoses and clogging the system.
I use mine enough where it says "fresh" between fill ups.
I have no idea if it is better than the house brand blue stuff, but orange is cool, right?
I actually pulled the tank about 3 1/2 years ago to answer a question, it was all good then! Given where it's at it in the right wheel well it needs a drain plug or something!
What you're saying about cleaning it every so often does make sense regarding the pump and lines.
It gets used occasionally but it doesn't look brown through a dirty windshield. This winter has been so mild salt-wise it's not really been needed.
I don't remember the fluid looking brown on those rare fill-ups. That color sure would have raised a red flag. :eeks:
Orange is great but blue matches the truck.
Hmmmm......Blue and orange would be brown....could we have gotten a gallon of orange at some point and I forgot? It's still visibly dirty but that would make it not as scary. Will definitely be cleaning it before putting new fluid in.
Got a couple projects in the works. Still working on a place for the winch control pack, have begun making a bracket bracket bracket (not a typo), and I'll be relocating the washer fluid tank. The husbandio found an Item Of Usefulness for that one, a dual pump out of a Volvo 240. The tank will be sitting in front of the air box, above its original spot.
Somehow my email notifications got turned off...... I was wondering why you weren't posting for the past few months hahaha
Everything going well?
I see you replaced your fuel pump... I did that a while ago. What a pain. Worst part was doing it in my steep driveway and the jack wanted to roll away with the gas tank the whole time.
I've been here chuckles! Actually, I'd better go check your build, I can't remember the last notification from it.
Everything is well and fine, pretty much the same weather we had last spring- wet and cold- so things keep getting put off and it's taking forever to get anything done. I miss the warm and dry.
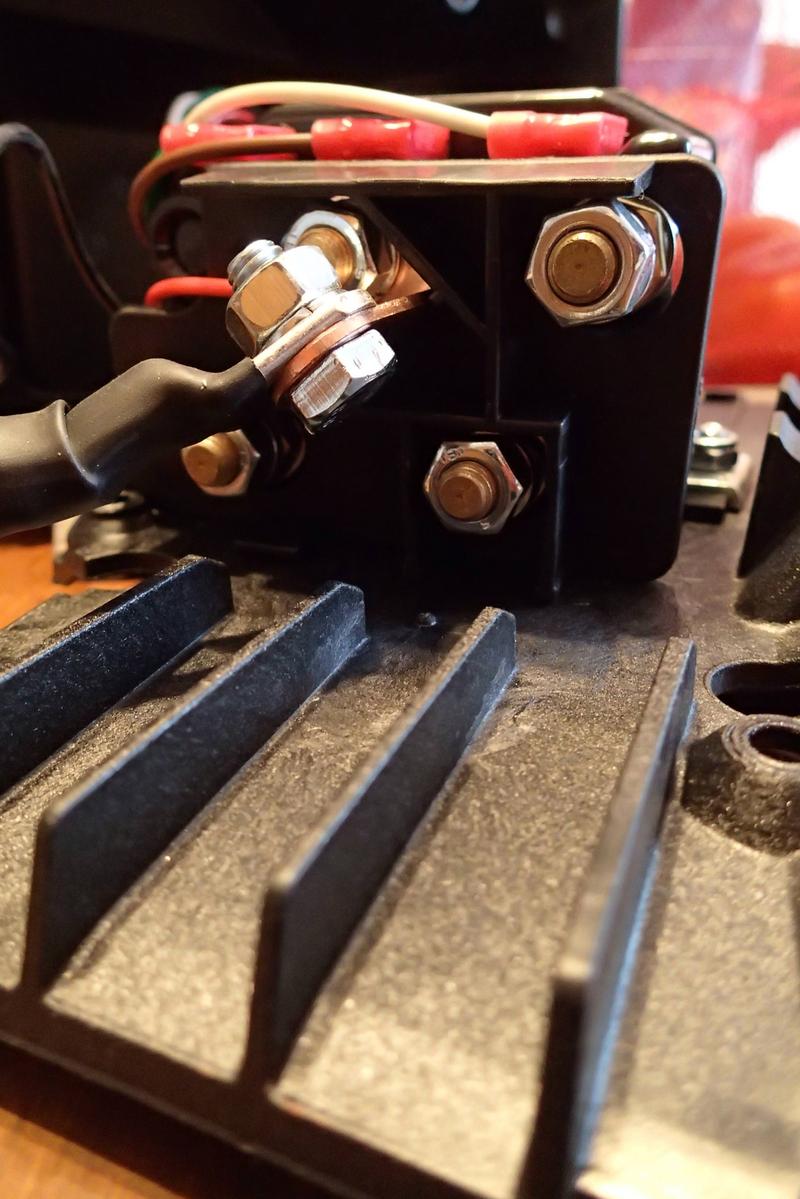
Spent the morning KISSing the winch solenoid bracket. The thing is so big and heavy the two places I had in mind aren't going to work and the third place would require even longer cables if it would fit. Been so busy splitting wood and trying to get other stuff done and it's trail building season and it's been a cold wet spring so far. Pics laters, work calls.
If I ever get this thing done I've got a new project in mind, a turn signal something sparked off a dropzone mod and part of a dark evening parked behind a stranger's car that ran out of gas.
Hope everything it treating you all well and good and things are going your ways.

 03-01-2018, 06:41 PM


 Ran out after the 1st wave and popped the grille back in. Lucky it was not a lot of cute little small marble sized hail and angled away from the front of the truck. Still, it's kinda been that kind of day.