Throttle Body Cleanout Write-up (w/ PICS)
#1
Throttle Body Cleanout Write-up (w/ PICS)
Ok, so there has been some write ups on this (Throttle Body Clean out) but no pictures. Today I cleaned out my throttle body with it OFF THE TRUCK. I believe this is the right way to do this since you really don't want the carbon buildup going into the engine (at least I don't).
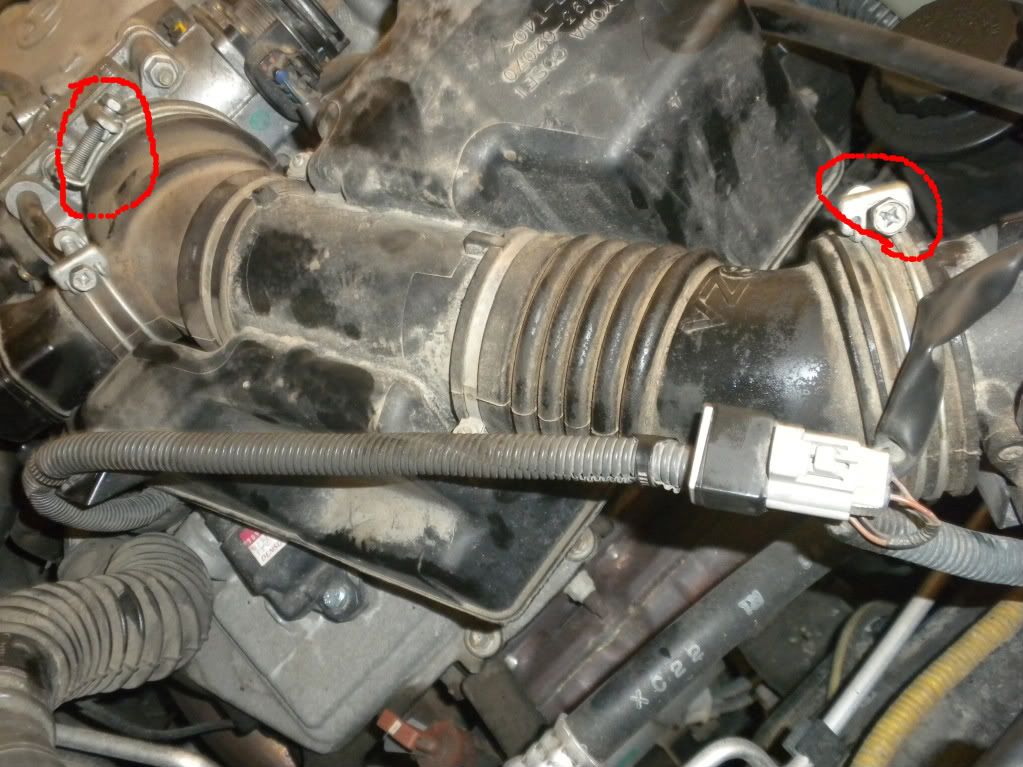
1) I detached the intake hose from the intake box (not the MAF) to the throttle body. I undid the small hose going into the baffles and the clips that hold the wires into the intake hose. These 2 clips are necessary to detach the intake hose from the truck completely.
Clip 1:

Clip 2:

The third clip is optional but it did help me to get the harness out of the way:

I then undid the clamps that hold the sections of hose and the baffles on the throttle body and MAF:

The intake hose should now come out of the truck.
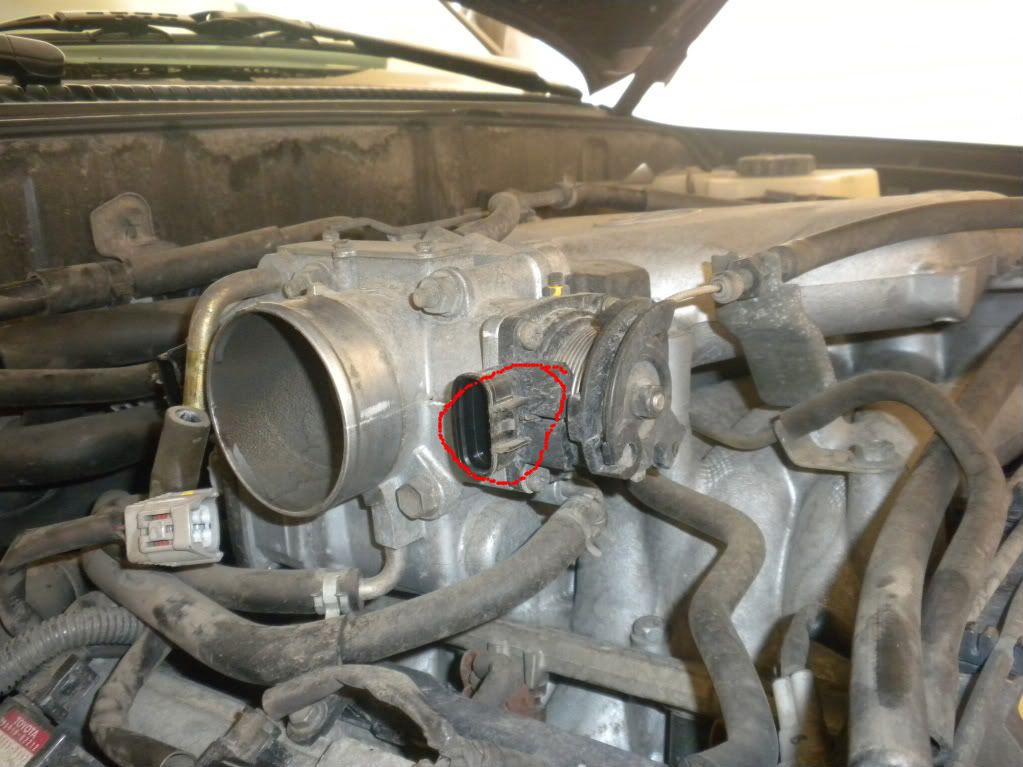
Next I undid all the vacuum hoses and connections on the throttle body:

Next I undid the 2 coolant hoses that go into the IAC:

I used a small set of vise grips (needle nose pliar looking). This allows them to lock while I have the clip expanded.

Don't forget the connection to the TPS:

So, total now we have:
1 Vacuum Hose
2 Coolant hoses
3 Electrical Connections
We still have to disconnect the throttle cable from the body. This is how I do it:

I lift up (turn clockwise) the throttle and slide out the throttle cable toward you with the throttle completely opened up. The cable only comes out 1 way.
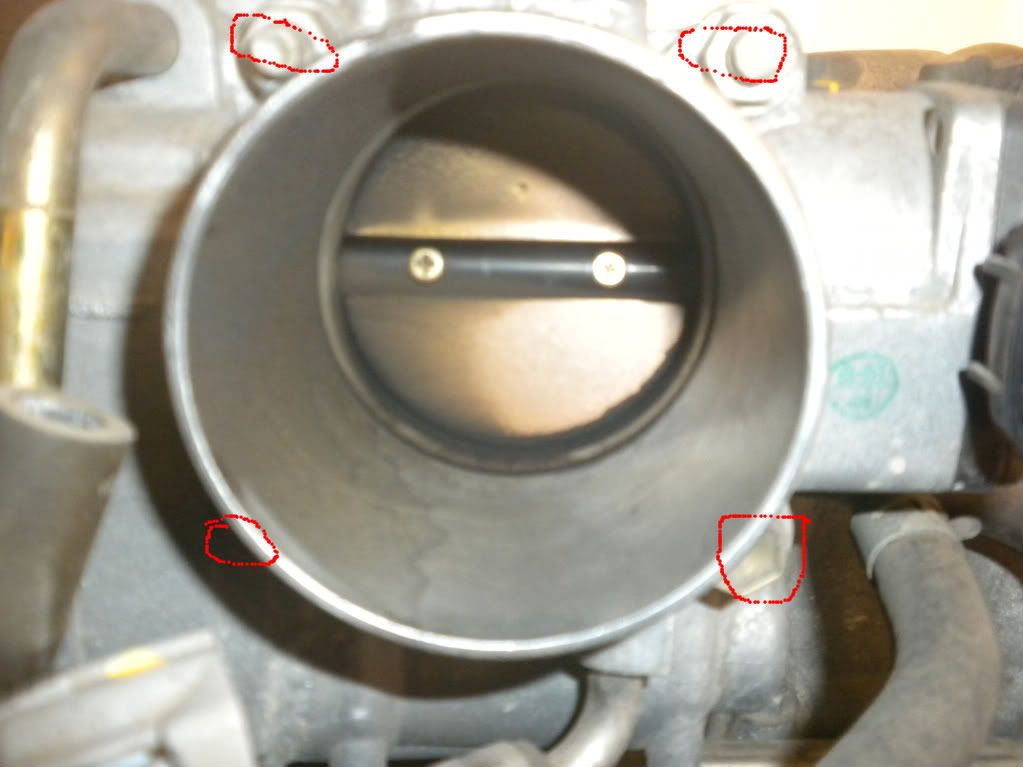
With everything disconnected, I then undid 2 nuts and 2 bolts. 2 Nuts on top and 2 Bolts on the bottom. They were 12 mm and I used a deep well socket.

See how dirty!?
The throttle body should now come out (sliding toward passenger side).
This is what you have left on the truck. See the metal gasket? You can reuse that:

Then I cleaned it up really well with carb and choke cleaner. A parts cleaning bin or bucket to dump the carb and choke cleaner is ideal. I especially cleaned out the ports (holes) on the top of the unit:

See how clean?!
Now, installation is reverse of removal. All electrical connections are different. Just make sure you put them all back or else you will throw the CEL. I did this procedure in about 1 hour start to finish without any manuals. When I started it up, it actually had a slightly higher idle but I think it should fix itself over time.
1) I detached the intake hose from the intake box (not the MAF) to the throttle body. I undid the small hose going into the baffles and the clips that hold the wires into the intake hose. These 2 clips are necessary to detach the intake hose from the truck completely.
Clip 1:

Clip 2:

The third clip is optional but it did help me to get the harness out of the way:

I then undid the clamps that hold the sections of hose and the baffles on the throttle body and MAF:

The intake hose should now come out of the truck.
Next I undid all the vacuum hoses and connections on the throttle body:

Next I undid the 2 coolant hoses that go into the IAC:

I used a small set of vise grips (needle nose pliar looking). This allows them to lock while I have the clip expanded.

Don't forget the connection to the TPS:

So, total now we have:
1 Vacuum Hose
2 Coolant hoses
3 Electrical Connections
We still have to disconnect the throttle cable from the body. This is how I do it:

I lift up (turn clockwise) the throttle and slide out the throttle cable toward you with the throttle completely opened up. The cable only comes out 1 way.
With everything disconnected, I then undid 2 nuts and 2 bolts. 2 Nuts on top and 2 Bolts on the bottom. They were 12 mm and I used a deep well socket.

See how dirty!?
The throttle body should now come out (sliding toward passenger side).
This is what you have left on the truck. See the metal gasket? You can reuse that:

Then I cleaned it up really well with carb and choke cleaner. A parts cleaning bin or bucket to dump the carb and choke cleaner is ideal. I especially cleaned out the ports (holes) on the top of the unit:

See how clean?!
Now, installation is reverse of removal. All electrical connections are different. Just make sure you put them all back or else you will throw the CEL. I did this procedure in about 1 hour start to finish without any manuals. When I started it up, it actually had a slightly higher idle but I think it should fix itself over time.
Last edited by stir_fry_boy; 10-17-2009 at 10:00 AM.
#6
Great writeup!!
Except for this part:
I hope others use common sense and do this in a bucket or parts cleaning bin.
Except for this part:
Then I cleaned it up really well with Carb and choke cleaner out in the street.
#7
To be honest, on a warm day (70 degrees F) out in the street at midday, the carb and choke cleaner is just so flammable and volatile that it evaporates either in the throttle body or quickly on asphalt. Unfortunately, I didn't have a parts cleaning bin or a bucket.
But, if people want to use a bucket that is fine.
Anyway, I did fix it so that it doesn't sound like I am advocating dumping toxic solutions out onto the street.
Last edited by stir_fry_boy; 10-17-2009 at 09:40 AM.
Trending Topics
#9
I did this and now my truck idles way high. about 1950 RPM when cold, and about 1200RPM when warm. Yikes! I did not take off my IAC, and clean it. Is that the problem? My truck runs awesome now, its just idling way high like I said.
#10
You may have tightened the throttle cable too much. You need to loosen that. If not you need to reset your throttle position sensor. In order to do this you need to have the truck running, and unplug the front sensor (toward the front of the car). Plug it back in. Your CEL will turn on but after like 3 or 4 key starts it will turn off. That should fix the problem. If someone has a better way to reset the TPS please feel free.
#12
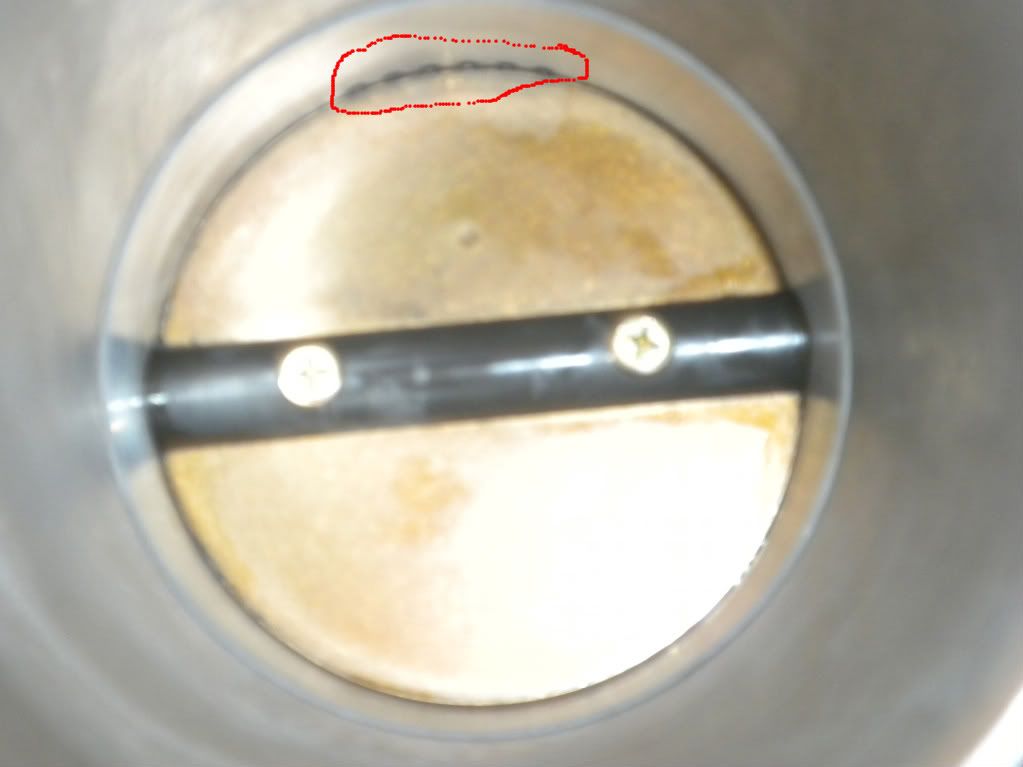
I made one out of "Ultra Copper". Sensor safe. I just have a hard time figuring out why they restricted the air flow into the engine so much. The throttle butterfly doesn't even open all the way. Those o-ring gaskets look nice.
#13
You may have tightened the throttle cable too much. You need to loosen that. If not you need to reset your throttle position sensor. In order to do this you need to have the truck running, and unplug the front sensor (toward the front of the car). Plug it back in. Your CEL will turn on but after like 3 or 4 key starts it will turn off. That should fix the problem. If someone has a better way to reset the TPS please feel free.
#15
#17
Any reason why you can't just Dremel off the "D"?
#18
Not a bad idea. Only problem is it's hard not to make a lip while using a bit that removes a decent amount of material (as in you will now have excess material now built to prevent a perfect seal when it's reinstalled) and obviously it would need to be cleaned real good with all those metal shavings/dust on it. Plus, if you screwed it up, you're dead in the water until you can get another one.
I'd just go with a guaranteed perfect seal, the O Gasket. And I'm not saying that because I sell them...I ran one way before I ever sold them; on my Taco and my current 4R.
I'd just go with a guaranteed perfect seal, the O Gasket. And I'm not saying that because I sell them...I ran one way before I ever sold them; on my Taco and my current 4R.

#19


