Some weekend mods
#1
Thread Starter
Contributing Member
Joined: Dec 2005
Posts: 2,226
Likes: 0
From: Houston (home), Atlanta (school), Cincinnati (work)
Some weekend mods
Since I was about the only one left at Tech over the break, I've had a lot of time to myself and to work on some mods that I've been meaning to do. Along with just a basic interior cleaning, I finally got around to painting my wheels black (cheaper than swapping wheels with my off-road set) and FINALLY doing the deckplate mod. I didn't have any of the materials so going out and getting them all was what was really holding me back. Here are some pics (I have more of the install if yall want em):
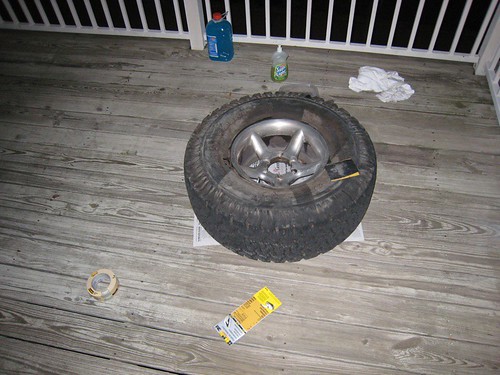
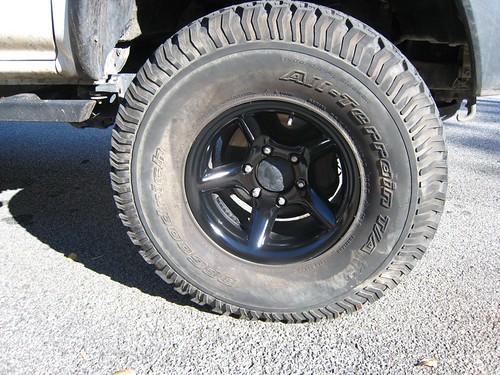
Wheels:
(Before)

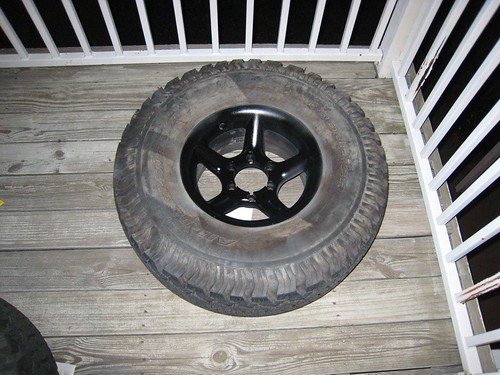
(After)
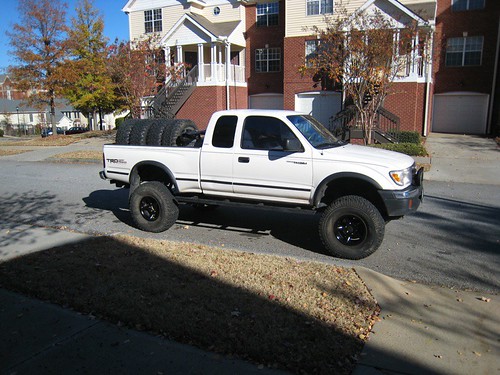
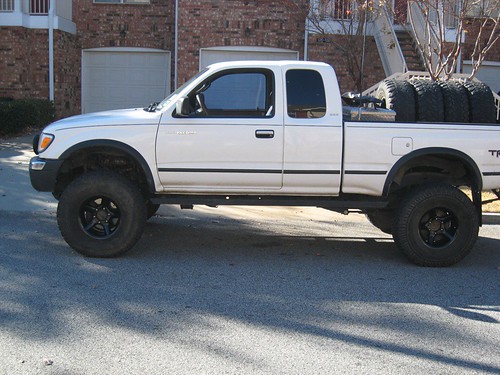
And deckplate:
Dirty airbox anyone?
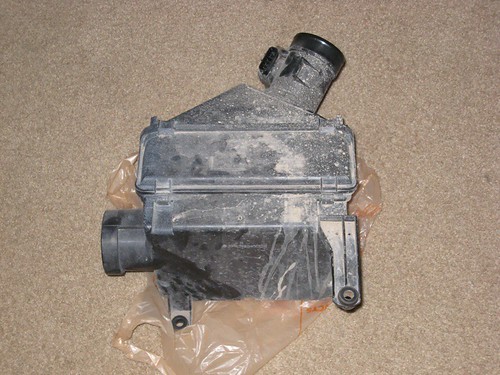
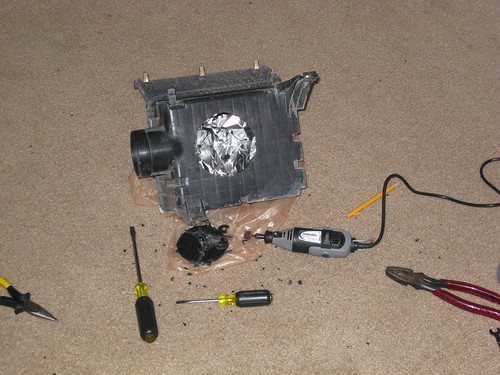
I didnt think it was worth paying $20-30 for a hole saw so out came the messy dremel...
The deckplate came in white and we just can't have that...
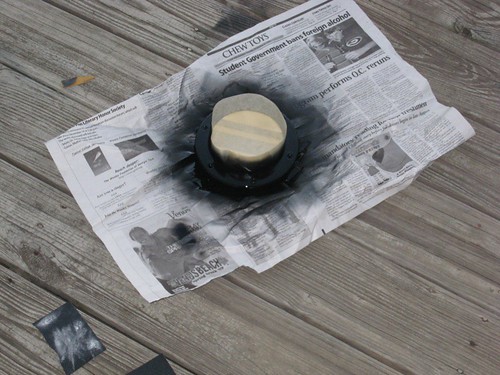
And the finished product
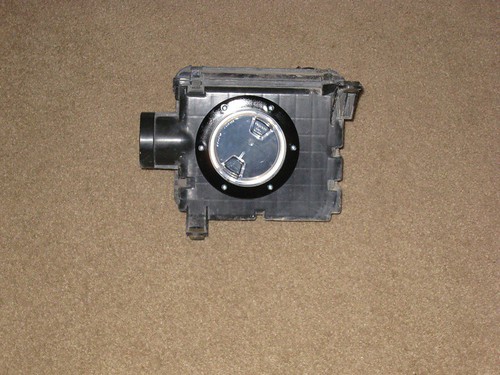
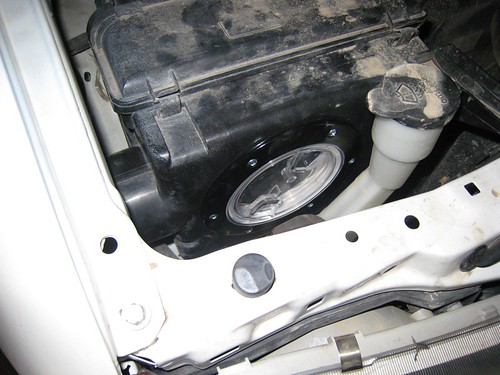
So far with the deckplate mod I don't notice TOO much difference. Maybe a little more growl at high RPMs (4000+) but other than that not much...maybe I need to give it more time and drive under normal conditions.
The only thing left to do with the wheels is touch up a small spot I messed up on the rear driver's side wheel. I touched it up already but in an effort to make it dry fast I blew on it a lot...BAD IDEA. Now that spot looks like crap so I'm going to touch it up tonight but it should be ok. I also decided to not put the center caps back on (theyre the kind that stick out 4" or so) because I don't like them. I am going to paint the center part of the hub now so itll blend in. The rear looks worse unpainted like that but I'll fix it.
It seems like every time I take pics of my truck I have those tires in back heh. They don't live there, they just always happen to be caught in pics while theyre in transit somewhere or have just been moved or are trying to level out my suspension left to right...
Wheels:
(Before)


(After)


And deckplate:
Dirty airbox anyone?

I didnt think it was worth paying $20-30 for a hole saw so out came the messy dremel...

The deckplate came in white and we just can't have that...

And the finished product


So far with the deckplate mod I don't notice TOO much difference. Maybe a little more growl at high RPMs (4000+) but other than that not much...maybe I need to give it more time and drive under normal conditions.
The only thing left to do with the wheels is touch up a small spot I messed up on the rear driver's side wheel. I touched it up already but in an effort to make it dry fast I blew on it a lot...BAD IDEA. Now that spot looks like crap so I'm going to touch it up tonight but it should be ok. I also decided to not put the center caps back on (theyre the kind that stick out 4" or so) because I don't like them. I am going to paint the center part of the hub now so itll blend in. The rear looks worse unpainted like that but I'll fix it.
It seems like every time I take pics of my truck I have those tires in back heh. They don't live there, they just always happen to be caught in pics while theyre in transit somewhere or have just been moved or are trying to level out my suspension left to right...
Last edited by drguitarum2005; 11-25-2006 at 07:05 PM.
#2
Very nice...
Question, are you using just regular black spray paint on your rims, or automotive paint?
I am making my Runner a black and Anthracite Metallic themes so I want to get my rims painted...
Tomorrow I am going to get the parts for the deck plate mod myself (only thing holdin me back too...)
Still lookin good!!
#3
Thread Starter
Contributing Member
Joined: Dec 2005
Posts: 2,226
Likes: 0
From: Houston (home), Atlanta (school), Cincinnati (work)
I used flat black sandable primer in 2 coats, black wheel spray paint (I think it was flat black also) in 3 coats, and a clear spray on top in 3 coats for a shiny finish. I can give you exact brands/types if you want.
#4
lol...
Sorry for soundin like a kid in a candy store...
But I have been doing alot of mods to the Runner and am on a roll so...
It brings a smile to my face thinking of shortenign my list of to-do's to have done's...
#5
I saved the time in having to paint me a black deckplate and got one already black hehe..
did you reset the computer?
it maybe that its not adapting to your air changes and its retarding the timing a tiny bit.
you'll notice a diff later
did you reset the computer?
it maybe that its not adapting to your air changes and its retarding the timing a tiny bit.
you'll notice a diff later
#6
Thread Starter
Contributing Member
Joined: Dec 2005
Posts: 2,226
Likes: 0
From: Houston (home), Atlanta (school), Cincinnati (work)
For the wheel paint I went to Pepboys and picked up:
Dupli-Color Sandable Primer (Black) PN: DAP 1698
Dupli-Color High Performance Wheel Coating (Flat Black) PN: HWP104
Dupli-Color High Performance Wheel Coating (Clear) PN: HWP103 (as recommended on the back of the flat black wheel paint to go on top)
I washed the wheels with just warm water and dish soap and a rag, rinsed it off, sanded it down smooth (3m wetordry 320 grit), rinsed it again, spot-sanded, rinsed again then taped around the edge of the wheel so I wouldn't hit the tire and put tape around the air valve then laid 2 coats of primer 10 mins apart then 10 mins later 3 coats of paint 10 mins apart, then 10 mins later 3 coats of clear coat 10 mins apart then let dry for 1 hour before putting back on the truck for the night. I didn't drive it til the next day. Take 3 hours to be dry to handle and 7 days to cure 100%.
Since you're doing the deckplate too and I know there are lots of good writeups, I'll just share some quick tips. I got the 4" deckplate at a local boat store for $12. Its your standard Beckson deckplate, white with a clear cover. I painted the plate black (as pictured) using the same paint from the wheels (as it was already out) but using 1 coat of each of the 3 components). I picked up 8 #8 x 3/4" self-tapping metal screws at Home Depot (#8 fits perfectly...1/2" probably would have fit better lengthwise, mine were a little long, but works fine) and used mt Dremel to cut the hole. I used Permatex Sensor-Safe Blue RTV Silicone Gasket Maker caulk from the boat store as well. It was like $6 for a tube which is a LOT of stuff for such a small project but I guess I can use it for other stuff.
Let me know if you have any other questions and good luck!
#7
Thread Starter
Contributing Member
Joined: Dec 2005
Posts: 2,226
Likes: 0
From: Houston (home), Atlanta (school), Cincinnati (work)
i pulled the EFI fuse during the install and put it back in like 1-2 hours later. That shoulda been fine right?
Trending Topics
#8
For the wheel paint I went to Pepboys and picked up:
Dupli-Color Sandable Primer (Black) PN: DAP 1698
Dupli-Color High Performance Wheel Coating (Flat Black) PN: HWP104
Dupli-Color High Performance Wheel Coating (Clear) PN: HWP103 (as recommended on the back of the flat black wheel paint to go on top)
I washed the wheels with just warm water and dish soap and a rag, rinsed it off, sanded it down smooth (3m wetordry 320 grit), rinsed it again, spot-sanded, rinsed again then taped around the edge of the wheel so I wouldn't hit the tire and put tape around the air valve then laid 2 coats of primer 10 mins apart then 10 mins later 3 coats of paint 10 mins apart, then 10 mins later 3 coats of clear coat 10 mins apart then let dry for 1 hour before putting back on the truck for the night. I didn't drive it til the next day. Take 3 hours to be dry to handle and 7 days to cure 100%.
Since you're doing the deckplate too and I know there are lots of good writeups, I'll just share some quick tips. I got the 4" deckplate at a local boat store for $12. Its your standard Beckson deckplate, white with a clear cover. I painted the plate black (as pictured) using the same paint from the wheels (as it was already out) but using 1 coat of each of the 3 components). I picked up 8 #8 x 3/4" self-tapping metal screws at Home Depot (#8 fits perfectly...1/2" probably would have fit better lengthwise, mine were a little long, but works fine) and used mt Dremel to cut the hole. I used Permatex Sensor-Safe Blue RTV Silicone Gasket Maker caulk from the boat store as well. It was like $6 for a tube which is a LOT of stuff for such a small project but I guess I can use it for other stuff.
Let me know if you have any other questions and good luck!
Dupli-Color Sandable Primer (Black) PN: DAP 1698
Dupli-Color High Performance Wheel Coating (Flat Black) PN: HWP104
Dupli-Color High Performance Wheel Coating (Clear) PN: HWP103 (as recommended on the back of the flat black wheel paint to go on top)
I washed the wheels with just warm water and dish soap and a rag, rinsed it off, sanded it down smooth (3m wetordry 320 grit), rinsed it again, spot-sanded, rinsed again then taped around the edge of the wheel so I wouldn't hit the tire and put tape around the air valve then laid 2 coats of primer 10 mins apart then 10 mins later 3 coats of paint 10 mins apart, then 10 mins later 3 coats of clear coat 10 mins apart then let dry for 1 hour before putting back on the truck for the night. I didn't drive it til the next day. Take 3 hours to be dry to handle and 7 days to cure 100%.
Since you're doing the deckplate too and I know there are lots of good writeups, I'll just share some quick tips. I got the 4" deckplate at a local boat store for $12. Its your standard Beckson deckplate, white with a clear cover. I painted the plate black (as pictured) using the same paint from the wheels (as it was already out) but using 1 coat of each of the 3 components). I picked up 8 #8 x 3/4" self-tapping metal screws at Home Depot (#8 fits perfectly...1/2" probably would have fit better lengthwise, mine were a little long, but works fine) and used mt Dremel to cut the hole. I used Permatex Sensor-Safe Blue RTV Silicone Gasket Maker caulk from the boat store as well. It was like $6 for a tube which is a LOT of stuff for such a small project but I guess I can use it for other stuff.
Let me know if you have any other questions and good luck!
Thanks Alot...
Got It All Writen Down...
I will paint the wheels after I get the Head Unit and Antenna Back...
(I can't stand driving with no radio feature and a cdplayer that dosen't play new or burned cd's... I am stuck listing to some really old stuff...)
Thanks Alot Though!!!
Updates will be on my Runners page
#13
Thread Starter
Contributing Member
Joined: Dec 2005
Posts: 2,226
Likes: 0
From: Houston (home), Atlanta (school), Cincinnati (work)
I'll bet it would but you should have an emphasis on sanding the bumper down. if its chrome you can get some etching primer to stick into the chrome to give the paint something to stick to
#14
#15
Those wheels look great!!!!
I did my deckplate, but it was black already, some off brand. It is only really making a difference above 4000 your right, right about 4200 is where mine sounds really good, but you should check out my new ISR thread, and do that too, cost you another $7 or so at the home improvement store of your choice. Check it out, then you'll get some noticeable noise and "seat of the pants" throttle response. Thread Here: https://www.yotatech.com/forums/f2/newly-designed-isr-04-double-cab-100417/
I did my deckplate, but it was black already, some off brand. It is only really making a difference above 4000 your right, right about 4200 is where mine sounds really good, but you should check out my new ISR thread, and do that too, cost you another $7 or so at the home improvement store of your choice. Check it out, then you'll get some noticeable noise and "seat of the pants" throttle response. Thread Here: https://www.yotatech.com/forums/f2/newly-designed-isr-04-double-cab-100417/
Last edited by 04 Rocko Taco; 11-28-2006 at 01:35 PM.
#17
Those wheels look great!!!!
I did my deckplate, but it was black already, some off brand. It is only really making a difference above 4000 your right, right about 4200 is where mine sounds really good, but you should check out my new ISR thread, and do that too, cost you another $7 or so at the home improvement store of your choice. Check it out, then you'll get some noticeable noise and "seat of the pants" throttle response. Thread Here: https://www.yotatech.com/forums/showthread.php?t=100417
I did my deckplate, but it was black already, some off brand. It is only really making a difference above 4000 your right, right about 4200 is where mine sounds really good, but you should check out my new ISR thread, and do that too, cost you another $7 or so at the home improvement store of your choice. Check it out, then you'll get some noticeable noise and "seat of the pants" throttle response. Thread Here: https://www.yotatech.com/forums/showthread.php?t=100417
Mine I notice sound kicking in at 2500 close to 3000RPM...
Intresting...
Very Intresting...
#18
Contributing Member
Joined: Dec 2003
Posts: 3,659
Likes: 0
From: Between a rock and a hard place, AZ
Careful, bro...you know what they say, "Once you go black..."  I got black wheels and the next thing you know, I'm painting everything that was chrome a nice satin black... It's addictive!
Good job on the wheels, and your ride's looking great!
 I got black wheels and the next thing you know, I'm painting everything that was chrome a nice satin black... It's addictive!
 Good job on the wheels, and your ride's looking great!

#19
Contributing Member
Joined: Dec 2003
Posts: 3,659
Likes: 0
From: Between a rock and a hard place, AZ
Those wheels look great!!!!
I did my deckplate, but it was black already, some off brand. It is only really making a difference above 4000 your right, right about 4200 is where mine sounds really good, but you should check out my new ISR thread, and do that too, cost you another $7 or so at the home improvement store of your choice. Check it out, then you'll get some noticeable noise and "seat of the pants" throttle response. Thread Here: https://www.yotatech.com/forums/showthread.php?t=100417
I did my deckplate, but it was black already, some off brand. It is only really making a difference above 4000 your right, right about 4200 is where mine sounds really good, but you should check out my new ISR thread, and do that too, cost you another $7 or so at the home improvement store of your choice. Check it out, then you'll get some noticeable noise and "seat of the pants" throttle response. Thread Here: https://www.yotatech.com/forums/showthread.php?t=100417
#20

I am doing a black and brown theme with the Runner,
and chrome is just not fitting into the theme...
Hence my reasoning...
I don't if anyone else has the same idea...


