Replacing 4Runner horns with American Car Horns
#1
Replacing 4Runner horns with American Car Horns
Replacing the 4Runner Horn
 Another in my on going series of "Mods for Dummies". This one will be installing a standard 2 note horn into a Gen 3 4runner.
Locate a suitable donor vehicle. I choose a 1999 Cadillac Deville. These horns were located behind the right side headlight. I was able to get both flutes and the harness for each horn. These are two wire horns (green & black) so using them in a 4runner is really simple once you see the schematic.
Before we begin,
Disclaimer: This write up is for educational purposes only. Any use or application of this procedure is done so at the risk of the installer/owner. The author and YotaTech are not responsible for any modifications done to any vehicle using these or any other related procedures contained in this write up. Descriptions and photographs are the sole property and copyright of the author ritzy4runner and may not be copied or distributed without written consent. Links to this article may be allowed but are protected by all US copyrights. Use of specific products along with any photographs of such items remains the copyrighted property of the copyright holder and is not an endorsement of any specific company or items.
Basic hand tools are required as well as a basic understanding of a 12vdc negative ground system.
Tools:
-10 mm socket/wrench
-12 mm socket/wrench
-3/8 drive ratchet handle
-3/8 drive 3 extension
-Diagonal cutters
-Wire strippers
-Wire connector crimper
-File or bench grinder
-Lineman pliers
-3/8 drill
-5/16t drill bit
-2 - loop end lugs
-2 Flat male connectors
Material:
-Set of dual note horns - two wire negative ground. I recommend metal body flutes for deeper tones. Most high end GM vehicles will have these. Be sure to get the flutes from the same vehicle so you dont have two high/low horns
-Harness for horns
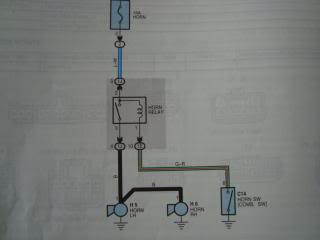
This is the basic wiring schematic for the Gen 3 4runner horn;
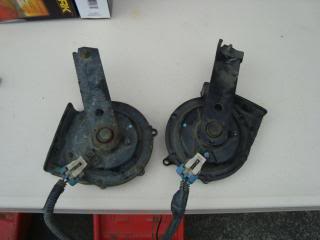
Begin with selecting the horns that we will install. 1999 Cadillac Deville
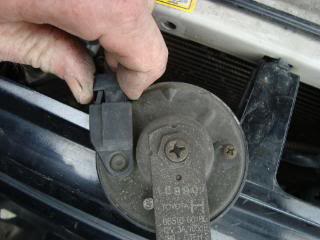
Starting with the right side horn, using a 10 mm wrench/socket, remove the attaching bolt.
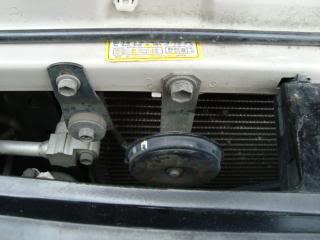
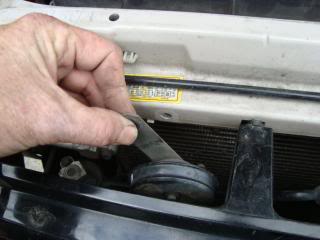
Grasp the connector at the top and pressing the tab in; pull the connector free of the horn.
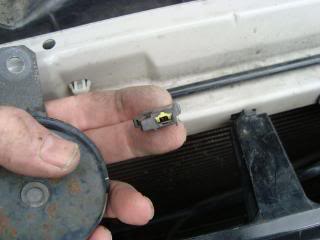
Using a 10 mm socket, remove the right side hood latch holding bolt.
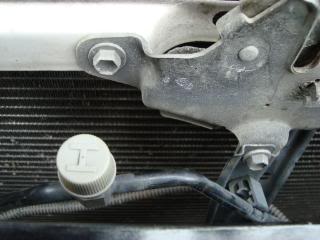
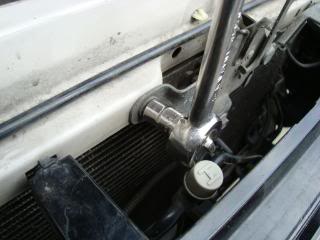
There are two horn flutes. The one we will mount first will be the horn that has an integrated threaded nut in the flange. The horn with the blind nut clip will be installed on the left side of radiator support.
Using the ball peen hammer, flatten the flange tang.
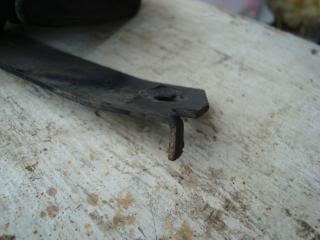
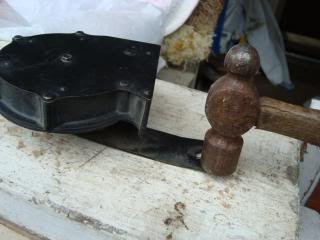
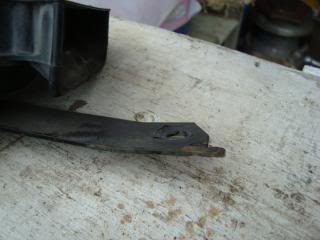
Using the drill and 5/16 drill bit drill out the threads in the flange nut.
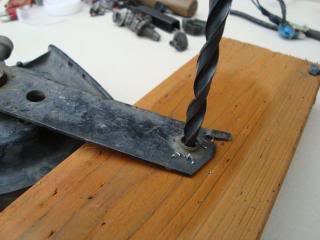
Using either a flat mill bastard file or bench grinder, remove the remaining shoulder of the flange threaded nut so the flange is flat.
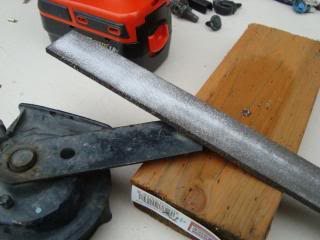
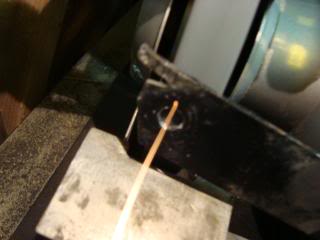
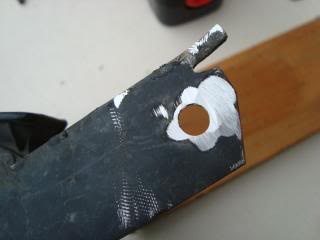
Grasp the tang with the lineman or other suitable heavy duty pliers. Using an up-down motion break off the tang.
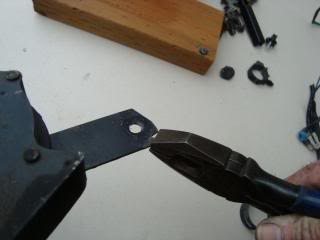
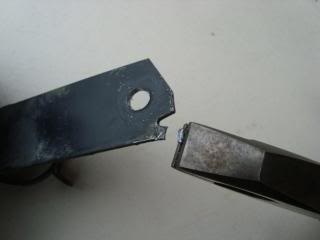
File down the end of the flange by rounding the end.
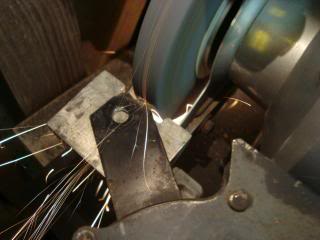
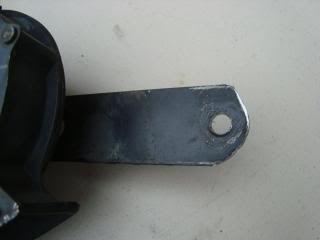
Install the Loop end connector to the black (ground wire) wire of the harness.
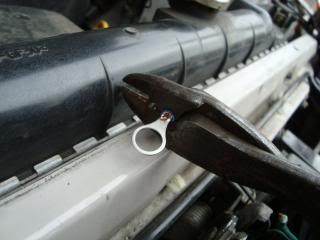
Install the flat male tip connector to the green wire.
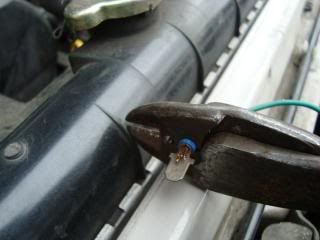
Attach the horn harness to the horn.
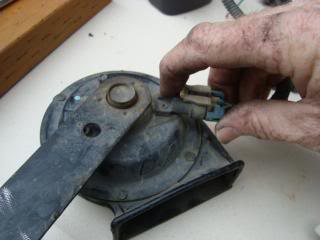
From the right side of the radiator support, slip the horn down inside the space between the radiator and the grill working over to the hood latch hold down
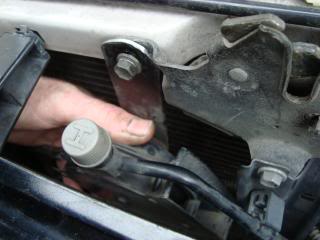
Press the A/C tubing back into its clip on the radiator center support.
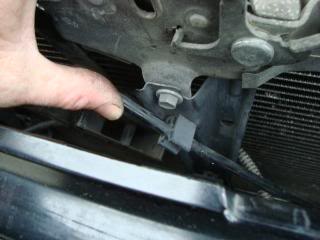
Tighten the hood latch bolt securely but do not over tighten. Ensure the horn flute is situated so as not to touch either the support or the A/C tubing.
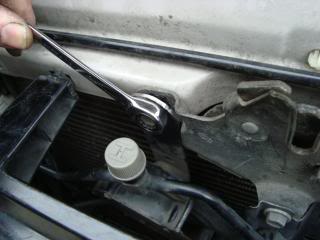
Connect the flat tip male connector from the horn harness to the OEM connector for the right side horn.
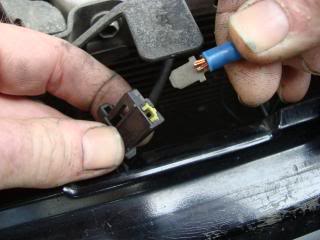
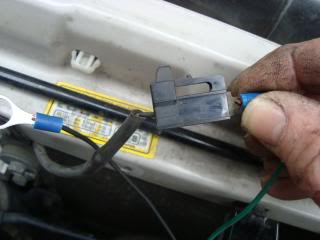
Route the ground loop connector under the A/C tubing and up to the right side OEM horn location. Reinstall the horn bolt. I used the OEM horn as the washer as it would provide a solid mount and contact point for the ground.
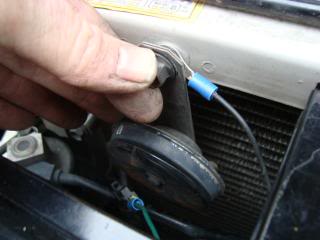
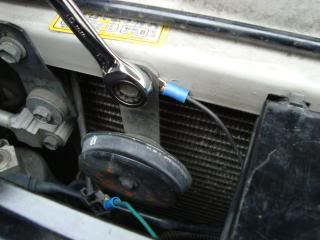
The right side horn is now installed.
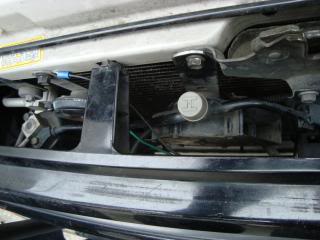
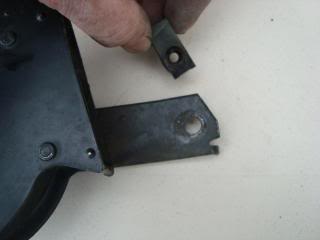
Prepare the second horn flute as follows; the second flute uses a clip blind nut. Remove this clip.
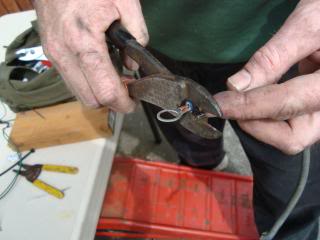
Attach the loop end connector to the ground (black) wire.
Attach the flat male end connector to the positive (green) wire.

Attach the harness to the second horn.
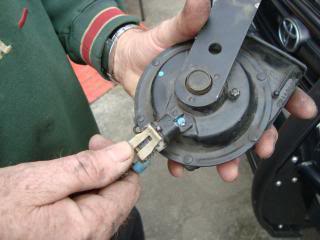
Remove the left side horn.
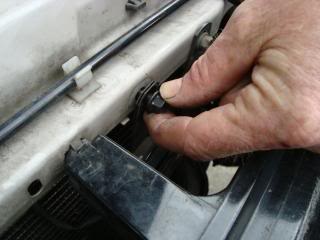
Squeeze the connector as you did for the right side horn connector and pull the connector free from the horn.
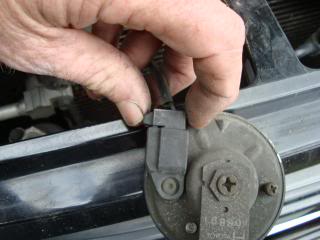
Install the new horn in the left horn location. Place the loop end connector between the radiator support and the horn flange, and then tighten.
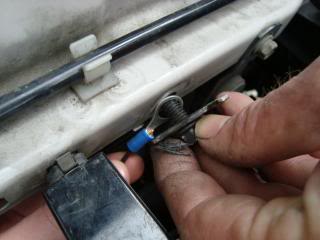
Position the flange so that the flange tang points upward. Using the ball peen hammer, tap the flange over to provide for solid placement of the horn.
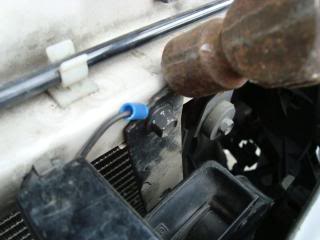
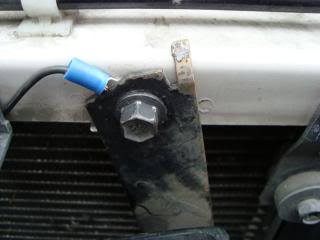
Connect the flat blade connector (green wire) to the OEM horn connector.

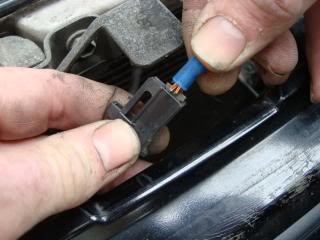
If it is desired, you may tie back the harnesses but if the harness were trimmed during installation this will not be necessary.
The horns are now installed. Enjoy!
Follow this link to hear the horns, 4runner stock OEM Gen 3 horn and the installed Cadillac dual flute horns.
http://www.youtube.com/watch?v=TmYrNkx2SdQ
 Another in my on going series of "Mods for Dummies". This one will be installing a standard 2 note horn into a Gen 3 4runner.
 Locate a suitable donor vehicle. I choose a 1999 Cadillac Deville. These horns were located behind the right side headlight. I was able to get both flutes and the harness for each horn. These are two wire horns (green & black) so using them in a 4runner is really simple once you see the schematic.
Before we begin,

Disclaimer: This write up is for educational purposes only. Any use or application of this procedure is done so at the risk of the installer/owner. The author and YotaTech are not responsible for any modifications done to any vehicle using these or any other related procedures contained in this write up. Descriptions and photographs are the sole property and copyright of the author ritzy4runner and may not be copied or distributed without written consent. Links to this article may be allowed but are protected by all US copyrights. Use of specific products along with any photographs of such items remains the copyrighted property of the copyright holder and is not an endorsement of any specific company or items.
Basic hand tools are required as well as a basic understanding of a 12vdc negative ground system.
Tools:
-10 mm socket/wrench
-12 mm socket/wrench
-3/8 drive ratchet handle
-3/8 drive 3 extension
-Diagonal cutters
-Wire strippers
-Wire connector crimper
-File or bench grinder
-Lineman pliers
-3/8 drill
-5/16t drill bit
-2 - loop end lugs
-2 Flat male connectors
Material:
-Set of dual note horns - two wire negative ground. I recommend metal body flutes for deeper tones. Most high end GM vehicles will have these. Be sure to get the flutes from the same vehicle so you dont have two high/low horns
-Harness for horns
This is the basic wiring schematic for the Gen 3 4runner horn;

Begin with selecting the horns that we will install. 1999 Cadillac Deville

Starting with the right side horn, using a 10 mm wrench/socket, remove the attaching bolt.


Grasp the connector at the top and pressing the tab in; pull the connector free of the horn.


Using a 10 mm socket, remove the right side hood latch holding bolt.


There are two horn flutes. The one we will mount first will be the horn that has an integrated threaded nut in the flange. The horn with the blind nut clip will be installed on the left side of radiator support.
Using the ball peen hammer, flatten the flange tang.


Using the drill and 5/16 drill bit drill out the threads in the flange nut.

Using either a flat mill bastard file or bench grinder, remove the remaining shoulder of the flange threaded nut so the flange is flat.


Grasp the tang with the lineman or other suitable heavy duty pliers. Using an up-down motion break off the tang.


File down the end of the flange by rounding the end.


Install the Loop end connector to the black (ground wire) wire of the harness.

Install the flat male tip connector to the green wire.

Attach the horn harness to the horn.

From the right side of the radiator support, slip the horn down inside the space between the radiator and the grill working over to the hood latch hold down

Press the A/C tubing back into its clip on the radiator center support.

Tighten the hood latch bolt securely but do not over tighten. Ensure the horn flute is situated so as not to touch either the support or the A/C tubing.

Connect the flat tip male connector from the horn harness to the OEM connector for the right side horn.


Route the ground loop connector under the A/C tubing and up to the right side OEM horn location. Reinstall the horn bolt. I used the OEM horn as the washer as it would provide a solid mount and contact point for the ground.


The right side horn is now installed.

Prepare the second horn flute as follows; the second flute uses a clip blind nut. Remove this clip.

Attach the loop end connector to the ground (black) wire.

Attach the flat male end connector to the positive (green) wire.

Attach the harness to the second horn.

Remove the left side horn.

Squeeze the connector as you did for the right side horn connector and pull the connector free from the horn.

Install the new horn in the left horn location. Place the loop end connector between the radiator support and the horn flange, and then tighten.

Position the flange so that the flange tang points upward. Using the ball peen hammer, tap the flange over to provide for solid placement of the horn.


Connect the flat blade connector (green wire) to the OEM horn connector.


If it is desired, you may tie back the harnesses but if the harness were trimmed during installation this will not be necessary.
The horns are now installed. Enjoy!

Follow this link to hear the horns, 4runner stock OEM Gen 3 horn and the installed Cadillac dual flute horns.
http://www.youtube.com/watch?v=TmYrNkx2SdQ
#3
Eltons got the horn I want.Horns are for making dangerously stupid people on the road crap in there pants.IMO...I.E.people texting while driving,my favorite-people driving in 2 lanes,driving while stupid is very common.
#5

I'll have to watch out for a set next time I am out. Really do like Lexus. And THANKS DC
 !
!Decided to go with these horns as they can be found quite easily and they should be pretty easy for just about anyone looking to get a more solid sound from their horns.
#7
I have Crown Vic horns but am still always on the lookout for the Ultimate...thanks DC for the Lexus suggestion.
I had a Ford truck horn for awhile in general they are still too high pitched- I want something with some low end rumble.
Idiot the other day was doing the slow speed drift from left lane into right. About every 30 seconds it would repeat... Could not see the drivers head, caught up at a light and it was an elderly lady who no longer should be driving methinks...
Outstanding detail just like all the Ritz writeups.
Trending Topics
#8
Option three: find a set off an 01-02 4Runner or an 01-04 Tacoma. Also plug and play and have that "American" sound.
Funny though, I've done just the opposite...I pulled the "American" sounding horns off my '02 and chucked them right in the trash and installed some LandCruiser 80 series horns (also plug and play) to get me that nice Toyota sound I've known and loved for many many years.
-Ferg-
Funny though, I've done just the opposite...I pulled the "American" sounding horns off my '02 and chucked them right in the trash and installed some LandCruiser 80 series horns (also plug and play) to get me that nice Toyota sound I've known and loved for many many years.
-Ferg-
Last edited by theferg; 07-31-2012 at 10:25 AM.
#9
I have since "modified" my horns, seems one of the tones died ... hey it was a used part, but anyway, decided to go with the twin horns from 91 and 92 Lincoln Continental. They use two tones, are grounded via the mounting bolt and both horns HI & LO are tied together so you end up with a single wire to attach. I decided to give a pair of these a try as they only needed one wire to operate both notes so I figured what the heck? Twice the horns should be a bit louder then just the one pair ... WOW
Needles to say I had to do a bit of hanger mounting bending but after flattening them out, I ended up mounting them in the same locaitons as I had the single horn notes from the Caddy. I'll try to update the write up to reflect some of the changes. As for cost. less then $5 for both sets!

Needles to say I had to do a bit of hanger mounting bending but after flattening them out, I ended up mounting them in the same locaitons as I had the single horn notes from the Caddy. I'll try to update the write up to reflect some of the changes. As for cost. less then $5 for both sets!

Last edited by Ritzy4Runner; 05-25-2010 at 10:51 AM. Reason: spelling
#14
I forgot about this mod until we had a guy come into our shop and wanted to change out the horns on his newer Caddy for the kind that was stock in his 91 Deville.
Originally I had purchased some JY Lexus horns from I think either an ES300 or LS400 and didn't notice anything different.
Then the above mentioned Caddilac guy came in and reminded me of the Caddy horn mod. I pulled a pair from a 91 Deville, modded the brackets similar to the write up above and installed them and DAYUM what a difference!!!
The Cadillac horn mod is one of the very easiest and cheapest to do and I highly recommend it to anybody not wanting air horns.

#16
Older RWD Cadillacs and Buicks have the sets of 4 horns, all different notes. Really gives it that full orchestral impact, with all the highs and lows.
Chevy's and Old's made do with only 2.
Chevy's and Old's made do with only 2.
#17
Nice. I'm a big fan of my Cadillac 4-note horns.
4 Caddys versus 2 Toyota horns:
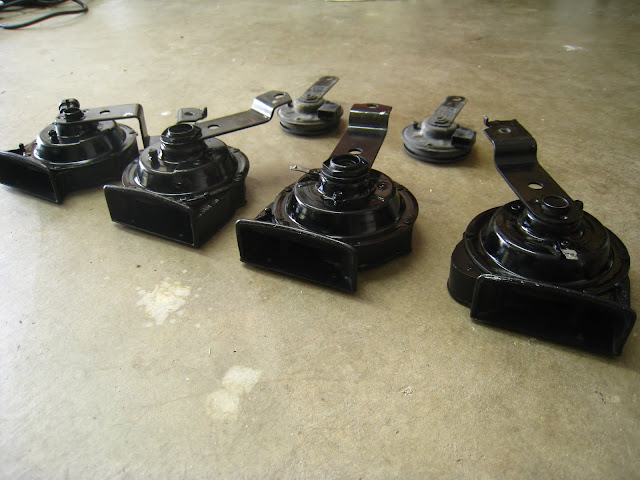
You mounted yours the same way as mine; the A and F notes are in the stock location and the C and D notes are next to the battery:

They sound amazing.
http://www.youtube.com/watch?v=ljZWstarTsc
4 Caddys versus 2 Toyota horns:
You mounted yours the same way as mine; the A and F notes are in the stock location and the C and D notes are next to the battery:
They sound amazing.
http://www.youtube.com/watch?v=ljZWstarTsc
#18
Anybody have their old horns laying around? I need another set of original "foreign" sounding horns for a new project. I am willing to trade my stock "American" sounding horns or pay a few $$.
-Ferg
-Ferg
#20
This is funny...I was browsing the local "you pull it" style salvage yard when I came across a Cadillac with the 4 horns. FWIW I think it was a 1994. I find it funny that someone else suffered American horn envy enough to perform the mods I have in mind.  I still haven't mounted mine yet because I need to round off the tops of the metal brackets on the horns and wire everything up. The problem that I ran into was finding a place to fit all four of them to minimize the amount of wire I have running. I decided to sacrifice a little noise and mount them on top of the passenger wheel well. I ended up machining a post for them to mount to as you can see in the pics. The post is tapped on one end to accept a bolt that will pass though a hole already in the wheel well sheet metal of my 1996 Tacoma. The all thread allowed for adjustable placement to minimize interference with other engine bay components. Has anyone with a four horn setup felt the need to use a relay due to the higher amperage? I was leaning towards using a relay just to be safe.
http://www.flickr.com/photos/34007886@N03/7786111018/http://www.flickr.com/photos/34007886@N03/7786111018/ by http://www.flickr.com/people/34007886@N03/, on Flickr
http://www.flickr.com/photos/34007886@N03/7786118484/http://www.flickr.com/photos/34007886@N03/7786118484/ by http://www.flickr.com/people/34007886@N03/, on Flickr
 I still haven't mounted mine yet because I need to round off the tops of the metal brackets on the horns and wire everything up. The problem that I ran into was finding a place to fit all four of them to minimize the amount of wire I have running. I decided to sacrifice a little noise and mount them on top of the passenger wheel well. I ended up machining a post for them to mount to as you can see in the pics. The post is tapped on one end to accept a bolt that will pass though a hole already in the wheel well sheet metal of my 1996 Tacoma. The all thread allowed for adjustable placement to minimize interference with other engine bay components. Has anyone with a four horn setup felt the need to use a relay due to the higher amperage? I was leaning towards using a relay just to be safe.
http://www.flickr.com/photos/34007886@N03/7786111018/http://www.flickr.com/photos/34007886@N03/7786111018/ by http://www.flickr.com/people/34007886@N03/, on Flickr
http://www.flickr.com/photos/34007886@N03/7786118484/http://www.flickr.com/photos/34007886@N03/7786118484/ by http://www.flickr.com/people/34007886@N03/, on Flickr


