
My custom-made ISR mod
 08-29-2006, 03:35 PM
#1
Registered User
Thread Starter
Join Date: Aug 2006
Location: Madison, WI
Posts: 112
Likes: 0
Received 0 Likes
on
0 Posts
My custom-made ISR mod
I wanted to share with you my custom made ISR modification on my 1999 SR5 4-Runner. I think it looks neat and I love the sound.
After I figured out what I was going to do it was a piece of cake. I read many posts in regards to the ISR using PVC pipe and steel tubes. I wanted to make this modification with parts that anyone could purchase on the web. I am a plastics engineer so I also wanted to leverage my knowledge of these materials.
Part 1 of this post covers the general description and parts, part 2 describes the modification in more detail and part 3 has the pictures.
After a lot of search I finally found a tube 2.5� i.d. and 2.75 o.d. This I found at McMaster-Carr (www.mcmaster.com), part #1989T21 for $22.56. This is a tube made out of Delrin plastic, and it is sold in 6� pieces. You can take the tube right out of the box and plug it on the IS place. I went a little further, but it is not required, and painted the tube with black high-temp engine paint (part 7614T418 from McMaster-Carr). The tube is made out of Delrin. Delrin is a polyacetal (POM) plastic with better temperature resistance than PVC. Its chemical resistance is good enough for the typical stuff around the engine bay. Delrin is actually used for fuel connections in motorcycles. And for those of you skeptical about plastics, keep in mind that the original IS is made out of Polypropylene plastic, which has a much lower temperature resistance. Plus the IS is closer to the engine, so it gets even hotter. As a warning, keep Delrin away from chlorine.
Depending how sophisticated you want this modification to be, you can do the tee connection from the front of the intake manifold for the vacuum hose that has been talked to death on this forum. I first tried this way and work fine. However, I wanted to keep the vacuum connected before the TB as stock. What I did is use a nipple with a 1/8� NPT thread on one end and a �� barb on the other. I drilled the respective hole on the Delrin pipe, tapped it and screwed the nipple. Then purchase a universal vacuum hose and connected it from the nipple to the original connection on the engine.
I was lucky to have a 1/8� NPT nipple and tap at my company. You won�t find these on your regular Home Depot or auto parts store. However, you can find these on specialty stores that sell pneumatic equipment. I used Pneumadyne, which is an excellent source for all type of miniature connectors and fittings. I used some of these connectors for a project here at work so I had them lying around.
EDIT: you may be able to use other nipple with a different thread or fitting. I used this specific one because it's what I had handy. Stick with as a small tap as possible. This will limit the amount of intrusion into the pipe, and improve the thread grip.
List of parts, cost and where to find them:
6� Delrin tube, 2.5� i.d., 2.75� o.d., $22.56
http://www.mcmaster.com, part #1989T21
High temp engine spray paint black, $5.43
http://www.mcmaster.com, part # 7614T418
1/8� NPT tap, $6.94, http://www.aquaticeco.com/index.cfm/.../9863/cid/3076
EDIT: you can find the tap at McMaster-Carr as well,part # 2525A112, $5.20
1/8� NPT x �� fitting, $0.75 ea. (I think there is a 25 piece minimum order)
http://www.pneumadyne.com/onlinecat.cfm, click on the �not a distributor� link. Search for the part number, EB60-1/16
2' universal vacuum tube, $3.50
Any auto parts store
Disclaimer: my intention is this post to be a suggestion but I am not responsible if it does not work in your vehicle. So fat it works great for me!
Last edited by tony_4runner; 08-30-2006 at 11:31 AM.
 08-29-2006, 03:38 PM
#2
Registered User
Thread Starter
Join Date: Aug 2006
Location: Madison, WI
Posts: 112
Likes: 0
Received 0 Likes
on
0 Posts
Details:
+ First I selected where I wanted the vacuum nipple to be located. I picked a location facing towards the front of the truck and off-center towards the engine. I marked this location so I can start drilling.
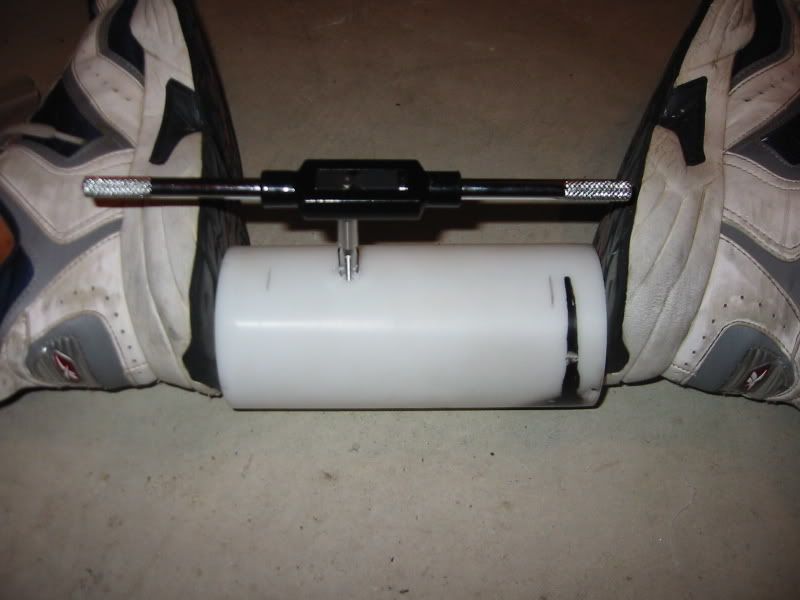
+ Secure the Delrin pipe (I used my feet) and start drilling the hole for the vacuum connection. Start with a small bit and go all the way to a 5/16� or smaller bit. Keep the bit as vertical as possible and be careful not to over-drill and damage the other side. This is plastic and not metal.
+ Use the 1/8� tap. Be really careful when tapping the pipe. This is a soft material and you don�t have much thickness. You will tap few threads on it, so make sure you are holding the tap as vertical as possible and turn it slowly. You don�t need to insert the tap all the way. (Since it is a soft material, it may work to screw the nipple without tapping but I did not want to try this option myself).
+ Time to screw the nipple. I used some Teflon tape, but probably it is not needed. I made sure the Teflon tape was wrapped on the top end of the nipple that contacts the pipe. I don�t want to have Teflon threads sticking inside the tube. Be careful not to top the nipple or not to screw it to far. Again, the threads are fairly delicate and you don�t want to damage them. Few turns will do it.
+ For painting I used masking tape to cover the nipple and both ends of the pipe. I did not want the interior of the pipe to be painted in case the paint chips away. Spray paint couple times and it should be enough. I let it dry over night.
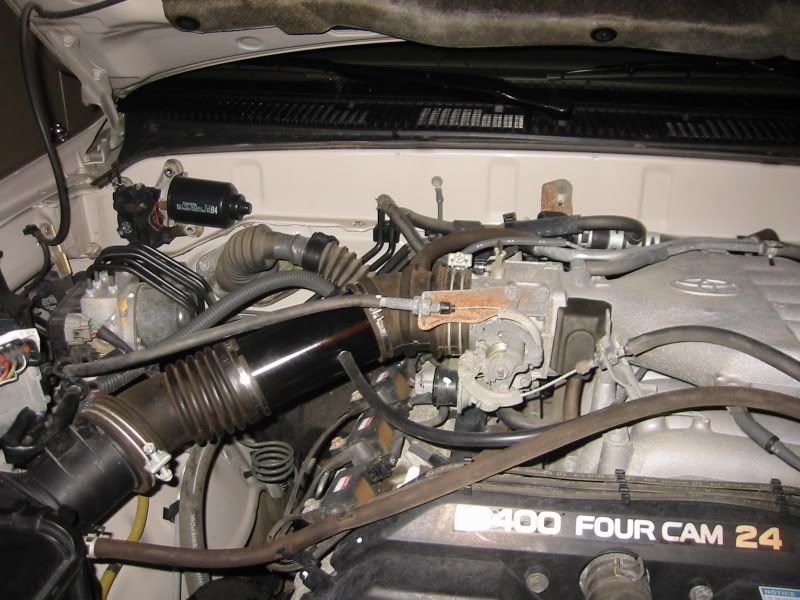
+ Ready to connect the new pipe. Disassemble the IS and connect the new pipe in its place. Make sure you open the original clamps on the intake hose all the way. The pipe will easily fit on both ends. Make sure you push it until it tops out on the intake hose. Finally, tighten the clamps and connect the vacuum hose to the nipple on the new pipe and the other end to the nipple on the engine.
Notes:
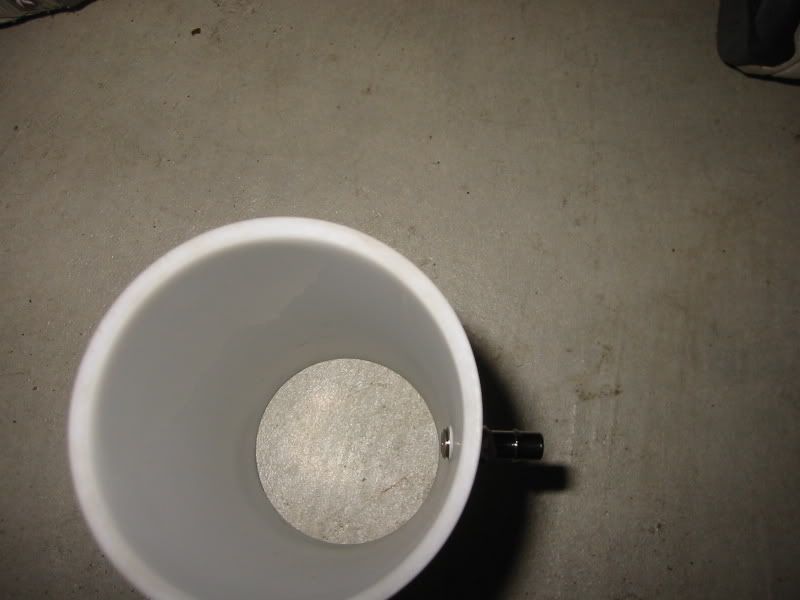
_The nipple�s threads protrude a little into the tube. I don�t think the disturbance of my setup is significant to justify grinding it. If someone feels that it is too much then I guess it can be grinded down with a Dremel or similar tool.
_The new tube is about 1/2" longer than the factory IS.
+ First I selected where I wanted the vacuum nipple to be located. I picked a location facing towards the front of the truck and off-center towards the engine. I marked this location so I can start drilling.
+ Secure the Delrin pipe (I used my feet) and start drilling the hole for the vacuum connection. Start with a small bit and go all the way to a 5/16� or smaller bit. Keep the bit as vertical as possible and be careful not to over-drill and damage the other side. This is plastic and not metal.
+ Use the 1/8� tap. Be really careful when tapping the pipe. This is a soft material and you don�t have much thickness. You will tap few threads on it, so make sure you are holding the tap as vertical as possible and turn it slowly. You don�t need to insert the tap all the way. (Since it is a soft material, it may work to screw the nipple without tapping but I did not want to try this option myself).
+ Time to screw the nipple. I used some Teflon tape, but probably it is not needed. I made sure the Teflon tape was wrapped on the top end of the nipple that contacts the pipe. I don�t want to have Teflon threads sticking inside the tube. Be careful not to top the nipple or not to screw it to far. Again, the threads are fairly delicate and you don�t want to damage them. Few turns will do it.
+ For painting I used masking tape to cover the nipple and both ends of the pipe. I did not want the interior of the pipe to be painted in case the paint chips away. Spray paint couple times and it should be enough. I let it dry over night.
+ Ready to connect the new pipe. Disassemble the IS and connect the new pipe in its place. Make sure you open the original clamps on the intake hose all the way. The pipe will easily fit on both ends. Make sure you push it until it tops out on the intake hose. Finally, tighten the clamps and connect the vacuum hose to the nipple on the new pipe and the other end to the nipple on the engine.
Notes:
_The nipple�s threads protrude a little into the tube. I don�t think the disturbance of my setup is significant to justify grinding it. If someone feels that it is too much then I guess it can be grinded down with a Dremel or similar tool.
_The new tube is about 1/2" longer than the factory IS.
08-29-2006, 03:39 PM
#3
Registered User
Thread Starter
Join Date: Aug 2006
Location: Madison, WI
Posts: 112
Likes: 0
Received 0 Likes
on
0 Posts
... and the pictures......
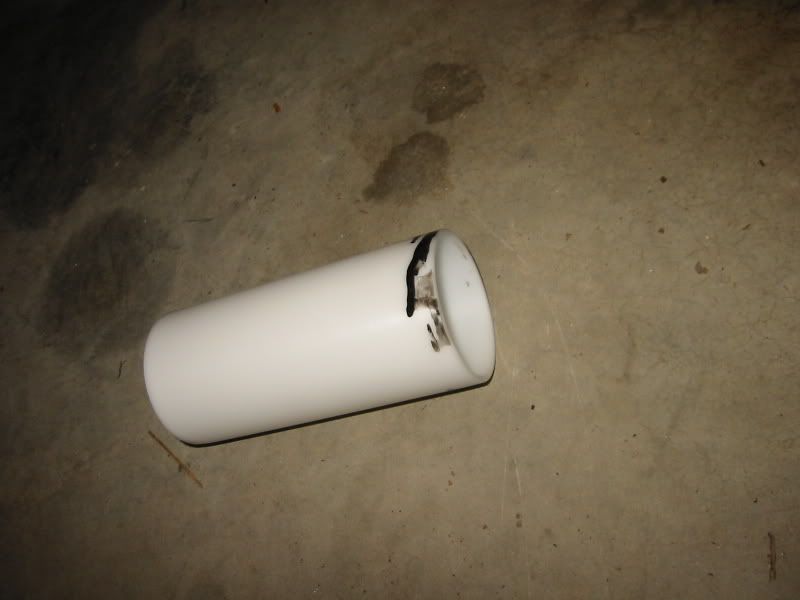
The new tube out of the box (I have already tested some black paint on it before the picture)
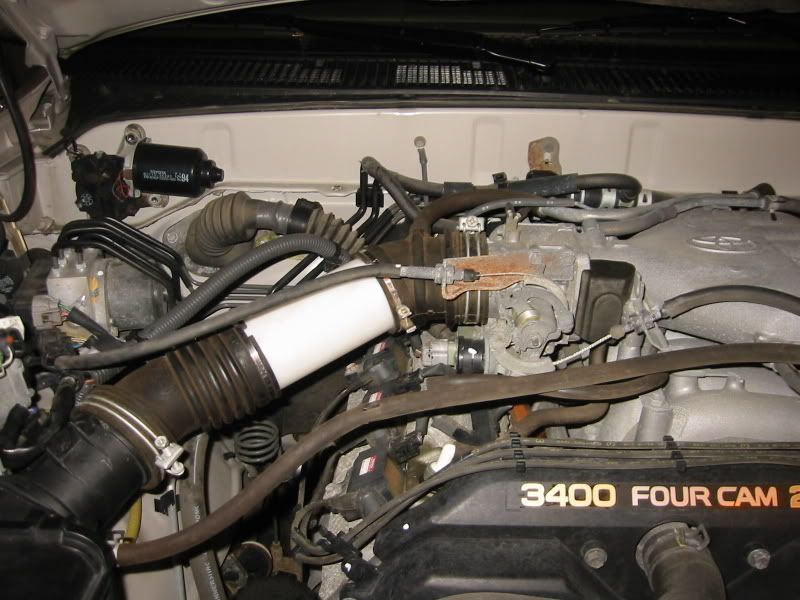
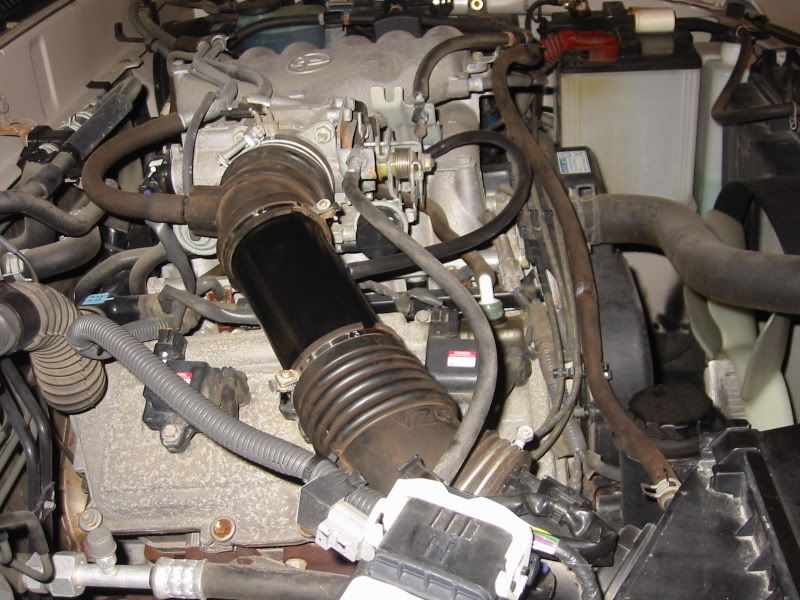
The unpainted tube installed
Tapping the hole
Nipple in place
Masking tape before painting
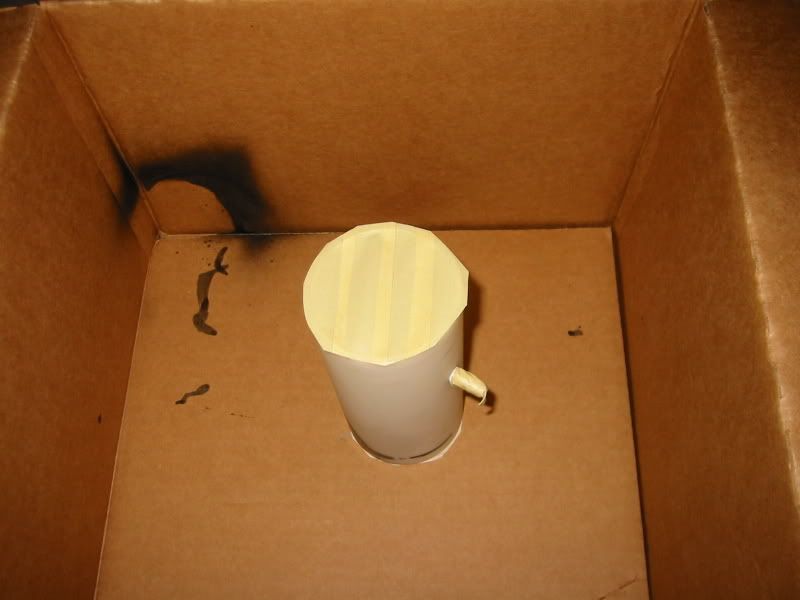
The tube, next day after painting
The final setup
The new tube out of the box (I have already tested some black paint on it before the picture)
The unpainted tube installed
Tapping the hole
Nipple in place
Masking tape before painting
The tube, next day after painting
The final setup

Trending Topics
08-30-2006, 10:56 AM
#9
Registered User

Join Date: Feb 2006
Posts: 37
Likes: 0
Received 0 Likes
on
0 Posts
Nice work. . .
FWIW, I just wanted to add that Mcmaster will have the 1/8" NPT tap so, if you're ordering the tube you can order the tap too. My local Lowe's actually carries 1/8" and 1/4" NPT taps. They also have the brass nipples.
I'm just curious, how do you know about Aquatic Ecosystems? I did not expect to see a link to them in the 4runner forum
08-30-2006, 11:21 AM
#10
Registered User
Thread Starter
Join Date: Aug 2006
Location: Madison, WI
Posts: 112
Likes: 0
Received 0 Likes
on
0 Posts
I bought the 1/8" NPT tap about a year ago for my company and I found them after an internet search. I guess I should have checked McMaster before posting to make it easier. I will edit and add a note.
09-05-2006, 10:29 AM
#12
Contributing Member
Join Date: Jun 2006
Posts: 4,047
Likes: 0
Received 0 Likes
on
0 Posts
this is beautiful. I like it, Im going with your plan and parts...I like it. Delrin is amazing. I use a Delrin Plastic ACS bolt in my 06 Spyder Electra ACS Paintball Gun, the thing is great!!!!
08-30-2012, 07:59 PM
#14
Registered User
Thread Starter
Join Date: Aug 2006
Location: Madison, WI
Posts: 112
Likes: 0
Received 0 Likes
on
0 Posts
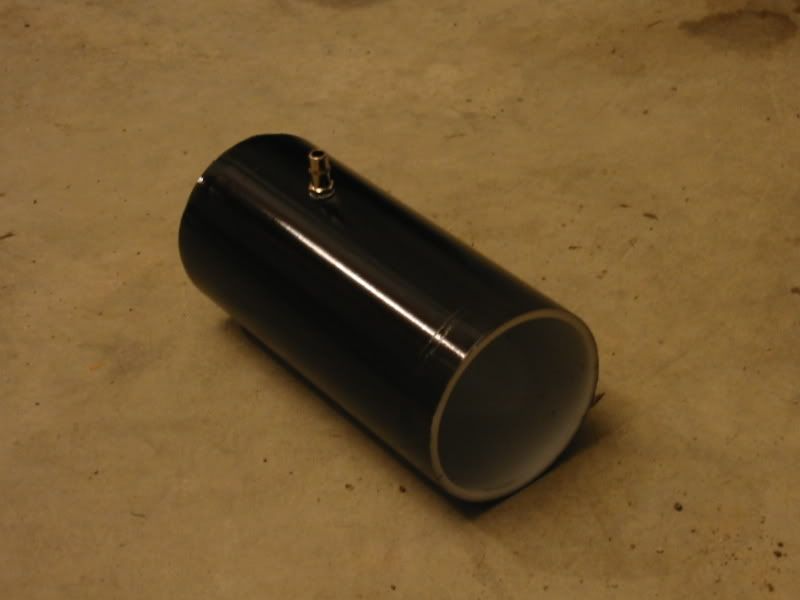
I am reviving this old thread because I just sold my 1999 4Runner and replaced with a 2008. Before selling it I removed the ISR mod. I have it now in my garage and I am sure it can find a new home. After 6 years it looks like new except with some minor paint scratching. I am willing to sell it for about what it cost plus shipping. Say $35. Let me know if interested.
I have the main Delrin tube with the nipple installed and the vacuum hose.
Current picture below. It just needs to be repainted.
I have the main Delrin tube with the nipple installed and the vacuum hose.
Current picture below. It just needs to be repainted.
Last edited by tony_4runner; 08-31-2012 at 05:27 AM. Reason: Picture
03-19-2017, 11:40 AM
#15
Registered User

Join Date: Mar 2017
Posts: 3
Likes: 0
Received 0 Likes
on
0 Posts
I am reviving this old thread because I just sold my 1999 4Runner and replaced with a 2008. Before selling it I removed the ISR mod. I have it now in my garage and I am sure it can find a new home. After 6 years it looks like new except with some minor paint scratching. I am willing to sell it for about what it cost plus shipping. Say $35. Let me know if interested.
I have the main Delrin tube with the nipple installed and the vacuum hose.
Current picture below. It just needs to be repainted.
I have the main Delrin tube with the nipple installed and the vacuum hose.
Current picture below. It just needs to be repainted.
03-20-2017, 10:28 AM
#16
Registered User
Thread Starter
Join Date: Aug 2006
Location: Madison, WI
Posts: 112
Likes: 0
Received 0 Likes
on
0 Posts
03-22-2017, 07:46 AM
#17
Registered User
Thread Starter
Join Date: Aug 2006
Location: Madison, WI
Posts: 112
Likes: 0
Received 0 Likes
on
0 Posts
04-10-2017, 03:18 PM
#19
Registered User

Join Date: Apr 2017
Posts: 1
Likes: 0
Received 0 Likes
on
0 Posts
I am reviving this old thread because I just sold my 1999 4Runner and replaced with a 2008. Before selling it I removed the ISR mod. I have it now in my garage and I am sure it can find a new home. After 6 years it looks like new except with some minor paint scratching. I am willing to sell it for about what it cost plus shipping. Say $35. Let me know if interested.
I have the main Delrin tube with the nipple installed and the vacuum hose.
Current picture below. It just needs to be repainted.
I have the main Delrin tube with the nipple installed and the vacuum hose.
Current picture below. It just needs to be repainted.


