When you click on links to various merchants on this site and make a purchase, this can result in this site earning a commission. Affiliate programs and affiliations include, but are not limited to, the eBay Partner Network.
Hi Everybody! I am outfitting my 1996 limited 4Runner with a low-profile drawer system that doubles as a sleep platform/seating area with an emphasis on winter camping. I will also be preserving the rear seats.
Major Changes from Glen's Design:
1. I will be making my aluminum drawers 3-1/4" deep (1/4" deeper than Glen's) because a lot of items tend to be exactly 3" and I wanted a little breathing room. The drawers will be 40" instead of 42" so they fit nicely behind the rear seats. The drawer slides will be 38" so that the little locking handles fit nicely inside the drawer (I'll post that fit-up later) but I'm not worried about losing 2" of extension.
2. My drawers will have locking slides. Not sure If I want each drawer to have one or two locking slides. I am leaning towards one locking on each drawer for easier access. The drawers will be secured in transit by the tailgate pressing against them, so the locking slides will not have to take G-force loading from wheeling.
3. This is probably the biggest change. I designed this platform to fold up, similar to Glen's, but I am going to use ratcheting drafting table supports to create an angled platform you can lean on to sit (like a poolside lounge chair). This should also maximize head room because you won't have to sit with your back straight up; it will be about 70 degrees or so. There will be a second hinge in this platform about 8" from the forward end. the purpose of this is to allow the seat bottom to be folded down and have the platform folded down behind it. I intend to remove the seat bottoms for camping and will fold out the extra 8" of headroom (needed for anyone over 5'6). I will be keeping the seat backs in the car the entire time. the backs are a pain to remove compared to the bottoms, and I know I would be too lazy to put them back in when I'm not camping.
4. I am planning to add two 'hatches' on top of the drawer. These are very important to me because I do not want to have to get out of the car on a cold winter's night to access items in the drawers. I plan to have two small hatches towards the rear of the car to access essential items.
5. Since the driver-side wheel well is so obtrusive, I plan to create a shelving system that encompasses the space above and around it. The space I plan to use is 7" wide and extends from the tailgate to the rear of the back seats. I think this will be a great supplement to the only 3.25" tall drawers. I'll put essential items in here and things that are too wide for the drawers, like my jet-boil stove.
6. There is no fridge in this build. This setup doesn't really have space for a fridge. This is not a concern for me because I will be mostly eating backpacking meals that just need boiling water (no cooking with fresh produce). I'll have a small cooler bag for drinks with no dedicated location.
The aluminum drawers are being fabricated as we speak ( I do not have the experience nor the tools to bend and weld sheet aluminum). I wanted to make the drawers a little thicker than Glen's, based on his recommendations, but the shop only had 1/8" on hand, so this drawer should be way stronger than it needs to be.
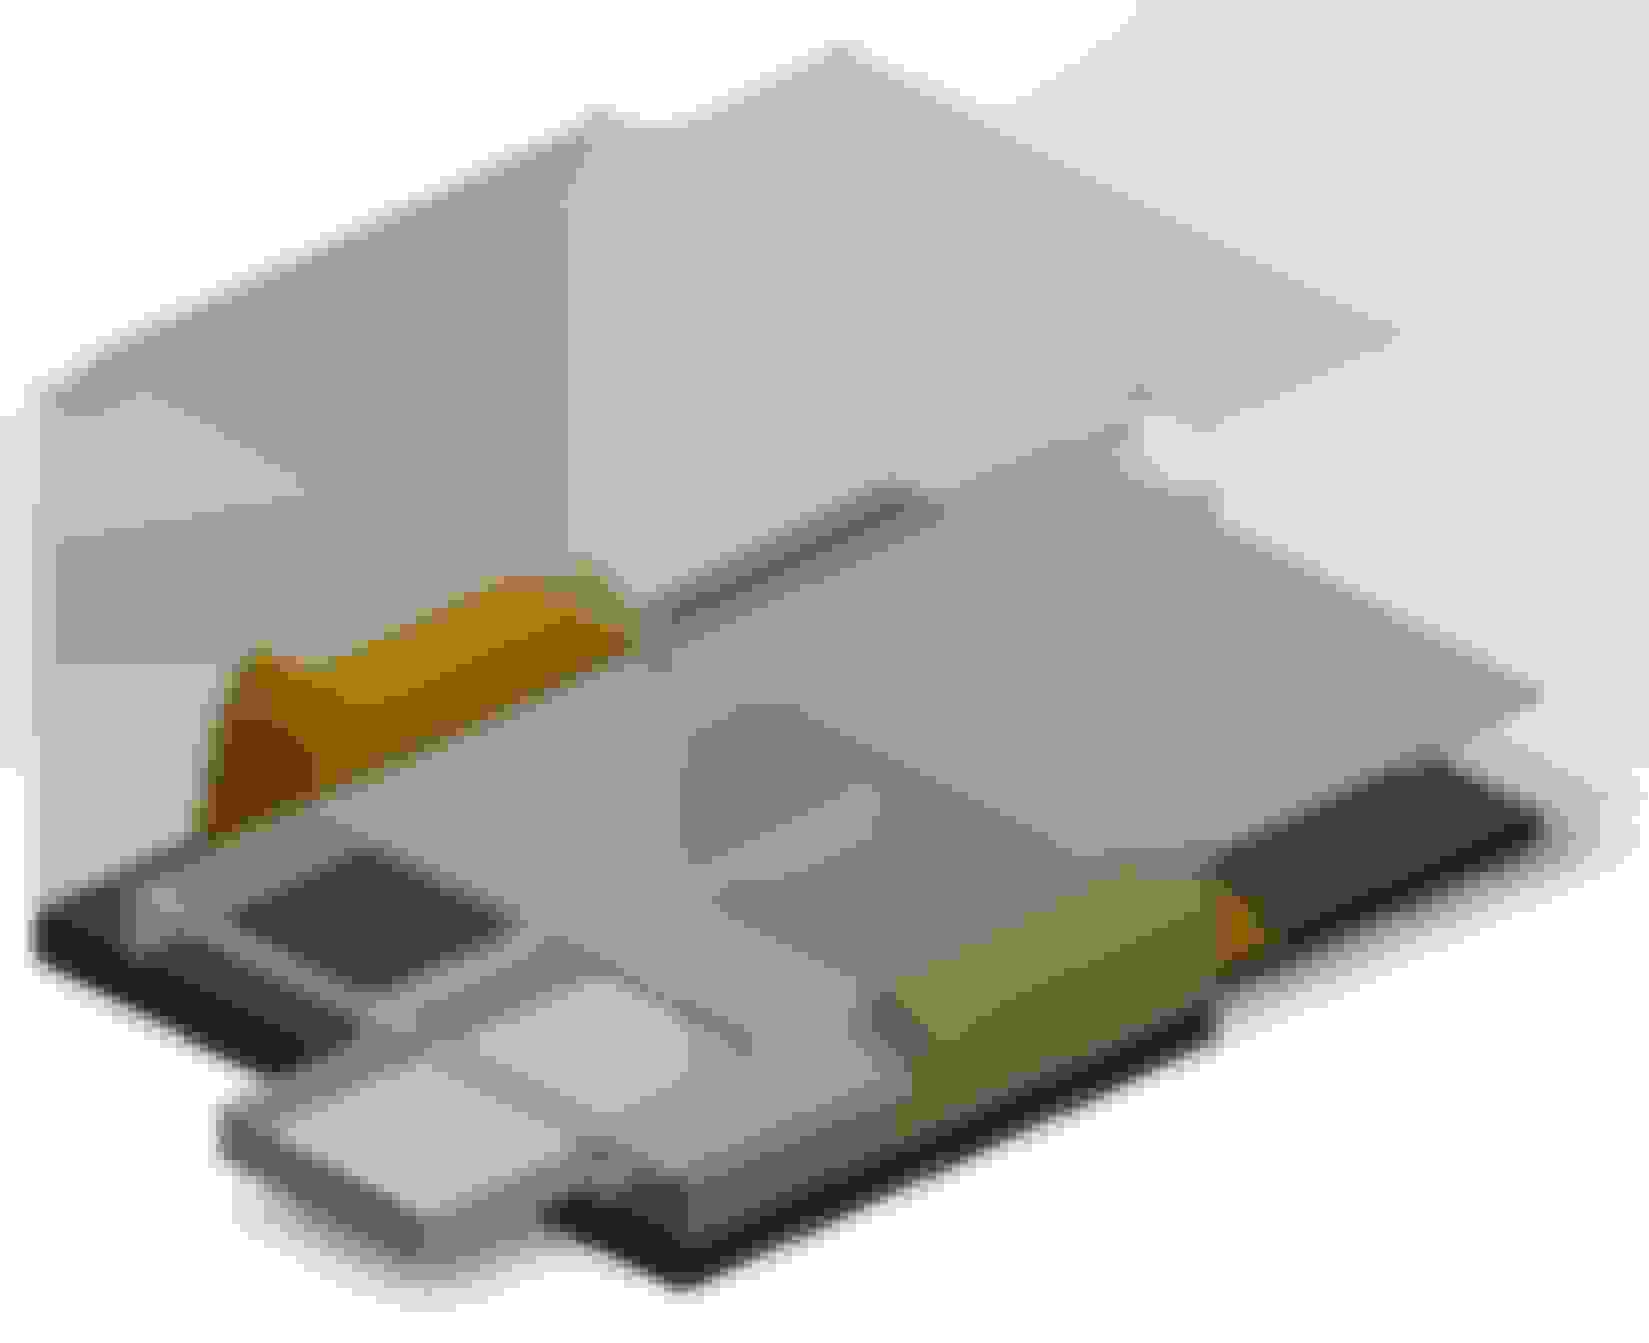
I've been 3-d modeling my ideas, so here are some screenshots of the design so far, which includes the hatches in the drawers and the folding seating platform. I'm hoping for some ideas/criticism of the hatches specifically because they will weaken the frame of the drawers. My current plan is to attach a piece of flat bar aluminum or steel to the end of the drawers near the hatches to provide resistance to bending here since the plywood is only a couple inches across. I think a 3/4" wide and 1/8" thick bar running along this face will provide enough support to have the wood this thin here. Here's the seating platform. This is about the angle I plan to have it set for when you want to sit on it. there will be a thin mattress across the whole platform and it should bend nicely when upright like this.
If you've read this far, thanks for stopping by! I will be updating this thread regularly with my progress and design changes. I should have the drawers back from the fab shop in the next few days, so I'll post how they came out here. Please feel free to comment with questions or suggestions!
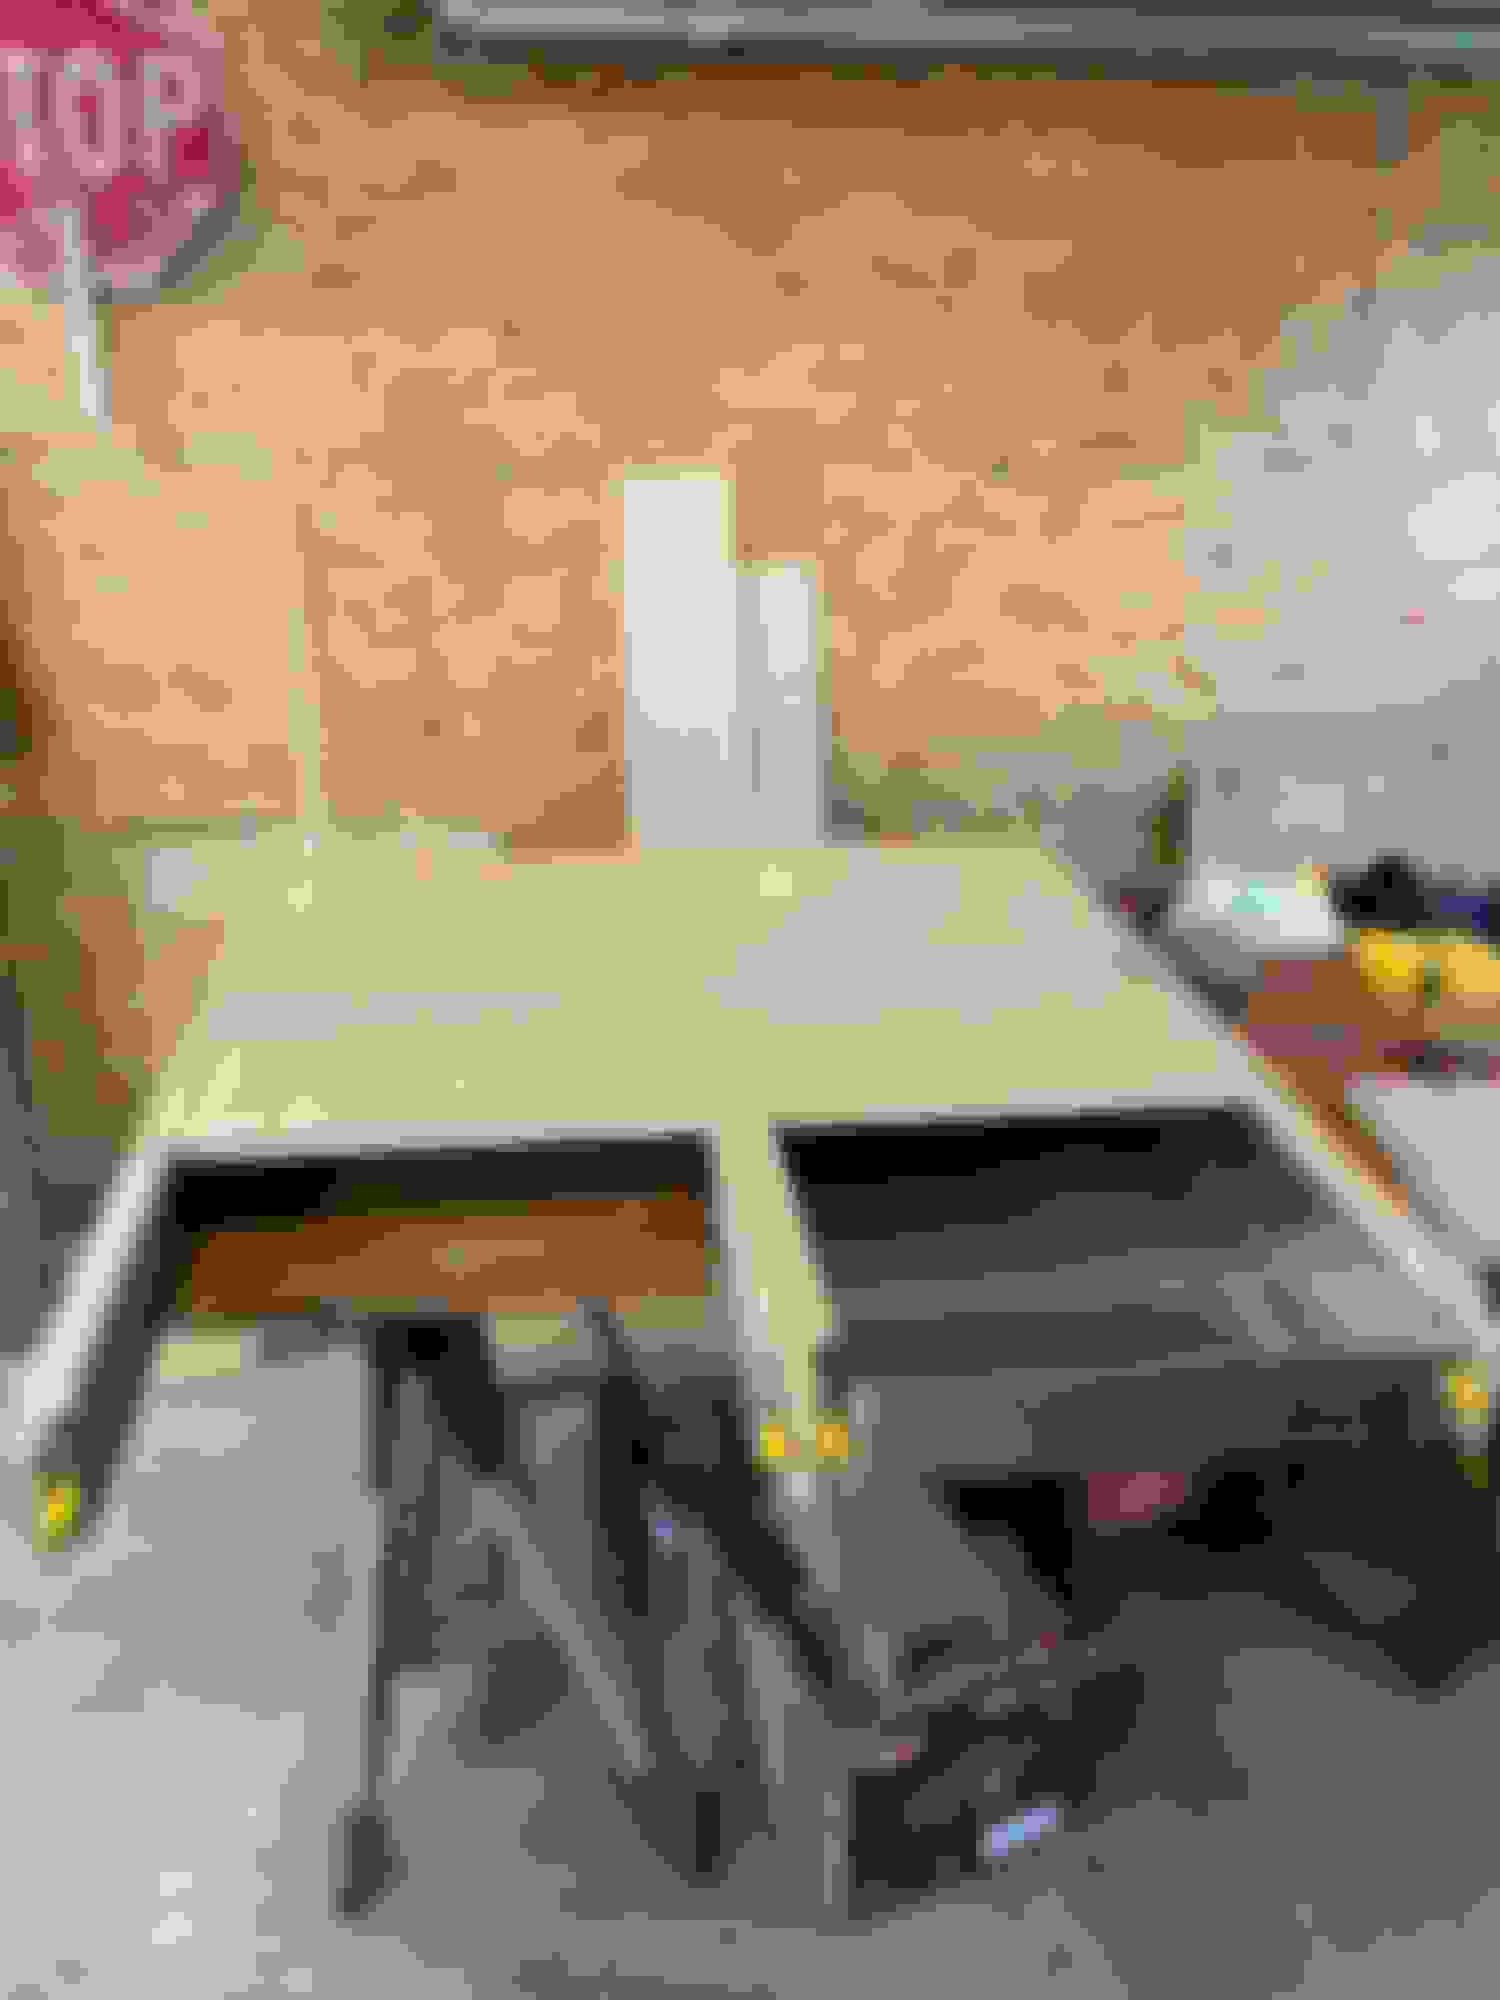
Well, it looks like my post got some views, so I'll keep posting LOL. The drawers won't be done until next week, so I figured I would find something to post about. I just picked up the 3/4" plywood and the carpet I plan to put on the platform from Home Depot. The rug was really cheap ($25) and it won't get ruined when it gets wet. That said, the carpet doesn't create a moisture barrier between it and the wood, so I will have to prime and paint the entire platform before carpeting it. I got the plywood home with a couple cuts at the store and one section sticking out the 4Runner rear window; very cool! Here are some pics of the carpet. It's really thin, so it looks like it will make tight corners with ease. I also wanted to match the interior tan color of the existing carpet so it would look a bit 'cleaner'.
Your cargo build looks awesome! Looking forward to seeing your new and improved version.
A couple of buddies of mine have done similar hatch access panels but they never use them because it was such a pain to move the bedding or move the extra stuff on the bed while on the trail. I have the same problem of being able to access some basic things while still in the cargo area of the rig. For me, a change of clothes in the morning is the main thing. Looking forward I'd still like to do some other storage such as an airline overhead storage for things such as clothes so I'm not moving bags back and forth between the cargo area to the front seats. That overhead style would still allow headroom to sit up while in the back.
One idea that might help with your build is to cut the access holes in your platform top at a 45deg bevel. That way when you close the lids they can't push down into the drawer area.
Maybe that area of the decking between the opening and the drawer face could be replaced with rectangular tube. Taking a guess from the sketch it looks like you could fit a 3/4"h x 2"w rectangular tube which would be much stronger than a strip of steel.
I was planning to use 1/2" L-channel in the access holes for the hatches to sit on, but I hadn't thought of cutting at an angle. Could make the end product simpler. One idea I am playing with right now is to make the hatches wide enough to fit on an extended drawer. They would be pretty small, but two together could give some decent space. It adds in a table-top without adding extra thickness to the platform. Haven't thought too much of the downsides to this idea though. I guess someone could be laying in the truck and have their feet go through the hole? You wouldn't crawl in the back with the drawers open, so it might not be a big deal.
Yep, that's the exact dimension, 2 x 3/4. the tube idea sounds perfect. I never would have thought of that. That will nest in nicely and be super strong.
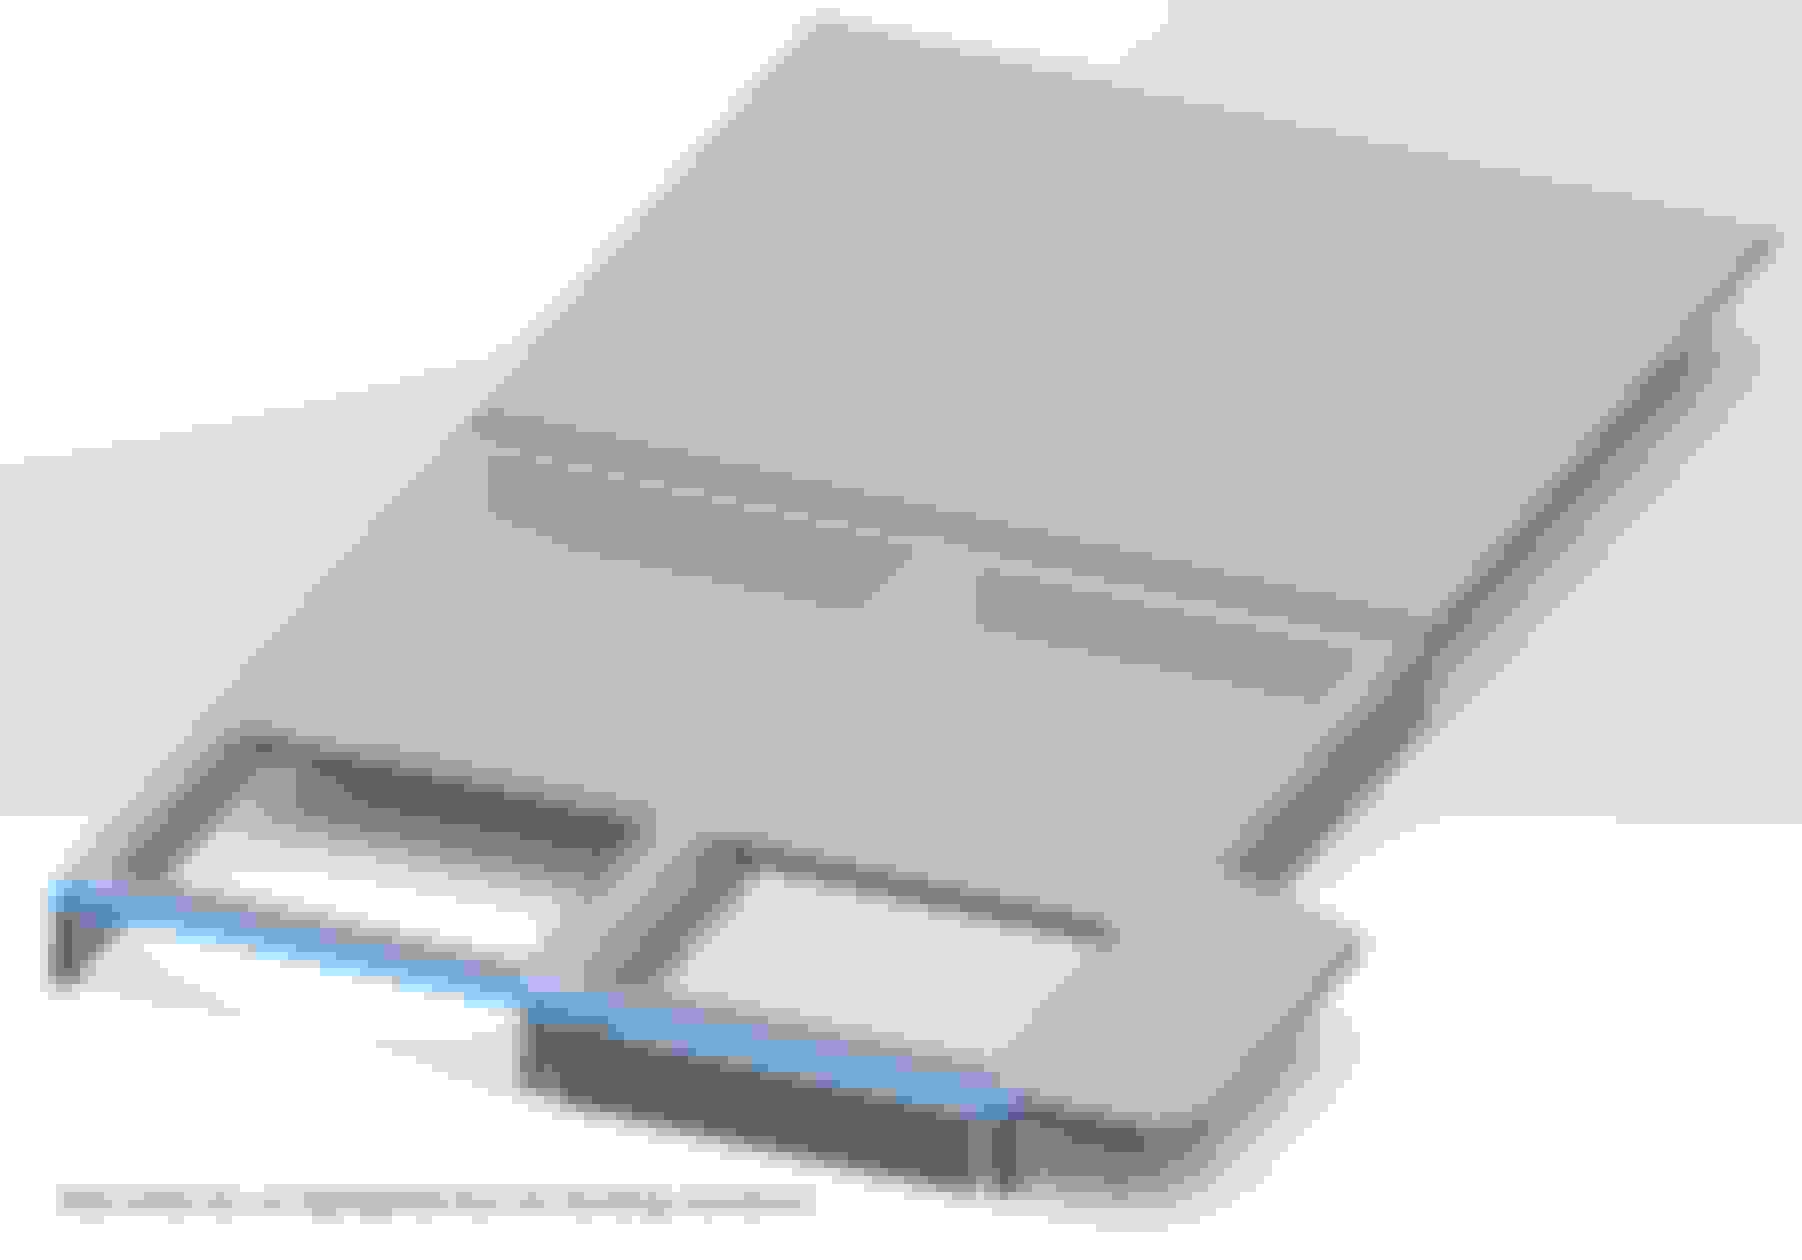
As for in-car access if the hatches don't work out (too complicated, hard to use, etc.) I do have a backup plan. I forgot to mention it above, but I am planning to add in a shelving unit similar to your overhead storage idea, but it would span the entire height of the driver's side wheel well area behind the rear seats. Since the wheel well is too high to sleep on top of I was just going to make the space above is storage. I've shown the outline in purple in this image. I'm not going to even think about the details of that until I've got the actual platform built, and I think some on-trail testing will help me see what space I am ok with losing. I am planning to sleep two people in the back.
I really like the idea of the driver's side storage. I bet that turns out to be used even more than the cargo drawers. You mentioned drawer locks but I wasn't sure if they lock both closed as well as at different points while open. I've found that keeping the drawers open is pretty important too as I find myself propping the drawer open when the nose of the rig is down. This is fun to see your ideas gel. It makes me want to redo my cargo with all the things I've wished for over the years.
The drawer slides will lock in and out. I can see how nice it will be to have them stay out. I didn't find any off-the-shelf options for locking in different positions, just all the way out. I am actually still deciding which drawer slides to buy. There is an Austrian brand, Fulterer, that has an office in the US (not sure about manufacturing) that seems pretty reputable, but very expensive ($200 for a pair). I am tempted to go with a Chinese company, Vervor, that offers a similar slide for $100 per set. Vervor has an office in the US, but mfg is in China and I have seen some reviews about the locking mechanism breaking on people. The only reason I would consider getting the cheaper one is because I am planning to secure the drawers by 'pinching' them with the tailgate and some rubber stoppers when the car is moving. This should reduce the load that the locking mechanisms are taking to keep the drawers closed. That said, cars jump and bump a lot, so the Fulterer is still a better choice. But $400 is a lot of money.
On a similar topic, @glenyoshida how did you attach your drawers to the slides? I was thinking maybe rivets, but I guess I could drill and tap the drawer and thread in some button-head screws.
Here's the mechanism I plan to use to raise and lower the seat back portion of the bed. It is a drafting table support from Rockler that rachets up and then comes back down. The 'legs' of the hinge are about 8" long, so the bed will extend past them a good bit. I plan to use 4 of them side by side.
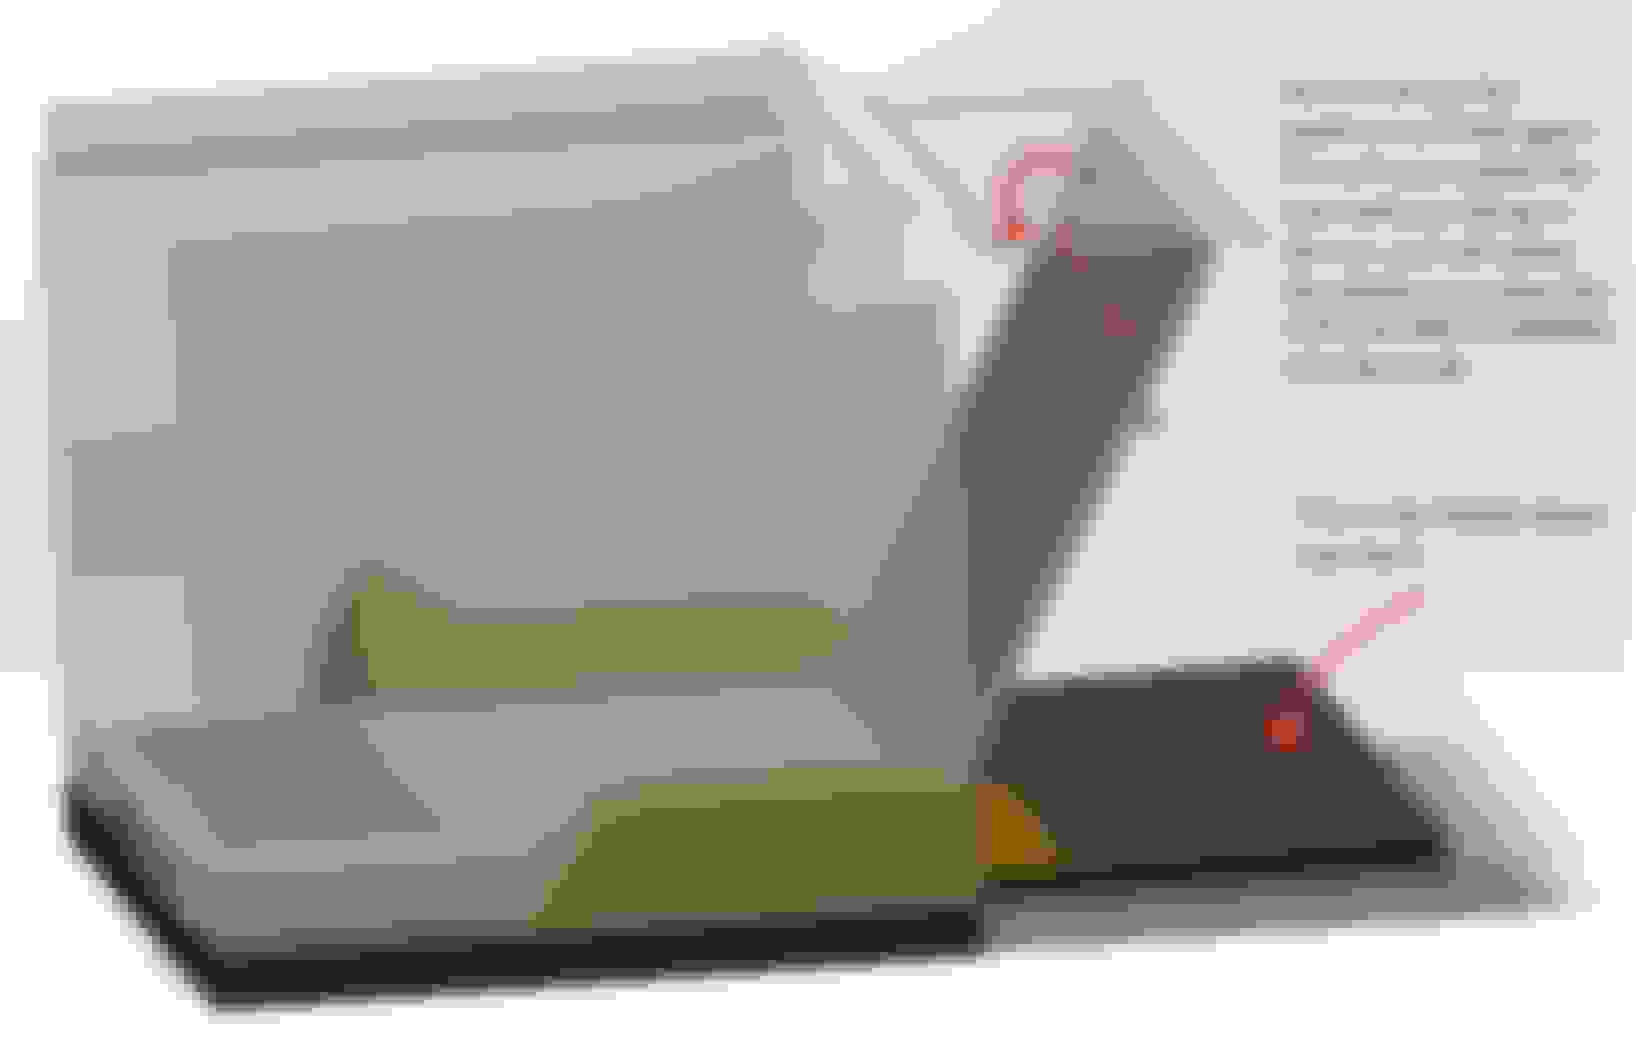
It's a pretty cool mechanism; it rachets on the way up, and then is able to slide all the way back down because of the channel built into the white plastic piece. See this sketch:
When the supporting bar gets pulled up past the teeth, it slides up past the teeth because of a little pin in the side of the bar. The pin slides up the groove in the plastic piece as shown, and the dotted-red outline of the end of the bar shows the bar is completely above the teeth, therefore bypassing them. When you pull up on the mechanism again, the metal pin slides to the right relative to the plastic piece, and the support will again go into the teeth. I think it is going to take a lot of effort to dial in the mounting of all four of these next to each other, but when it is done it should work really well! Here is a picture of the intended fit-up:
The hinges are a little bigger than I have drawn them, but not much. I am a little worried about overloading the hinges or the big piano hinge holding the plywood down, because of how far the plywood overhangs from these supports. See yet another picture (I like my diagrams):
Since the drafting table support is so close to the piano hinge, it basically lets the person's weight act as a crowbar to pry the piano hinge right out of the platform! I am hoping that the design will be viable because you are not really sitting with your full weight on the platform, just leaning against it. Hopefully this keeps the overall forces down. I'm definitely open to suggestions here though. I really like the drafting table hinges, but it's a weak point in the design for sure. I seriously doubt the drafting table hinges will buckle, but I do worry about the piano hinge. Perhaps if they don't work well I could try to make my own, larger mechanism to do the task...
On a similar topic, @glenyoshida how did you attach your drawers to the slides? I was thinking maybe rivets, but I guess I could drill and tap the drawer and thread in some button-head screws.
I just used screws with washers and nuts to attach the slides to the drawers.
Hey everybody! The aluminum drawers finally came in from the shop! They look great and seem super sturdy and light. I also got my order of aluminum and steel stock in for mourning the platform to the car and putting face-plates on the drawers. There�s a place near me that does laser engraving l, so I�m thinking when I finish this up I can engrave something cool on the drawer face plates. I�m not sure how much work I�ll get done before the holidays, but I�m excited to start assembling! Here are some pics.
One interesting challenge is that the drawers are bowed out a little on the sides, meaning that the part that mounts to the drawer slide is curved instead of straight. I�ll need to figure out how to bend them slightly or just figure out a way to mount the slides using washers to make them fit right.
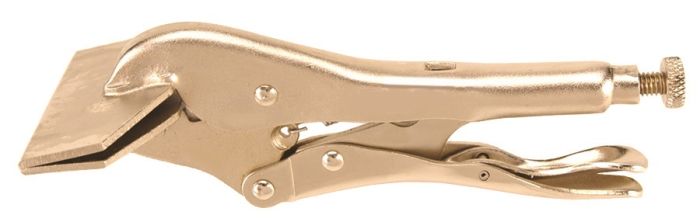
So my first attempt at bending the sides in... failed. Hopefully you guys will find this funny! I tried just pushing the sides together using clamps but wasn't able to bend them enough to get them to stay. They just bent right back! I'm going to try to get one of those vice grips with a really wide grip to bend it as my next attempt.
I think something like this might help me. I like how strong these drawers feel, but I'm regretting the 1/8" thickness at this stage in the process!
So I was able to bend the sides using the crude method in the picture below. Unfortunately, the vice grip didn�t crop all the way down the sides, meaning the sides bend back in at the middle now, but it�s really good enough.
I put the drawers, slides, and pieces of plywood into the truck to see how they fit and it was a smidge tight. They all fit, but the drawers are getting compressed a little bit. I think I�m going to rip the outer plywood supports down by 1/8� on each side to open up some room for the drawers to slide more freely. That�s what I get for not giving myself wiggle room.
It�s exciting to see these things in place! Here�s a preliminary pic of the seats up and down.
Well, life happened and I had to put this project on hold. But.... I'm jumping back into working on it! I made some cuts for the hatches a while ago, but never posted a picture. It worked really well to drill holes in the corners and use a handheld circular saw to cut the sides. Today, I cut the other supports for the platform, so I now have all the pieces I need for the box. The next step will be test-assembling the pieces using screws and making sure the drawers will slide before gluing it all together. Here's some pictures! Here's a picture of the hatches box fit-up! Here's where the aluminum tube will go. I'm planning to secure it from the underside by using a self-tapping screw through the plywood at a slight angle.
Thanks for sharing your design and notes! This is a really impressive and practical project! I found your thread while looking for low profile cargo solutions that allow for sleeping in the cab and sitting upright. I also like that youre having this built as that would be a barrier for me as well. How's this project coming?
I have very exciting news! About a month ago, I finished the "initial" install of this project and have taken it camping a couple of times. I couldn't be happier with how it came out. I'm going to share a bunch of pictures of how I've been using it and what I like about it. I did a LOT of work that I didn't post, and the whole point of this thread is to show y'all how I built it, so I'll be posting more to fill in the gaps of what design decisions I made and how I made things work. But, I'm too excited to post the work right now since the finished product is in use!
First, some pictures of drawers right after I installed them:
If you look in the back, you'll see the part of the platform that folds up is folded down for sleeping. It looks black because I haven't put the carpet on that section of it yet.
Here's what a packed car full of camping supplies might look like! The items in the drawers are easy to reach even though there's lots of things piled up on top Notice how the rear seats are up. It was very important to me to be able to use the seats with this system installed, so the sleep platform folds into the trunk and the seats fold back up. The idea of placing the hatch covers on top of the drawers to create a table ended up working really well. Here's us using the drawer as a table to boil some water under the tailgate and mostly out of the rain. We realized on our most recent trip that you can make a really wide cooking platform by putting one hatch cover on each drawer. And, if you're lazy like us, you can cook from the comfort of your own bed and completely out of the rain! We will definitely be doing this again for simple meals. By the way, this "Hilltop Gear" brand propane stove fits inside the drawers! It's just over 3.25" tall, but I added a little air gap between the top of the drawer and the bottom of the plywood and this thing fits. It's the only stove I know of that fits.
This is all great, but the feature that I am most excited about is the "seating" system. I haven't installed the racheting brackets yet, but we did some field testing of the seats by propping up the platform with hiking poles (picture below). WOW. It couldn't have worked out better. Sitting in the back of the car with a backrest and looking out at the lake we were camping at is by far the highlight of this build. The main goal of this camper build is to camp in cold ski resort parking lots, and this folding seat is going to make that so much nicer. Here is a view of how I propped up the platform using hiking poles to test it out before installing the ratcheting mechanisms. The piece of wood on the seat back isn't really part of the build. It's just what I've been using to level out the sleeping platform on the seat back. Eventually, I'll attach something to the back of the seats or to the platform to make the platform level when it folds down. And here is what it looks like to be sitting on the comfy chair! It is very nice with the tailgate open because there is plenty of room for your feet. With the tailgate closed, your feet definitely touch the tailgate. Depending on how thick your mattress is and how tall you are, it might not work for you. I am 5'10 and my mattress is about 3" thick (we deflated our air mattress some so it would bend easier) and I wasn't too claustrophobic. I think there is room here for personal testing with different mattress thicknesses and different seat angles to find the most comfortable position for you.
If you've been following this thread and are really studious, you might notice this is not the same 4runner that I originally tested the drawers in. Unfortunately, my '96 limited was totalled in a car accident, but I was able to replace it with a '99 limited. I miss some things about the '96, like the mechanical A/C controls, but overall I think I like the '99 better. Just goes to show how easily material things can be lost. Luckily, none of the drawer system was installed during the wreck and nobody was injured too bad. I actually wasn't in the car.
I hope you've enjoyed reading through! I fully intend to make backdated posts where I explain the process of installing the platform and everything. I took pictures during the process but got busy and didn't make any uploads. Life has a way of doing that, I guess.
I also installed a winch that hides under the factory front bumper and built a custom bracket to mount the winch control box discretely while still being fully accessable. I'll make a separate thread for that, but here's a teaser pic of how that came out: This was a somewhat complicated install made much much simpler by the fact that I used a prefabricated bracket to bolt the winch directly to the frame rails. I'll leave a link to the shop local to the PNW who makes the bracket.
I'm excited to hear what you think of the project!
Wow OP that's a thorough update! Thanks for keeping us informed, platform looks awesome, looking forward to your backdated build details. And sorry about your '96. Great job!
Thanks @Chopper678! It makes me happy to know other people are interested in this project. Luckily I took pictures of many parts of the install that I haven�t shown yet. I�ll try to spend some time this weekend adding comments to them to show the process.
My process for assembling the platform was as follows:
1. Assemble the wooden platform, drawer slides, and drawers with screws
2. Disassemble all the items
3. Reassemble the wooden platform using screws and wood glue
4. Paint the wooden platform
5. Reinstall drawer slides and drawers
I first assembled the wooden frame using pocket holes and screws. You don�t need to use pocket holes, but it allows you to secure the screws from the inside of the frame so you can�t see screw heads on the top of the platform. After assembly, I mounted the drawer slides. I aligned the slides by stacking plastic shims underneath them while the entire platform is upside down. This is one of the pocket holes holding the back to the top.
These pocket holes needed to be on the outside, but they will be hidden when the platform is installed.
You can see how I stacked these plastic 'horseshoe' shims to offset the drawer slide from the top of the platform. I also placed a piece of plywood between the drawer slide and the back of the platform to provide consistent spacing for all four slides.
After mounting the slides, I mounted the drawers to the slides using screws, nuts, and washers. I drilled holes in the sides of the drawers where the mounting holes in the drawer slides matched up. Pro tip: Buy wide washers and drill oversized holes in your drawers. That way, you will have a lot of flexibility in positioning the drawer exactly where you want it relative to the wooden frame when the slides are completely closed. It also makes it easier to get all the screws to fit because the position of your holes doesn�t have to be exactly correct. I used 3 screws on each side of the drawer, so 6 total per drawer. This has worked out very well and I don�t anticipate anyone needing more screws than this.
Here is the vertical spacing of the slides. They are about centered.
And here is the installed drawer! I mounted the drawer as far down as it could go to give the largest clearance between the top of the drawer and the wooden platform.
Now rotated in the orientation it will actually be used in.
Add the hatch cover back in to show what it will look like!
Fully extending drawer! Looking pretty good!
I was really happy with how the slides came out! (you can see I was also playing with my new winch!)Next step was to disassemble everything and prepare to glue the wooden platform together for a permanent bond. You may be wondering why I went through the trouble of installing the drawers and slides before this. My reasoning was that I wanted to test the functionality of the drawers sliding in and out BEFORE I permanently glued it together and had no means of fixing fitment issues. I also didn�t want to drill any holes in the platform after I painted it, so it made sense to install all the screws first. I also used a mixture of wood glue and sawdust to patch some gaps in the plywood I uncovered when I cut the hatches out. Here's the patch where a hole in the plywood was exposed. I just sanded this after it dried and it now looks pretty smooth!
Painting: aka my worst nightmare. I feel like there�s always at least one part of a large project that is the most difficult or time-consuming. For me, it was painting. I had spent so much time on this project already and was meticulous at every step, that I just didn�t have it in me to research what paint to use or how to paint. I ended up spraying some generic spray paint on all the wooden parts but it didn�t stick well because I didn�t use a primer and I was spraying outside in the wind.
I spent a bunch of time sanding off the bad paint job, only to buy paint that was so-so and not mix it all the way� So now the black paint is better than before but still not great. It pains me to see one aspect of this project so neglected since I spent so much time thinking through my other design choices, but wasn�t about to paint it for a third time, so this is the paint job it has. Possibly the most annoying thing about the first botched paint job was that directly after, I moved to a house where I didn�t have a shop space set up yet, so I had to let the project sit for a few months while I set up a place I could sand off the old paint job. The new primer coat on all three wooden parts. This brush-on primer actually worked really well. It is advertised as a 'stain coverer' so it should hide any markings on the wood underneath. I used two coats.
Here is the second try at a top coat. I didn't mix the can fully, so it went on a little runny. The drawer platform is actually pretty good, but the two folding pieces did not hold their paint well. I applied one top coat.
I think that�s enough for tonight! My next post will show installing the aluminum angle channel that the hatch covers rest in, installing the folding parts of the platform, installing the carpet, test-fitting the platform in the 4Runner, reinstalling the drawers and slides, and fastening the entire assembly to the car!
 10-26-2022, 09:39 PM


 Notice how the rear seats are up. It was very important to me to be able to use the seats with this system installed, so the sleep platform folds into the trunk and the seats fold back up.