
Heater ticking sound


 03-06-2004, 08:35 AM
#22
Contributing Member
Join Date: Jan 2003
Location: Houston, TX
Posts: 5,377
Likes: 0
Received 0 Likes
on
0 Posts
Bob
You should Rev your write-up. This is how I did it this morning. Just pull the clip and pull the squirl cage. then clean the cage and I did one extra thing. take your air compressor and blow the dust out of the motor. man, when I hit it with air the first time a cloud of brownish black dust billowed out of it and continued for a good 15-20 seconds. then just reassemble and reinstall.
man, I would post thumbnails but this new system really sucks. I can't figure out how to do that the old [] type formatting doesn't work anymore. anyway, here's the pics.


man, I would post thumbnails but this new system really sucks. I can't figure out how to do that the old [] type formatting doesn't work anymore. anyway, here's the pics.
Last edited by keisur; 03-06-2004 at 08:39 AM.
03-06-2004, 09:19 AM
#23
Contributing Member
Hey keisur,
Any tricks to getting the rotor off?
I tried and failed....but I didn't want to break it either (at least in the middle of winter!)
Let's hear the technique!!!
What did you use to clean off the blower cage?
It looks spotless!!
Any tricks to getting the rotor off?
I tried and failed....but I didn't want to break it either (at least in the middle of winter!)
Let's hear the technique!!!
What did you use to clean off the blower cage?
It looks spotless!!
03-07-2004, 06:15 AM
#24
Contributing Member
Join Date: Jan 2003
Location: Houston, TX
Posts: 5,377
Likes: 0
Received 0 Likes
on
0 Posts
Originally Posted by MTL_4runner
Hey keisur,
Any tricks to getting the rotor off?
I tried and failed....but I didn't want to break it either (at least in the middle of winter!)
Let's hear the technique!!!
What did you use to clean off the blower cage?
It looks spotless!!
Any tricks to getting the rotor off?
I tried and failed....but I didn't want to break it either (at least in the middle of winter!)
Let's hear the technique!!!
What did you use to clean off the blower cage?
It looks spotless!!
I pulled the clip, then I wedged a metal mending plate between the motor and cage and 180 degrees on the other side I levered another mending plate (because they are wide and it distributed the load) until I saw it start working up the shaft. then I switched the two plates and levered on the other side 180 degrees, and basically kept lightly working my way around the cage while it creeped up the shaft and after a while it popped right off. there's alot of greasy dust under the cage in that cone thing that was nazty.
the trick is, the shaft has a lip on the end of it to retain the cage and that little tab on the circumference, I took a little screw driver and bent it out a little so it wouldn't catch, the snap ring squeezes that in and holds it so it's ok to flex it into the inelastic range a tad. just don't really wrench at it because you don't want it to break.
06-05-2004, 11:46 AM
#25
Registered User
Join Date: Oct 2003
Location: Montana
Posts: 1
Likes: 0
Received 0 Likes
on
0 Posts
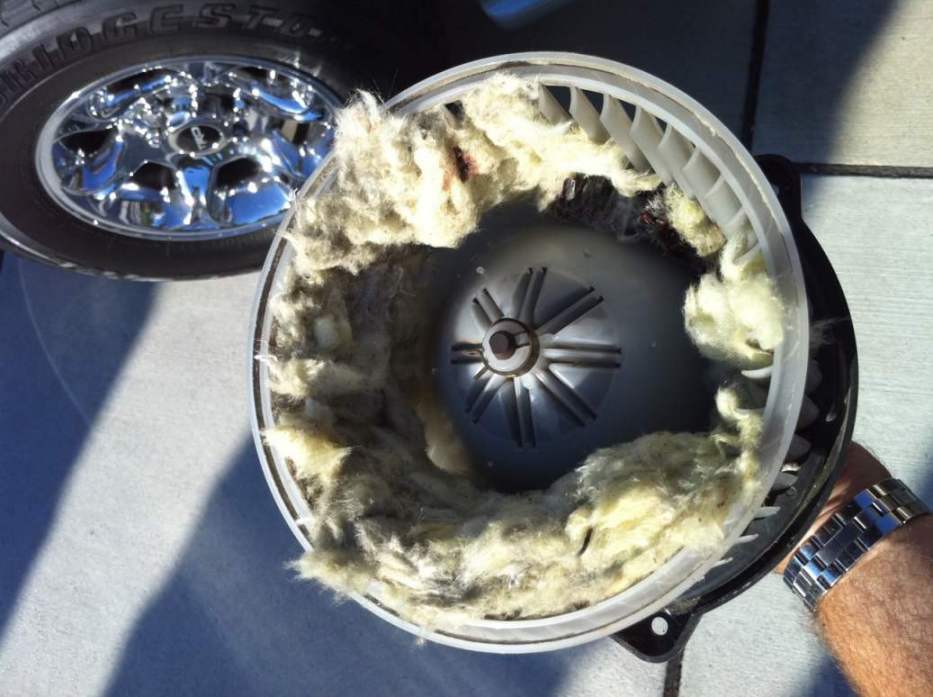
Speaking of mice, who do you think is responsible for this?!

I bought my 4Runner used last fall, and the air output was never up to par, and it rattled a bit when I turned it on high. A few days ago, it got so bad that no air was coming out the vents and the dash was vibrating like mad.
Thanks to all your posts and Bob's awesome write-up, I took the plunge and pulled out the fan, expecting to see twigs and leaves...
-Jennifer
Last edited by Inspired; 06-05-2004 at 11:48 AM.
06-06-2004, 04:48 AM
#26
Contributing Member
Originally Posted by Inspired
Speaking of mice, who do you think is responsible for this?!
-Jennifer
-Jennifer

Must have been like the turkish twist on steroids for the little rodent.
 01-19-2010, 06:17 AM
#28
Registered User

Join Date: Jan 2010
Posts: 1
Likes: 0
Received 0 Likes
on
0 Posts
Hello.
Newbie here. I just bought a 2002 Runner and on the low fan speed it was making this almost imperceptible but highly annoying sound. Read your post, took out blower motor, took off plastic backing... had to pry it with some strength... oiled the pads with 3 and 1 and got some under the cage too with a little hose... quite as a mouse. Thanks for the tip!
PS. If you don't want to do the repair I'm seeing these motors on Amazon.com for $55 now.
Cheers
09-06-2010, 08:51 AM
#30
Contributing Member
I just had a similiar issue. I turned on the blower and I could hear something inside moving around. It was on low, so it then went to medium speed, then to high, then thump, lol. I then realized it was an animal probably, but it was surely dead after being on HIGH, due to the SMELL! I pulled the blower fan apart, and this is what I found, with two mice inside.
I cleaned it all out yesterday but it still stinks in my truck! I borrowed my neighbors Sea Snake (a portable flexible camera with has a light on the end)

I aimed it in the channel where the fan blows the air through the big black box beside where the fan mounts, and saw this:
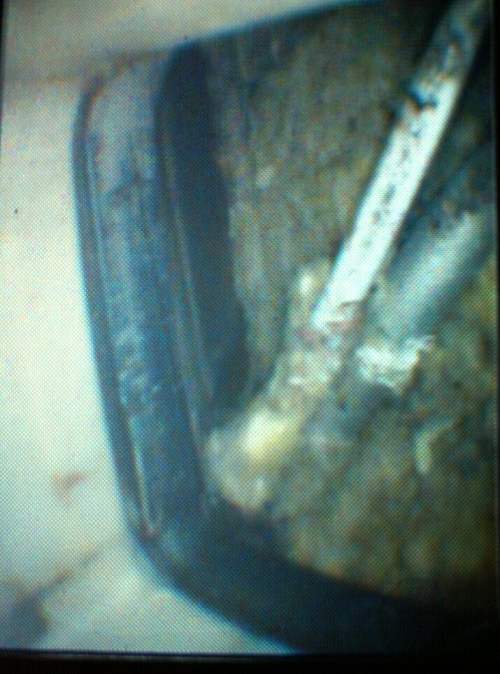
Yep, thats mice guts! I don't know how I'm going to get it all out of there and need some help on how to get everything apart in that lower black box area where the air blows through. Anyone have instructions on how to do this, or something from the service manual??? Great way to spend Labor Day!
I cleaned it all out yesterday but it still stinks in my truck! I borrowed my neighbors Sea Snake (a portable flexible camera with has a light on the end)
I aimed it in the channel where the fan blows the air through the big black box beside where the fan mounts, and saw this:
Yep, thats mice guts! I don't know how I'm going to get it all out of there and need some help on how to get everything apart in that lower black box area where the air blows through. Anyone have instructions on how to do this, or something from the service manual??? Great way to spend Labor Day!
Last edited by Jason B; 09-06-2010 at 08:55 AM.
06-23-2013, 11:32 AM
#31
Registered User

Join Date: Jan 2011
Location: SoCal
Posts: 3
Likes: 0
Received 0 Likes
on
0 Posts
Bob's 10mm is to remove the glove box.
He used a #25 torx to remove the blower assembly, but like you I found an 8mm socket easier to find and to use.
Hey Bob, maybe add 8mm as an option in your awesome write up?
He used a #25 torx to remove the blower assembly, but like you I found an 8mm socket easier to find and to use.
Hey Bob, maybe add 8mm as an option in your awesome write up?
Well I finally pulled out my blower motor and it was really not too bad as far as being dirty although when I put the clean one back in and turned it on full a whole bunch of dust blew out of the vents so there must be some increase in airflow to do that.
The blower was definately making some faint squeaking noise before and it is almost silent now so mission accomplished.
My experience was a bit different than Bob's because the screws holding the unit up to the ducts were 8mm instead of 10mm and to get it out I needed to remove the doorjam molding and the passenger side kickpanel (both very easy to do). After undoing the screws and the electrical connector, the unit just drops right down.
The other big revelation is that you can service the blower motor bearings too. The black plastic housing can be separated from the motor by undoing the 2 screws on the bottom of the motor as you can see in this pic here:

Then once those are out, you need to pry off the access cover. This is a little shield that is also on the back side of the motor (it just pops off with a screwdriver). Then you need to use a screwdriver to pry the motor out of the housing using the access hole for leverage. The motor should just slide out but it is a tight fit so take your time and don't apply too much pressure or you can crack the housing. Took me a little time but it came right out. Then when it is apart, you have access to the brushes (check them for wear) and oil the bushings. I used electric motor oil but marvel mystery oil or 3 in 1 oil will work fine too. The rear bushing has a pad for absorbing the oil so be sure to soak it thoroughly. The front bushing requires more disassembly to get at it (you need to remove the squirrel cage first). I did not go any further since it it is winter and we are screwed up here if I damage it, so I left it alone. I will disassemble it more this summer.
Another thing is that it is ok to fully submerge the blower assembly (including the motor) in soapy water or a cleaning solution (make sure to rinse with water after) as long as you let it dry thoroughly after. The motor runs on DC so technically it can even operate underwater.....no need to fear getting water in there, but again make sure to dry it out before install just to prevent rusting. You can also spay the inside of the motor with a little WD40 for some extra insurance against this.
It was definately worth doing so I hope this helps others.
The blower was definately making some faint squeaking noise before and it is almost silent now so mission accomplished.
My experience was a bit different than Bob's because the screws holding the unit up to the ducts were 8mm instead of 10mm and to get it out I needed to remove the doorjam molding and the passenger side kickpanel (both very easy to do). After undoing the screws and the electrical connector, the unit just drops right down.
The other big revelation is that you can service the blower motor bearings too. The black plastic housing can be separated from the motor by undoing the 2 screws on the bottom of the motor as you can see in this pic here:
Then once those are out, you need to pry off the access cover. This is a little shield that is also on the back side of the motor (it just pops off with a screwdriver). Then you need to use a screwdriver to pry the motor out of the housing using the access hole for leverage. The motor should just slide out but it is a tight fit so take your time and don't apply too much pressure or you can crack the housing. Took me a little time but it came right out. Then when it is apart, you have access to the brushes (check them for wear) and oil the bushings. I used electric motor oil but marvel mystery oil or 3 in 1 oil will work fine too. The rear bushing has a pad for absorbing the oil so be sure to soak it thoroughly. The front bushing requires more disassembly to get at it (you need to remove the squirrel cage first). I did not go any further since it it is winter and we are screwed up here if I damage it, so I left it alone. I will disassemble it more this summer.
Another thing is that it is ok to fully submerge the blower assembly (including the motor) in soapy water or a cleaning solution (make sure to rinse with water after) as long as you let it dry thoroughly after. The motor runs on DC so technically it can even operate underwater.....no need to fear getting water in there, but again make sure to dry it out before install just to prevent rusting. You can also spay the inside of the motor with a little WD40 for some extra insurance against this.
It was definately worth doing so I hope this helps others.
07-02-2013, 08:55 AM
#32

The following users liked this post:
Kenny O'Loughlin (11-18-2020)

Thread
Thread Starter
Forum
Replies
Last Post
LotOMiles
95.5-2004 Tacomas & 96-2002 4Runners
8
09-14-2015 11:45 PM


