
Zimsplat's 1993 Pickup Build
 01-03-2013, 11:16 AM
#1
Registered User
Thread Starter
Join Date: Nov 2012
Location: Northern california
Posts: 24
Likes: 0
Received 0 Likes
on
0 Posts
Zimsplat's 1993 Pickup Build
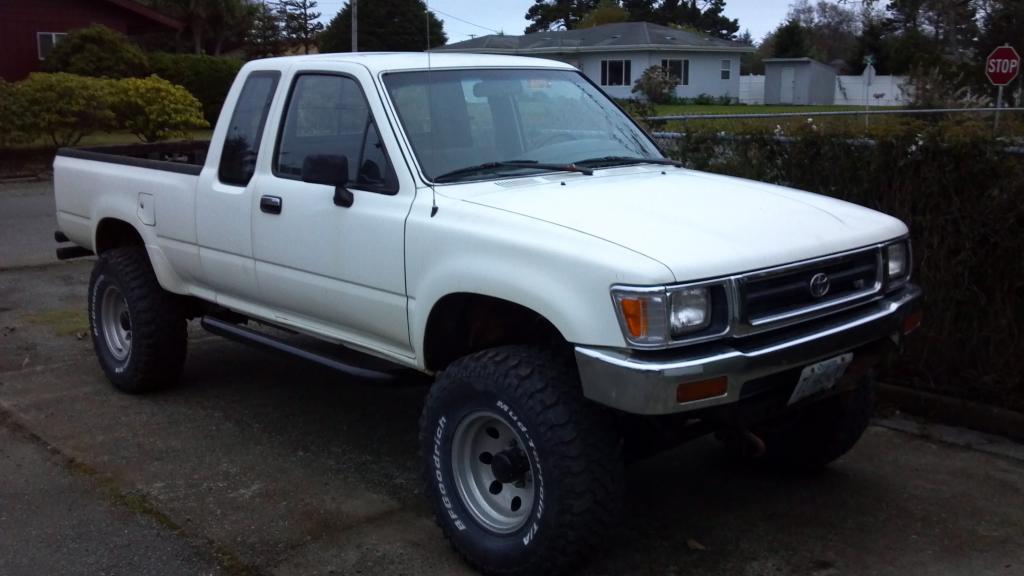
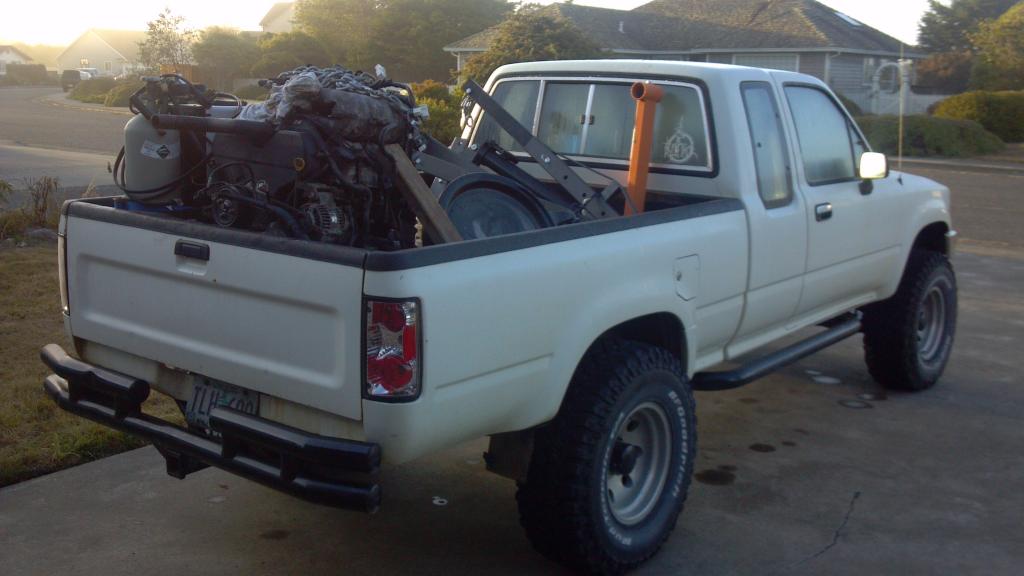
Here's the beginning of my money pit. Bought a 1993 V6 xtra cab on craigslist that was supposed to be blown up. I always wanted to try a 3.4 Swap, so I strarted gathering parts. I ended up driving the "blown up" truck 75 miles home to find out it only had a power steering pump that was dumping fluid all over the exhaust, and a small coolant leak.
It even Managed to make the trip loaded down with my welder, tools, and its engine to be
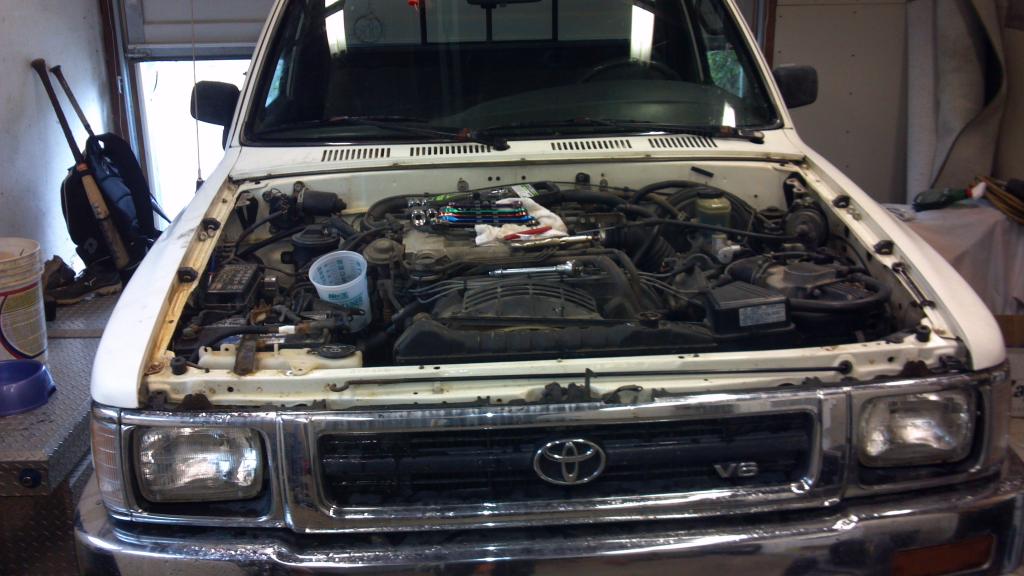
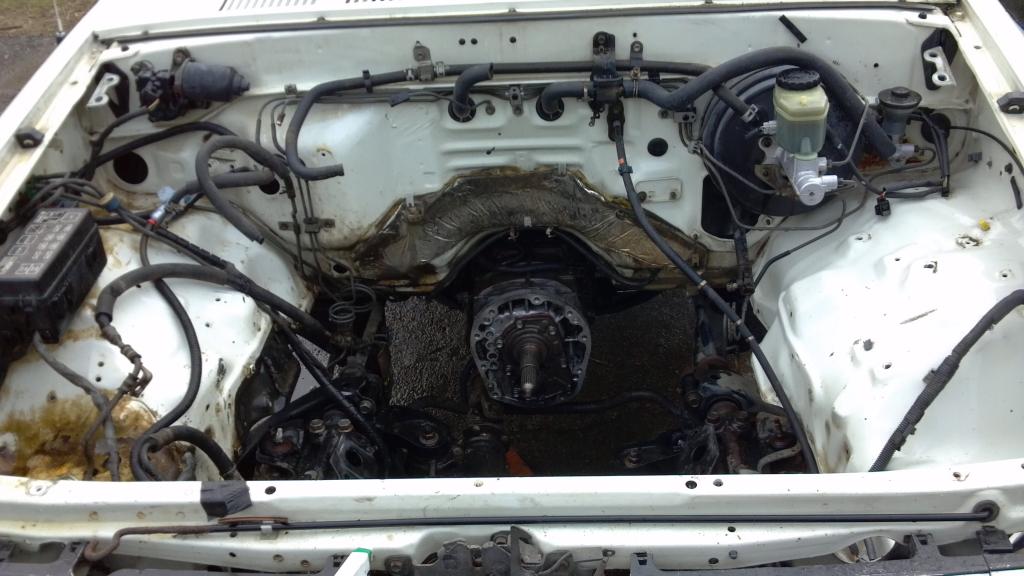
Step 1, Take this out
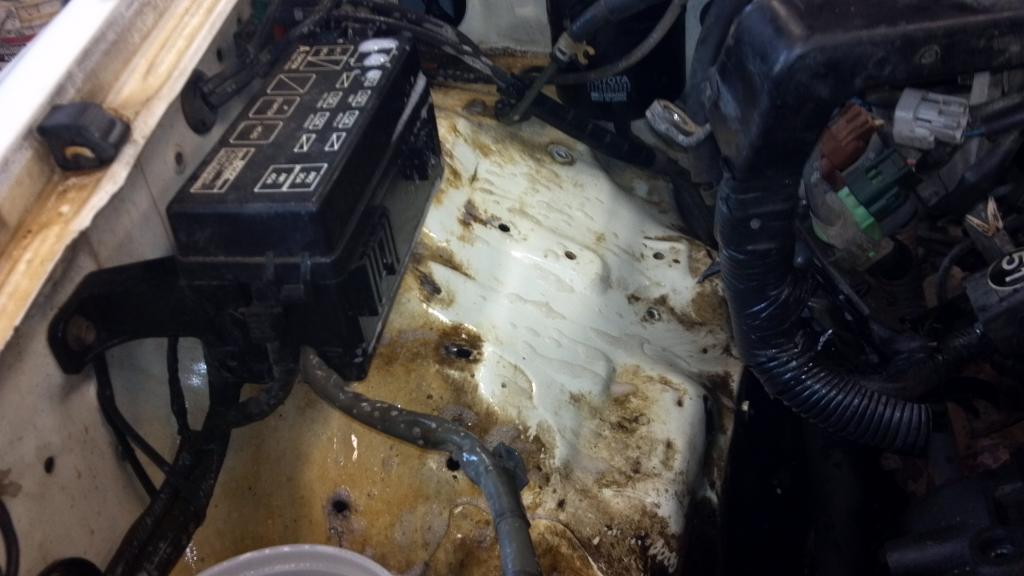
Don't think the engine bay had ever been cleaned
Turned out pretty well
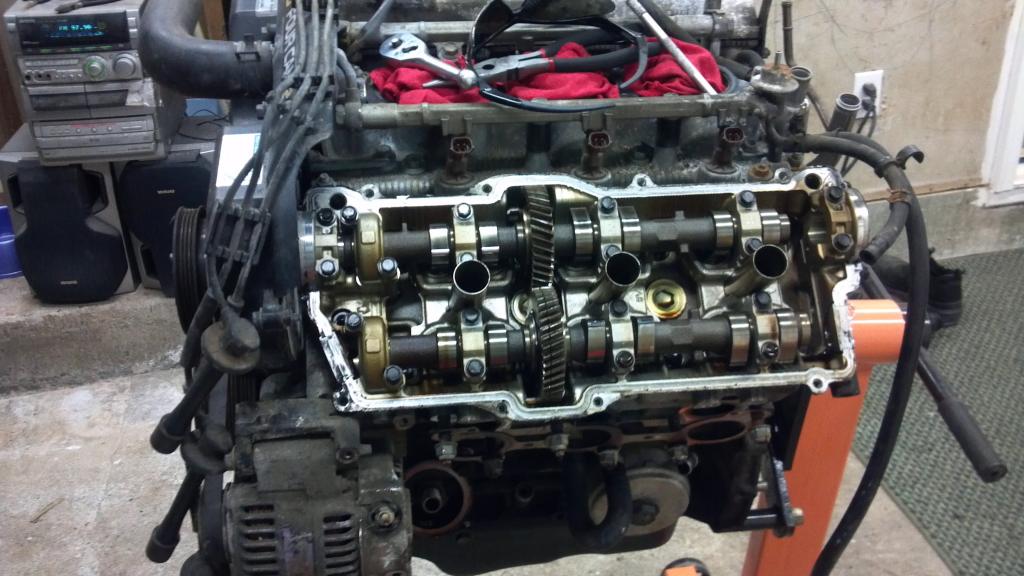
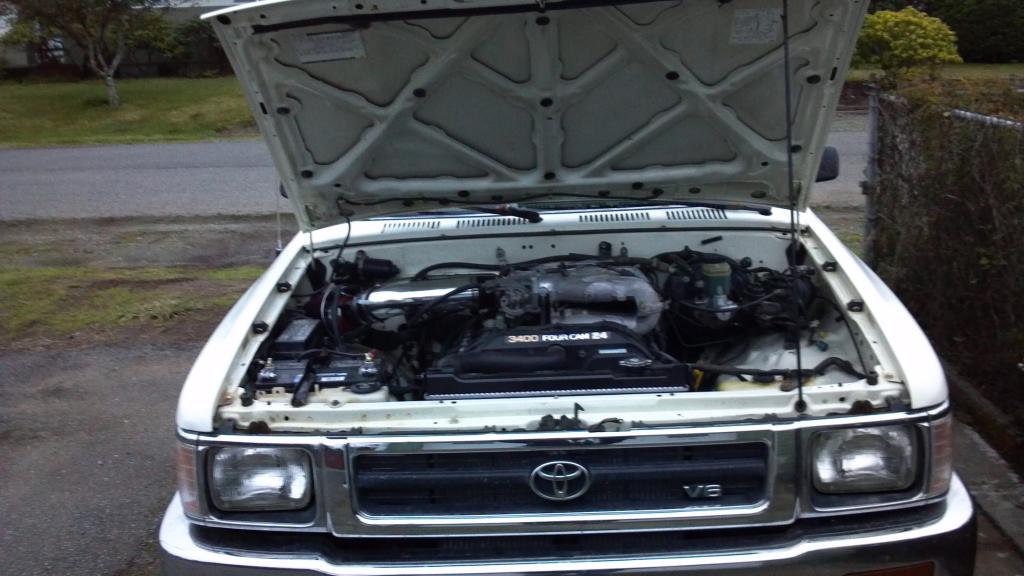
Motor from a 1998 4runner automagic.

New valve cover gaskets, hoses while they are infront of me
Not looking forward to this part
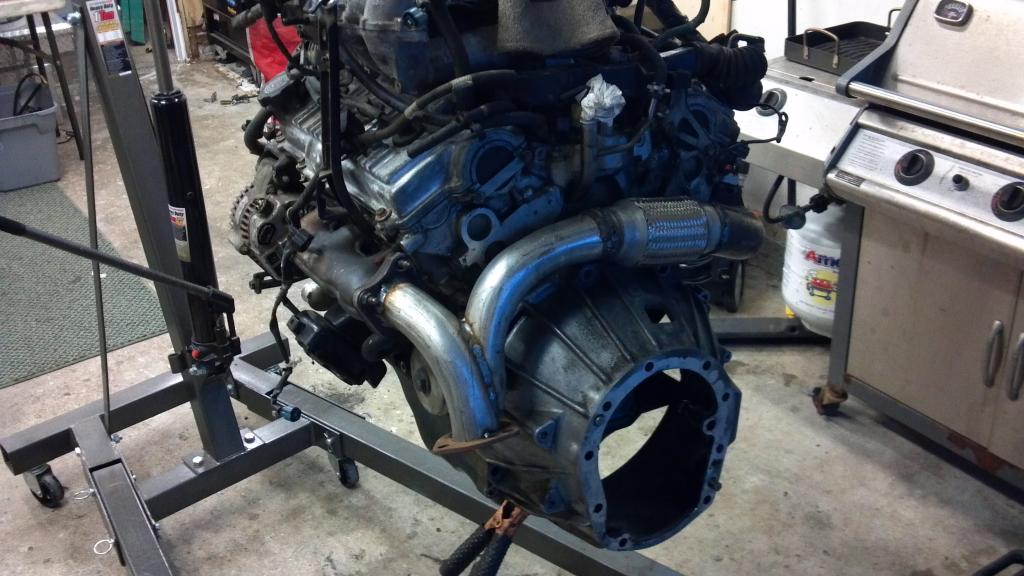
swapped oil pans and all the other various 3.0 parts to the 3.4, and started building the new crossover pipe. My goal was to use as small of a body lift as possible, which didnt leave me much room to work with. I only needed about 3/4" body lift to clear the hood on the intake manifold. I probably test fit and removed the new engine 10 times mocking up my pipes
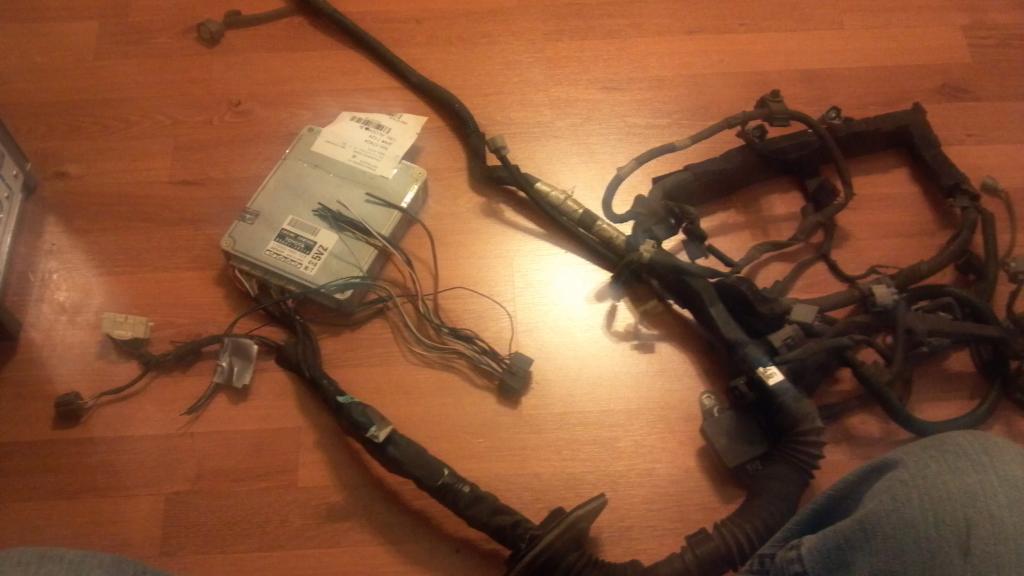
Engine In, Repinning the harness
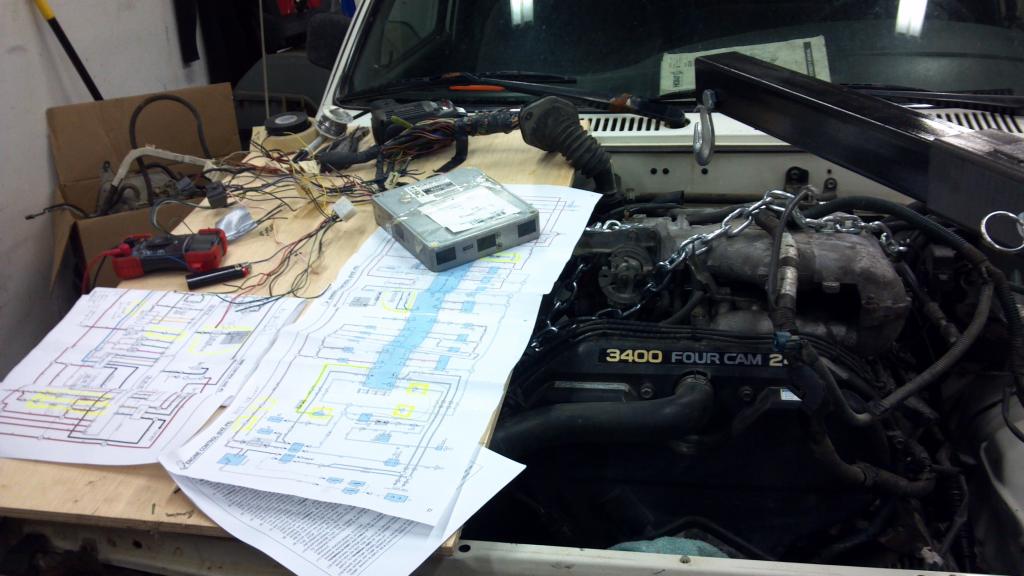
getting closer
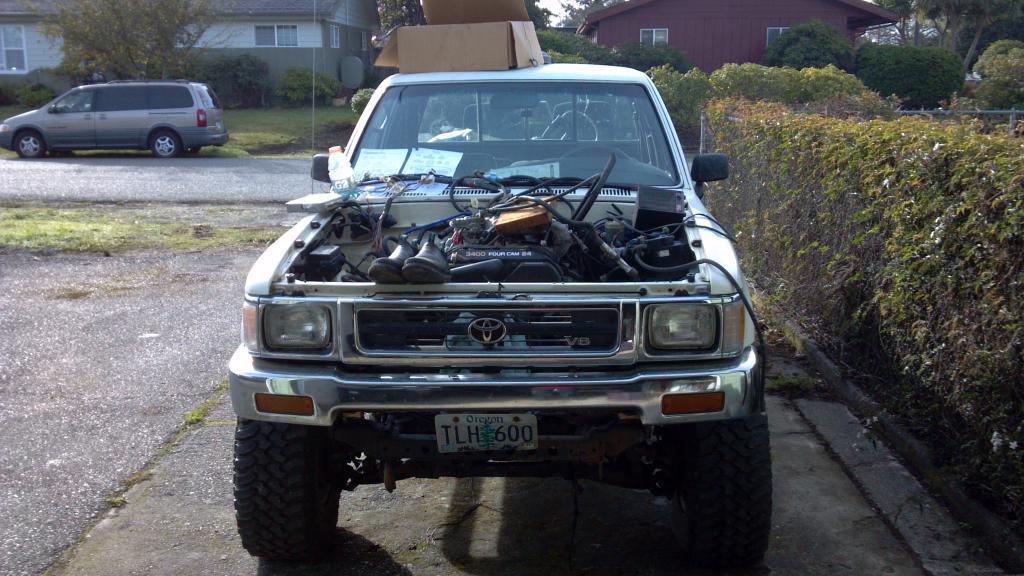
Call me ghetto, but running the intake this way was much easier than moving the battery, and hopefully it'll also keep it away from water
I finished up all the wiring, Including hooking up the front ADD to a switch on the dash. Its sort of fun to play with, gives me 2wd Low
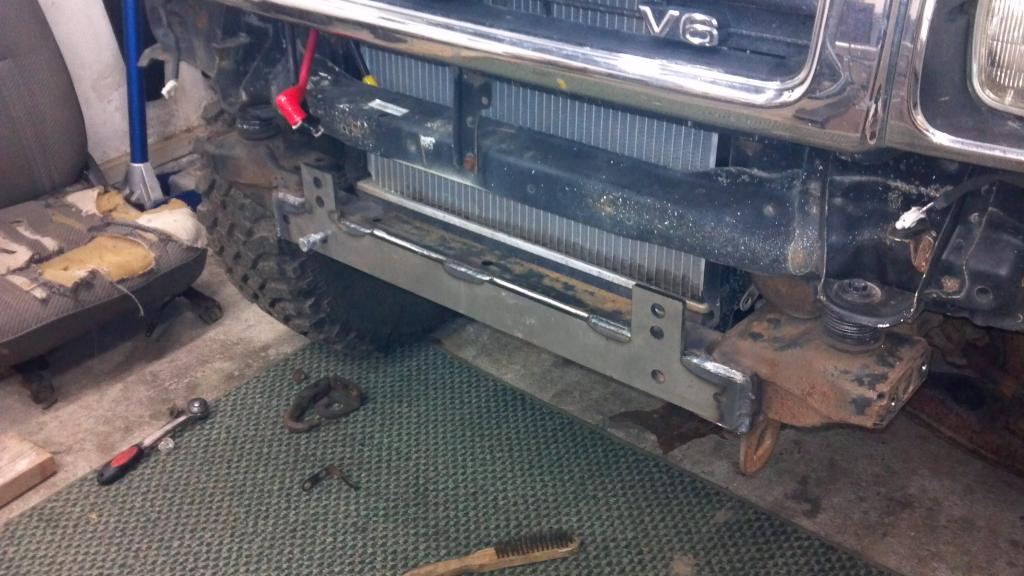
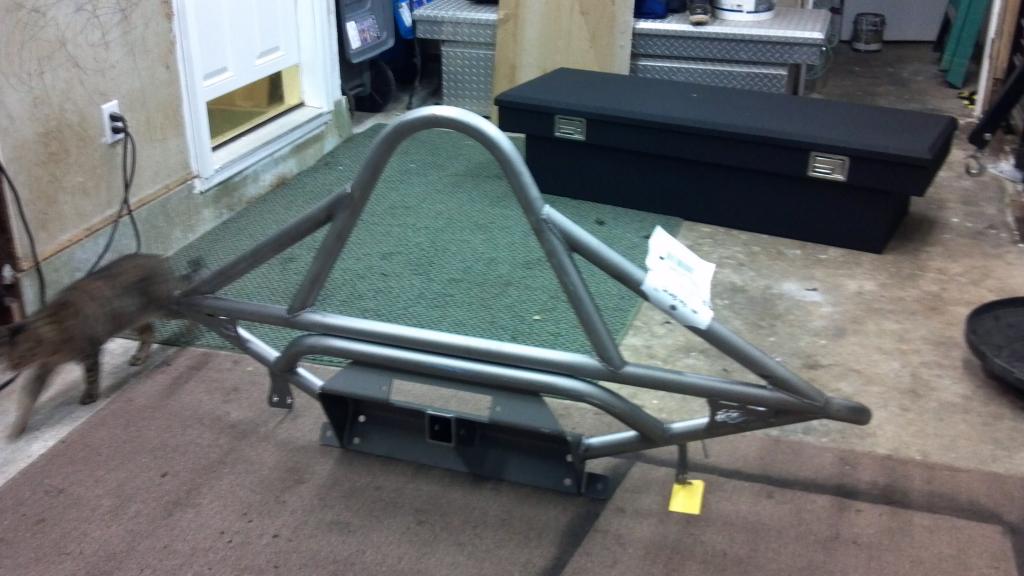
Bumper reinforcement bracket
scored a Trail gear front bumper, tool box, and a harbor freight 12k winch
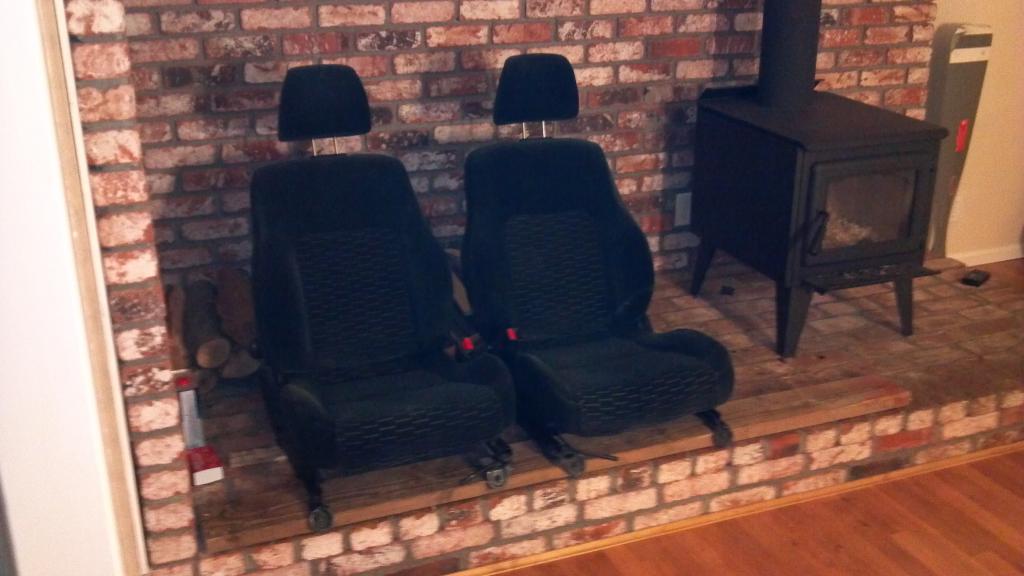
Also got some seats from a 1998 honda prelude, that nearly bolted in
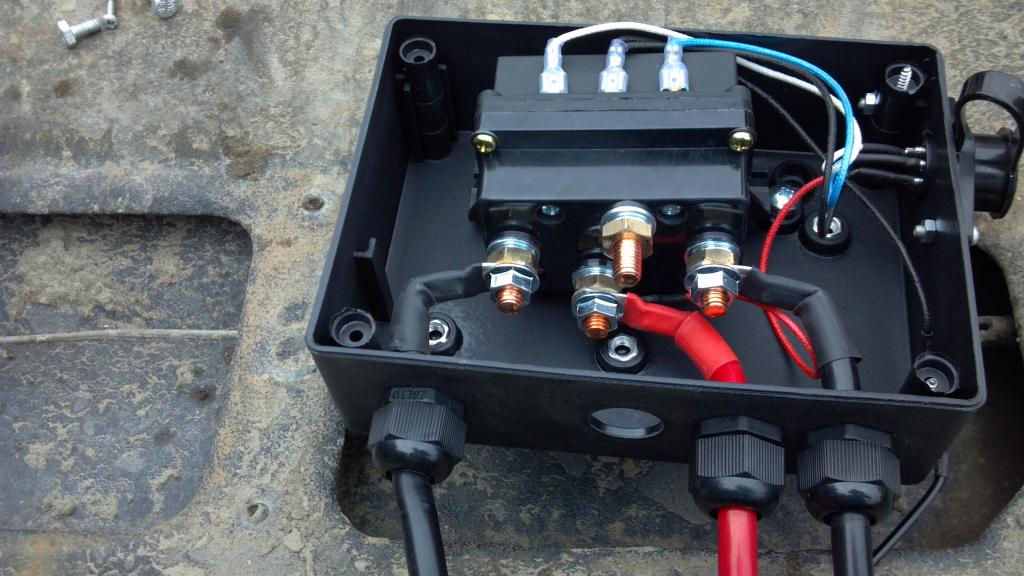
I rerouted some wires in the control box so I could mount it under my hood and hopefully keep it out of harms way

Had some fun with a friend and his 4wd civic wagon
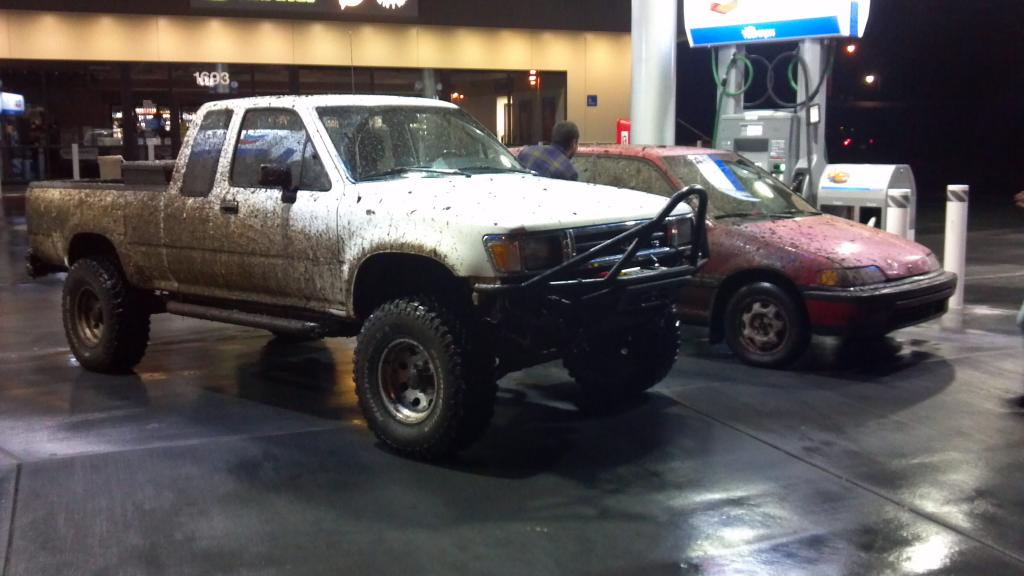
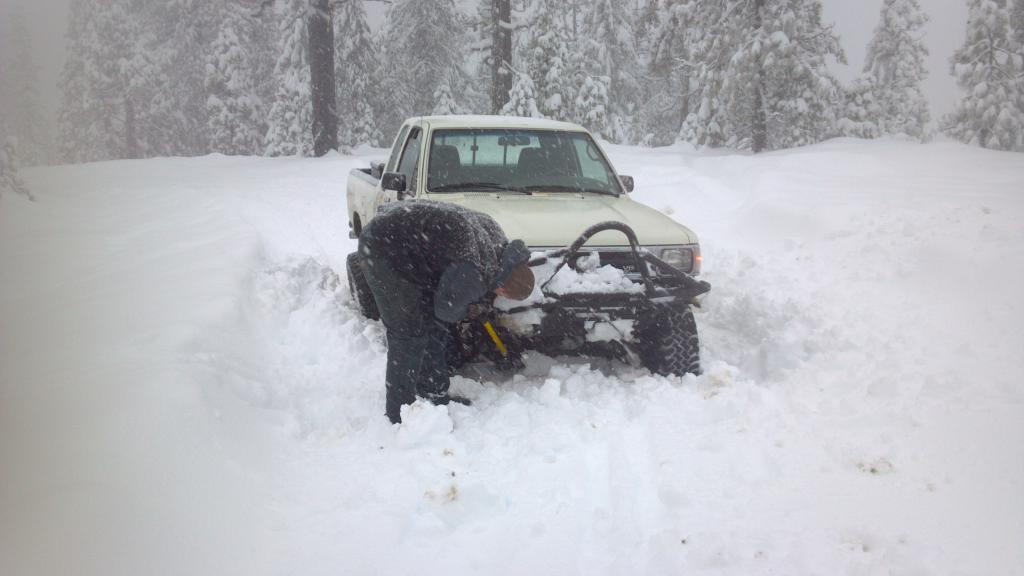
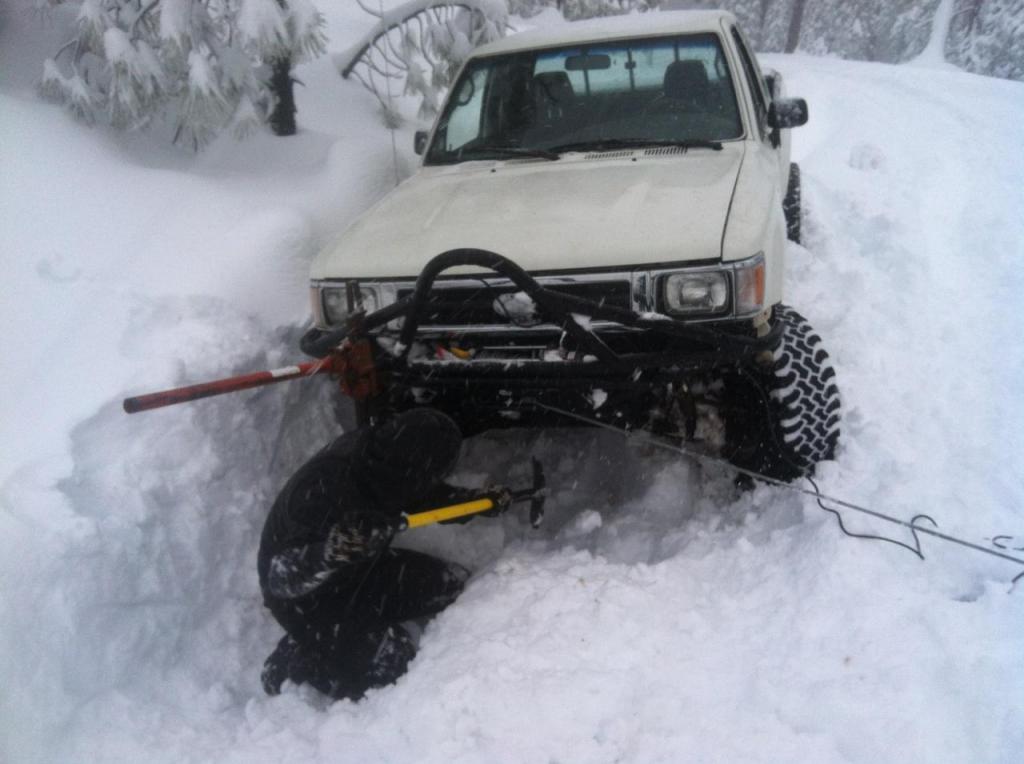
Went and played at the snow a little too while Im waiting for more parts in the mail, Glad I bought the winch!
Next up, SAS swap. I have some 63" chevys for the rear, and some 3" skyjacker front springs. Im currently collecting parts to build my front axle before it gets anywhere near the truck. So far I have dirty 30's, the trunion elimnator kit, high steer, ARP knuckle studs and some other nick nacks. I havent decided what type of lockers id like to go with yet, either spartan lockers or maybe the youkon grizzley . I'm planning on cutting and rotating the front housing and knuckles, and tinkering with the idea of hydro assist too.
It even Managed to make the trip loaded down with my welder, tools, and its engine to be
Step 1, Take this out
Don't think the engine bay had ever been cleaned
Turned out pretty well
Motor from a 1998 4runner automagic.
New valve cover gaskets, hoses while they are infront of me
Not looking forward to this part
swapped oil pans and all the other various 3.0 parts to the 3.4, and started building the new crossover pipe. My goal was to use as small of a body lift as possible, which didnt leave me much room to work with. I only needed about 3/4" body lift to clear the hood on the intake manifold. I probably test fit and removed the new engine 10 times mocking up my pipes
Engine In, Repinning the harness
getting closer
Call me ghetto, but running the intake this way was much easier than moving the battery, and hopefully it'll also keep it away from water
I finished up all the wiring, Including hooking up the front ADD to a switch on the dash. Its sort of fun to play with, gives me 2wd Low
Bumper reinforcement bracket
scored a Trail gear front bumper, tool box, and a harbor freight 12k winch
Also got some seats from a 1998 honda prelude, that nearly bolted in
I rerouted some wires in the control box so I could mount it under my hood and hopefully keep it out of harms way
Had some fun with a friend and his 4wd civic wagon
Went and played at the snow a little too while Im waiting for more parts in the mail, Glad I bought the winch!
Next up, SAS swap. I have some 63" chevys for the rear, and some 3" skyjacker front springs. Im currently collecting parts to build my front axle before it gets anywhere near the truck. So far I have dirty 30's, the trunion elimnator kit, high steer, ARP knuckle studs and some other nick nacks. I havent decided what type of lockers id like to go with yet, either spartan lockers or maybe the youkon grizzley . I'm planning on cutting and rotating the front housing and knuckles, and tinkering with the idea of hydro assist too.
Last edited by zimsplat; 01-03-2013 at 03:58 PM.


 01-28-2013, 03:29 PM
#3
Registered User
Thread Starter
Join Date: Nov 2012
Location: Northern california
Posts: 24
Likes: 0
Received 0 Likes
on
0 Posts
Figured id start out on suspenson with the rear 63" chevy swap. Got the trail gear hanger kit, which was good quality and made this swap a piece of cake.

took the old springs and axle off to strip down, and also install my spartan locker. Im a little skeptical, so I only bough one for now. I might end up going with a grizzley locker depending on how it preforms.

made some new perches out of 2" box steel


I used a plumb bob to locate the front hangers, then set up my loaded shackle angle at about 45 degrees


once I was happy with all my angles, I welded it all up. Also extended the parking brake arms to clear the thicker spring pack

63" chevys in the rear vs 1.5" ball joint spacers in the front... for now

Yep, they are soft! Only had 2wd, but manage to get it up on a rock


took the old springs and axle off to strip down, and also install my spartan locker. Im a little skeptical, so I only bough one for now. I might end up going with a grizzley locker depending on how it preforms.
made some new perches out of 2" box steel
I used a plumb bob to locate the front hangers, then set up my loaded shackle angle at about 45 degrees
once I was happy with all my angles, I welded it all up. Also extended the parking brake arms to clear the thicker spring pack
63" chevys in the rear vs 1.5" ball joint spacers in the front... for now
Yep, they are soft! Only had 2wd, but manage to get it up on a rock
Last edited by zimsplat; 01-28-2013 at 03:56 PM.
Trending Topics
02-01-2013, 09:18 PM
#9
Registered User
Thread Starter
Join Date: Nov 2012
Location: Northern california
Posts: 24
Likes: 0
Received 0 Likes
on
0 Posts
So now onto some more serious mods. Took the truck to the carwash and spent a good 1/2 hour cleaning underneath the cab and forward suspension/frame. This is going to be a disaster in my single car garage.

start ripping this garbage out

Plasma cutter was the investment of the decade for this project

Figured it would be in my shop for a while with me banging on it, so i got some huge size jackstands for harbor freight

This oil pan is going to need to go. I hear I need a v6 2wd T100 Pan?

A few beers later and its looking pretty good. got all the main brackets off, Tomorrow is grinding day

start ripping this garbage out
Plasma cutter was the investment of the decade for this project
Figured it would be in my shop for a while with me banging on it, so i got some huge size jackstands for harbor freight
This oil pan is going to need to go. I hear I need a v6 2wd T100 Pan?
A few beers later and its looking pretty good. got all the main brackets off, Tomorrow is grinding day
Last edited by zimsplat; 02-02-2013 at 05:23 PM.
02-07-2013, 08:19 PM
#10
Registered User
Thread Starter
Join Date: Nov 2012
Location: Northern california
Posts: 24
Likes: 0
Received 0 Likes
on
0 Posts
Got the frame rails all ground down, blasted some holes with the plasma for the shackles
 .
.
Spent hours with a tape measure and my angle finder deciding where to mount my crossmember and shackles. Planning on doing the Rears up front swap with some 89 4runner springs I got.
they are definitely nice and long, but im worried im not going to end up with much lift to clear the 35's id like some day


Also bought two topshift transfer cases for the dual transfer case parts I'm planning on ordering with tax refund money.
they both started out like this

got one all torn down for the forward case, and the other nice and clean for the rear

.Spent hours with a tape measure and my angle finder deciding where to mount my crossmember and shackles. Planning on doing the Rears up front swap with some 89 4runner springs I got.
they are definitely nice and long, but im worried im not going to end up with much lift to clear the 35's id like some day
Also bought two topshift transfer cases for the dual transfer case parts I'm planning on ordering with tax refund money.
they both started out like this
got one all torn down for the forward case, and the other nice and clean for the rear
Last edited by zimsplat; 02-07-2013 at 08:31 PM.
 02-08-2013, 09:03 AM
#12
Registered User
Thread Starter
Join Date: Nov 2012
Location: Northern california
Posts: 24
Likes: 0
Received 0 Likes
on
0 Posts
its the trail gear rock defense http://www.trail-gear.com/front-bumpers
02-09-2013, 08:08 AM
#13
Registered User
Thread Starter
Join Date: Nov 2012
Location: Northern california
Posts: 24
Likes: 0
Received 0 Likes
on
0 Posts
started experimenting with spring packs for the front. Current setup is 89 4runner pack, with and added leaf from the 93 pack, and also one from a set of trailgear rear springs. I cut both of them down slightly to match the taper of the rest of the pack. im considering putting the overload on the bottom and cut it down to 6-8 inches to keep the springs from looking like a W. opinions anybody?


weight of the truck on it

weight of the truck on it
02-09-2013, 08:25 PM
#14
Registered User
Thread Starter
Join Date: Nov 2012
Location: Northern california
Posts: 24
Likes: 0
Received 0 Likes
on
0 Posts
Got my crossmember all mocked up to measure my front driveline angle. Looks like I need to rotate the housing about 9-10 degrees to make a perfect pinion angle


02-11-2013, 08:46 PM
#15
Registered User
Thread Starter
Join Date: Nov 2012
Location: Northern california
Posts: 24
Likes: 0
Received 0 Likes
on
0 Posts
Todays project, rotate front axle.
Started by chopping off the drivers side spring pad, and making a new one

Mocked up the front Diff and transfer case to figure out a straight driveline.
 .
.
While still on the truck, I tacked the spring pad in place, and set to cutting out a passanger side pad, which was a bitch. one side of it is a nice curve, and the other is a jacked up series of angles to fit the diff housing. the only way to really figure it out was trial and error.
matched its angle to the other side and bingo... rotated.

Onto the fun and scarry part. Rented a big ass pipe cutter and set to work

It was a little scarry not knowing how deep to go, But I was able to measure the inside diamiter of the axle and stop cutting prior to that

I rigged up the housing on my shop floor like this with the old torsion bars. I ended up standing/juping on one bar and wacking the end of the housing with a BFH while heating it with a torch. It finally broke free, and I turned one side back to 8 degrees of caster.

going back together

Once side 1 was complete, I just copied its angle on the second side. I'm pleased with the results. Hopefully my welds hold! Ill torch out some gussets and shock mounts anyway

Started by chopping off the drivers side spring pad, and making a new one
Mocked up the front Diff and transfer case to figure out a straight driveline.
.While still on the truck, I tacked the spring pad in place, and set to cutting out a passanger side pad, which was a bitch. one side of it is a nice curve, and the other is a jacked up series of angles to fit the diff housing. the only way to really figure it out was trial and error.
matched its angle to the other side and bingo... rotated.
Onto the fun and scarry part. Rented a big ass pipe cutter and set to work
It was a little scarry not knowing how deep to go, But I was able to measure the inside diamiter of the axle and stop cutting prior to that
I rigged up the housing on my shop floor like this with the old torsion bars. I ended up standing/juping on one bar and wacking the end of the housing with a BFH while heating it with a torch. It finally broke free, and I turned one side back to 8 degrees of caster.
going back together
Once side 1 was complete, I just copied its angle on the second side. I'm pleased with the results. Hopefully my welds hold! Ill torch out some gussets and shock mounts anyway
Last edited by zimsplat; 02-11-2013 at 09:03 PM.
 That thing is SWEEEET! Looking forward to more!
02-27-2013, 07:39 AM
That thing is SWEEEET! Looking forward to more!
02-27-2013, 07:39 AM
#18
Registered User
Thread Starter
Join Date: Nov 2012
Location: Northern california
Posts: 24
Likes: 0
Received 0 Likes
on
0 Posts
I was tired of changing broken studs on my last project, so I decided to beef up my knuckles on this one. Got the trail gear trunion bearing eliminator, ARP studs, and doing the 5th stud mod. I didnt like how uneven the surface was for the 5th stud mod, so i welded a little patch on it and milled it down.


ARP's installed

hopefully this helps


eliminator kit installed in the knuckle balls

Pressing the male ends into steering arms

deciding where to mount the ram

steering test fit and mockup

drilling the steering box for fittings

moving and rotating the steering box


ARP's installed
hopefully this helps
eliminator kit installed in the knuckle balls
Pressing the male ends into steering arms
deciding where to mount the ram
steering test fit and mockup
drilling the steering box for fittings
moving and rotating the steering box
Last edited by zimsplat; 03-15-2013 at 08:36 AM.
03-14-2013, 10:33 PM
#19
Registered User
Thread Starter
Join Date: Nov 2012
Location: Northern california
Posts: 24
Likes: 0
Received 0 Likes
on
0 Posts
lots of boxes showed up from inchworm gear. Ordered a dual adapter, 4.7 gears, 23 spline input gear,v6 adapter and trail gear crossmember.
4.7's getting installed in the rear case

I didnt have a set of snapring plyers, so I made some.

rear case, crossmember and bombproof mount

the 23 spline input gears look pretty beefy compared to the 21!

crawl box going together with stock 2.28 gears

I was almost disapointed how simple the v6 adapter was (for how expensive it was)

Its a little scarry, the incworm v6 adapter needs to be finish drilled for either stock location, or clocked 10 degrees. dont drill the wrong ones!!

top quality CNC machining on this adapter

crawl box /v6 adapter assembled

All assembled. There is some money invested here! Thanks tax return!

It all tucks up in the frame quite nicely with the Trail gear crossmember

4.7's getting installed in the rear case
I didnt have a set of snapring plyers, so I made some.
rear case, crossmember and bombproof mount
the 23 spline input gears look pretty beefy compared to the 21!
crawl box going together with stock 2.28 gears
I was almost disapointed how simple the v6 adapter was (for how expensive it was)
Its a little scarry, the incworm v6 adapter needs to be finish drilled for either stock location, or clocked 10 degrees. dont drill the wrong ones!!
top quality CNC machining on this adapter
crawl box /v6 adapter assembled
All assembled. There is some money invested here! Thanks tax return!
It all tucks up in the frame quite nicely with the Trail gear crossmember
Last edited by zimsplat; 03-15-2013 at 08:47 AM.
03-15-2013, 08:52 AM
#20
Registered User
Thread Starter
Join Date: Nov 2012
Location: Northern california
Posts: 24
Likes: 0
Received 0 Likes
on
0 Posts
Made my front driveline using the trail gear long spline kit. Took a stock front driveline and cut the tube... the trail gear kit is a perfect press fit into it. I crammed it in there using a jack and the bottom of my frame. Once together I bolted it all up so I could spin it and tap it straight with a hammer


turned out pretty good! doesnt vibrate at all!
turned out pretty good! doesnt vibrate at all!


