
yeayeayea's 1992 pickup body off restoration/ Build up thread
 09-05-2016, 04:31 PM
#1
Registered User
Thread Starter

Join Date: Sep 2016
Posts: 17
Likes: 0
Received 0 Likes
on
0 Posts
yeayeayea's 1992 pickup body off restoration/ Build up thread
This is a crossposting from my thread over on The Car Lounge, but I figured everyone here could benefit from having access to high res photos of nearly every aspect of one of these trucks! I took pictures of EVERYTHING I touched so I would remember how it goes back together, and so far the plan hasn't let me down yet!
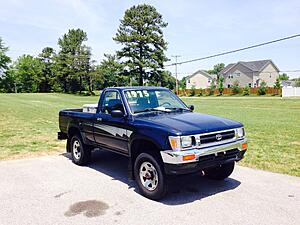
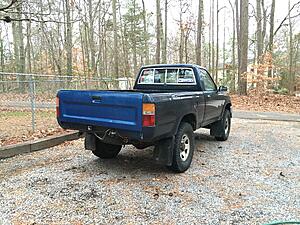
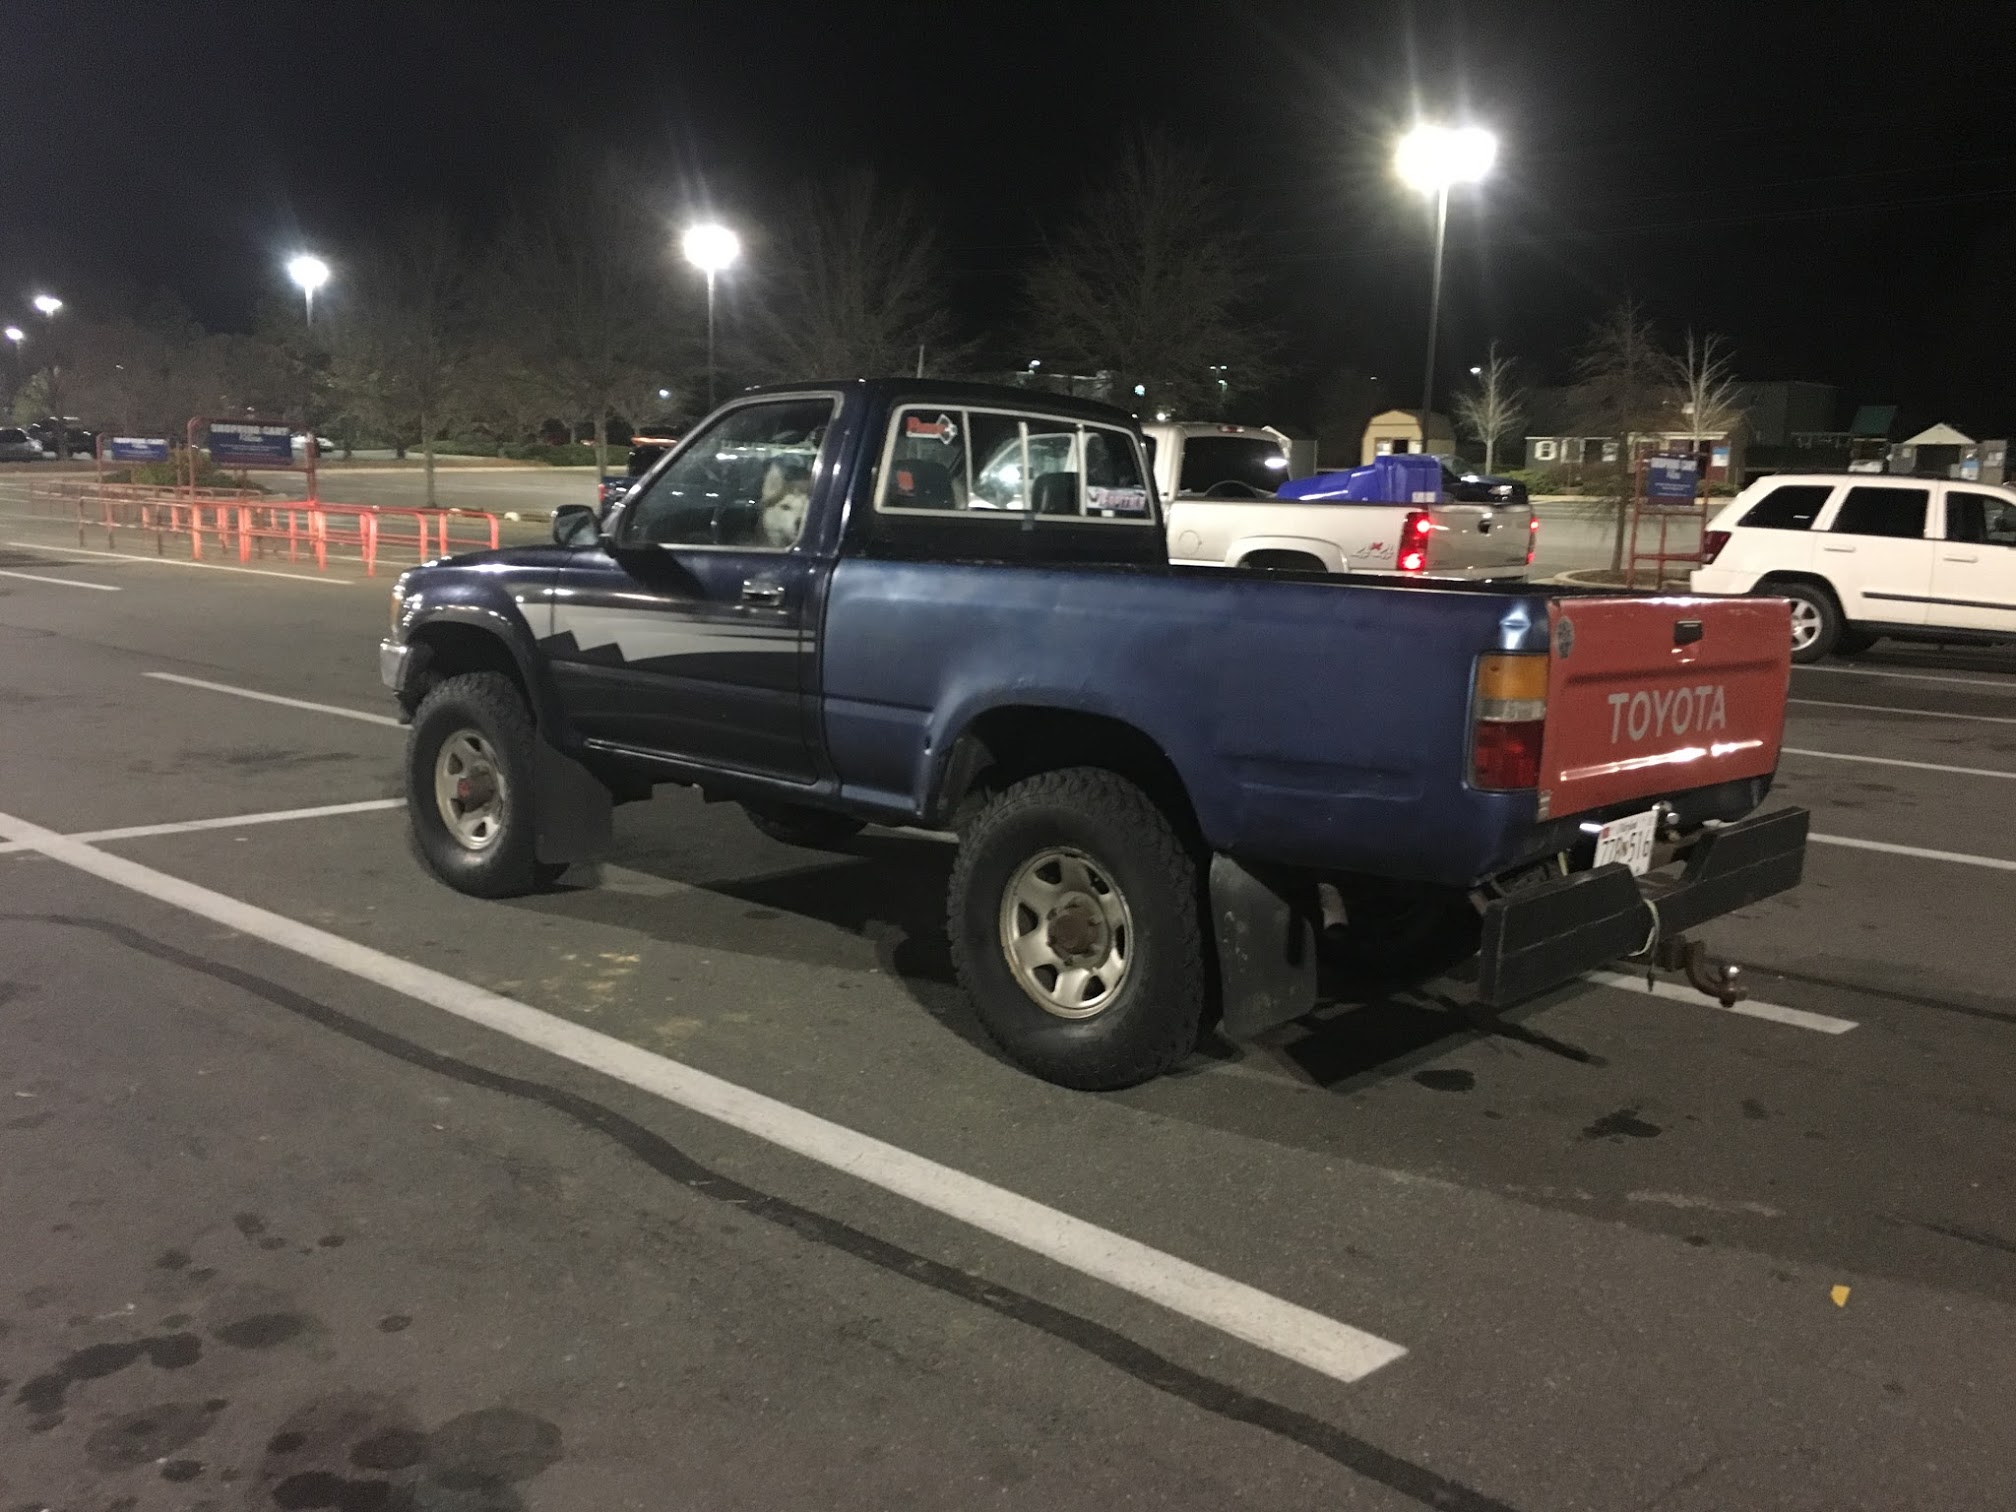
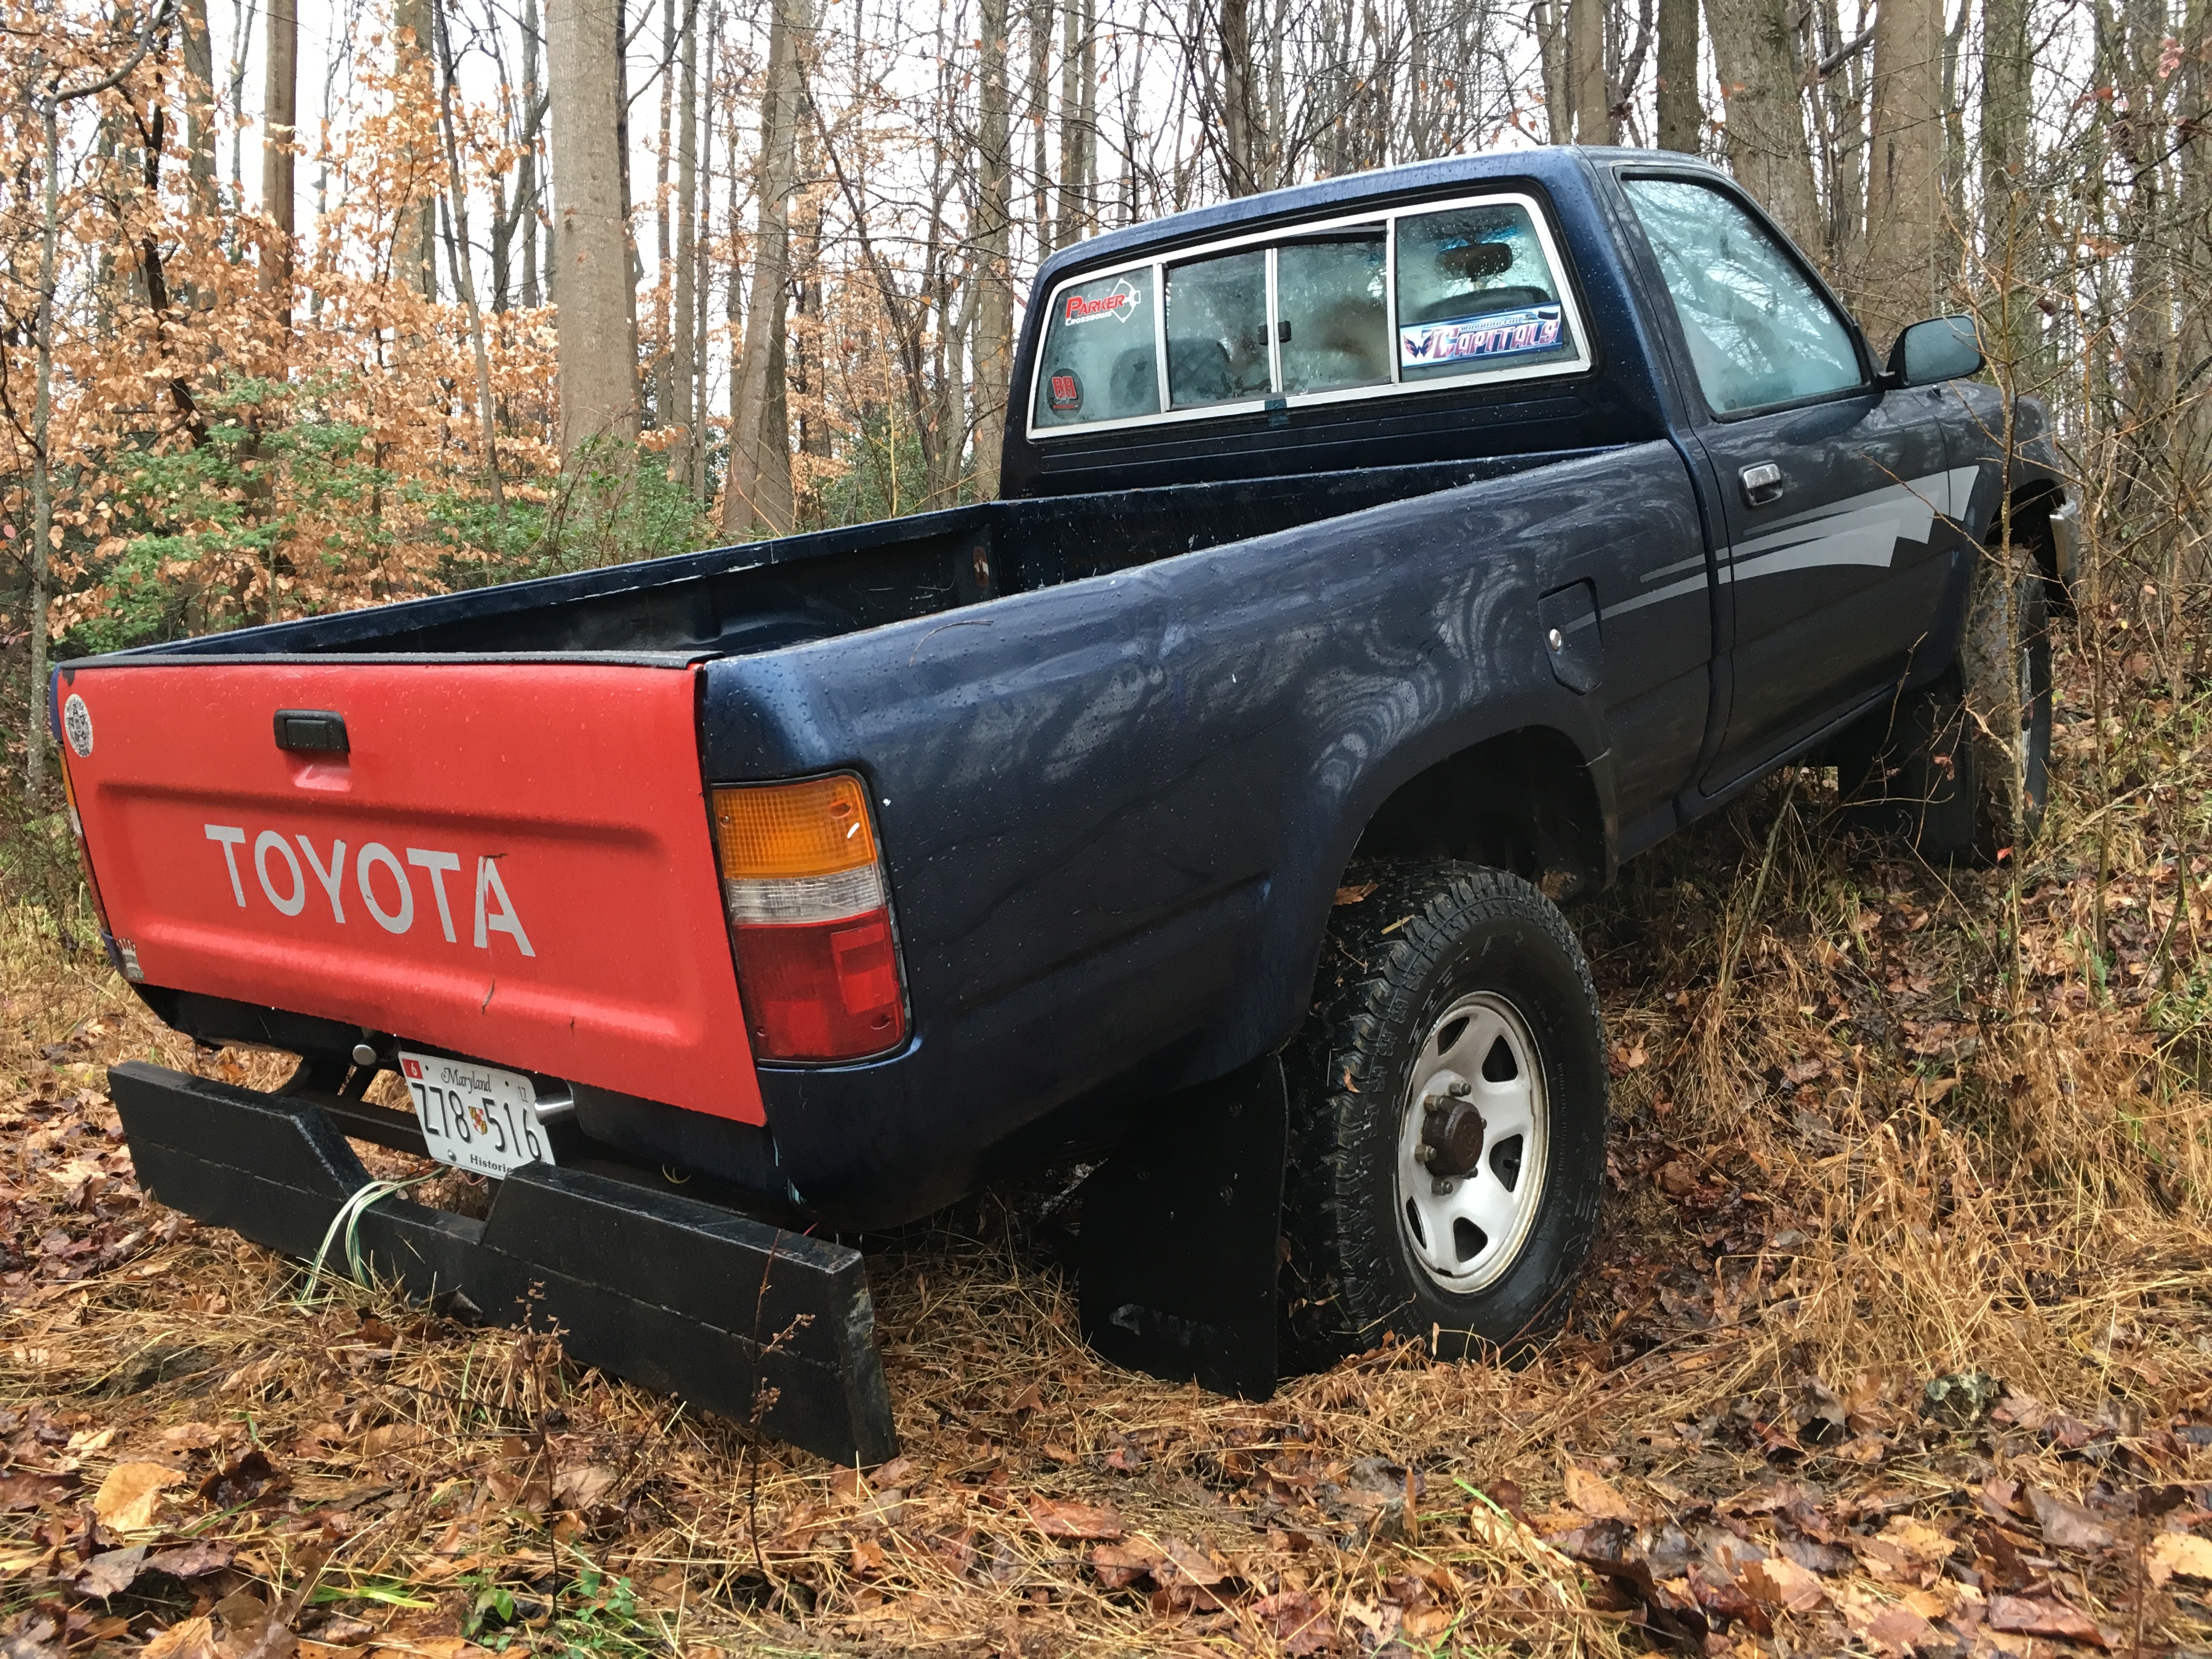
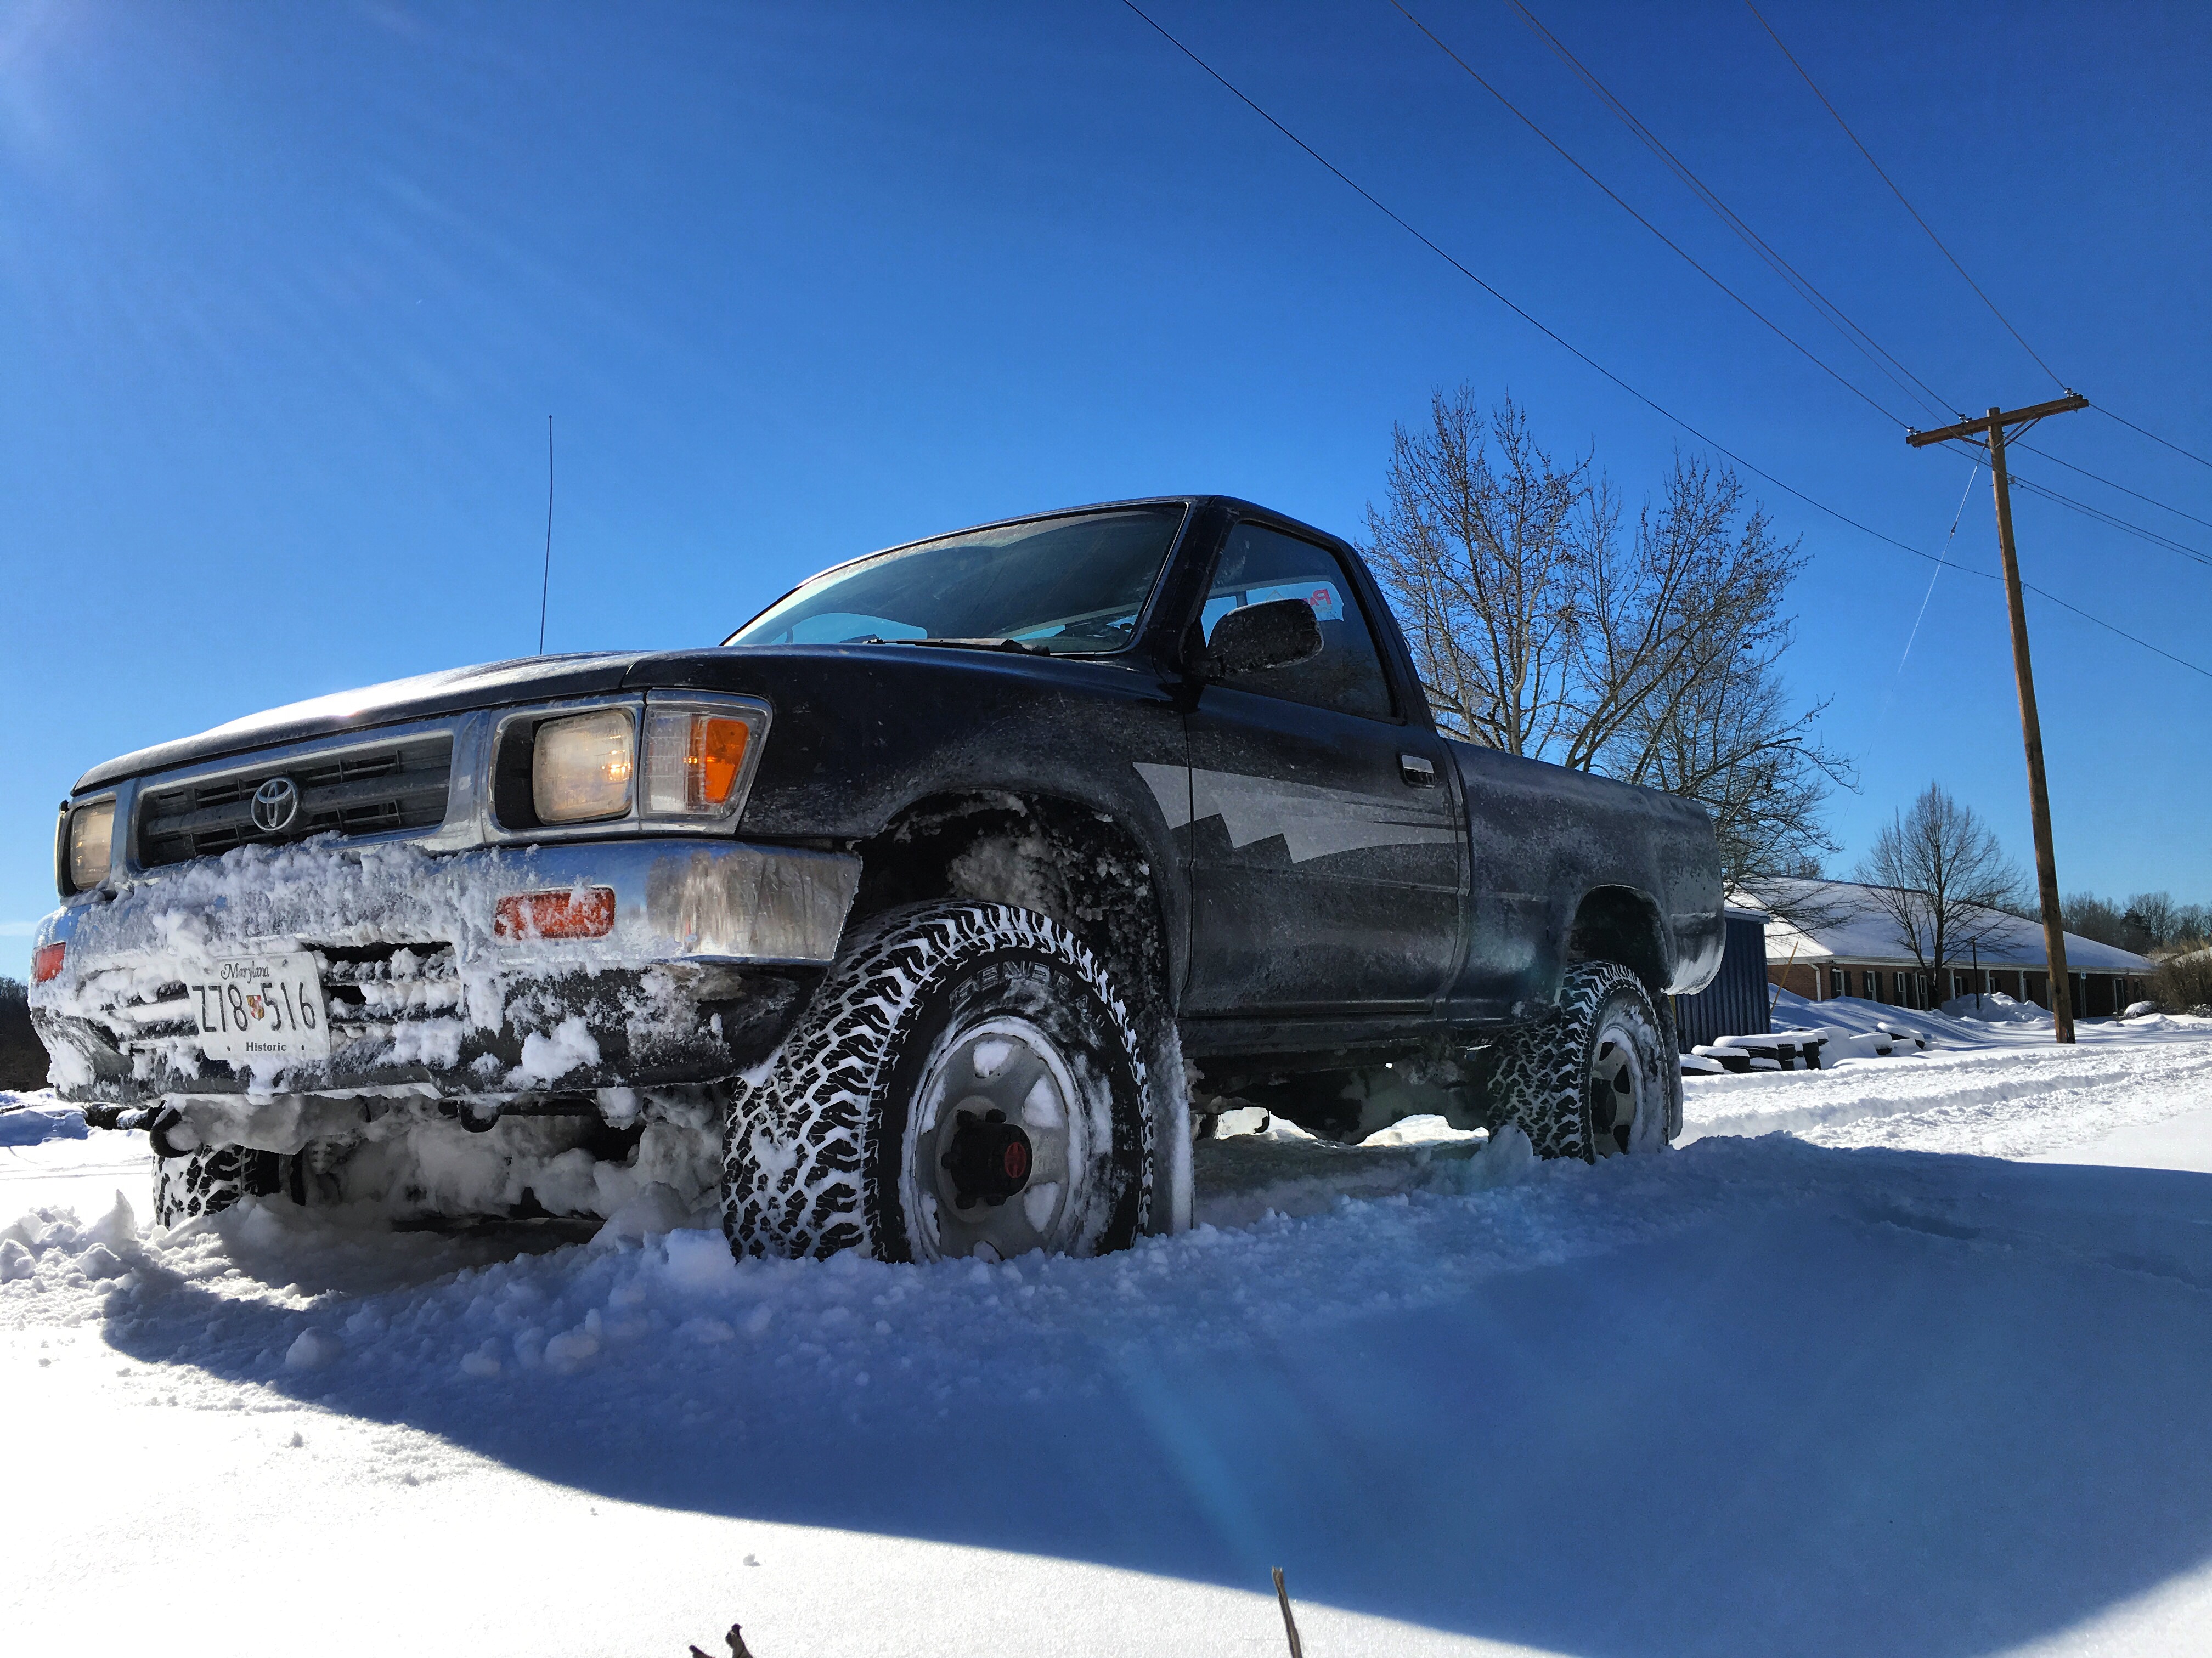
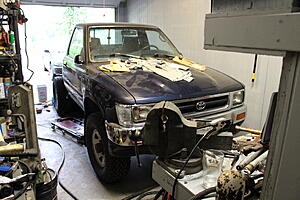
This is my toyota pickup! I bought it for the low, low price of $1800. It had a bedside made of bondo and 259,000 miles but it runs and drives and stops and the 4x4 works great.
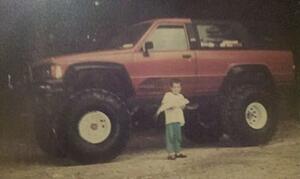
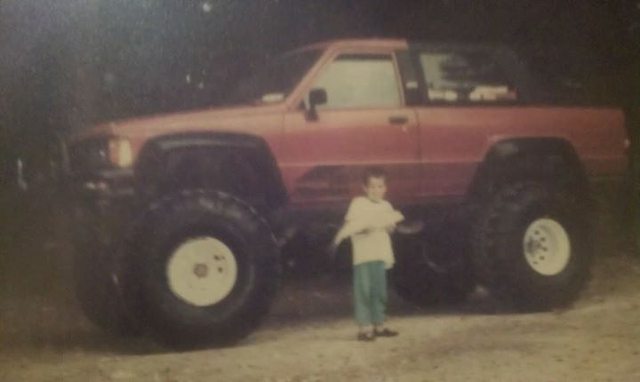
Growing up my parents had a built '85 4Runner with a chevy 350, 7" of lift and 38" Super Swampers
First Mod! 31" General Grabber AT2's which are awesome tires. Basically the General brand version of the BFG All Terrain KO2.
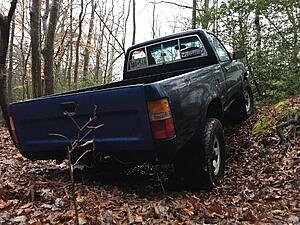
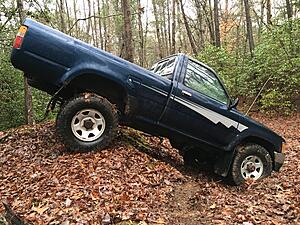
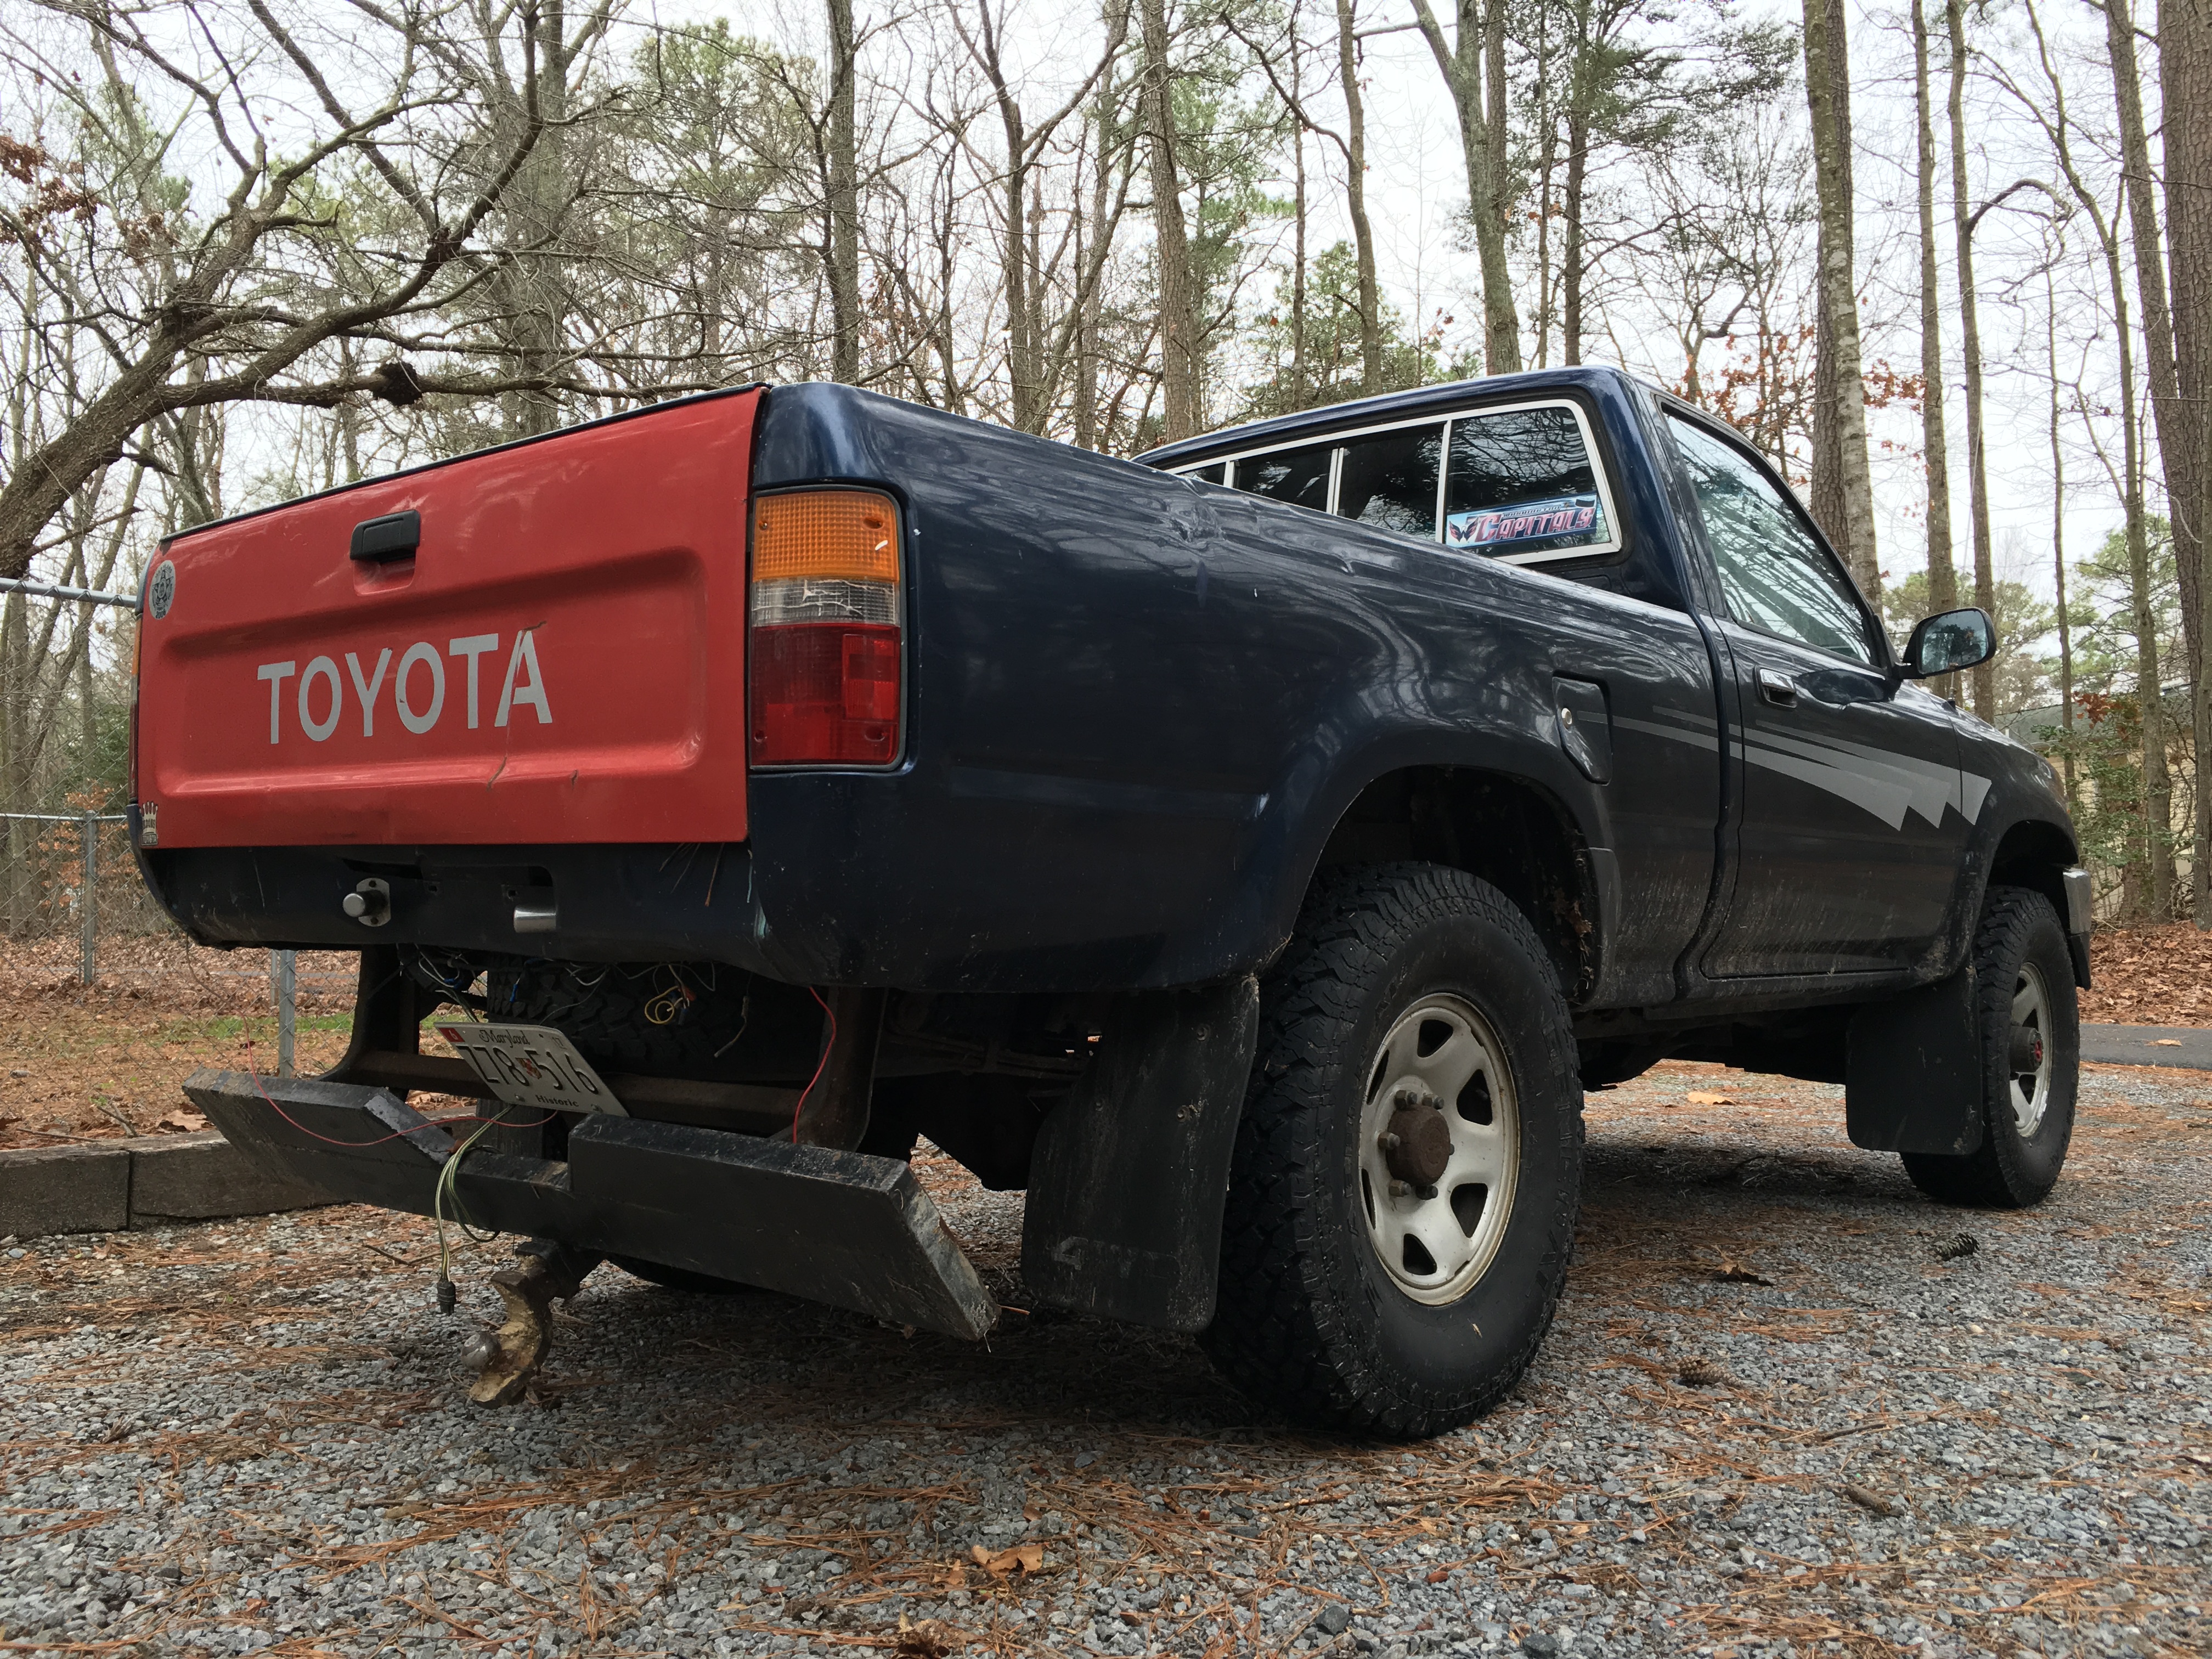
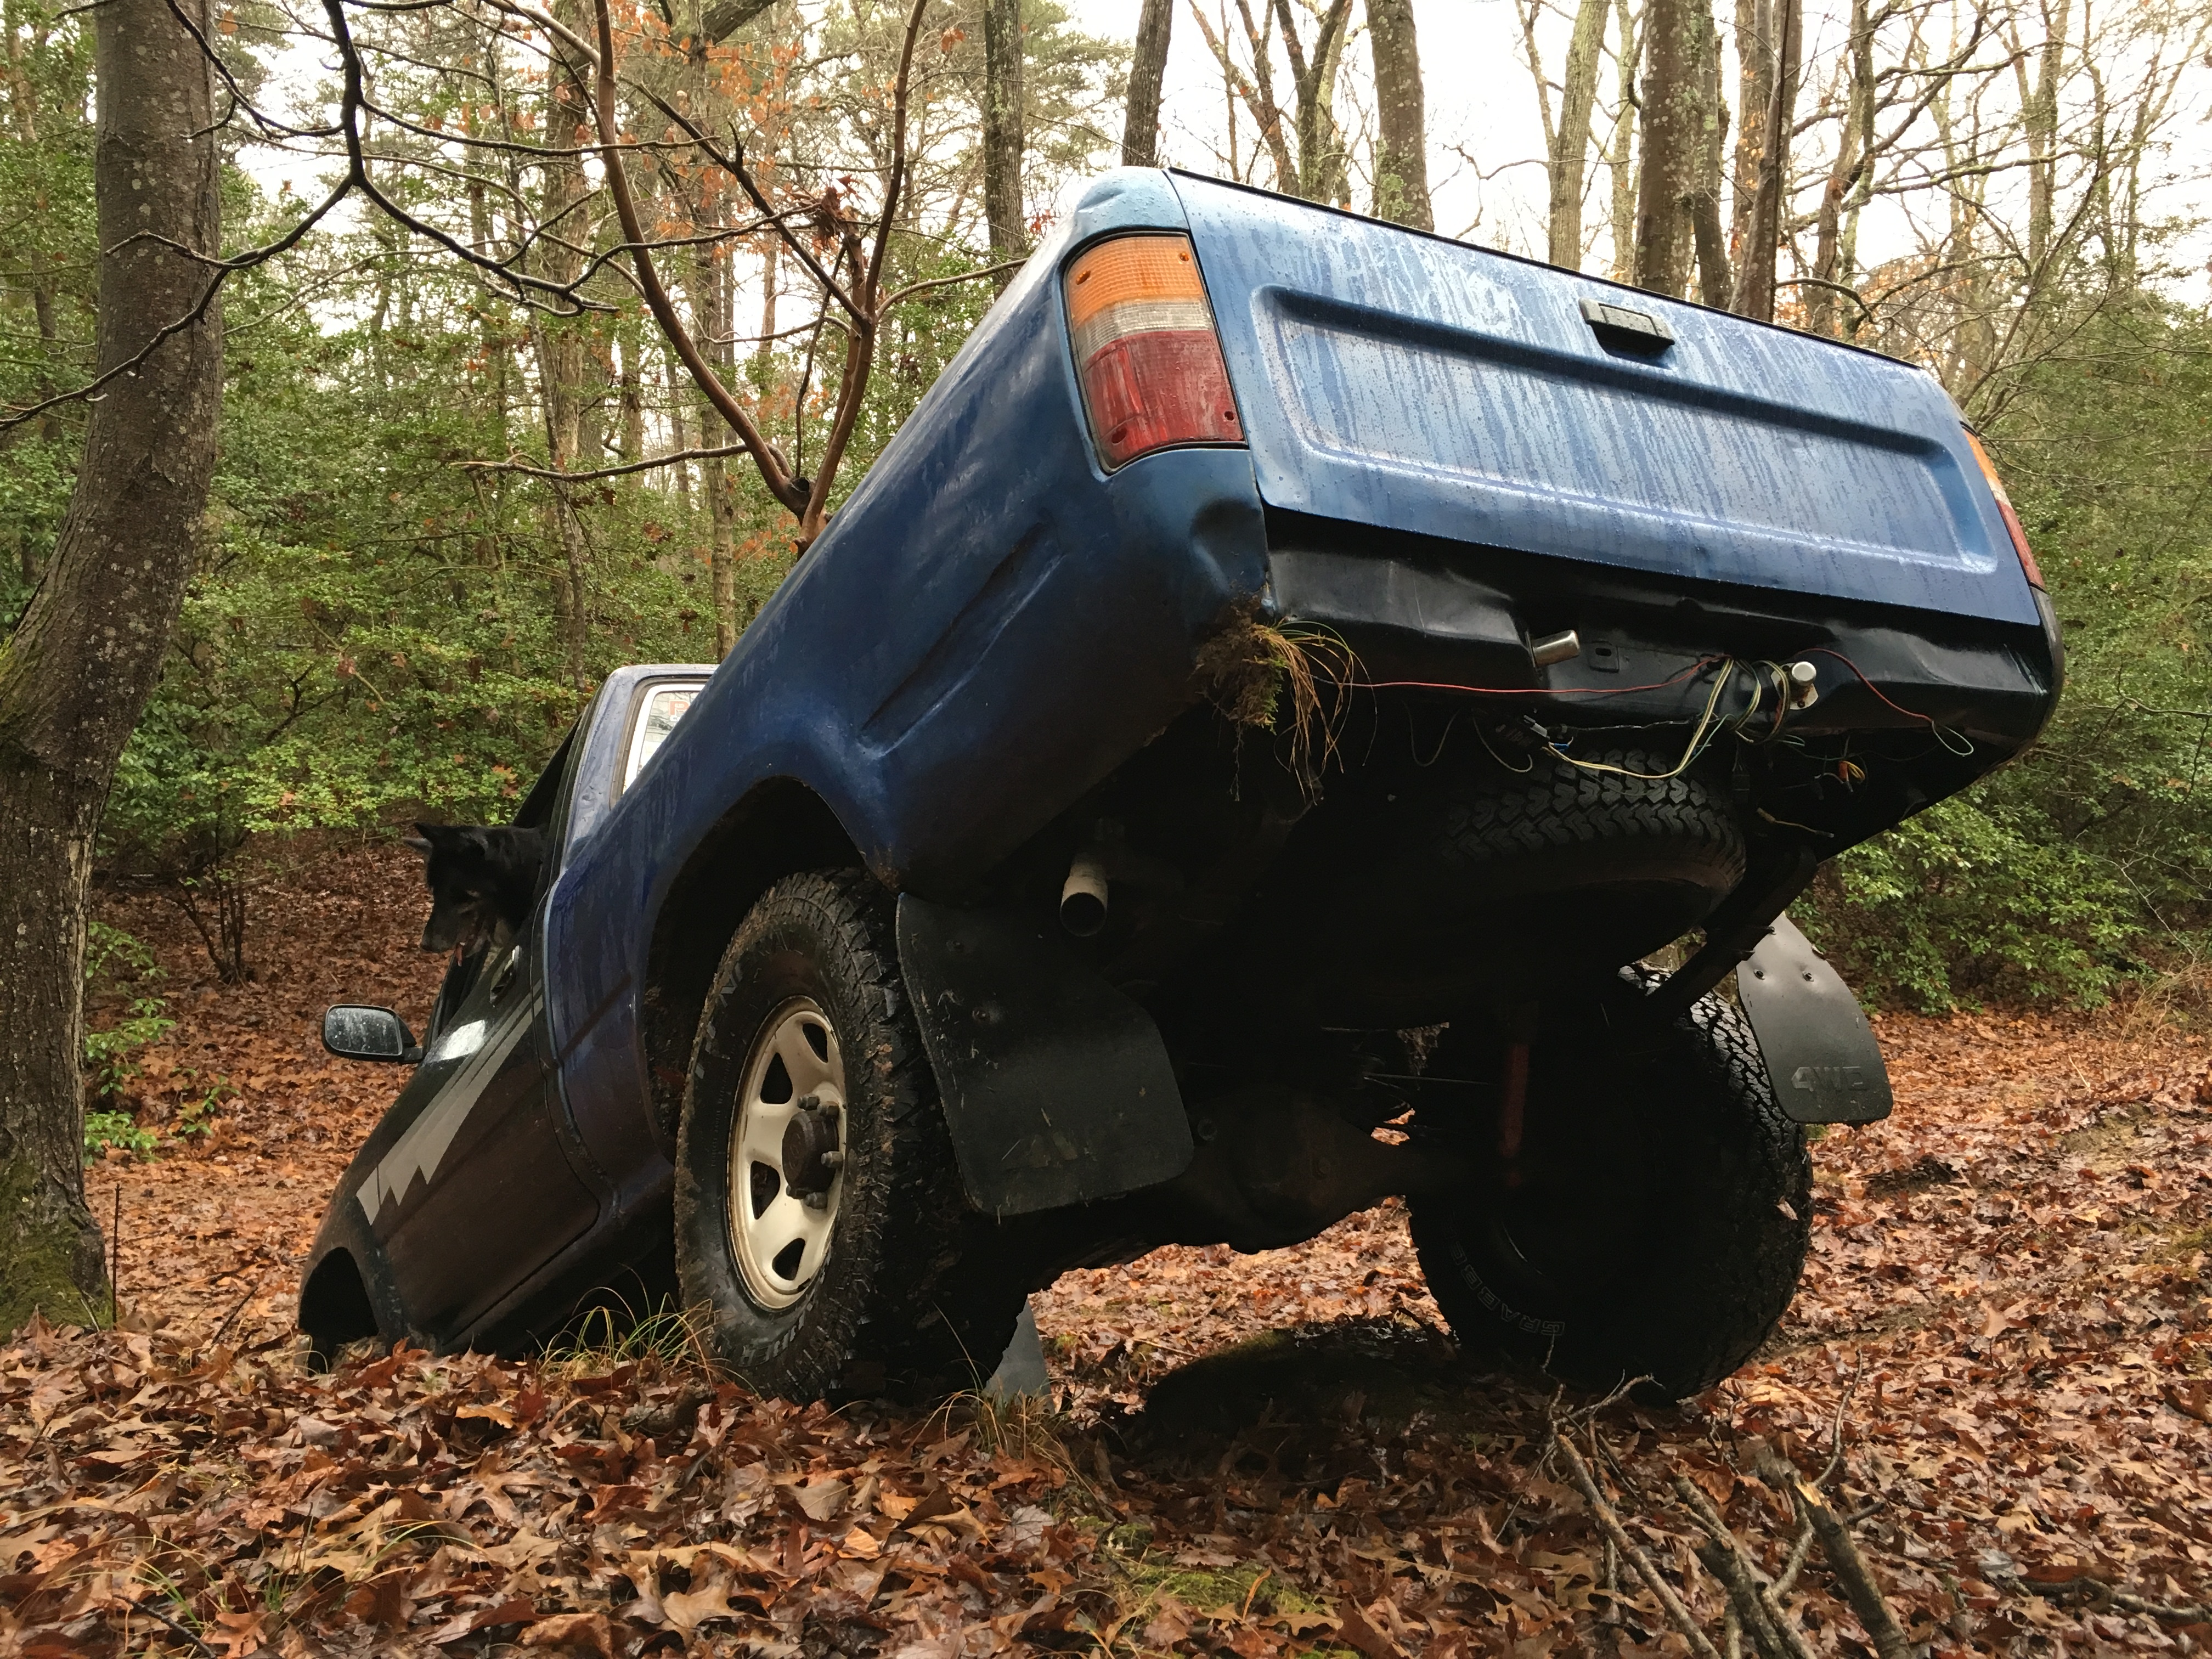
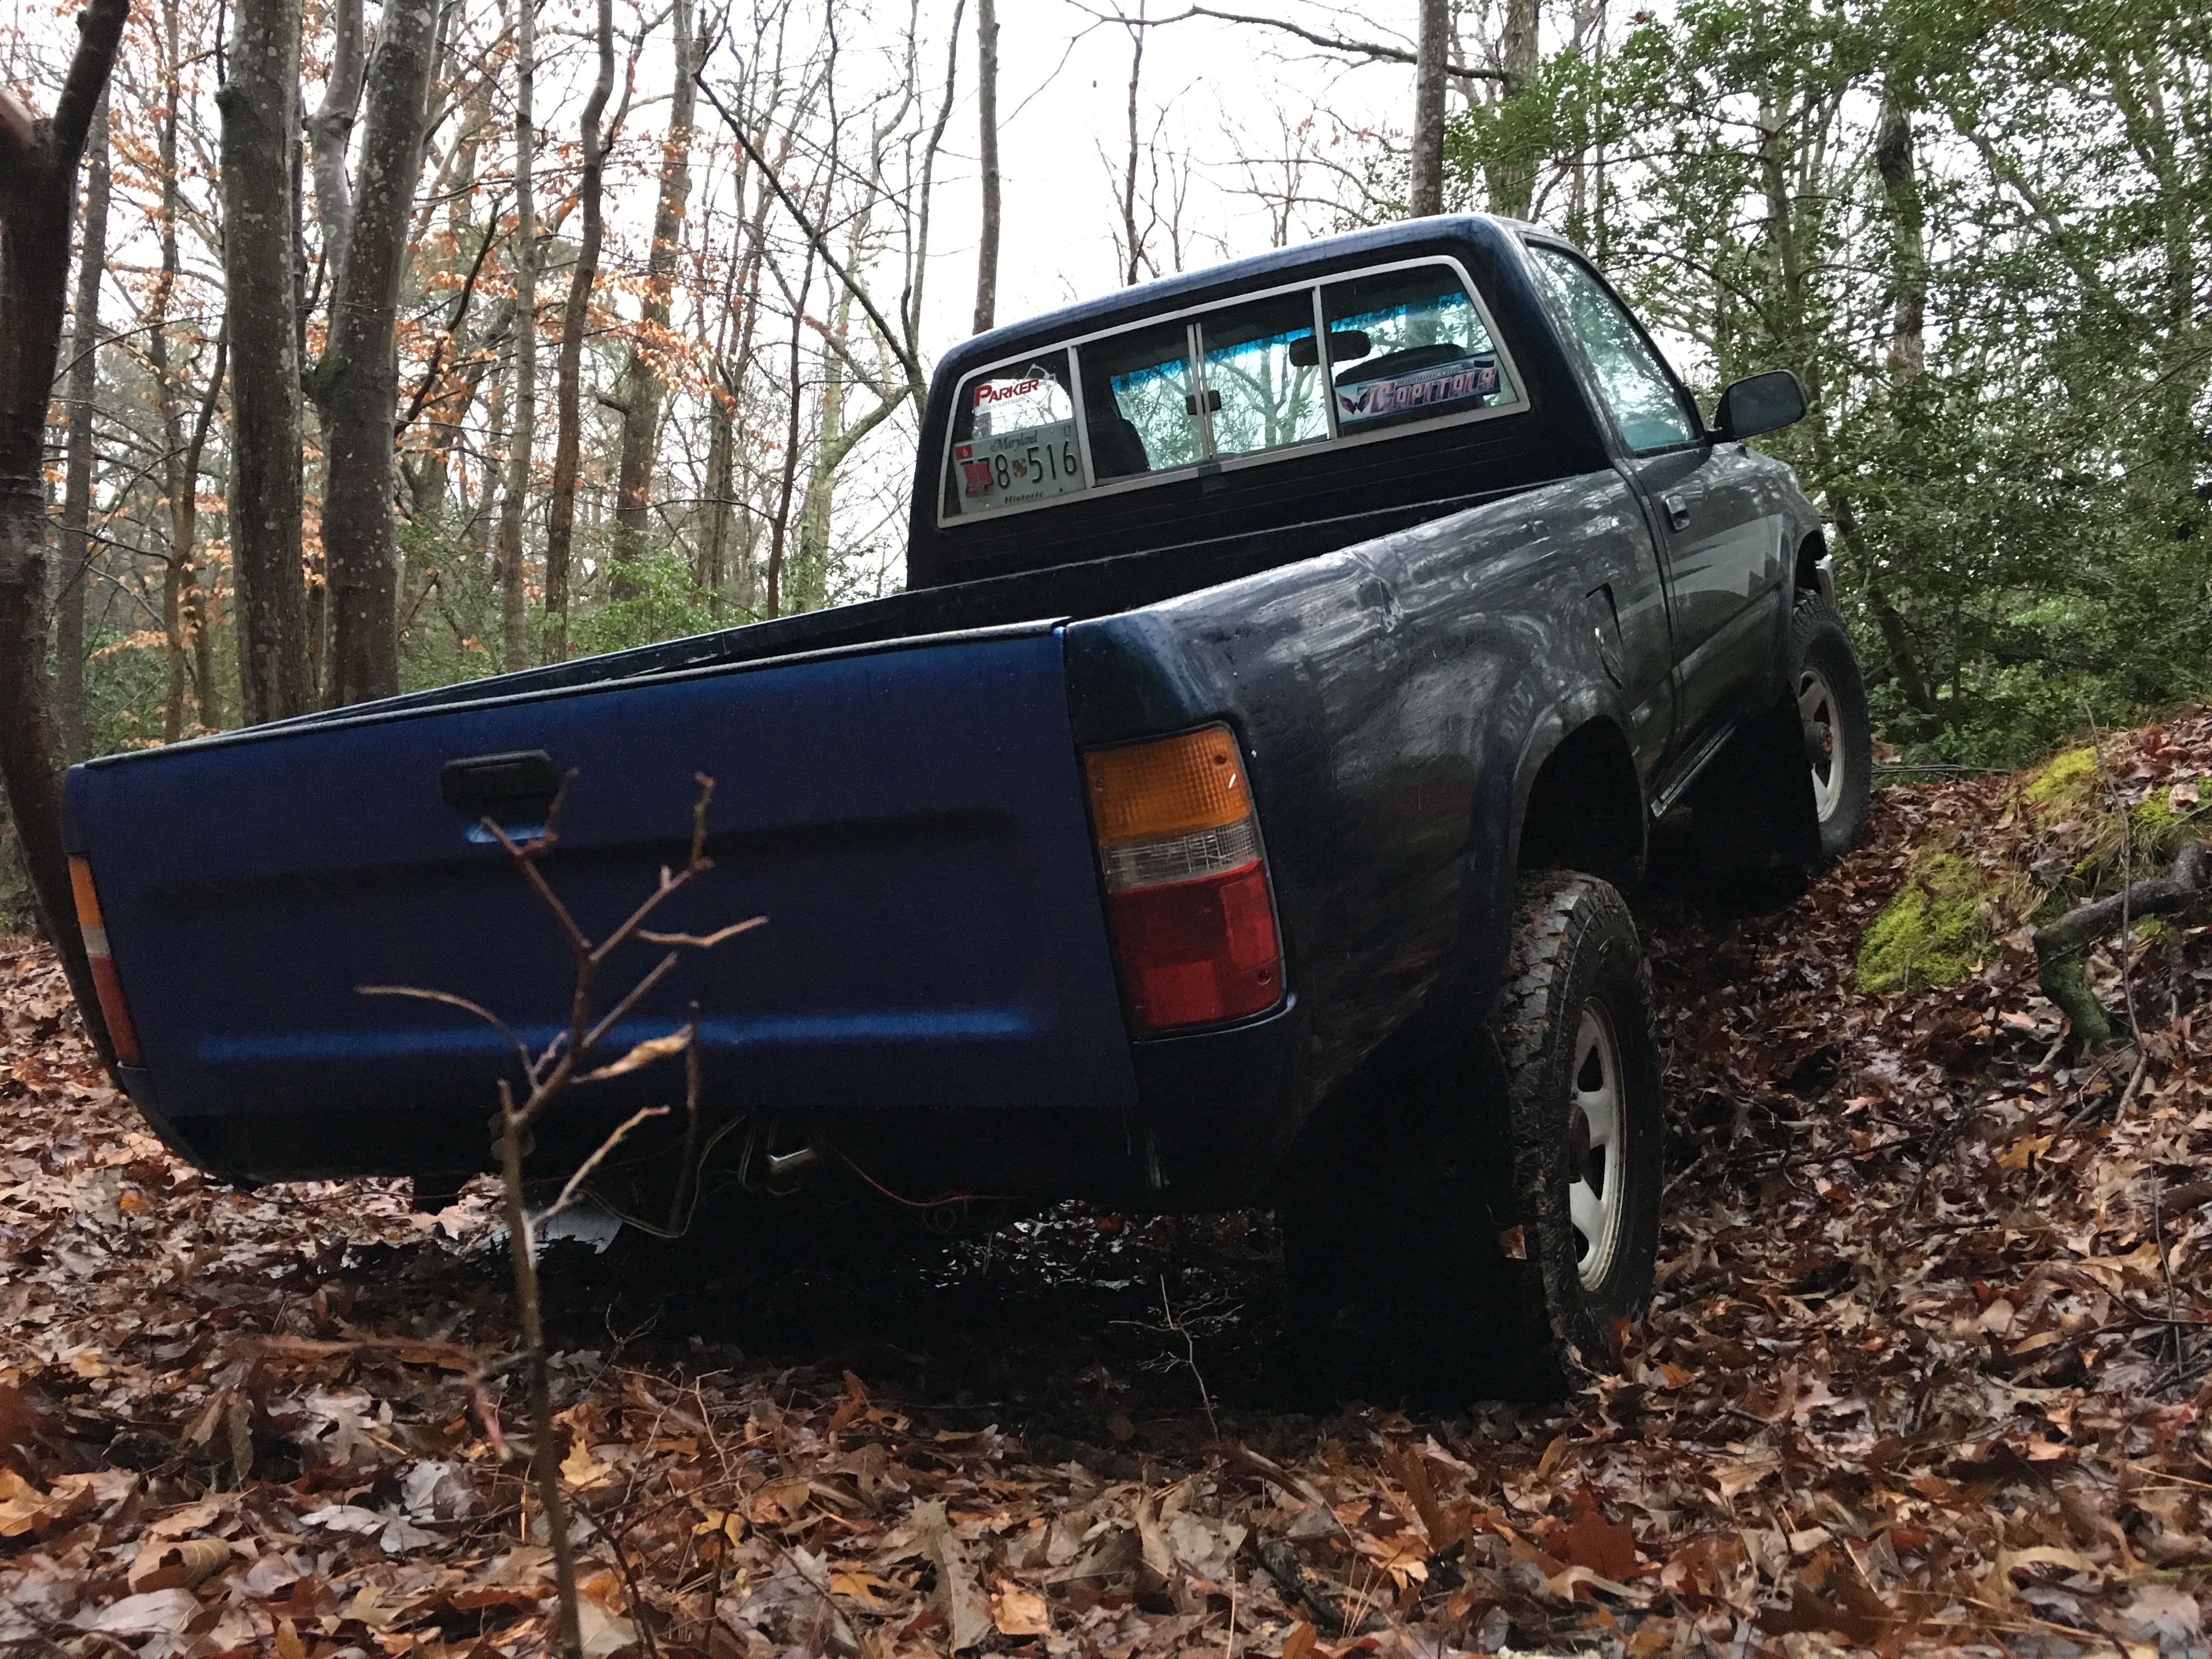
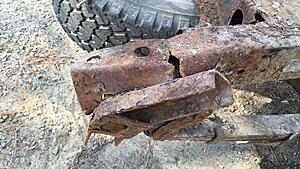
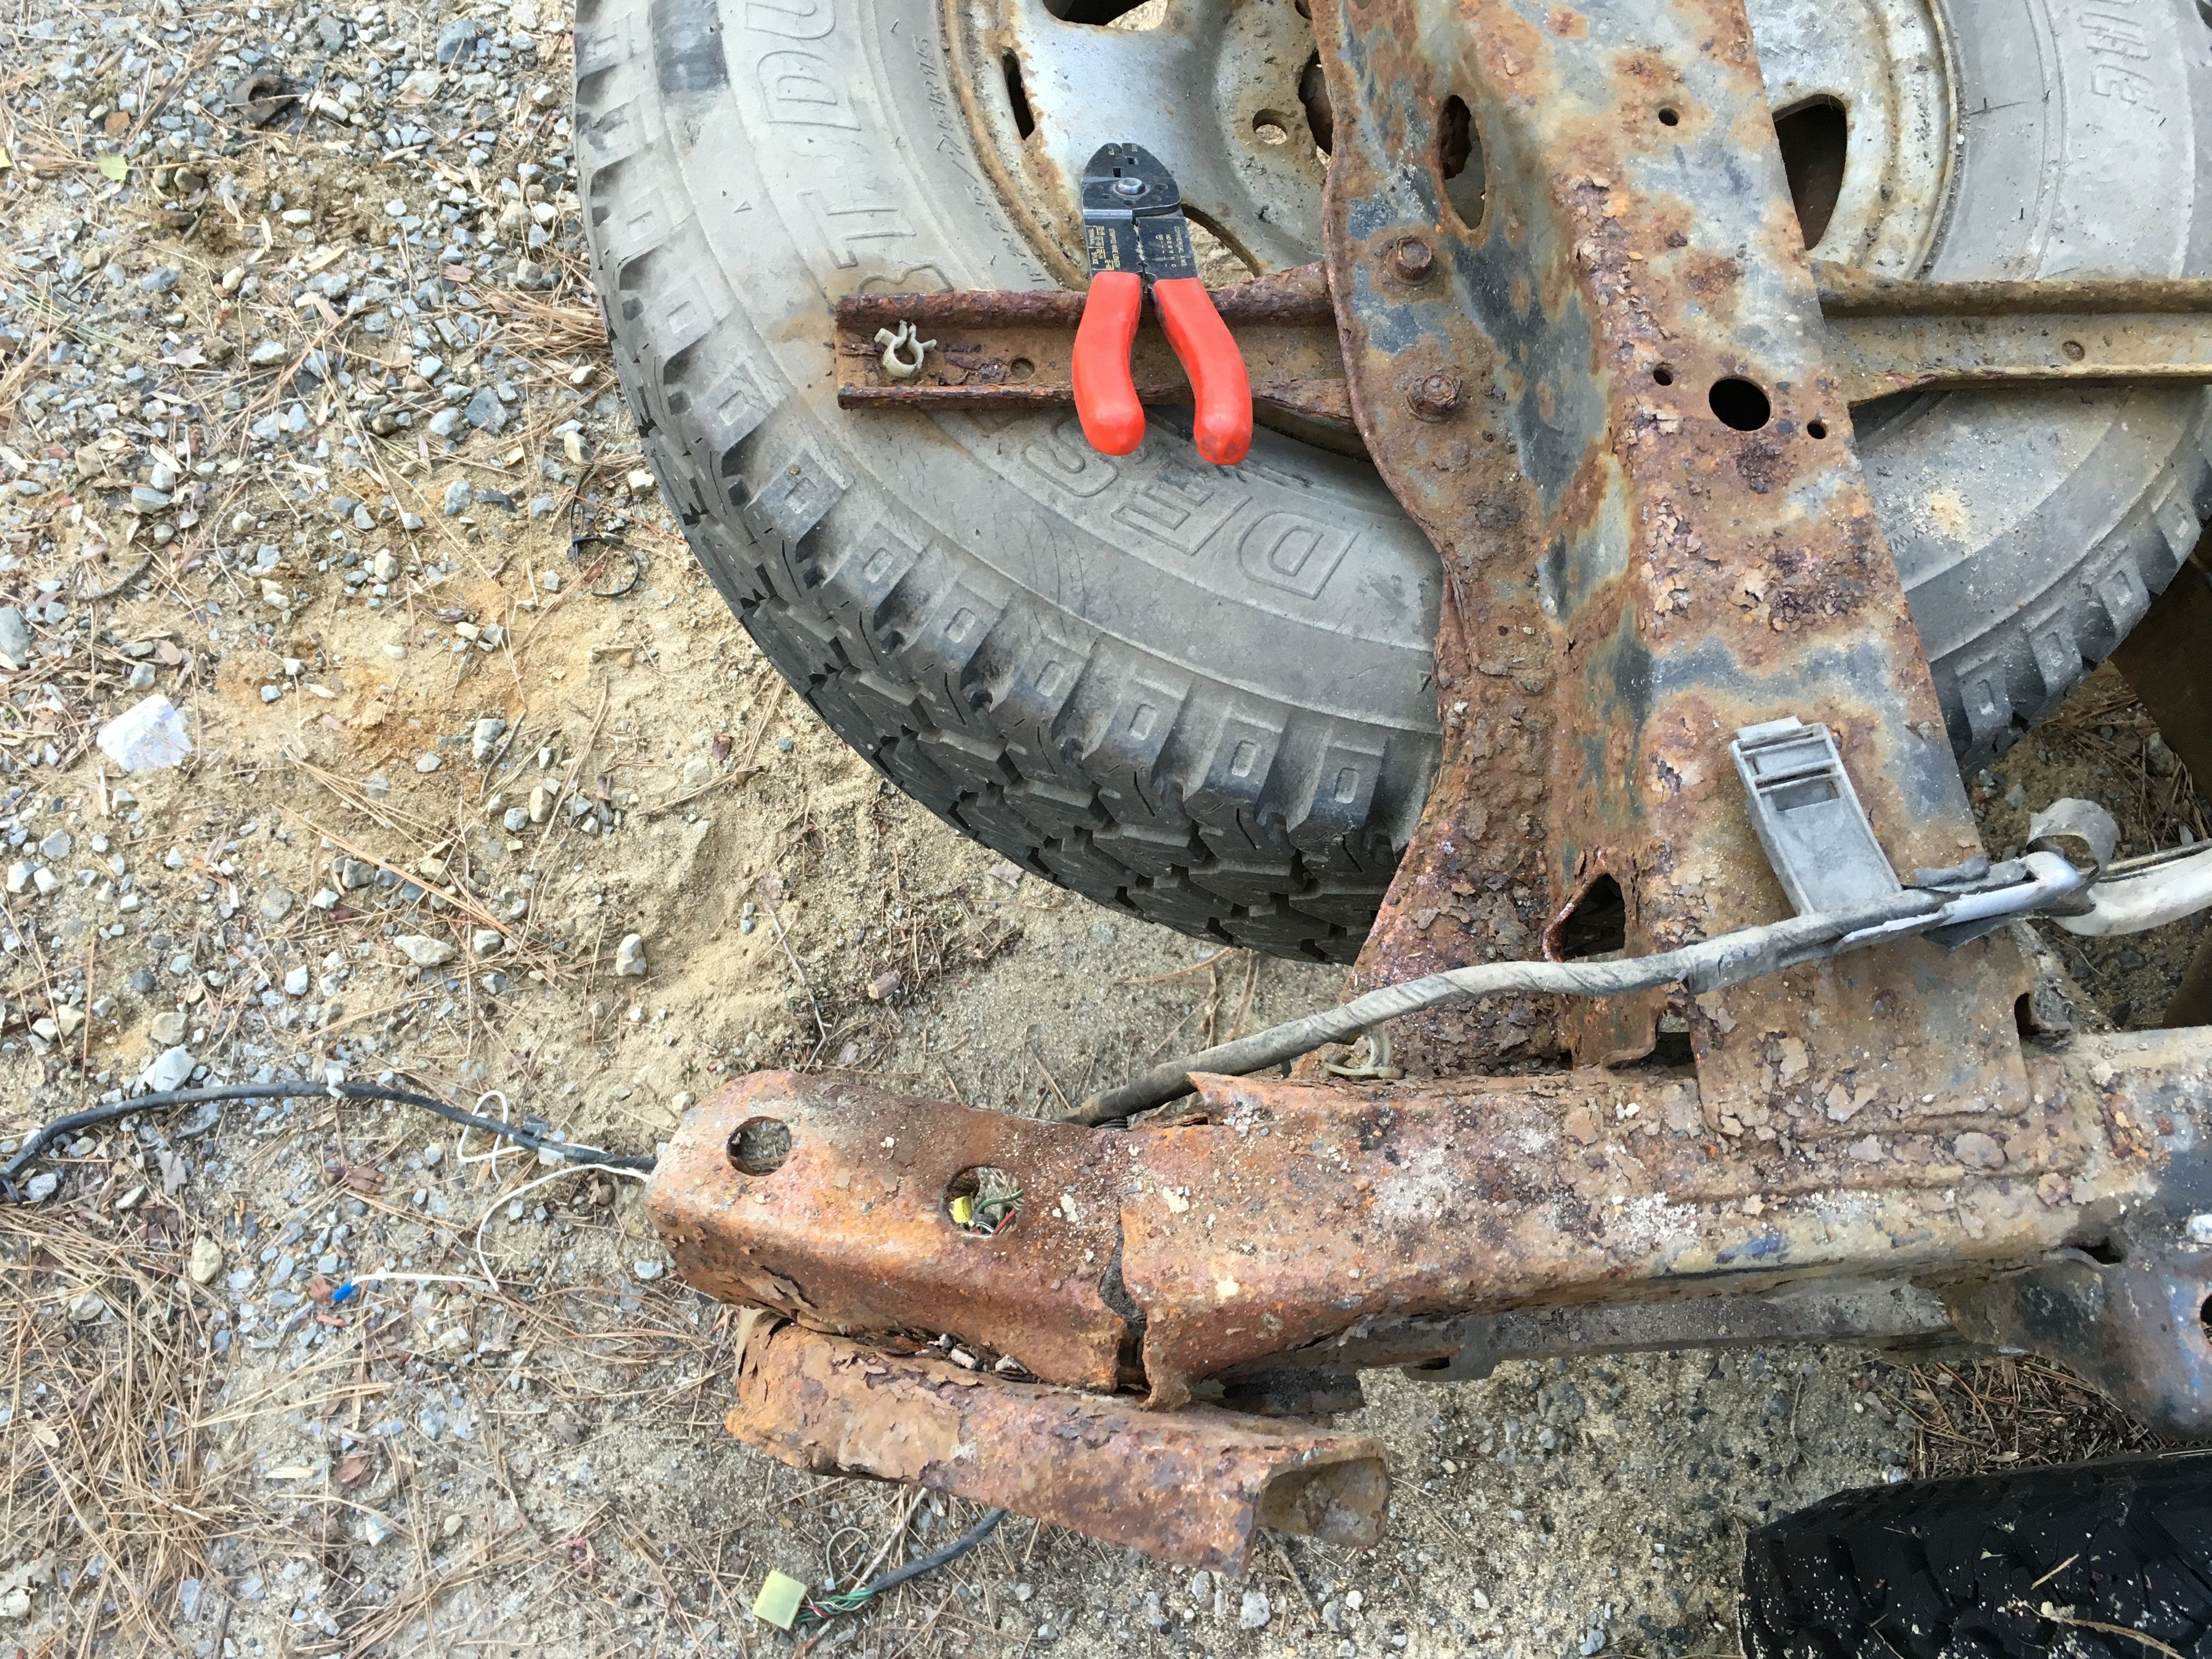
Had to test the new tires out. Got the home made rear bumper stuck and bent the mounts/frame :rolleyes:

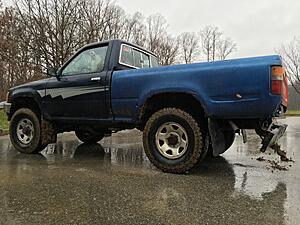

Decided for the time being I would just sawzall the bumper off completely. Next off road allowed much greater approach angle.
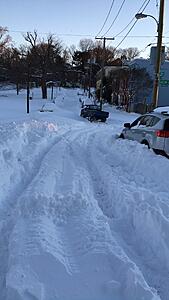
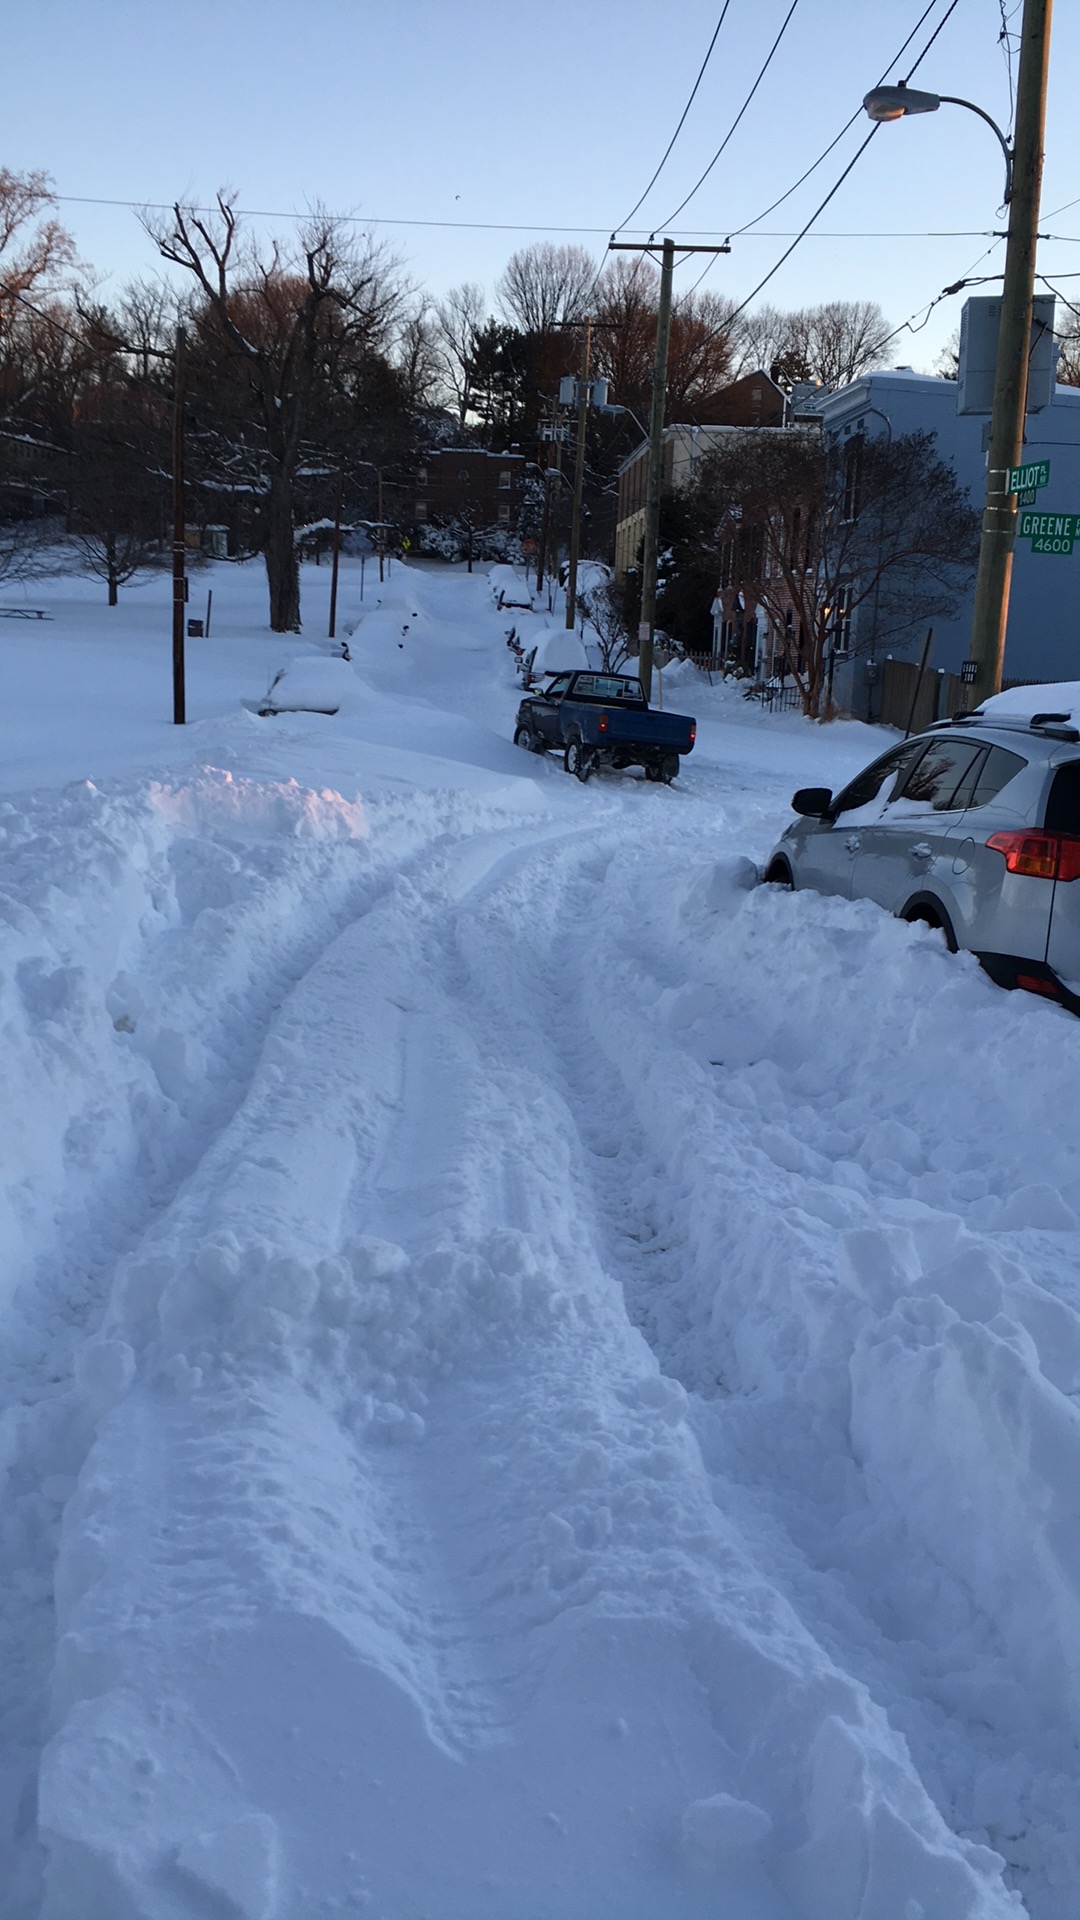
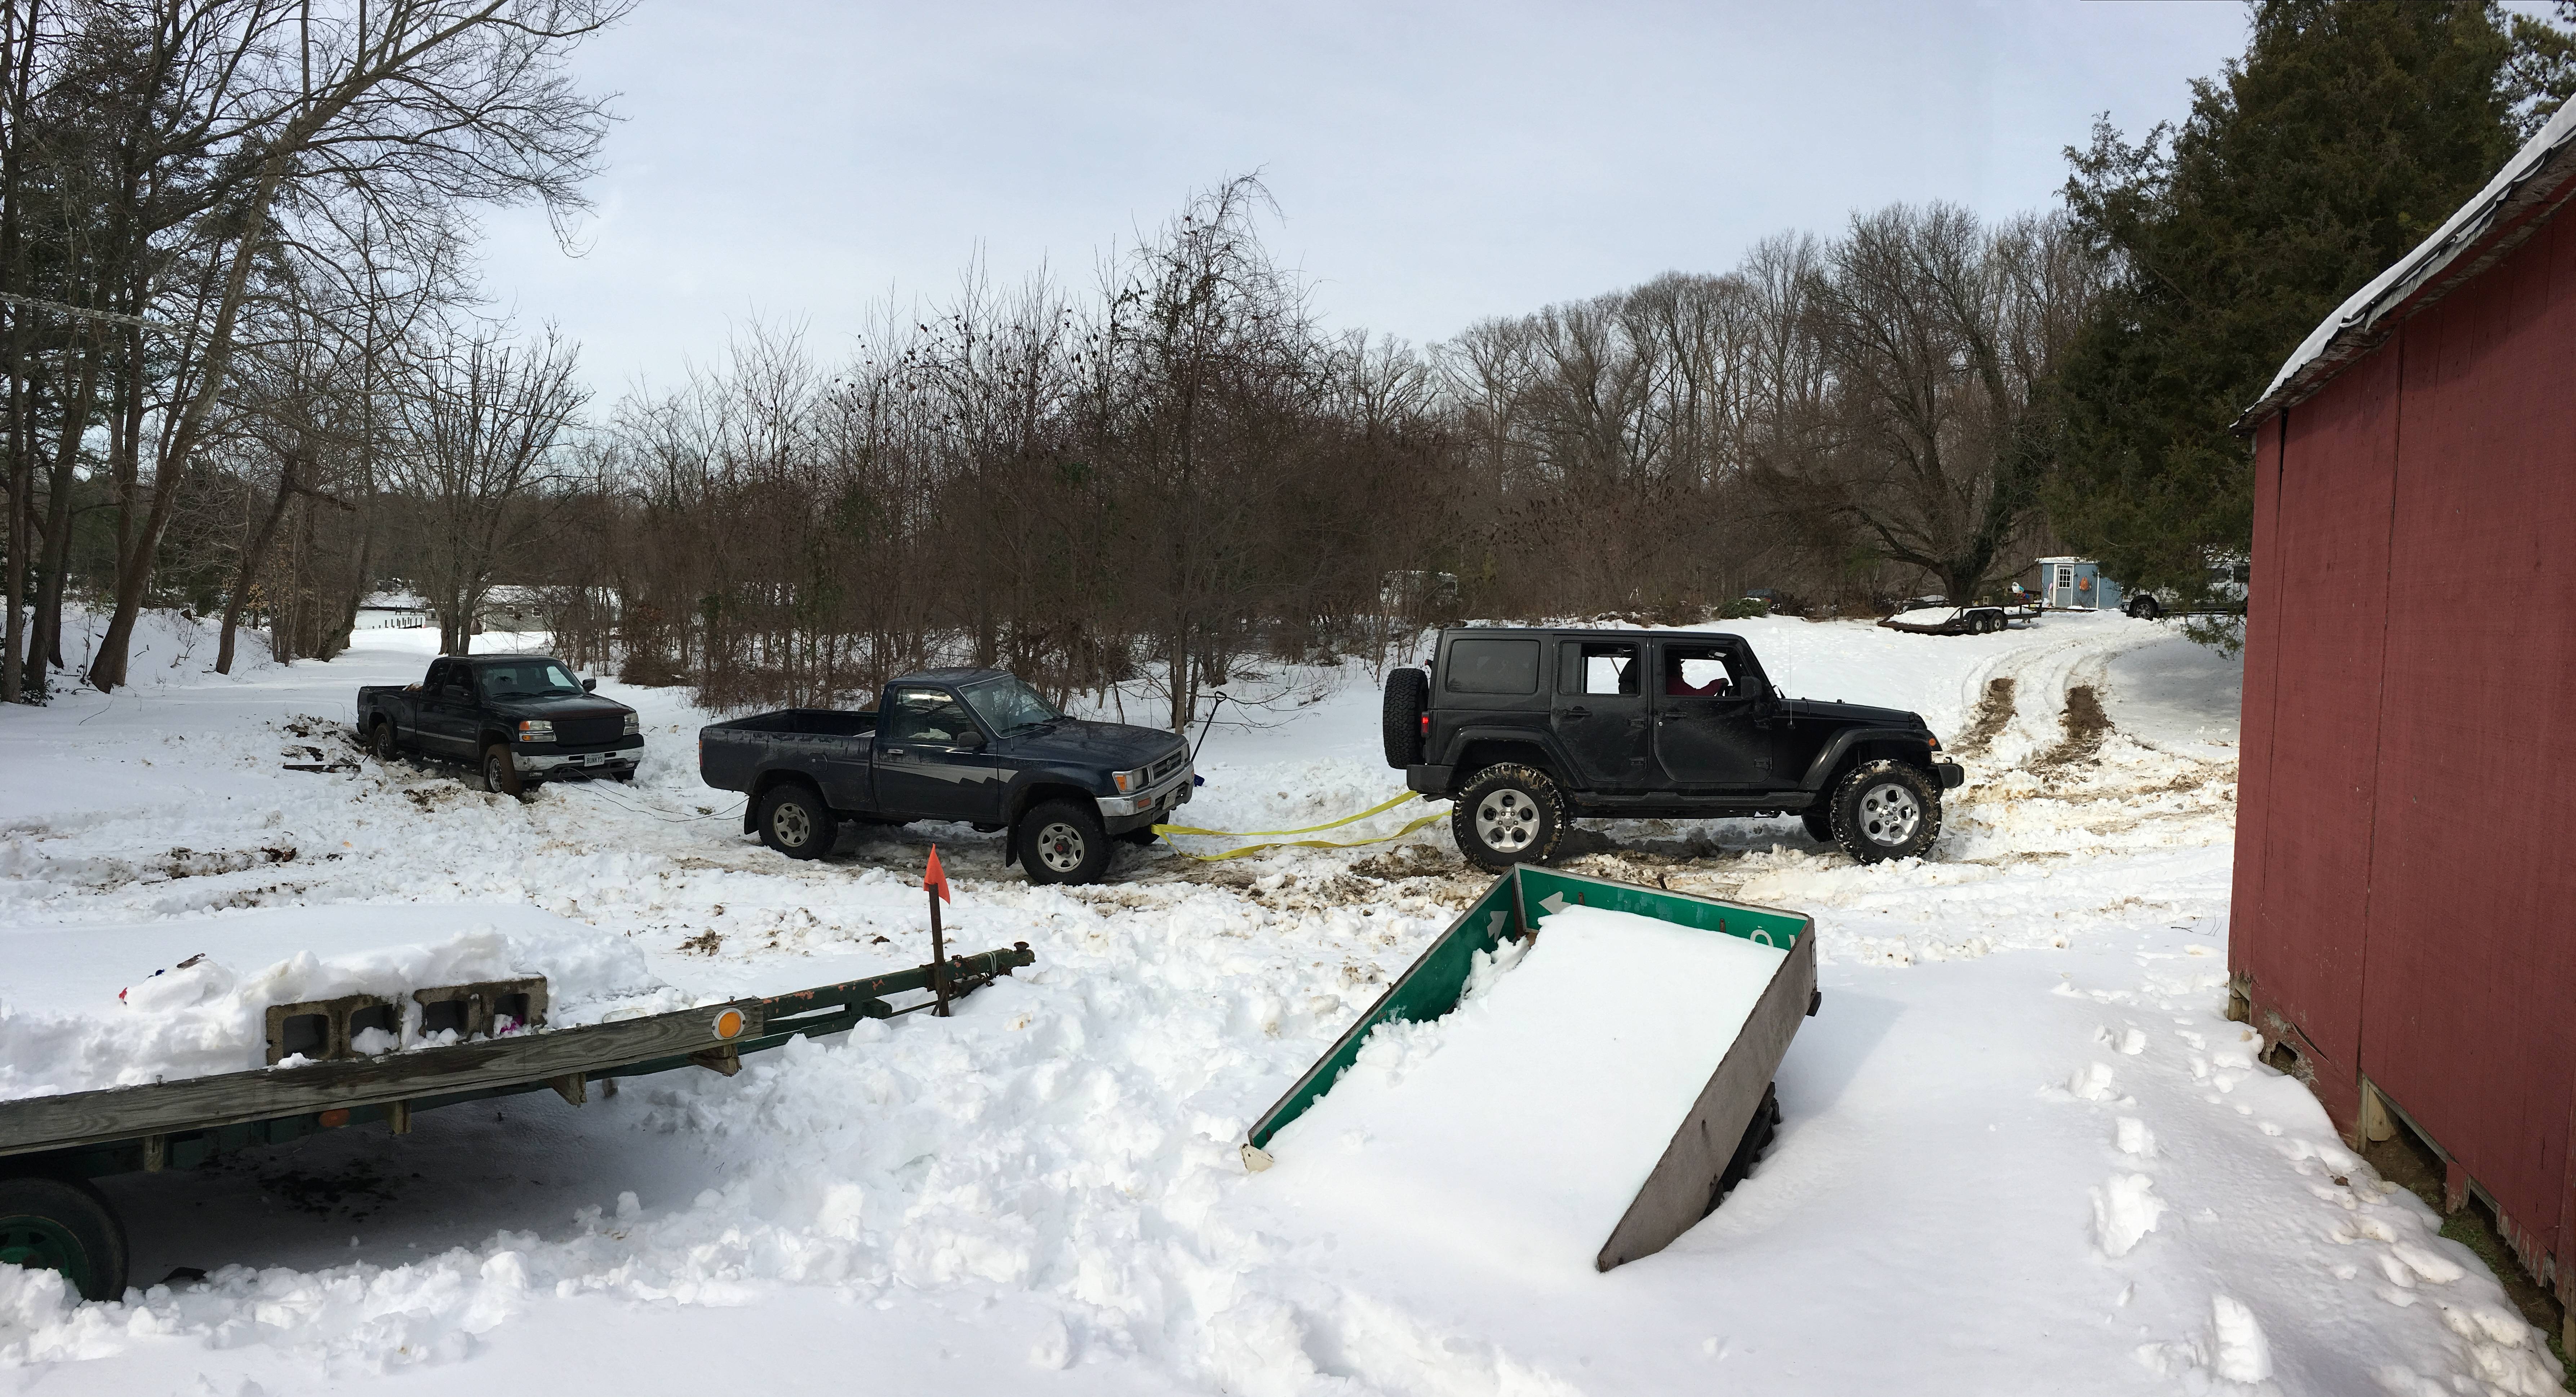
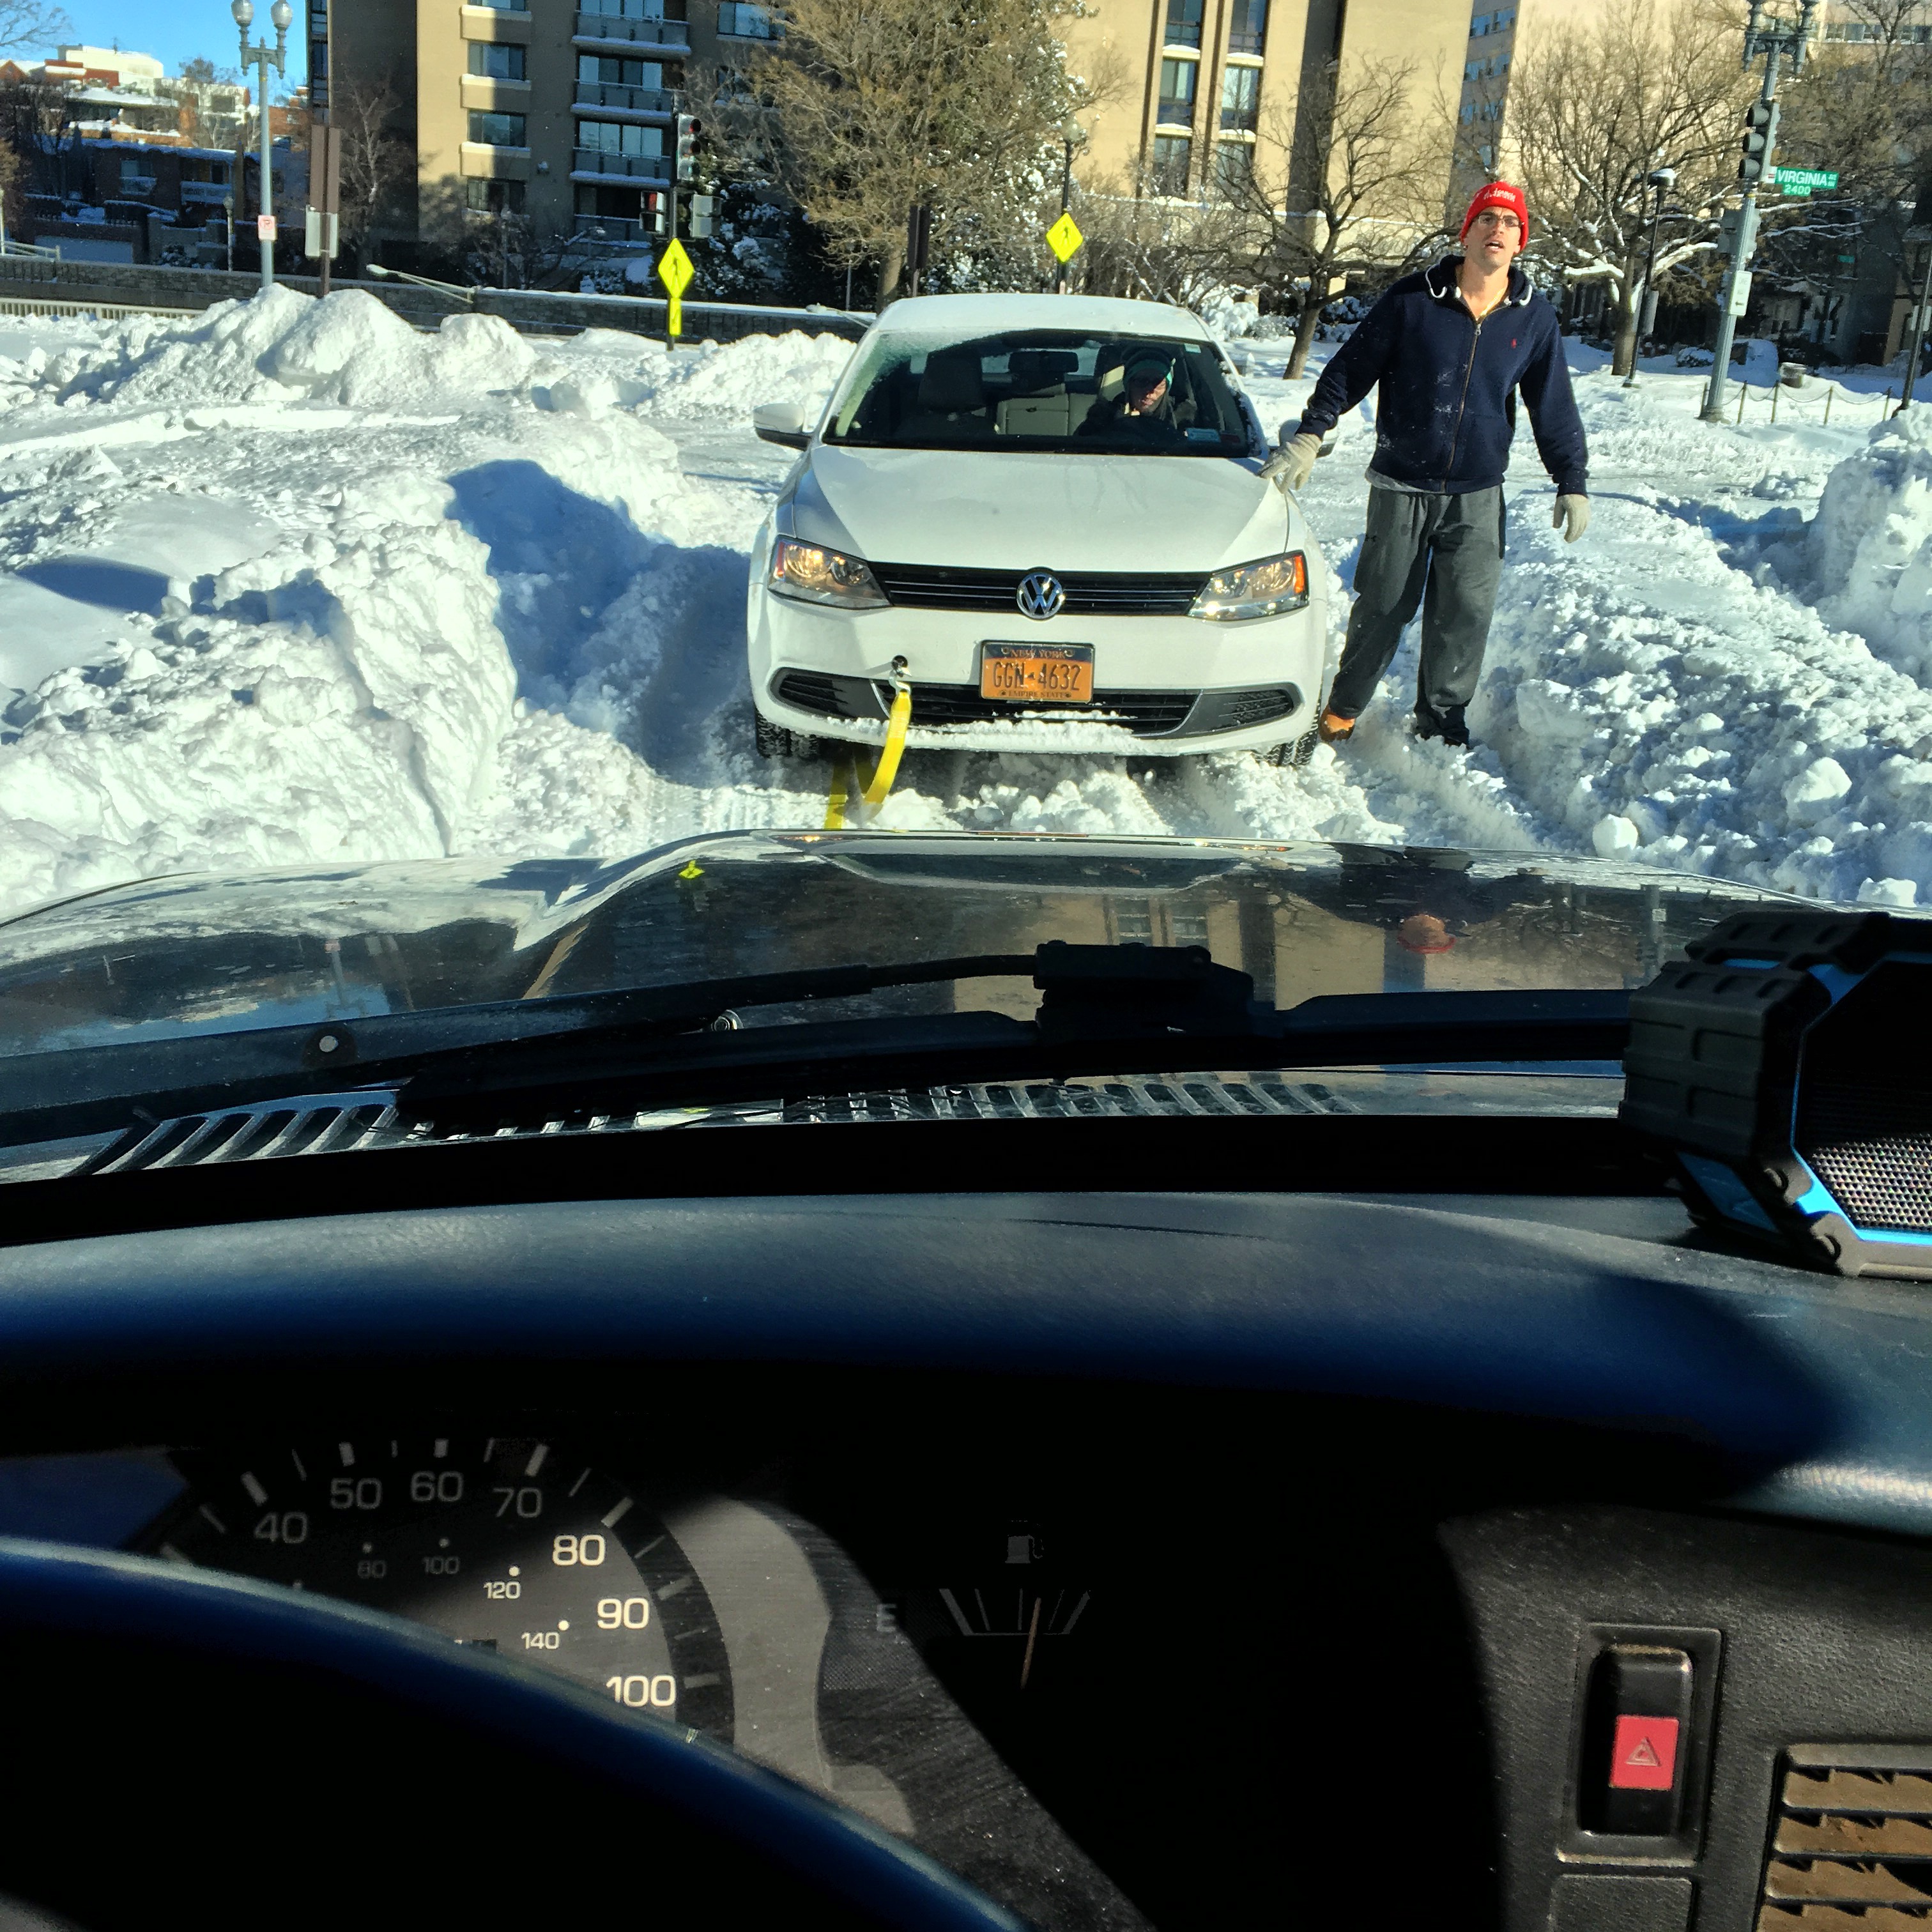
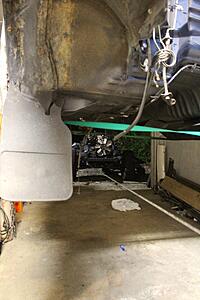
Then snowzilla 2k16 hit and DC had roughly 18' of snow and many unplowed roads. AKA Toyota playground! I forgot to reinstall the skidplate after doing the water pump install, but other than that it did excellent.
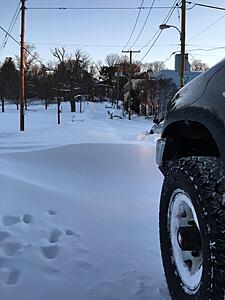
whoops. really needed that skid plate!

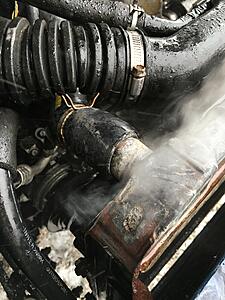
More on this later, but over the summer it overheated while i left the truck idiling with the ac on. Headgasket failure suspected! burped the air out, and kept on plowing through the snow.
Even helped pull out a chevy 2500hd diesel stuck up to its frame, and a bunch of stuck cars in DC.

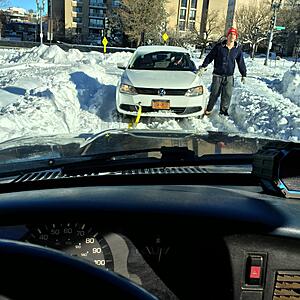
She's glorious!

This is my toyota pickup! I bought it for the low, low price of $1800. It had a bedside made of bondo and 259,000 miles but it runs and drives and stops and the 4x4 works great.

Growing up my parents had a built '85 4Runner with a chevy 350, 7" of lift and 38" Super Swampers
First Mod! 31" General Grabber AT2's which are awesome tires. Basically the General brand version of the BFG All Terrain KO2.
Had to test the new tires out. Got the home made rear bumper stuck and bent the mounts/frame :rolleyes:

Decided for the time being I would just sawzall the bumper off completely. Next off road allowed much greater approach angle.


Then snowzilla 2k16 hit and DC had roughly 18' of snow and many unplowed roads. AKA Toyota playground! I forgot to reinstall the skidplate after doing the water pump install, but other than that it did excellent.

whoops. really needed that skid plate!

More on this later, but over the summer it overheated while i left the truck idiling with the ac on. Headgasket failure suspected! burped the air out, and kept on plowing through the snow.

Even helped pull out a chevy 2500hd diesel stuck up to its frame, and a bunch of stuck cars in DC.
She's glorious!
Last edited by yeayeayea; 09-05-2016 at 04:50 PM.
 09-05-2016, 04:34 PM
#2
Registered User
Thread Starter
Join Date: Sep 2016
Posts: 17
Likes: 0
Received 0 Likes
on
0 Posts
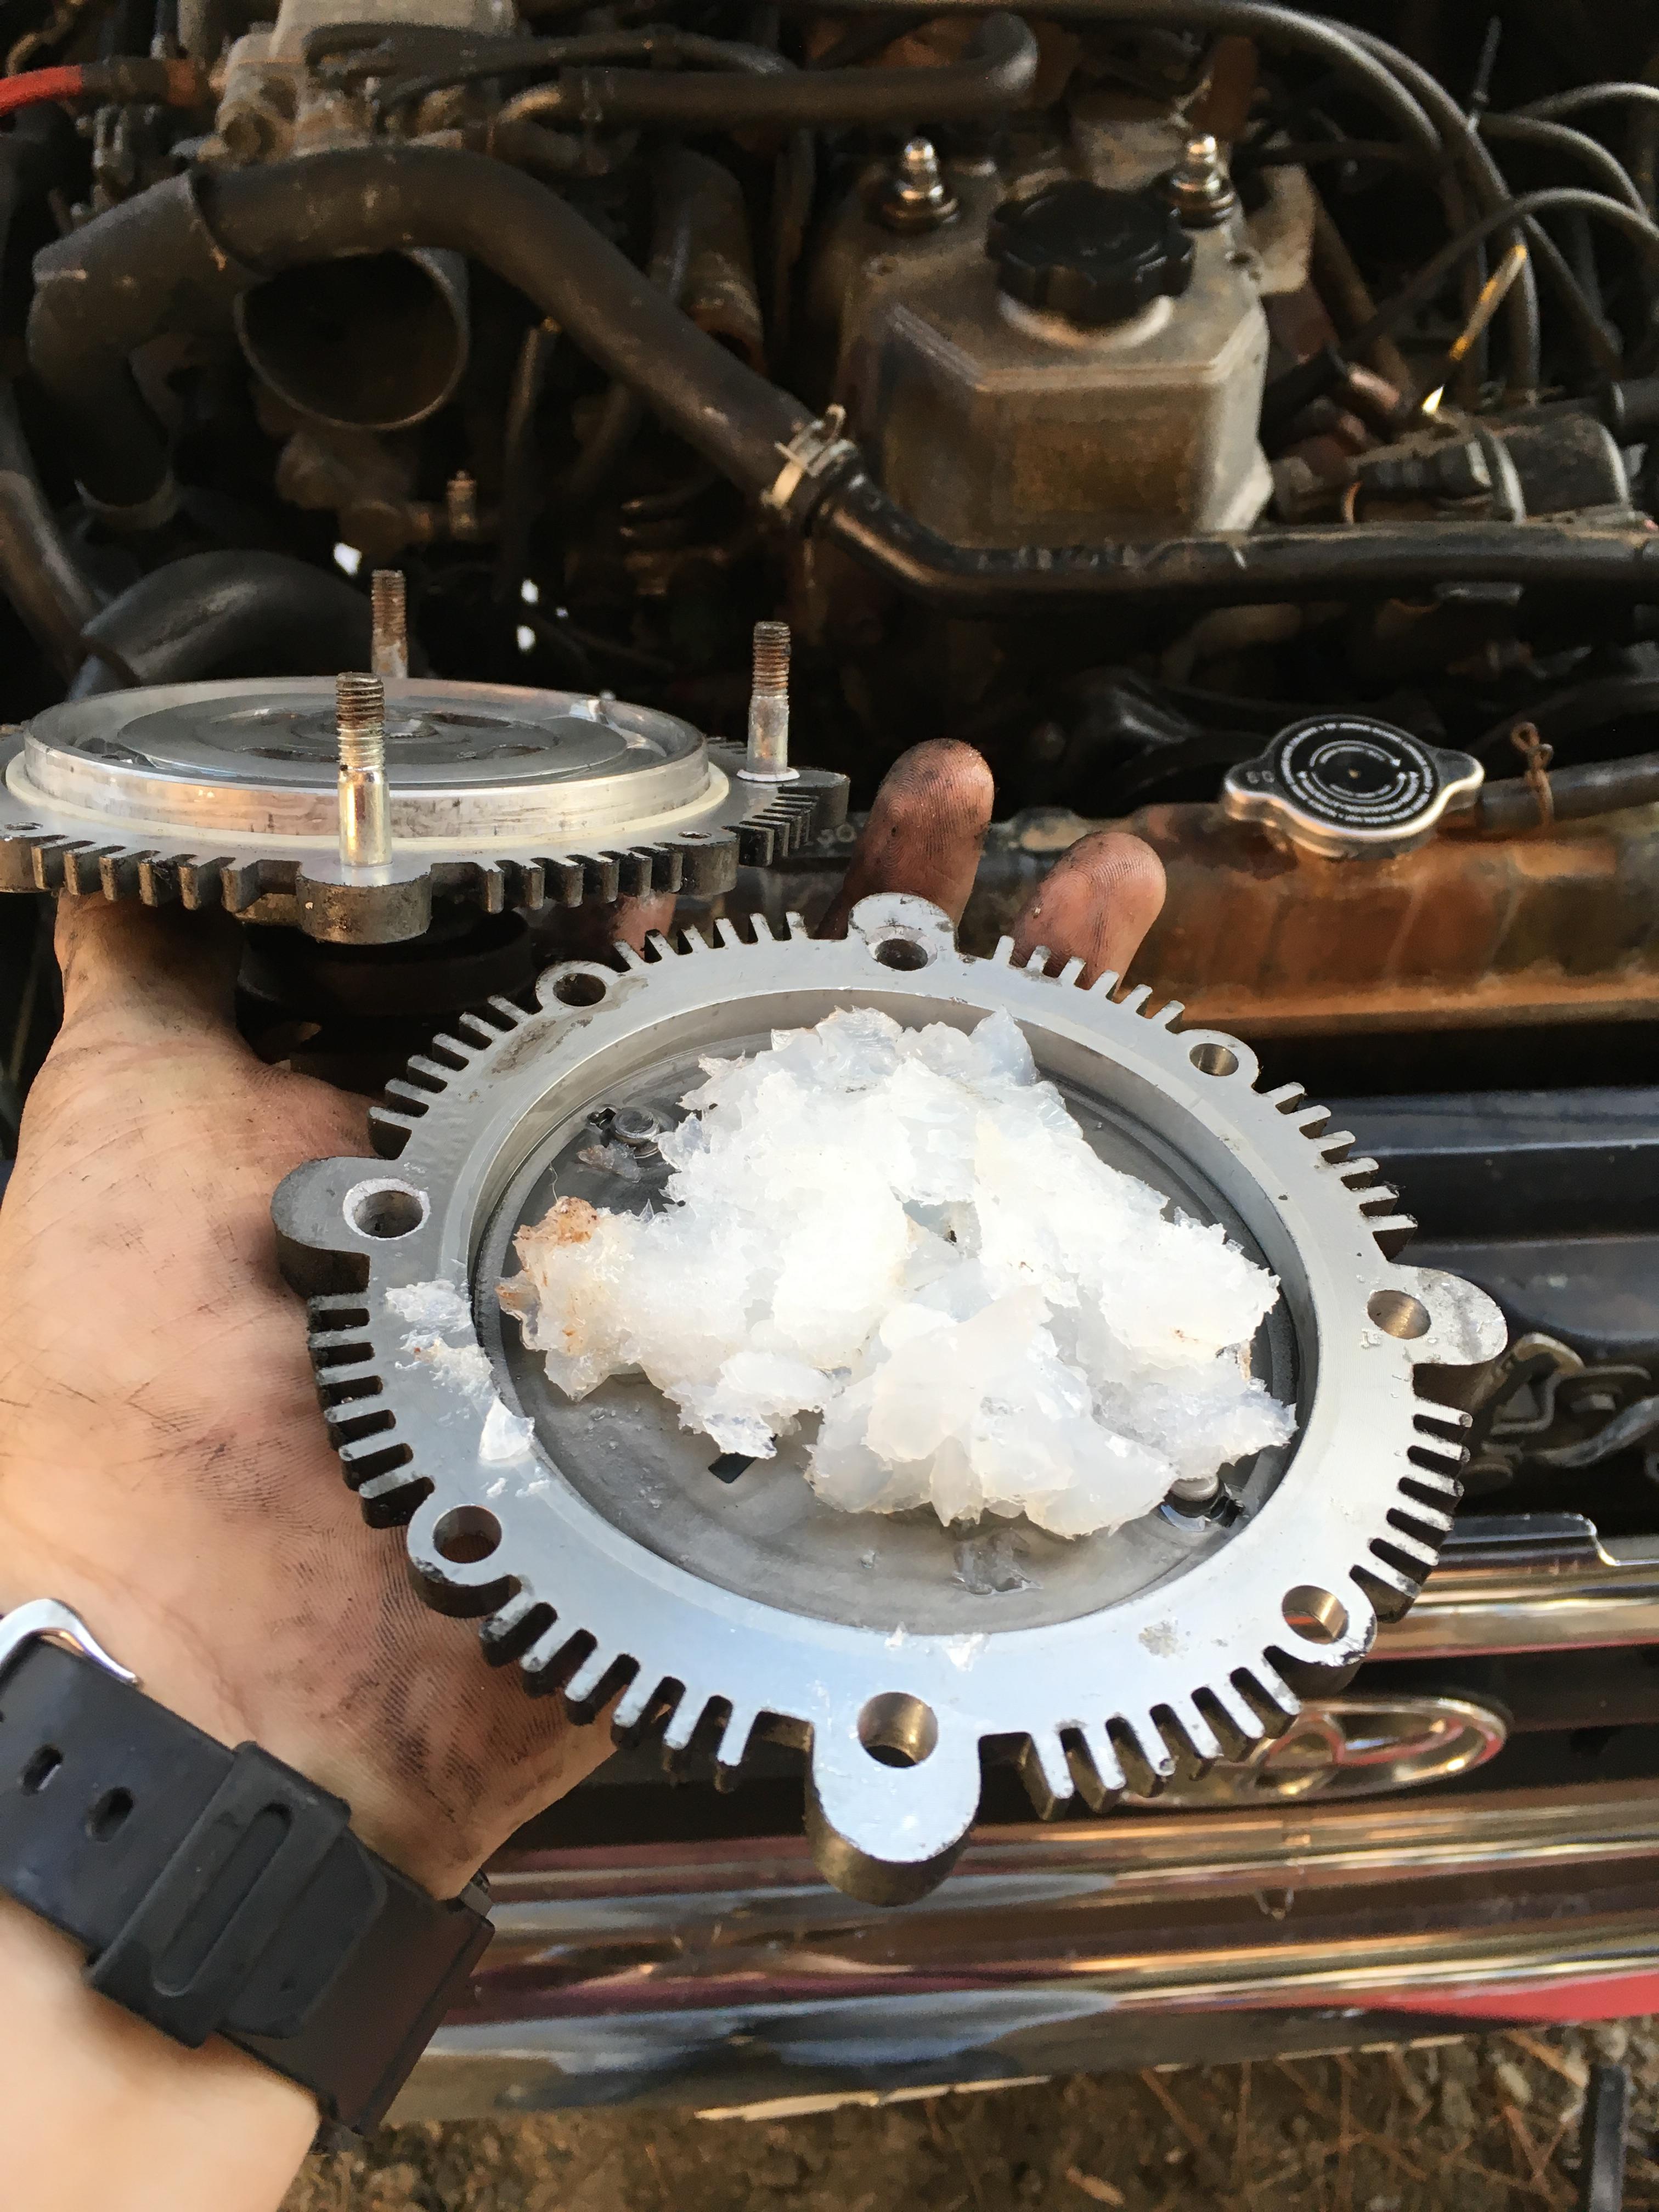
Coolant fan clutch is the culprit for the overheating. It was way too loose. For now, I opened it up, repacked it with dielectric grease, and sealed it back up. Much better!
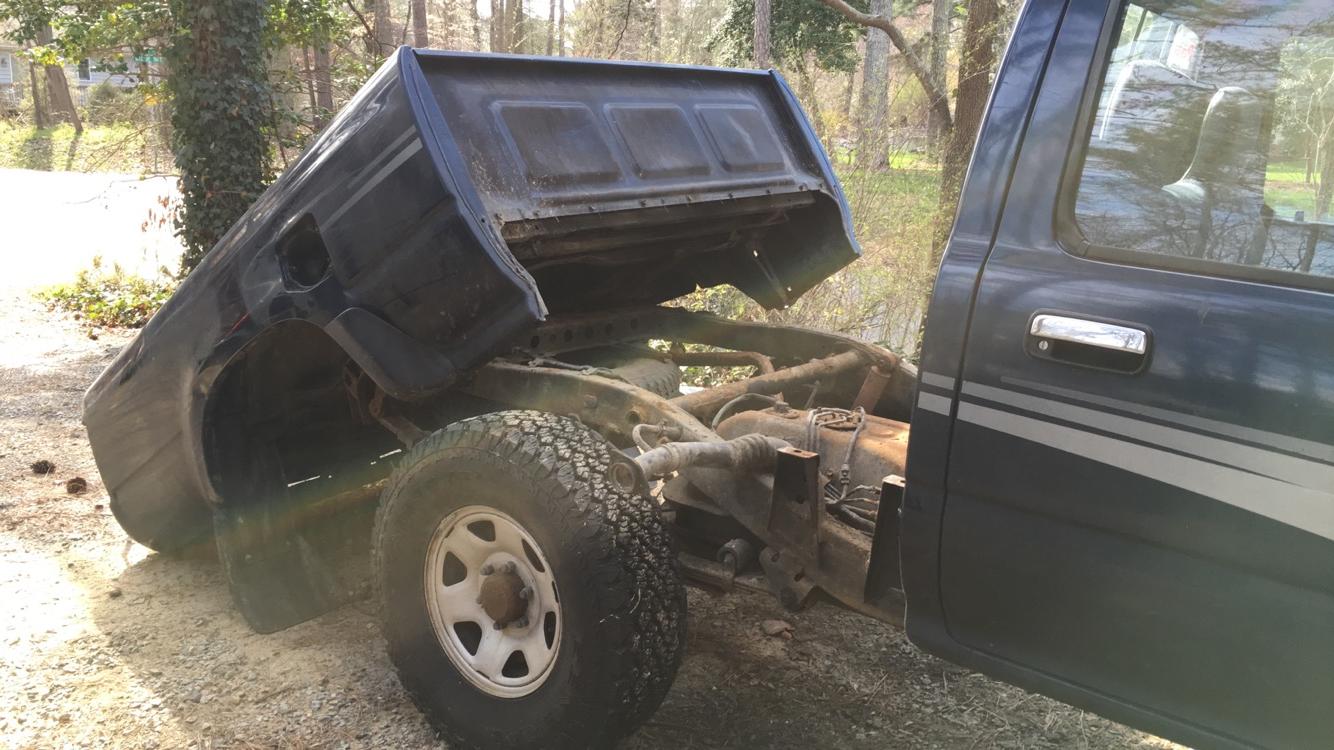
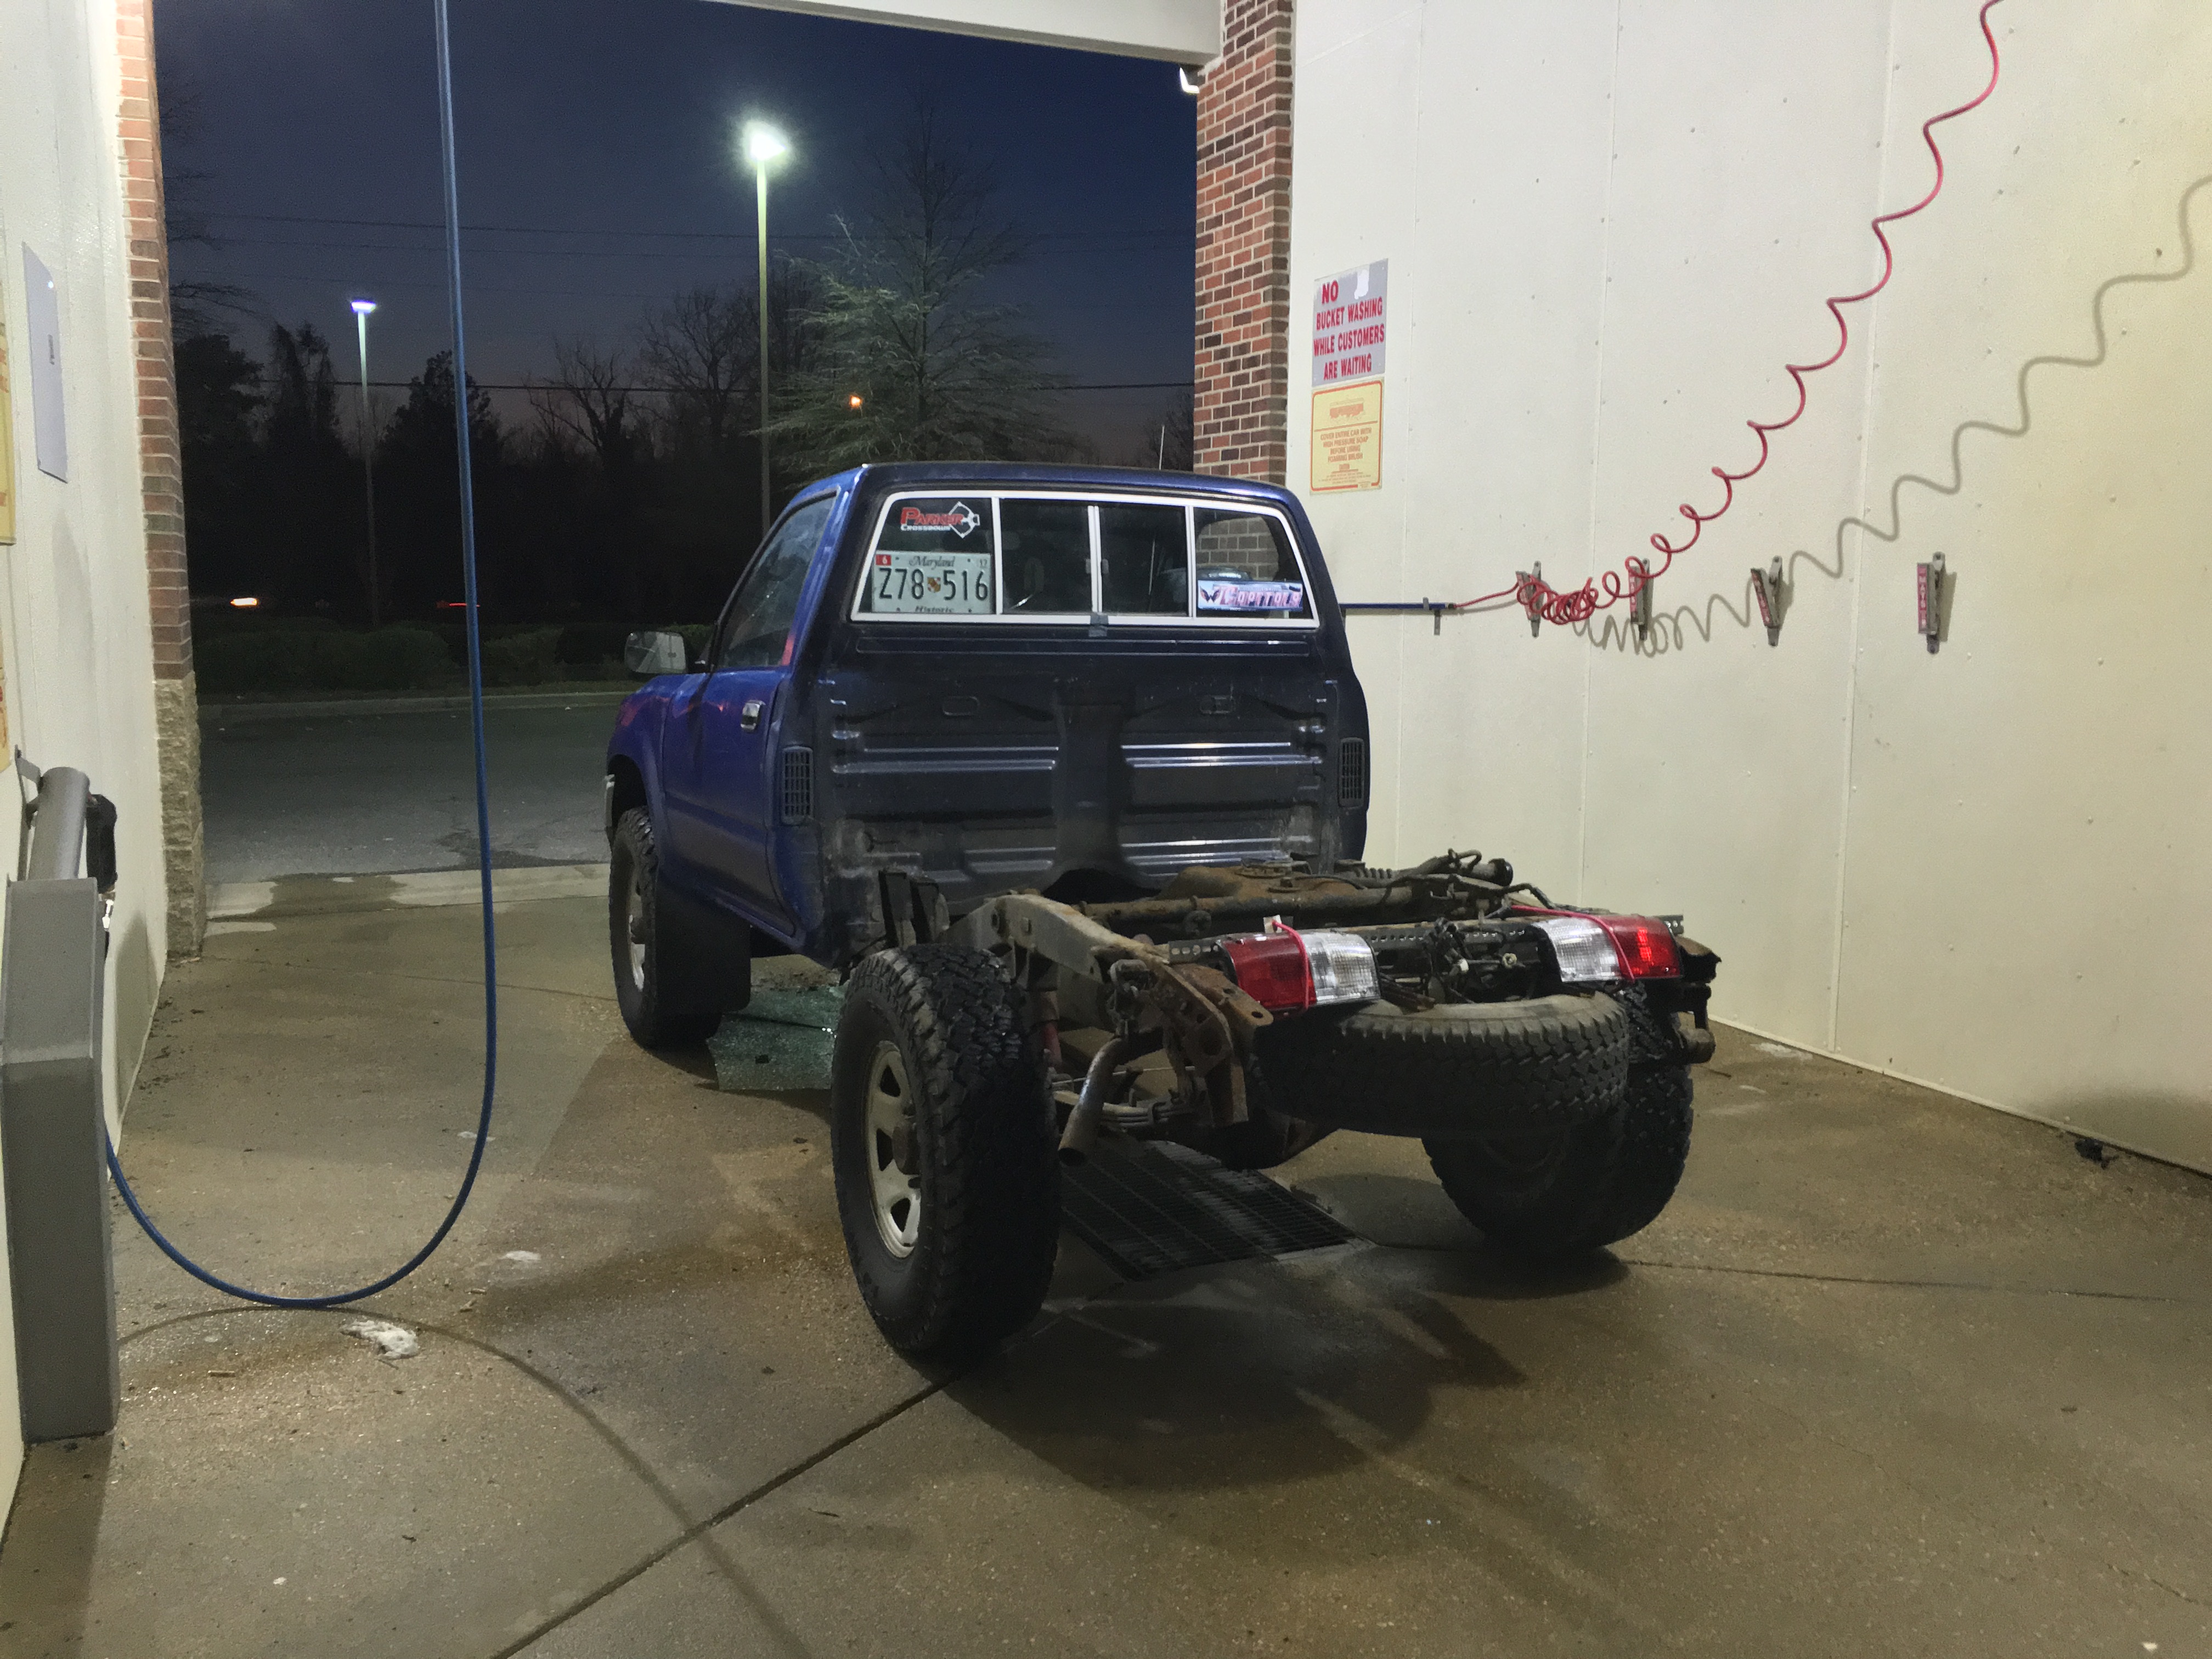
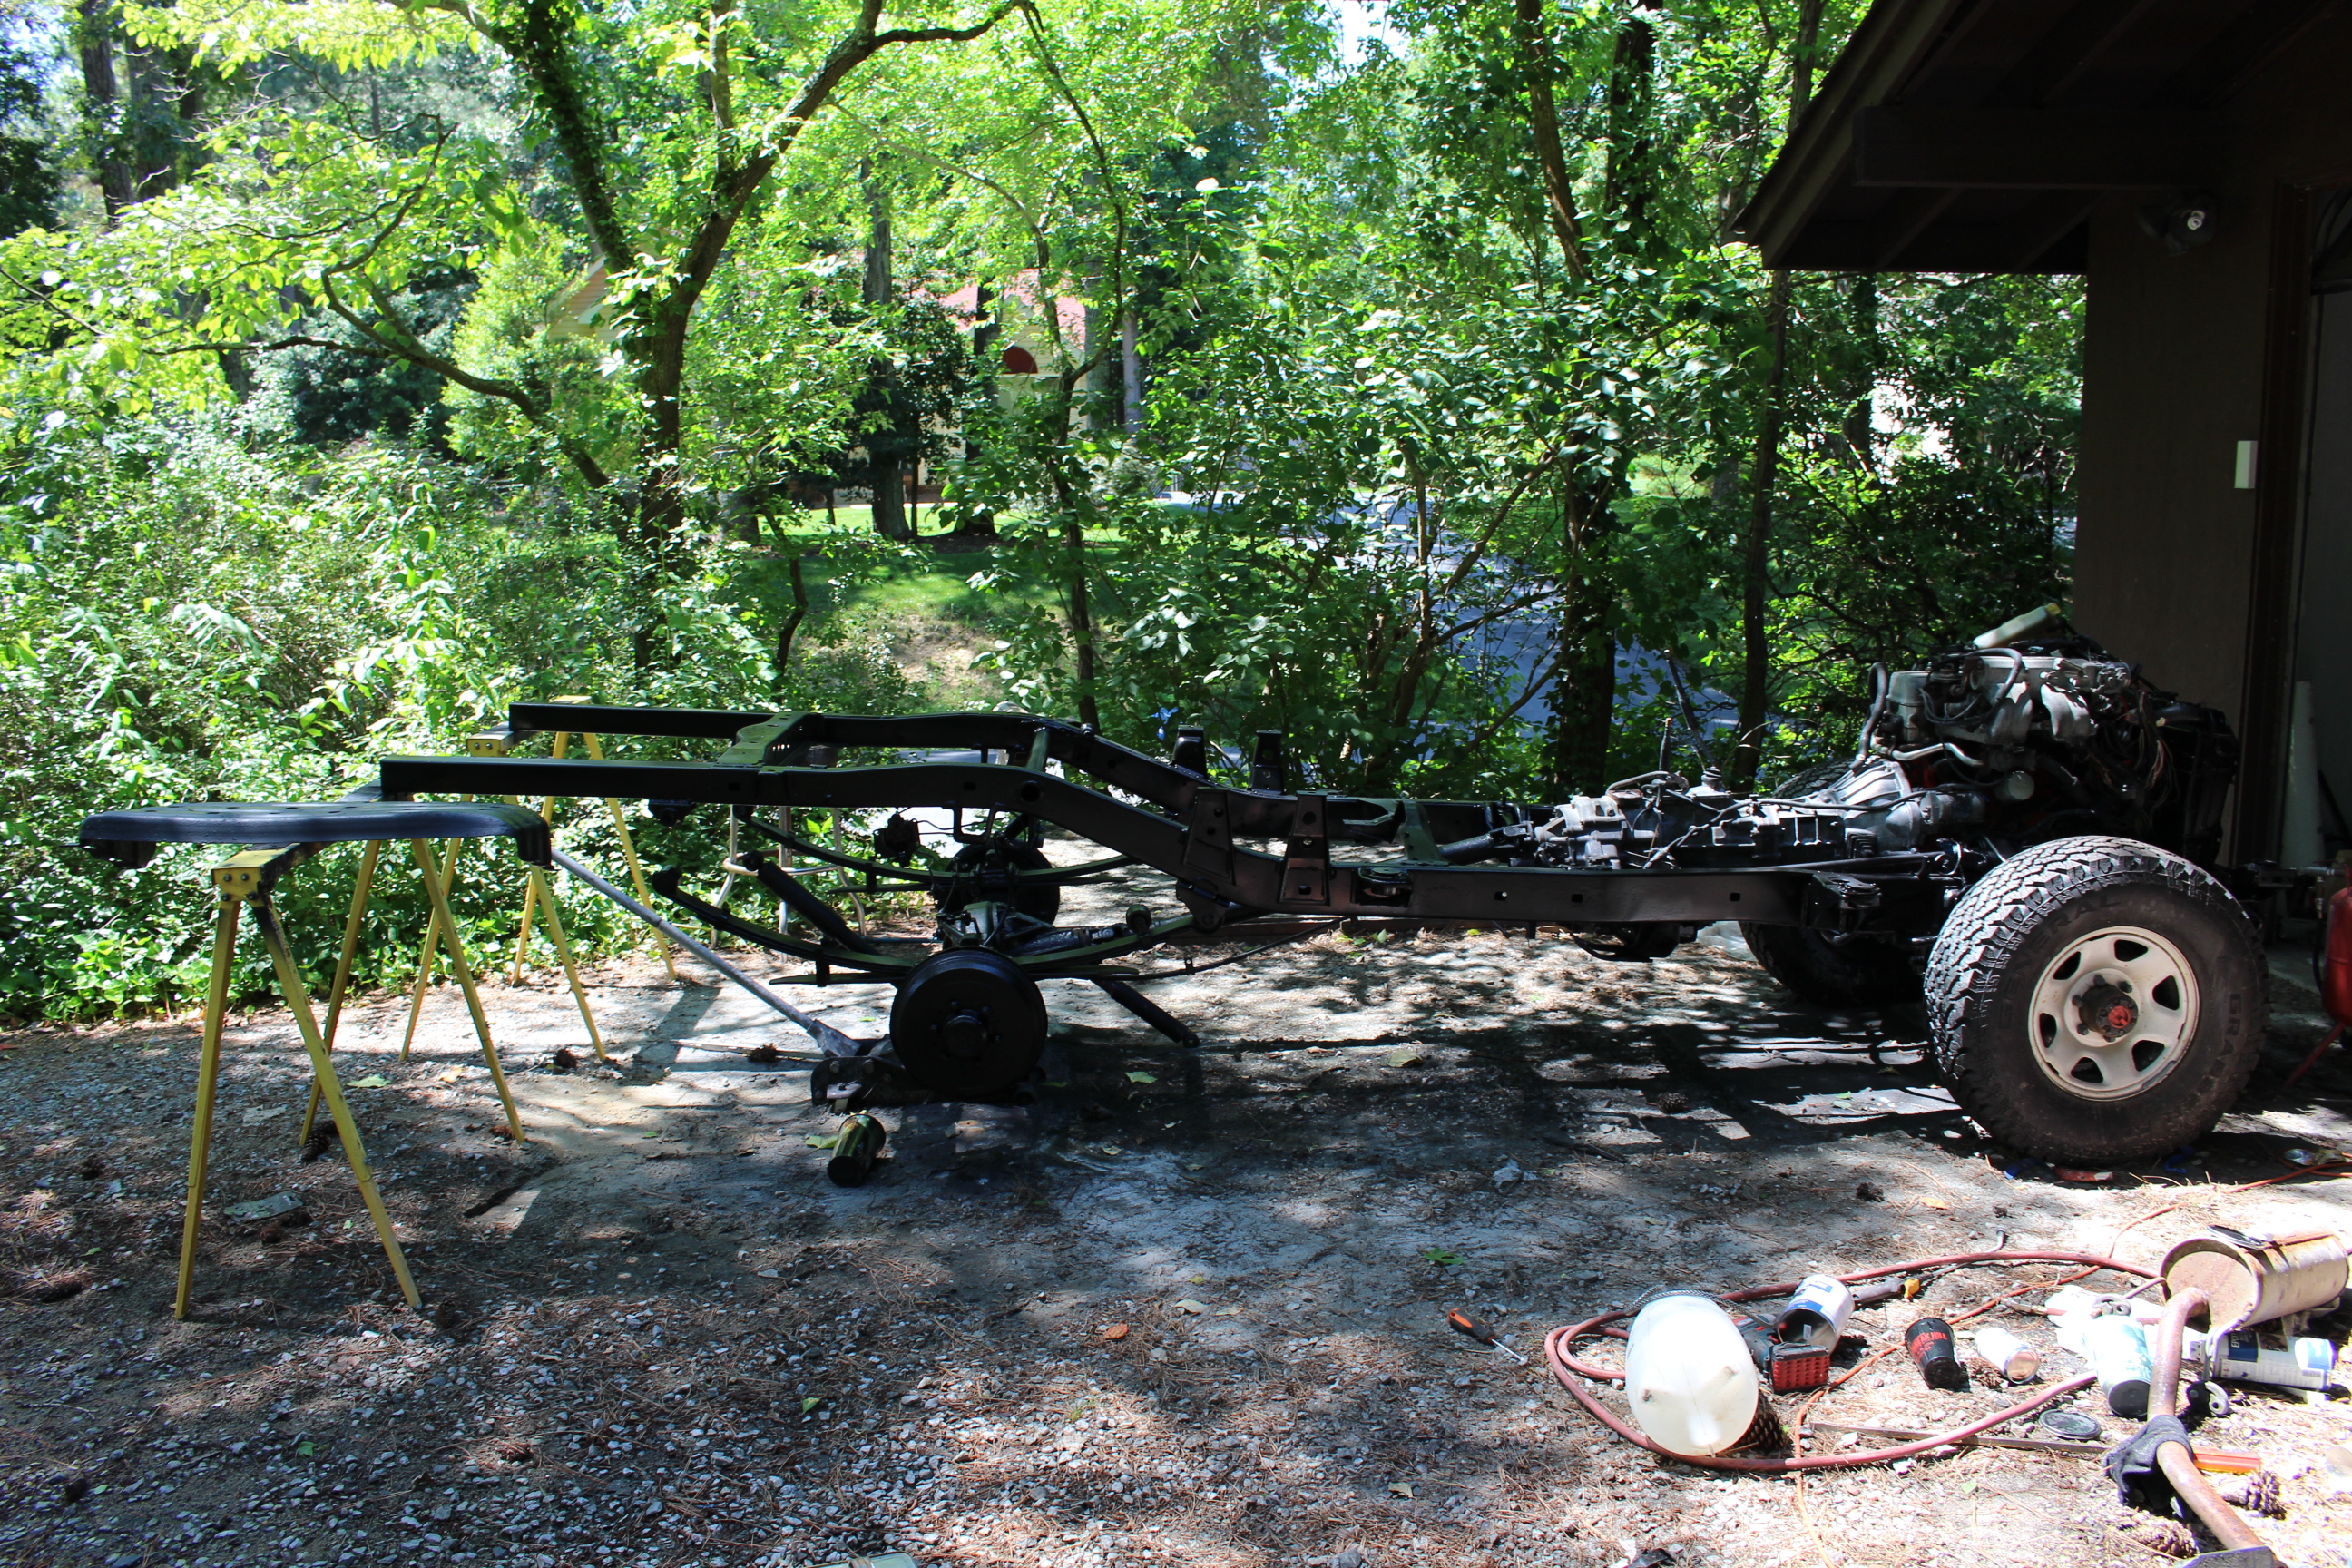
I bought a slim line bumper with integrated trailer hitch, so decided it would be easier to fix everything with the bed off. From here, the project snowballed into a body off restoration.
Took it to the car wash to clean the 24 years of grime off of the back of the frame.
Warning: gratuitous rust ahead :mad:
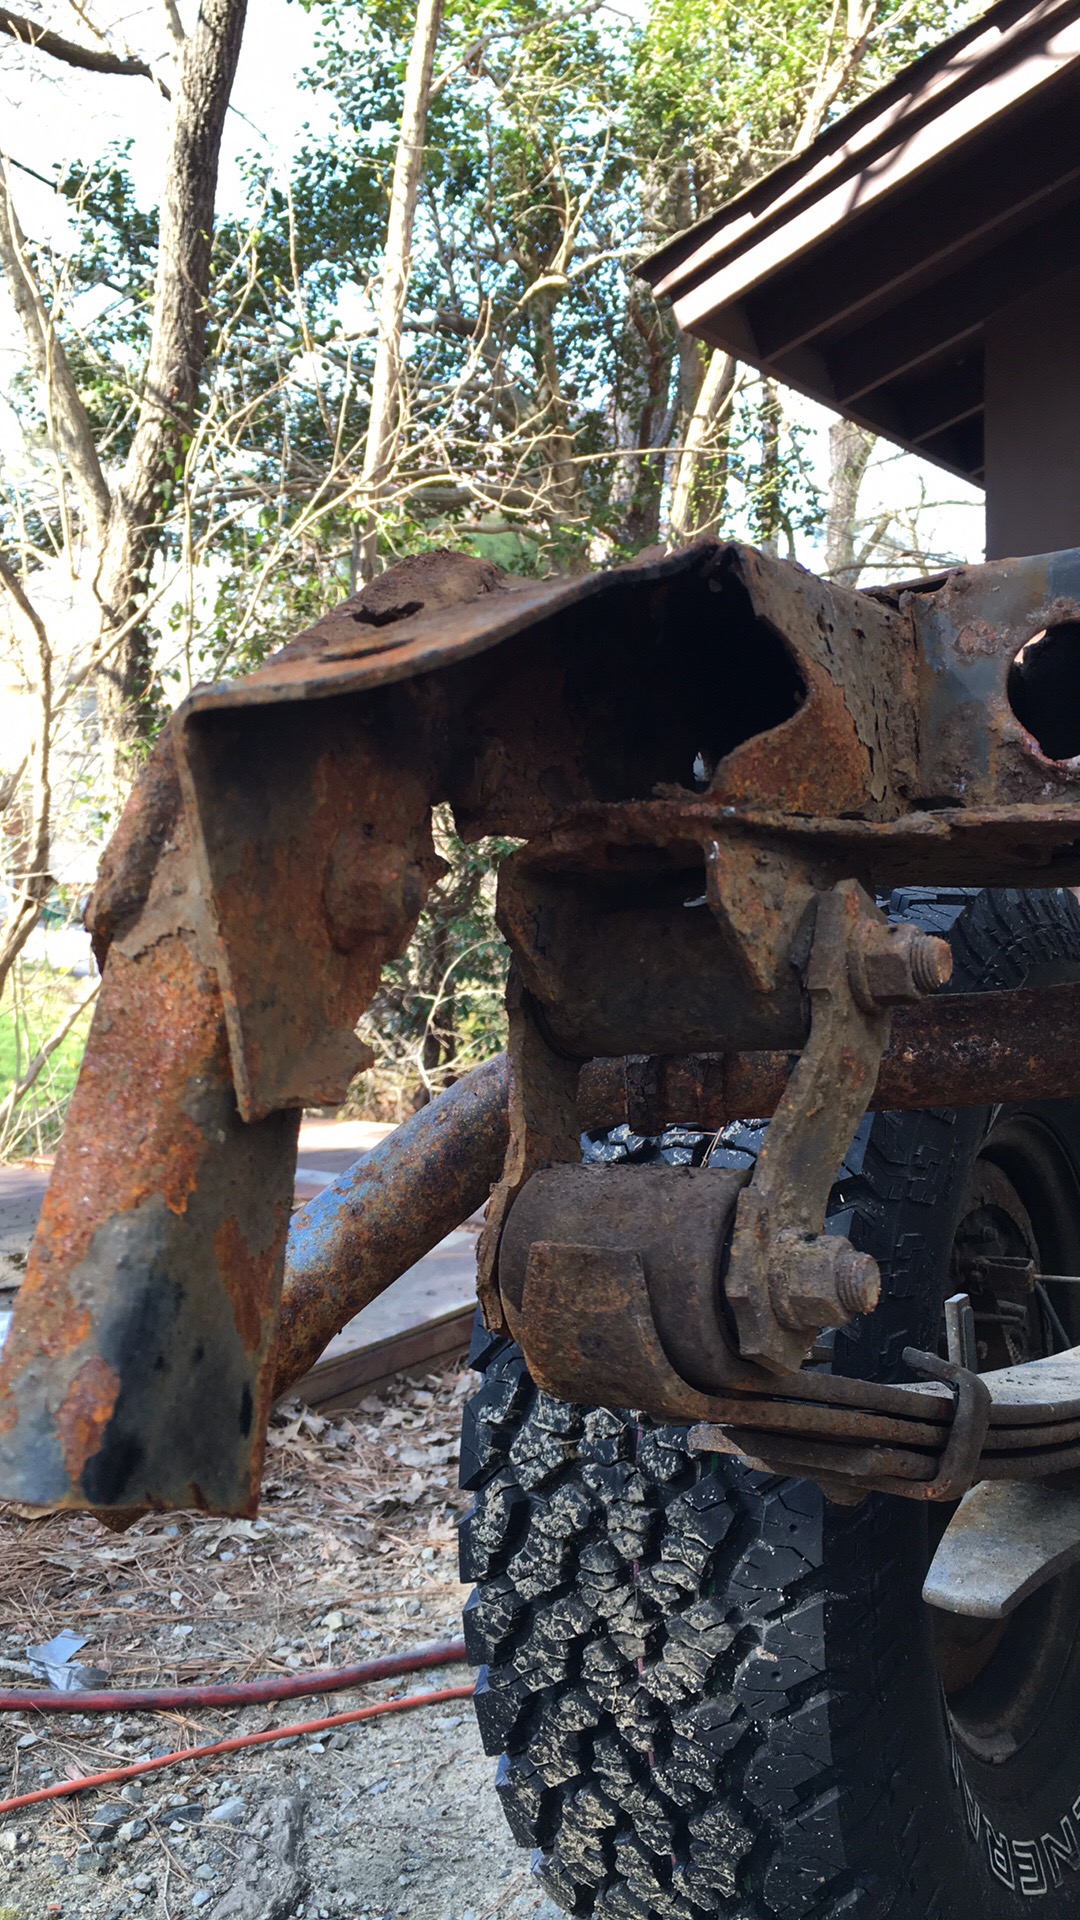
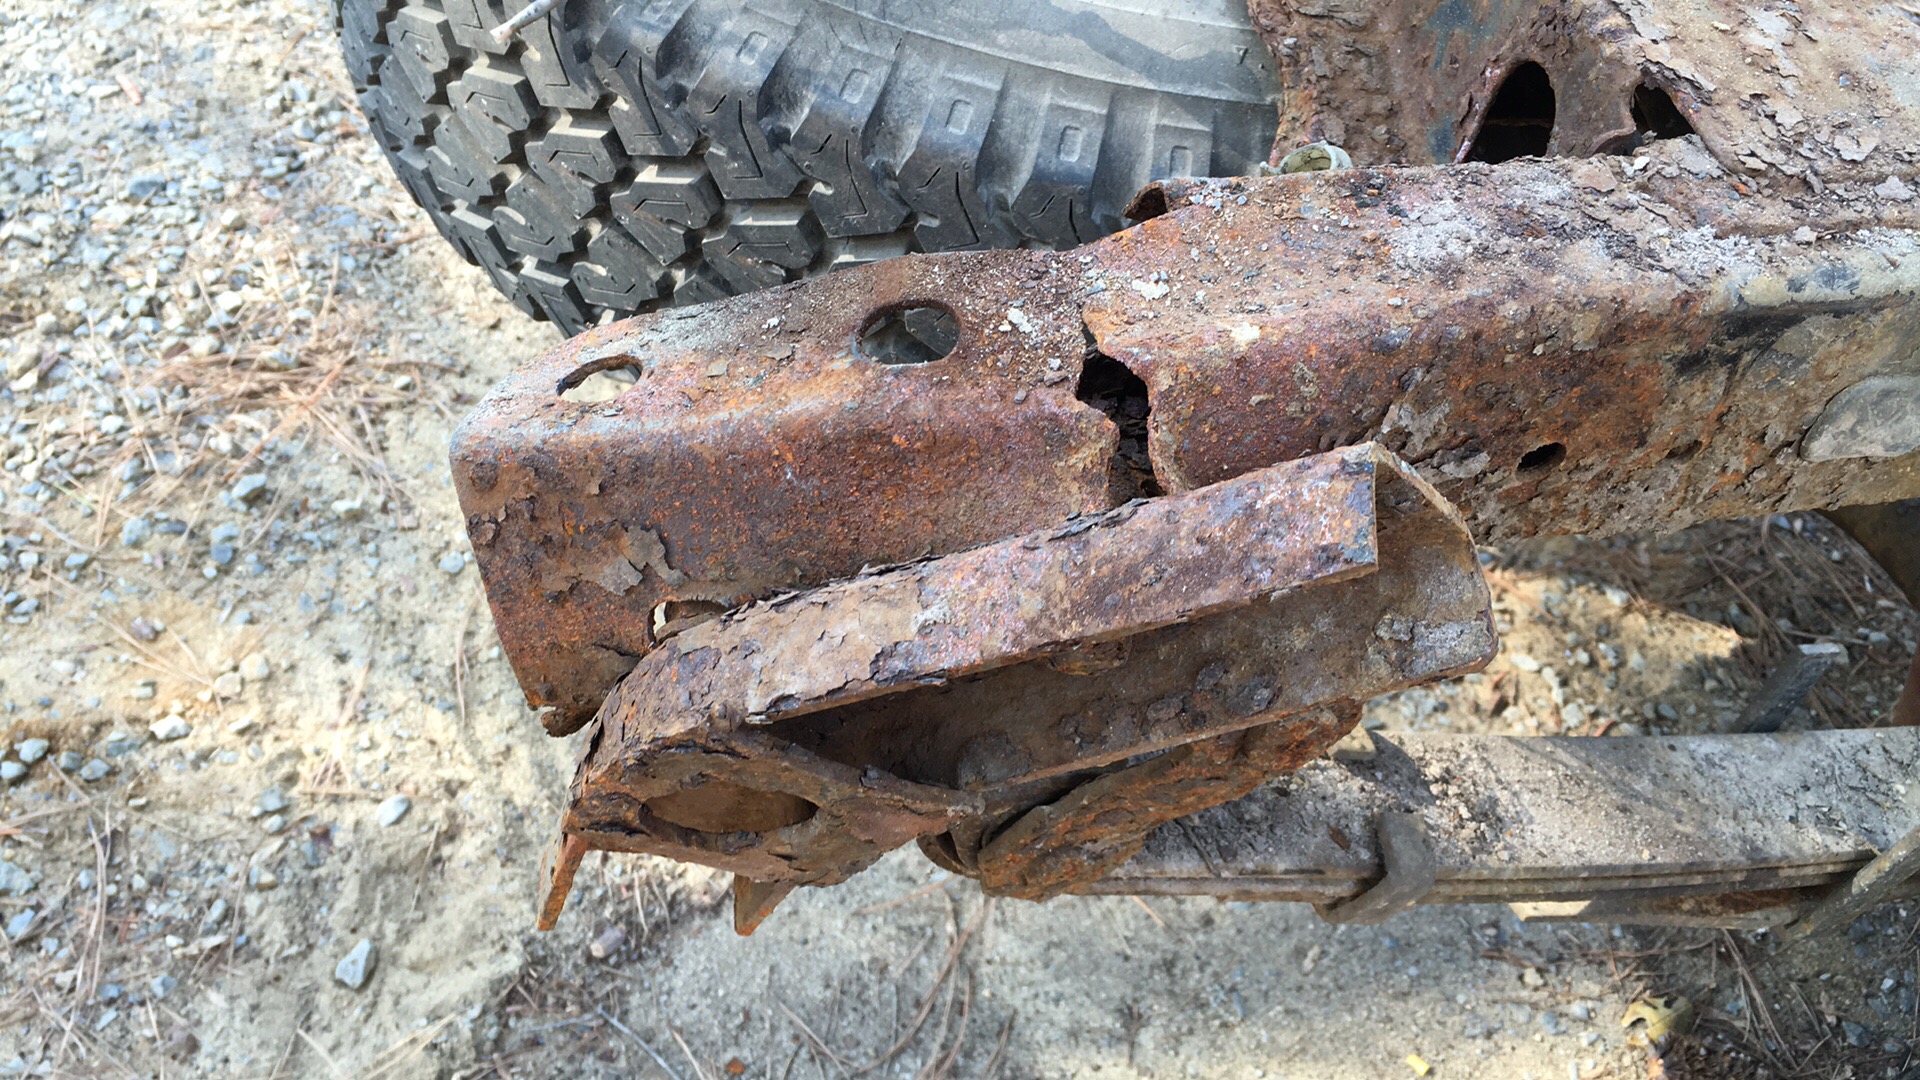
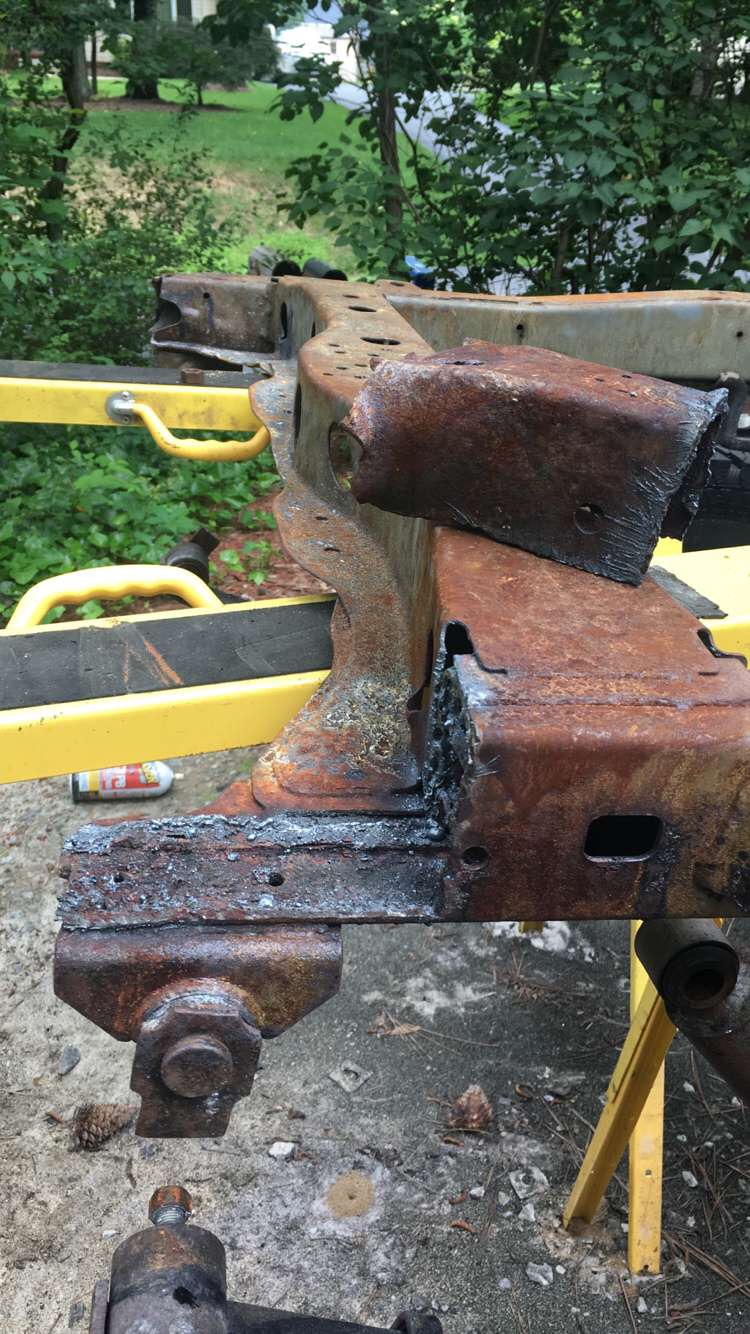
Bent frame/bumper mounts
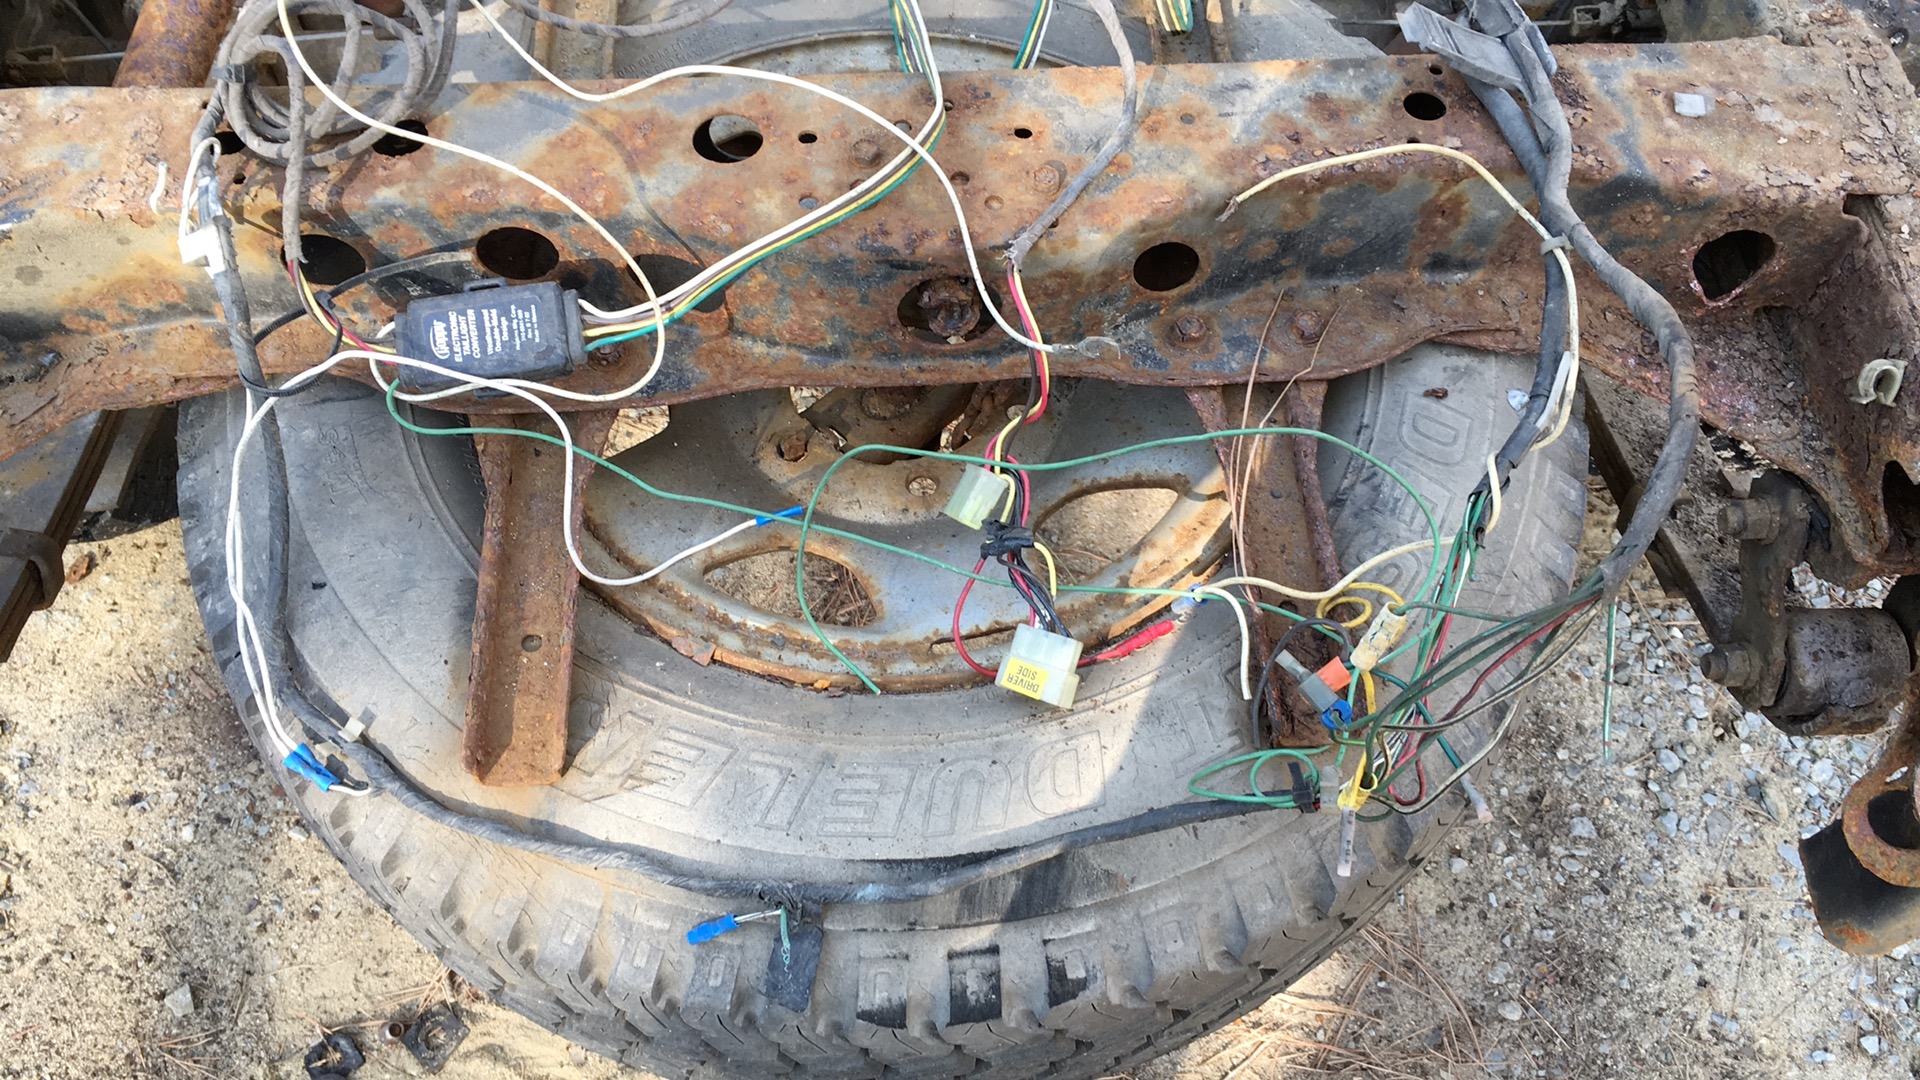
typical toyota spare tire rust

whoops
worst rust was in the spare tire area, the gas tank crossmember (also common on this era toyota). The rest of the frame wasn't terrible.
yikes.


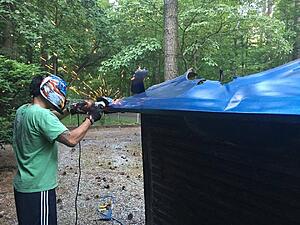
Decided I had an air compressor, I had a harbor freight bottle sand blaster, might as well do it myself.

gas tank crossmember cut out
yeeeaaahh
My tiny little 1 car carport that was enclosed into a garage. REALLY wish I had a two car space for all this work.
I bought a slim line bumper with integrated trailer hitch, so decided it would be easier to fix everything with the bed off. From here, the project snowballed into a body off restoration.
Took it to the car wash to clean the 24 years of grime off of the back of the frame.
Warning: gratuitous rust ahead :mad:
Bent frame/bumper mounts
typical toyota spare tire rust
whoops
worst rust was in the spare tire area, the gas tank crossmember (also common on this era toyota). The rest of the frame wasn't terrible.
yikes.
Decided I had an air compressor, I had a harbor freight bottle sand blaster, might as well do it myself.
gas tank crossmember cut out
yeeeaaahh
My tiny little 1 car carport that was enclosed into a garage. REALLY wish I had a two car space for all this work.
 09-05-2016, 04:35 PM
#3
Registered User
Thread Starter
Join Date: Sep 2016
Posts: 17
Likes: 0
Received 0 Likes
on
0 Posts
The gas door was almost completely broken off the hinge.

A couple welds on each side to reinforce it and it's good as new. It was originally just a tab that is rolled over to form the hole for the hinge pin. Now it is welded on both sides instead of being attached on only one side, so I shouldn't run into this issue again.

Disregard the brass T fitting in the gas line, it was only a temp fix to move the truck after I broke the fuel line. The brake lines and fuel lines were both badly rusted in this area for some reason. Probably was a big clump of mud stuck there at one point.

The factory fuel line has a roughly 1 ft length of flexible line before it goes to metal hard line. I am not sure why, but toyota felt it was necessary so I ended up replicating that (coming later)
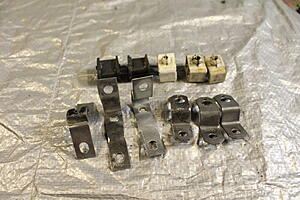
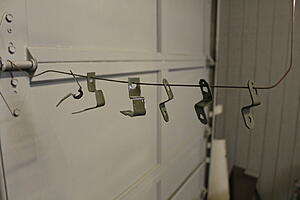
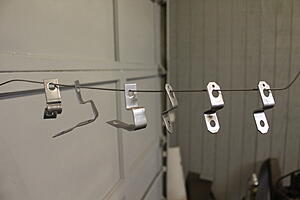
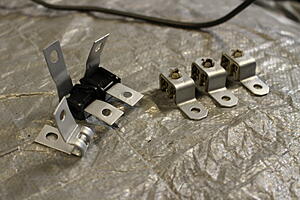
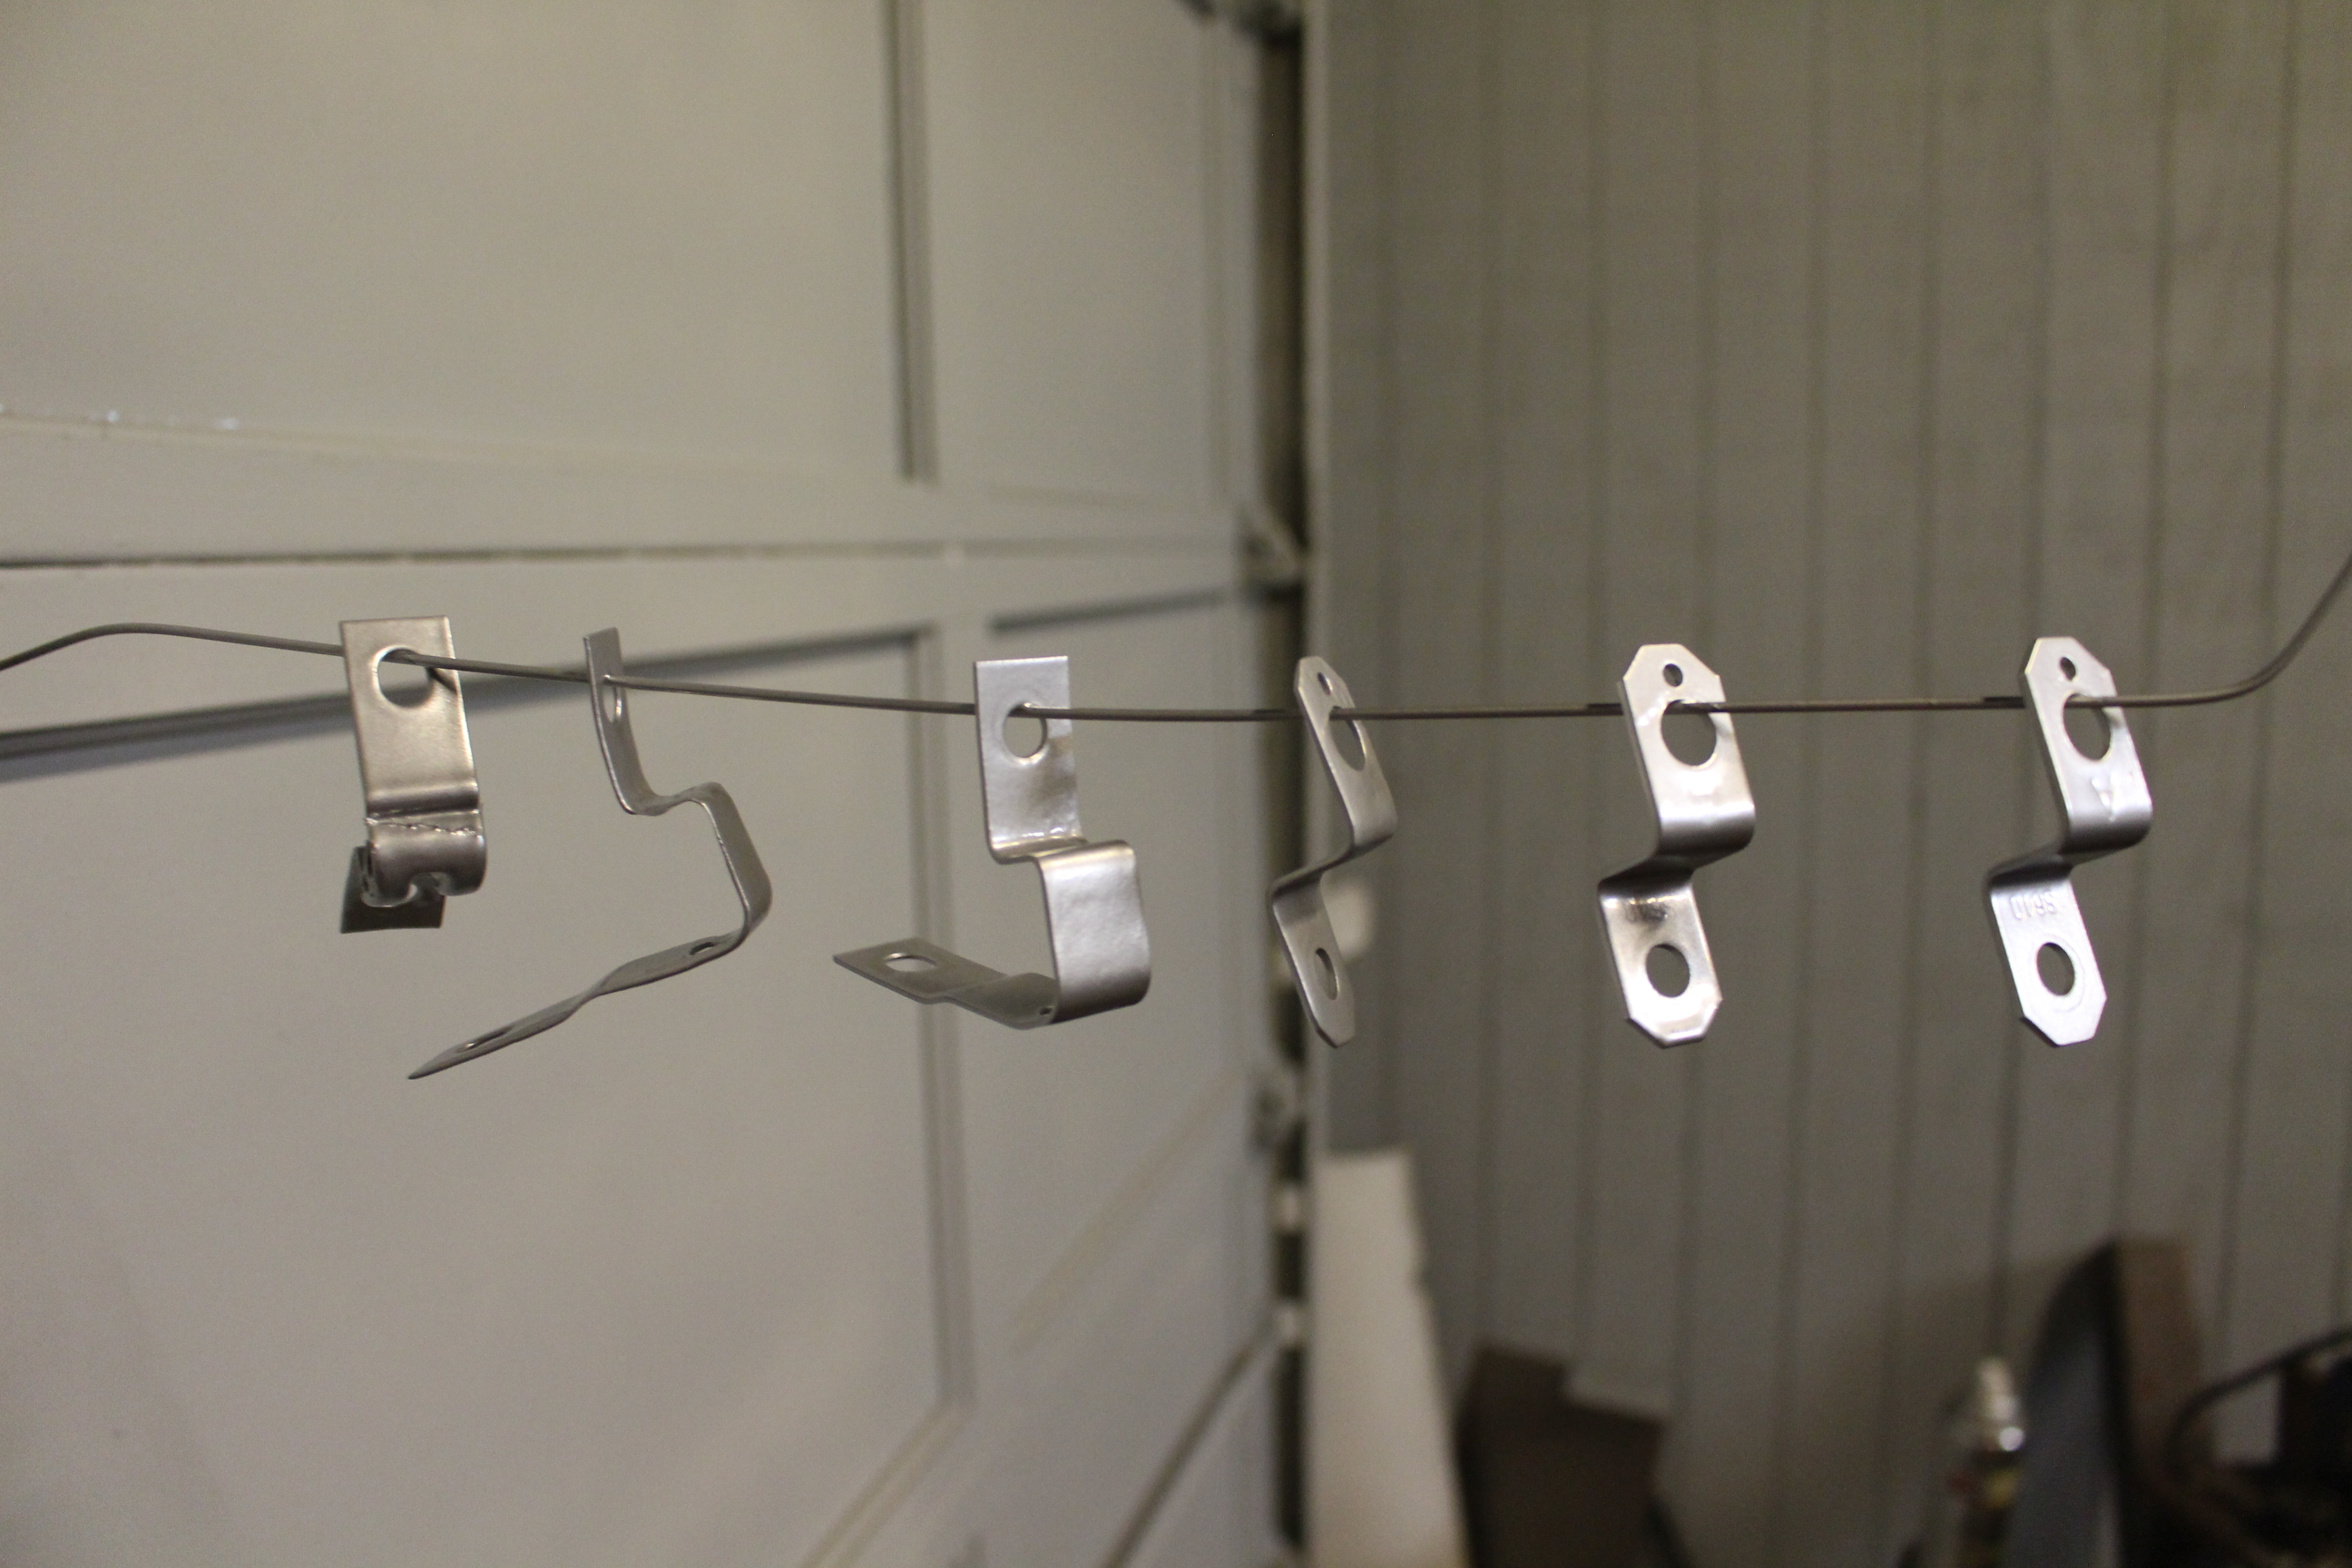
Gas tank out, exposing the rotten brake lines. All the brake line clamps got stripped and repainted.

This. This was so time consuming. I started blasting the truck, and then MD had a stretch of days where they broke the record for most consecutive days of rain (15 or so). Being that I could not move the frame back inside by myself, the bare frame sat outside, under a plastic sheet and then a tarp, for two weeks of consecutive rain. AKA I had to blast everything, again :mad:

Anyone doing sand blasting, do not waste your time using sand. Places like Tractor Supply Co. sell 50 pound bags of coal slag for under $8.00. None of the dangerous silica dust, it feeds better, it blasts quicker, and it recycles better.
Frame cleaning up nicely at this point. I think this was the first time blasting it before the record rainfall. All the faint rust was removed before painting.

Flash rust on the spare tire cross member from the rain :mad:

A couple welds on each side to reinforce it and it's good as new. It was originally just a tab that is rolled over to form the hole for the hinge pin. Now it is welded on both sides instead of being attached on only one side, so I shouldn't run into this issue again.
Disregard the brass T fitting in the gas line, it was only a temp fix to move the truck after I broke the fuel line. The brake lines and fuel lines were both badly rusted in this area for some reason. Probably was a big clump of mud stuck there at one point.
The factory fuel line has a roughly 1 ft length of flexible line before it goes to metal hard line. I am not sure why, but toyota felt it was necessary so I ended up replicating that (coming later)
Gas tank out, exposing the rotten brake lines. All the brake line clamps got stripped and repainted.
This. This was so time consuming. I started blasting the truck, and then MD had a stretch of days where they broke the record for most consecutive days of rain (15 or so). Being that I could not move the frame back inside by myself, the bare frame sat outside, under a plastic sheet and then a tarp, for two weeks of consecutive rain. AKA I had to blast everything, again :mad:
Anyone doing sand blasting, do not waste your time using sand. Places like Tractor Supply Co. sell 50 pound bags of coal slag for under $8.00. None of the dangerous silica dust, it feeds better, it blasts quicker, and it recycles better.
Frame cleaning up nicely at this point. I think this was the first time blasting it before the record rainfall. All the faint rust was removed before painting.
Flash rust on the spare tire cross member from the rain :mad:
09-05-2016, 04:36 PM
#4
Registered User
Thread Starter
Join Date: Sep 2016
Posts: 17
Likes: 0
Received 0 Likes
on
0 Posts
The underside of the cab was in surprisingly good shape. the back corner of the cab has two rust spots. one is at the bottom of the B pillar (cab corner) and the other was on the backside of that corner. I have fixed the backside, I will have to order a cab corner to fix the other side. Other than that, just a few spots where the seam sealer cracked on the underside and the rest was mostly clean.


I ground away all the rust from this spot on the backside of the cab.


Filler plate to weld in. Was running low on argon so the welds weren't perfect, but this is neither structural, nor visible when the bed is on. Welded, primed, painted, and undercoated.


The underside of the cab got a thorough wire wheeling. I used a few cup wheels designed for angle grinders. Two cup ones and one circular one. They are quite effective at rust removal. Also pretty hairy to use. Definitely use proper PPE when operating these!
Once cleaned up, I primed the underside and then sprayed a few coats of 3m Professional underbody spray. It turned out great! I am still in the process of bending new fuel return/vent lines for the underside, but then the underbody is done.


I ground away all the rust from this spot on the backside of the cab.
Filler plate to weld in. Was running low on argon so the welds weren't perfect, but this is neither structural, nor visible when the bed is on. Welded, primed, painted, and undercoated.
The underside of the cab got a thorough wire wheeling. I used a few cup wheels designed for angle grinders. Two cup ones and one circular one. They are quite effective at rust removal. Also pretty hairy to use. Definitely use proper PPE when operating these!
Once cleaned up, I primed the underside and then sprayed a few coats of 3m Professional underbody spray. It turned out great! I am still in the process of bending new fuel return/vent lines for the underside, but then the underbody is done.
09-05-2016, 04:37 PM
#5
Registered User
Thread Starter
Join Date: Sep 2016
Posts: 17
Likes: 0
Received 0 Likes
on
0 Posts
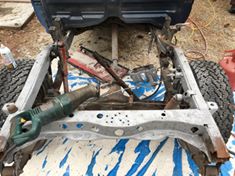
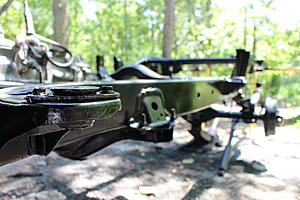
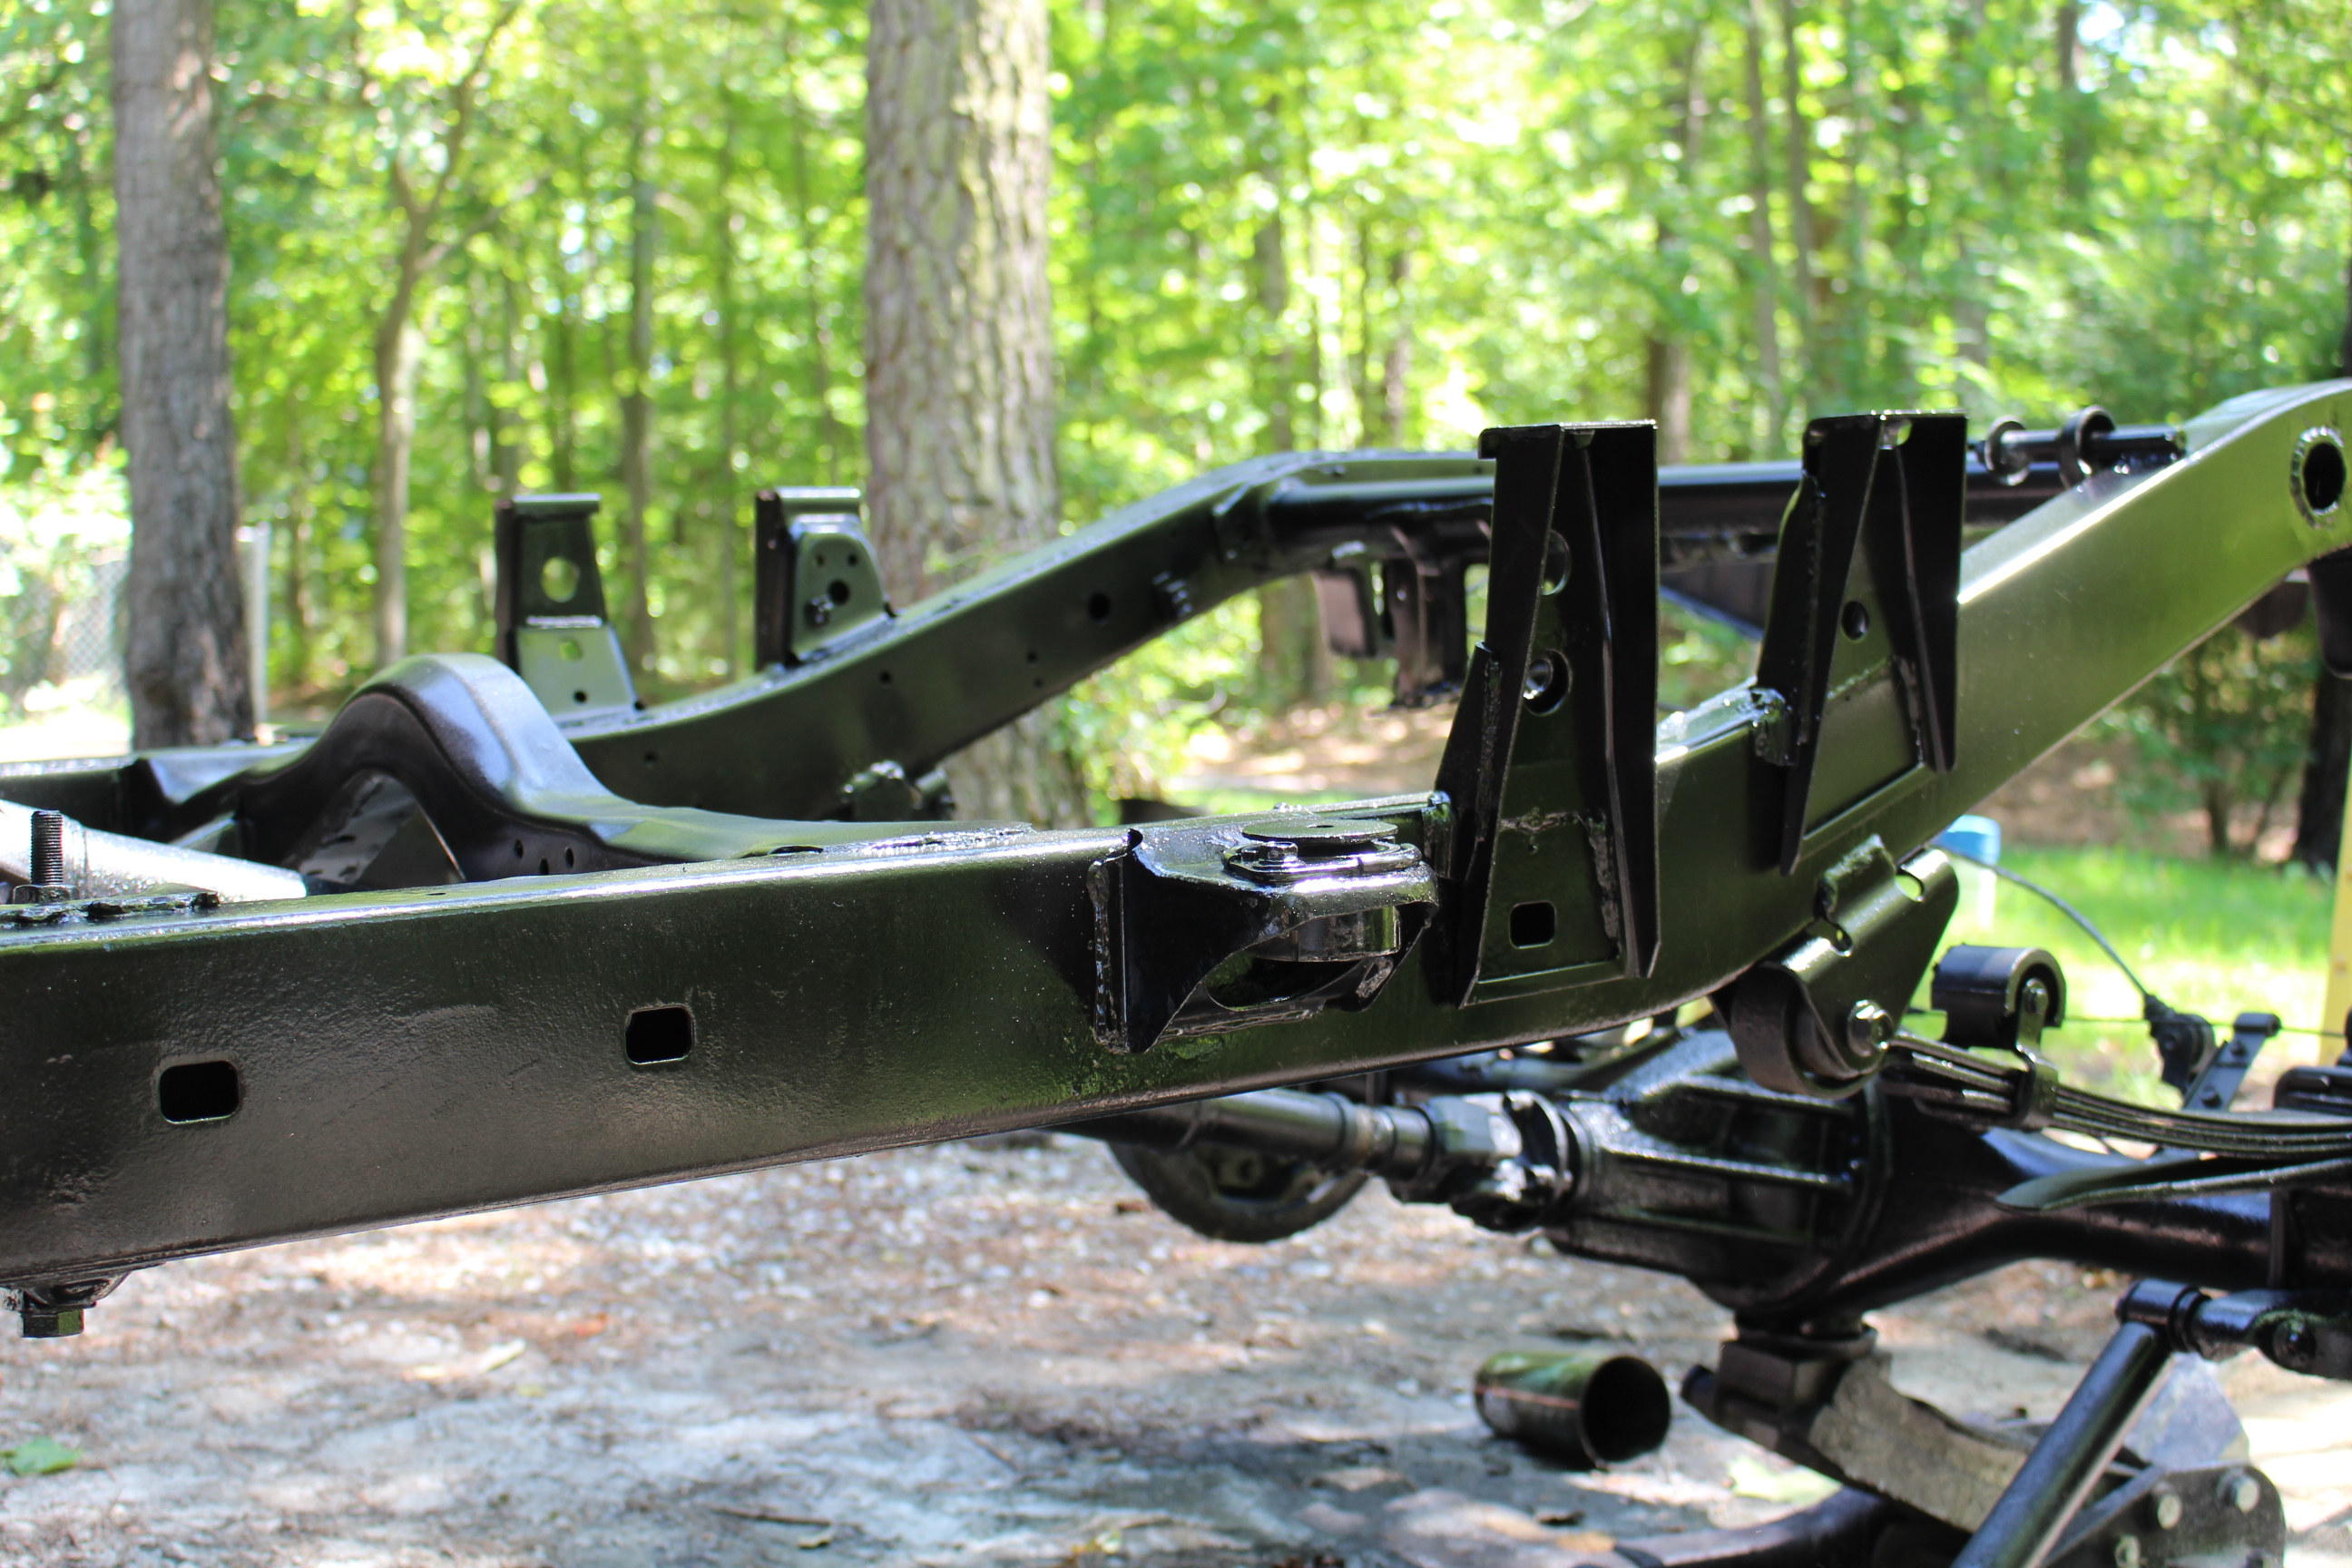
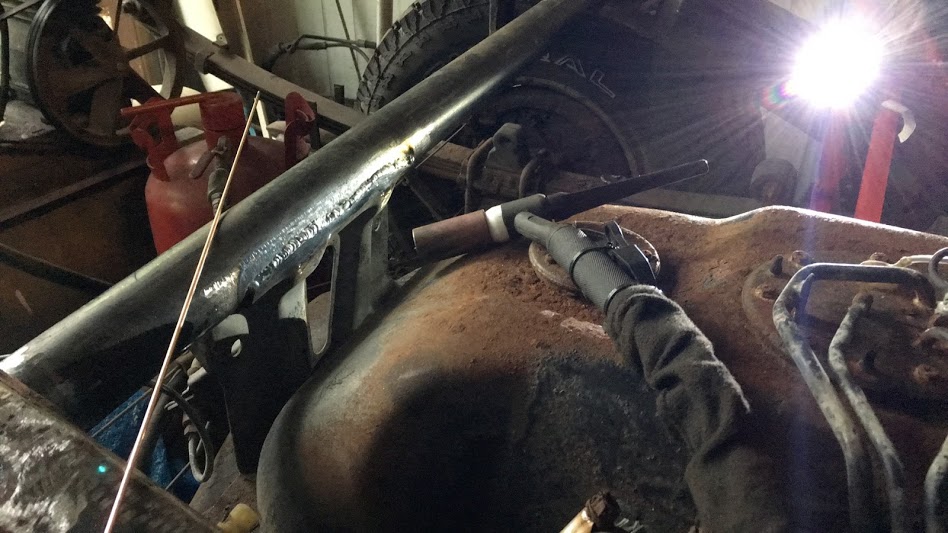
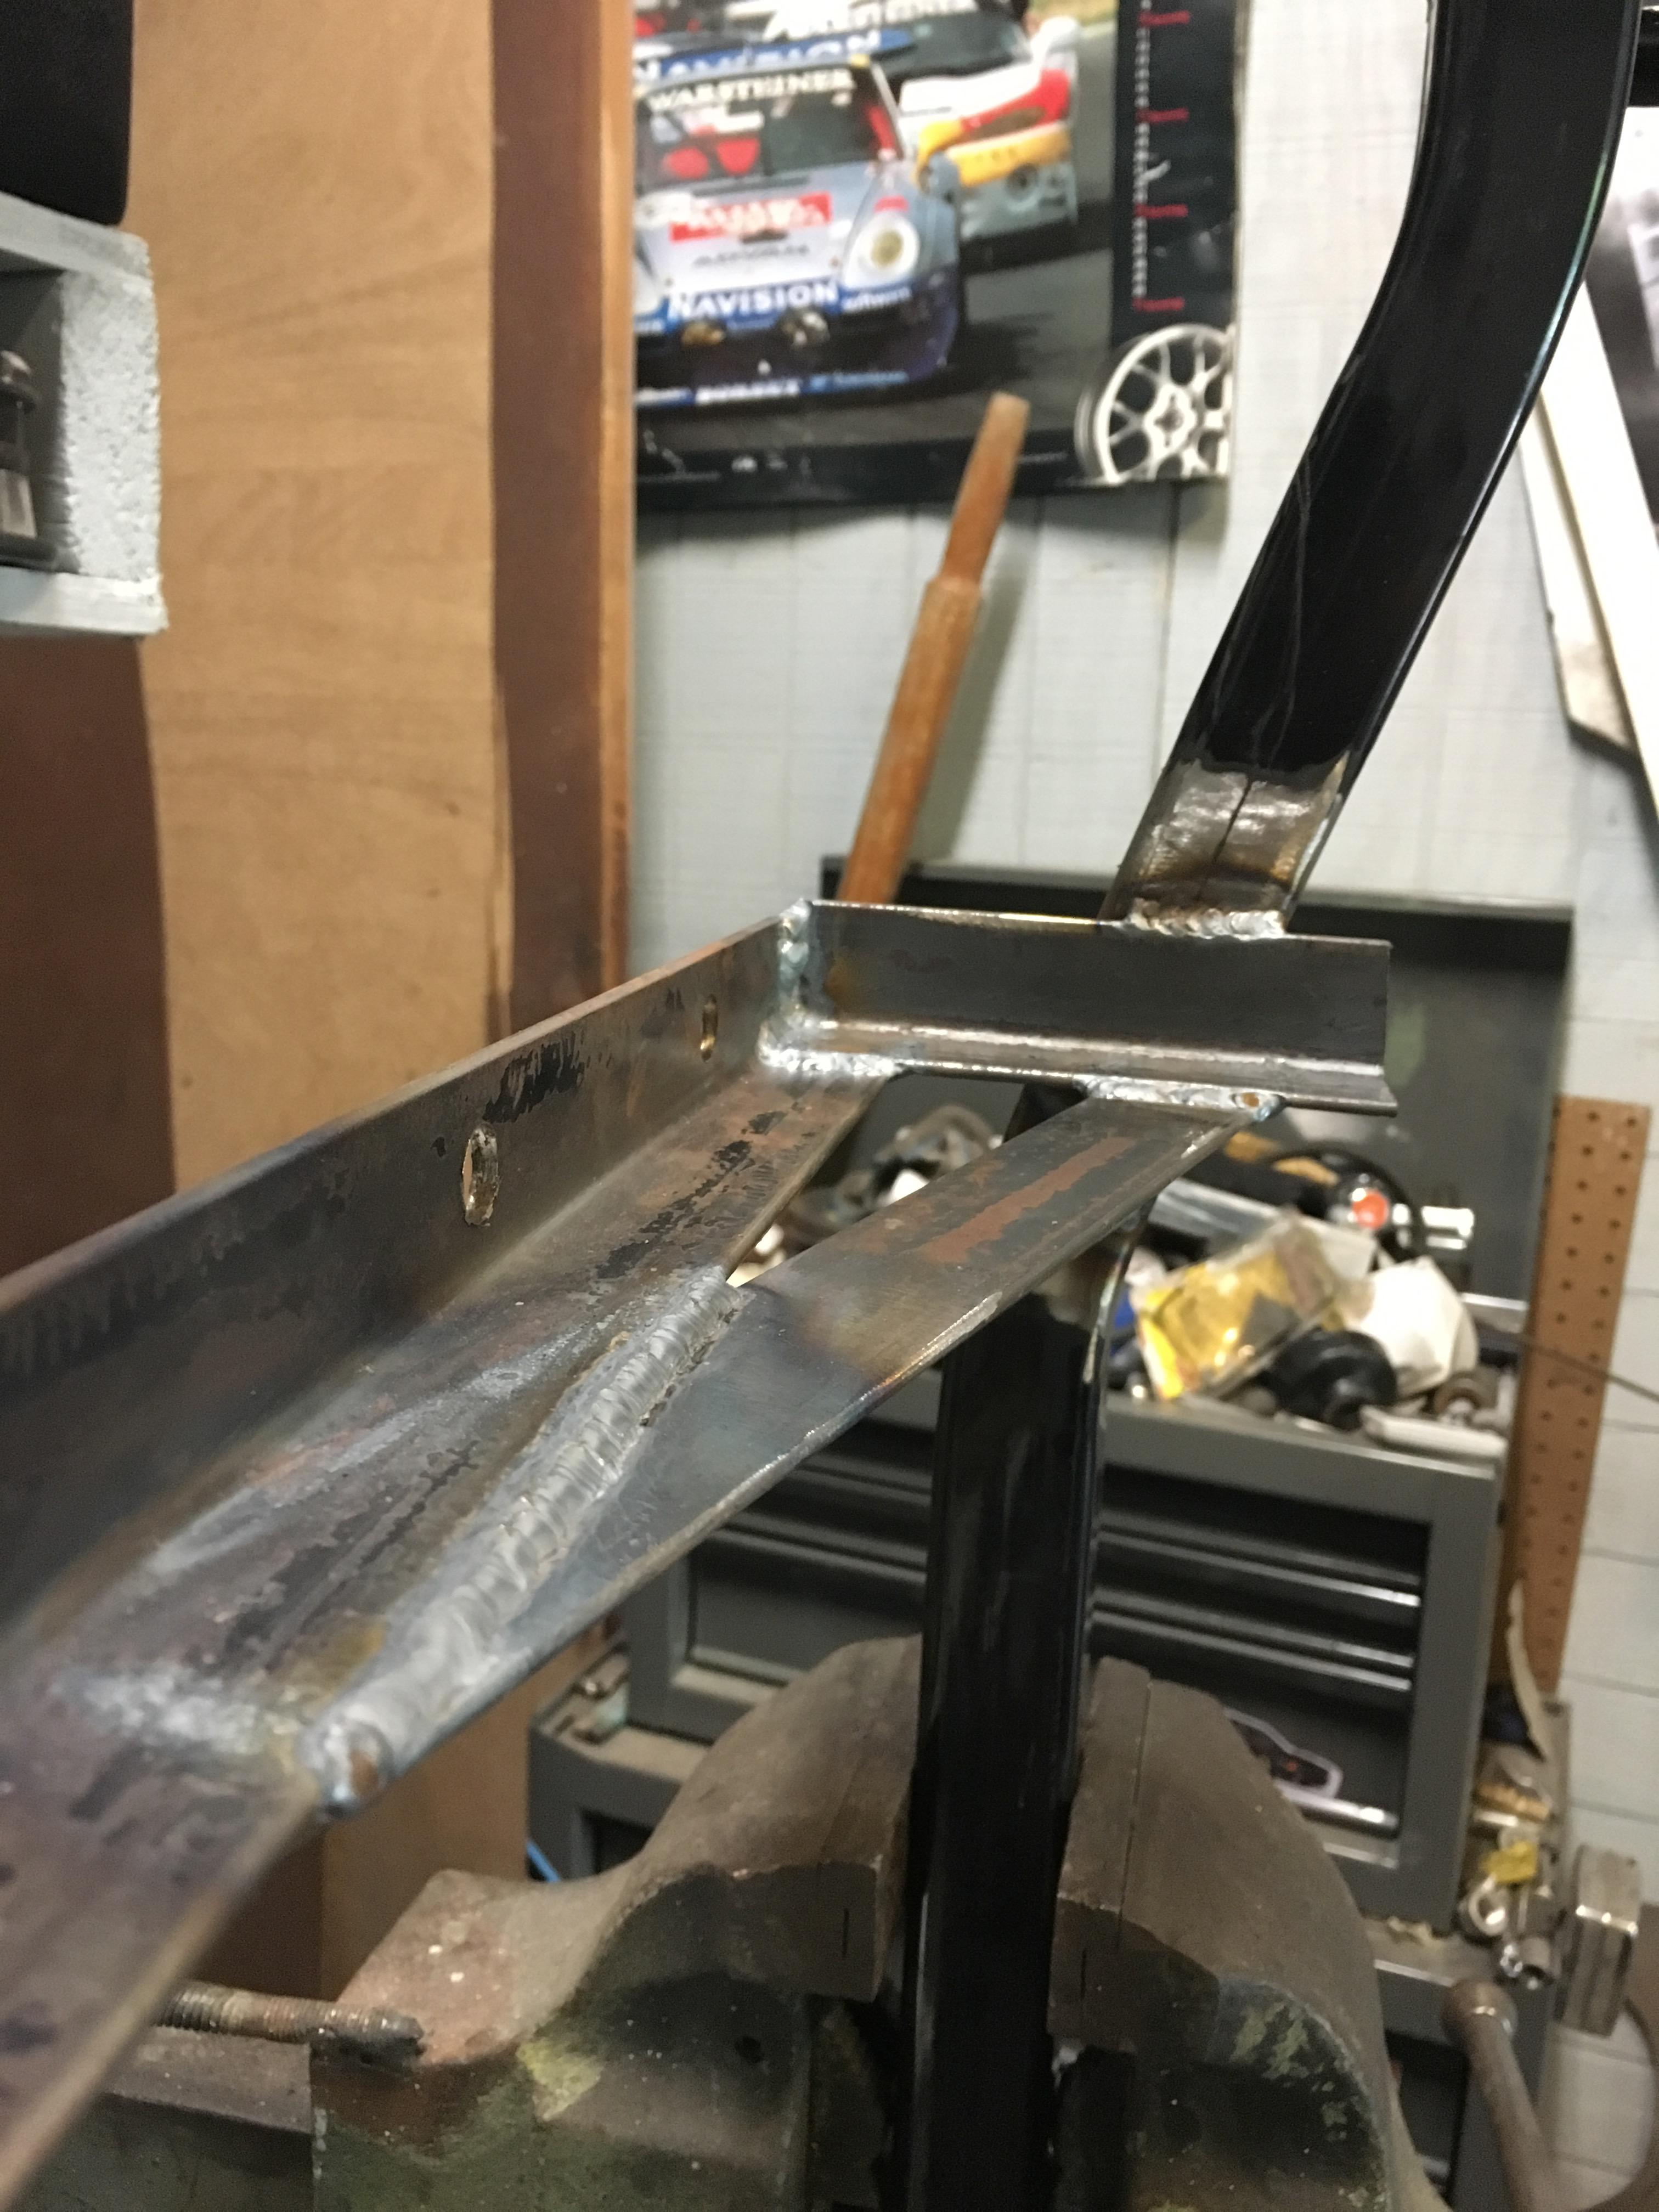
So. After all the above work, I finally made it to the part where I fixed the bent bumper mounts. felt like 1 step forward, 5 steps back with regards to the original goal of just fixing the bumper, but it was all worth it. I bought some 3x3 steel tube and plasma cut off the bent part of the frame. From there I sand blasted everything in the weld area, ground it smooth, and welded in new frame rail.

obviously have not sand blasted the bottom of the truck yet, that came last because I wasn't looking forward to laying on my back and sandblasting.

Before


After!


These pieces will get cut down to length later once I decide on if I am bobbing the bed or not. Then endplates will be welded on for the bumper to bolt to.
obviously have not sand blasted the bottom of the truck yet, that came last because I wasn't looking forward to laying on my back and sandblasting.
Before
After!
These pieces will get cut down to length later once I decide on if I am bobbing the bed or not. Then endplates will be welded on for the bumper to bolt to.
09-05-2016, 04:38 PM
#6
Registered User
Thread Starter
Join Date: Sep 2016
Posts: 17
Likes: 0
Received 0 Likes
on
0 Posts
That's a great dog! 
I'm leaning toward bobbing the bed, but that's only if you plan on doing semi-serious off-roading. Otherwise I'd leave it full length, especially since you're going to put the spare in the bed. Don't listen to me, though. That's all up to you. The only strong suggestion I'll make is to have fun with it, but that's as easy as falling off of a log in this case. :thumbup:
I'm leaning toward bobbing the bed, but that's only if you plan on doing semi-serious off-roading. Otherwise I'd leave it full length, especially since you're going to put the spare in the bed. Don't listen to me, though. That's all up to you. The only strong suggestion I'll make is to have fun with it, but that's as easy as falling off of a log in this case. :thumbup:
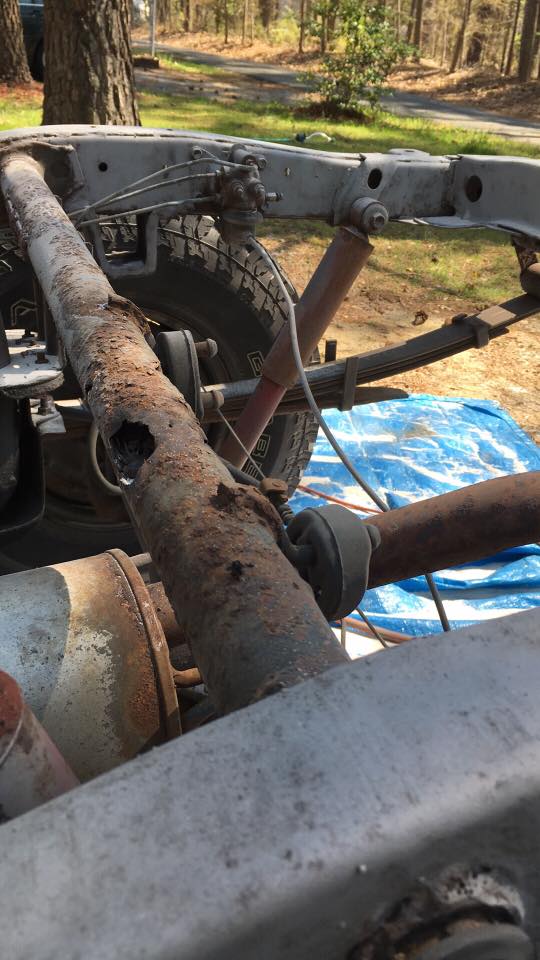
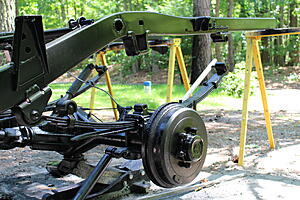
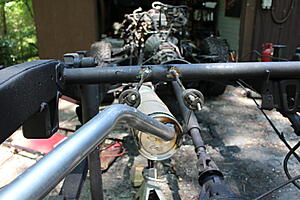
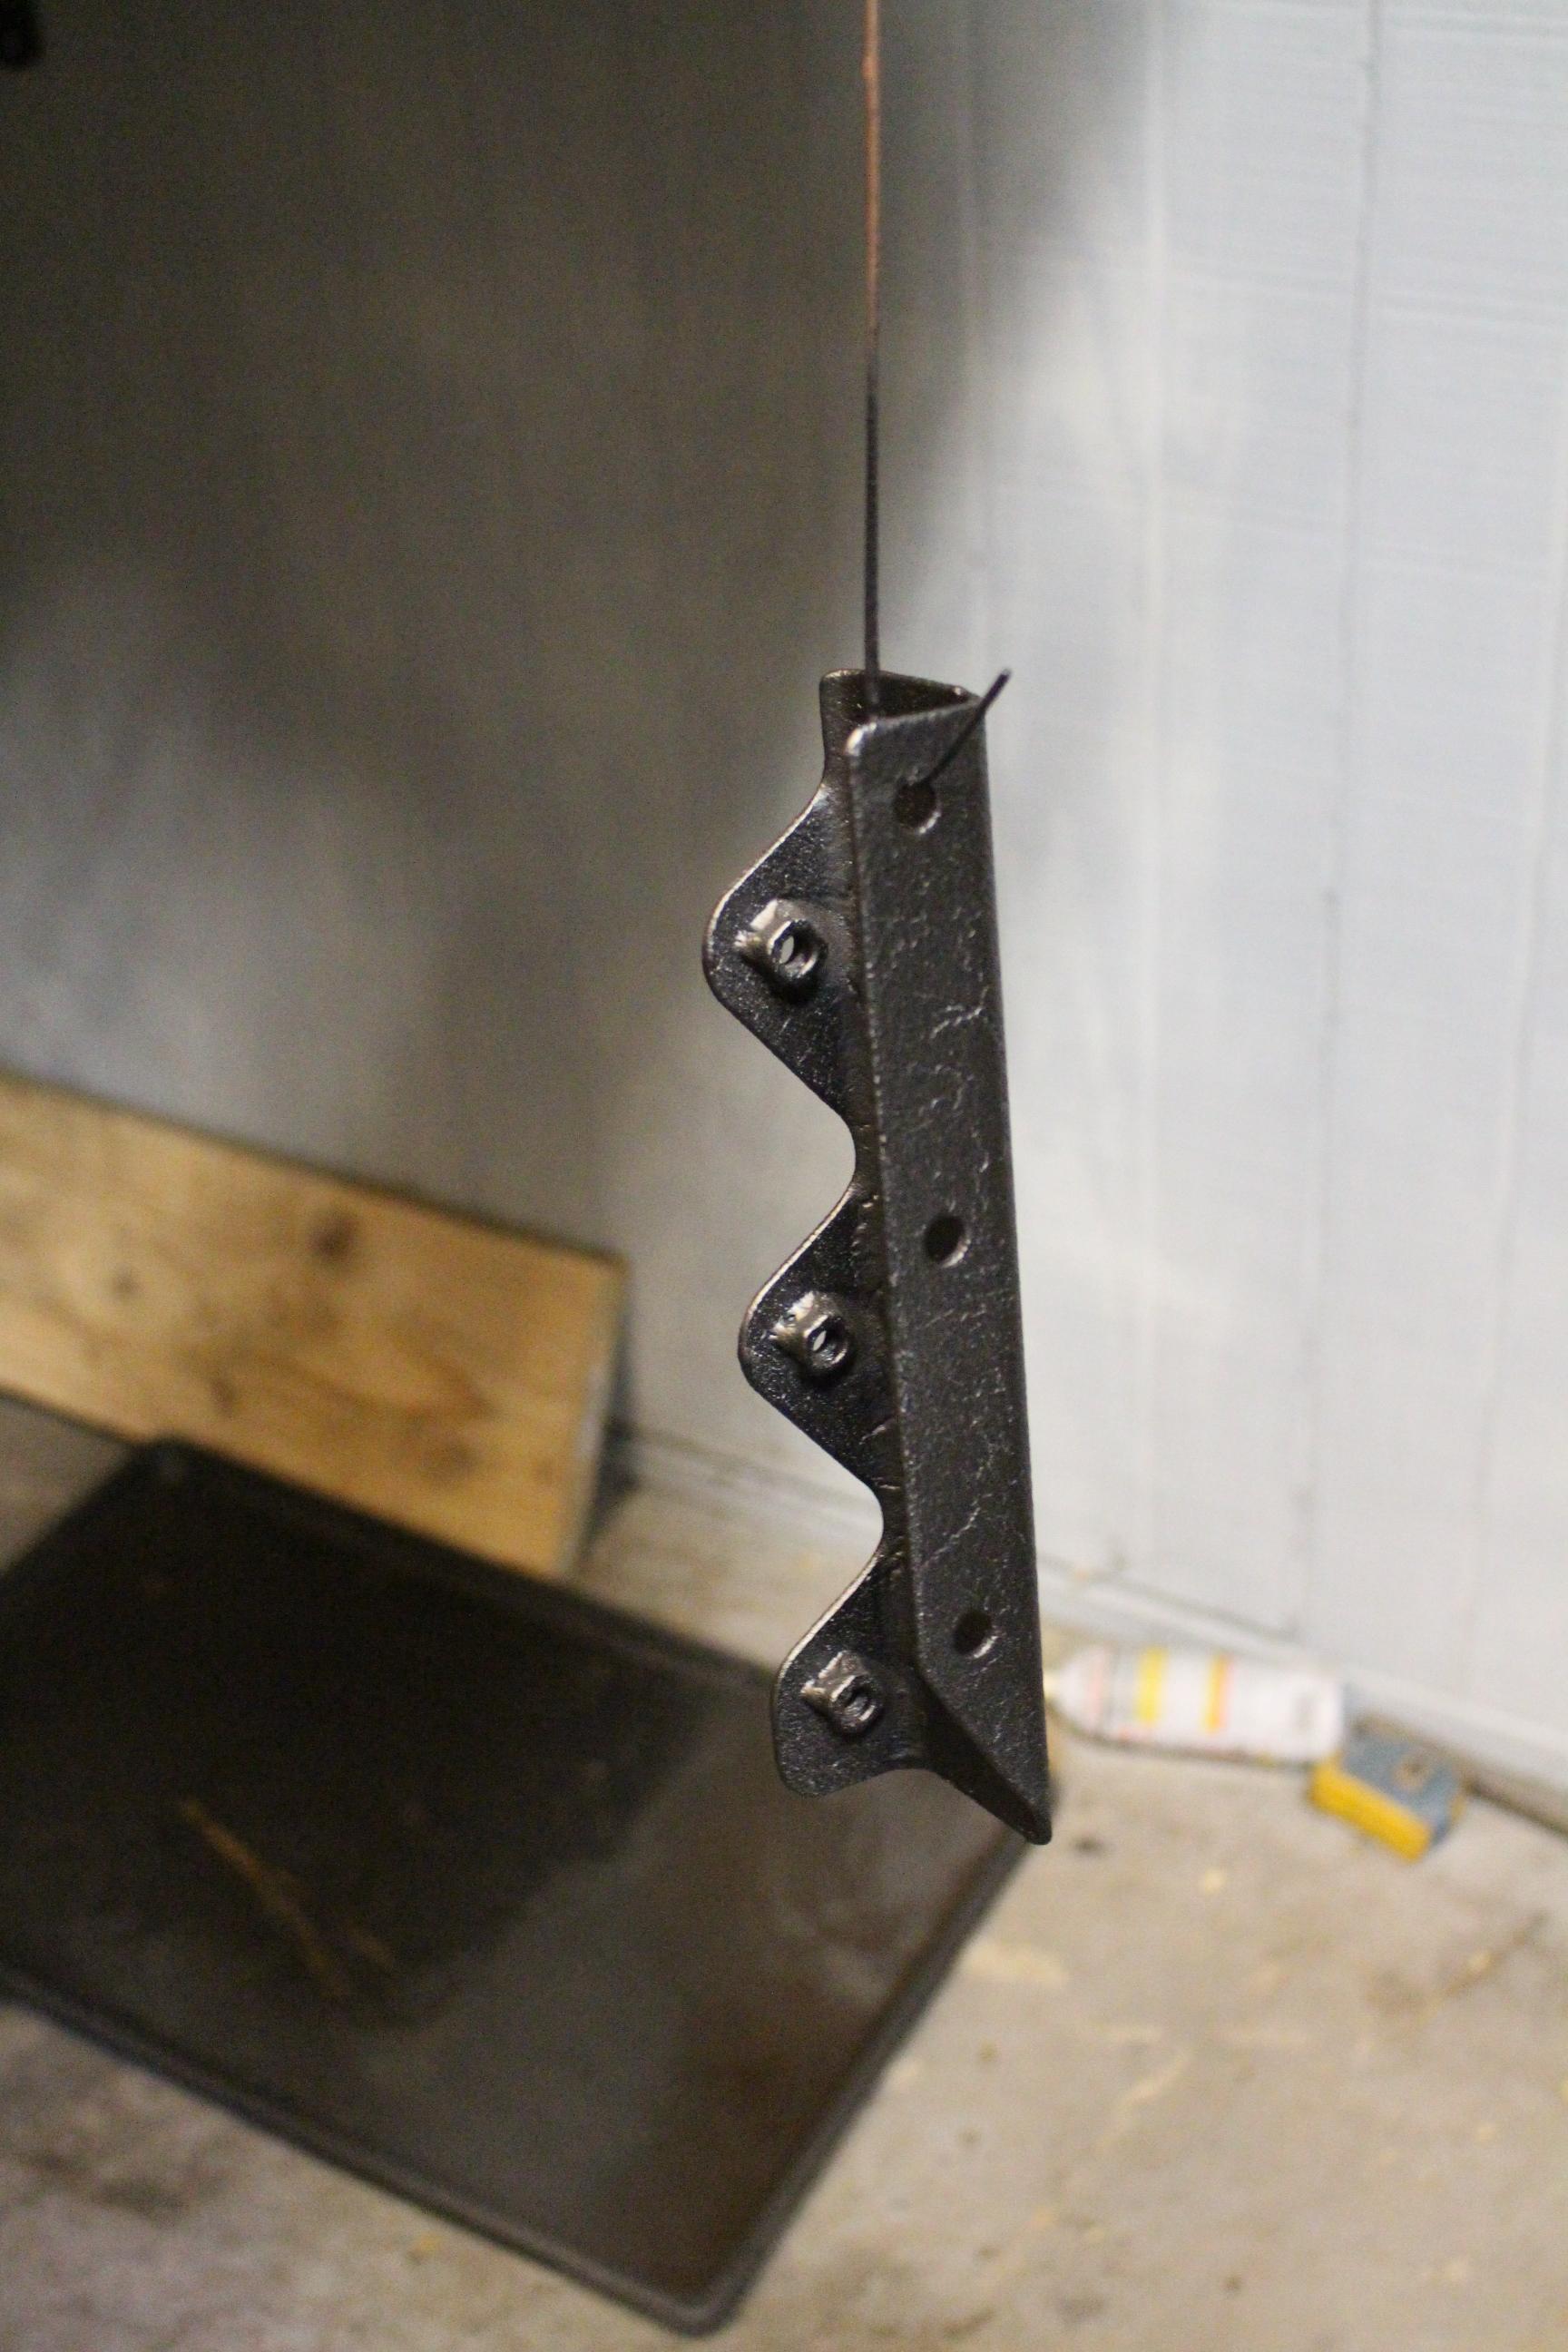
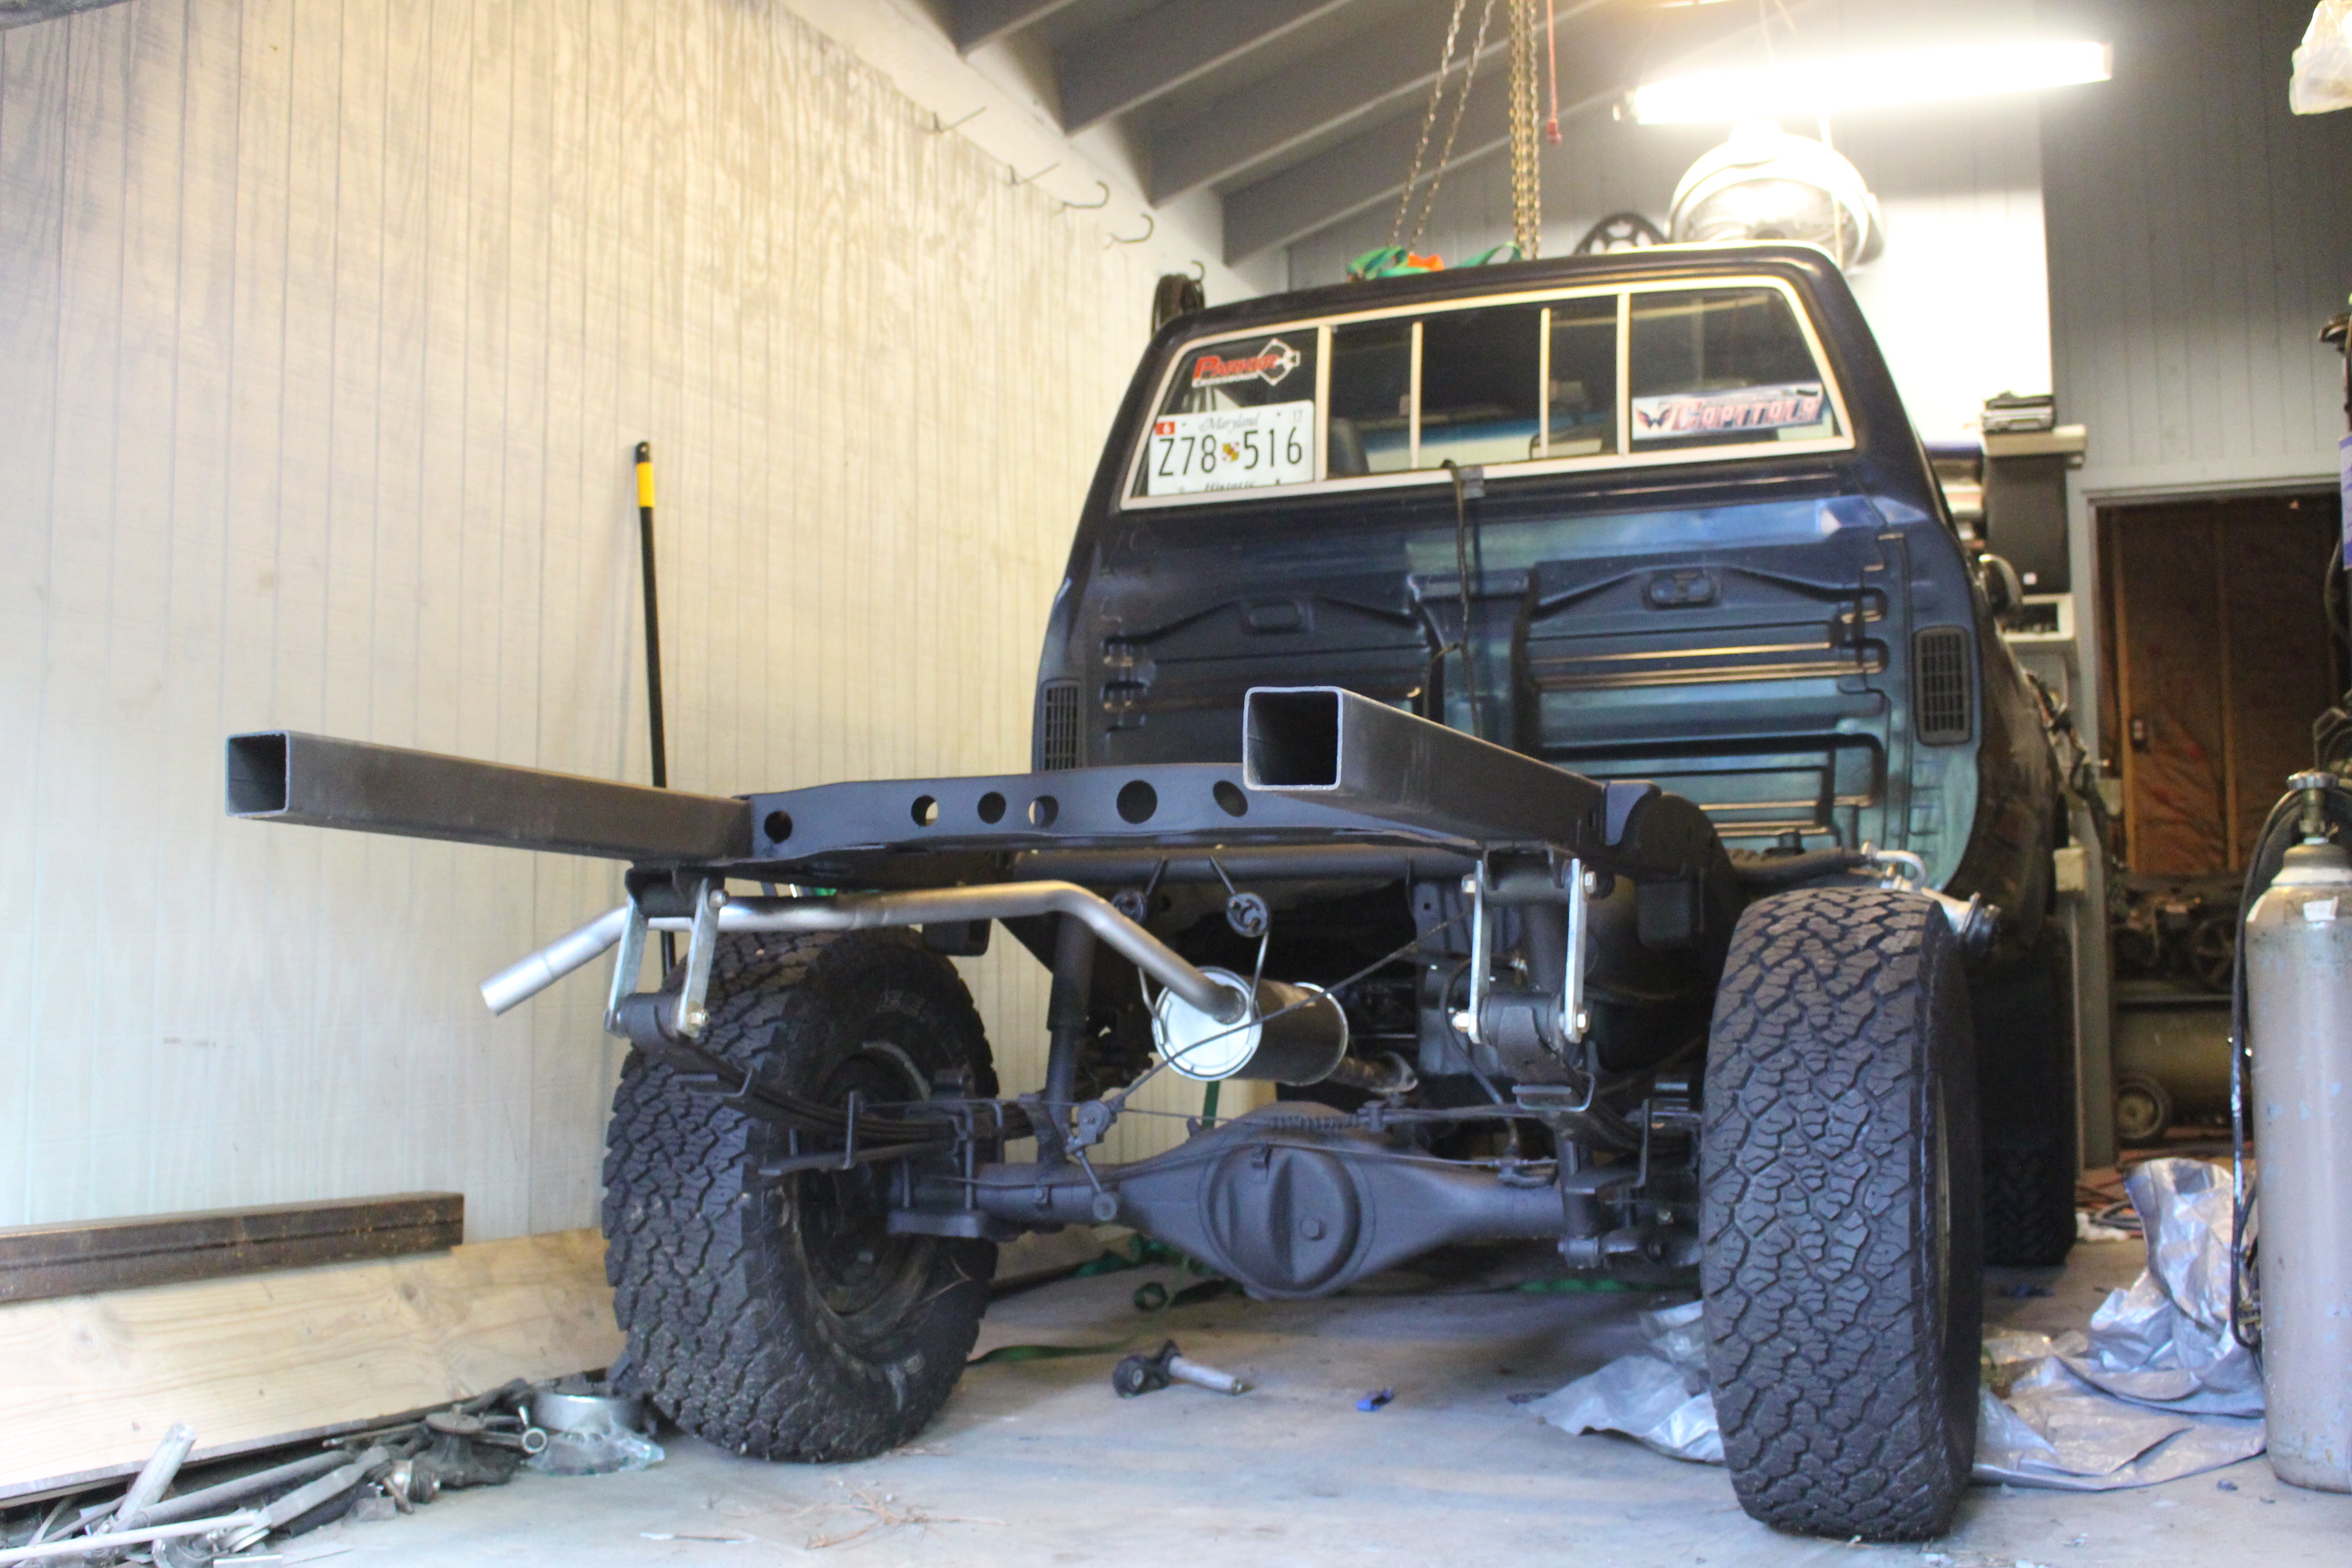
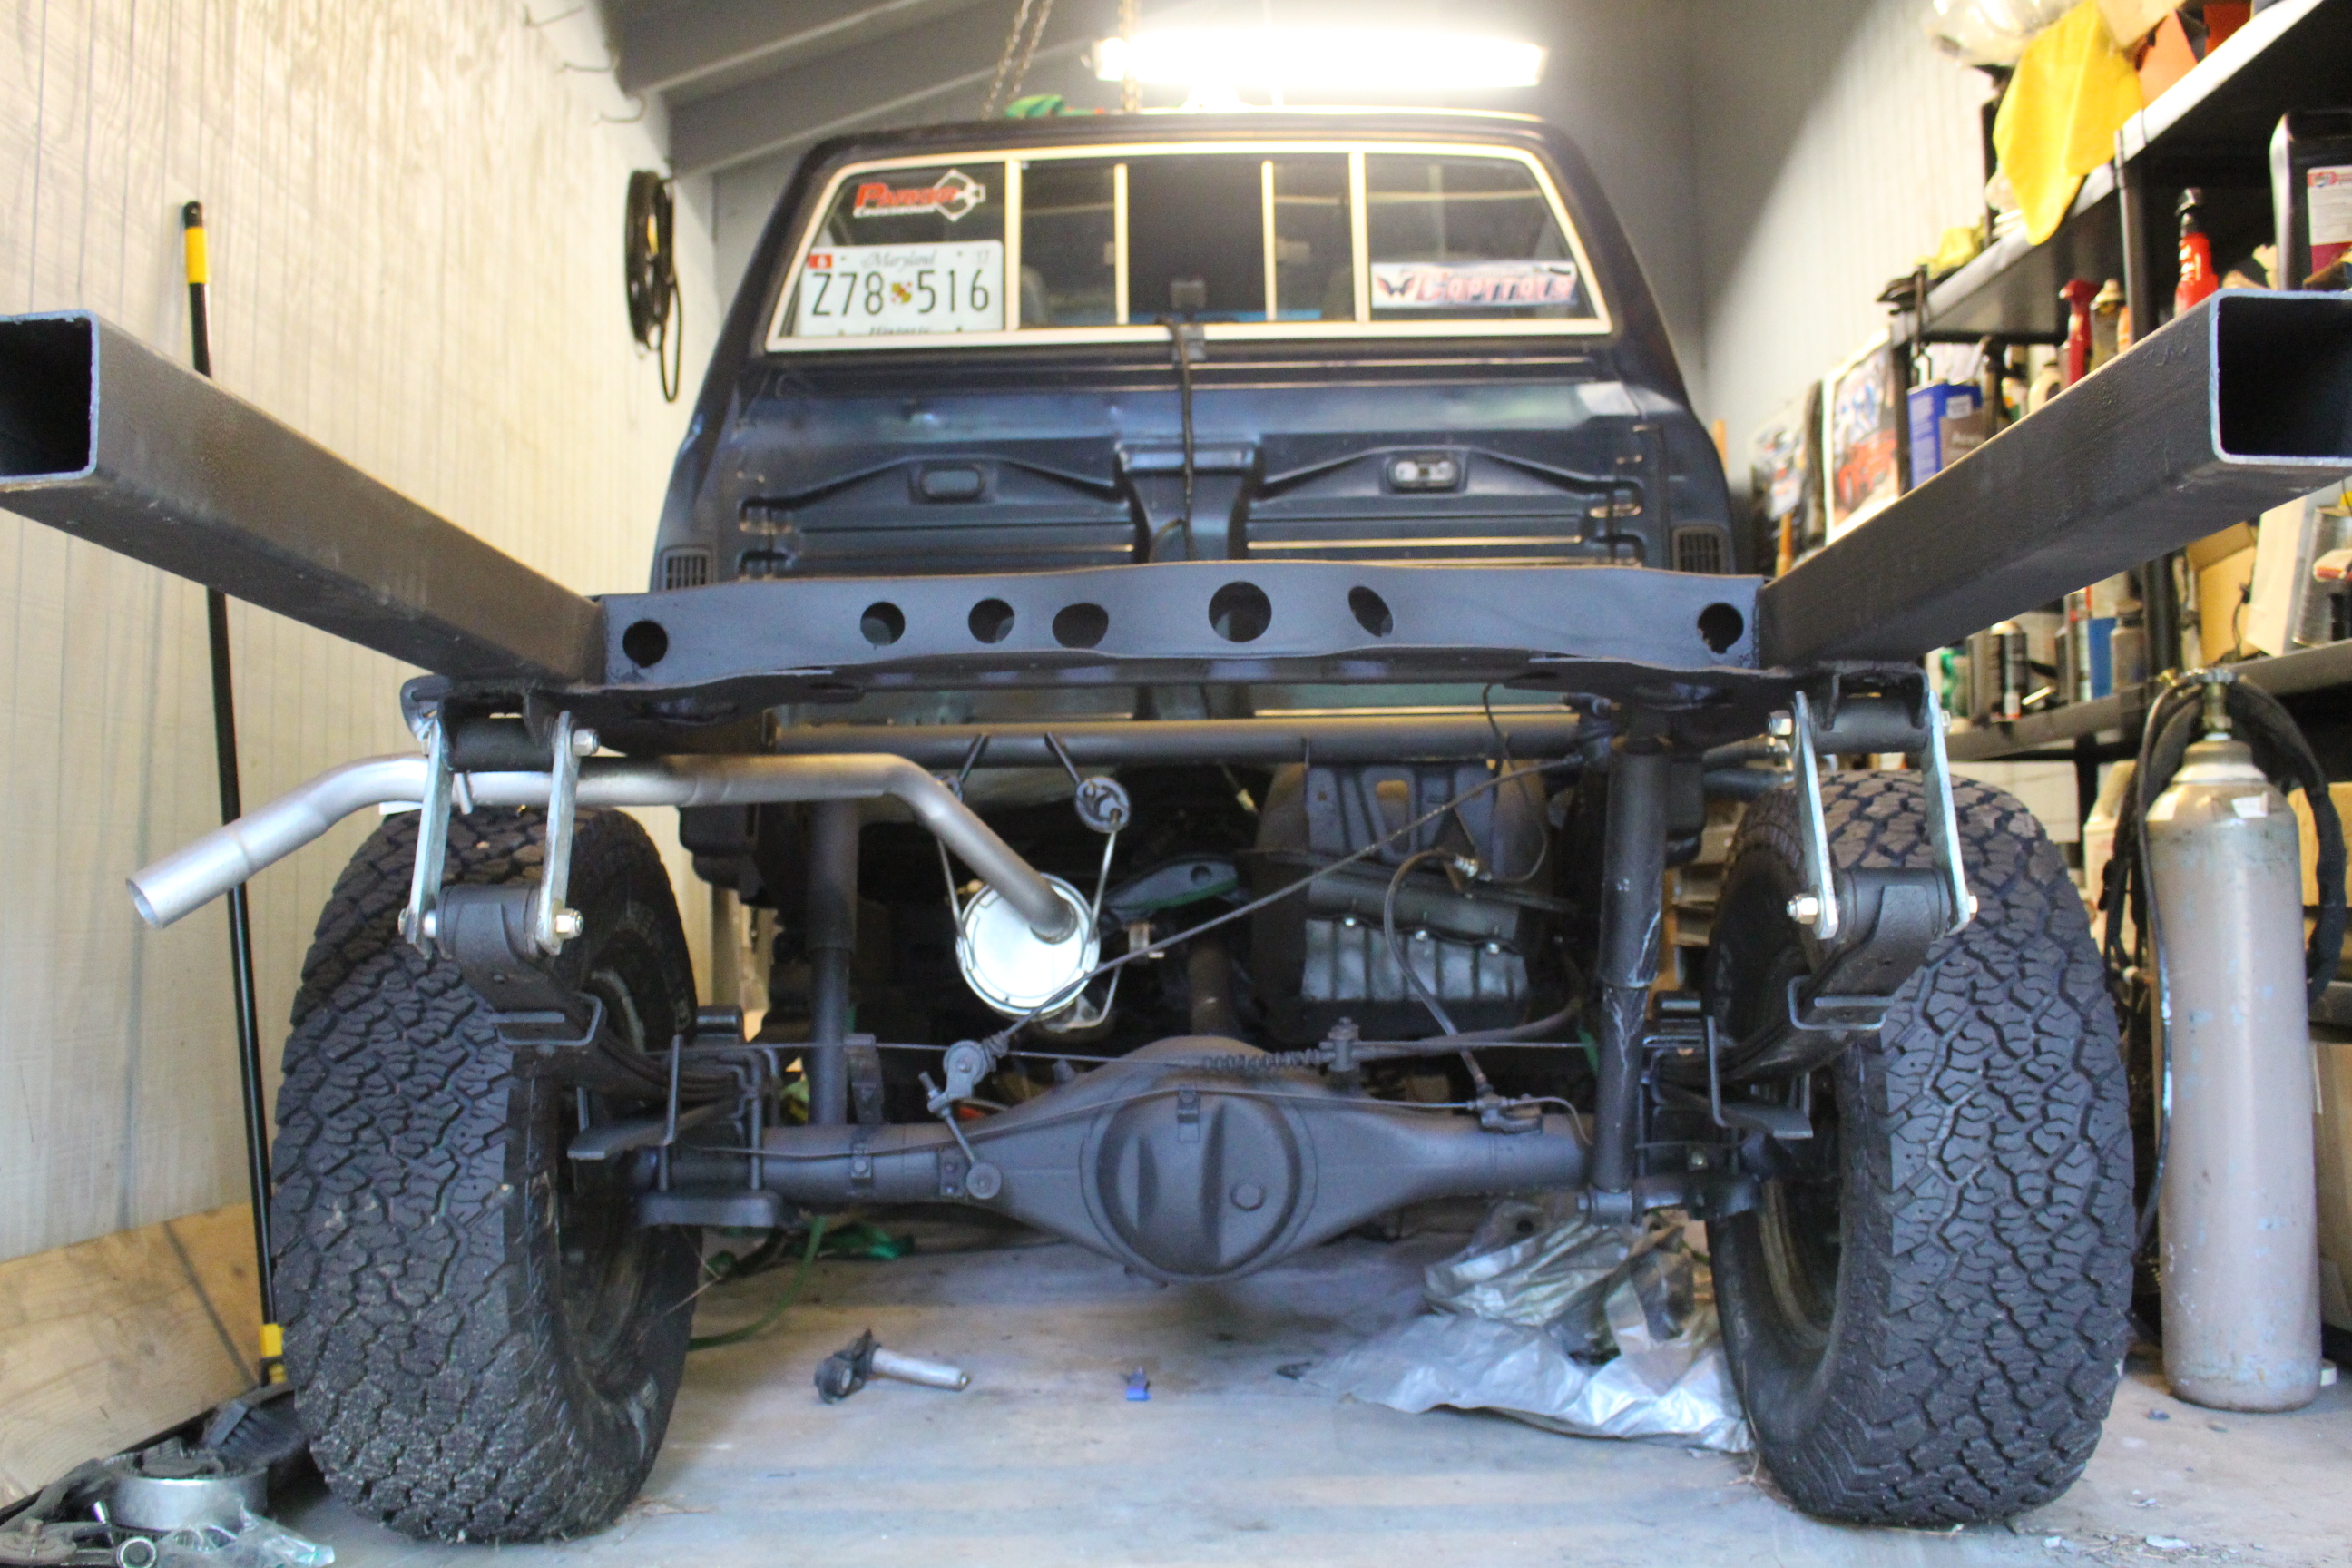
Found some more pictures of the rear frame repair. It was in rough shape before! As you can see I had to sawzall the leaf spring shackles because they were seized in the bushings.

Straightening out the leaf spring mounts.

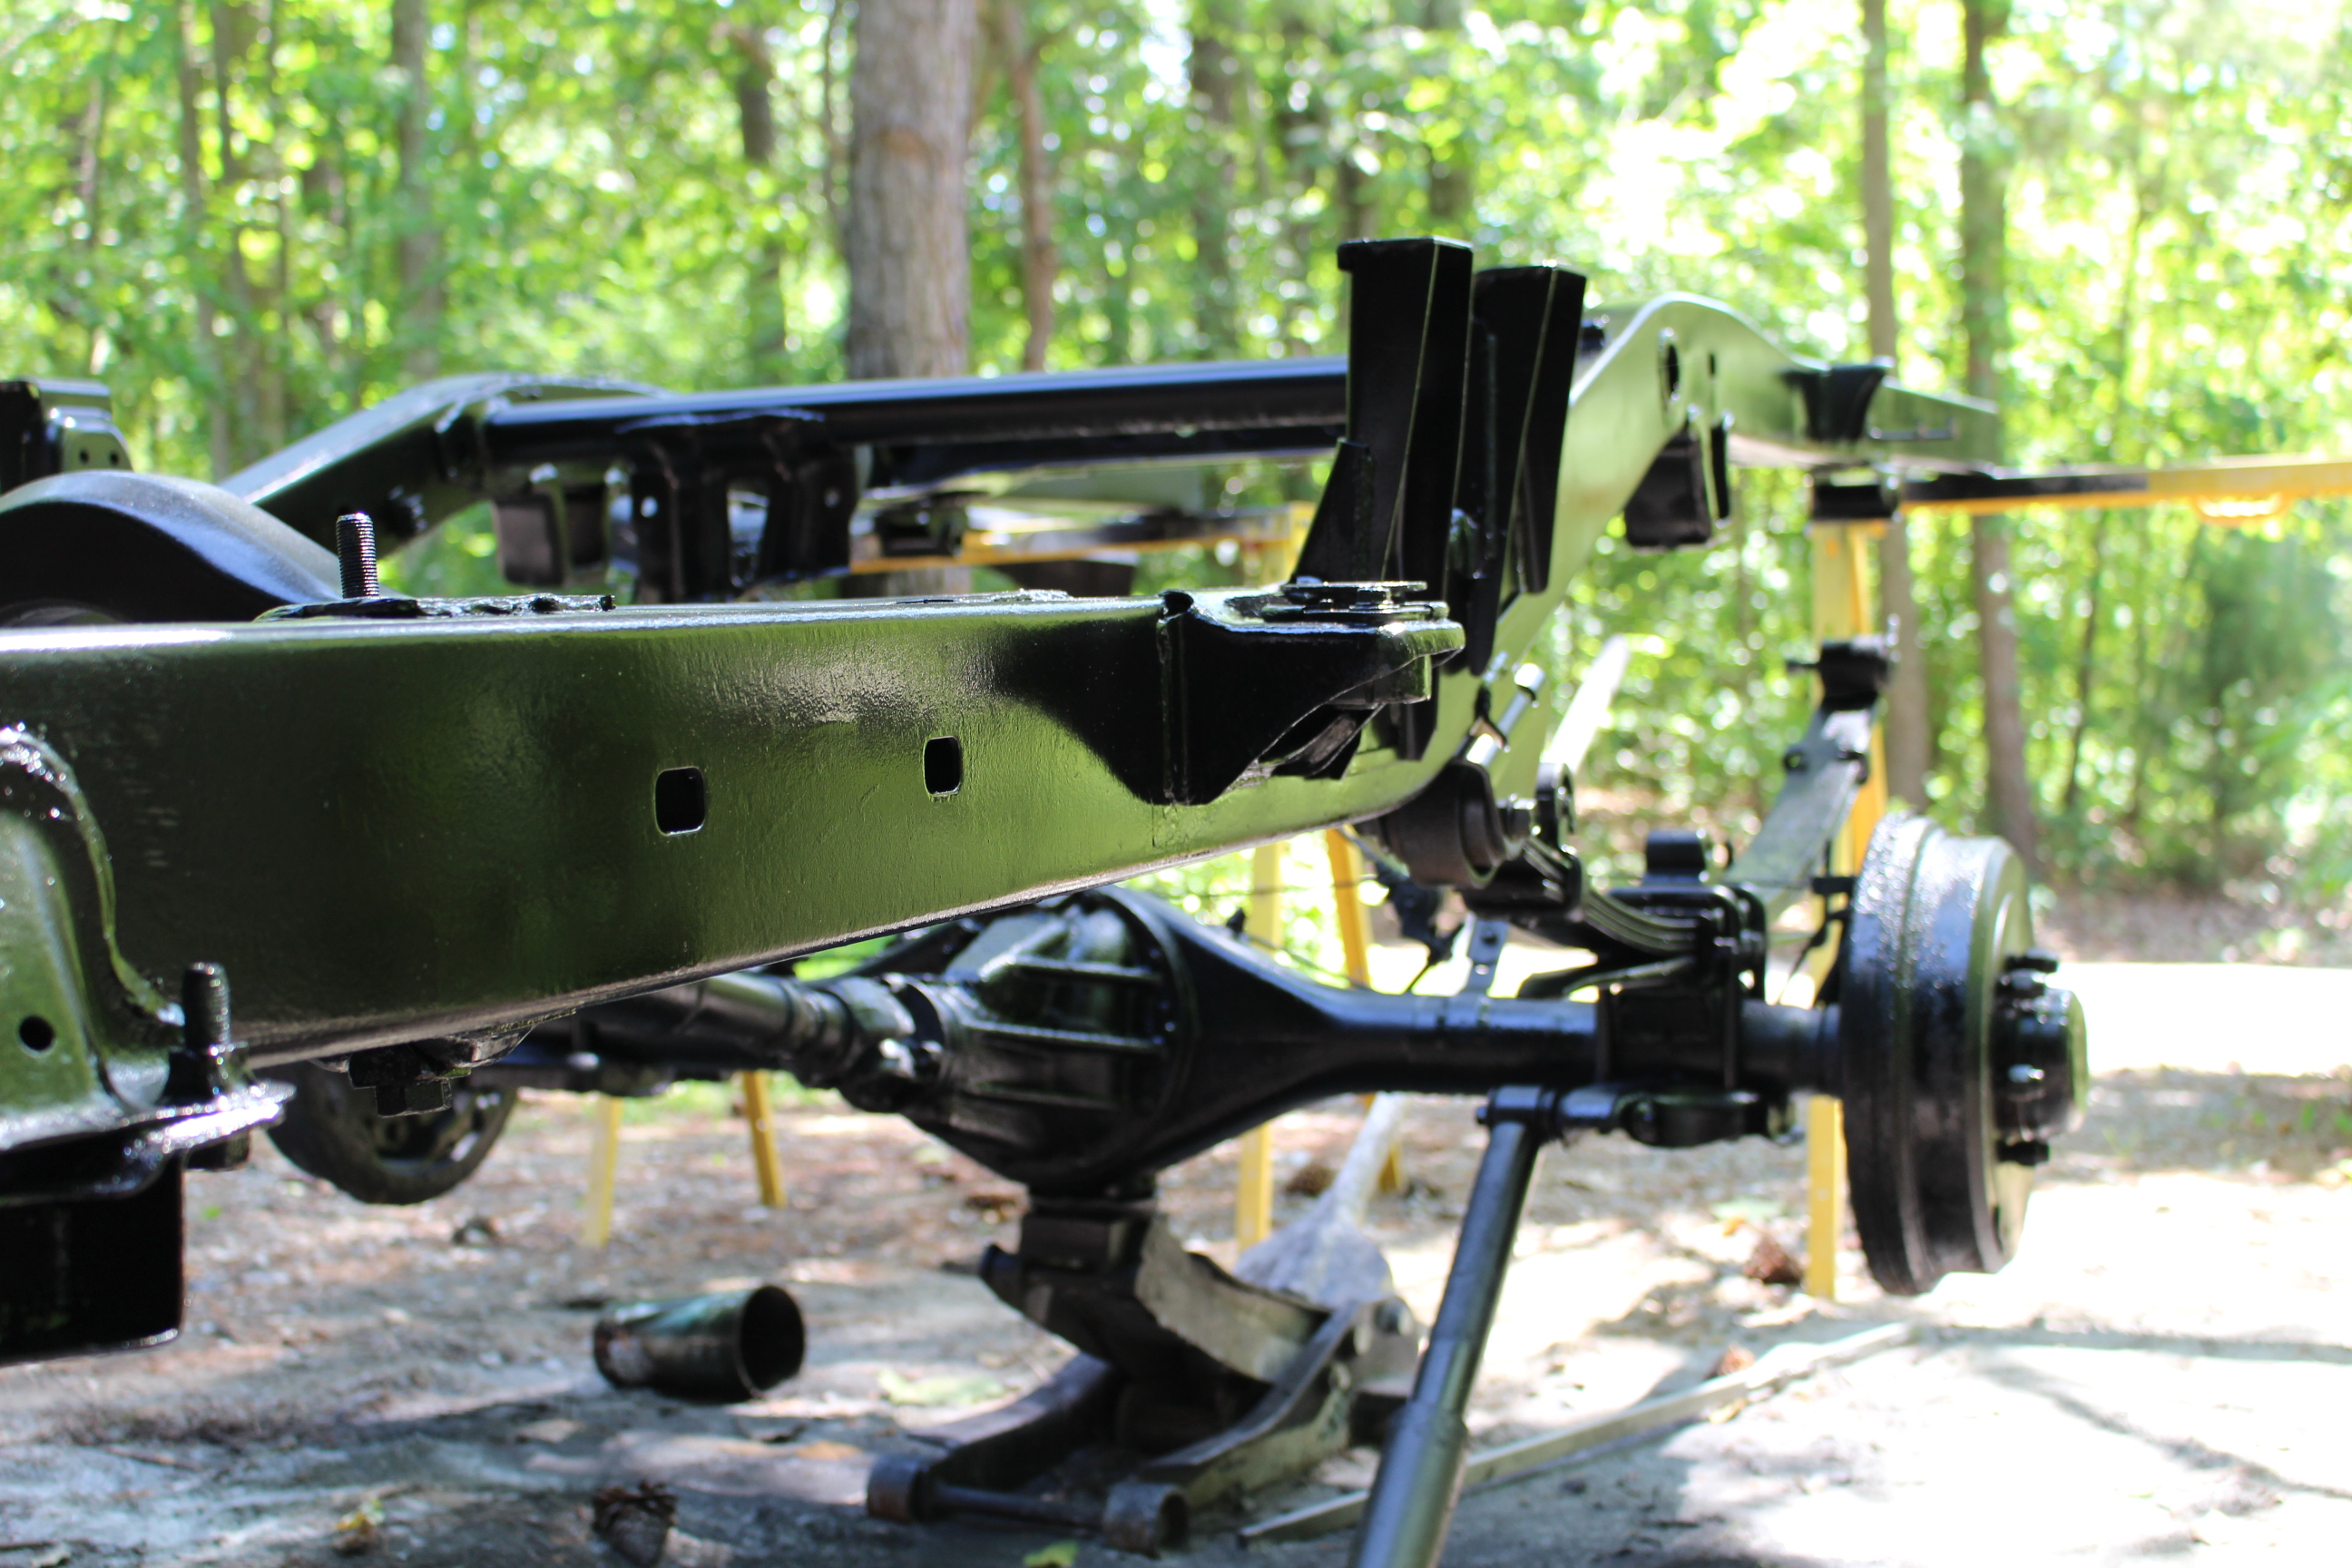
Finally blasted all the way. I didn't blast from the front control arms forward because the frame was quite clean. probably from years of oil coating it. I gave the whole frame a treatment with eastwoods fast etch/ rust converter to take care of anything I may have missed. I sprayed the inside of the frame rails with a rust converter as well.
 09-05-2016, 04:39 PM
#7
Registered User
Thread Starter
Join Date: Sep 2016
Posts: 17
Likes: 0
Received 0 Likes
on
0 Posts
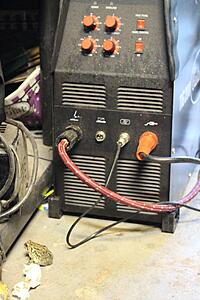
This was a good day. My first time spraying the frame. I used Eastwood's 2 part epoxy primer, and then topped it off with their 2k Ceramic Chassis black paint. It looked fantastic. I really should be sponsored by them by now (Eastwood Call me!)
Primer First.
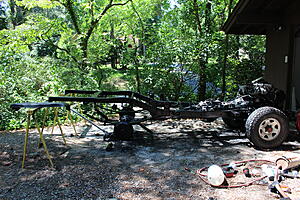
The chassis black laid out nice with a little thinning. It looked perfect. I REALLY wanted to leave it exactly like this...

But I decided longevity outweighed looks, so the entire frame got a healthy coating of rubberized undercoating on top of all that pretty chassis black paint. It nearly broke my heart to do it, but I know its the right thing to do.
Primer First.

The chassis black laid out nice with a little thinning. It looked perfect. I REALLY wanted to leave it exactly like this...


But I decided longevity outweighed looks, so the entire frame got a healthy coating of rubberized undercoating on top of all that pretty chassis black paint. It nearly broke my heart to do it, but I know its the right thing to do.
Trending Topics
09-05-2016, 04:39 PM
#8
Registered User
Thread Starter
Join Date: Sep 2016
Posts: 17
Likes: 0
Received 0 Likes
on
0 Posts
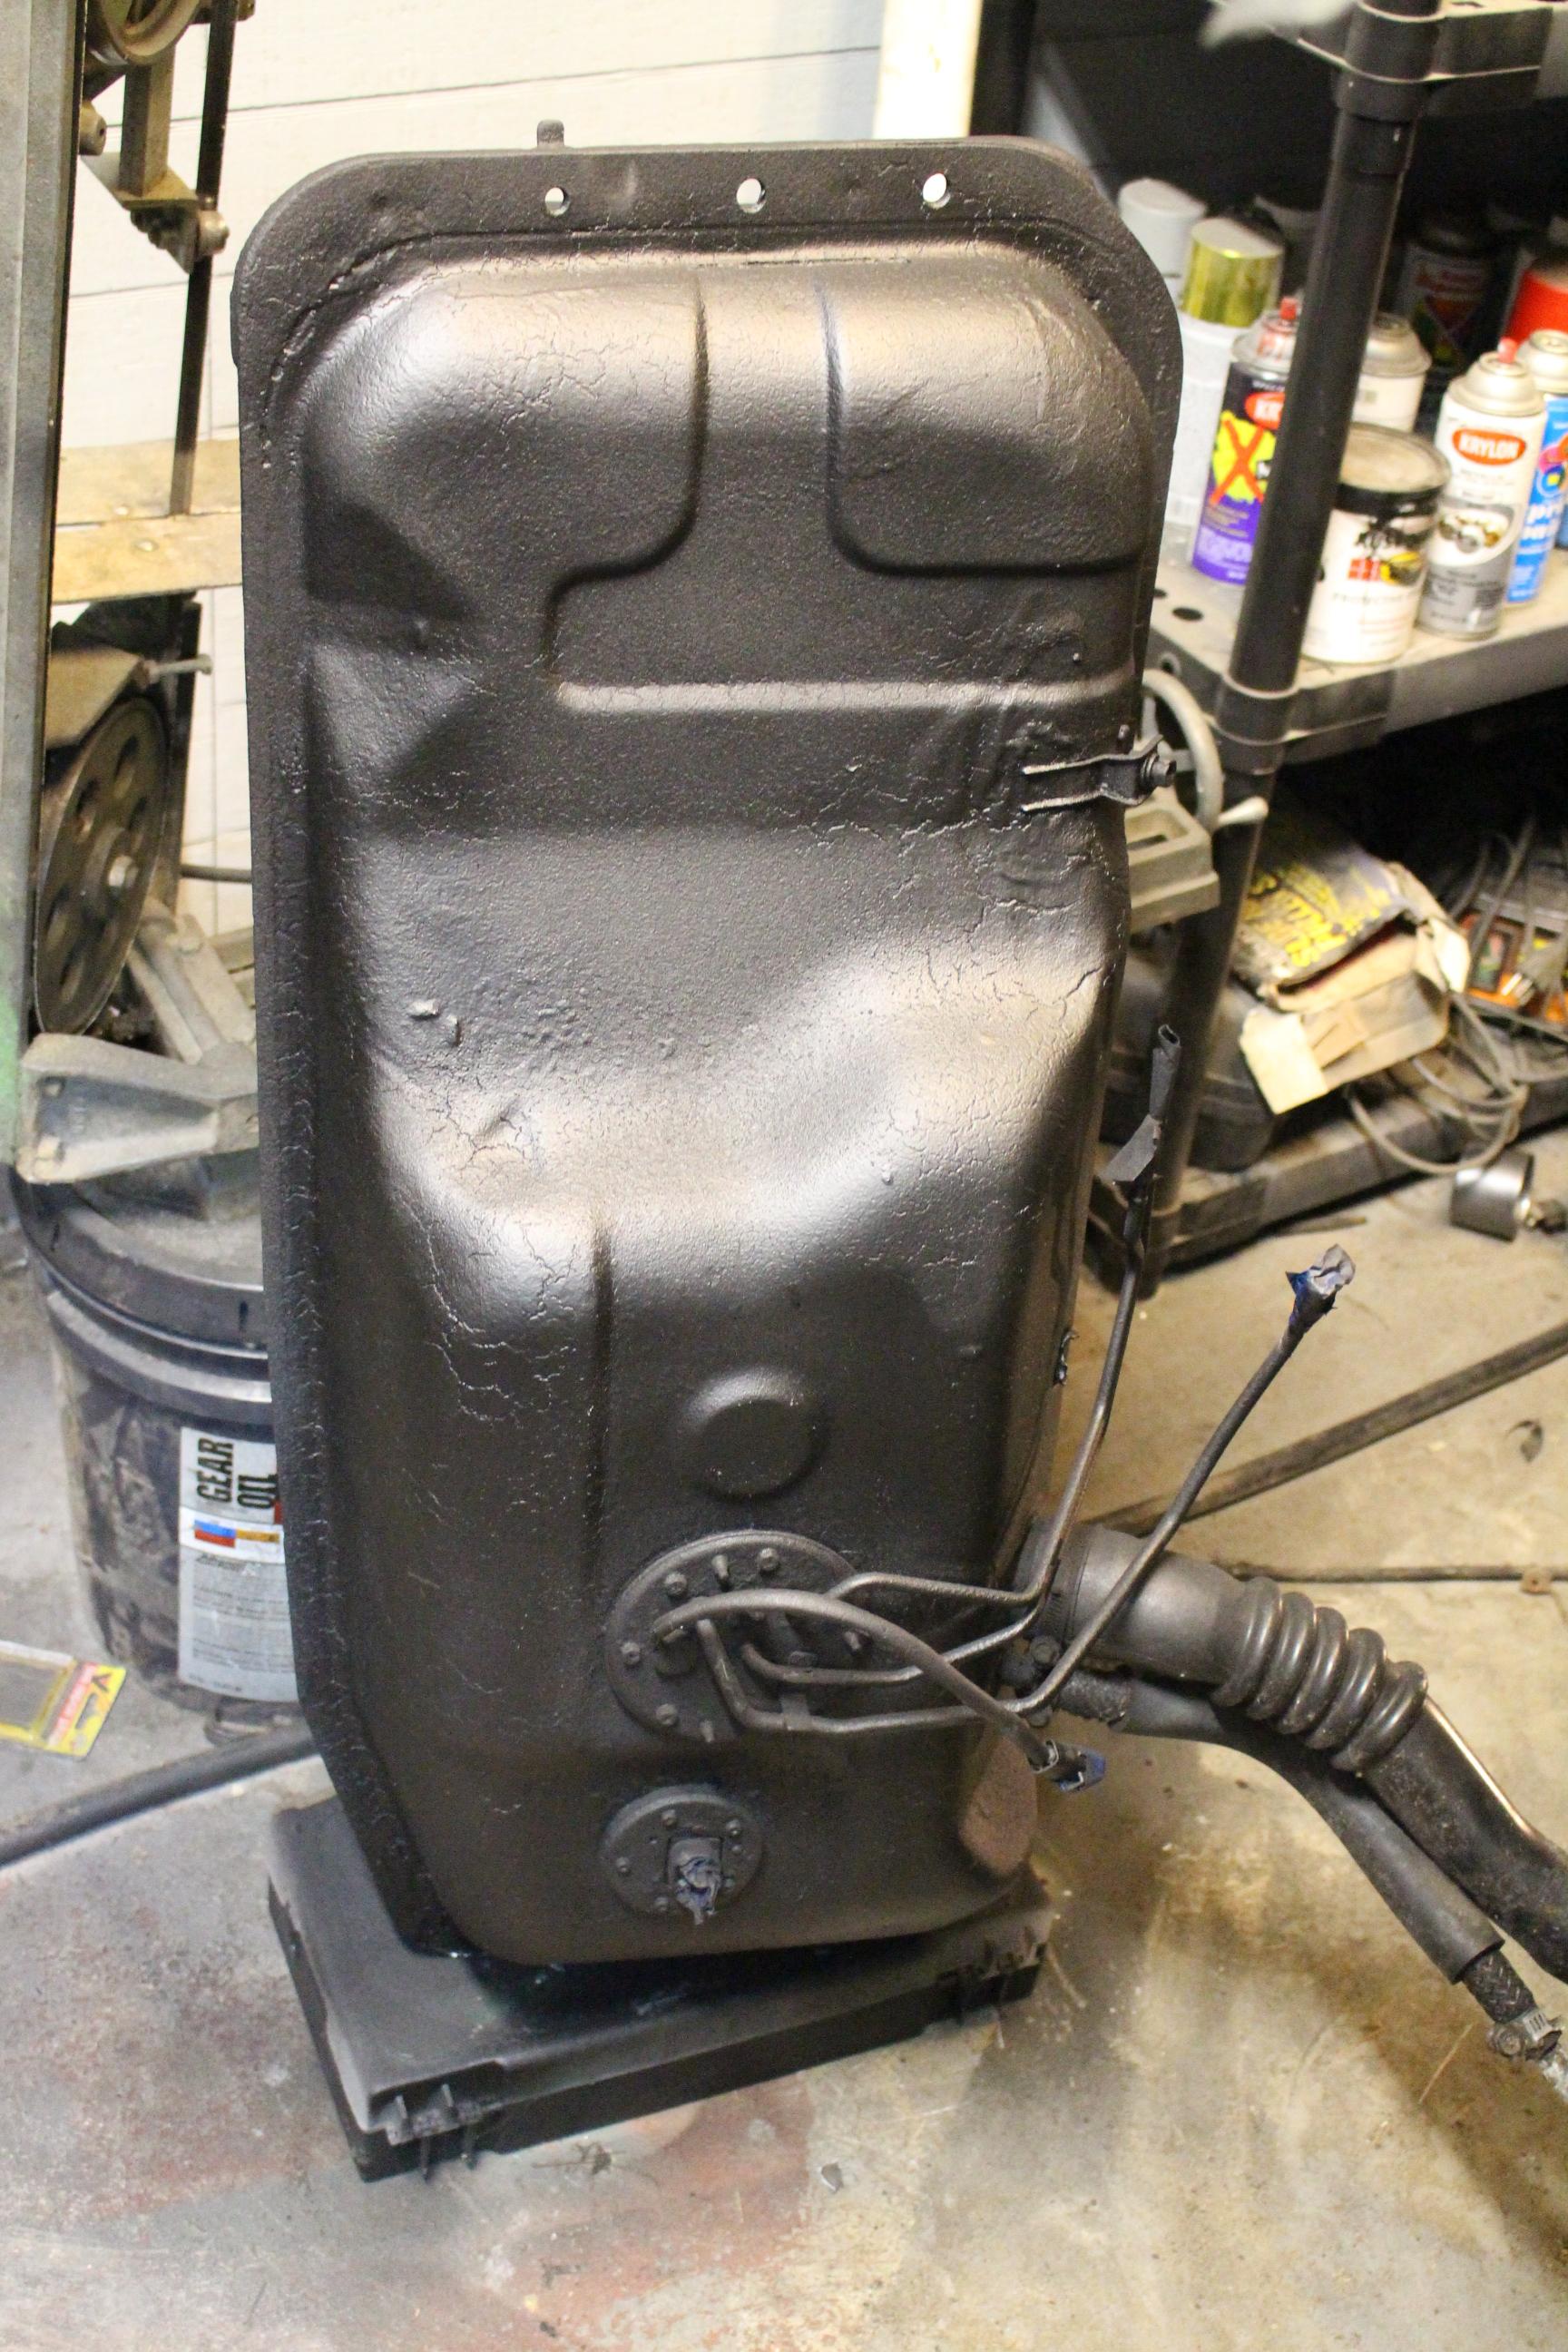
Cleaned up the gas tank. This was wire wheeled as well as I was kinda nervous about sand blasting a tank with gas in it, and didn't feel like draining it/filling it with water/ cleaning it out. I did that with the tank on my motorcycle and it was a pain in the ass, so I doubt I would want to do it with a tank this size. However I may down the road replace this entirely with a new tank and sending unit, but for now it was wire wheeled, rust converted with acid, and then primed, painted and rubber undercoated.

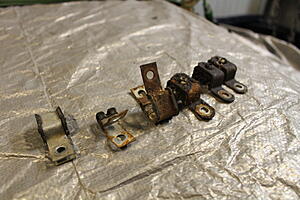
Gas tank bracket

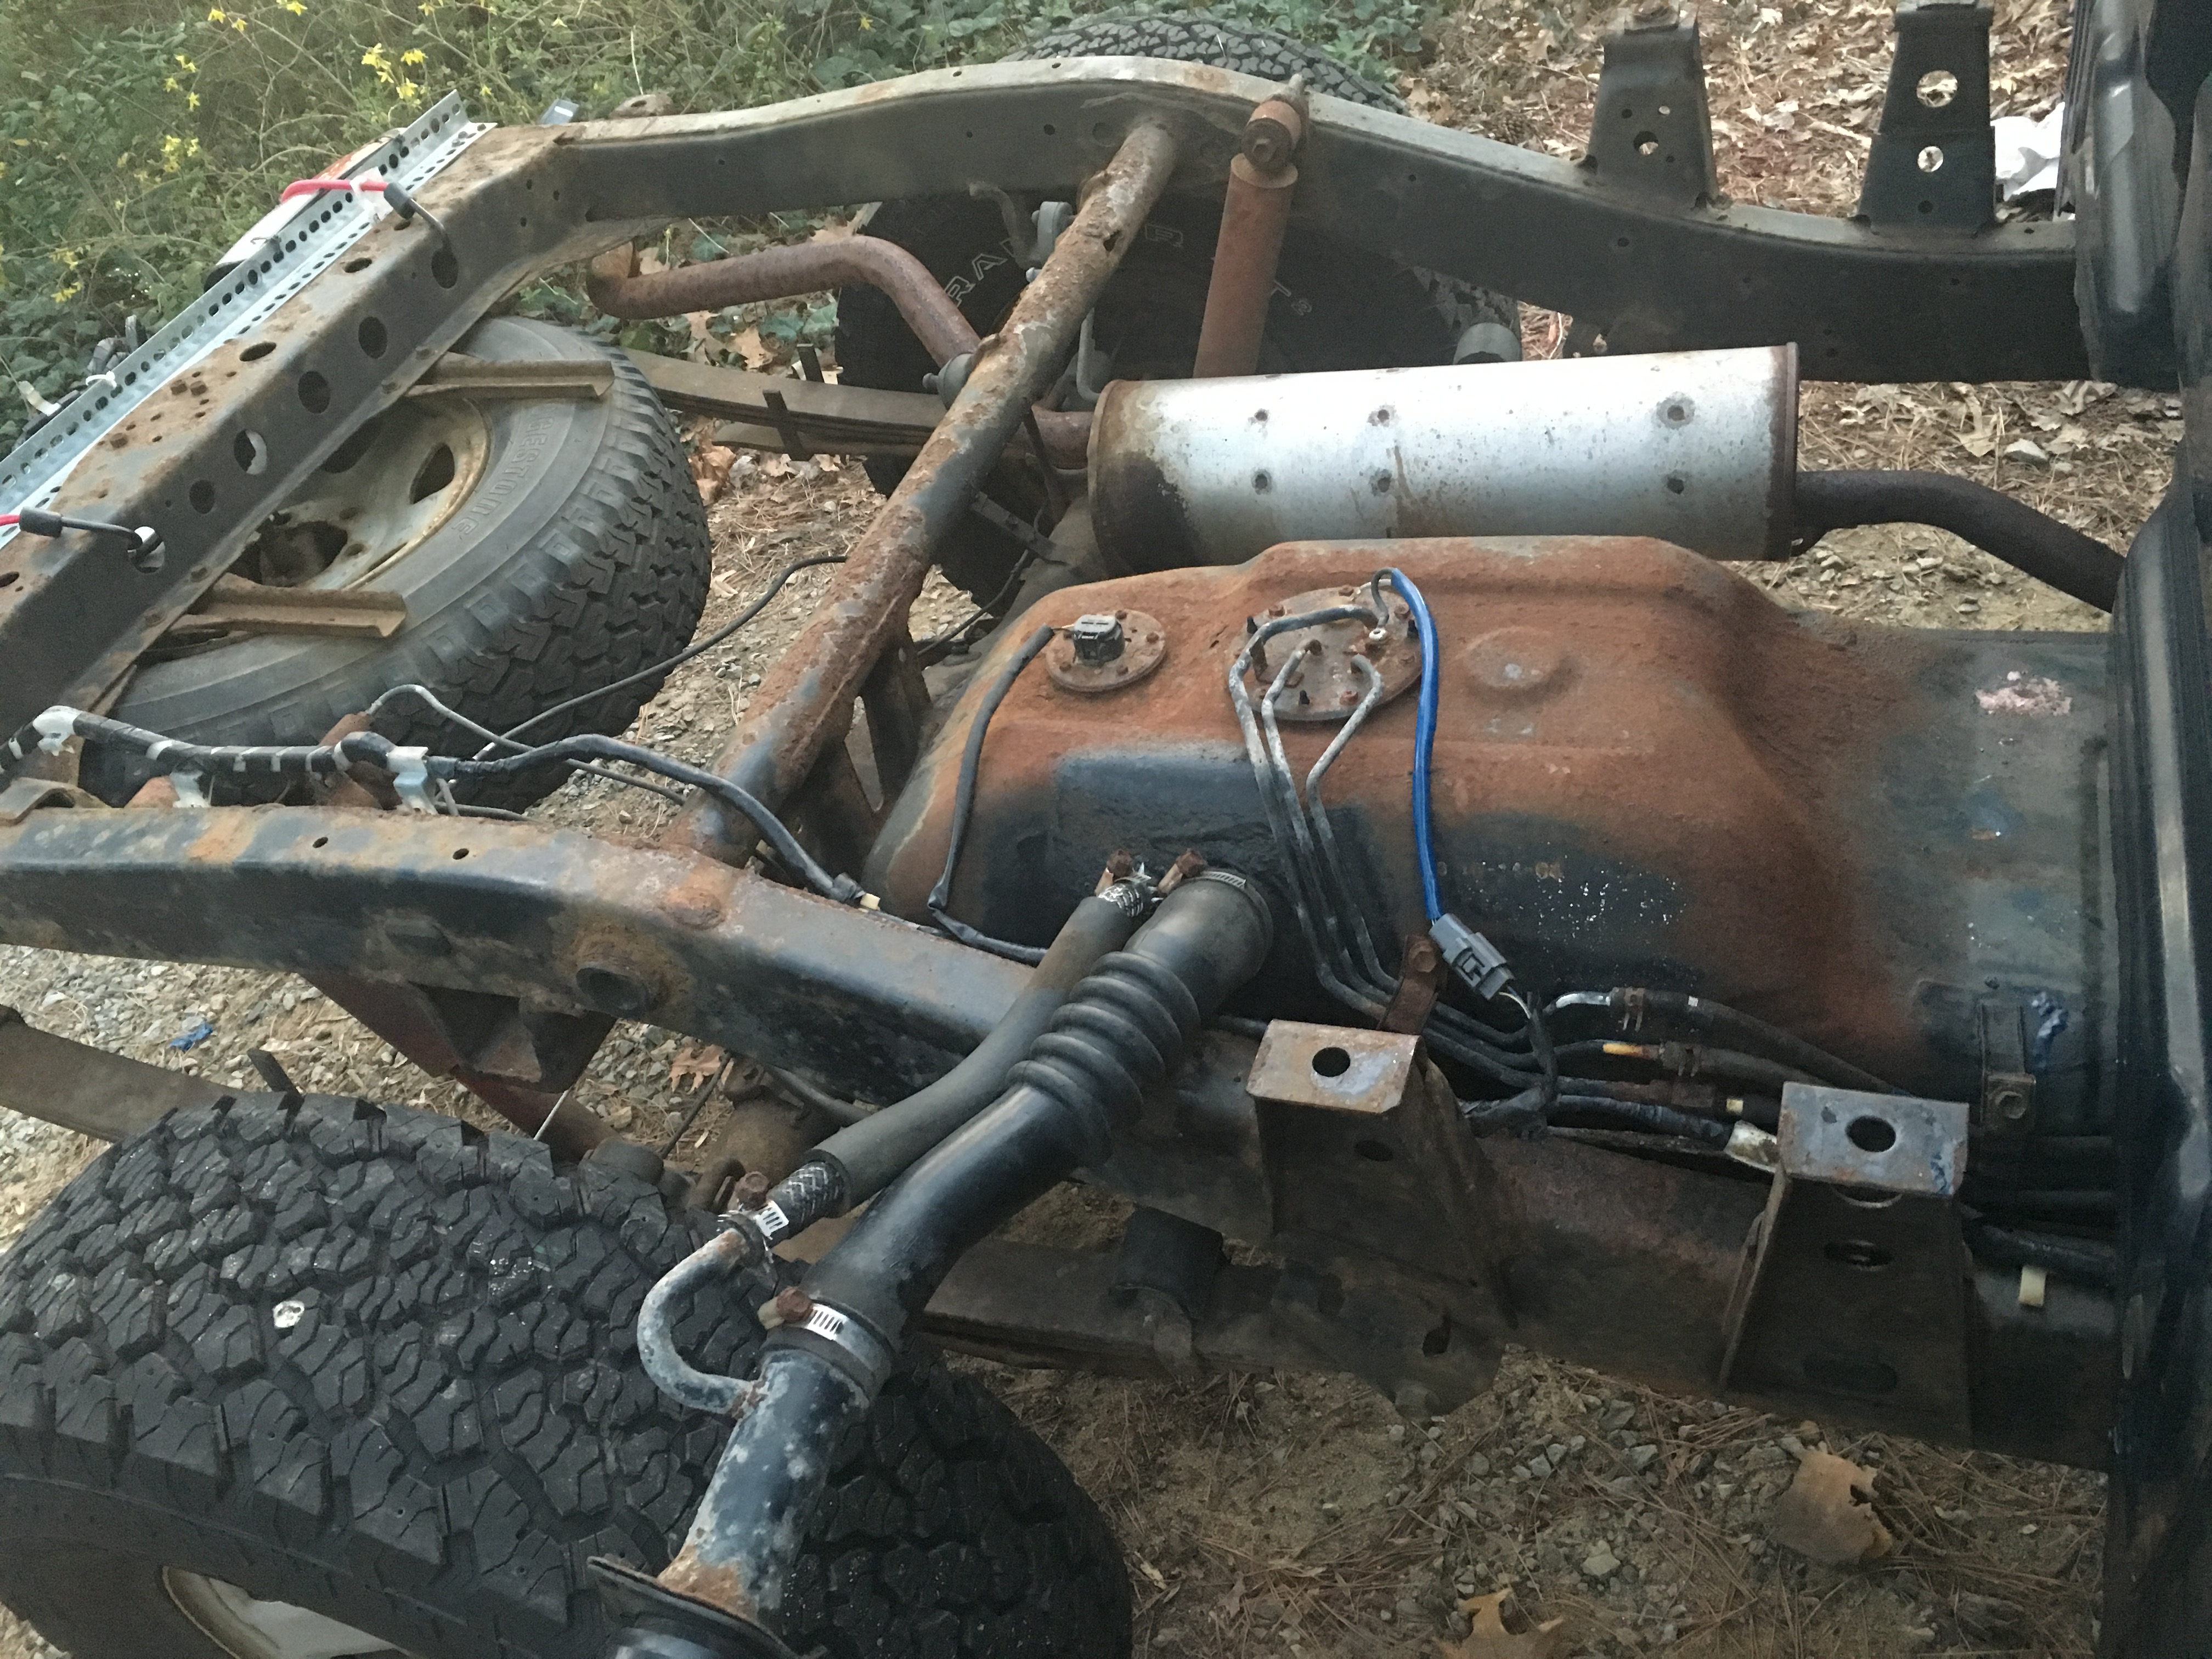
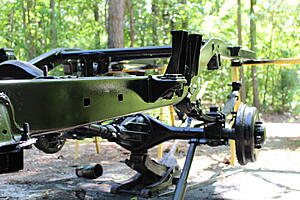
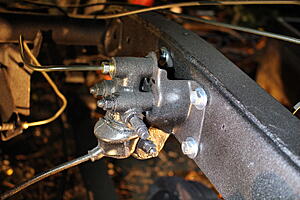
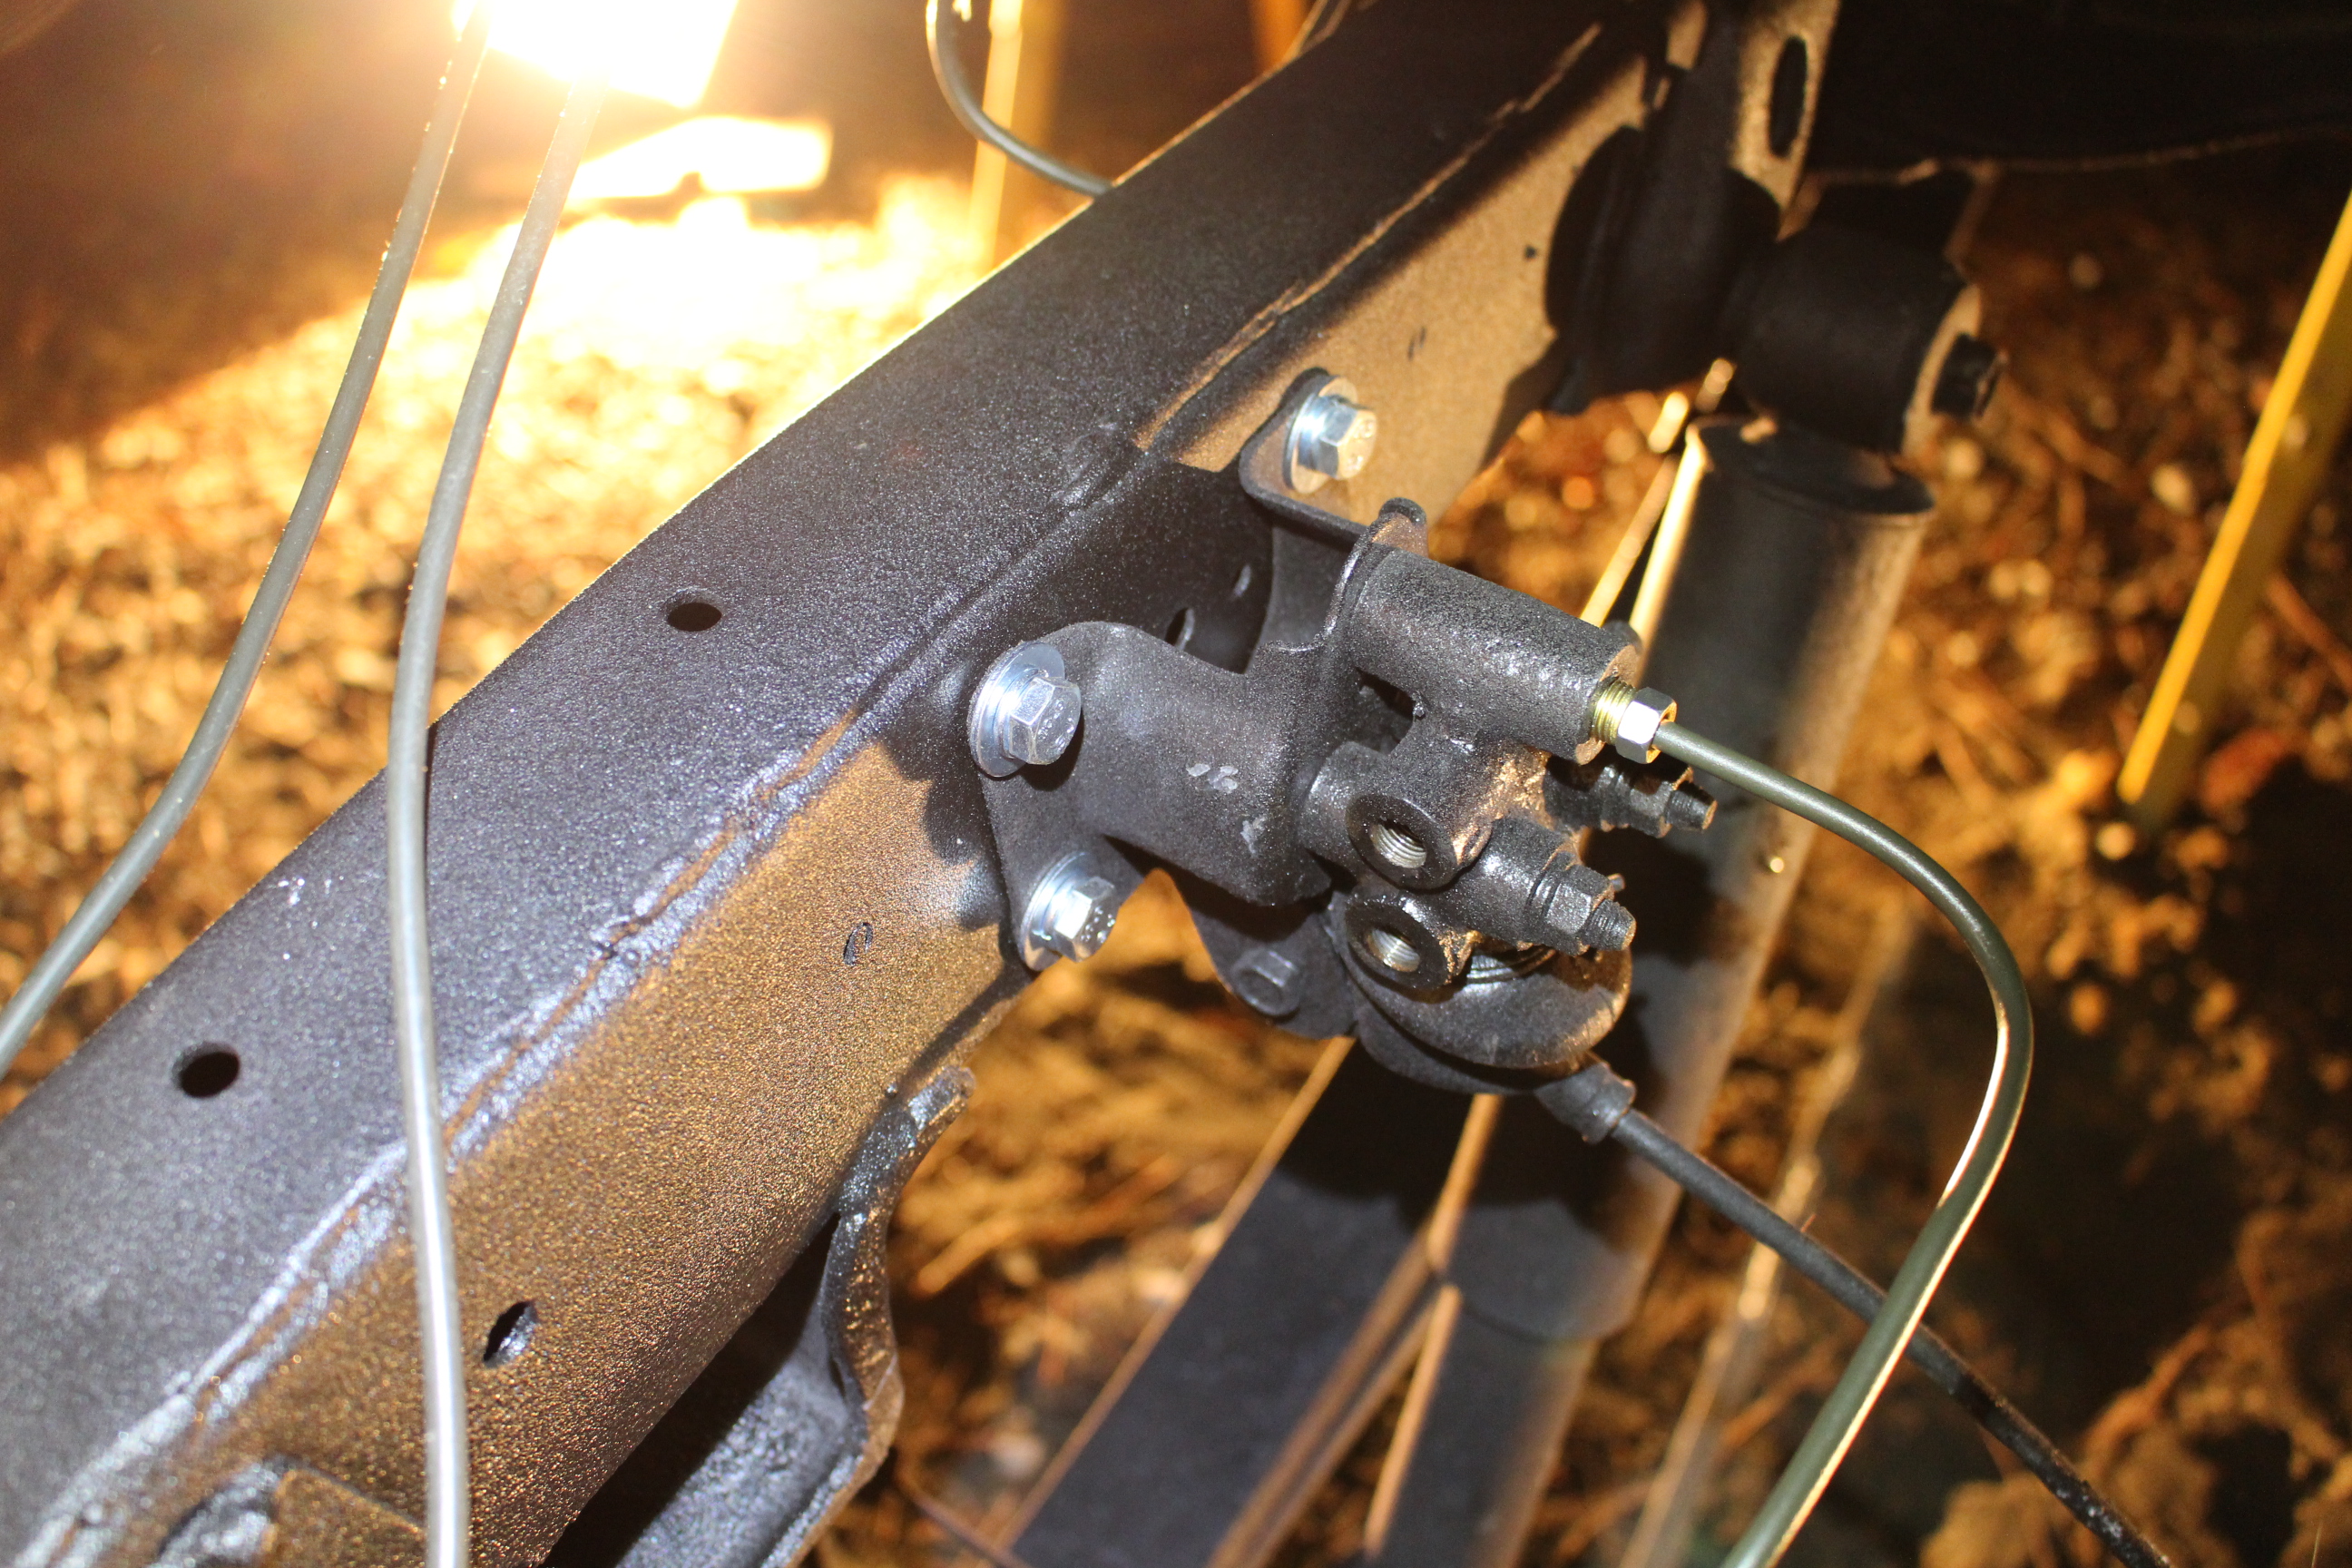
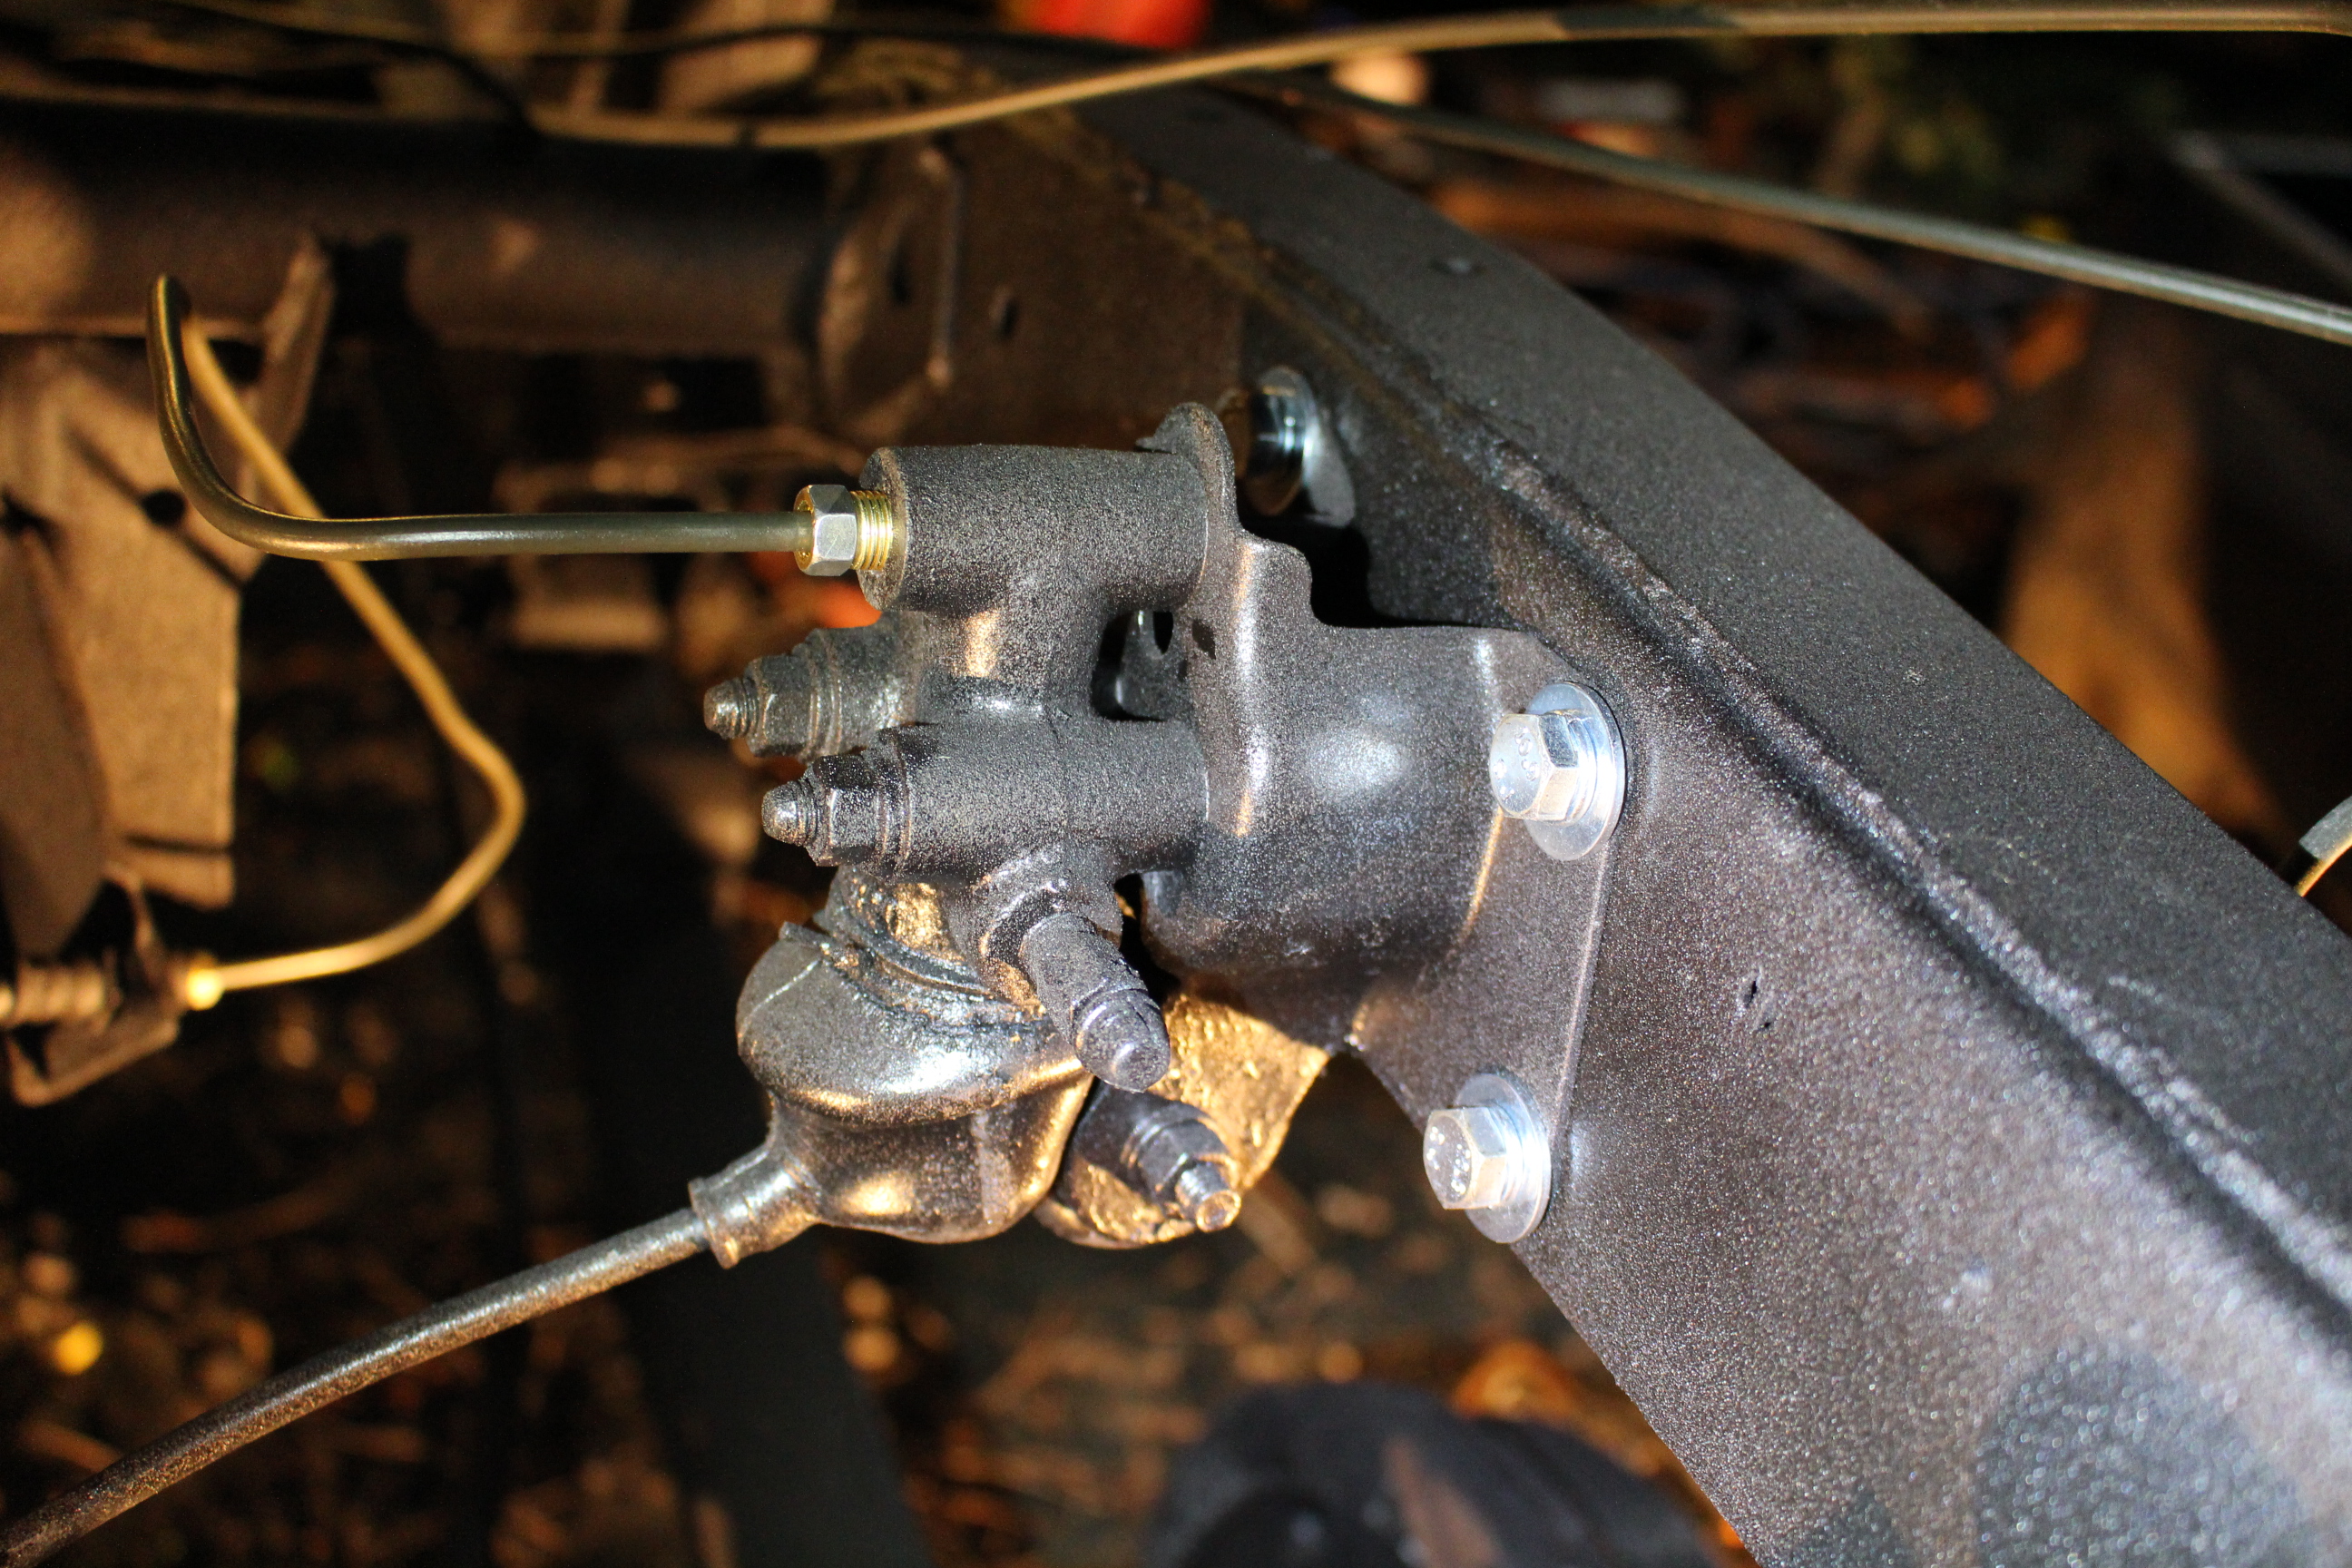
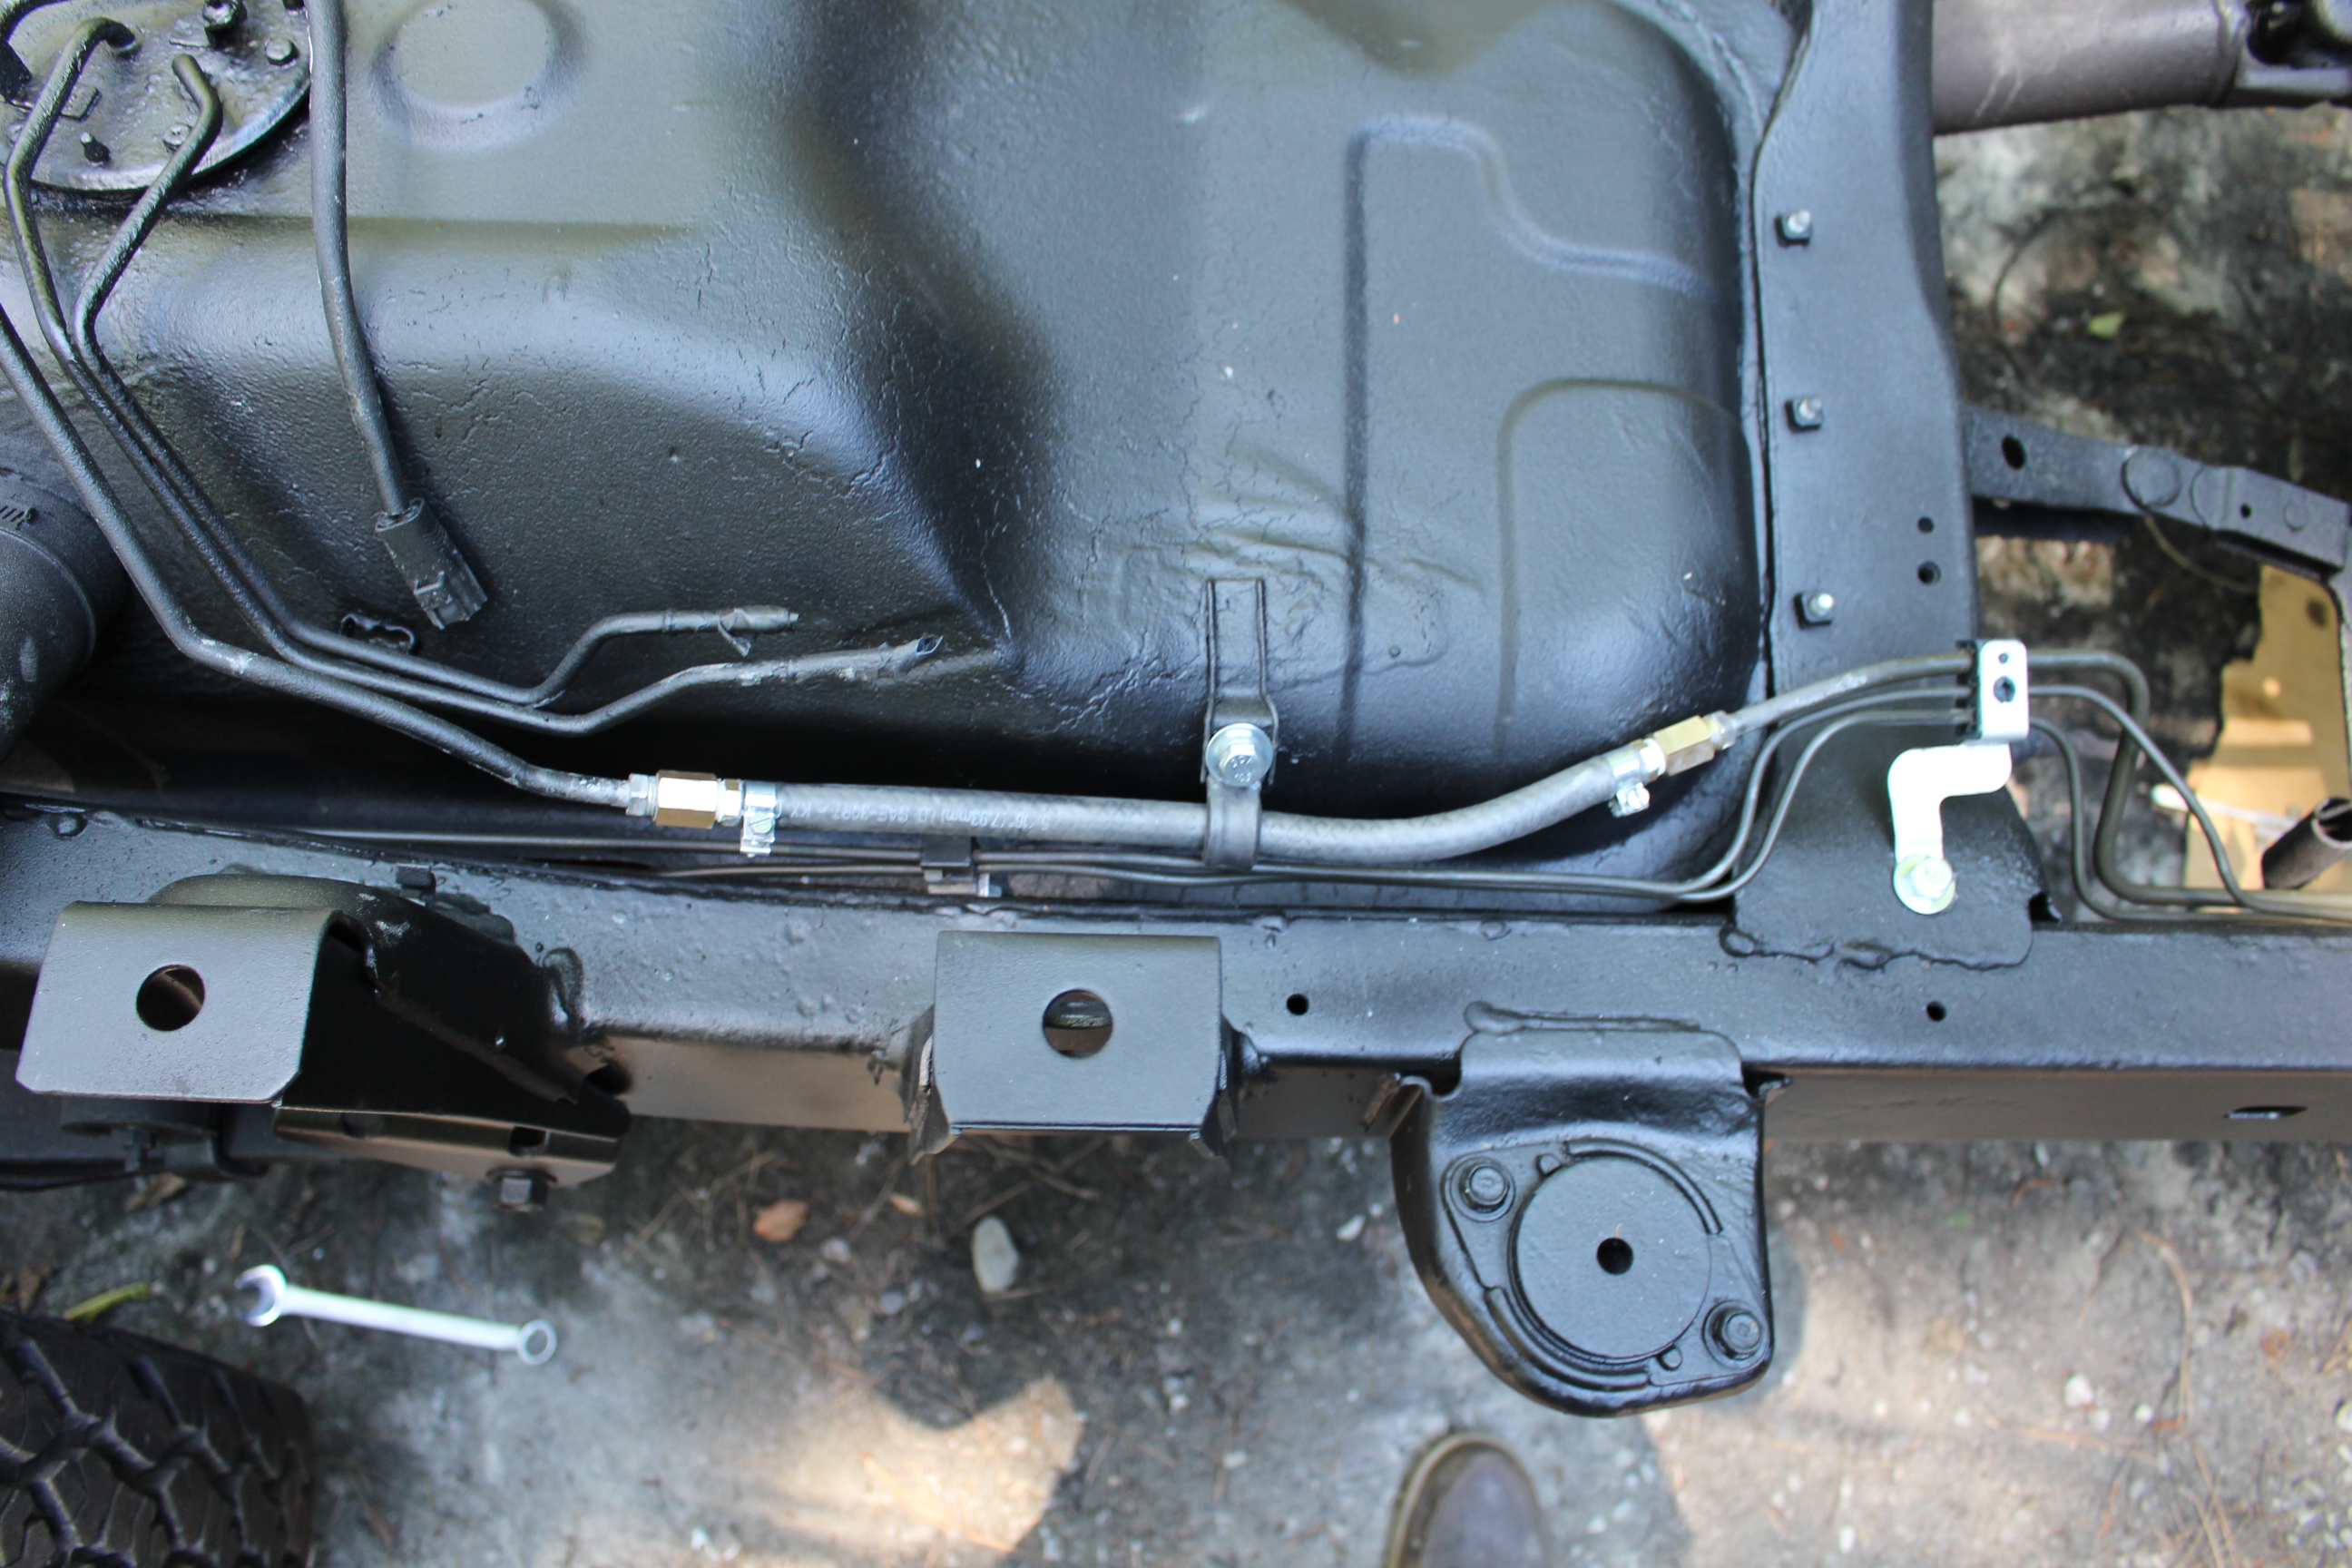
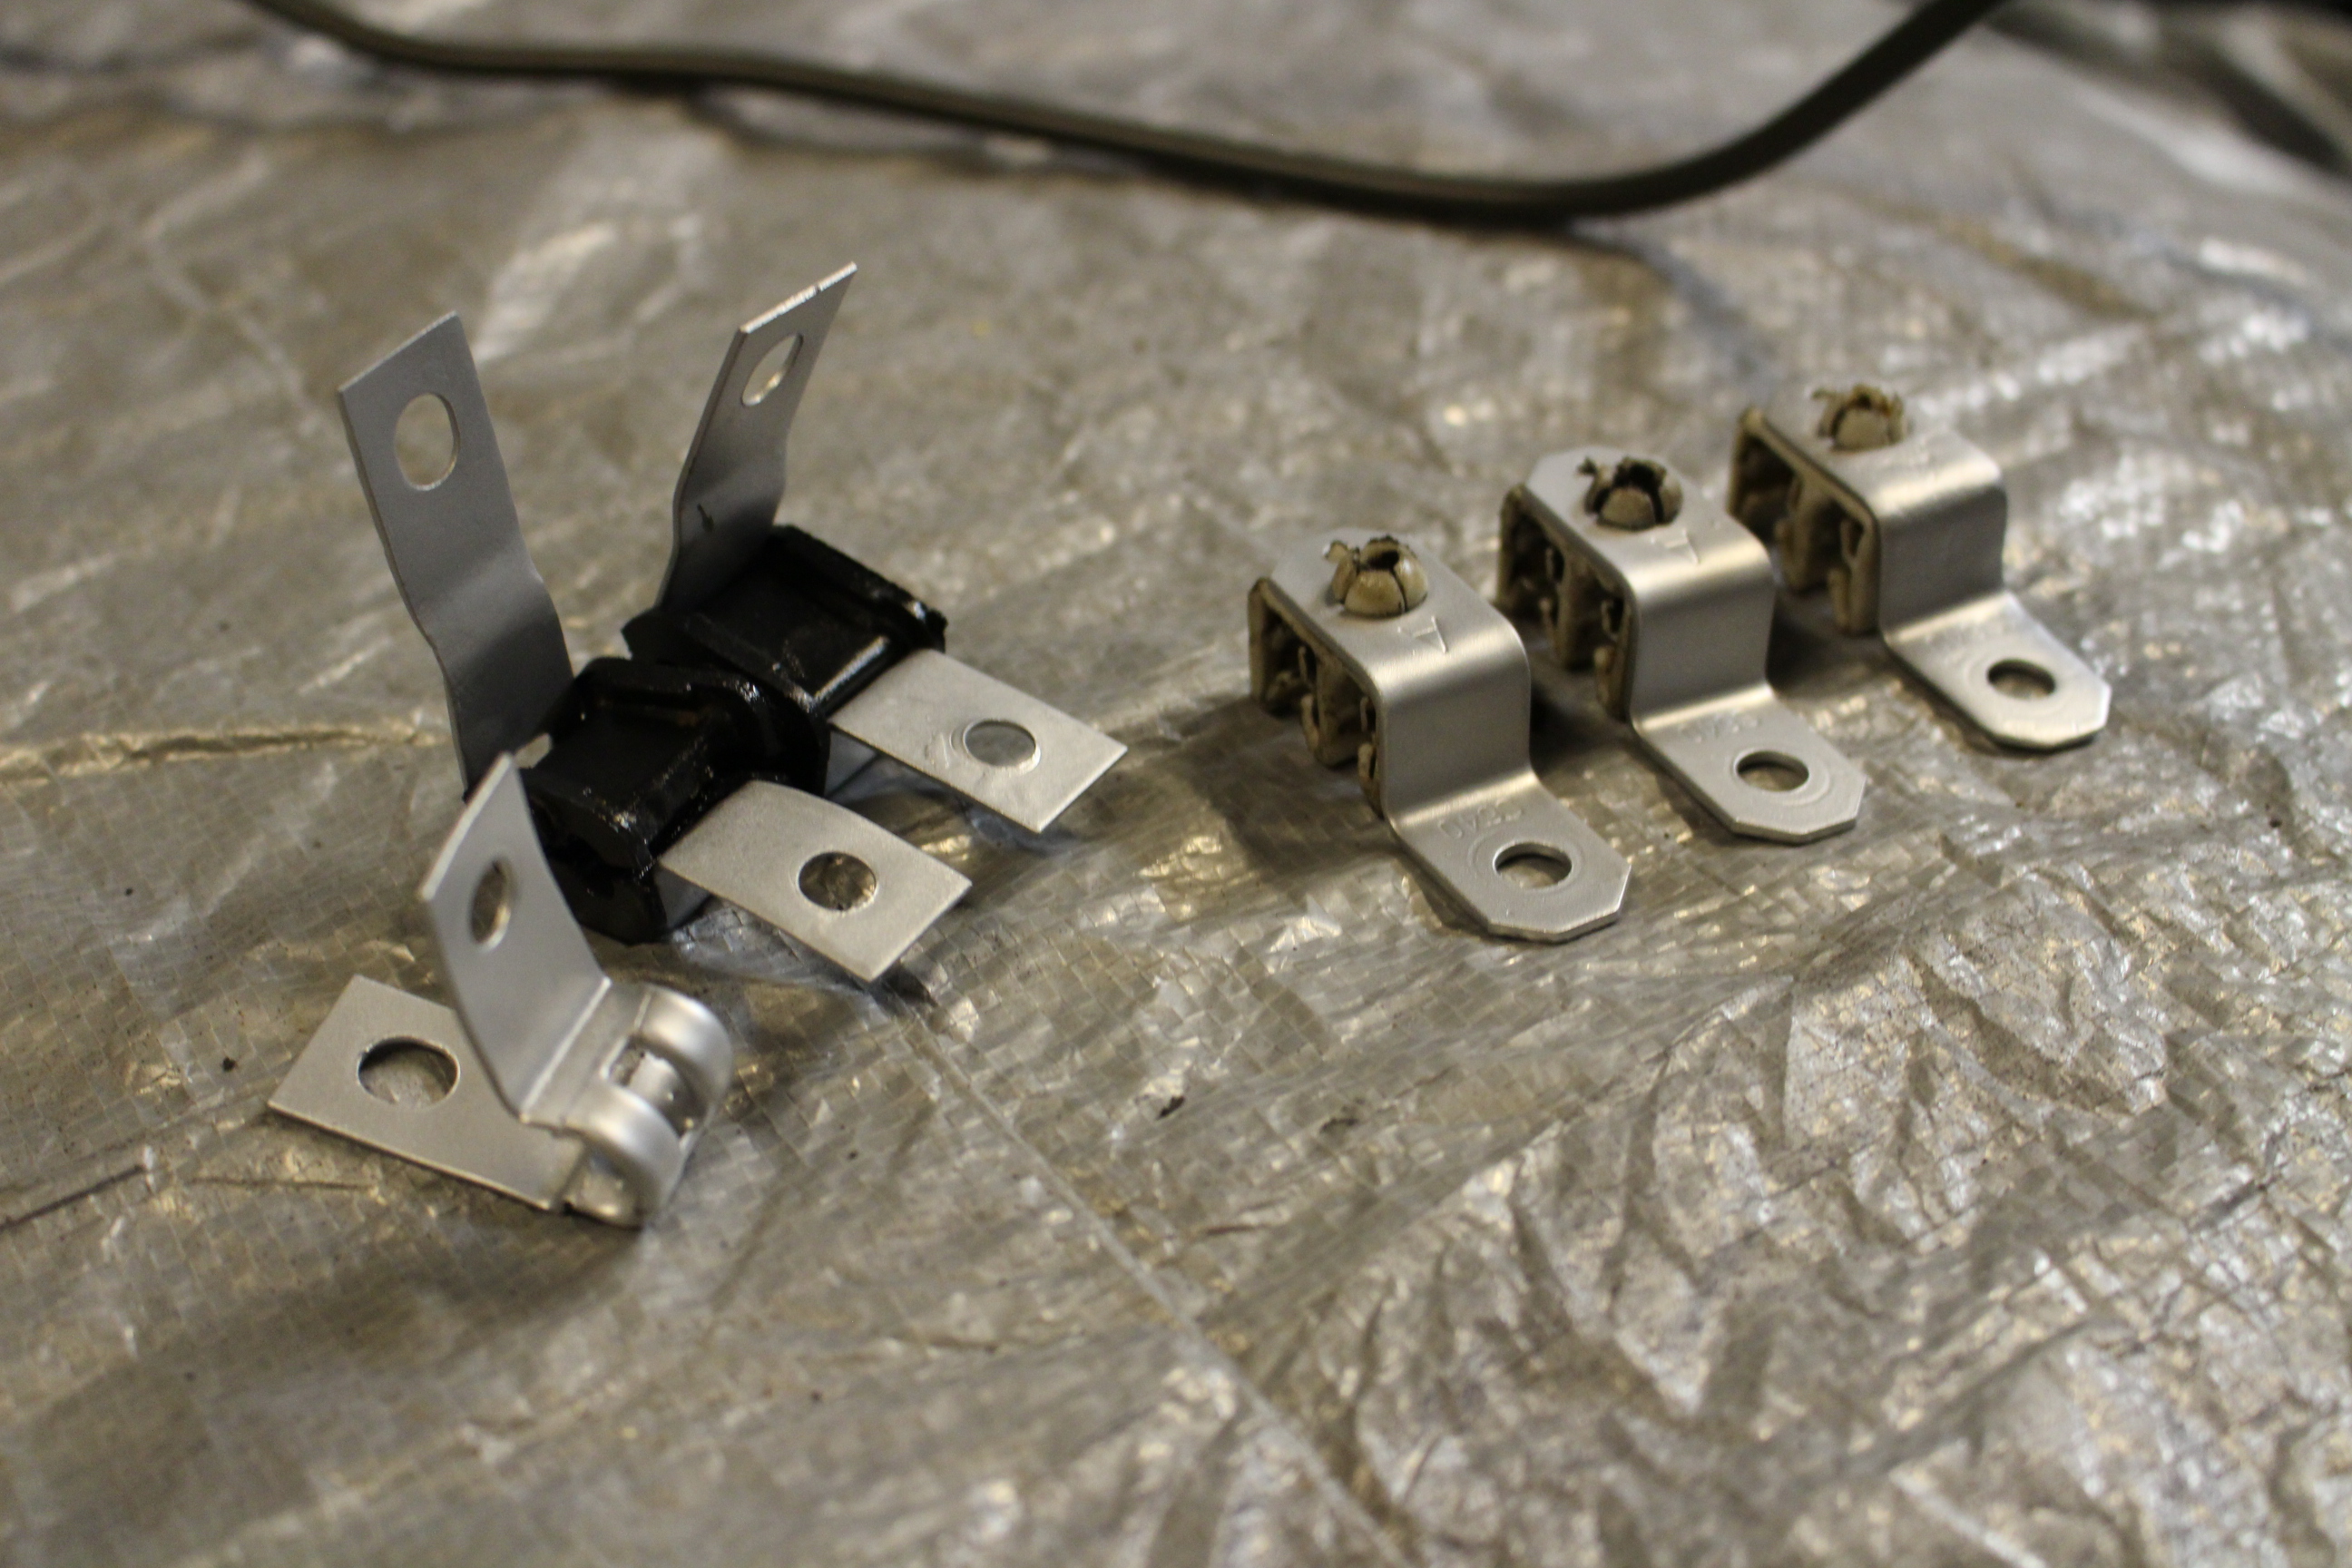
Rear brake bias valve bolted back up, with a new brake line running to the fuel tank bracket. From there, a new rubber brake line runs down to the axle to a Tee fitting and splits off to each rear drum brake. New brake lines were installed on the axle as well. New hardware used to bolt everything up.

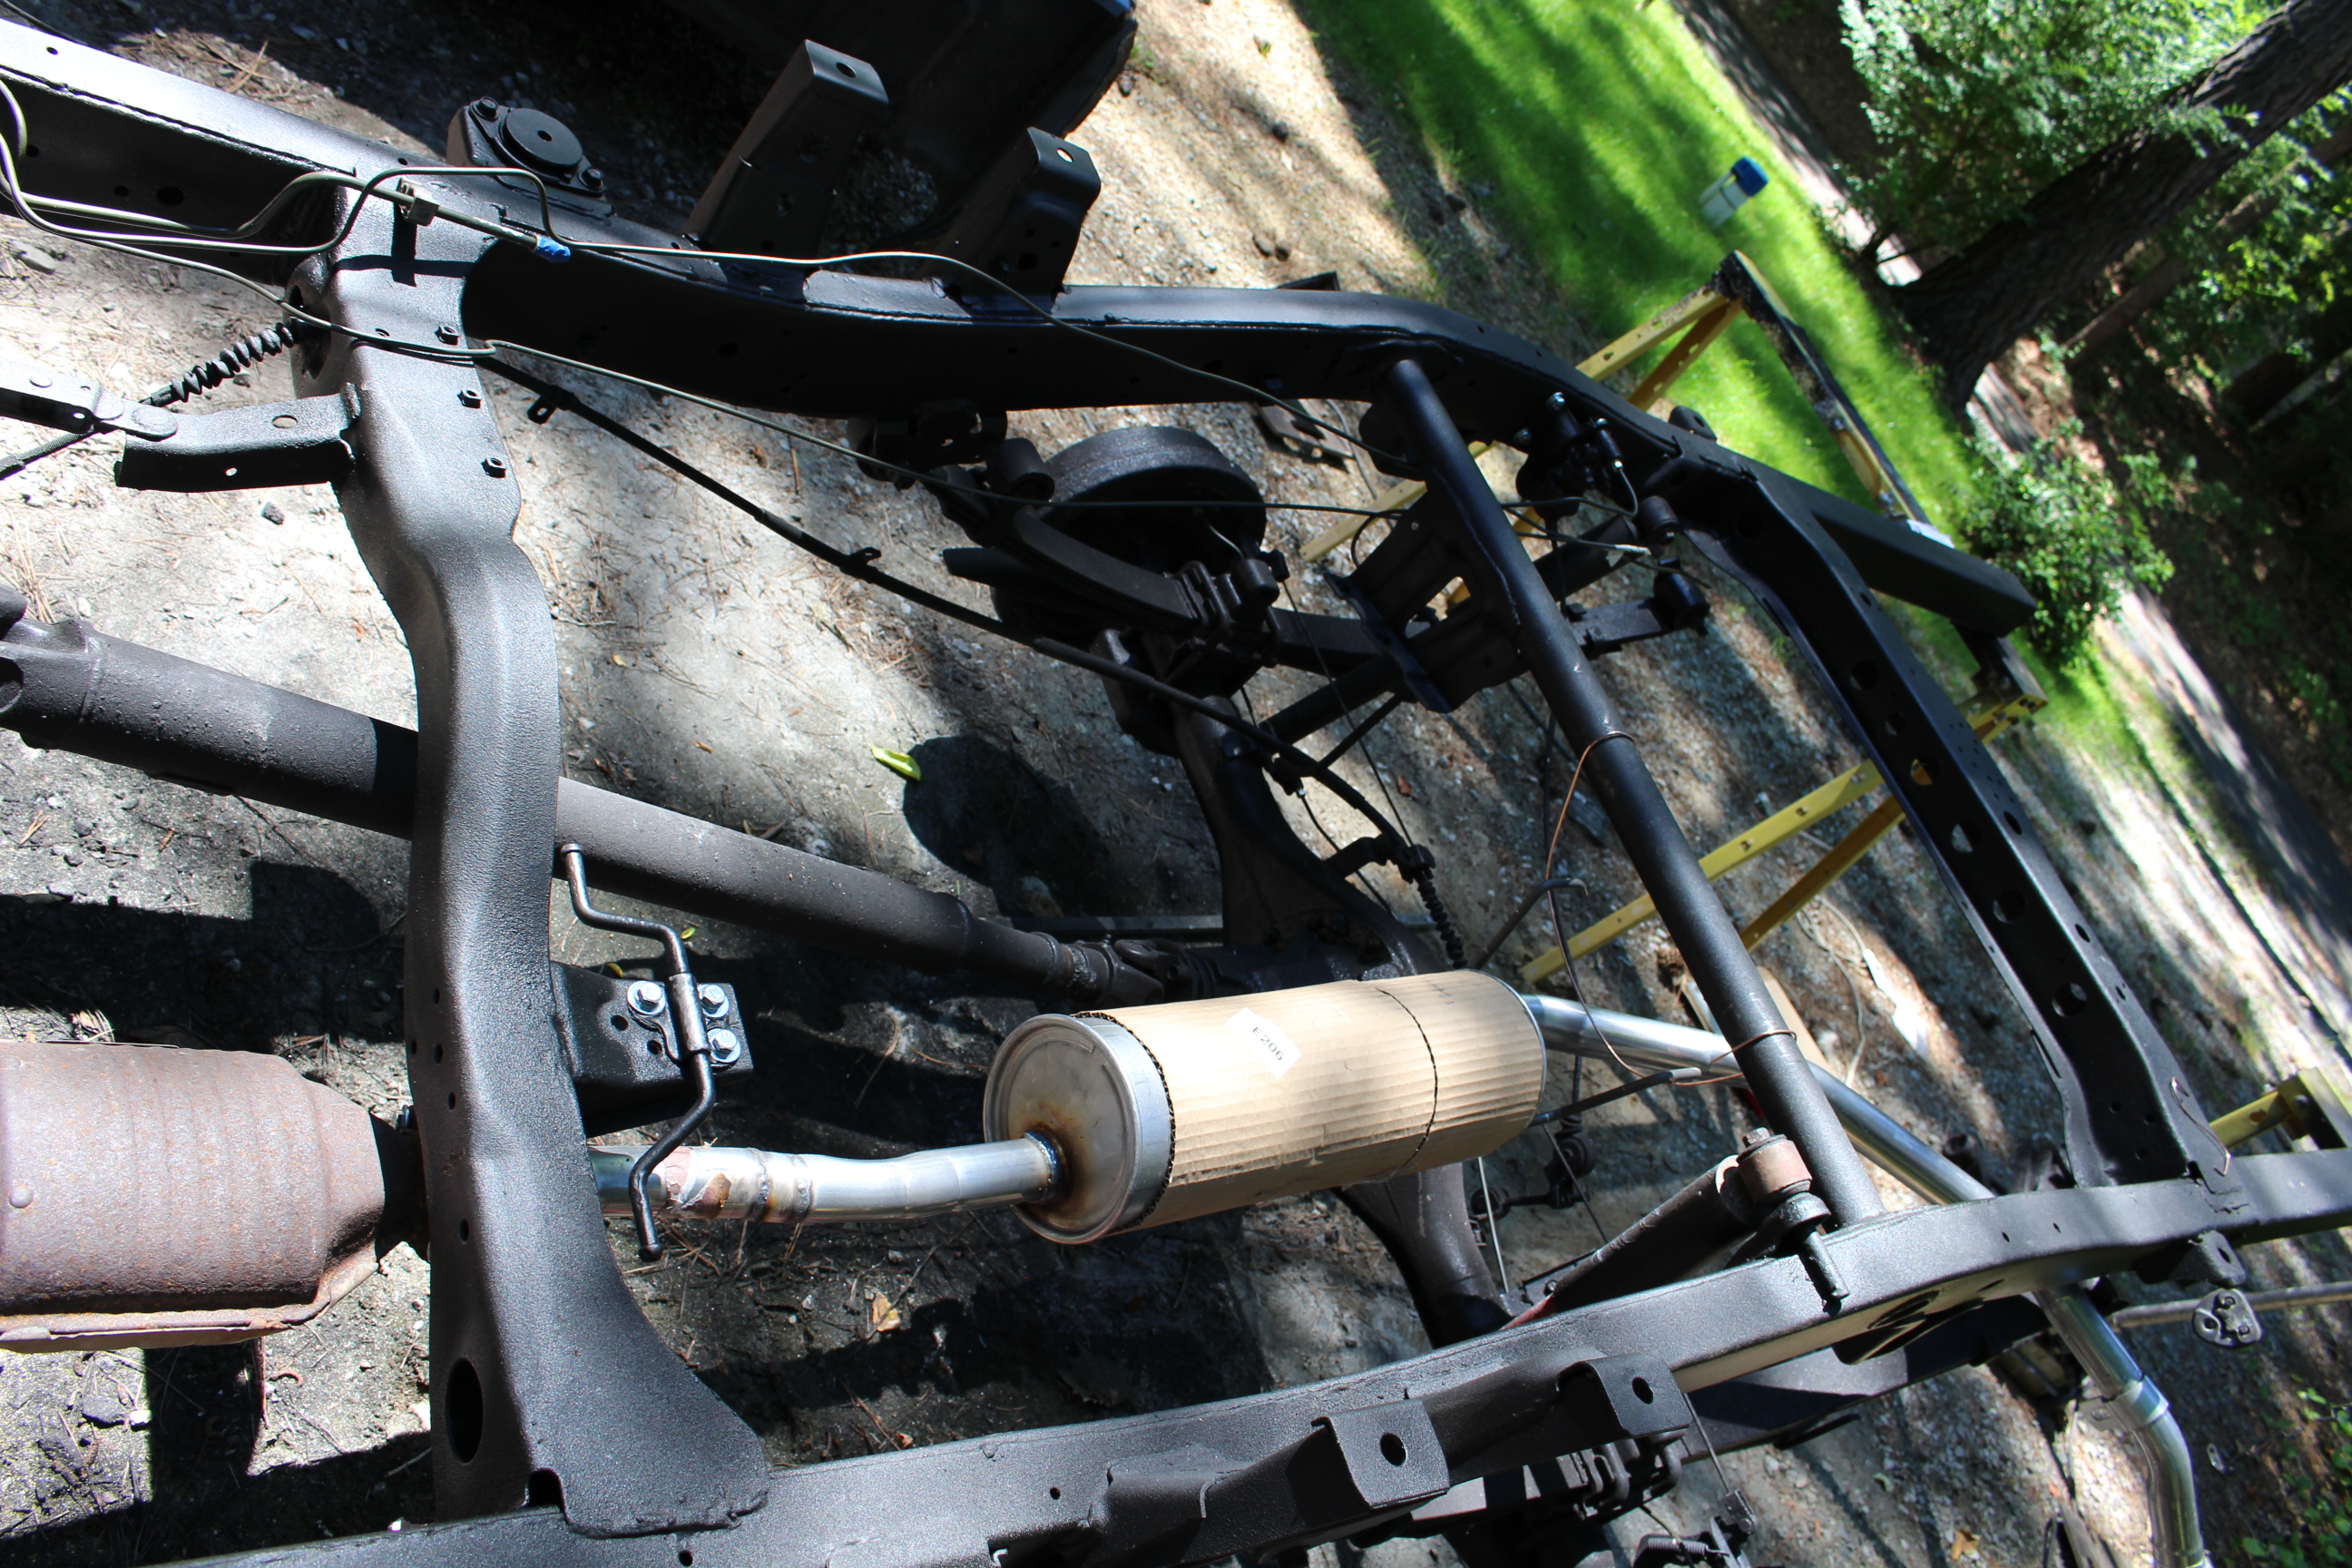
Laying out the new brake lines front to rear, and hanging the new exhaust. I was sent an extended cab exhaust so I had to modify the mid pipe some. Also I realized I forgot to weld exhaust hangers on the gas tank cross member :mad:

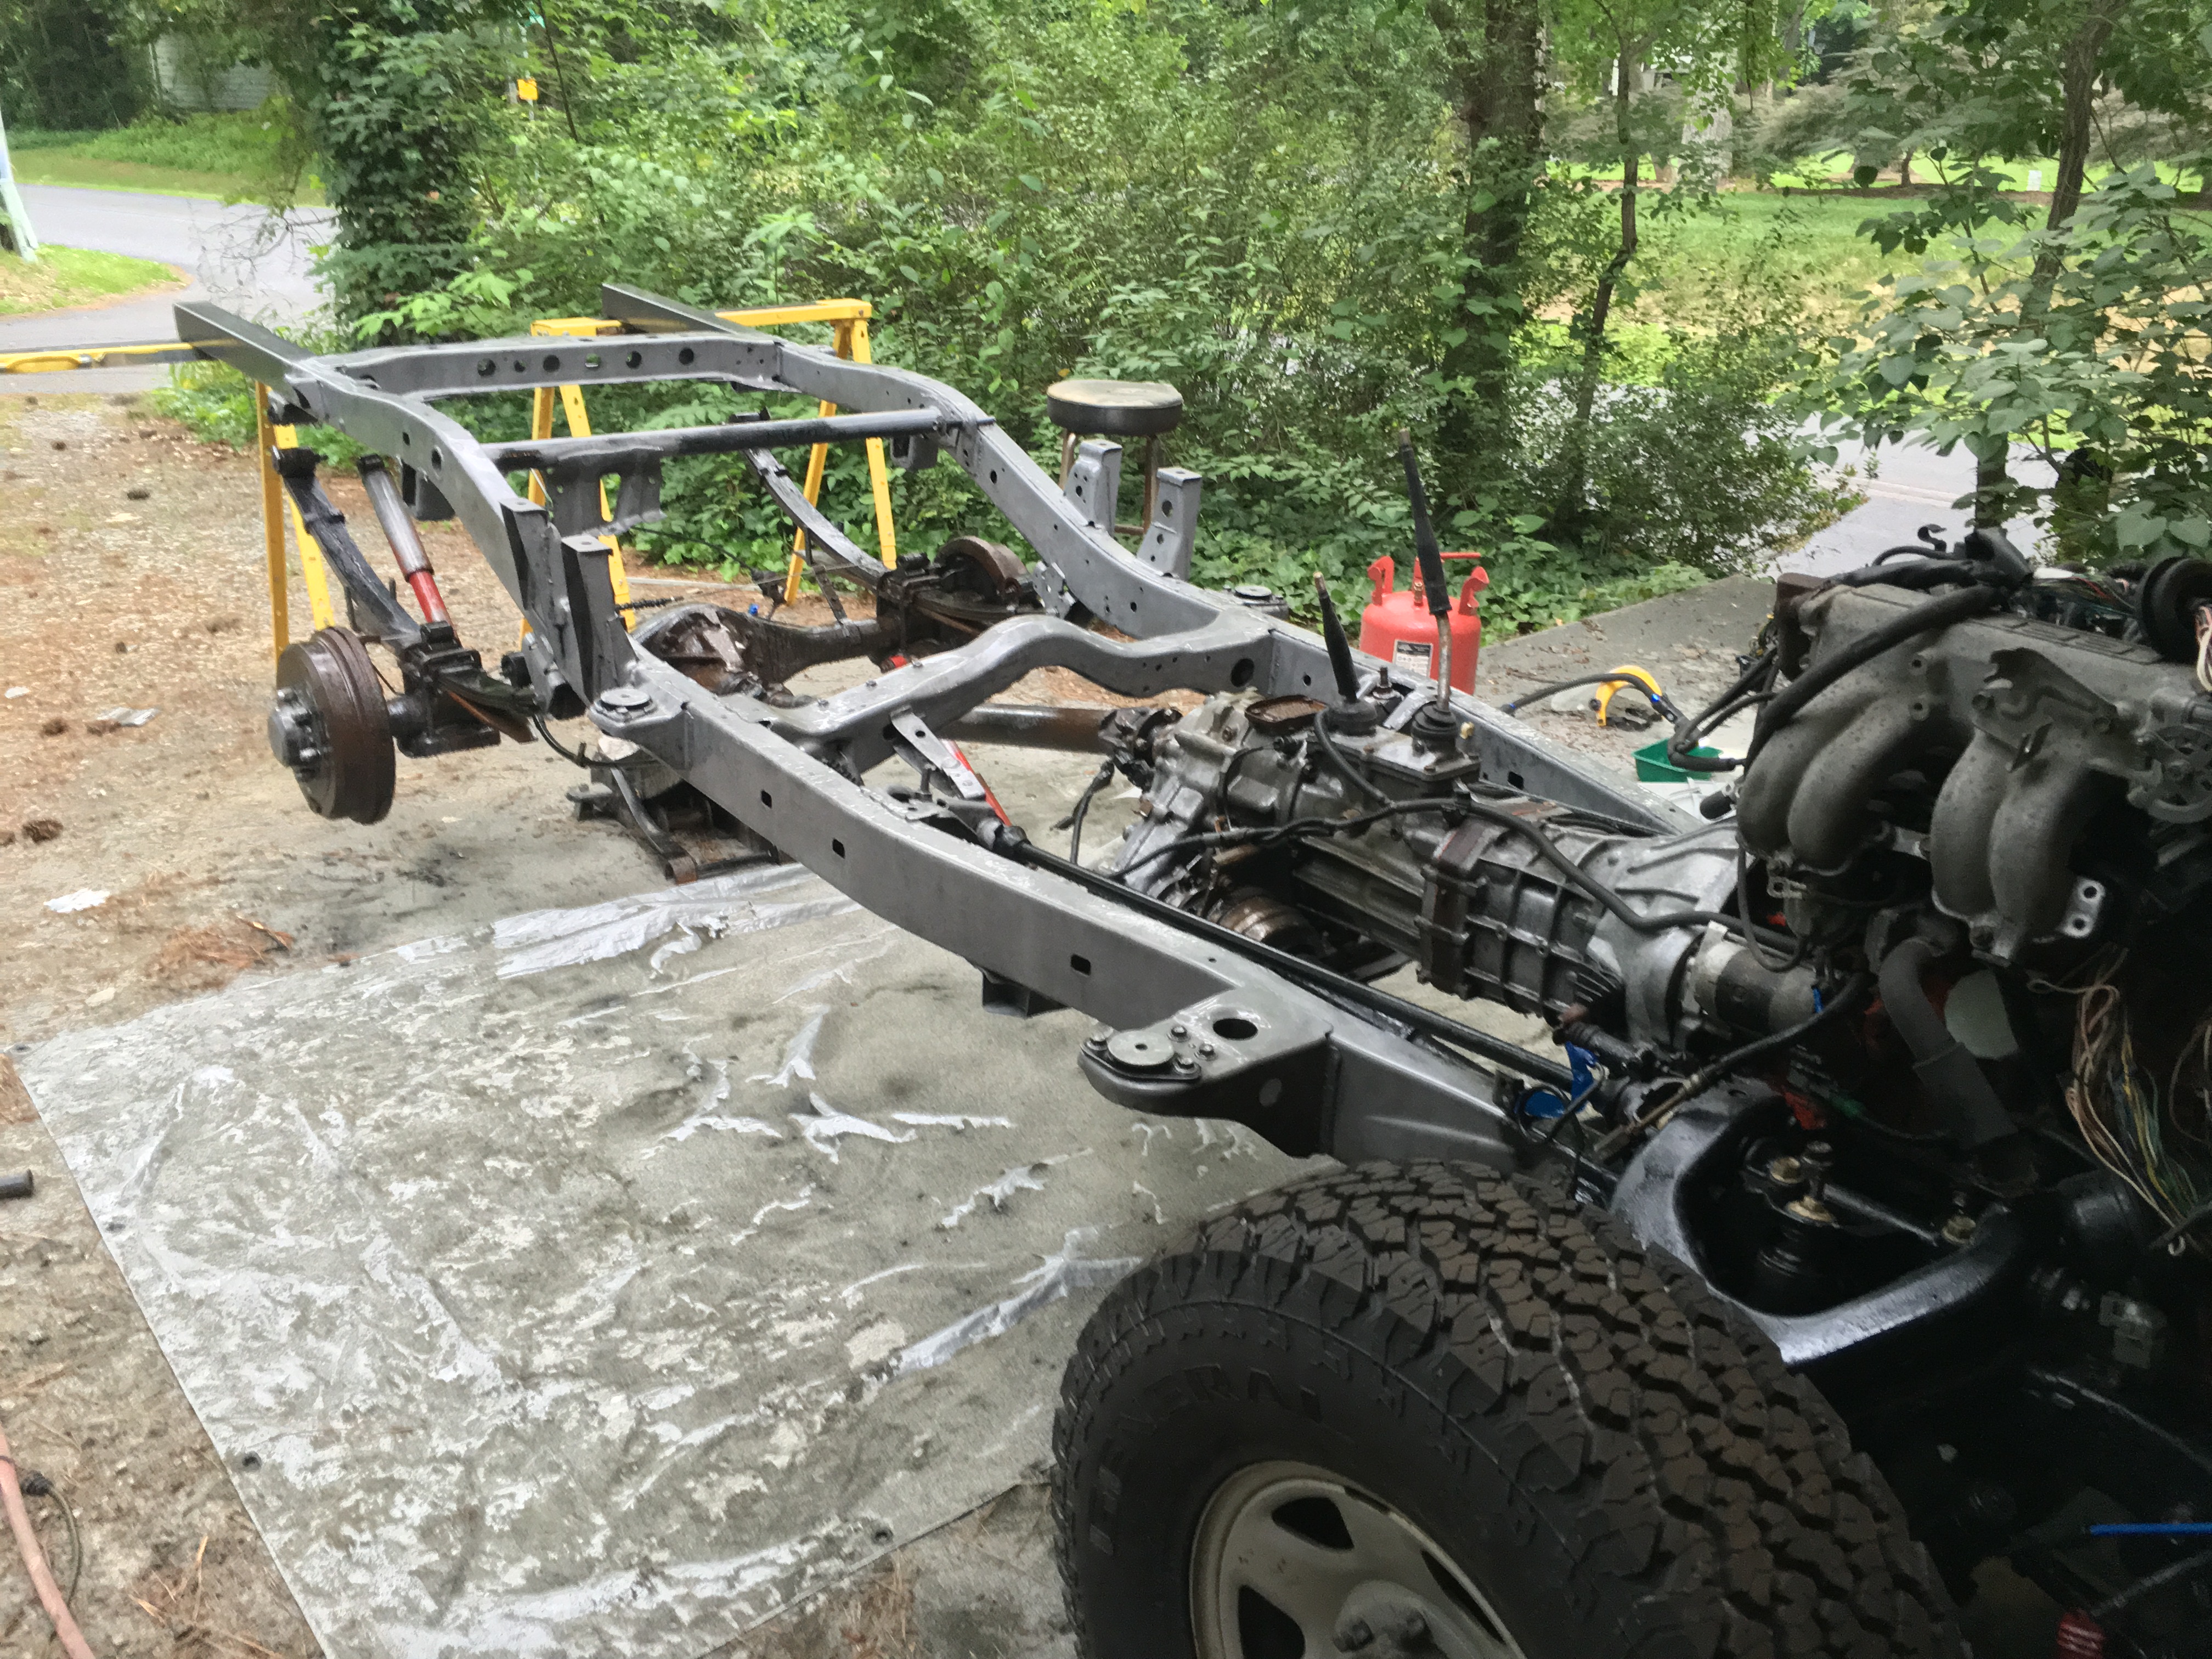
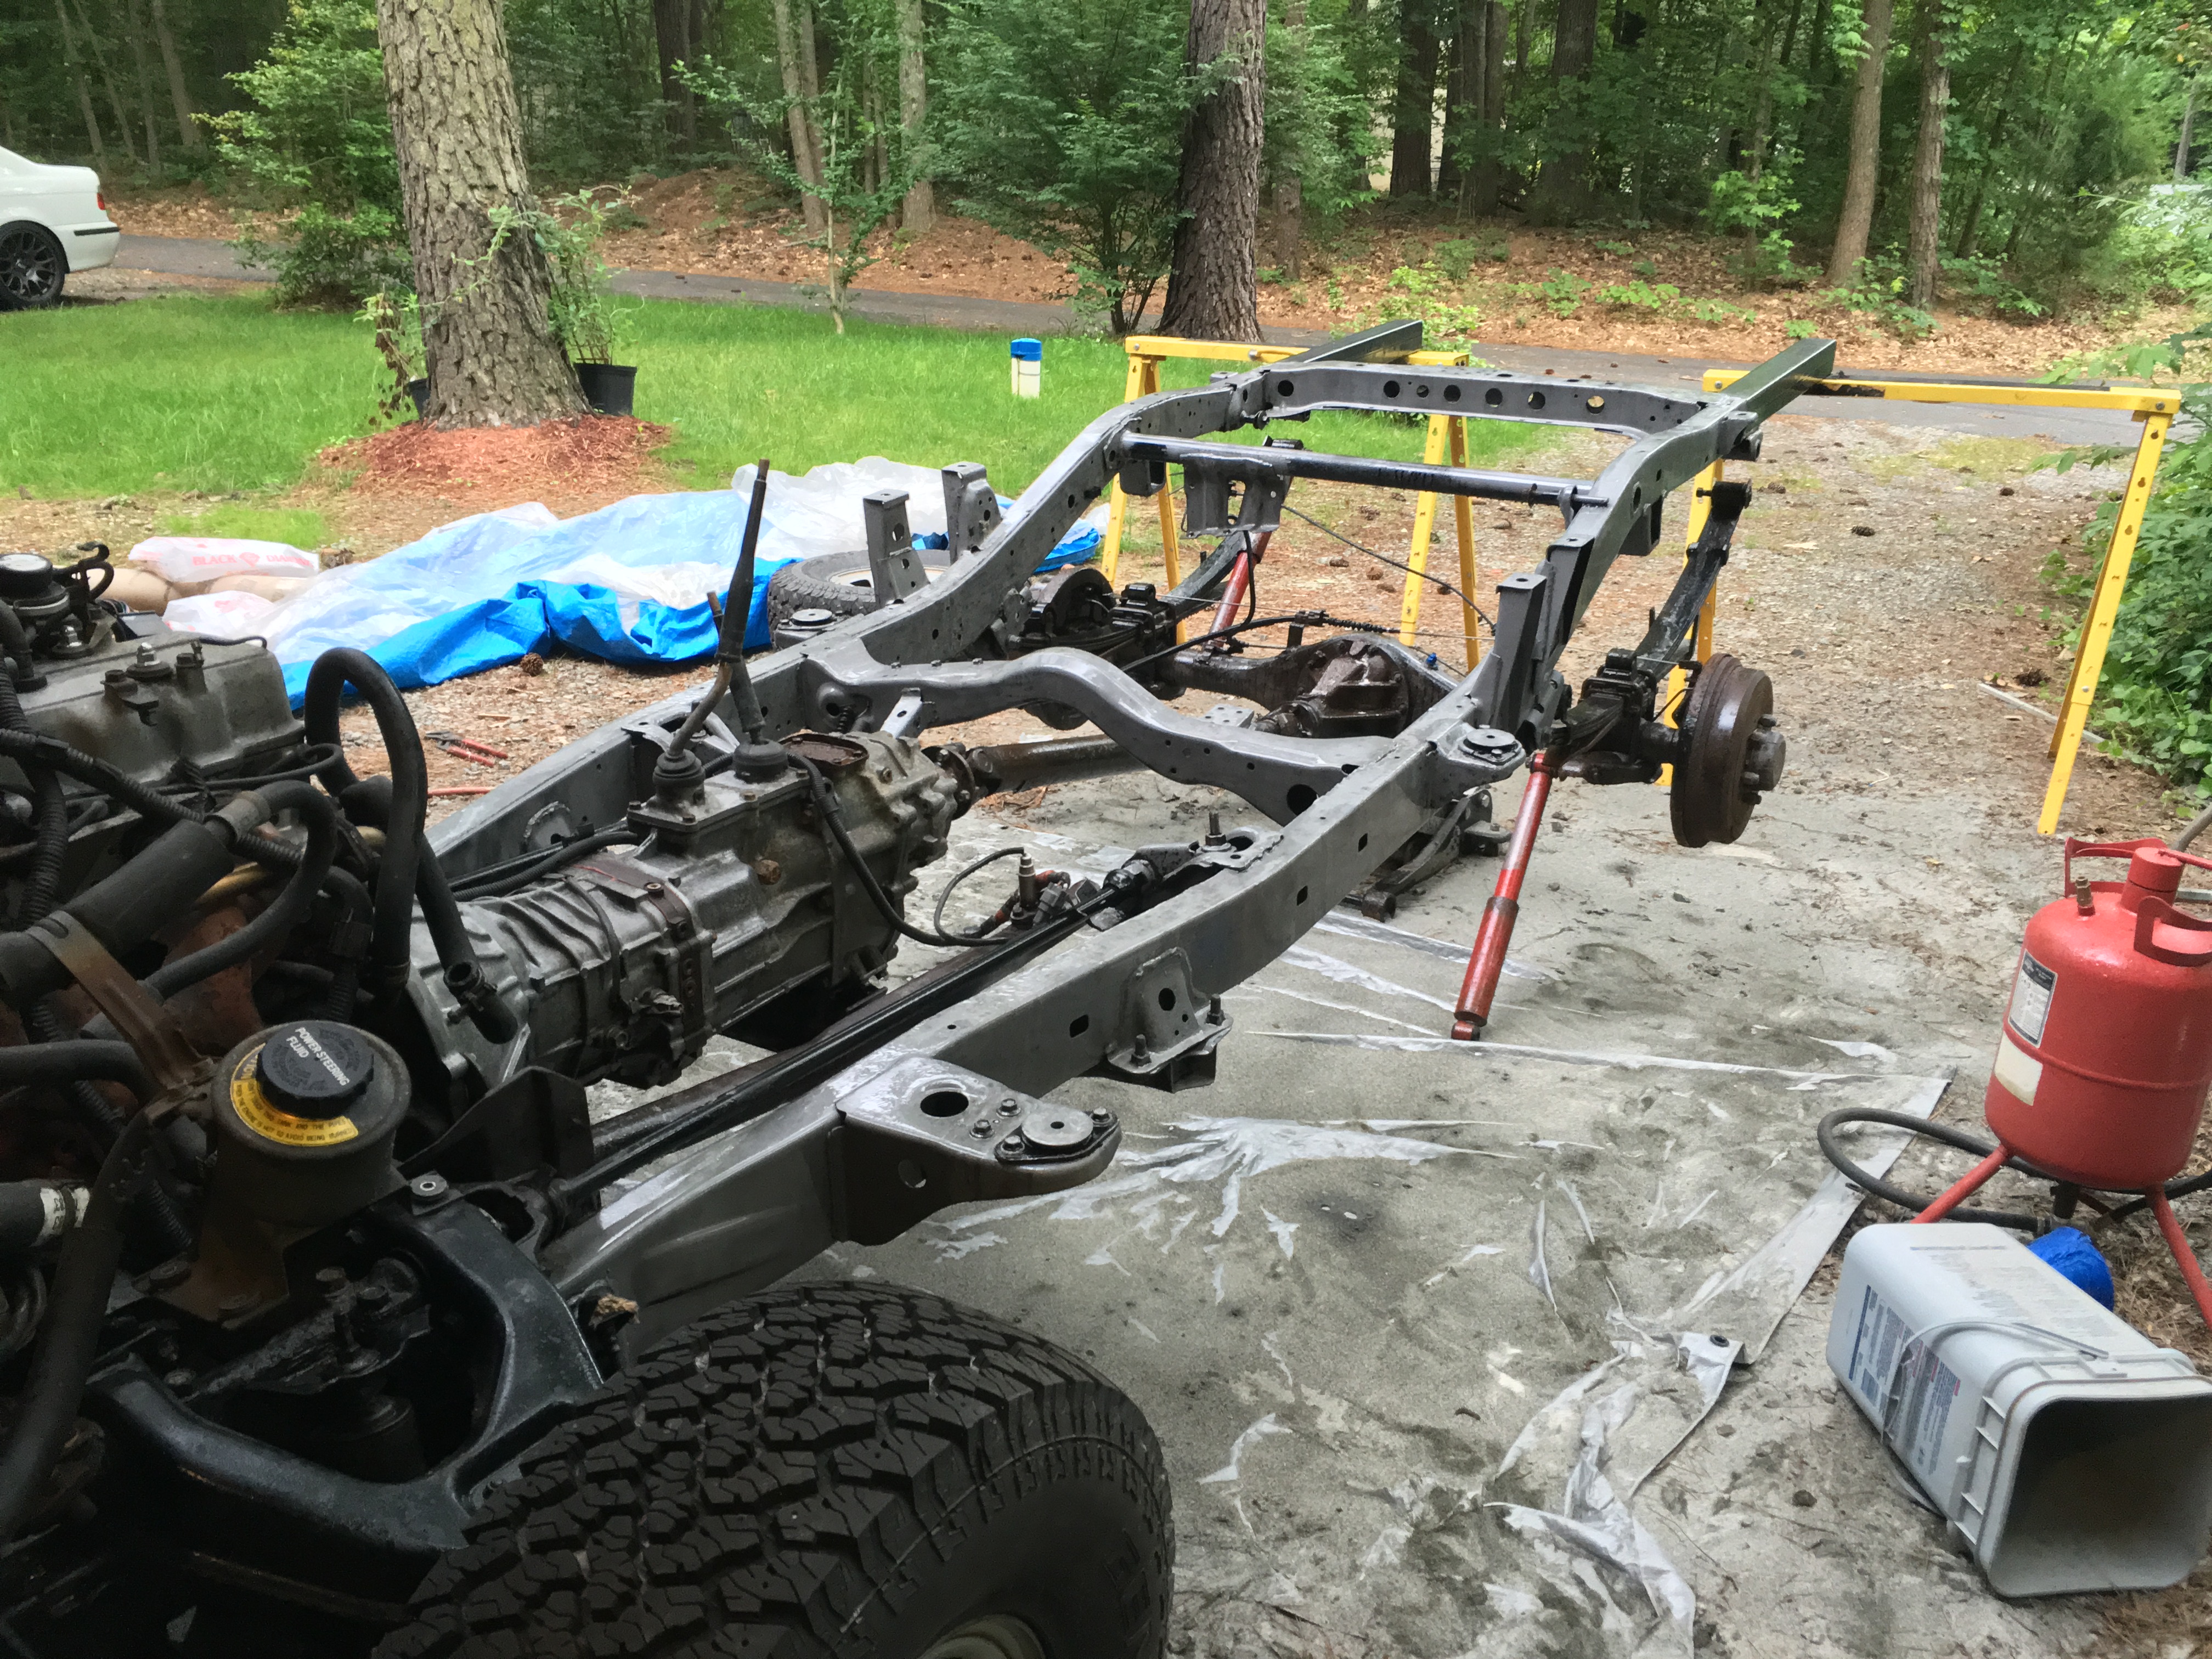
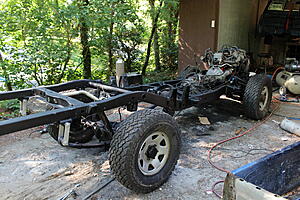
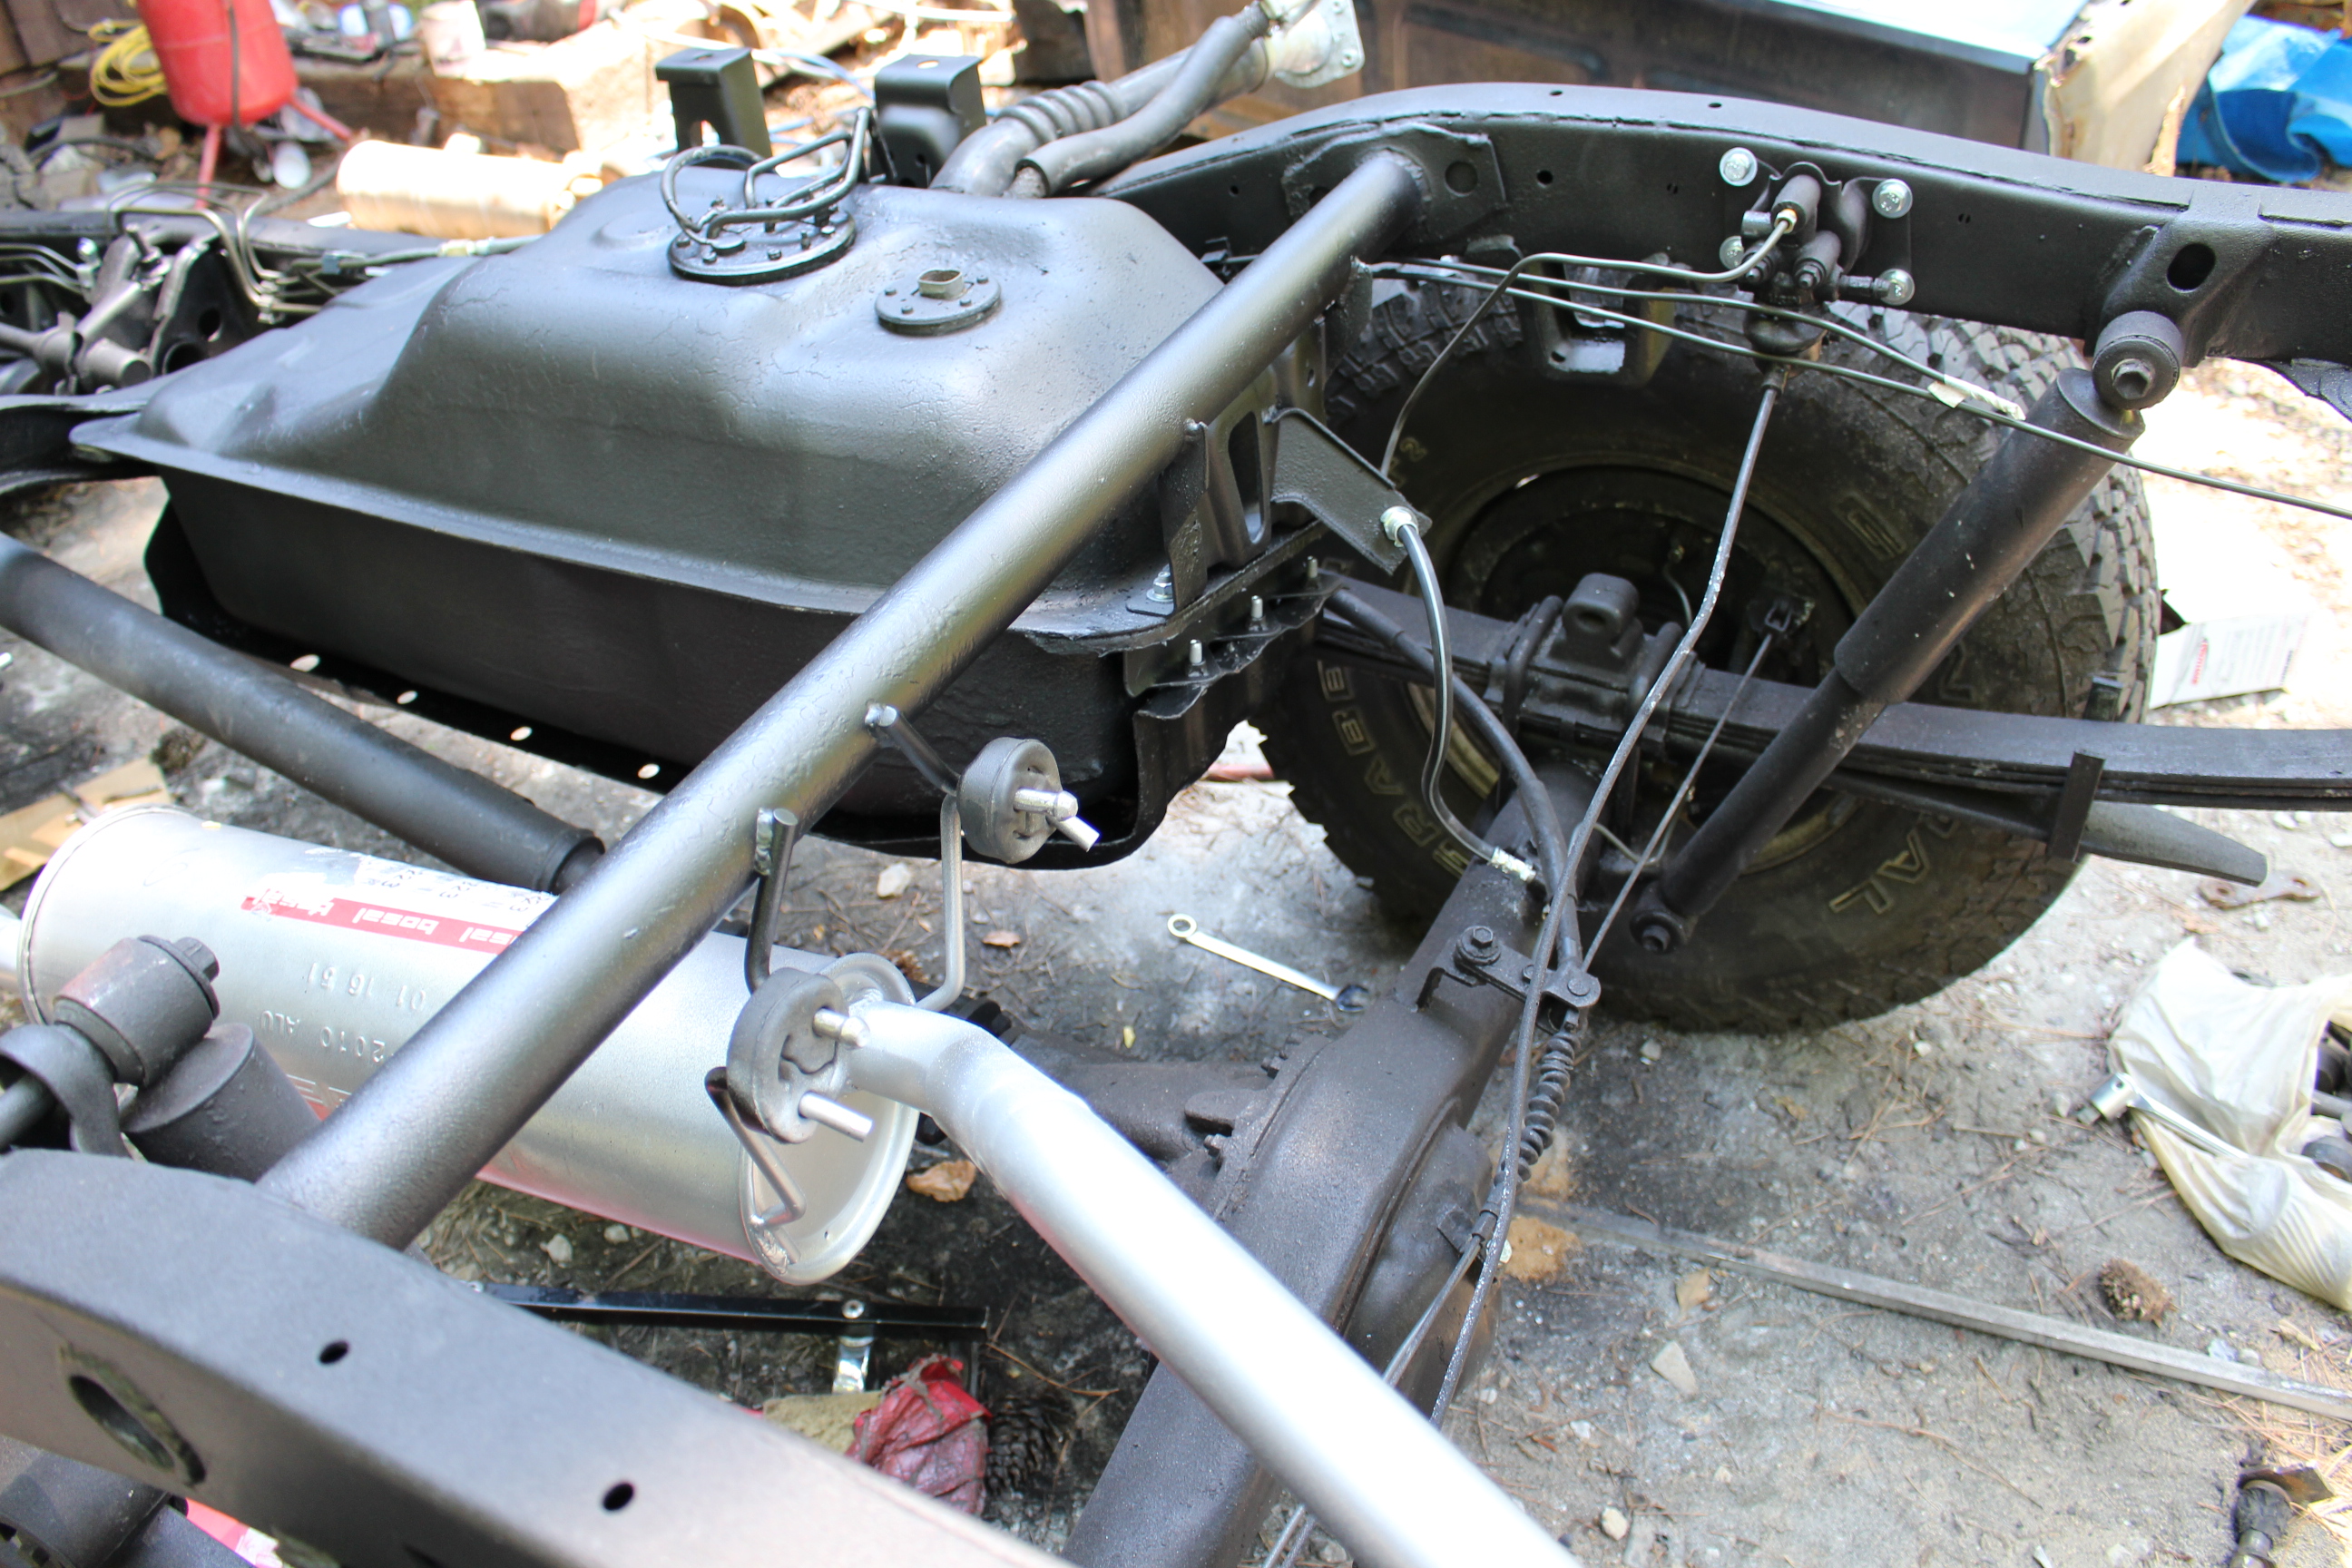
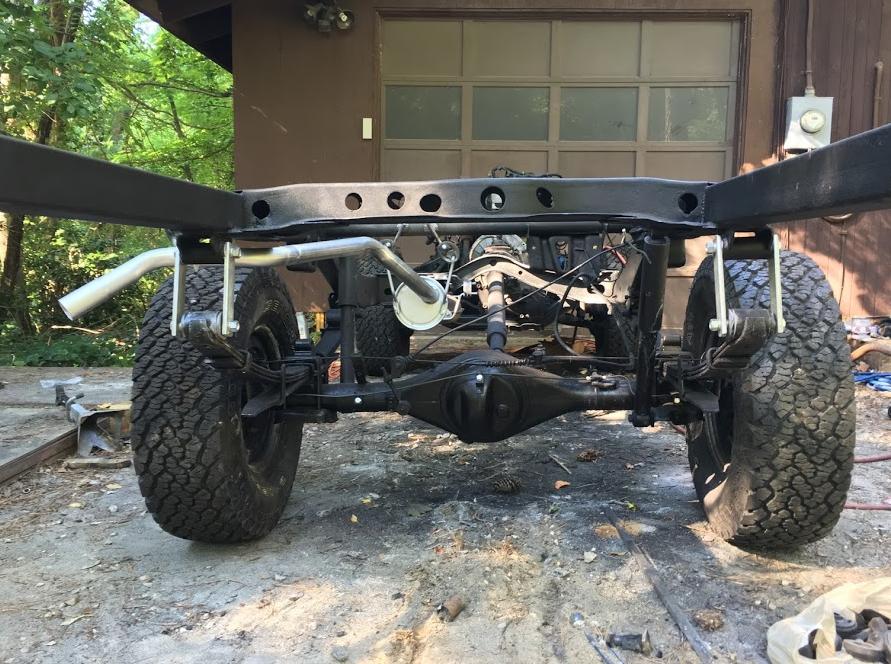
Starting to take shape at this point. Put the tires back on and its finally off the saw horses. Longer shackles installed with Urethane Leaf spring bushings to lift the rear back up some (it had a negative rake when I first got it)
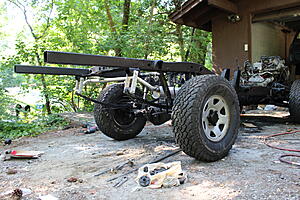
I actually had to put a little weight on the suspension to get the shocks to mount back up. they are at full extension right now. They will probably be fine once the weight of the bed is on, but to get more articulation I will need to switch to longer travel shocks.
Gas tank back in, new brake lines in, exhaust in.
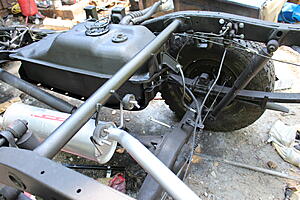
I don't have access to the proper tooling needed to replicate the factory felxible fuel line I broke earlier in the thread. So I made a new one with two brass unions and barb fittings. I don't know why there was a small length of flexible line even to begin with, but if it was there from the factory I figured there must have been a purpose. New fuel line clamp on the tank for the rubber line, refinished all the other factory clamps for the hardlines.

Gas tank bracket
Rear brake bias valve bolted back up, with a new brake line running to the fuel tank bracket. From there, a new rubber brake line runs down to the axle to a Tee fitting and splits off to each rear drum brake. New brake lines were installed on the axle as well. New hardware used to bolt everything up.
Laying out the new brake lines front to rear, and hanging the new exhaust. I was sent an extended cab exhaust so I had to modify the mid pipe some. Also I realized I forgot to weld exhaust hangers on the gas tank cross member :mad:

Starting to take shape at this point. Put the tires back on and its finally off the saw horses. Longer shackles installed with Urethane Leaf spring bushings to lift the rear back up some (it had a negative rake when I first got it)


I actually had to put a little weight on the suspension to get the shocks to mount back up. they are at full extension right now. They will probably be fine once the weight of the bed is on, but to get more articulation I will need to switch to longer travel shocks.
Gas tank back in, new brake lines in, exhaust in.
I don't have access to the proper tooling needed to replicate the factory felxible fuel line I broke earlier in the thread. So I made a new one with two brass unions and barb fittings. I don't know why there was a small length of flexible line even to begin with, but if it was there from the factory I figured there must have been a purpose. New fuel line clamp on the tank for the rubber line, refinished all the other factory clamps for the hardlines.
 09-05-2016, 04:40 PM
#9
Registered User
Thread Starter
Join Date: Sep 2016
Posts: 17
Likes: 0
Received 0 Likes
on
0 Posts
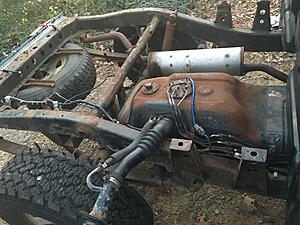
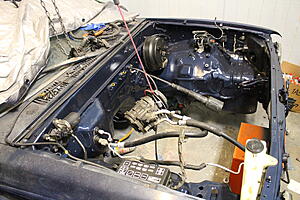
So as I mentioned earlier, one of the wires for the cold start injector melted through its casing. I had to remove almost all the tape off the bundle, rewrap the wire , and then rewrap the whole bundle. I will eventually replace the cold start injector as well, but for now it is simply unplugged.
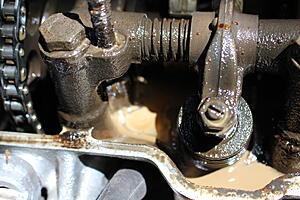
Then as someone suggested earlier, while I had the cab off I decided to do the head gasket and timing chains. Like I had mentioned earlier, the truck had overheated over the summer and was filling the coolant system with air. It would also misfire on cold starts as if coolant was in the cylinder. Pulled the valve cover gasket, it wasn't pretty.
chocolate milk, anybody?
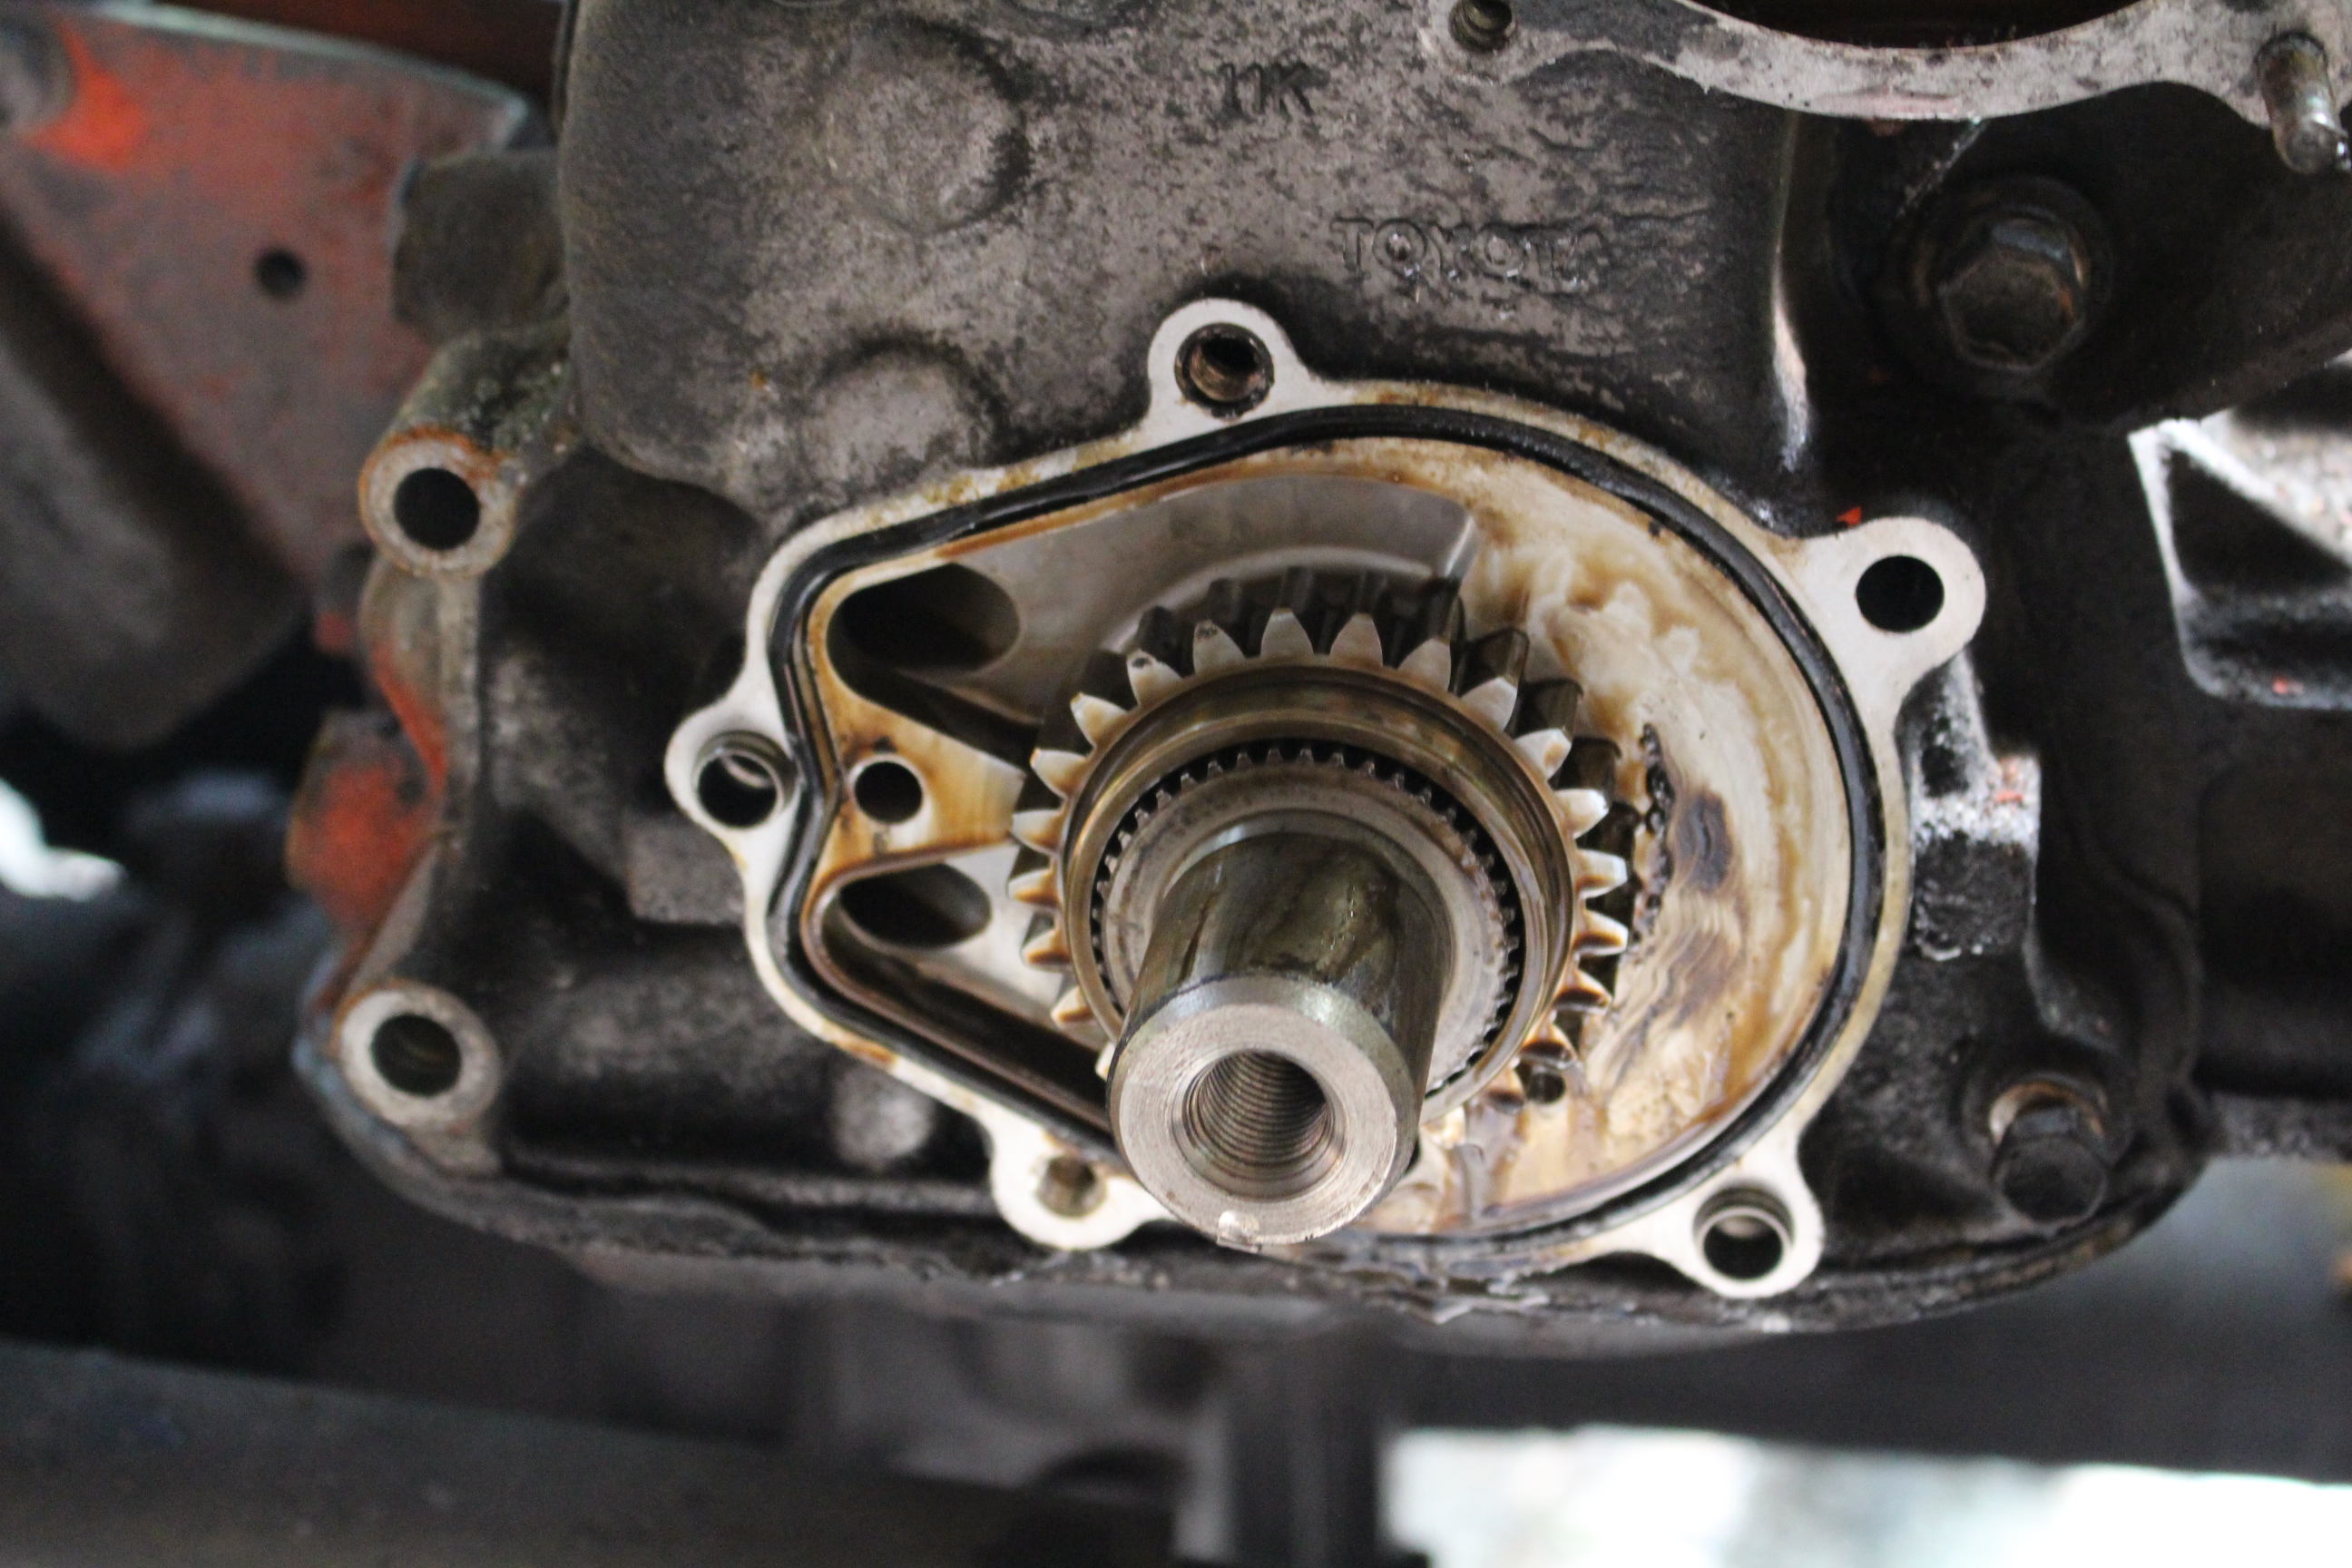
Water pump off, oil pump off
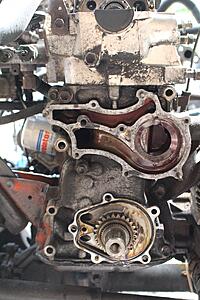

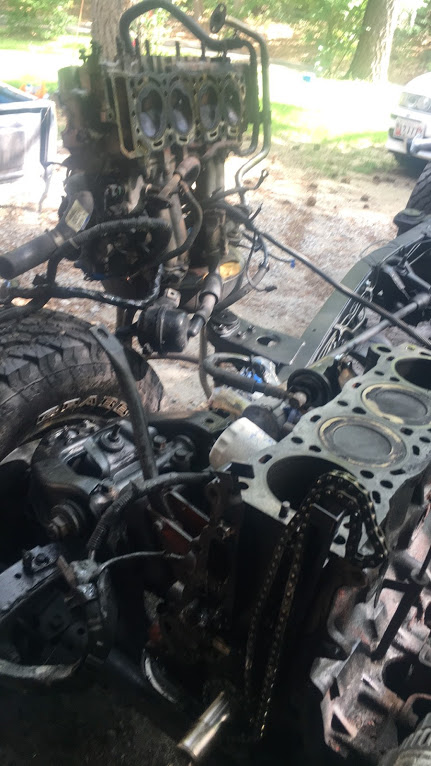
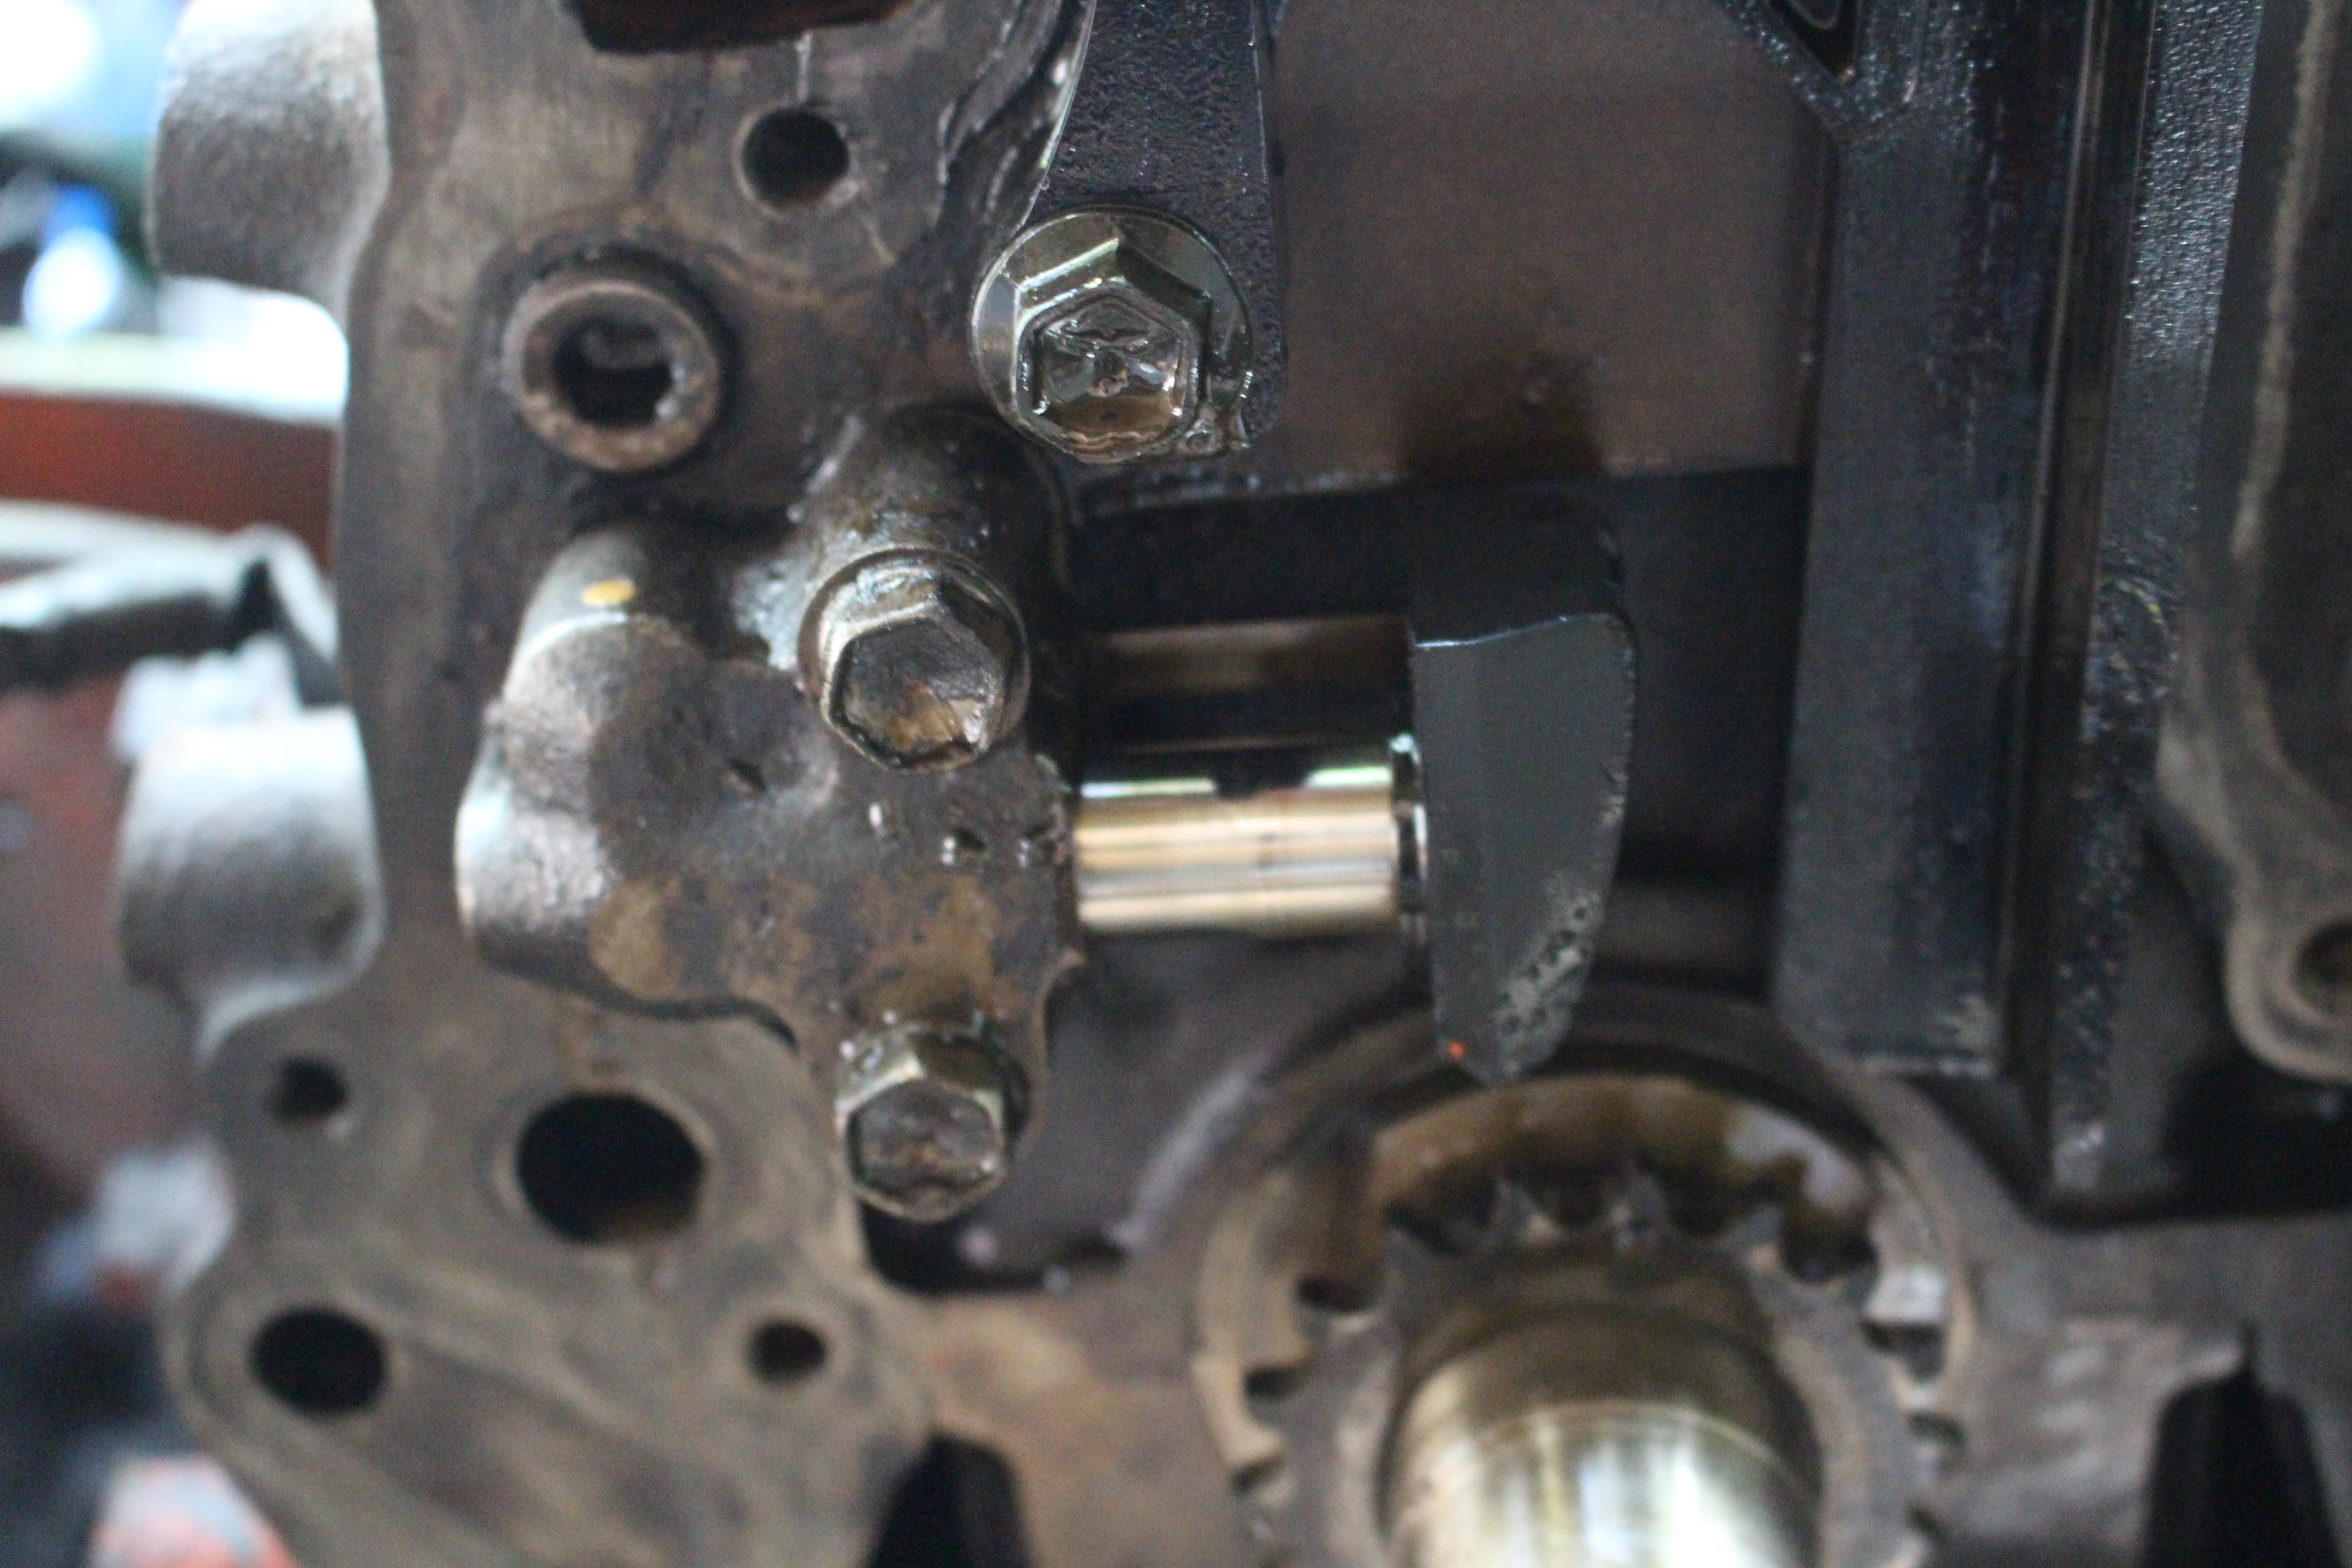
Head off, timing cover off
old timing chain tensioner
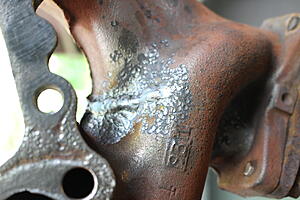
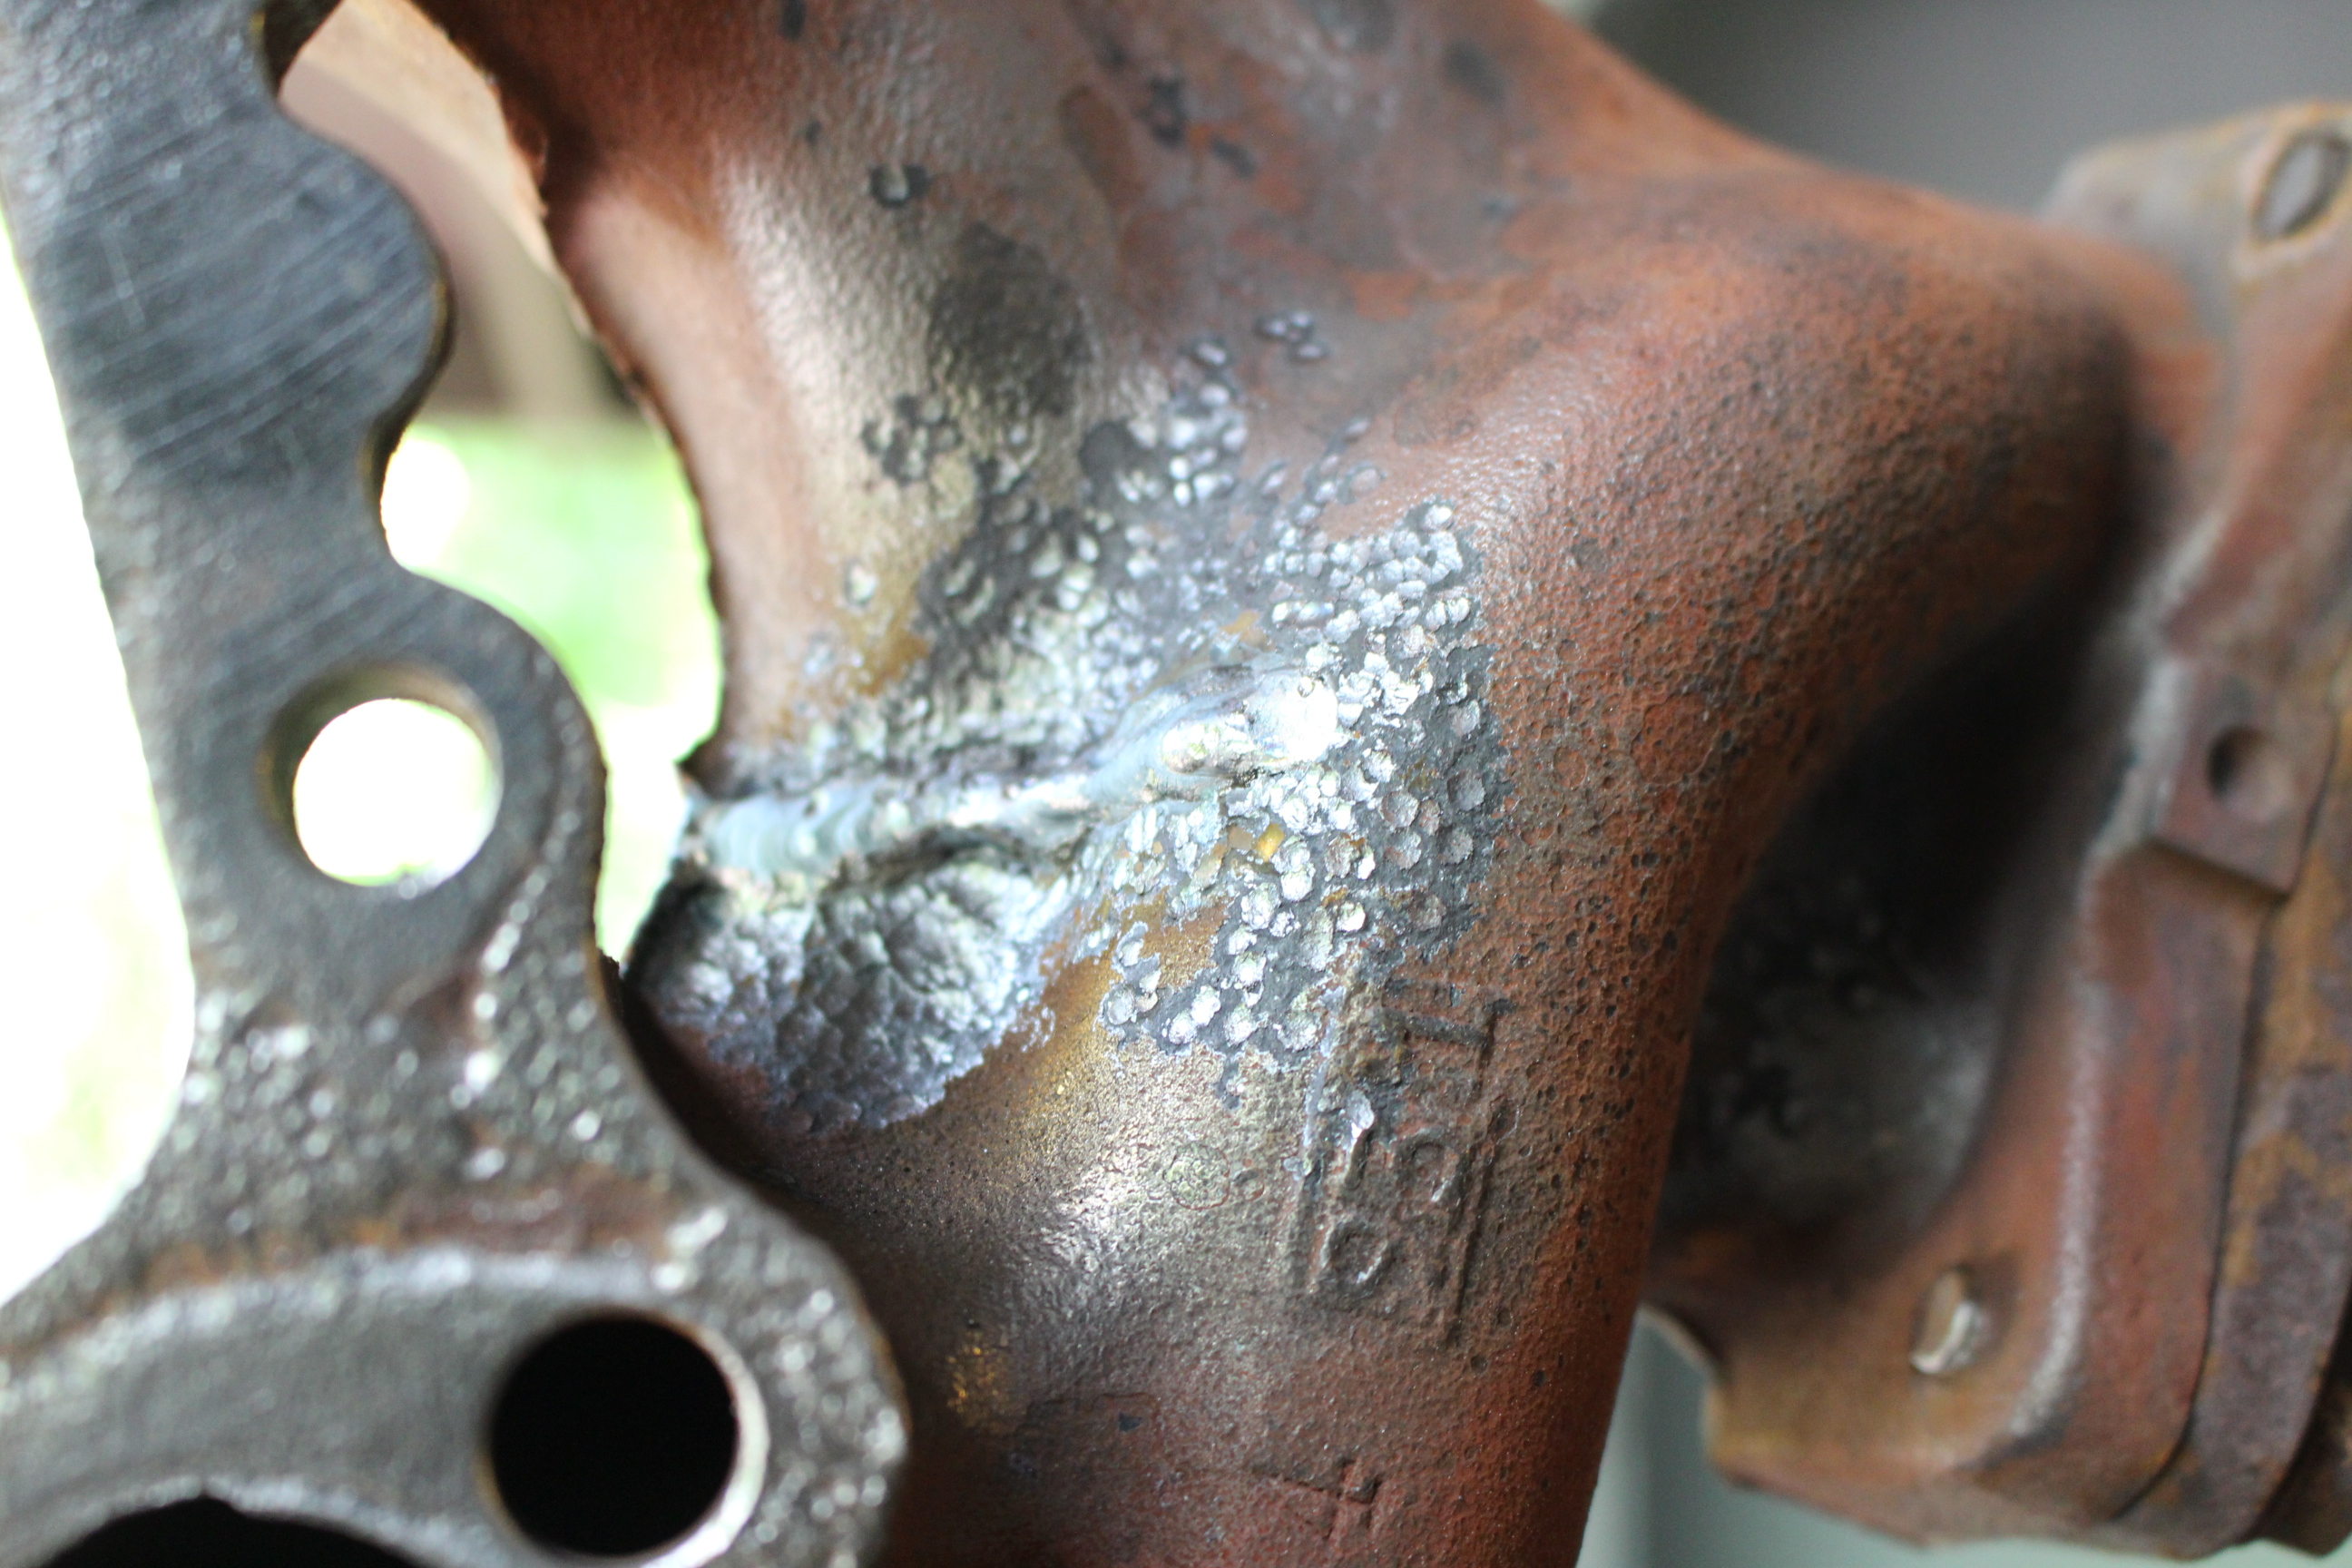
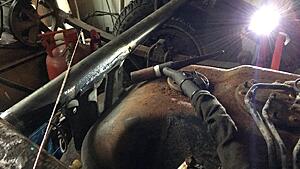
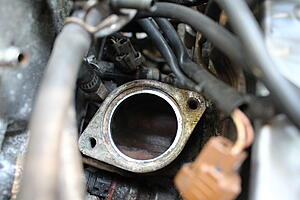
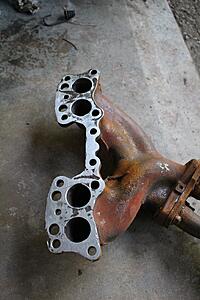
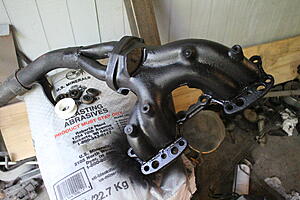
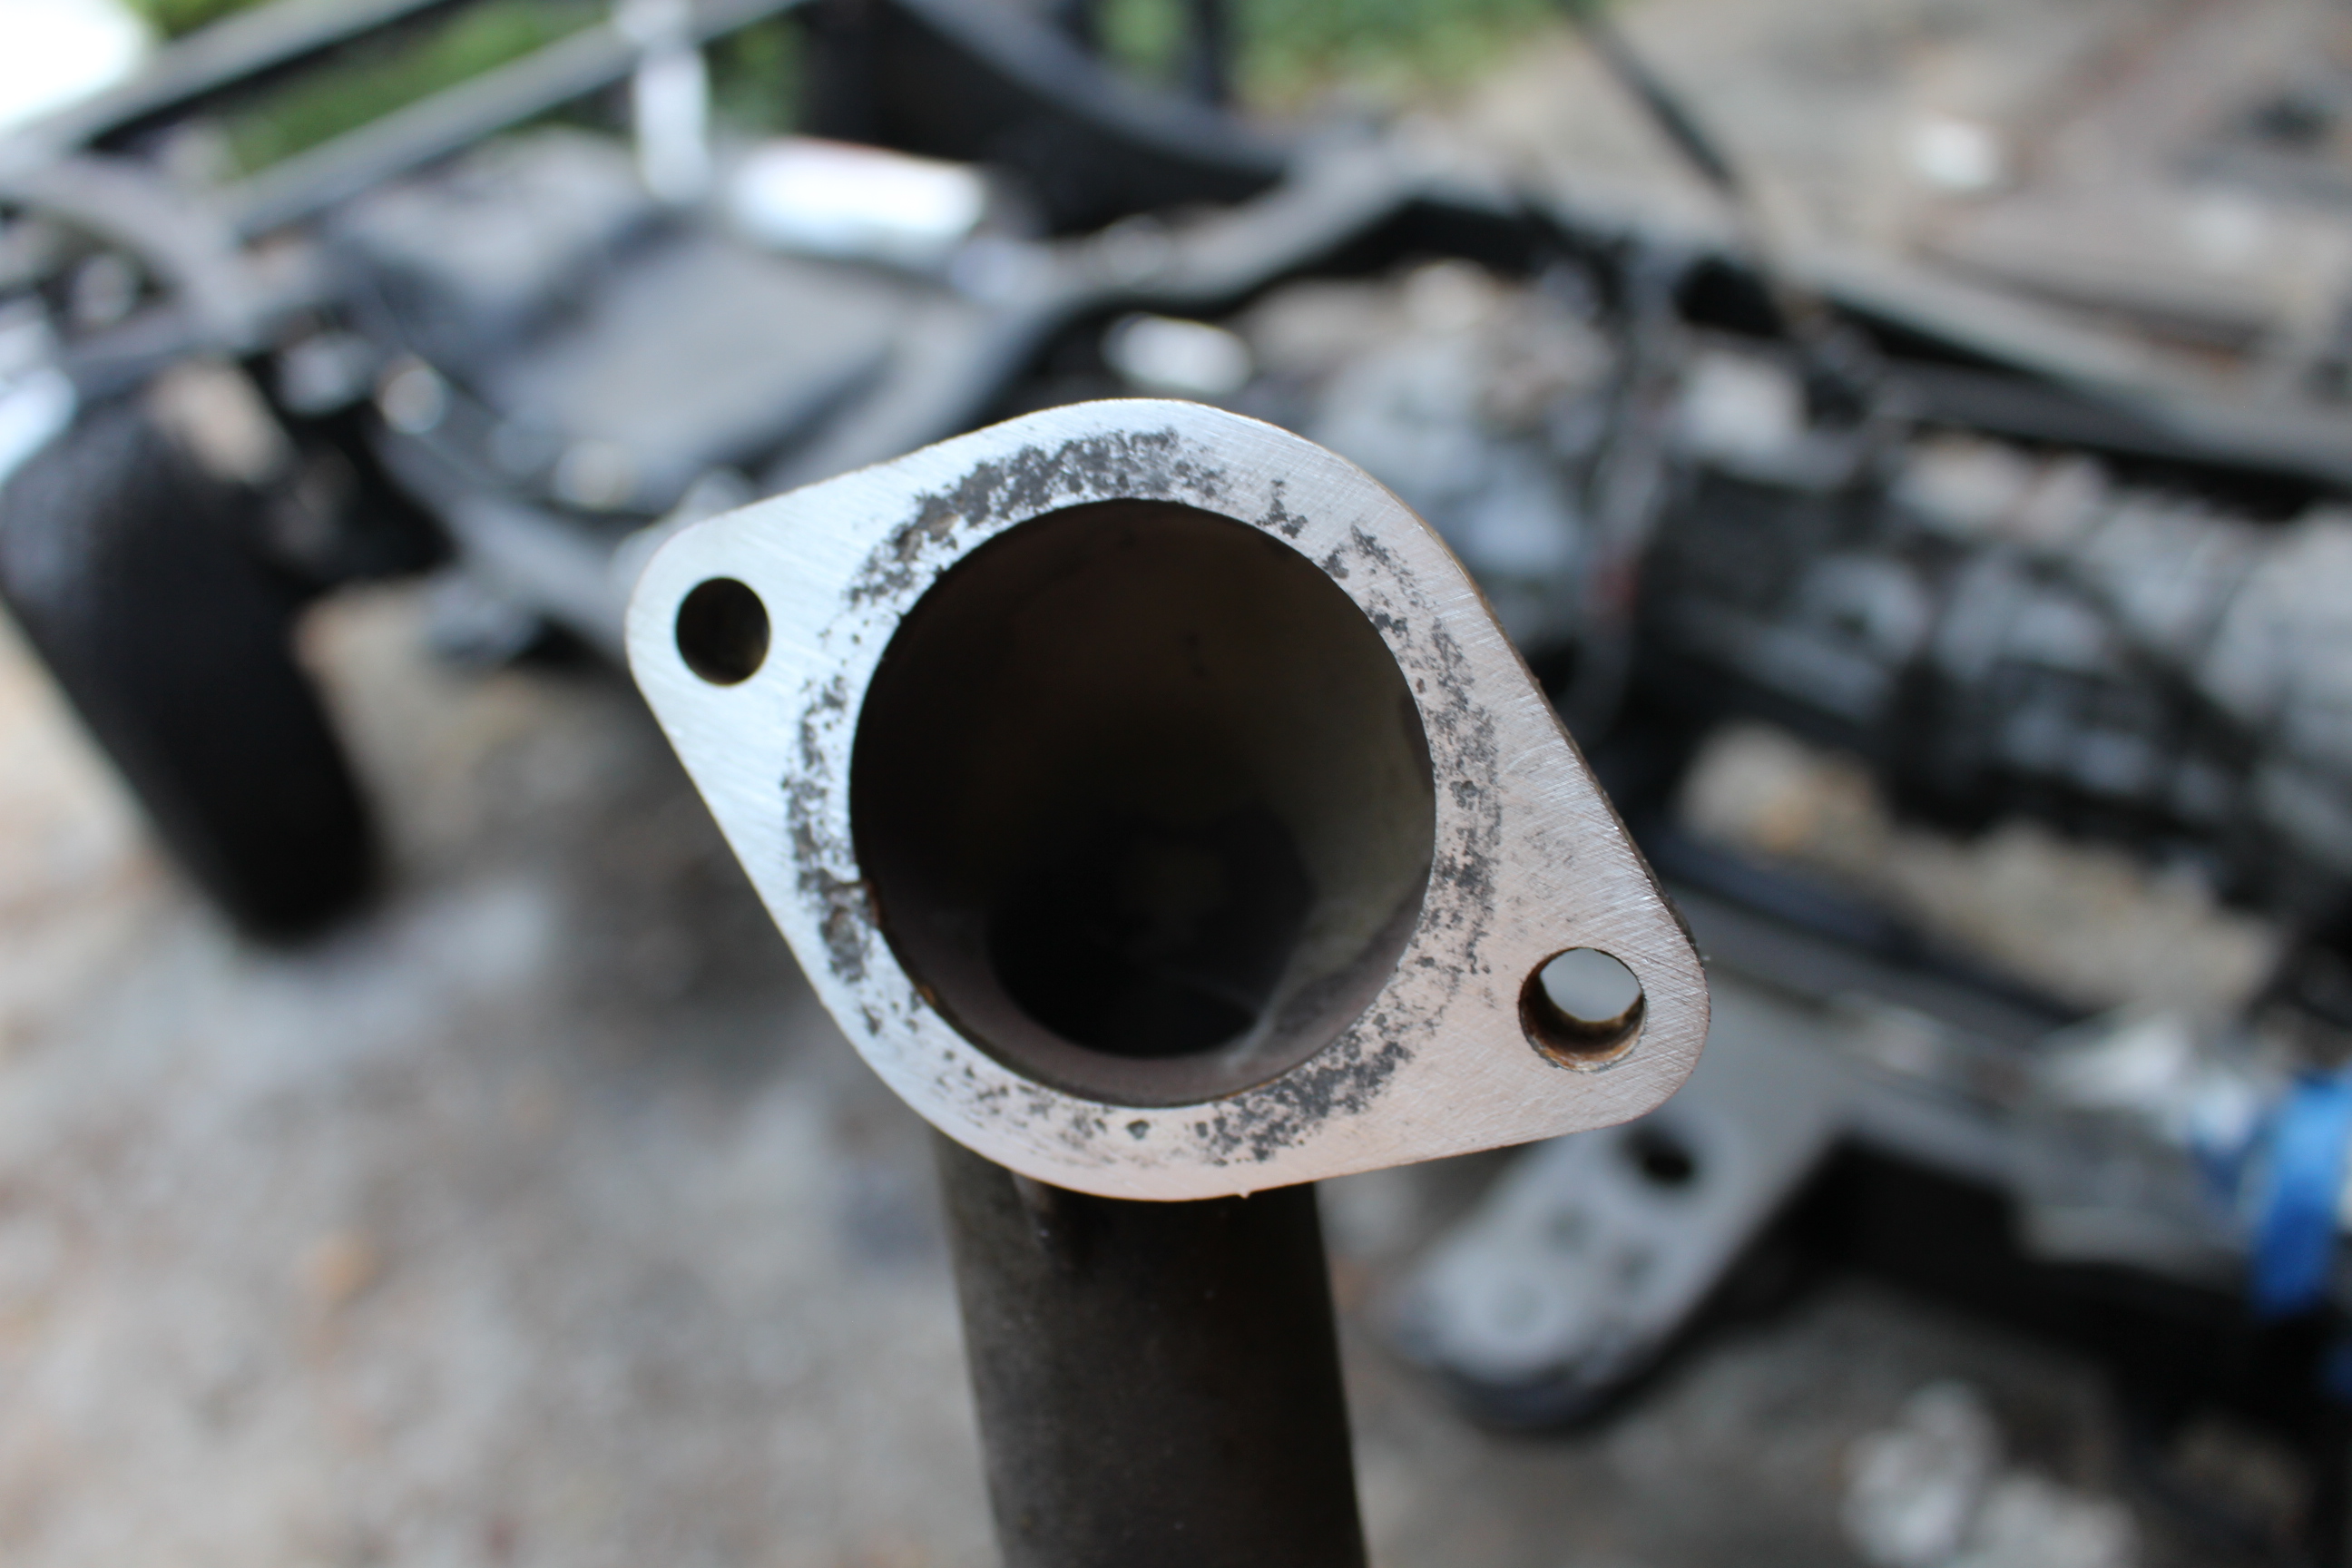
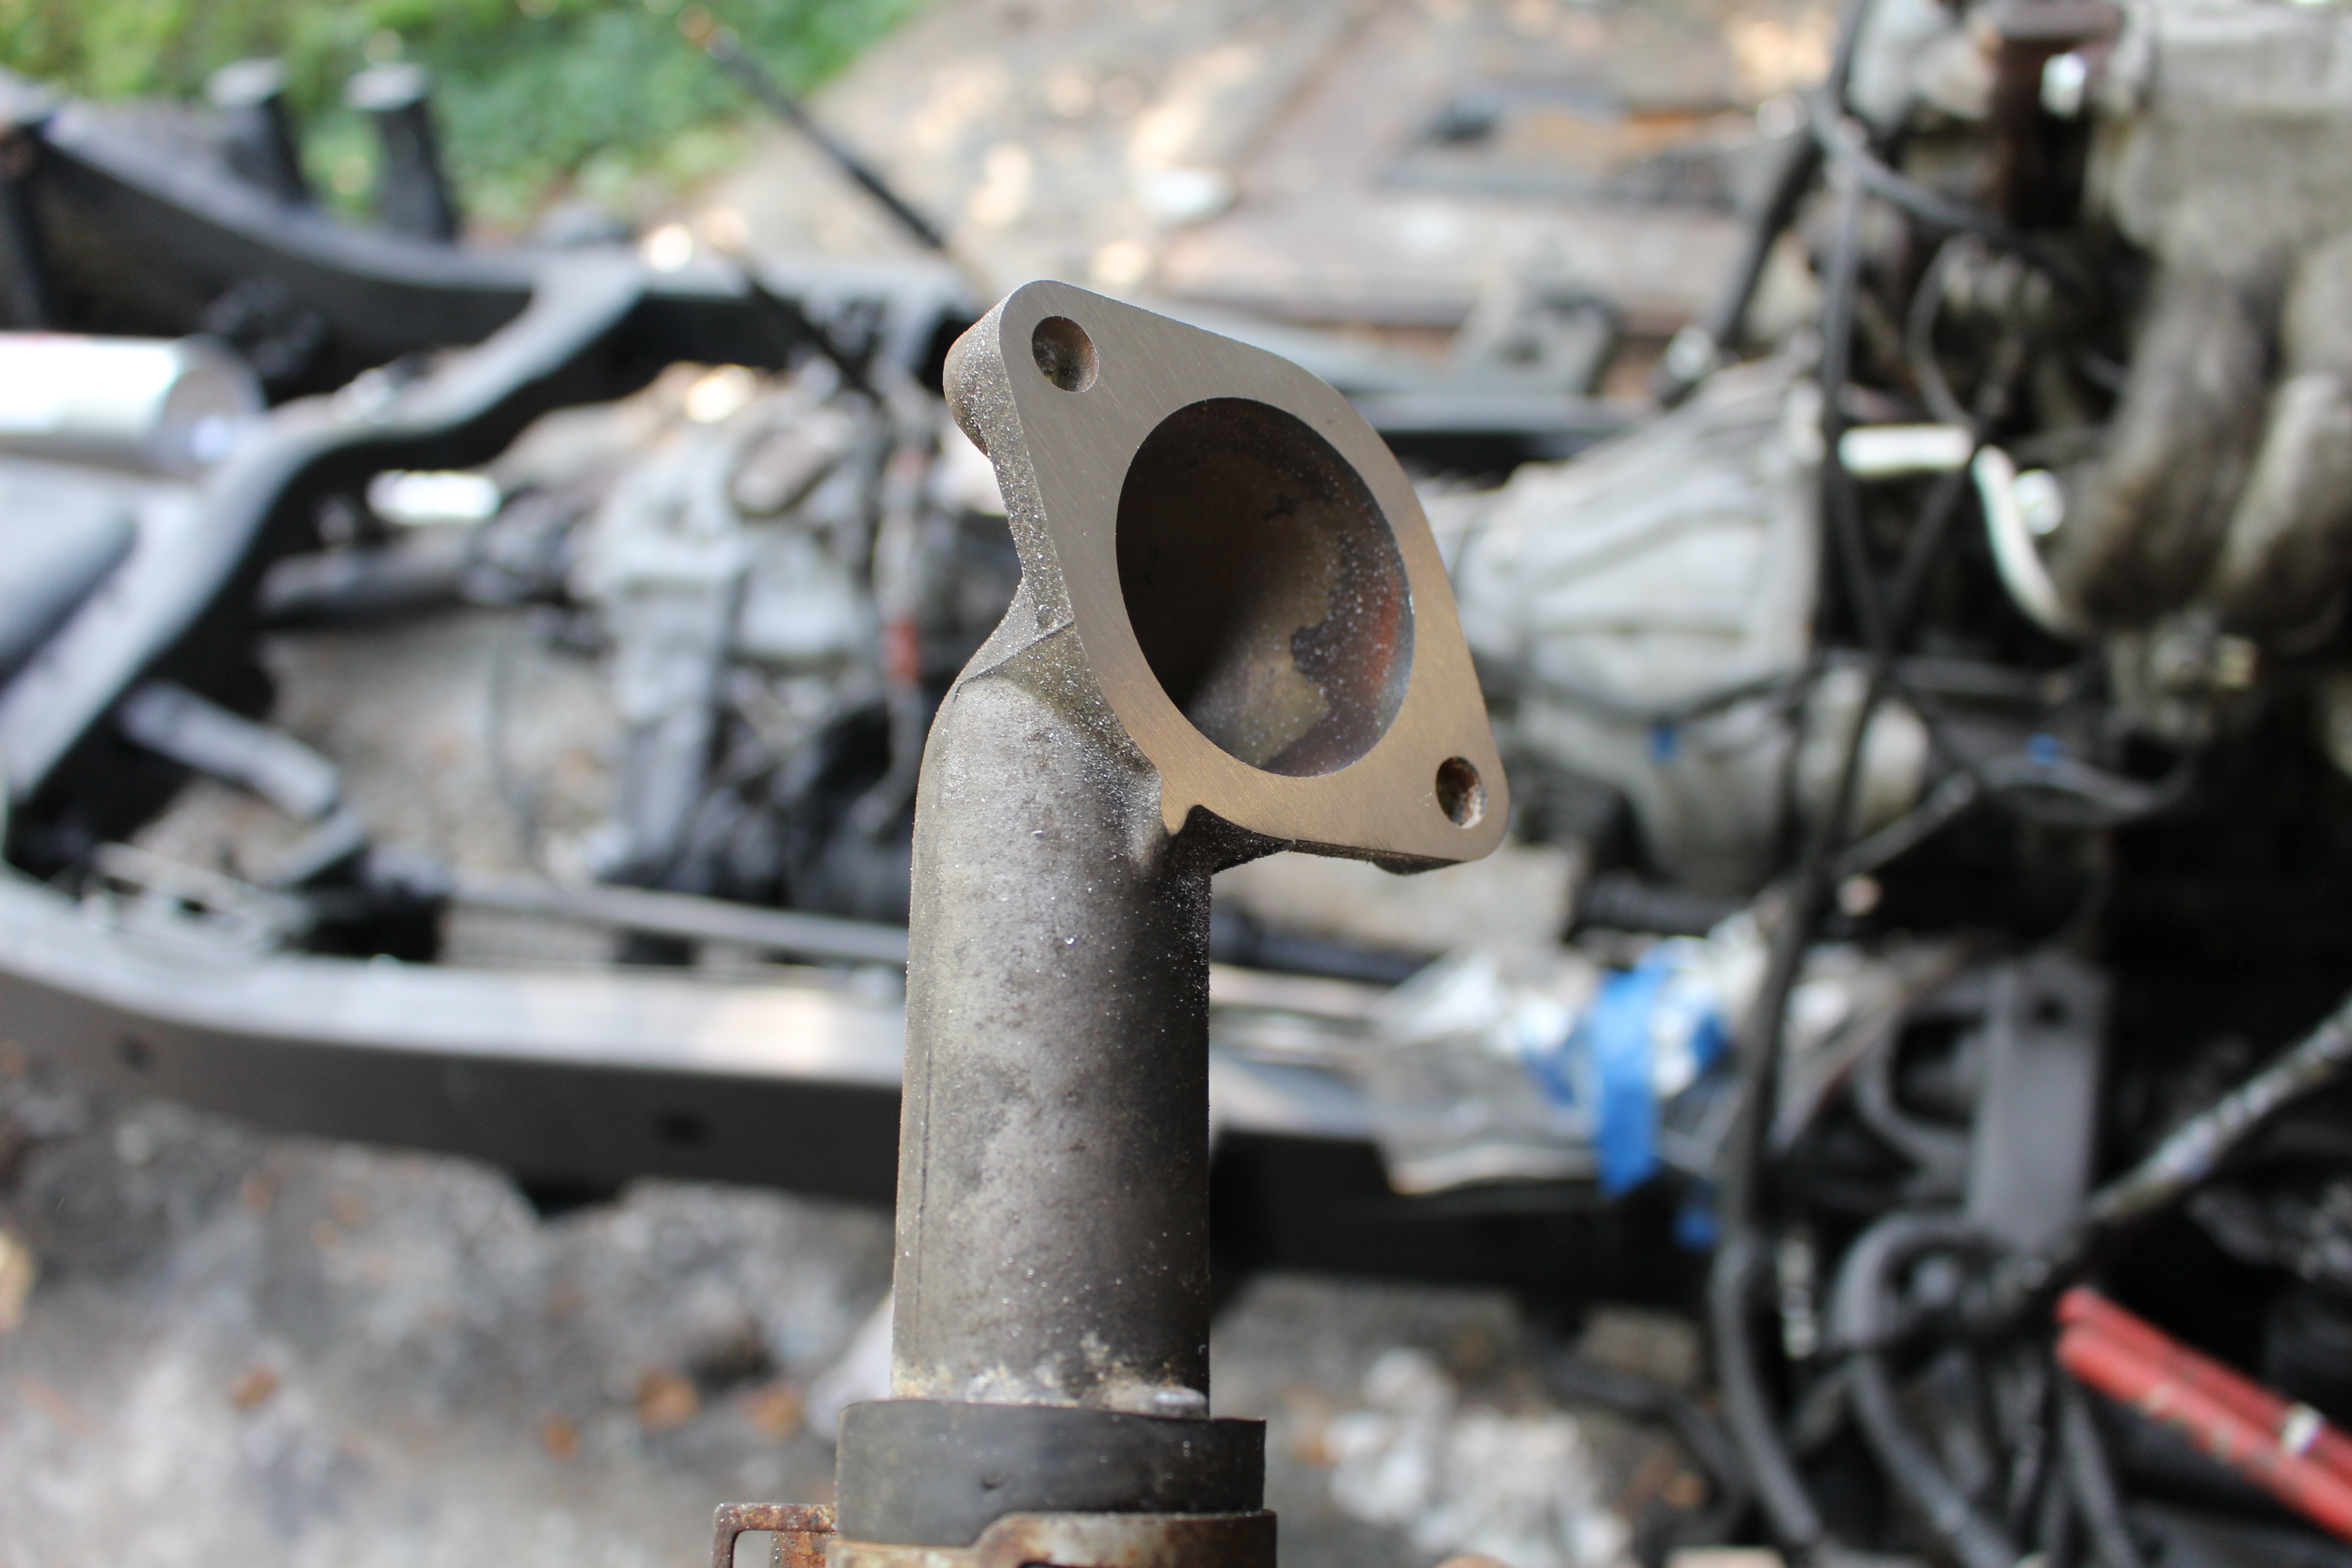
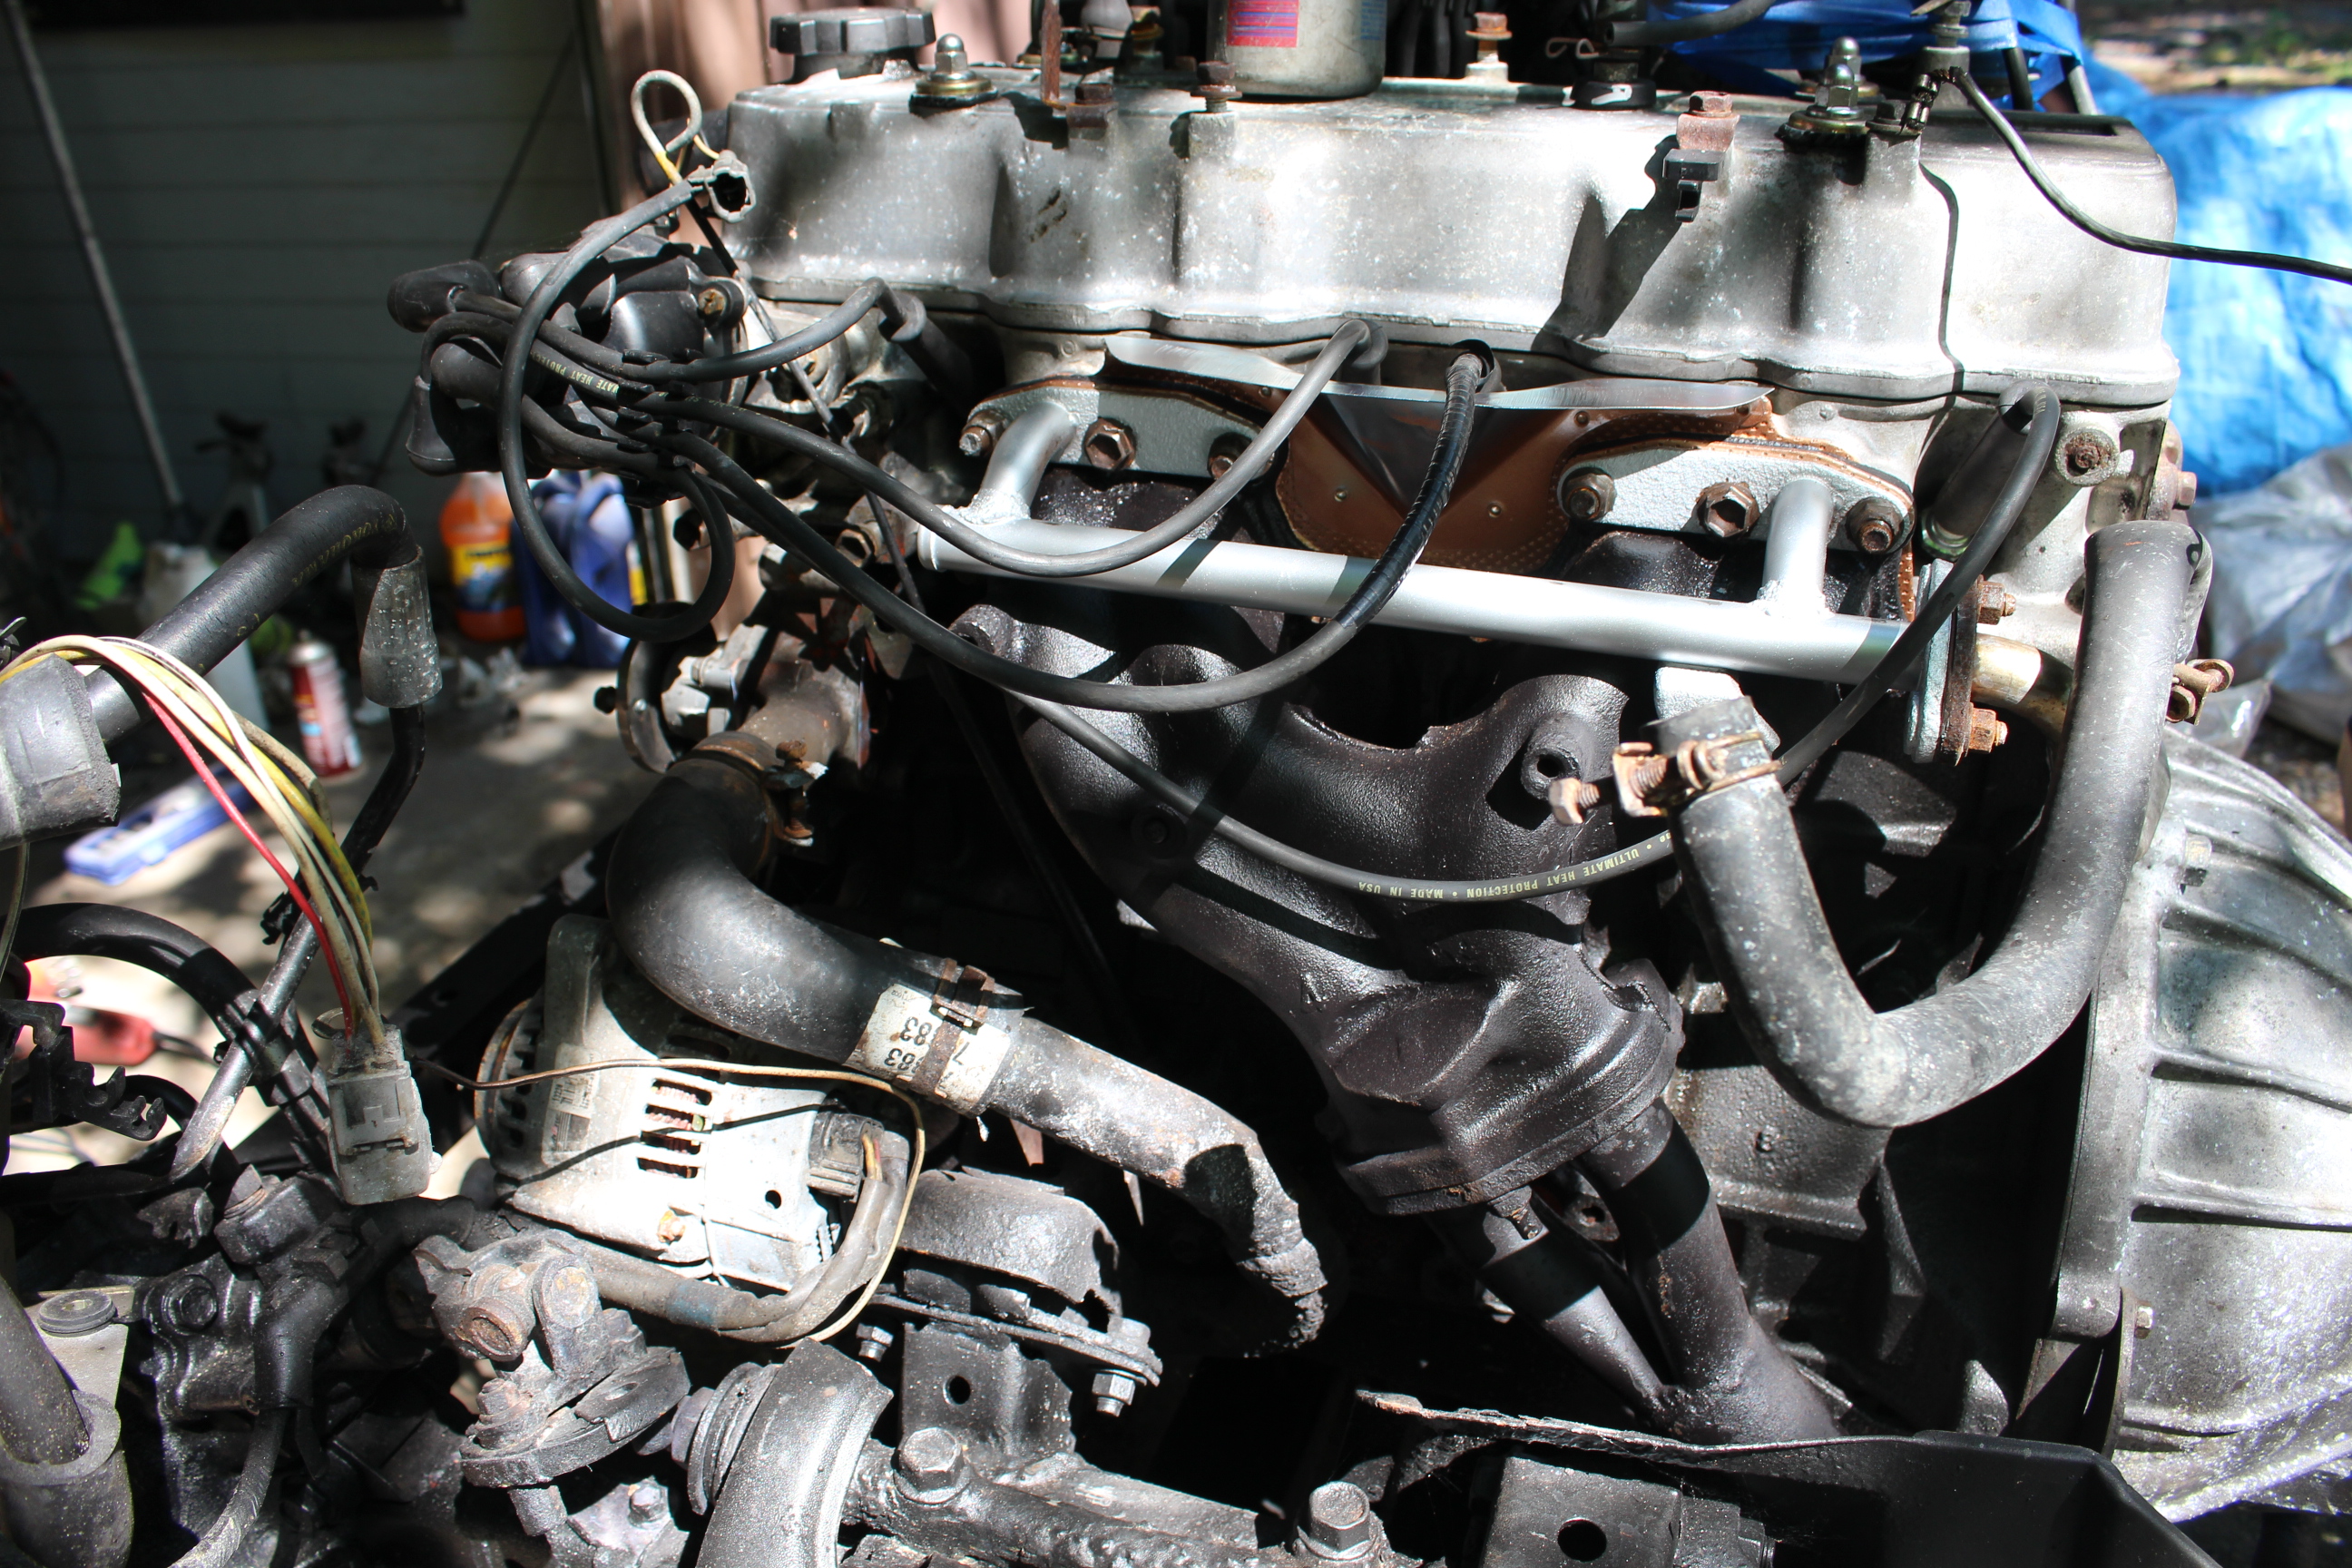
New tensioner and chain and guide kit was installed, as well as a new headgasket. While I had it apart, I tracked down the source of my exhaust leak, a crack on the backside of the manifold. I cleaned the manifold off, did three short welds with air hammering in between each short weld to relieve stresses in the metal. Then I did one long hot pass and repeened everything. no cracks while cooling which was a relief.

Eventually I will either switch to a stainless tube header, or a turbo setup, or a 1UZ-FE swap. But for now the stock manifold will go back on.


Then as someone suggested earlier, while I had the cab off I decided to do the head gasket and timing chains. Like I had mentioned earlier, the truck had overheated over the summer and was filling the coolant system with air. It would also misfire on cold starts as if coolant was in the cylinder. Pulled the valve cover gasket, it wasn't pretty.

chocolate milk, anybody?

Water pump off, oil pump off

Head off, timing cover off

old timing chain tensioner
New tensioner and chain and guide kit was installed, as well as a new headgasket. While I had it apart, I tracked down the source of my exhaust leak, a crack on the backside of the manifold. I cleaned the manifold off, did three short welds with air hammering in between each short weld to relieve stresses in the metal. Then I did one long hot pass and repeened everything. no cracks while cooling which was a relief.
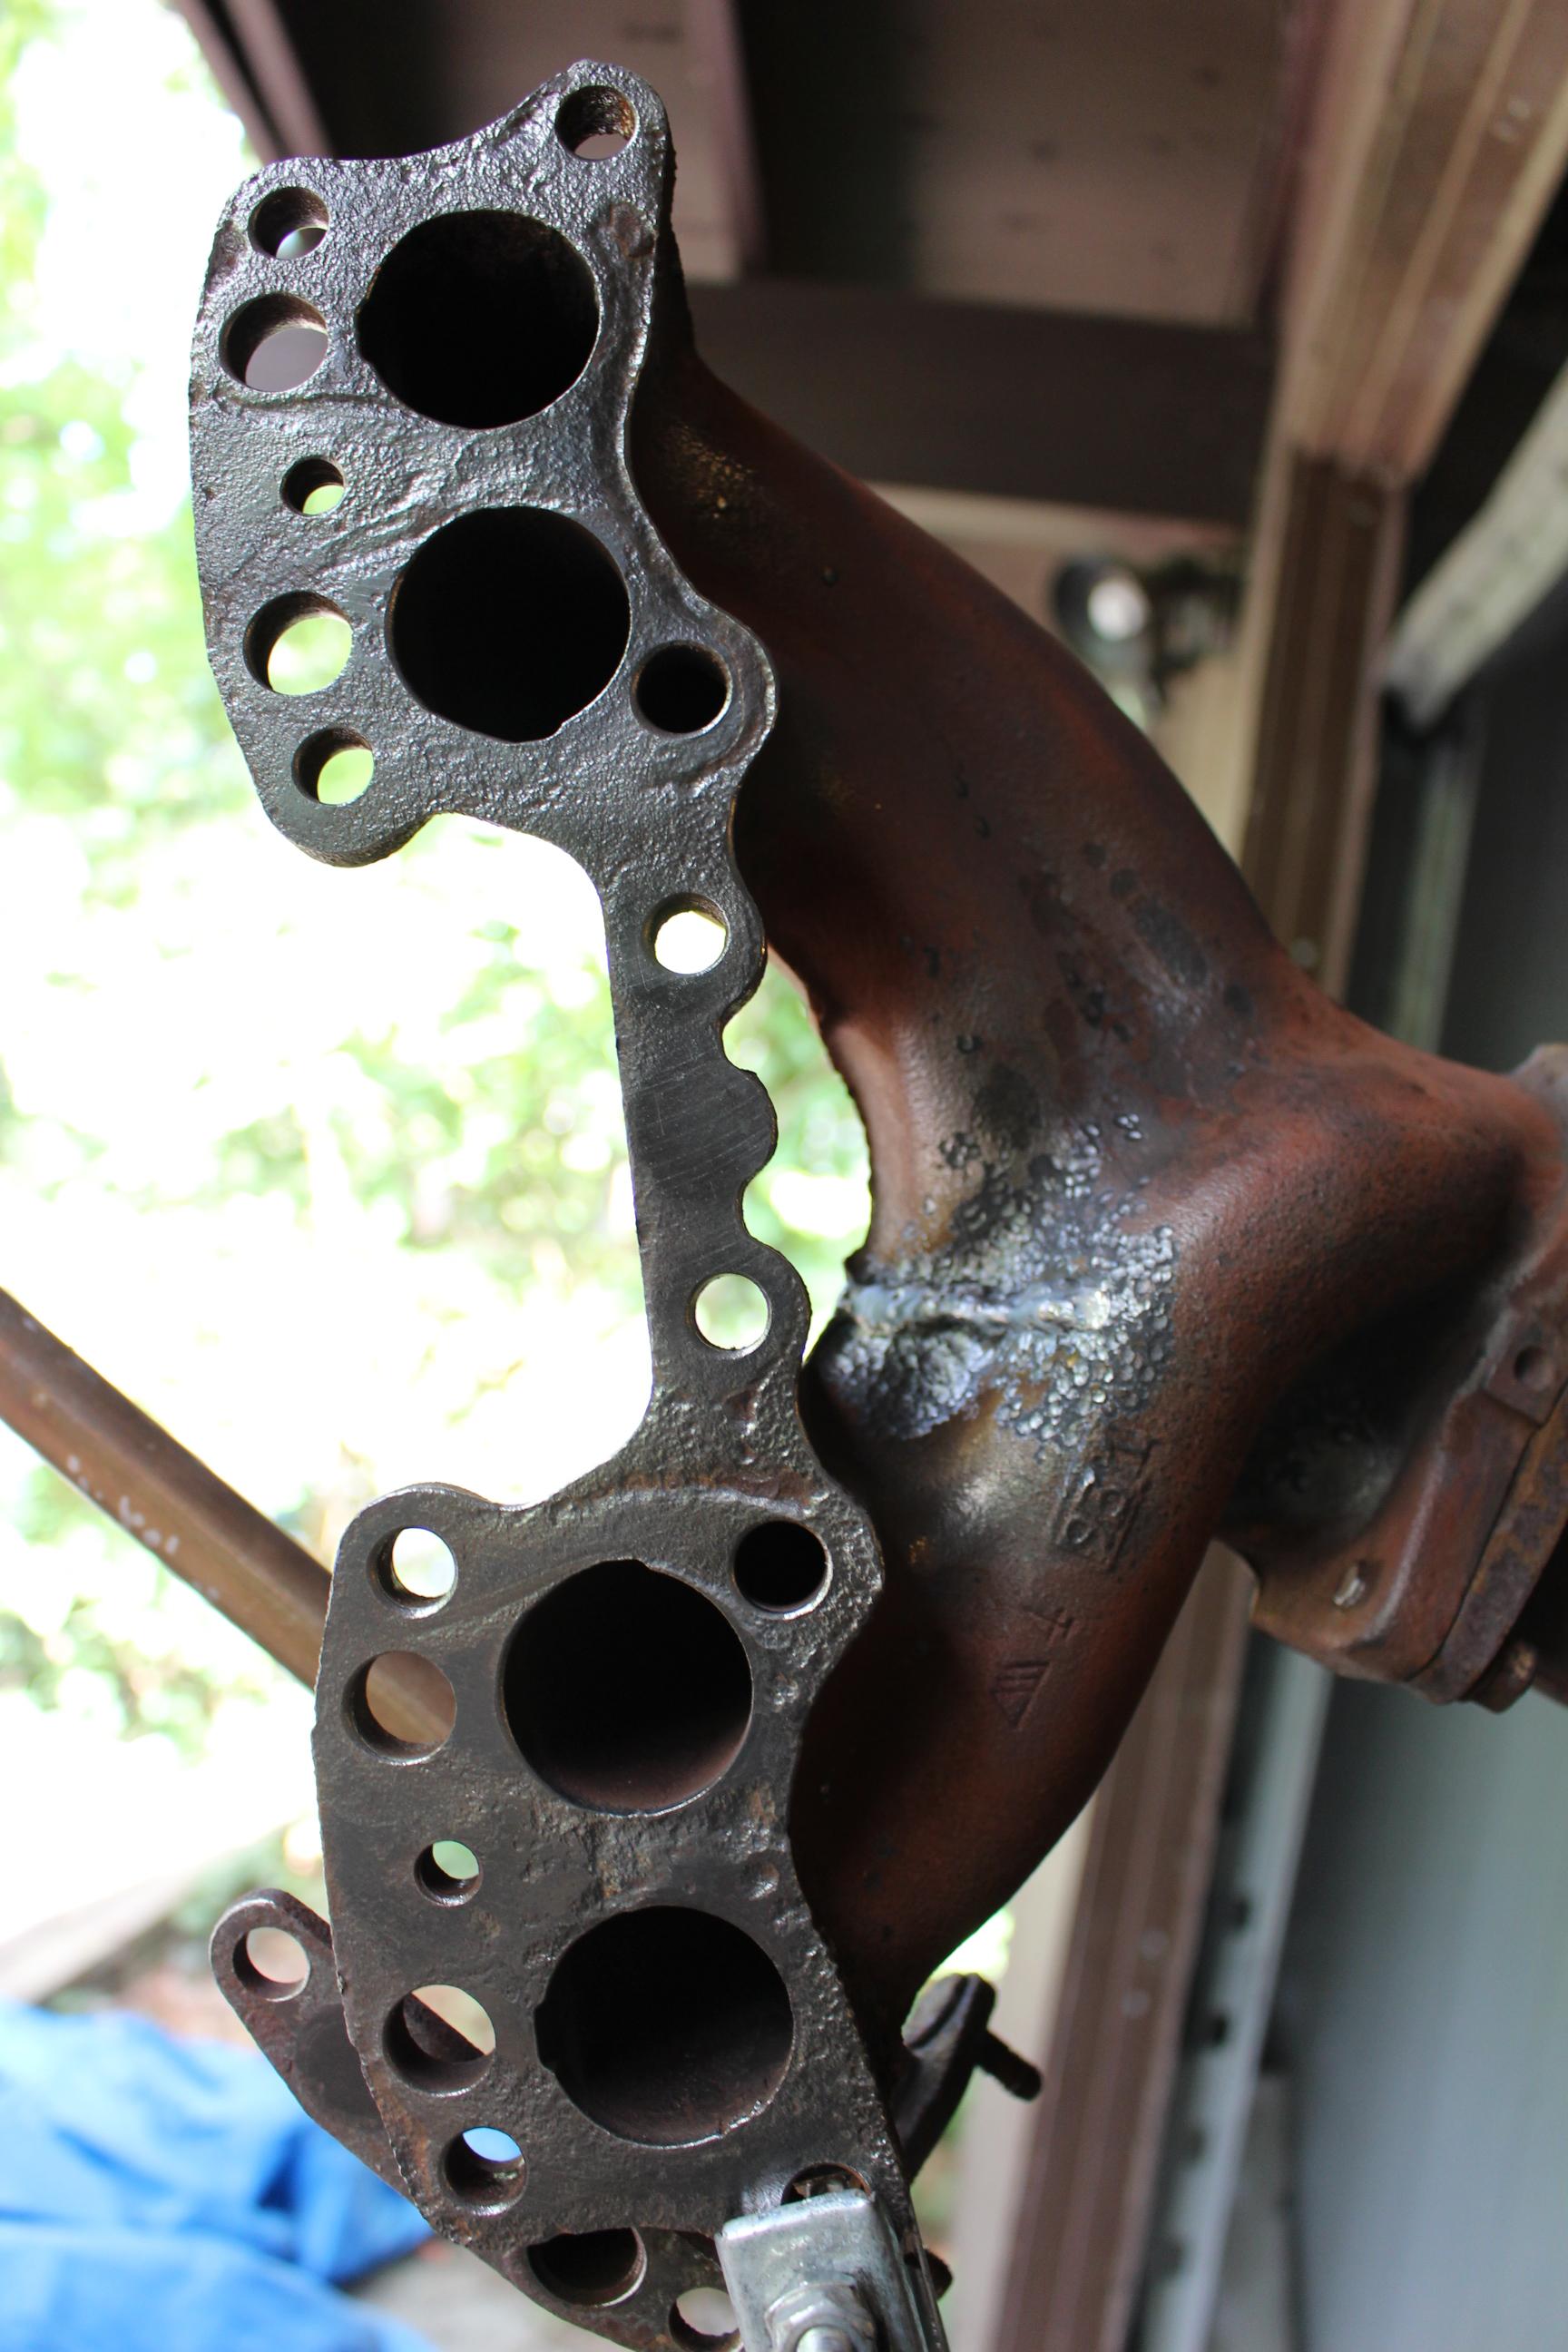
Eventually I will either switch to a stainless tube header, or a turbo setup, or a 1UZ-FE swap. But for now the stock manifold will go back on.
09-05-2016, 04:40 PM
#10
Registered User
Thread Starter
Join Date: Sep 2016
Posts: 17
Likes: 0
Received 0 Likes
on
0 Posts
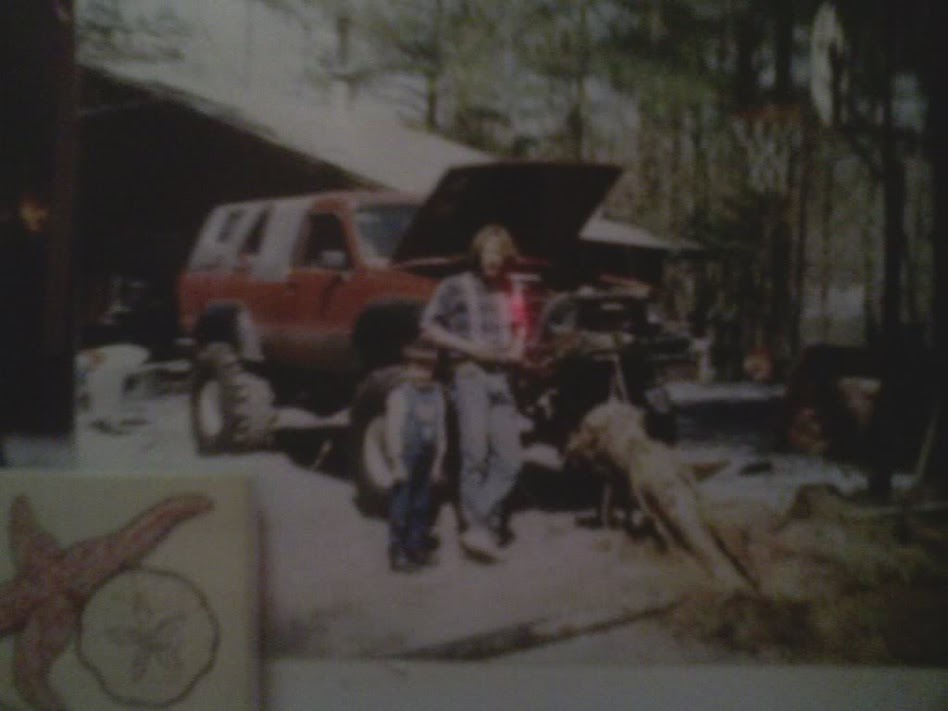
Found another old photo of our 4runner. My dad used it to pull tree stumps out of the ground when we were clearing an area for a dog fence. I have since bought the house a few years ago.

Also found a pic of when I had to weld the gas tank bracket onto the gas tank cross member, with the tank in place so everything lined up right. It was sketchy welding next to the gas tank! I'm still here so all is well.
The new leafspring bushings I installed.

Also found a pic of when I had to weld the gas tank bracket onto the gas tank cross member, with the tank in place so everything lined up right. It was sketchy welding next to the gas tank! I'm still here so all is well.
The new leafspring bushings I installed.
 09-05-2016, 04:41 PM
#11
Registered User
Thread Starter
Join Date: Sep 2016
Posts: 17
Likes: 0
Received 0 Likes
on
0 Posts
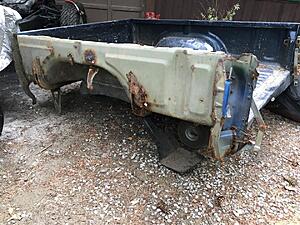
Ive almost got the car lounge caught up on my progress. A couple weeks ago a buddy of mine helped me rid the bed of that awful bondo fender.

Yay more sand blasting needed. The tail light mount will need work too.
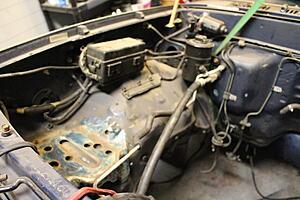
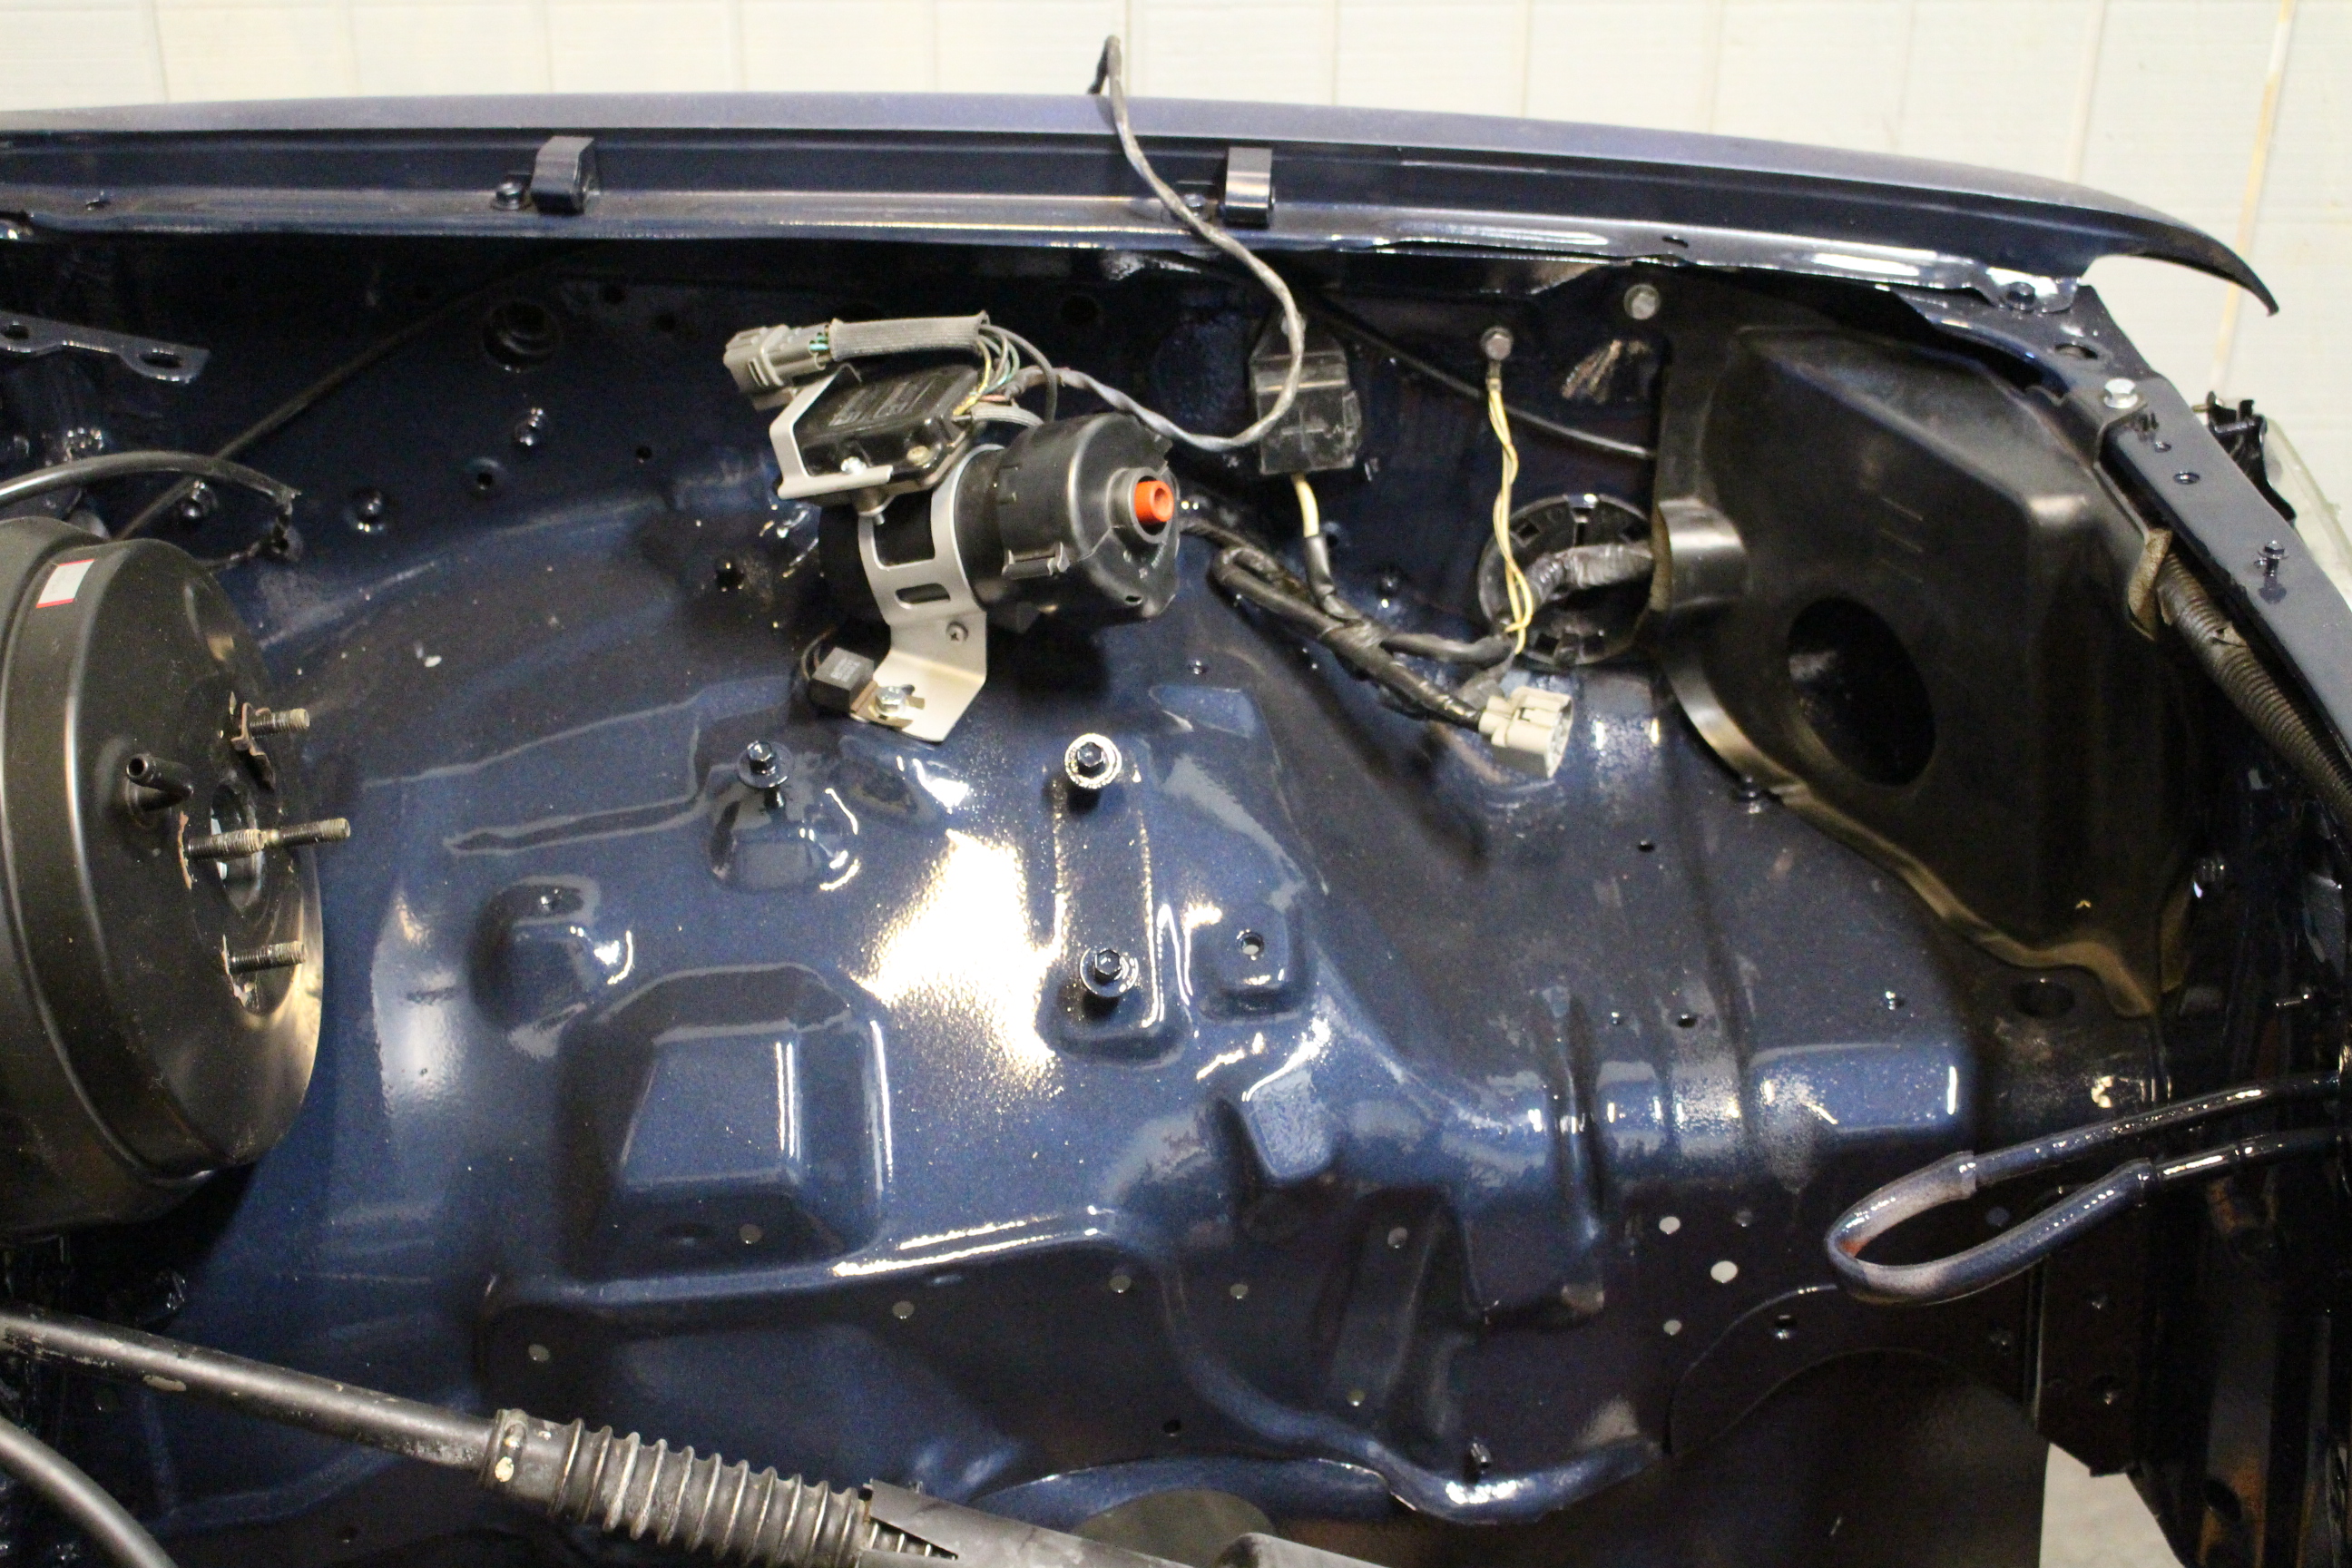
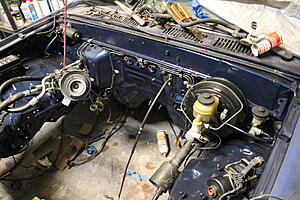
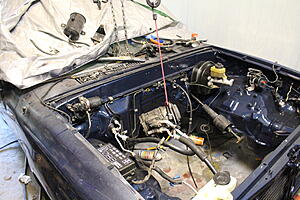
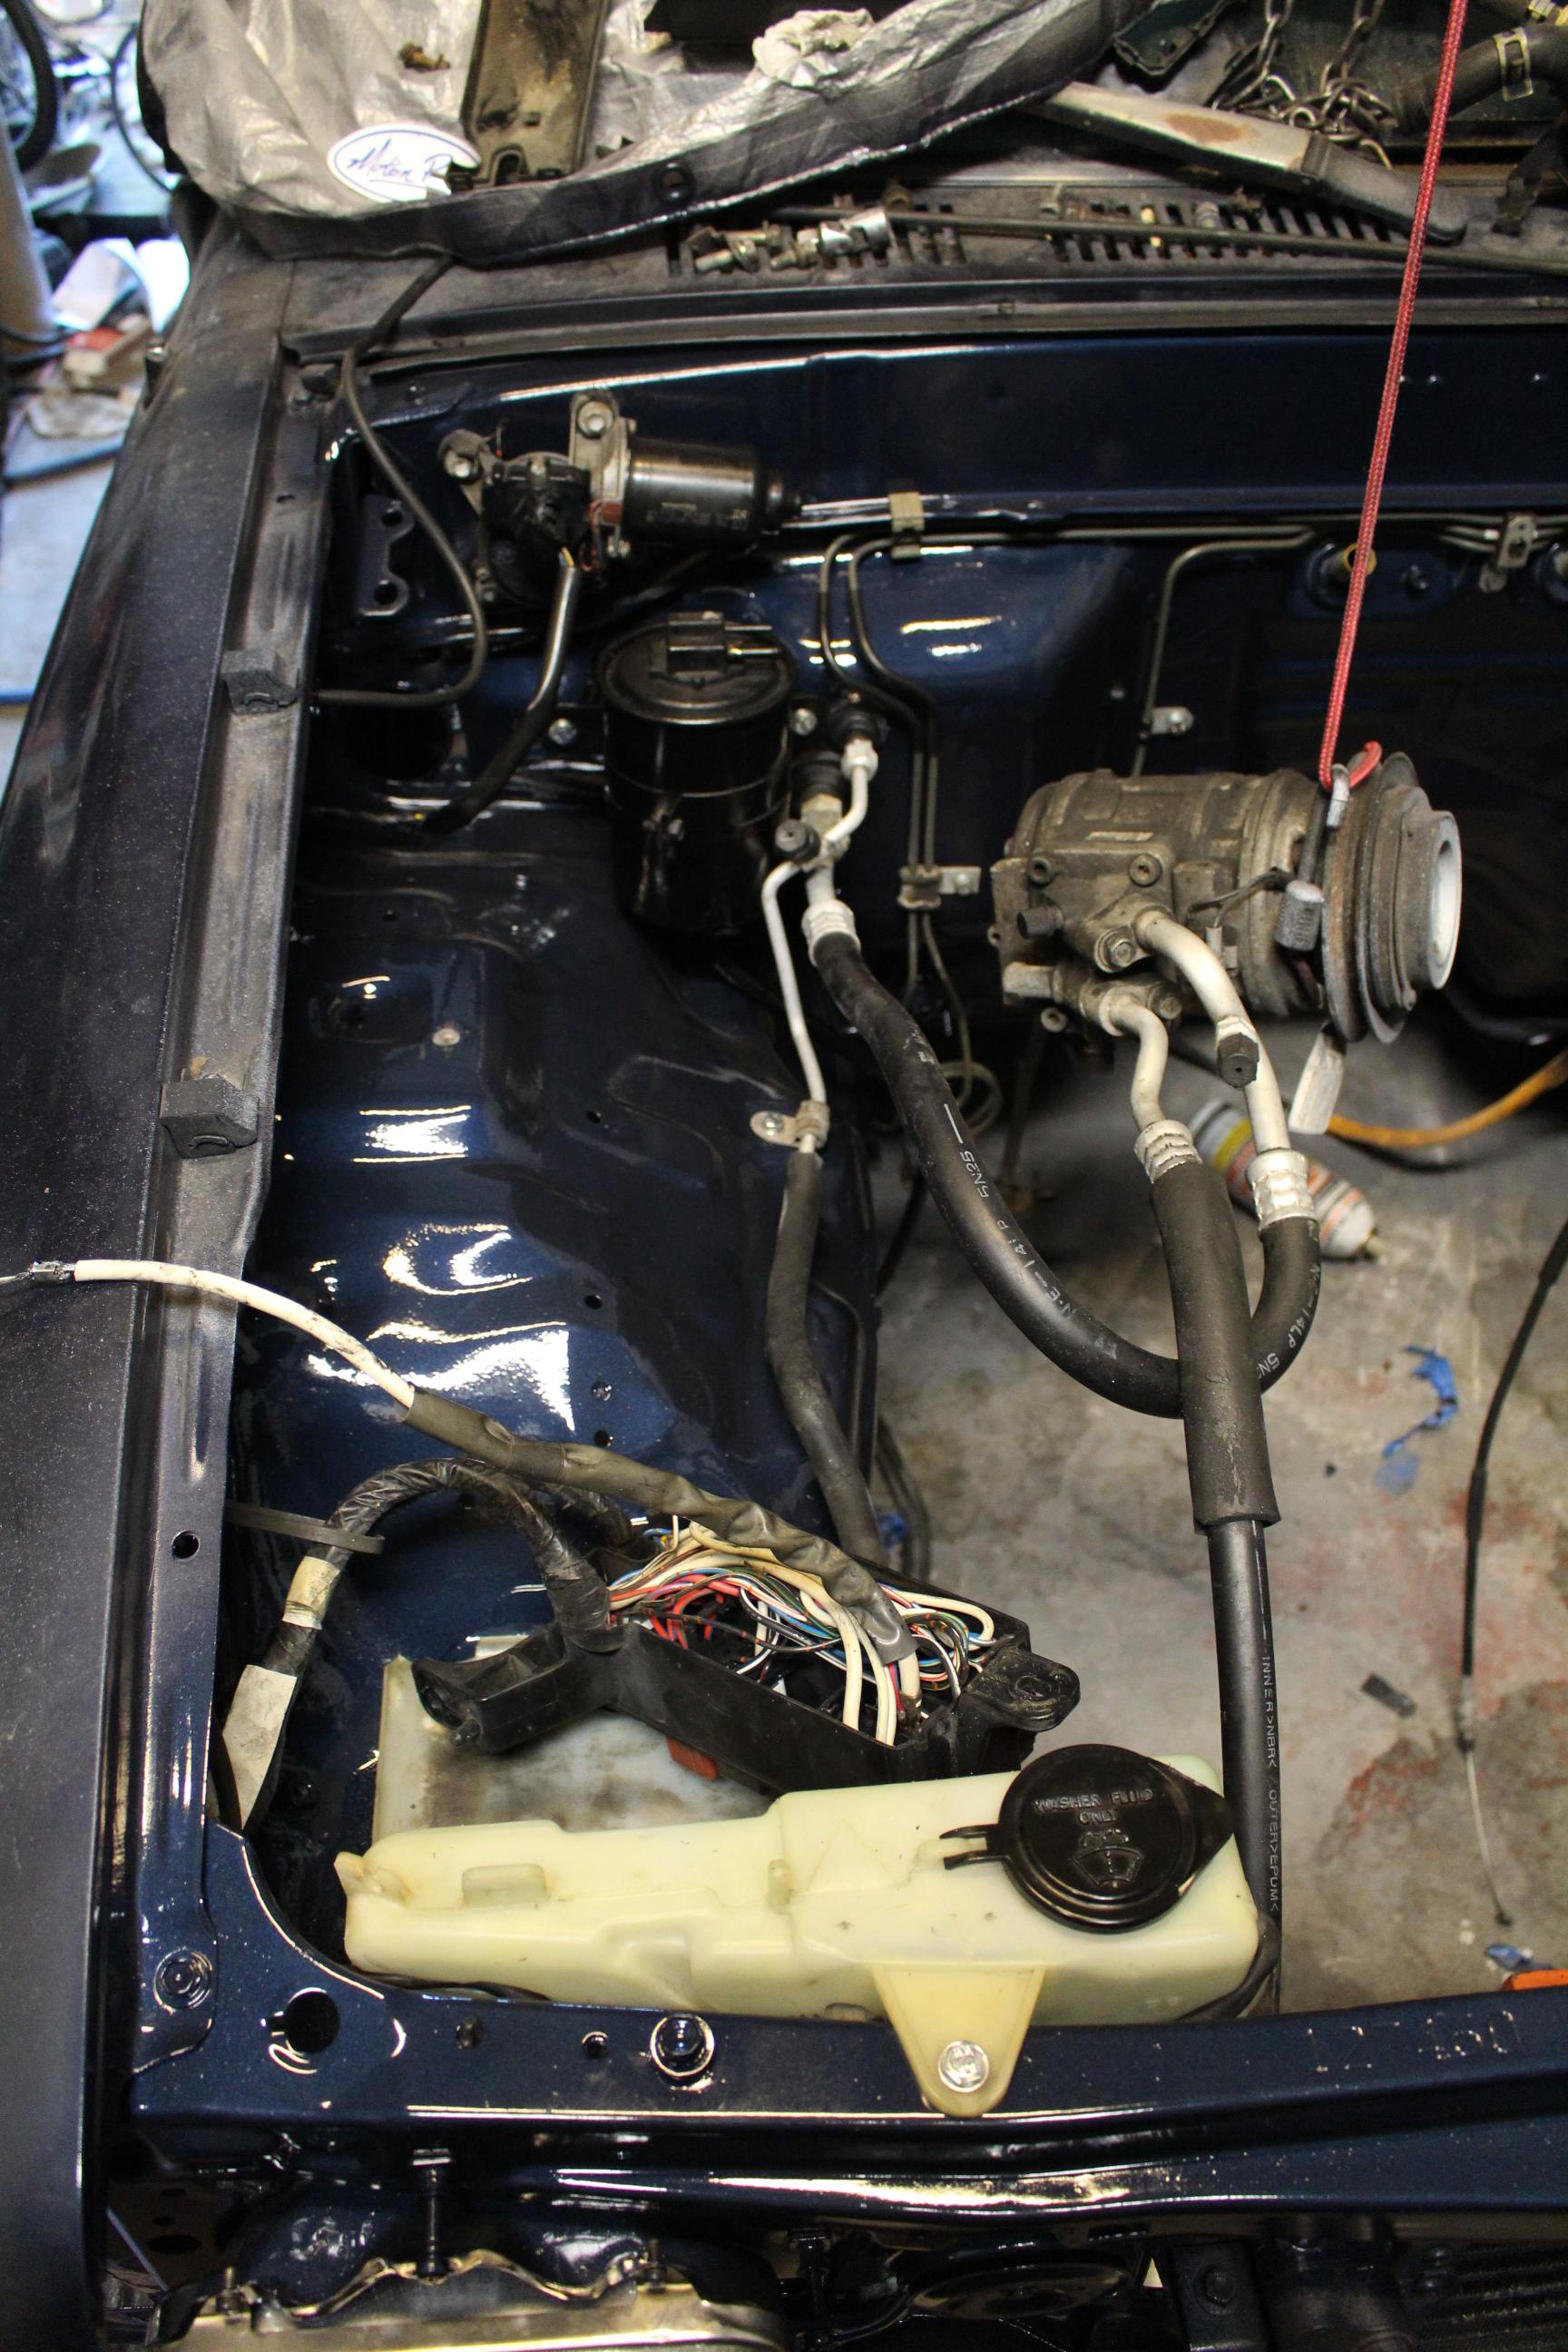
Around the same time I cleaned up the engine bay. There was some battery tray rust so I decided to respray it. The color is Eastwood moonlight drive metallic topped with their European clear. Can't wait to do the whole truck!


Yay more sand blasting needed
. The tail light mount will need work too. 
Around the same time I cleaned up the engine bay. There was some battery tray rust so I decided to respray it. The color is Eastwood moonlight drive metallic topped with their European clear. Can't wait to do the whole truck!


 09-05-2016, 04:42 PM
#12
Registered User
Thread Starter
Join Date: Sep 2016
Posts: 17
Likes: 0
Received 0 Likes
on
0 Posts
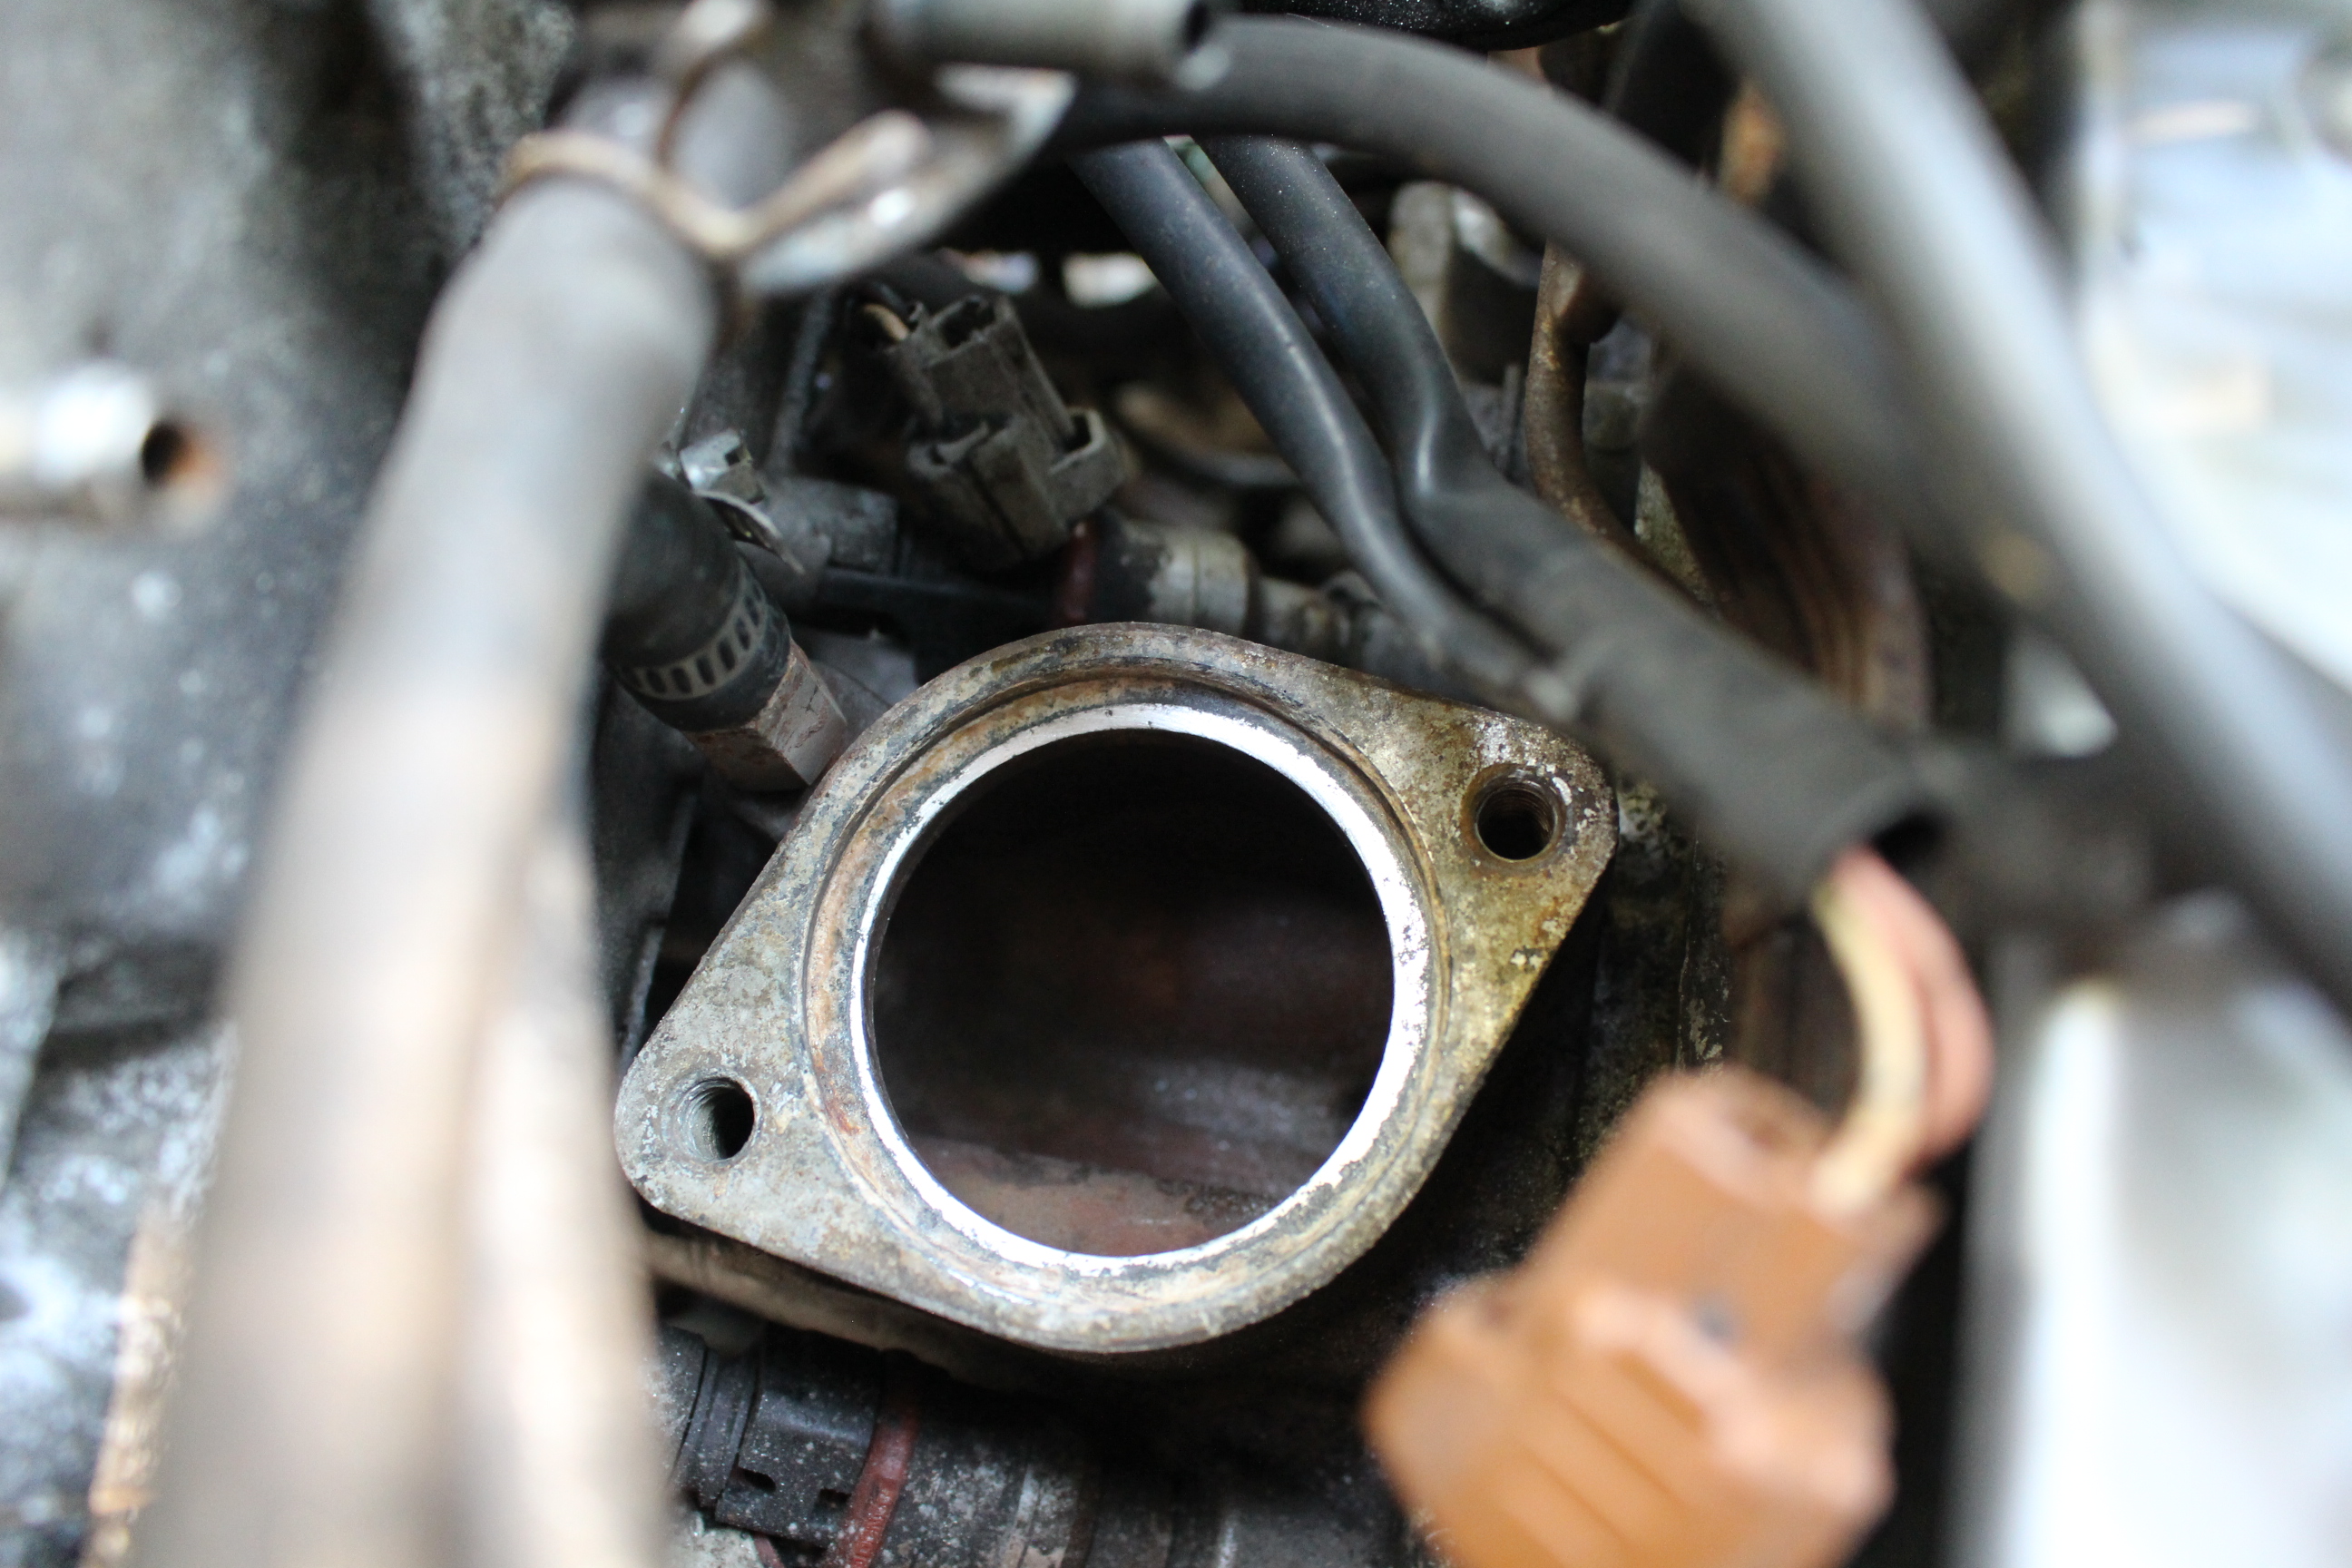
So after speaking to my dad about the progress on the truck, I mentioned that I was installing a 3" body lift. He recommended I drill a small 1/16" hole in the plate of the thermostat, as doing a body lift changes the elevation of the radiator and heater cores and can cause air to get trapped in the system. I did some research online and it seems overheating and body lifts occur a lot more often than I would have thought. The small hole in the thermostat allows any trapped air below the thermostat to escape so the coolant can heat up the thermostat as designed, while being small enough to not have any noticeable effect on engine warm up times.
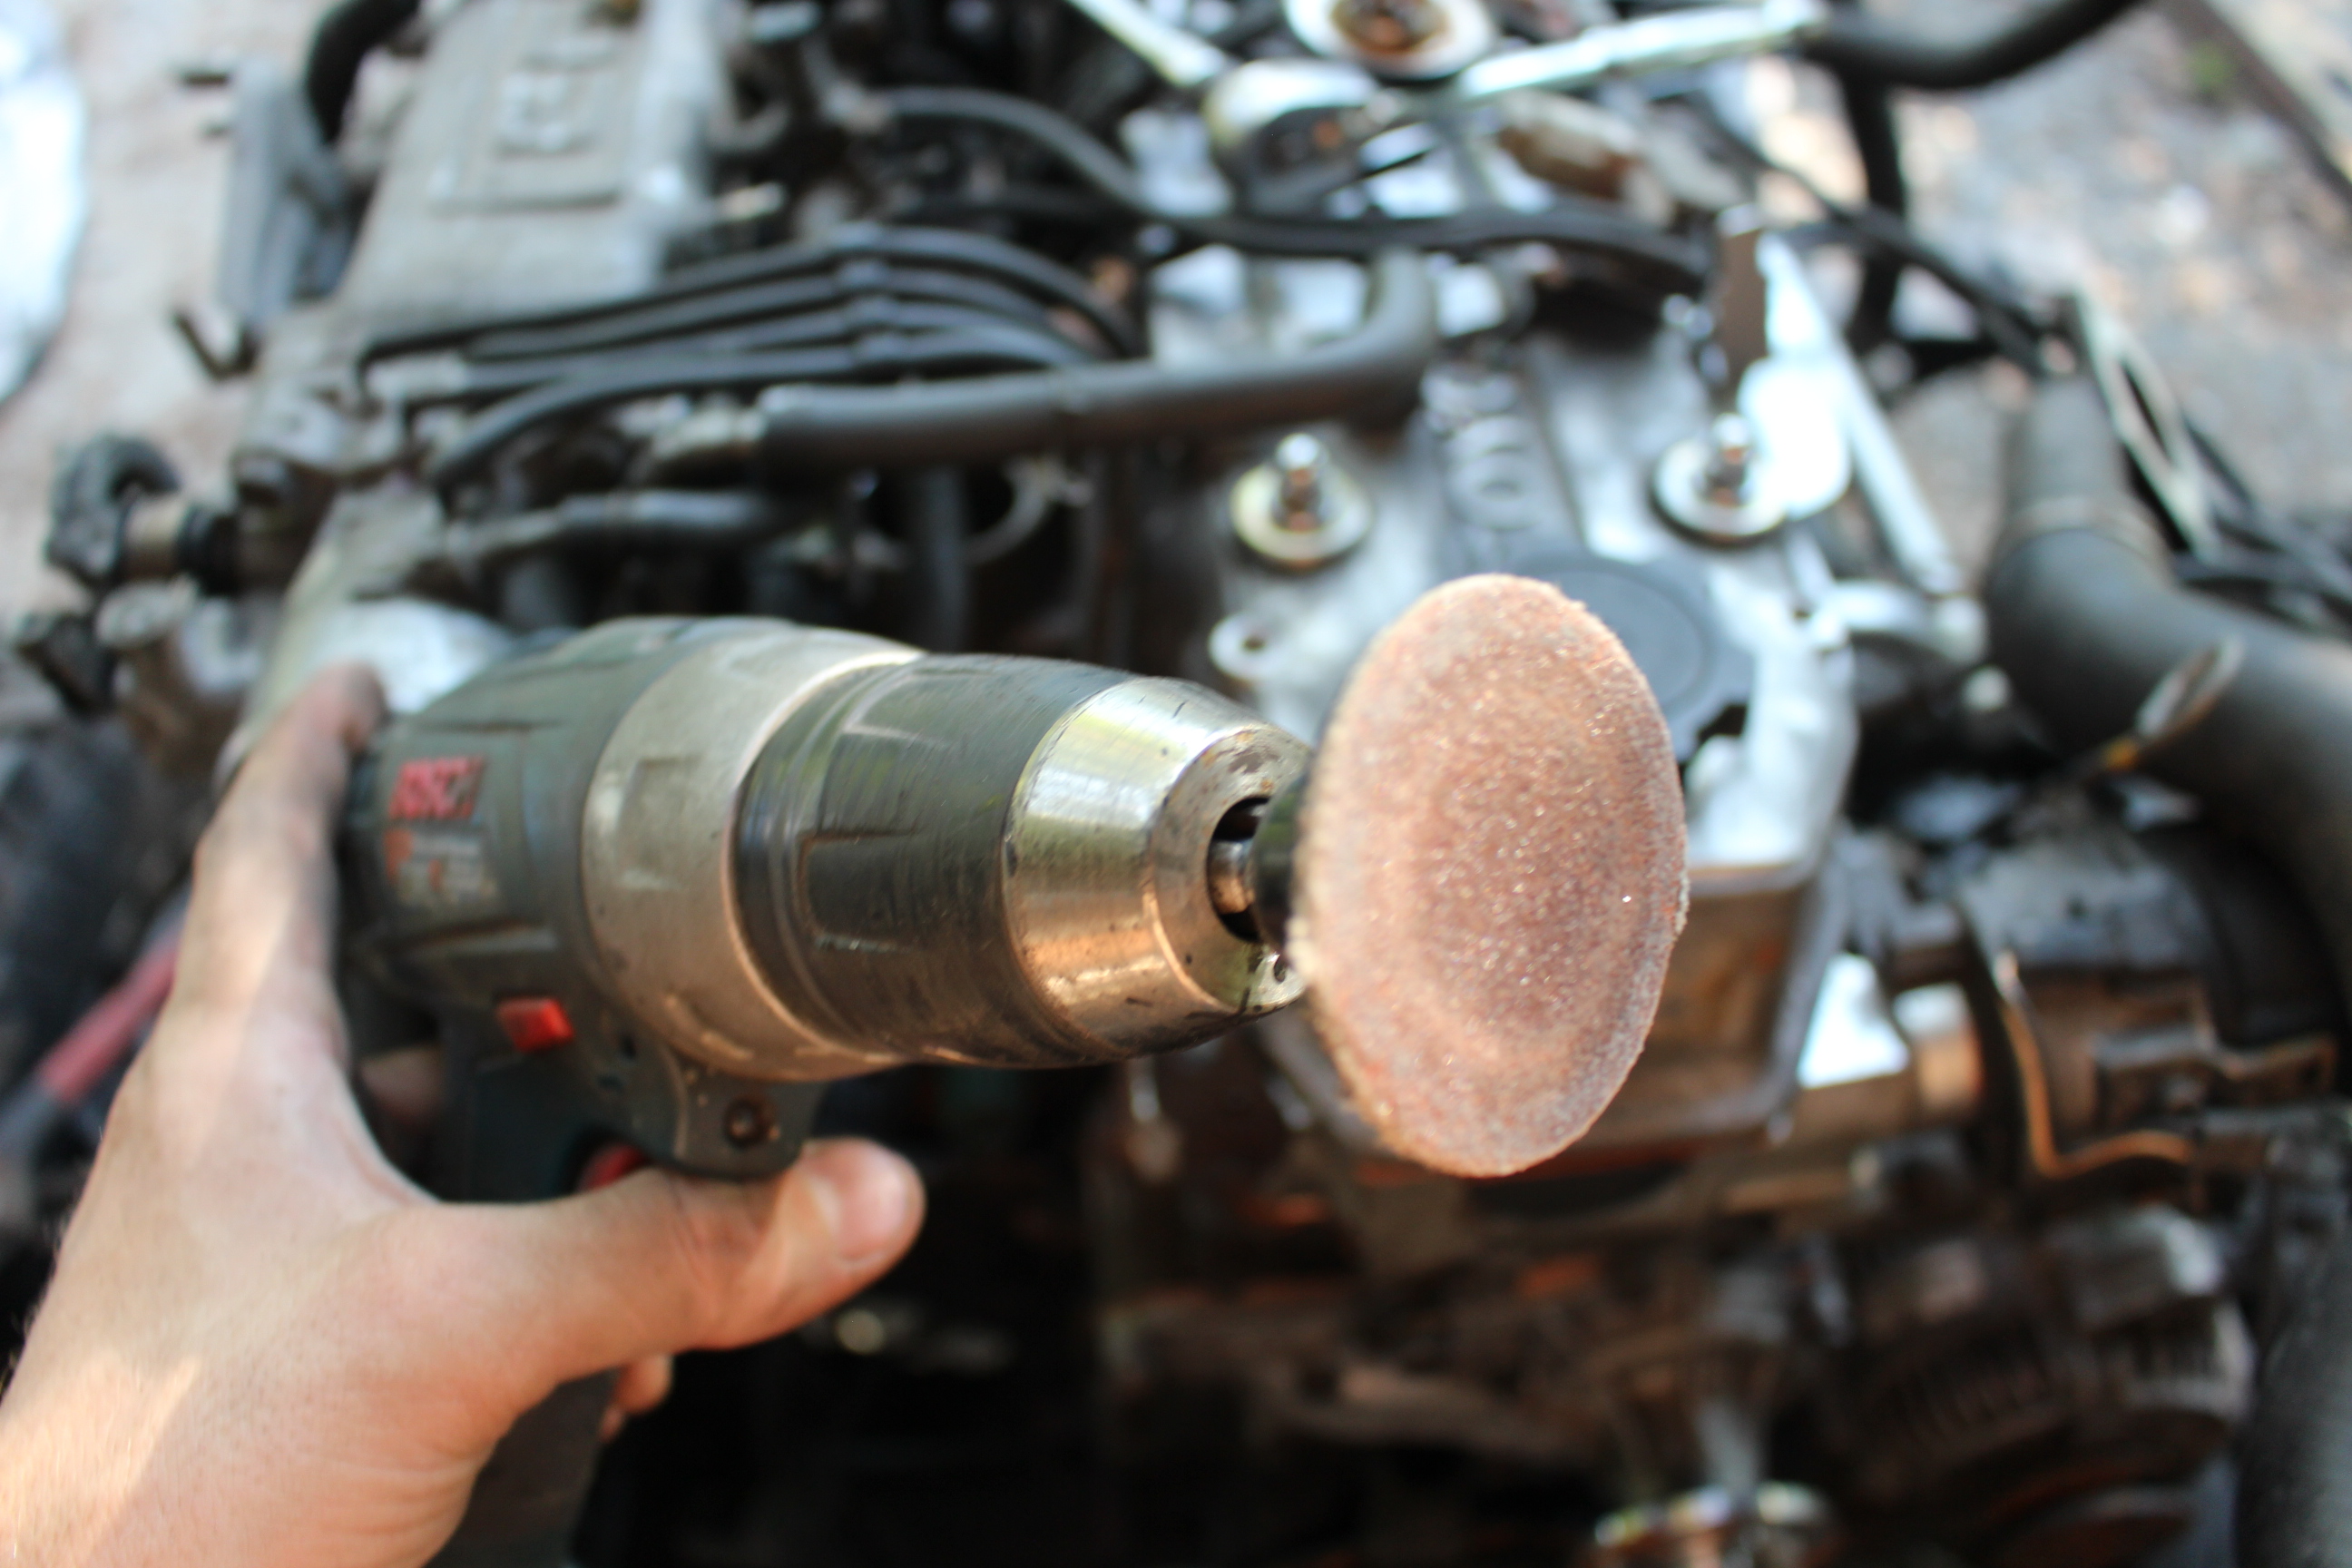
I pulled my thermostat and was greeted with more pitting on the gasket surface. I took Air and Water's advice and evened out the mating surface of the thermostat housing. I also cleaned up the housing in the cylinder head some to give the rubber seal somewhere to mate up to.
Some time with my belt sander and I had it smooth like new.

Used one of these to clean up the inside of the thermostat housing in the head. It isn't perfect but it'll get the job done.

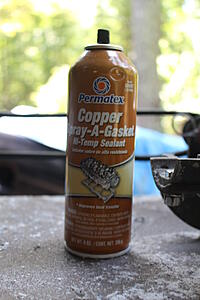
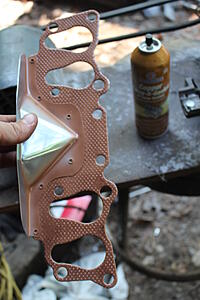
Also put the manifold on there for a bit but broke the belt. Time will tell if this one leaks or not, but I think I will be ok as the gasket is fairly thick and isn't a crush ring gasket type like a headgasket would be. Coated the gasket in the copper spray gasket goodness to give it a little extra kick. Cleaned up the manifold a bit and sprayed it with some 1500* Black paint. Time will tell how long it last (hopefully long enough until I get the header or do a turbo setup or a motor swap)

The mighty belt sander. I think my grand dad made this. I found it in his basement after he passed and have been keeping it busy since then

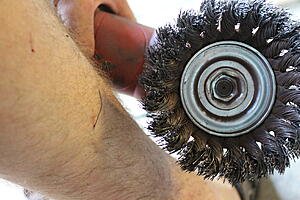
Like 0ddJ0b stated on the last page, these things are not cute or cuddly at all! definitely wear pants and PPE when using them.
Tucked back in place. The 2 bolt flanges on the cat are just about rusted thin, so this whole operation may be on the way out sooner than expected, but for now it's in place and I can tackle other stuff.

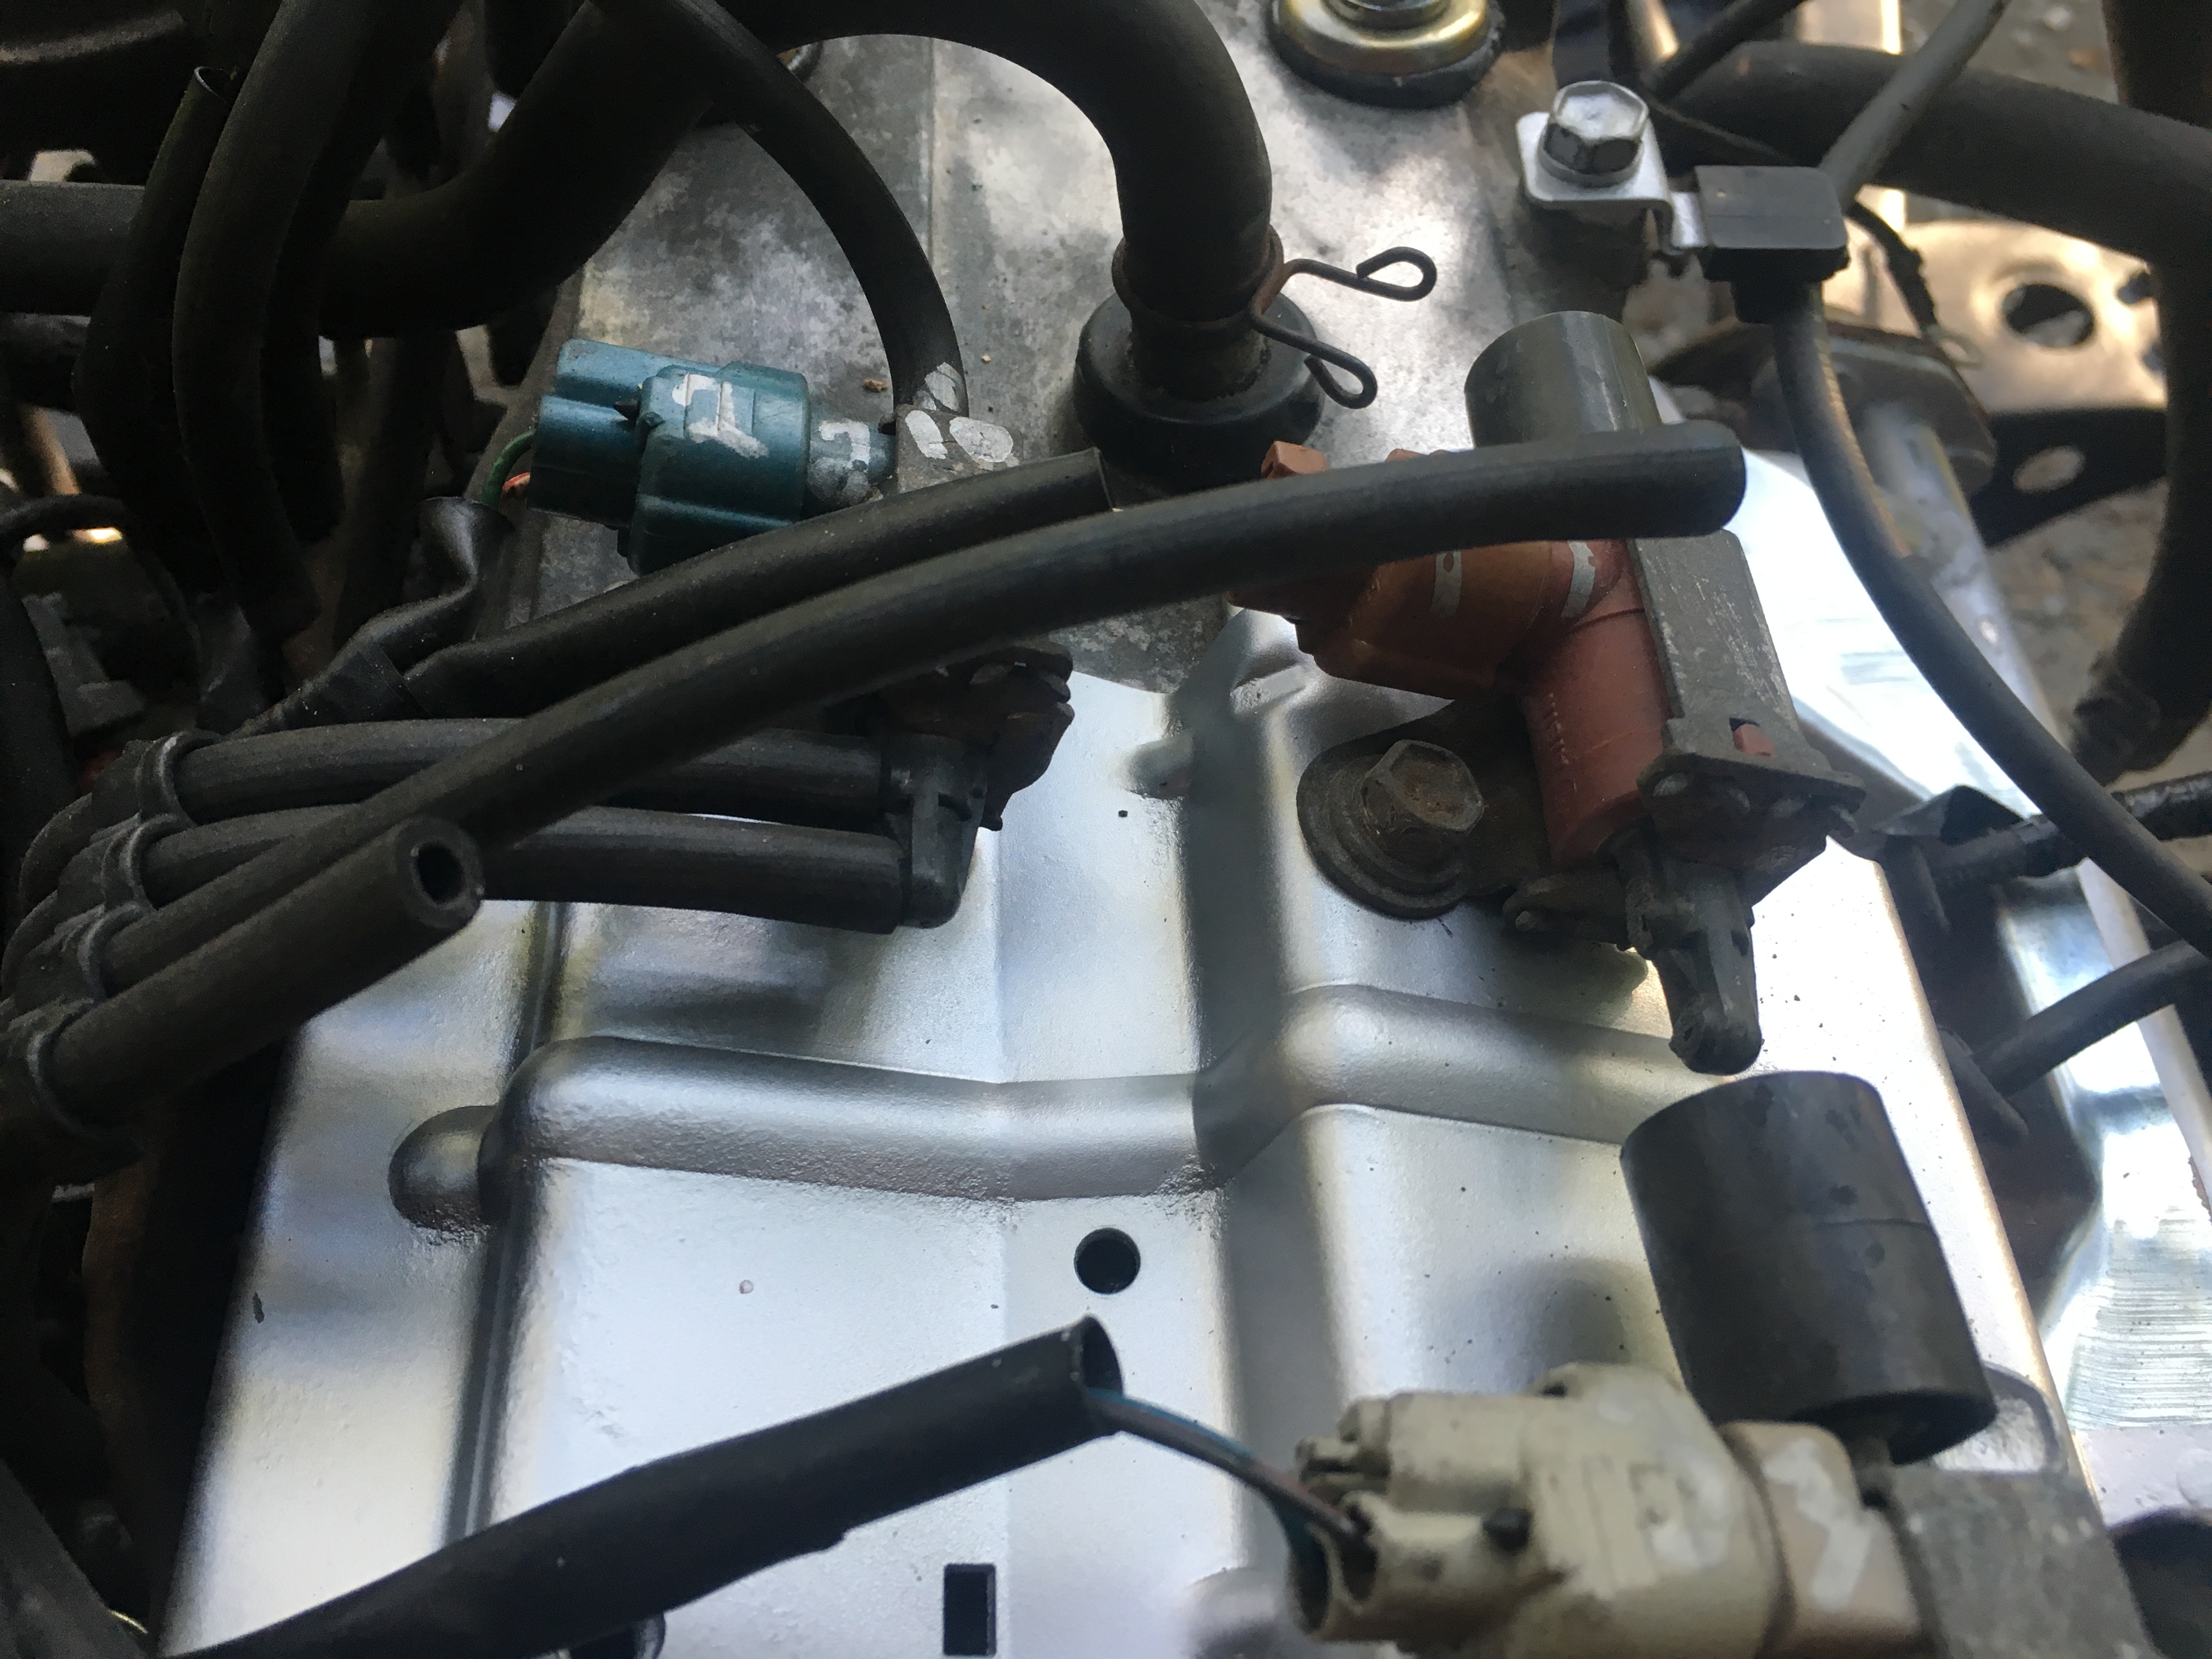
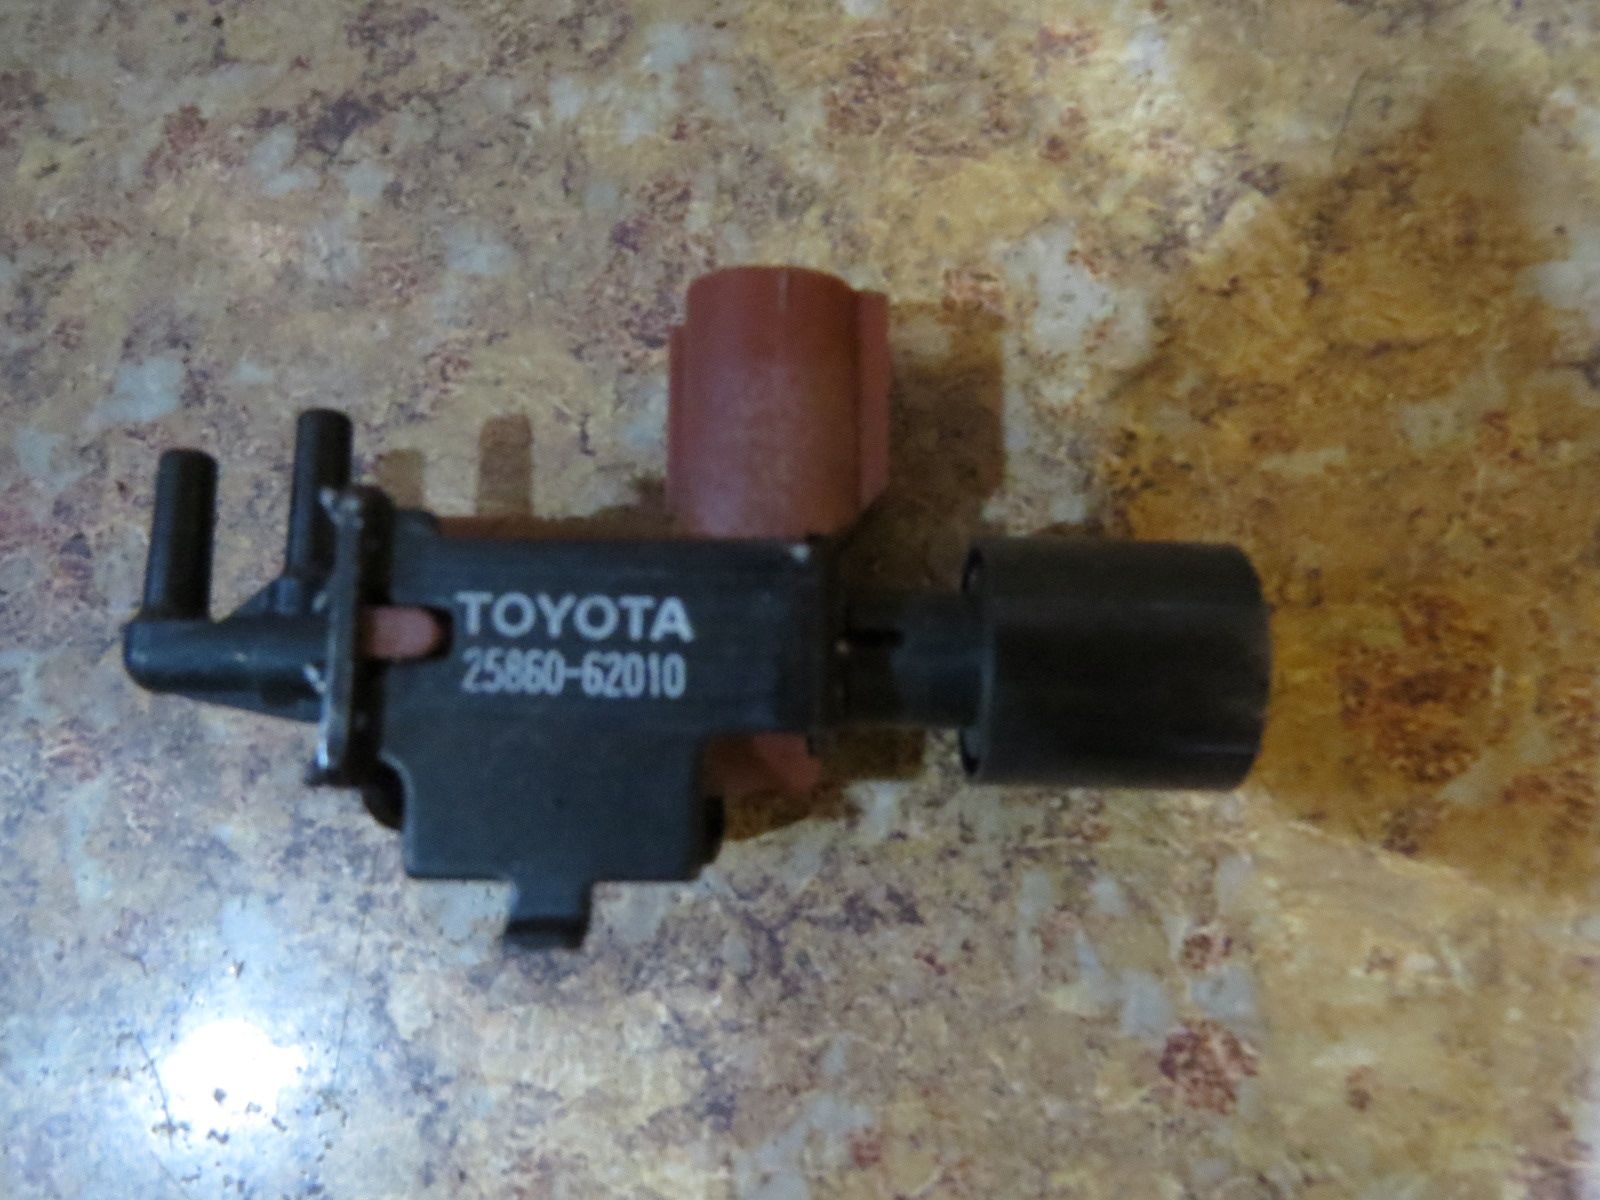
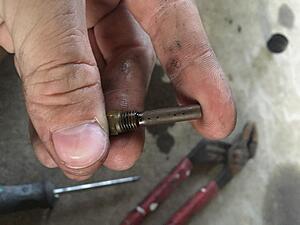
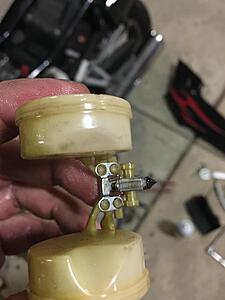
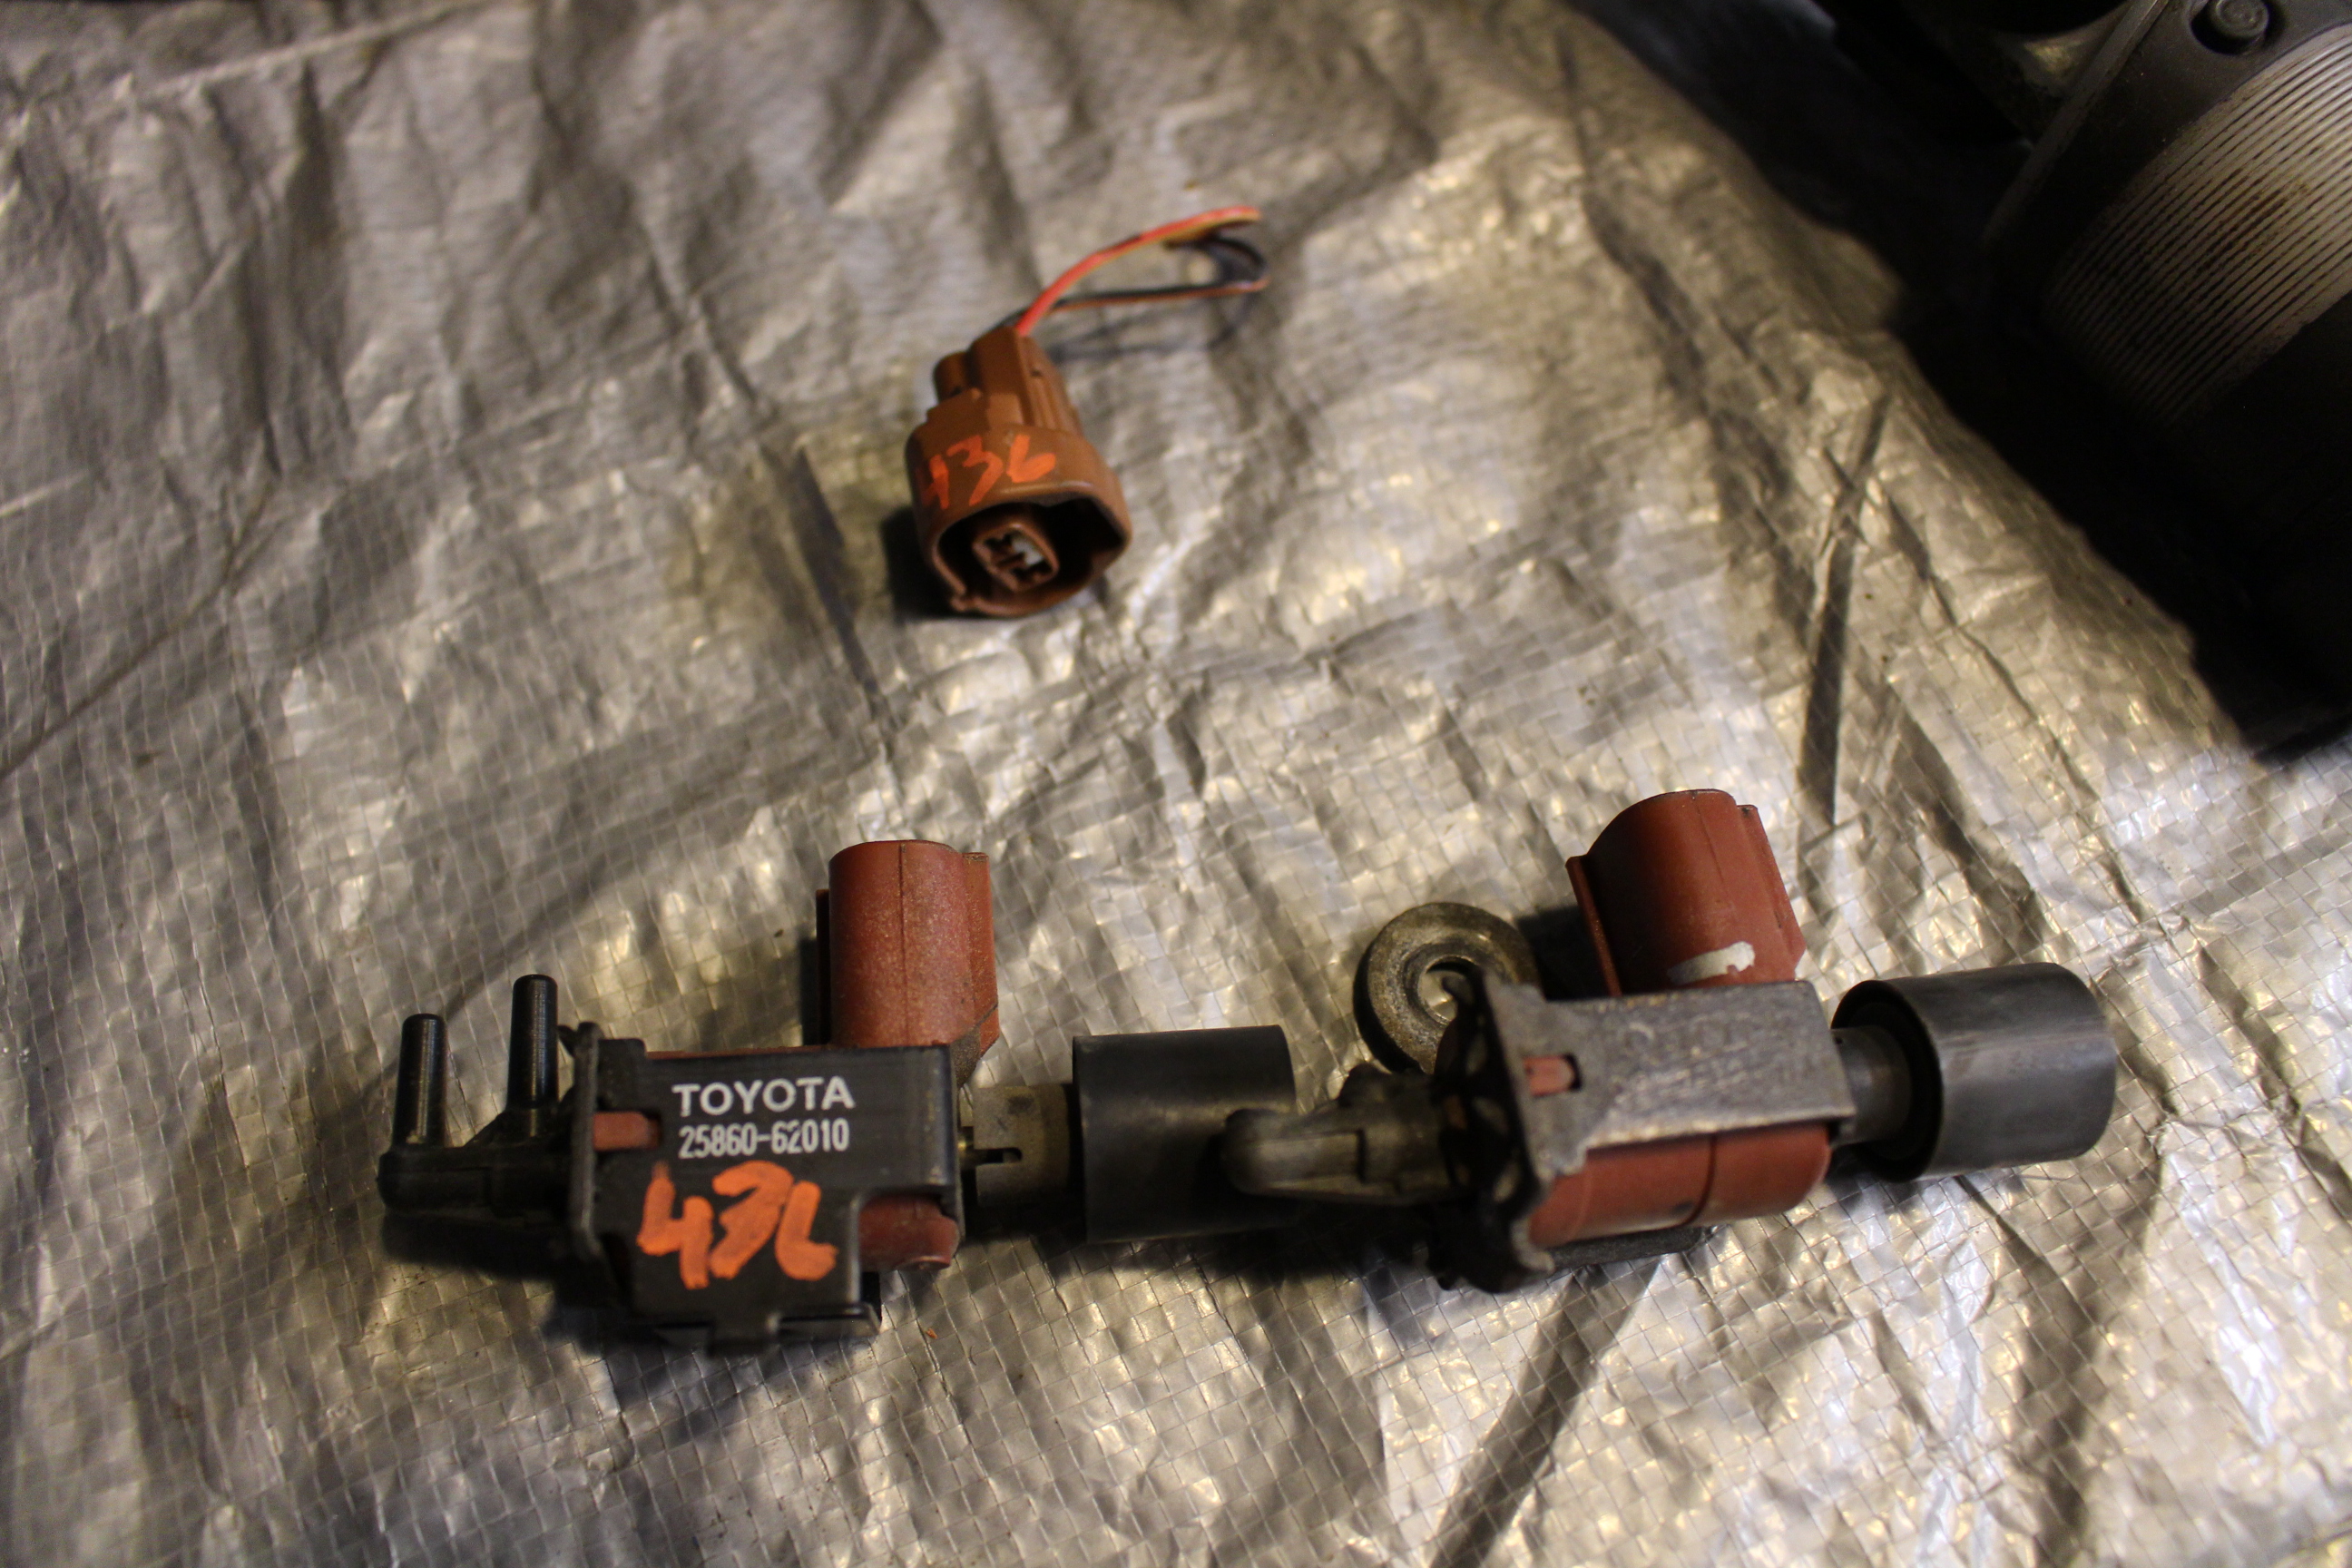
Accidently broke the nipples off of one of the Emissions vacuum solenoids on the top of the valve cover. Ran the part number on ebay and the listings were in the 40-60 dollar range. Began studying the various toyota vacuum solenoids and discovered that newer solara/avalon/camry models used the same valve, just with a different bracket to hold it, which is easily swappable. 15$ later, I have a replacement on the way :thumbup:
What I broke:

generic ebay photo of an unbroken one
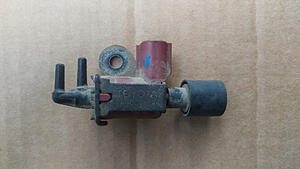
and the avalon replacement

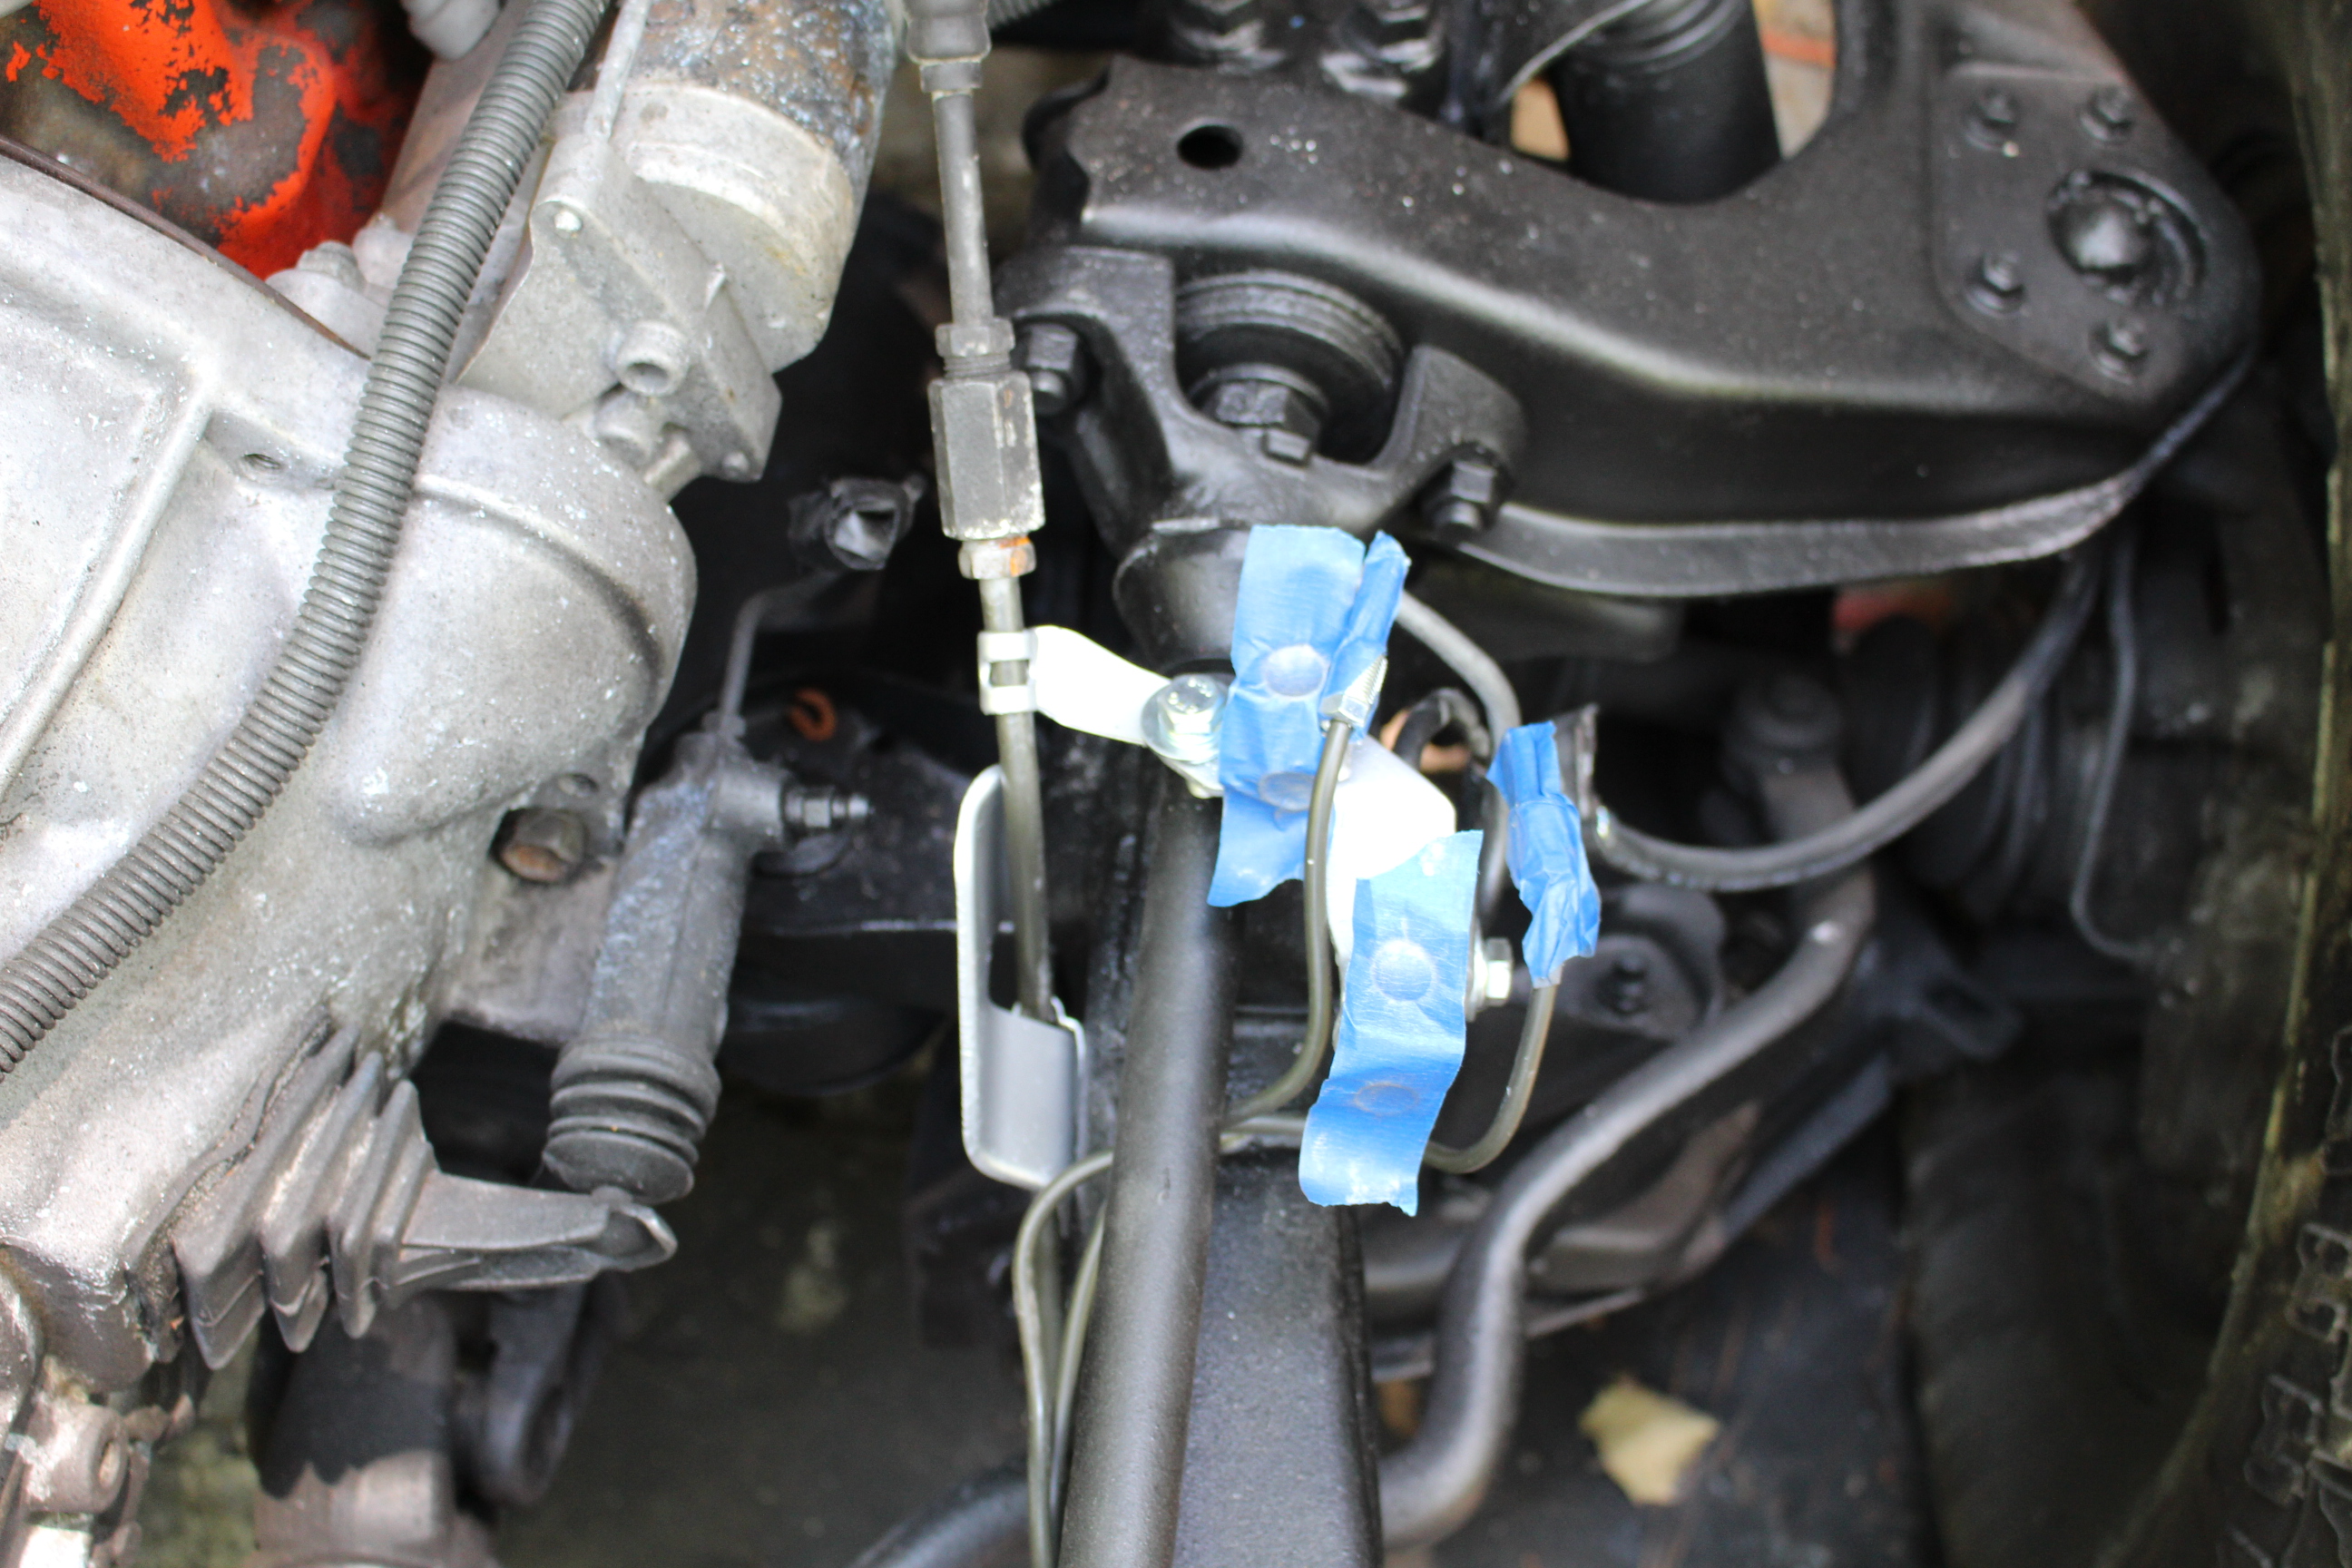
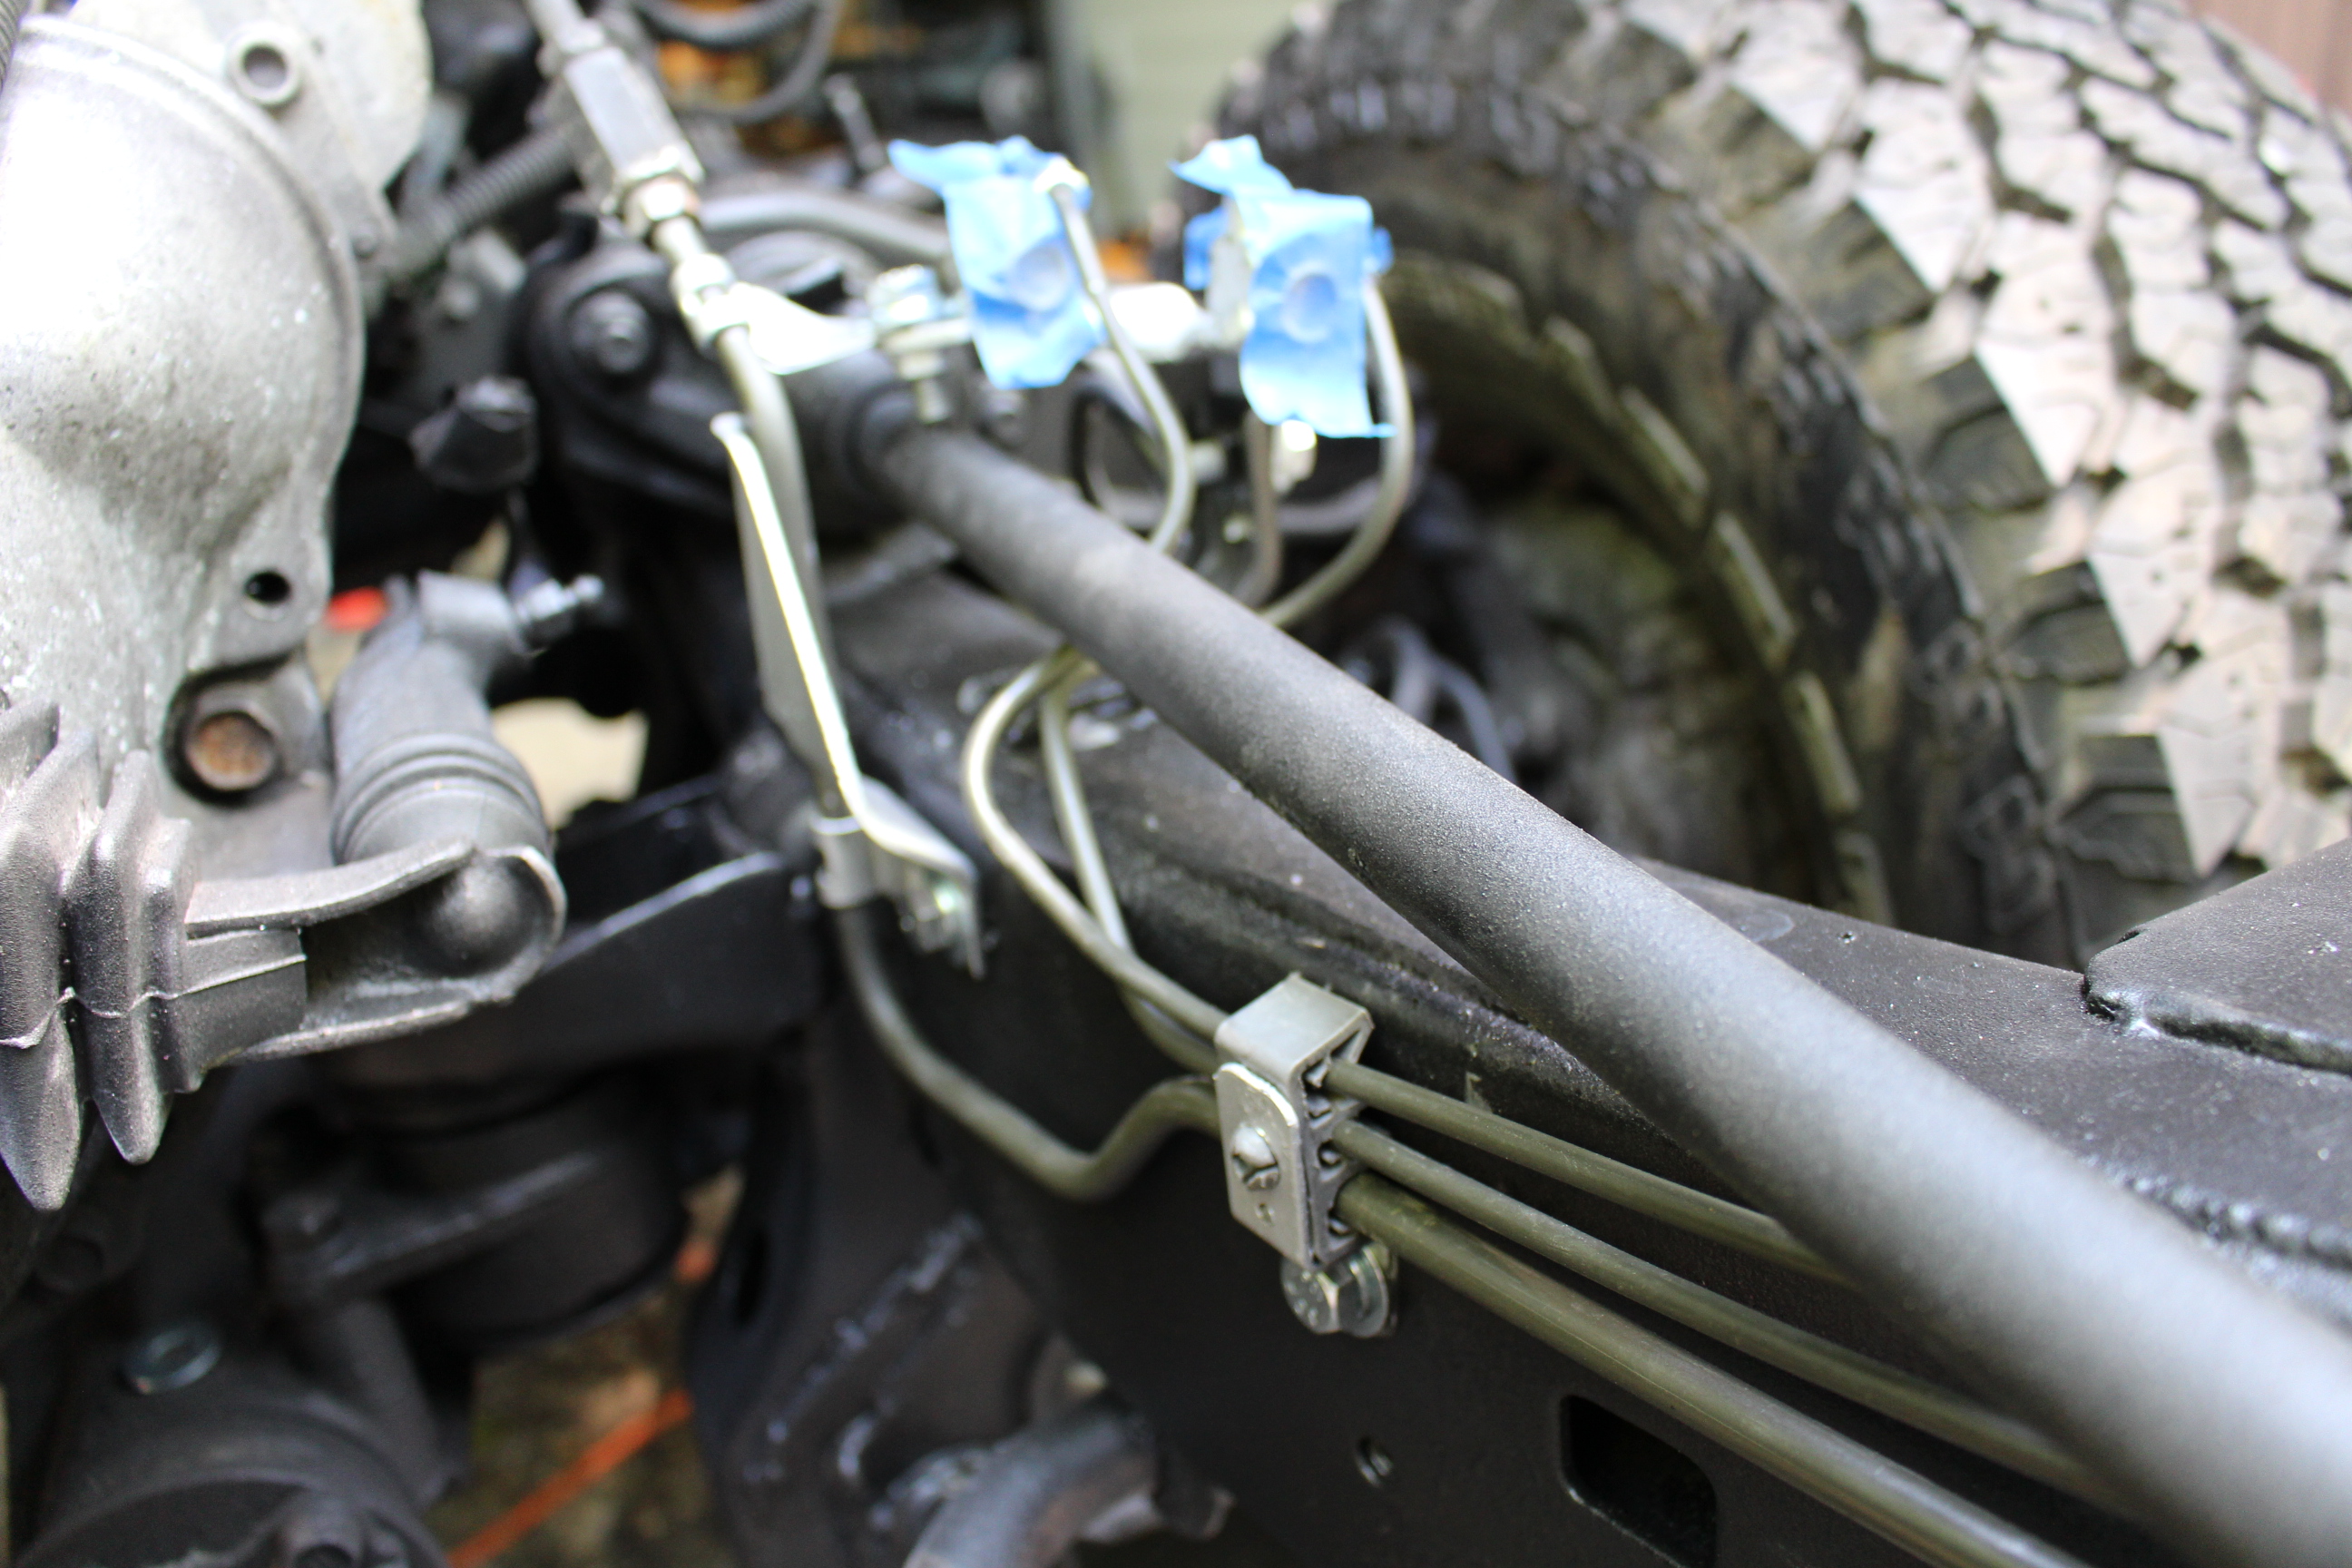
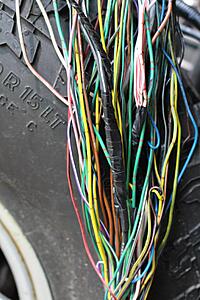
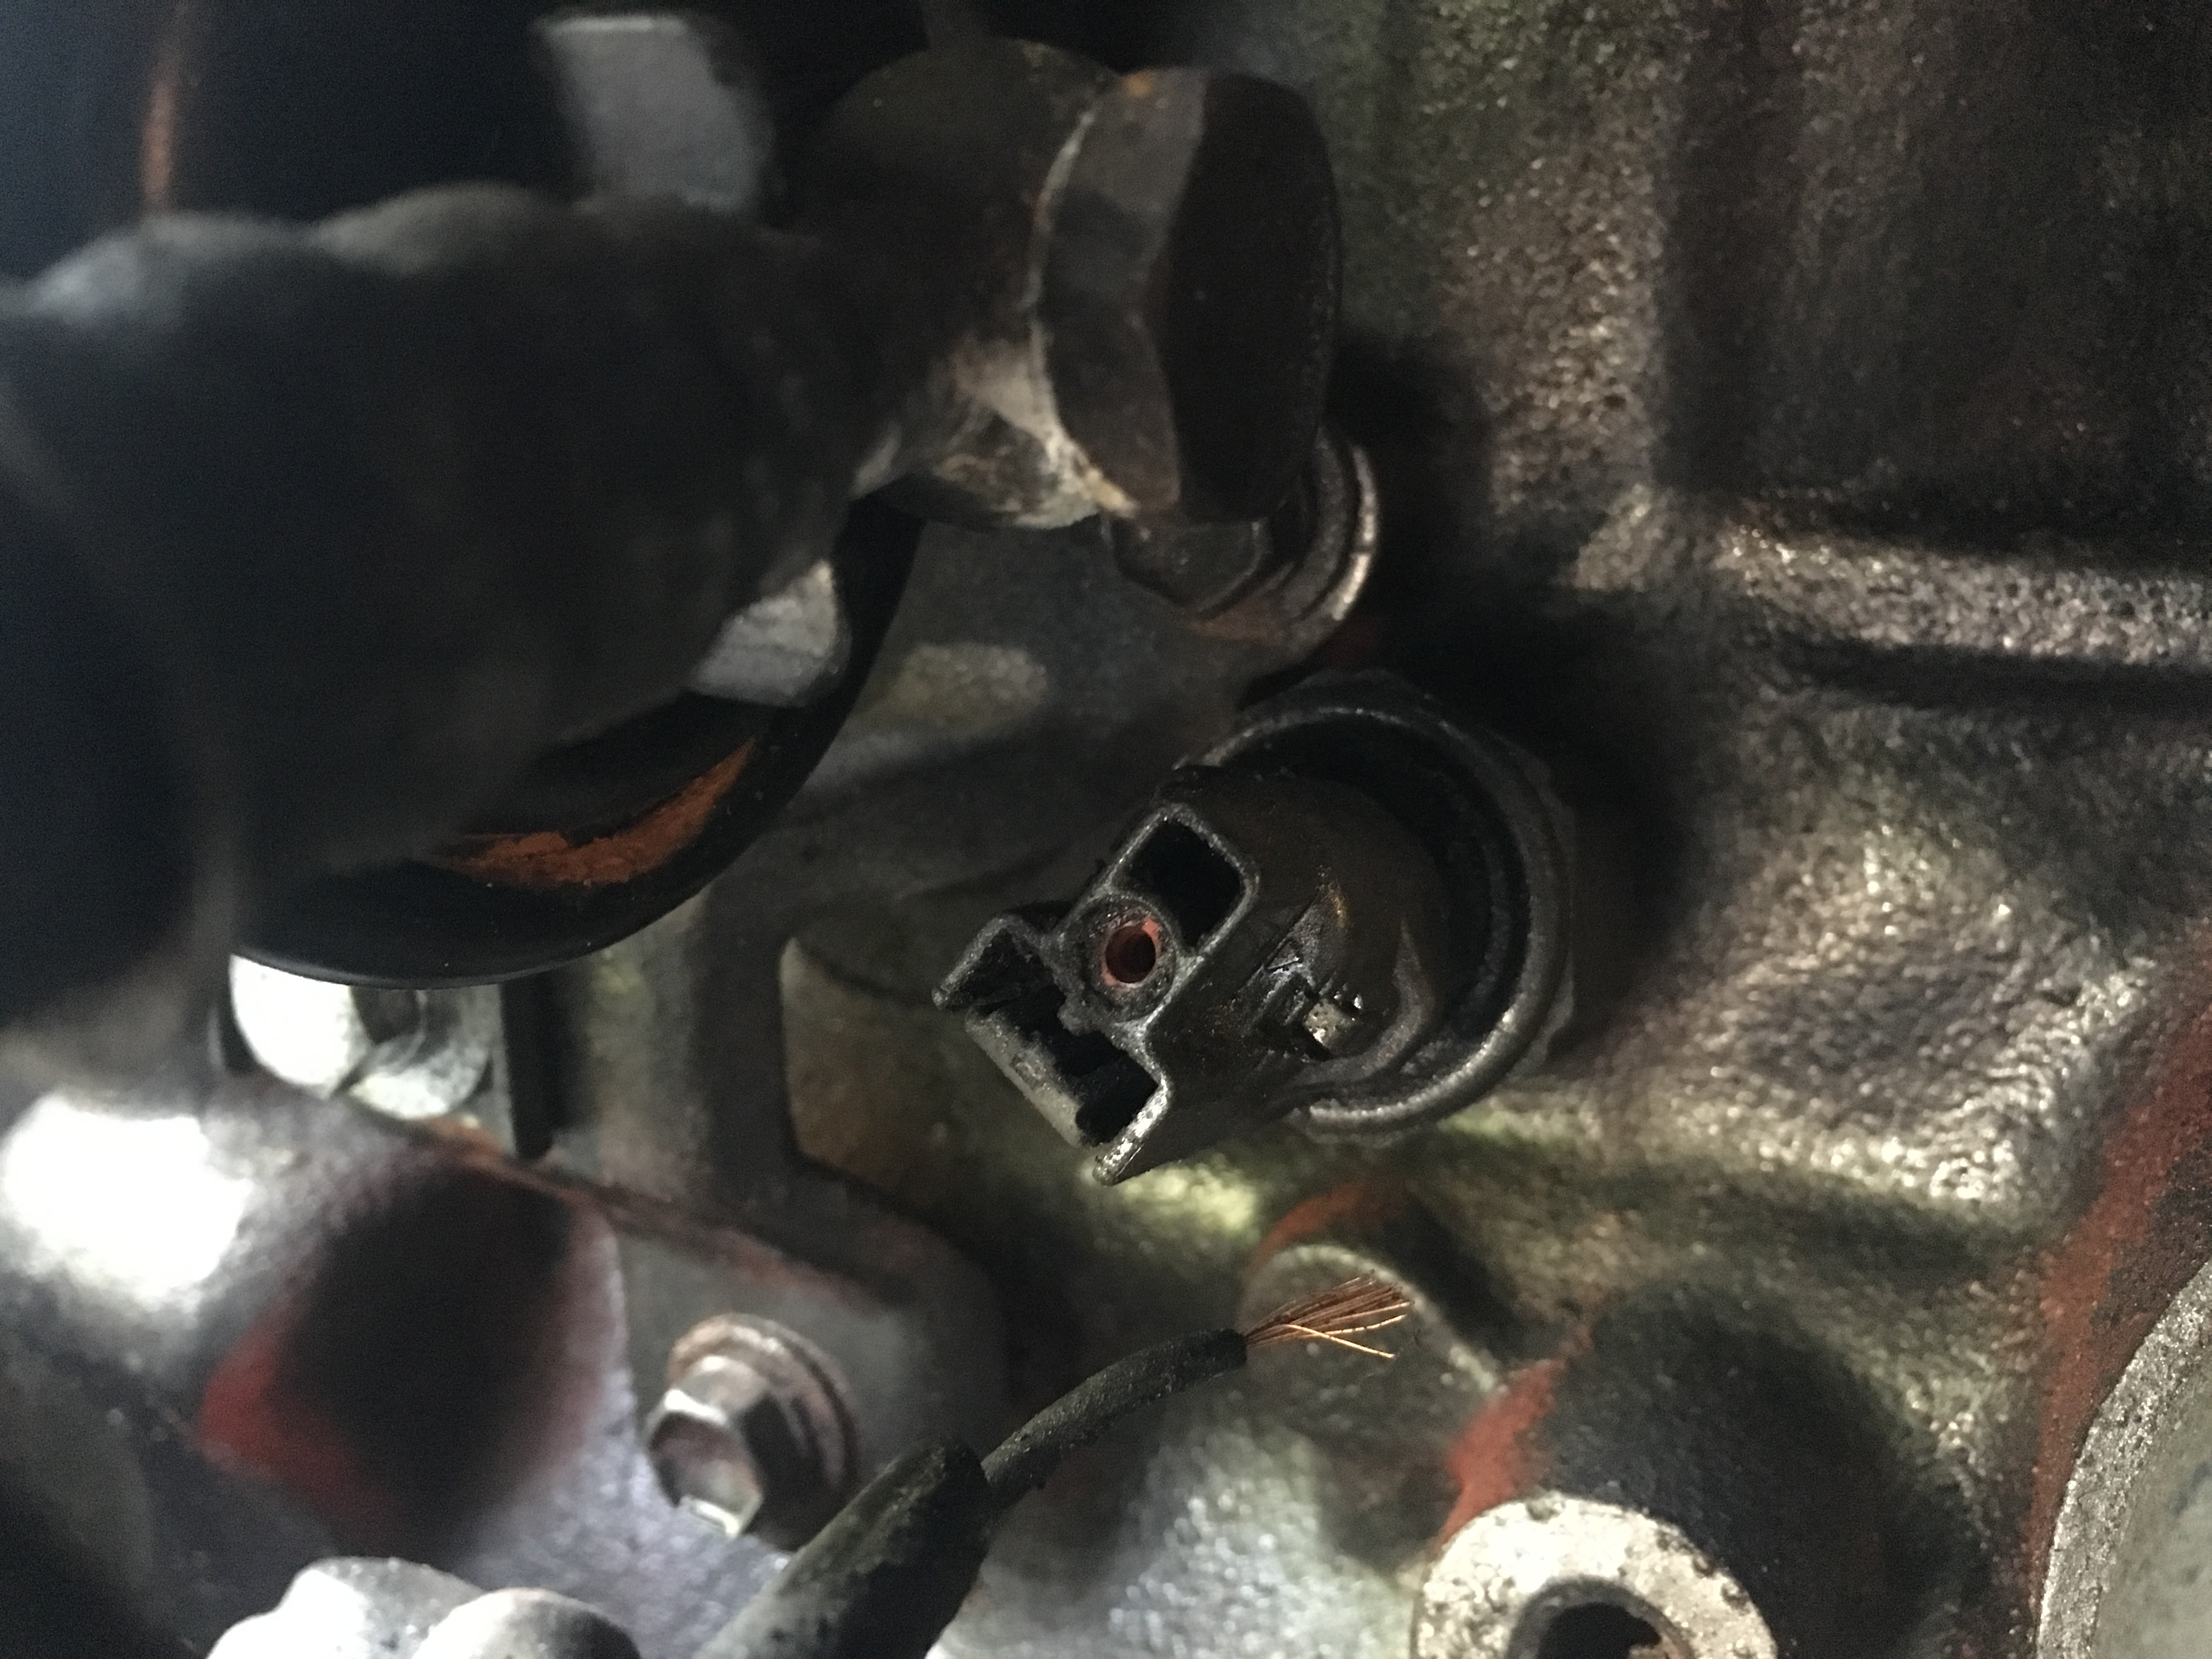
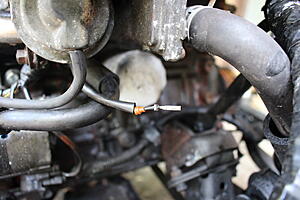
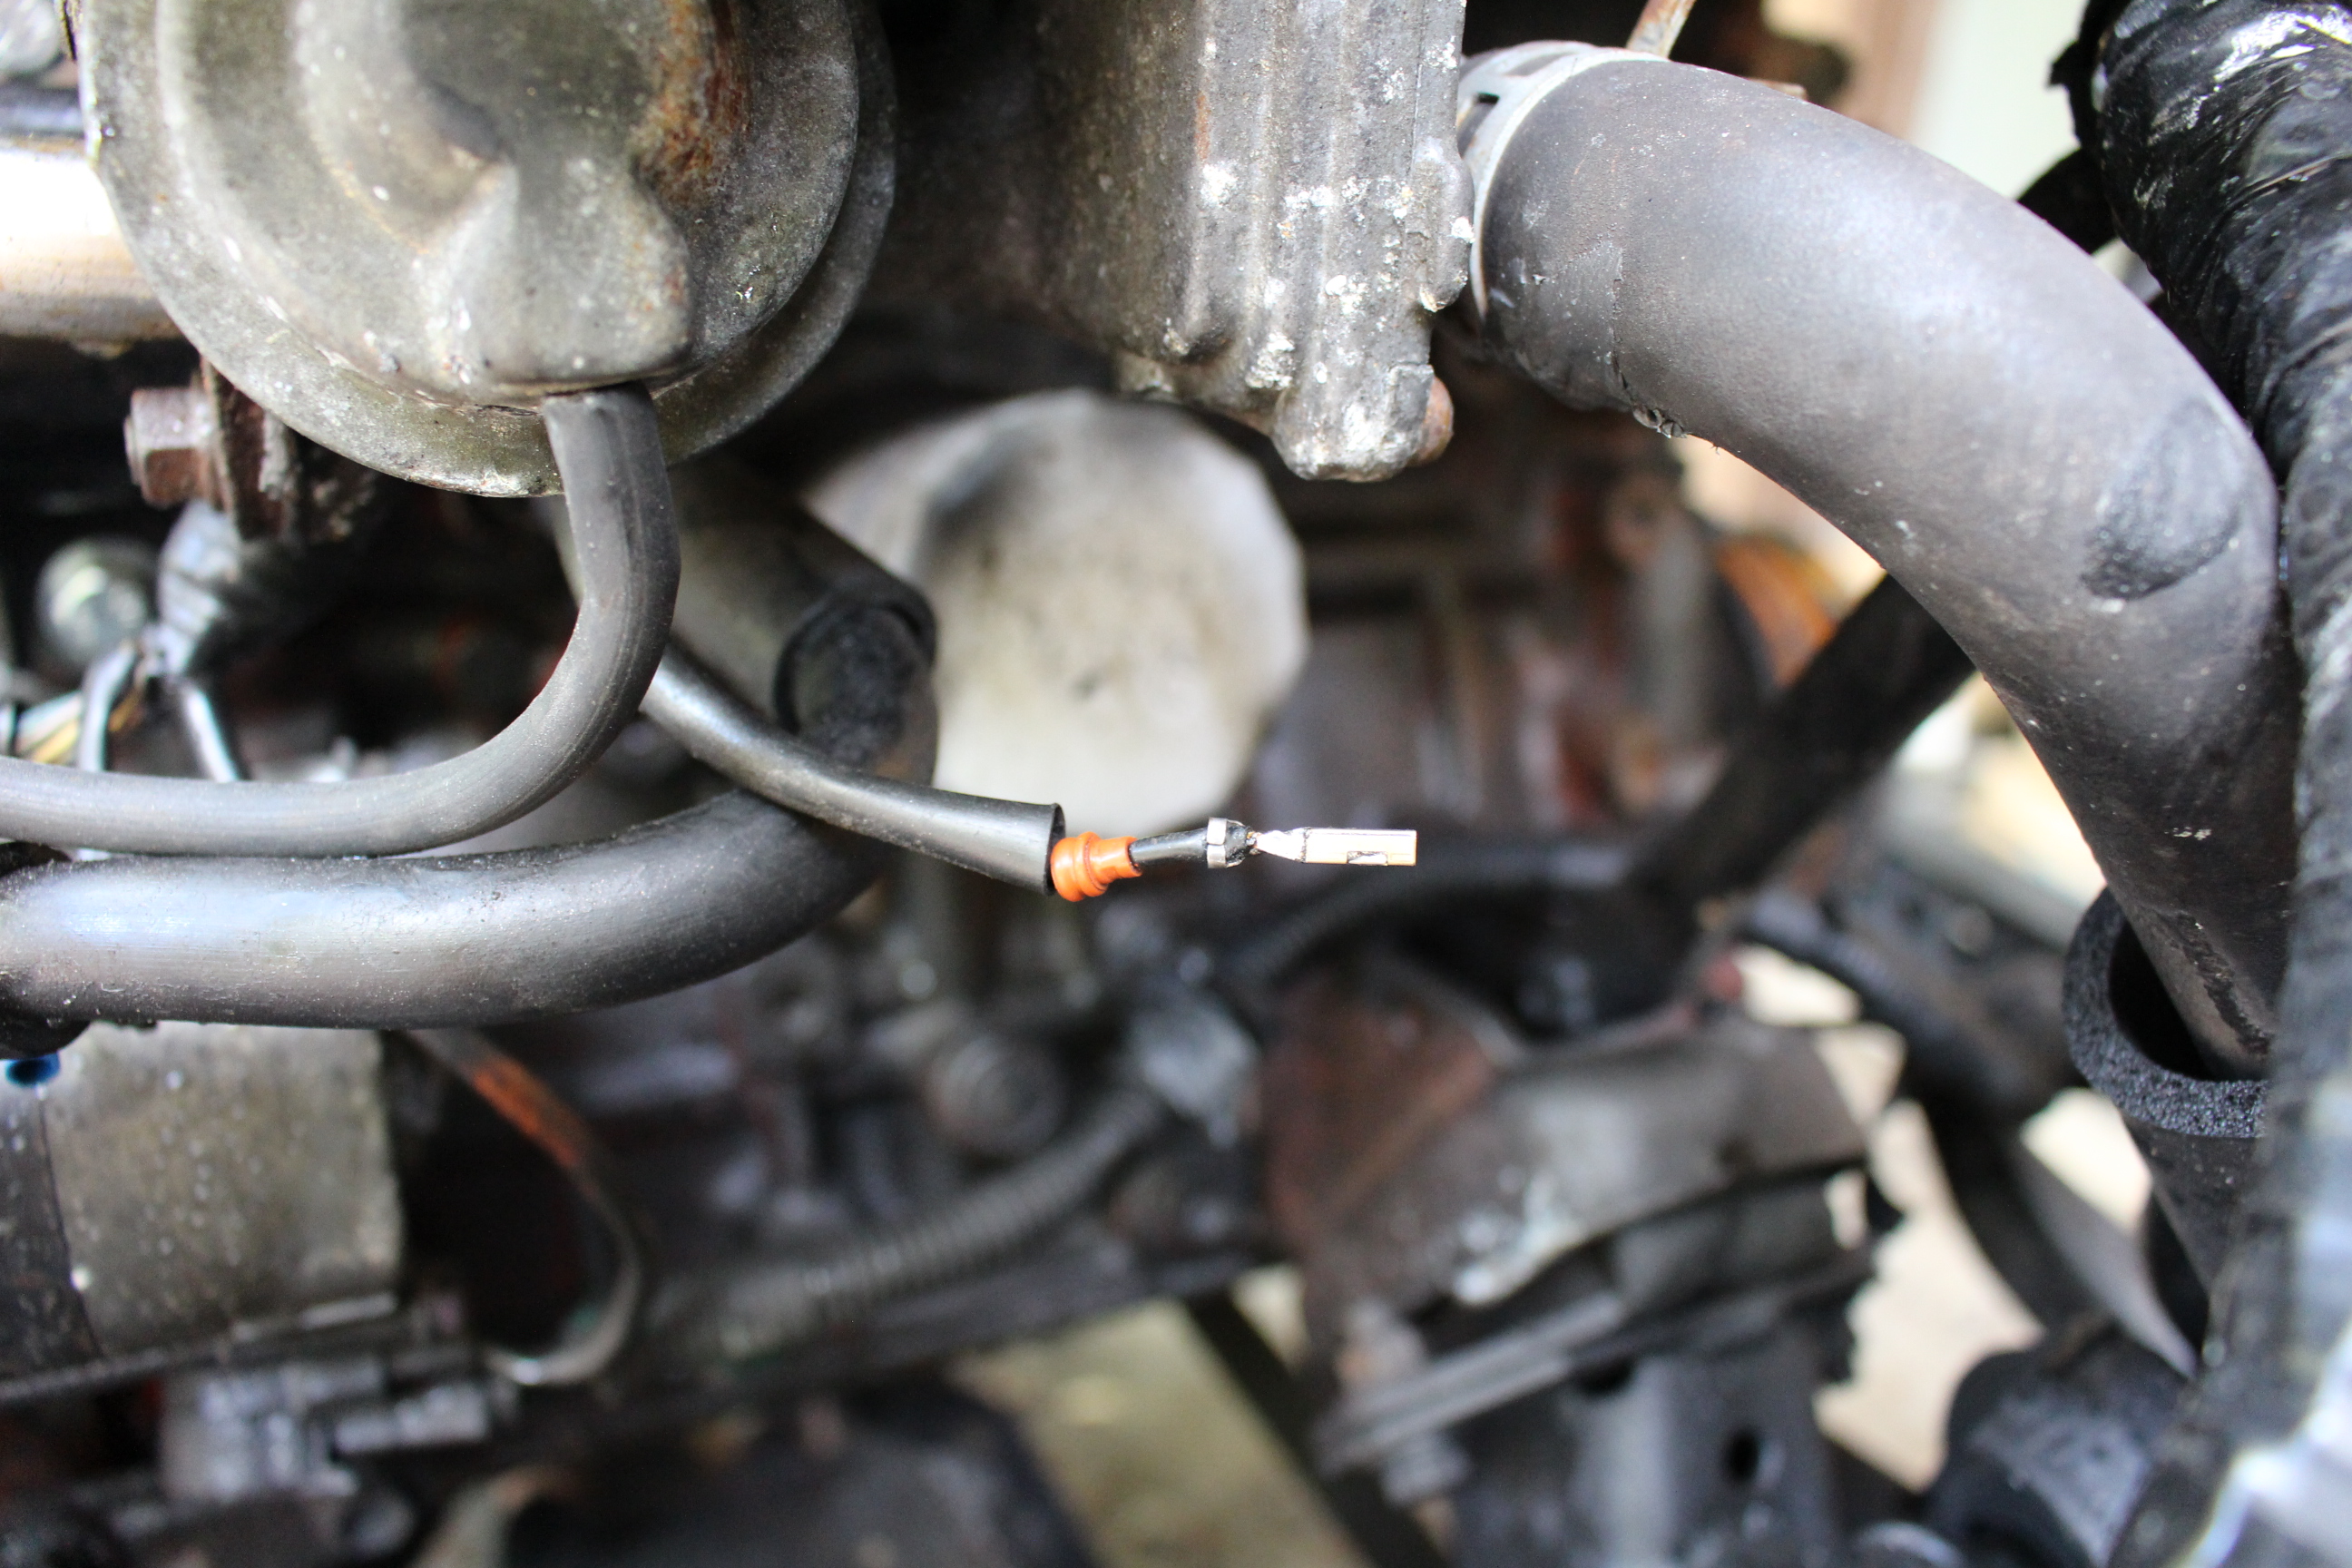
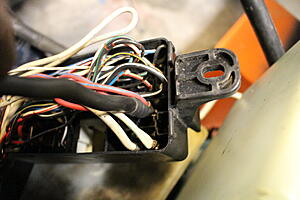
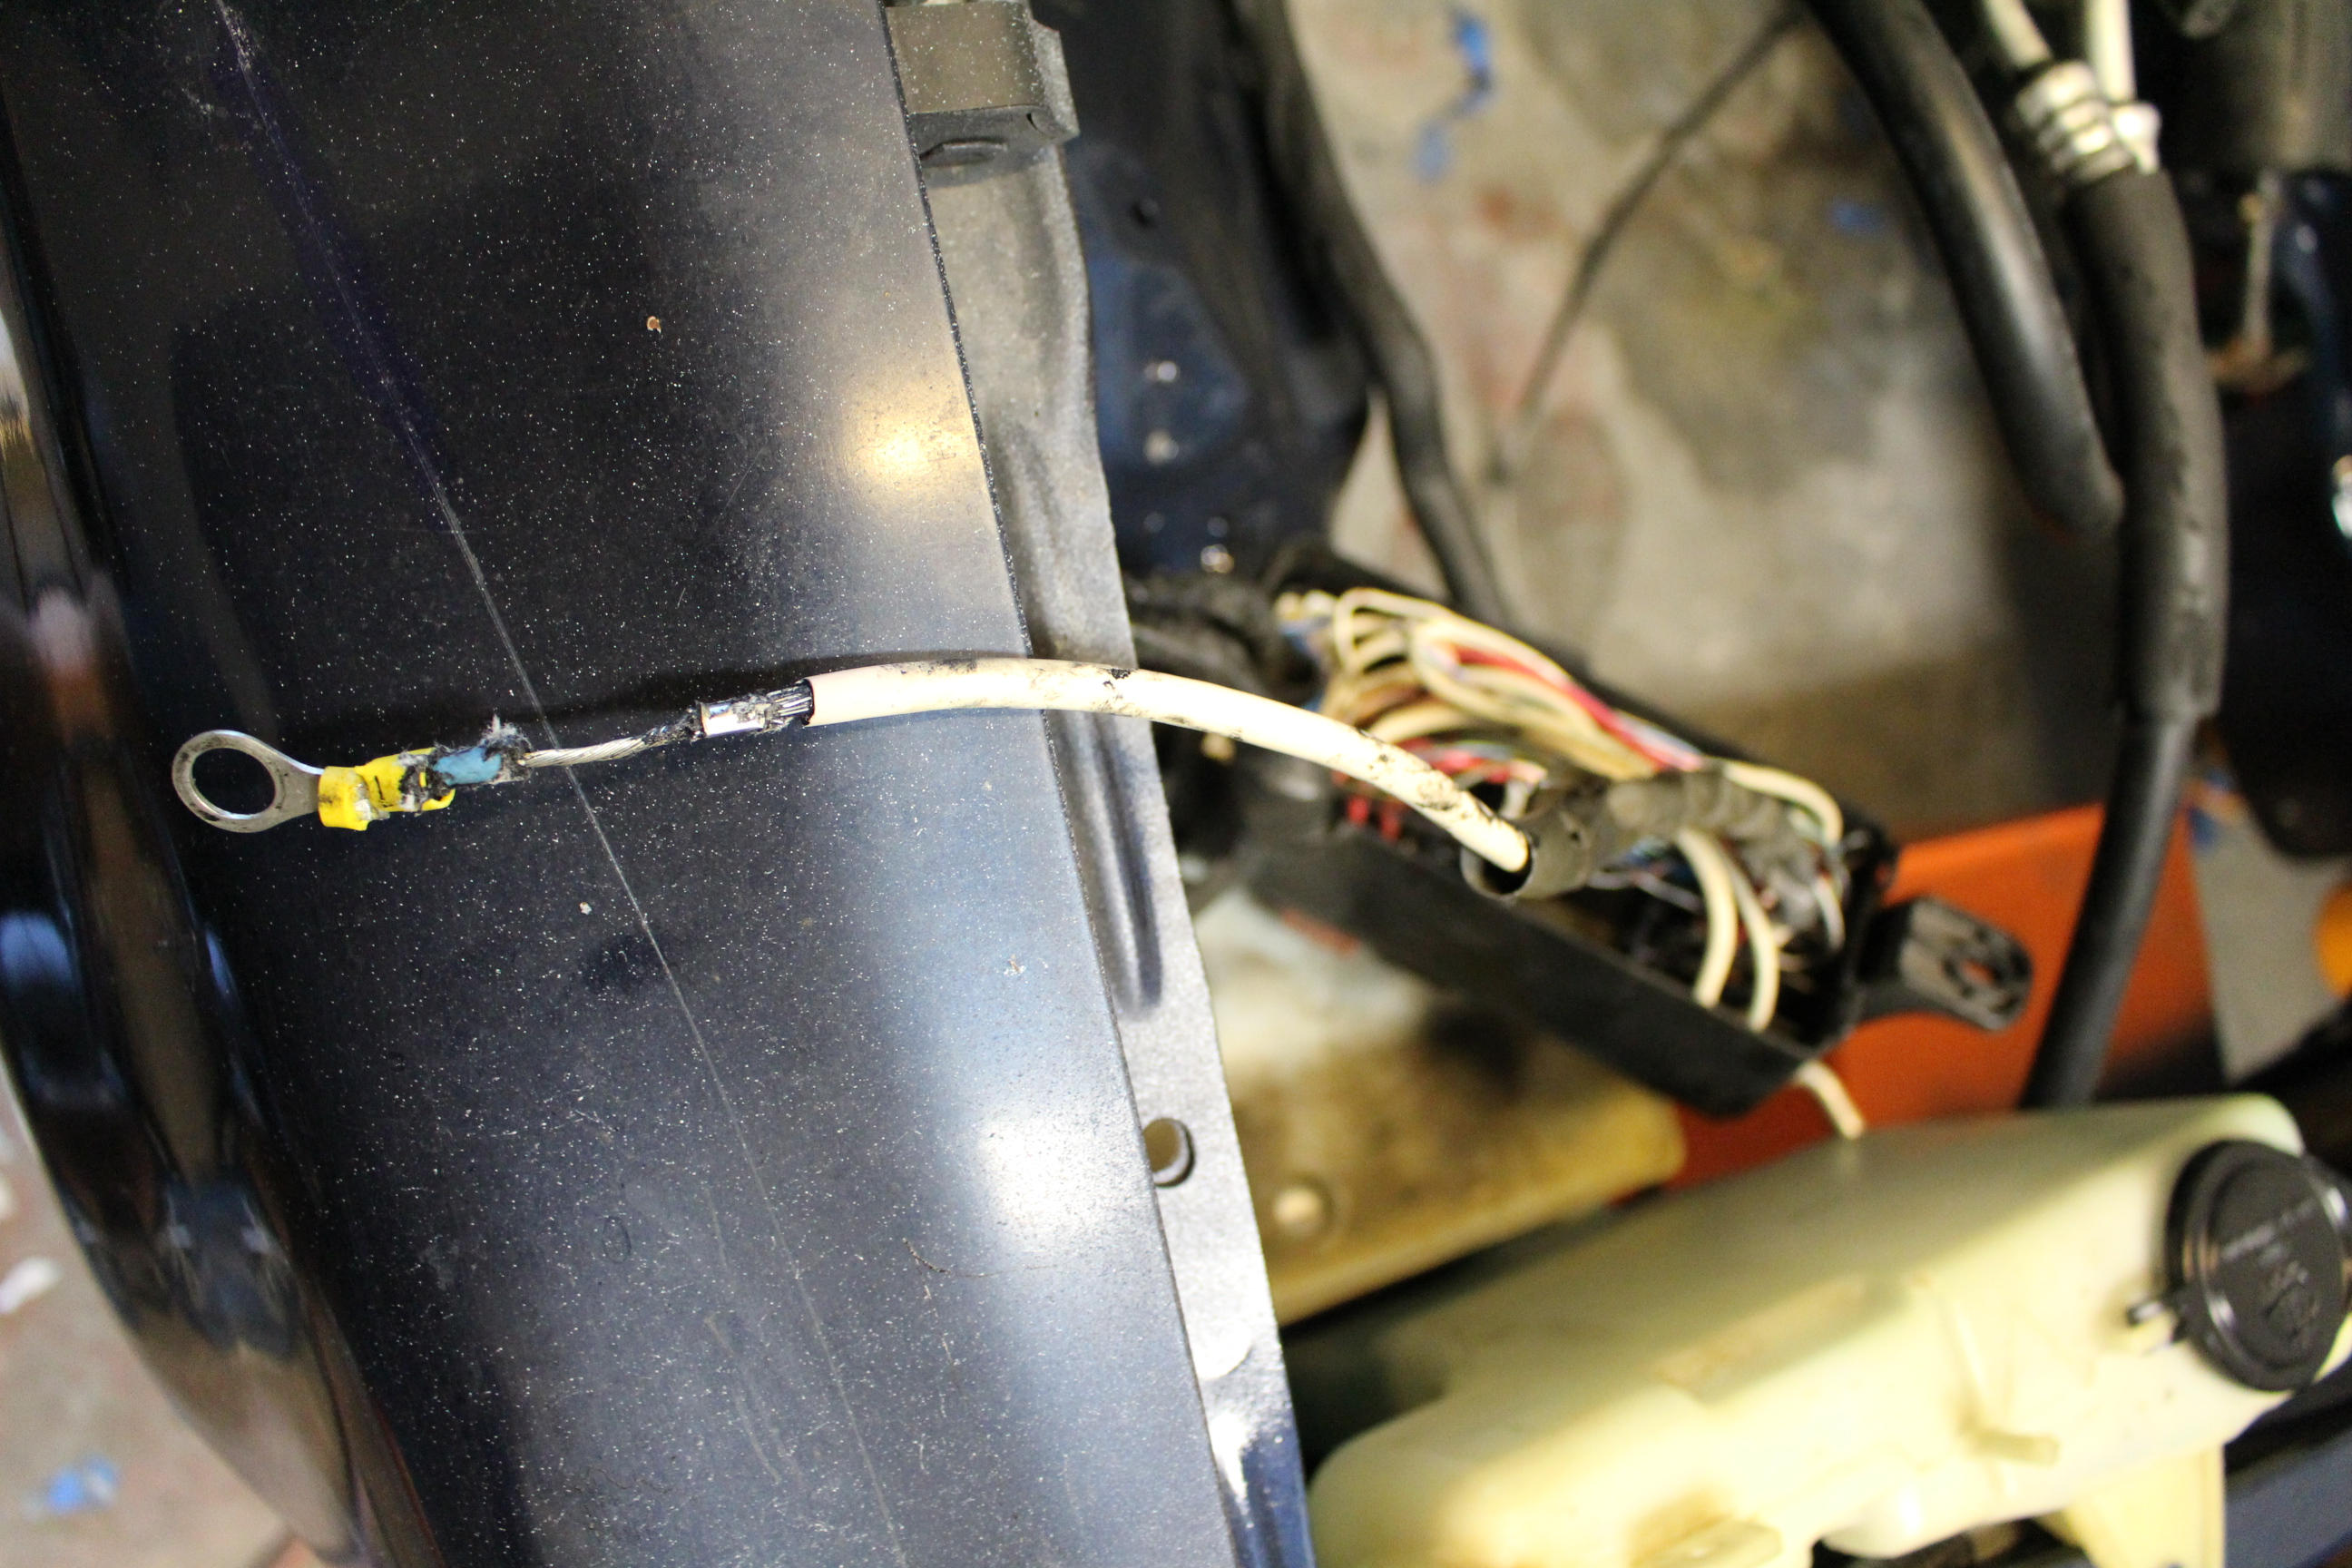
Lastly, I happened to notice this wire has pulled out of its harness. I don't know what that sensor does, or how long it has been broken, but I will find a way to get that wire back in its plug or will just put a crimp connector on there. There is also a random wire coming out of the bundle going back to the transmission/o2 sensor with a butt connector crimped to it and nothing else. The joys of previous owners...
I pulled my thermostat and was greeted with more pitting on the gasket surface. I took Air and Water's advice and evened out the mating surface of the thermostat housing. I also cleaned up the housing in the cylinder head some to give the rubber seal somewhere to mate up to.
Some time with my belt sander and I had it smooth like new.
Used one of these to clean up the inside of the thermostat housing in the head. It isn't perfect but it'll get the job done.
Also put the manifold on there for a bit but broke the belt. Time will tell if this one leaks or not, but I think I will be ok as the gasket is fairly thick and isn't a crush ring gasket type like a headgasket would be. Coated the gasket in the copper spray gasket goodness to give it a little extra kick. Cleaned up the manifold a bit and sprayed it with some 1500* Black paint. Time will tell how long it last (hopefully long enough until I get the header or do a turbo setup or a motor swap)


The mighty belt sander. I think my grand dad made this. I found it in his basement after he passed and have been keeping it busy since then
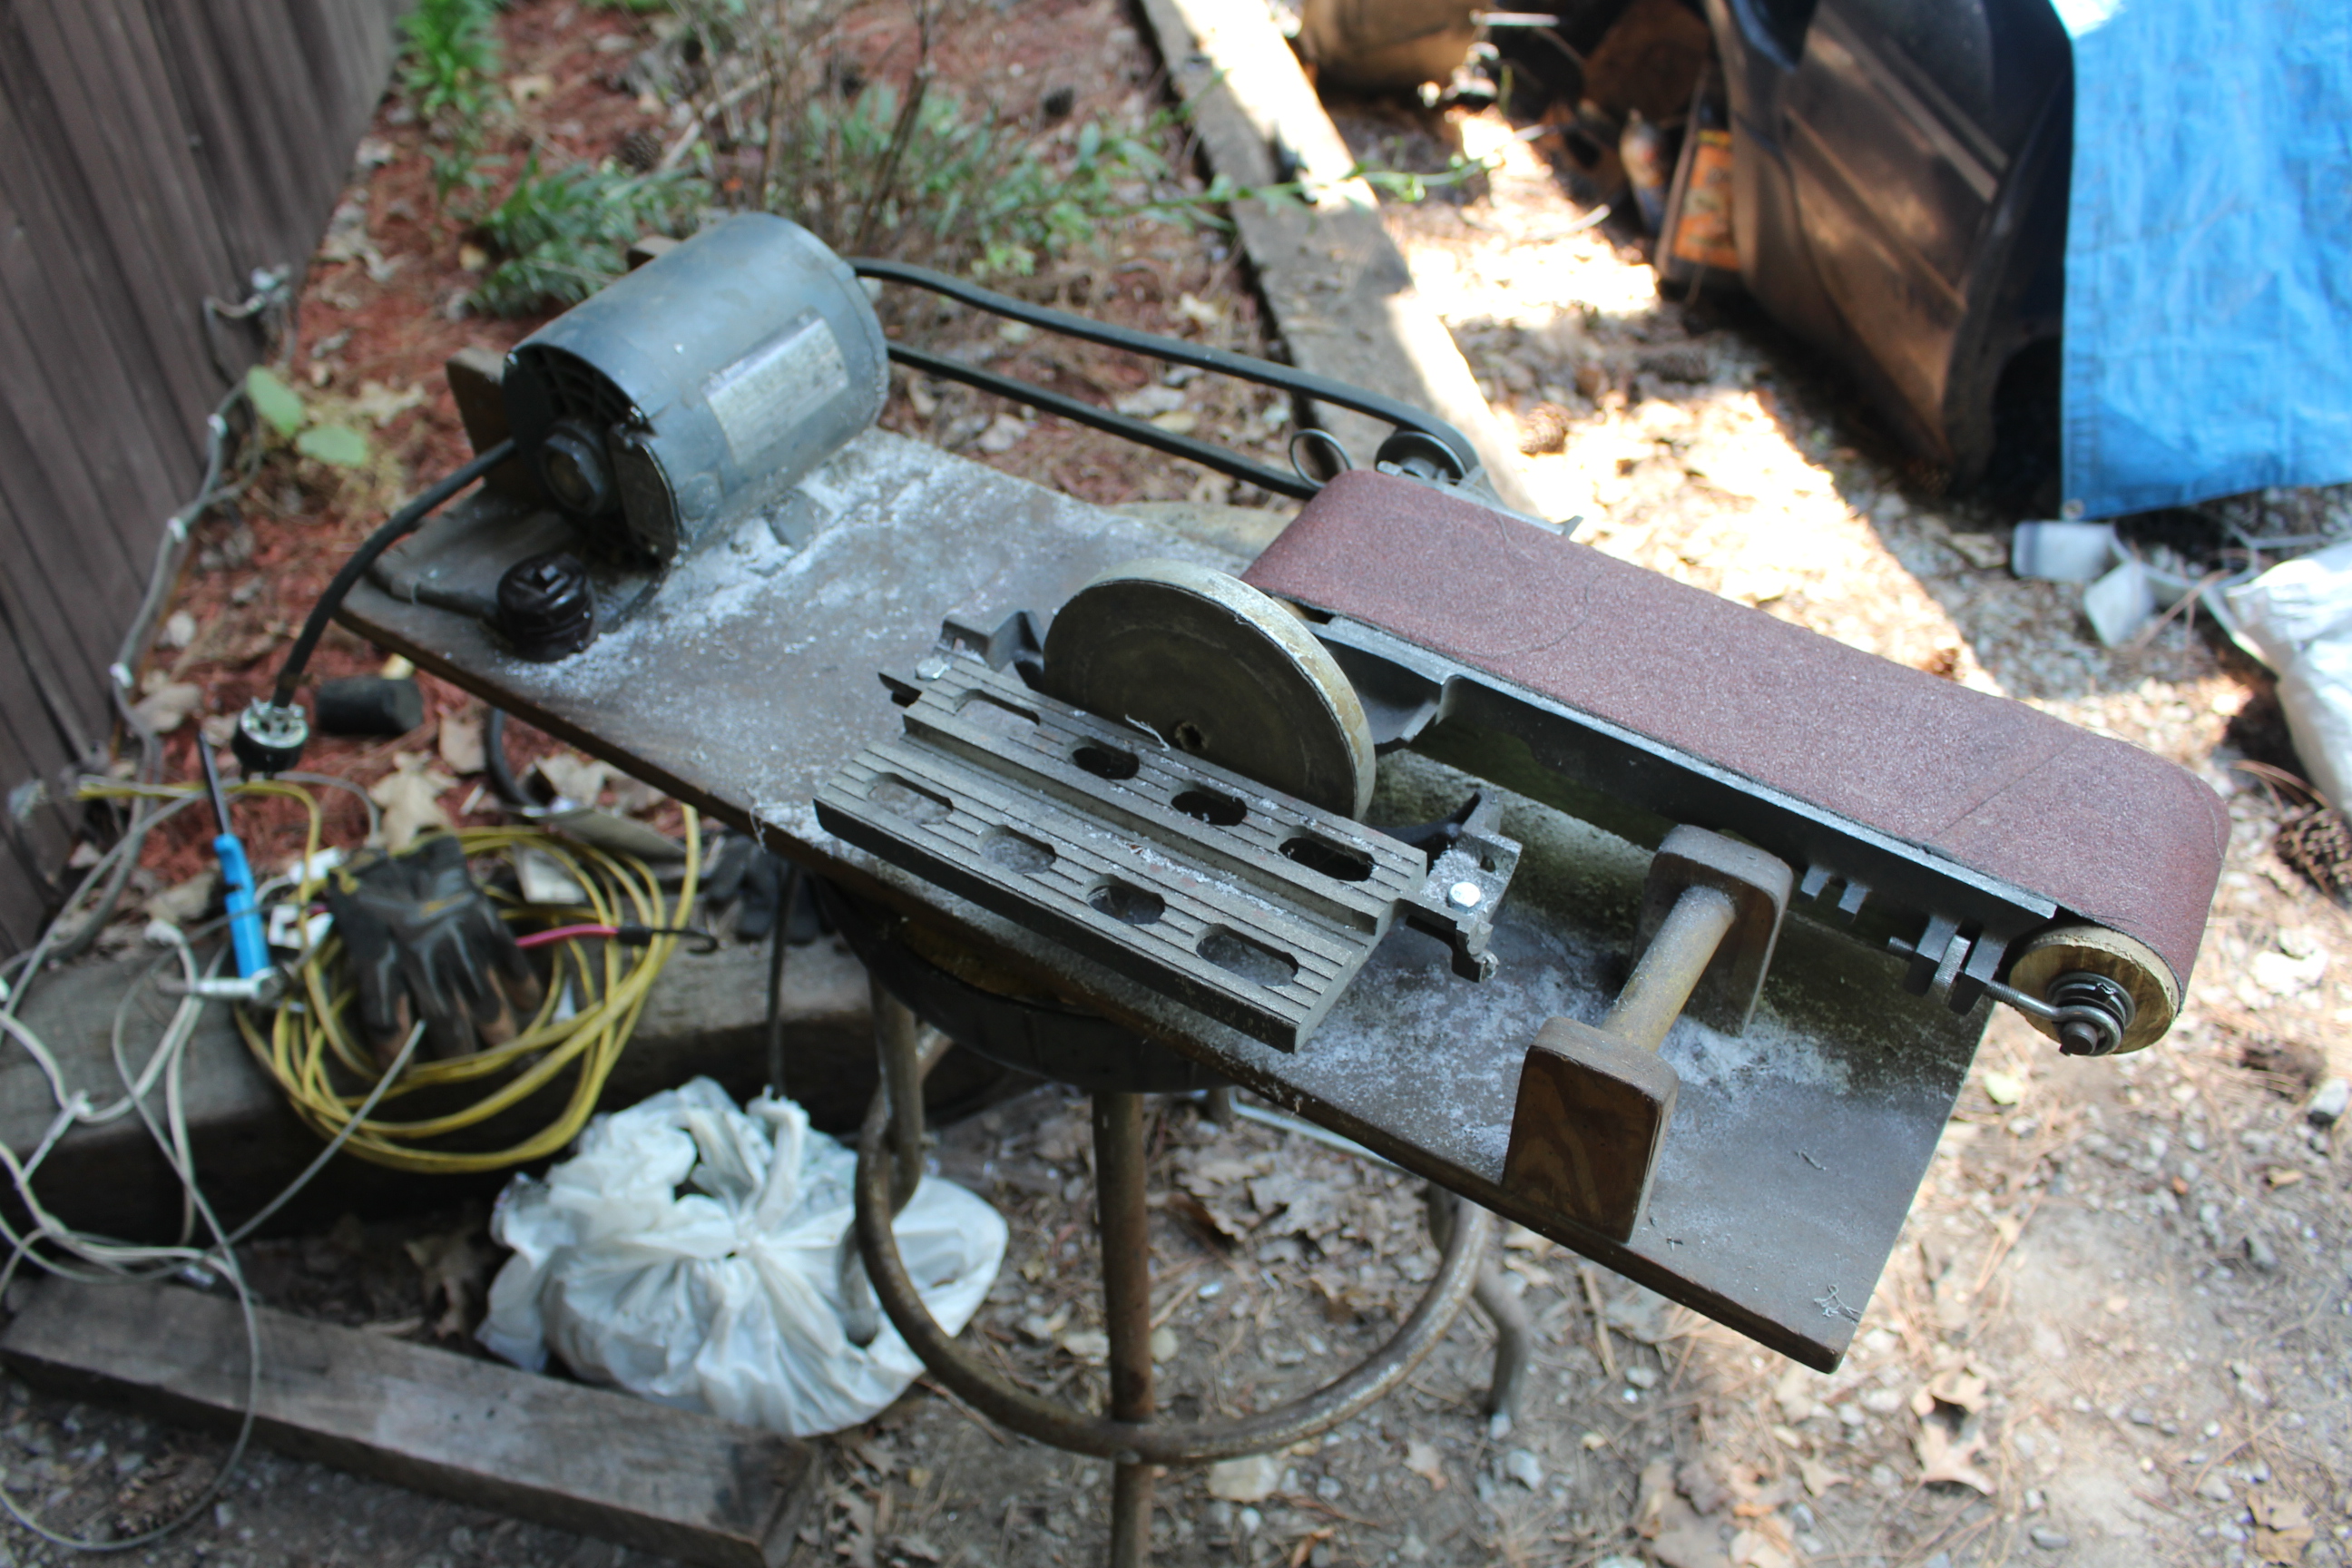
Like 0ddJ0b stated on the last page, these things are not cute or cuddly at all! definitely wear pants and PPE when using them.

Tucked back in place. The 2 bolt flanges on the cat are just about rusted thin, so this whole operation may be on the way out sooner than expected, but for now it's in place and I can tackle other stuff.
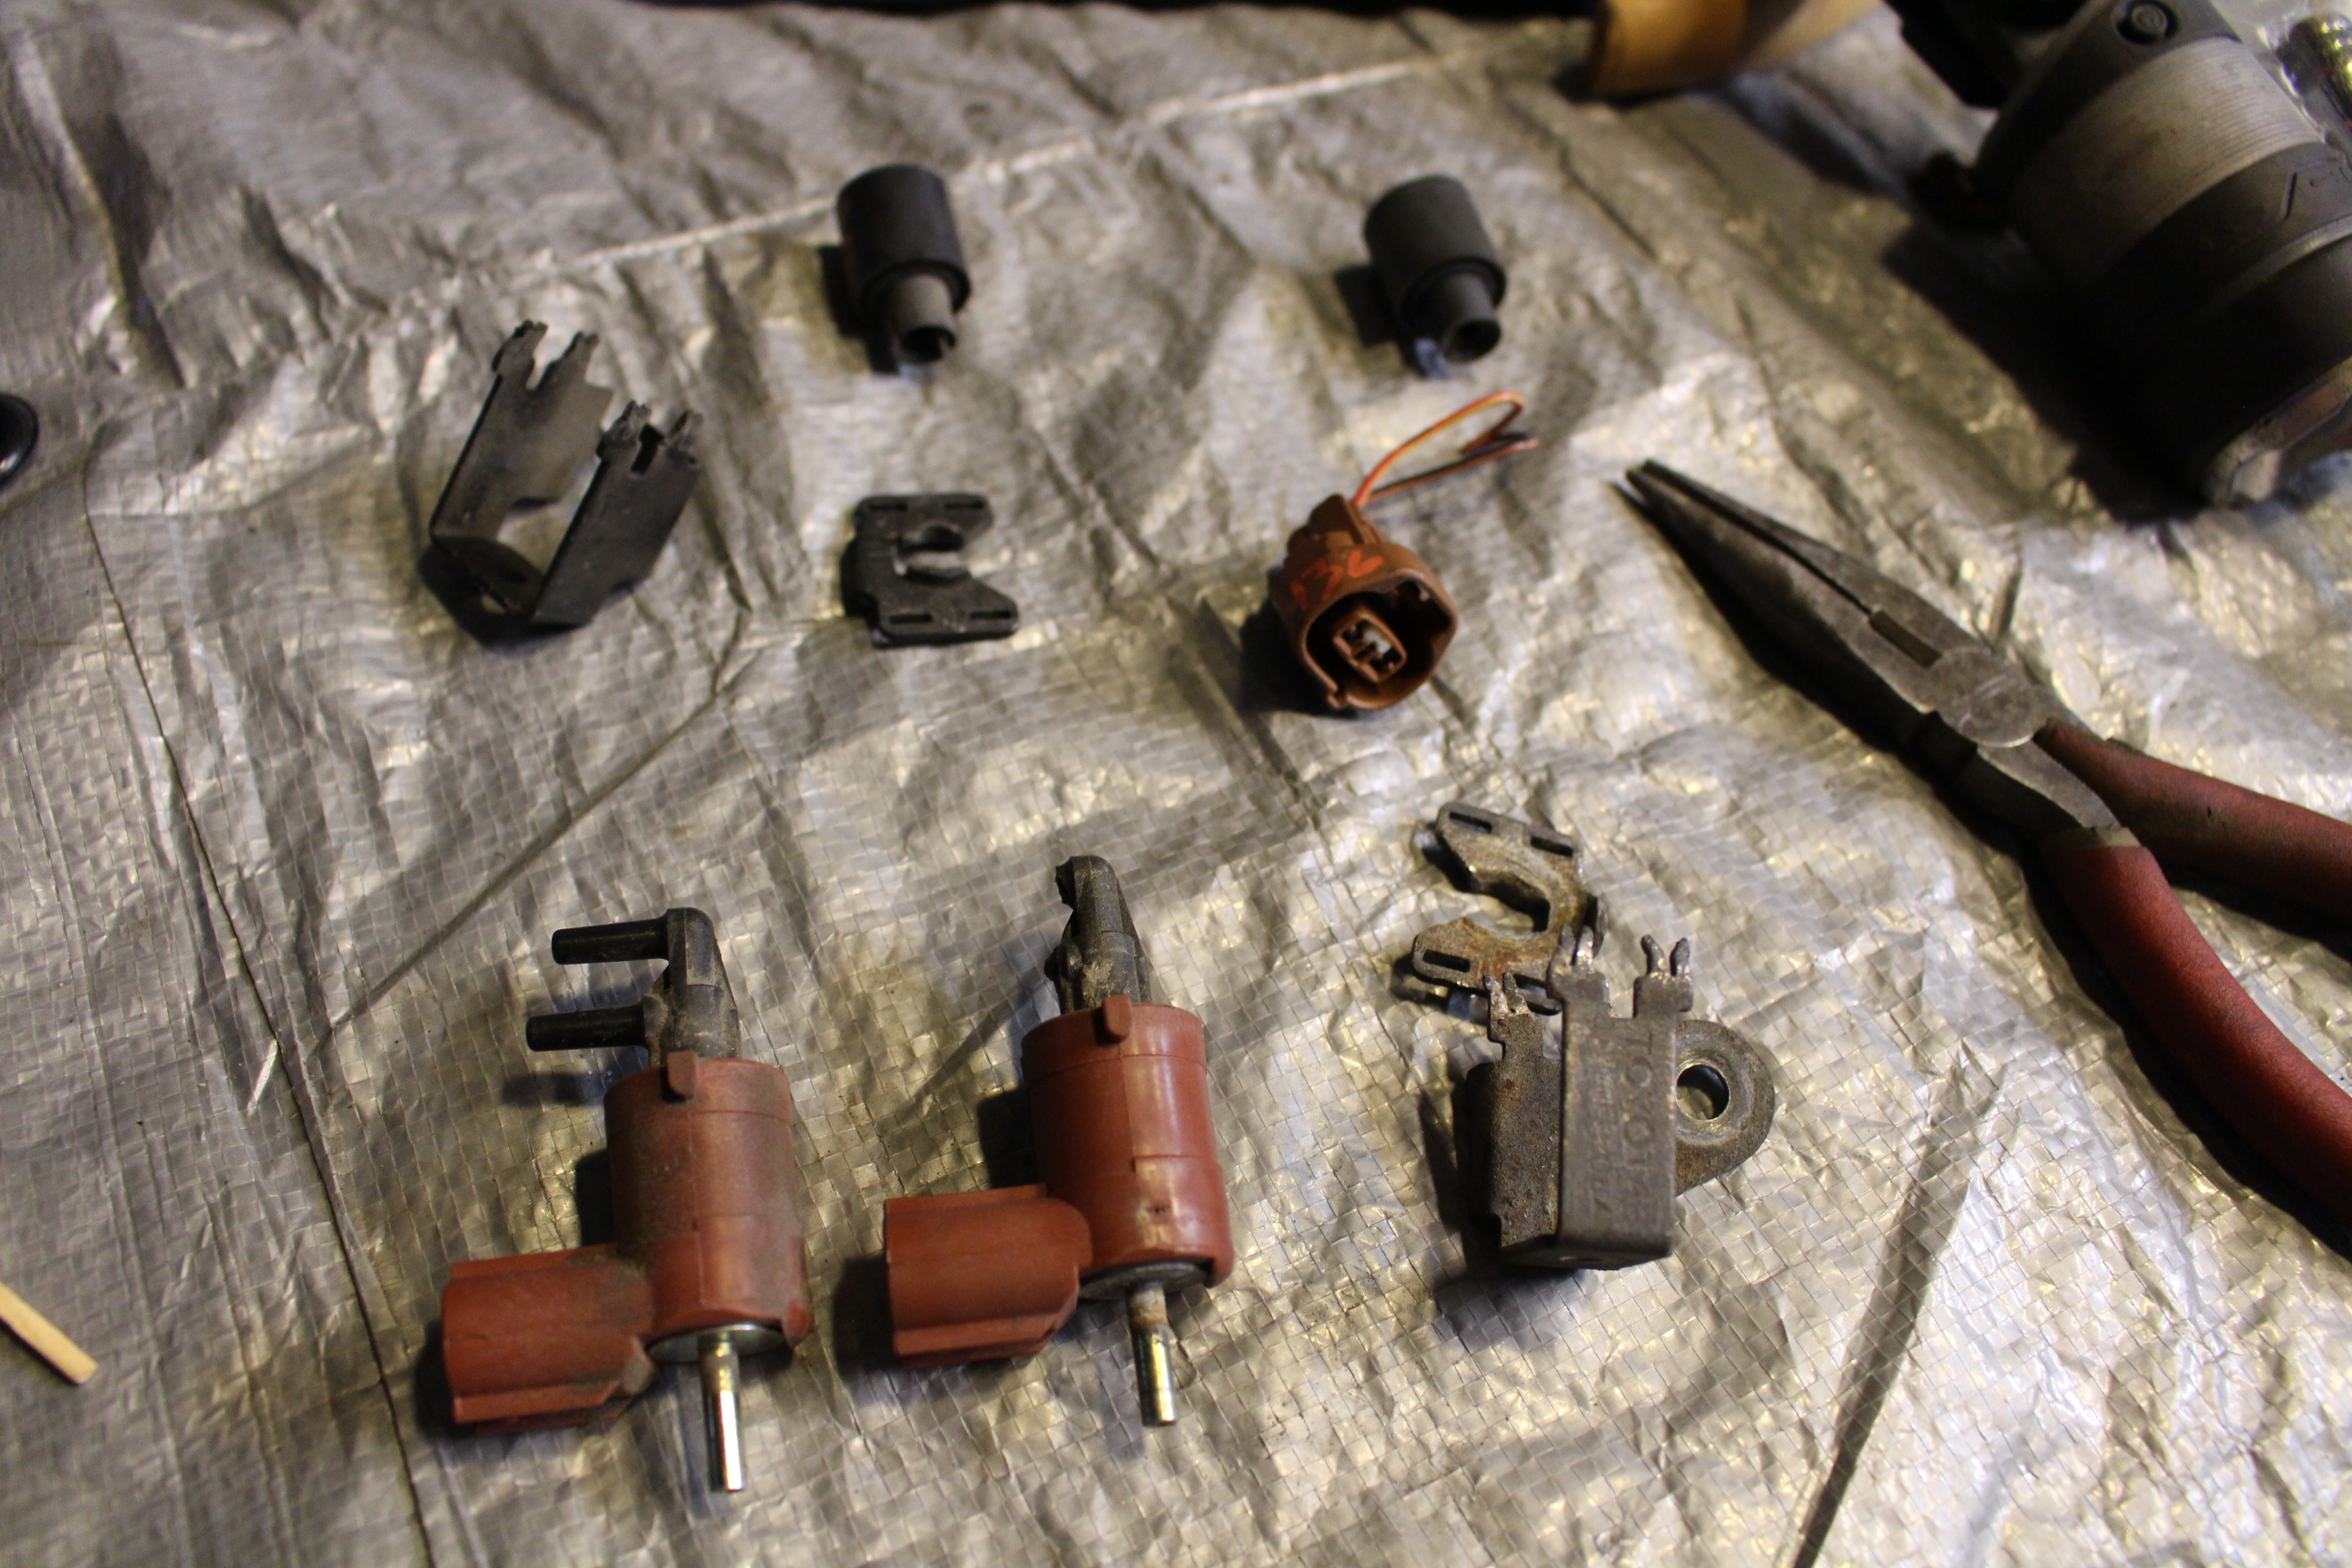
Accidently broke the nipples off of one of the Emissions vacuum solenoids on the top of the valve cover. Ran the part number on ebay and the listings were in the 40-60 dollar range. Began studying the various toyota vacuum solenoids and discovered that newer solara/avalon/camry models used the same valve, just with a different bracket to hold it, which is easily swappable. 15$ later, I have a replacement on the way :thumbup:
What I broke:
generic ebay photo of an unbroken one

and the avalon replacement
Lastly, I happened to notice this wire has pulled out of its harness. I don't know what that sensor does, or how long it has been broken, but I will find a way to get that wire back in its plug or will just put a crimp connector on there. There is also a random wire coming out of the bundle going back to the transmission/o2 sensor with a butt connector crimped to it and nothing else. The joys of previous owners...
 09-05-2016, 04:45 PM
#13
Registered User
Thread Starter
Join Date: Sep 2016
Posts: 17
Likes: 0
Received 0 Likes
on
0 Posts
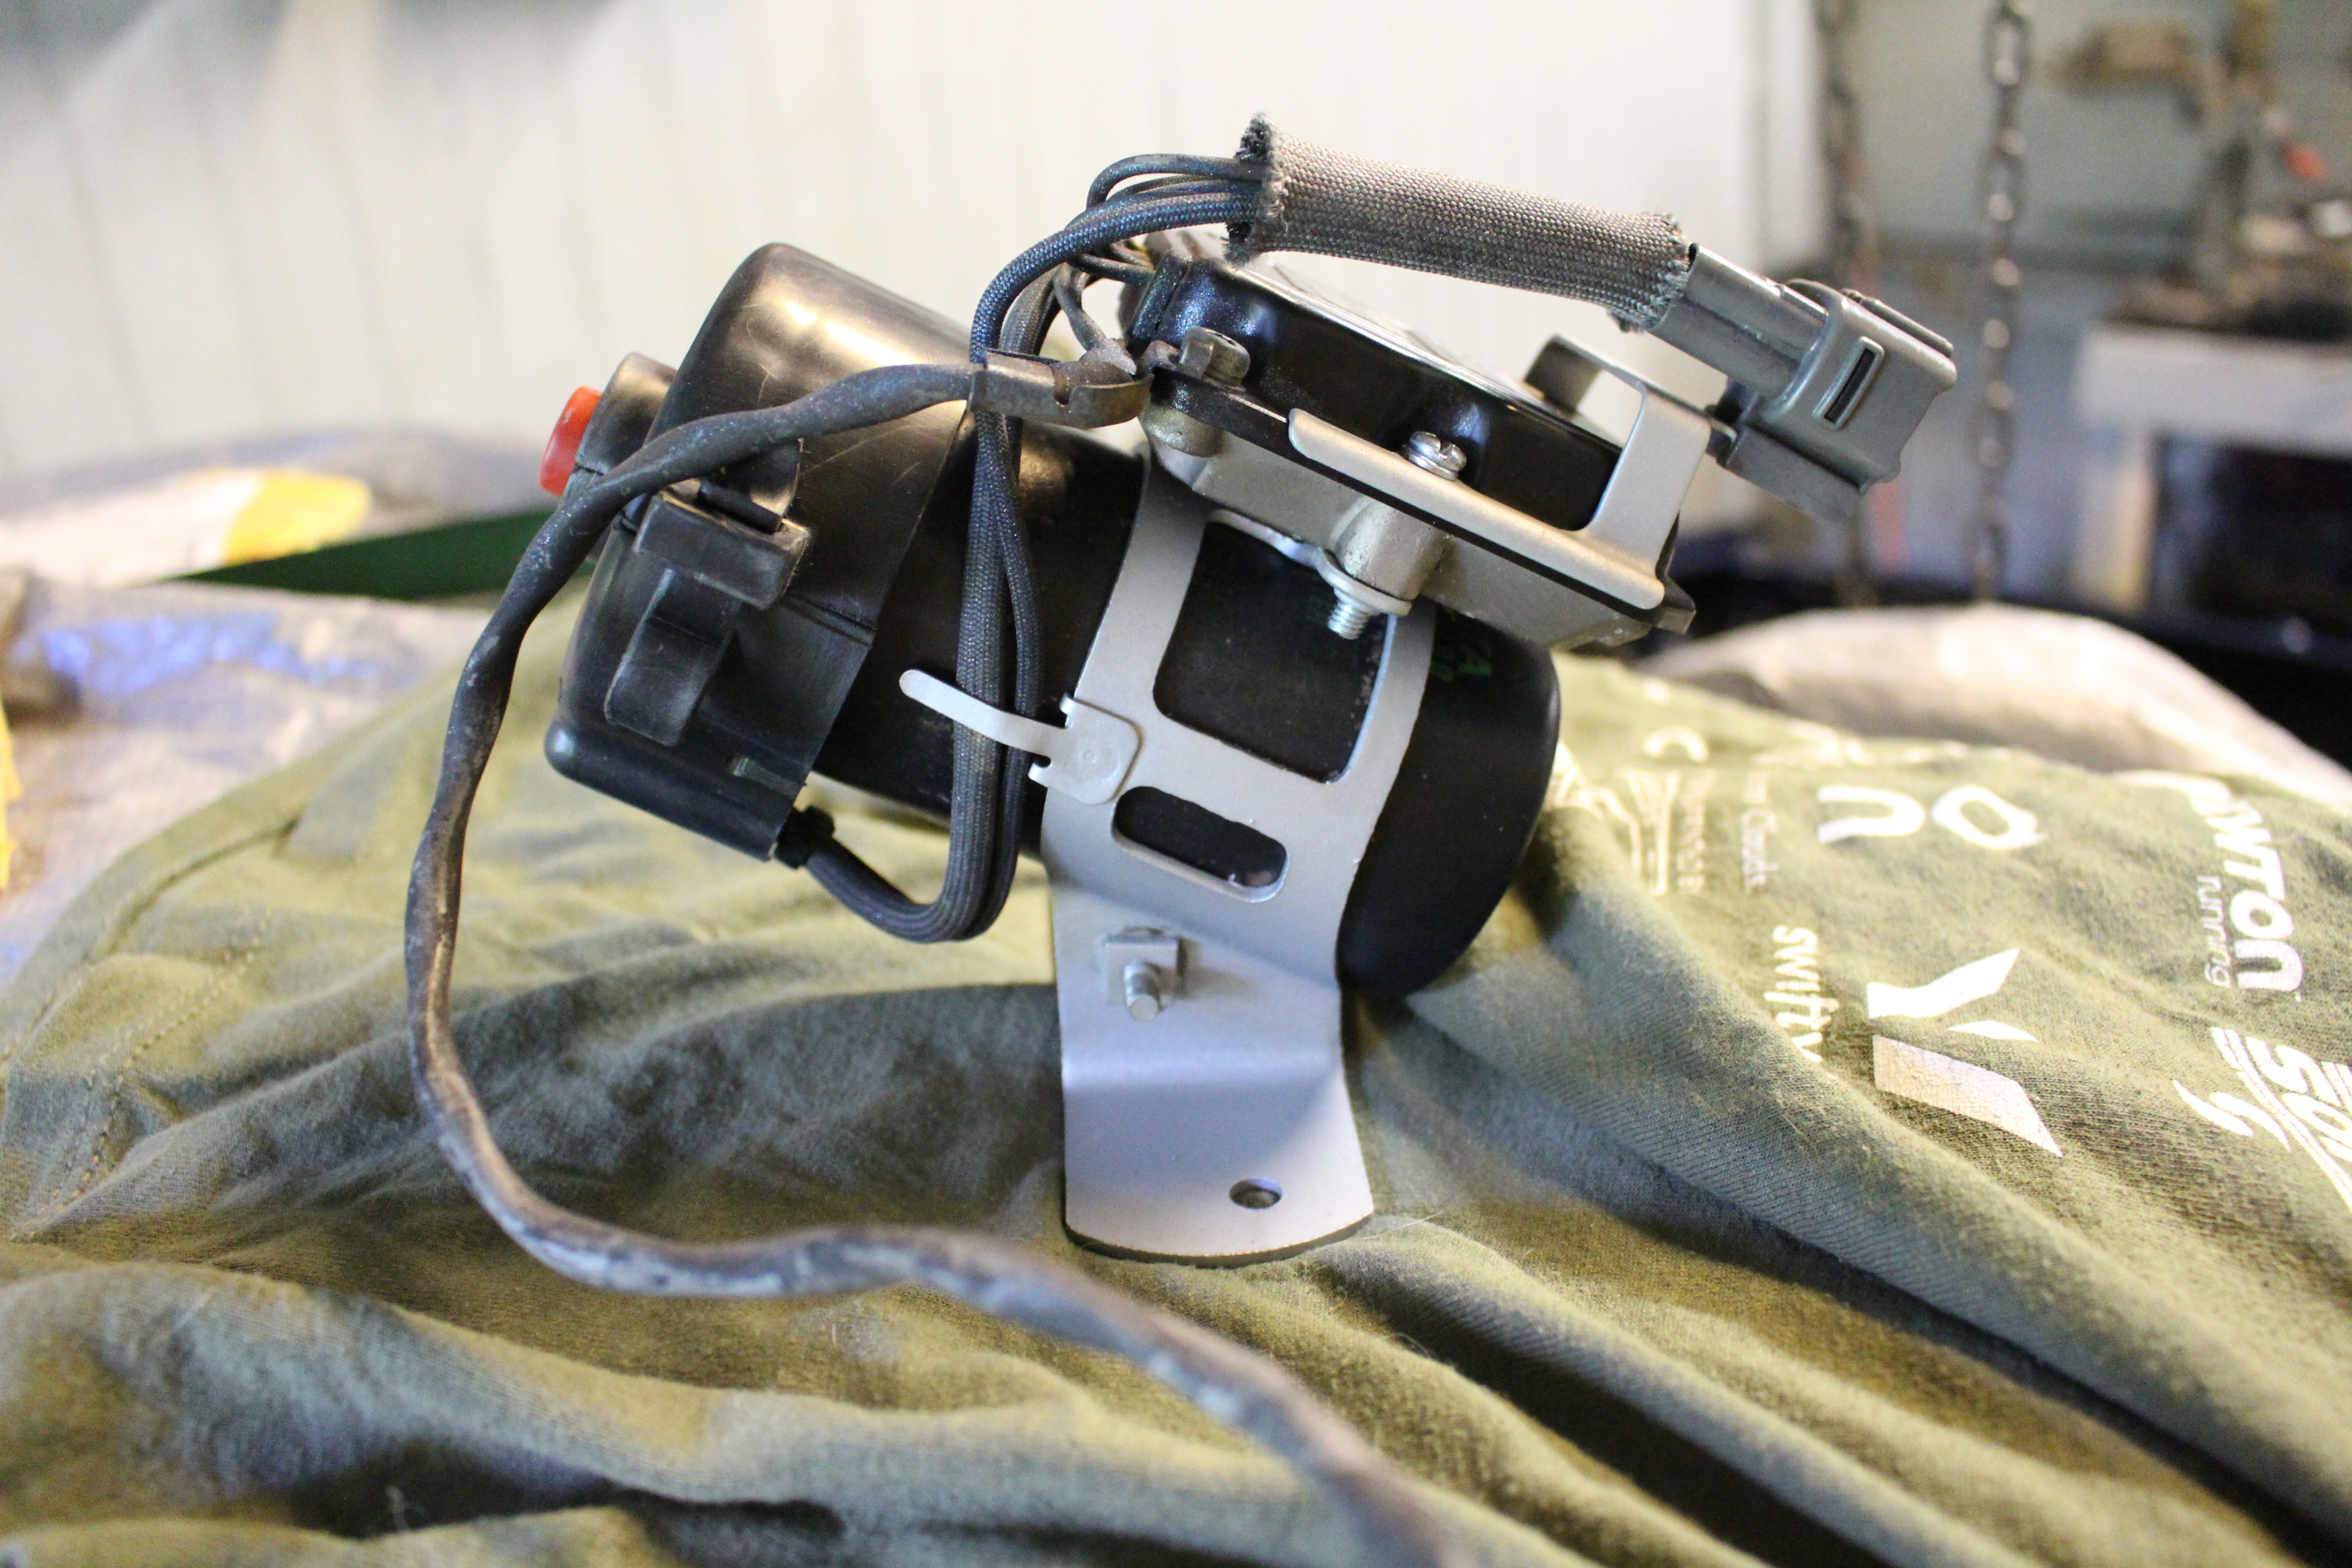
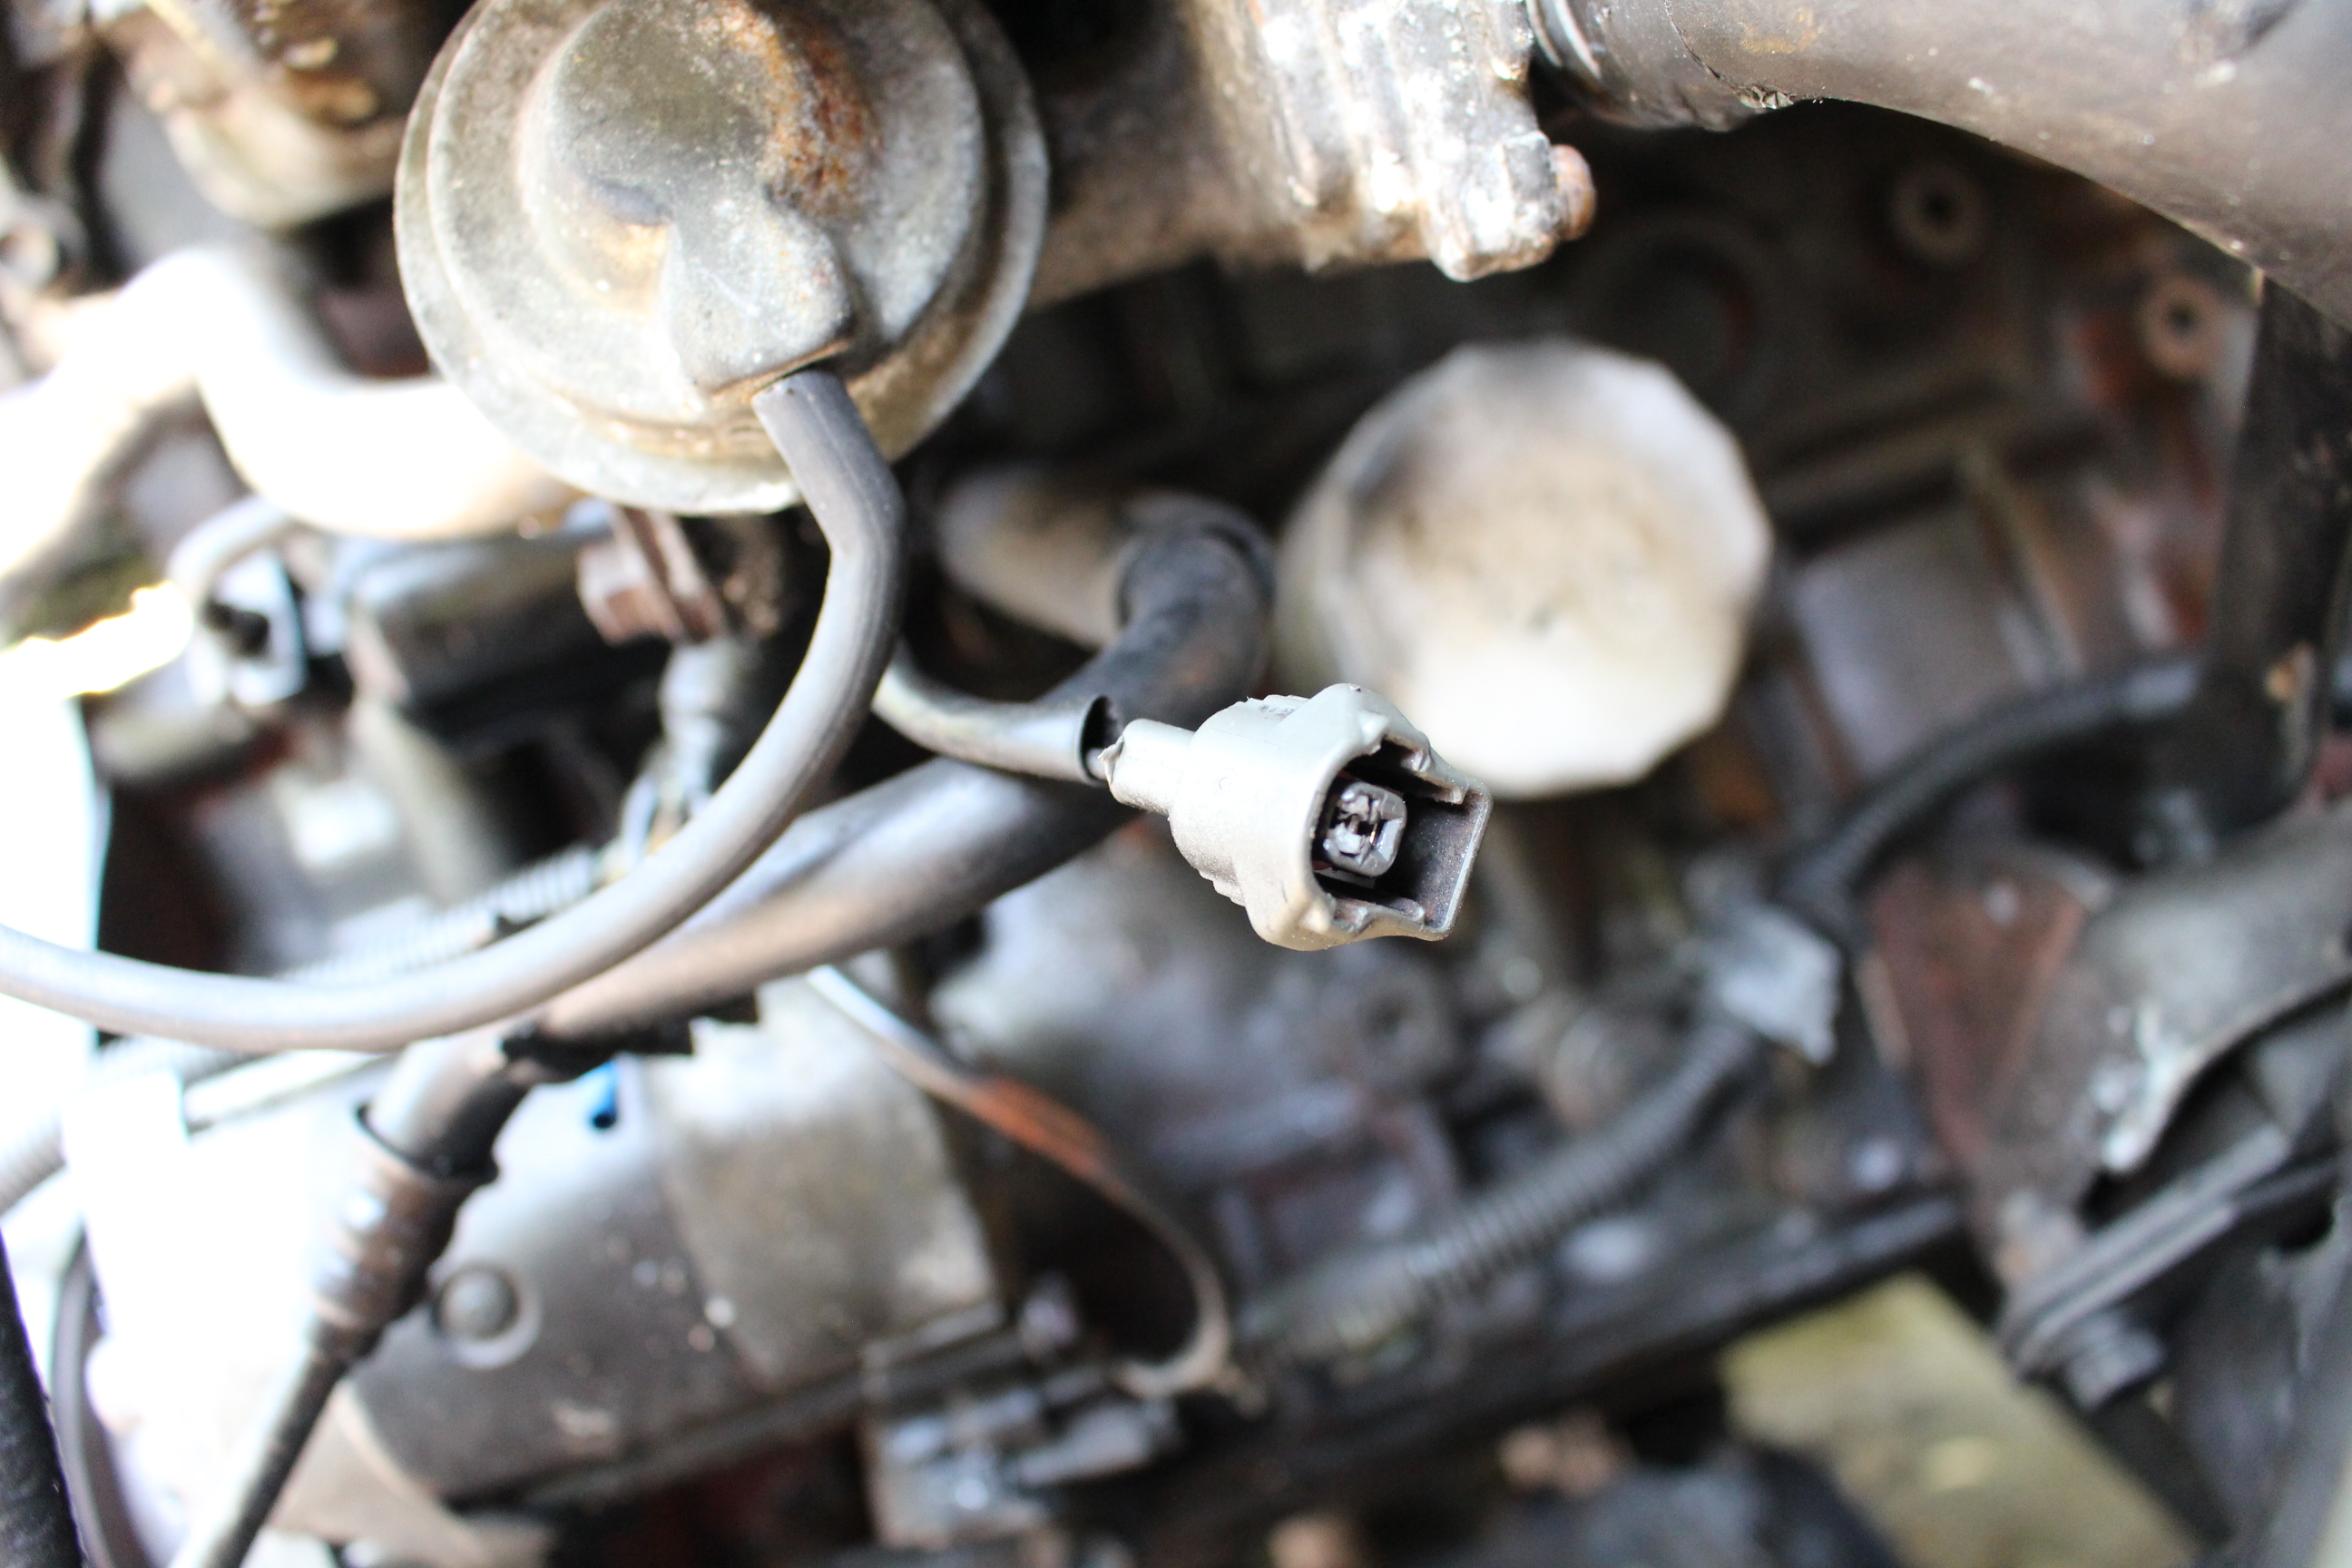
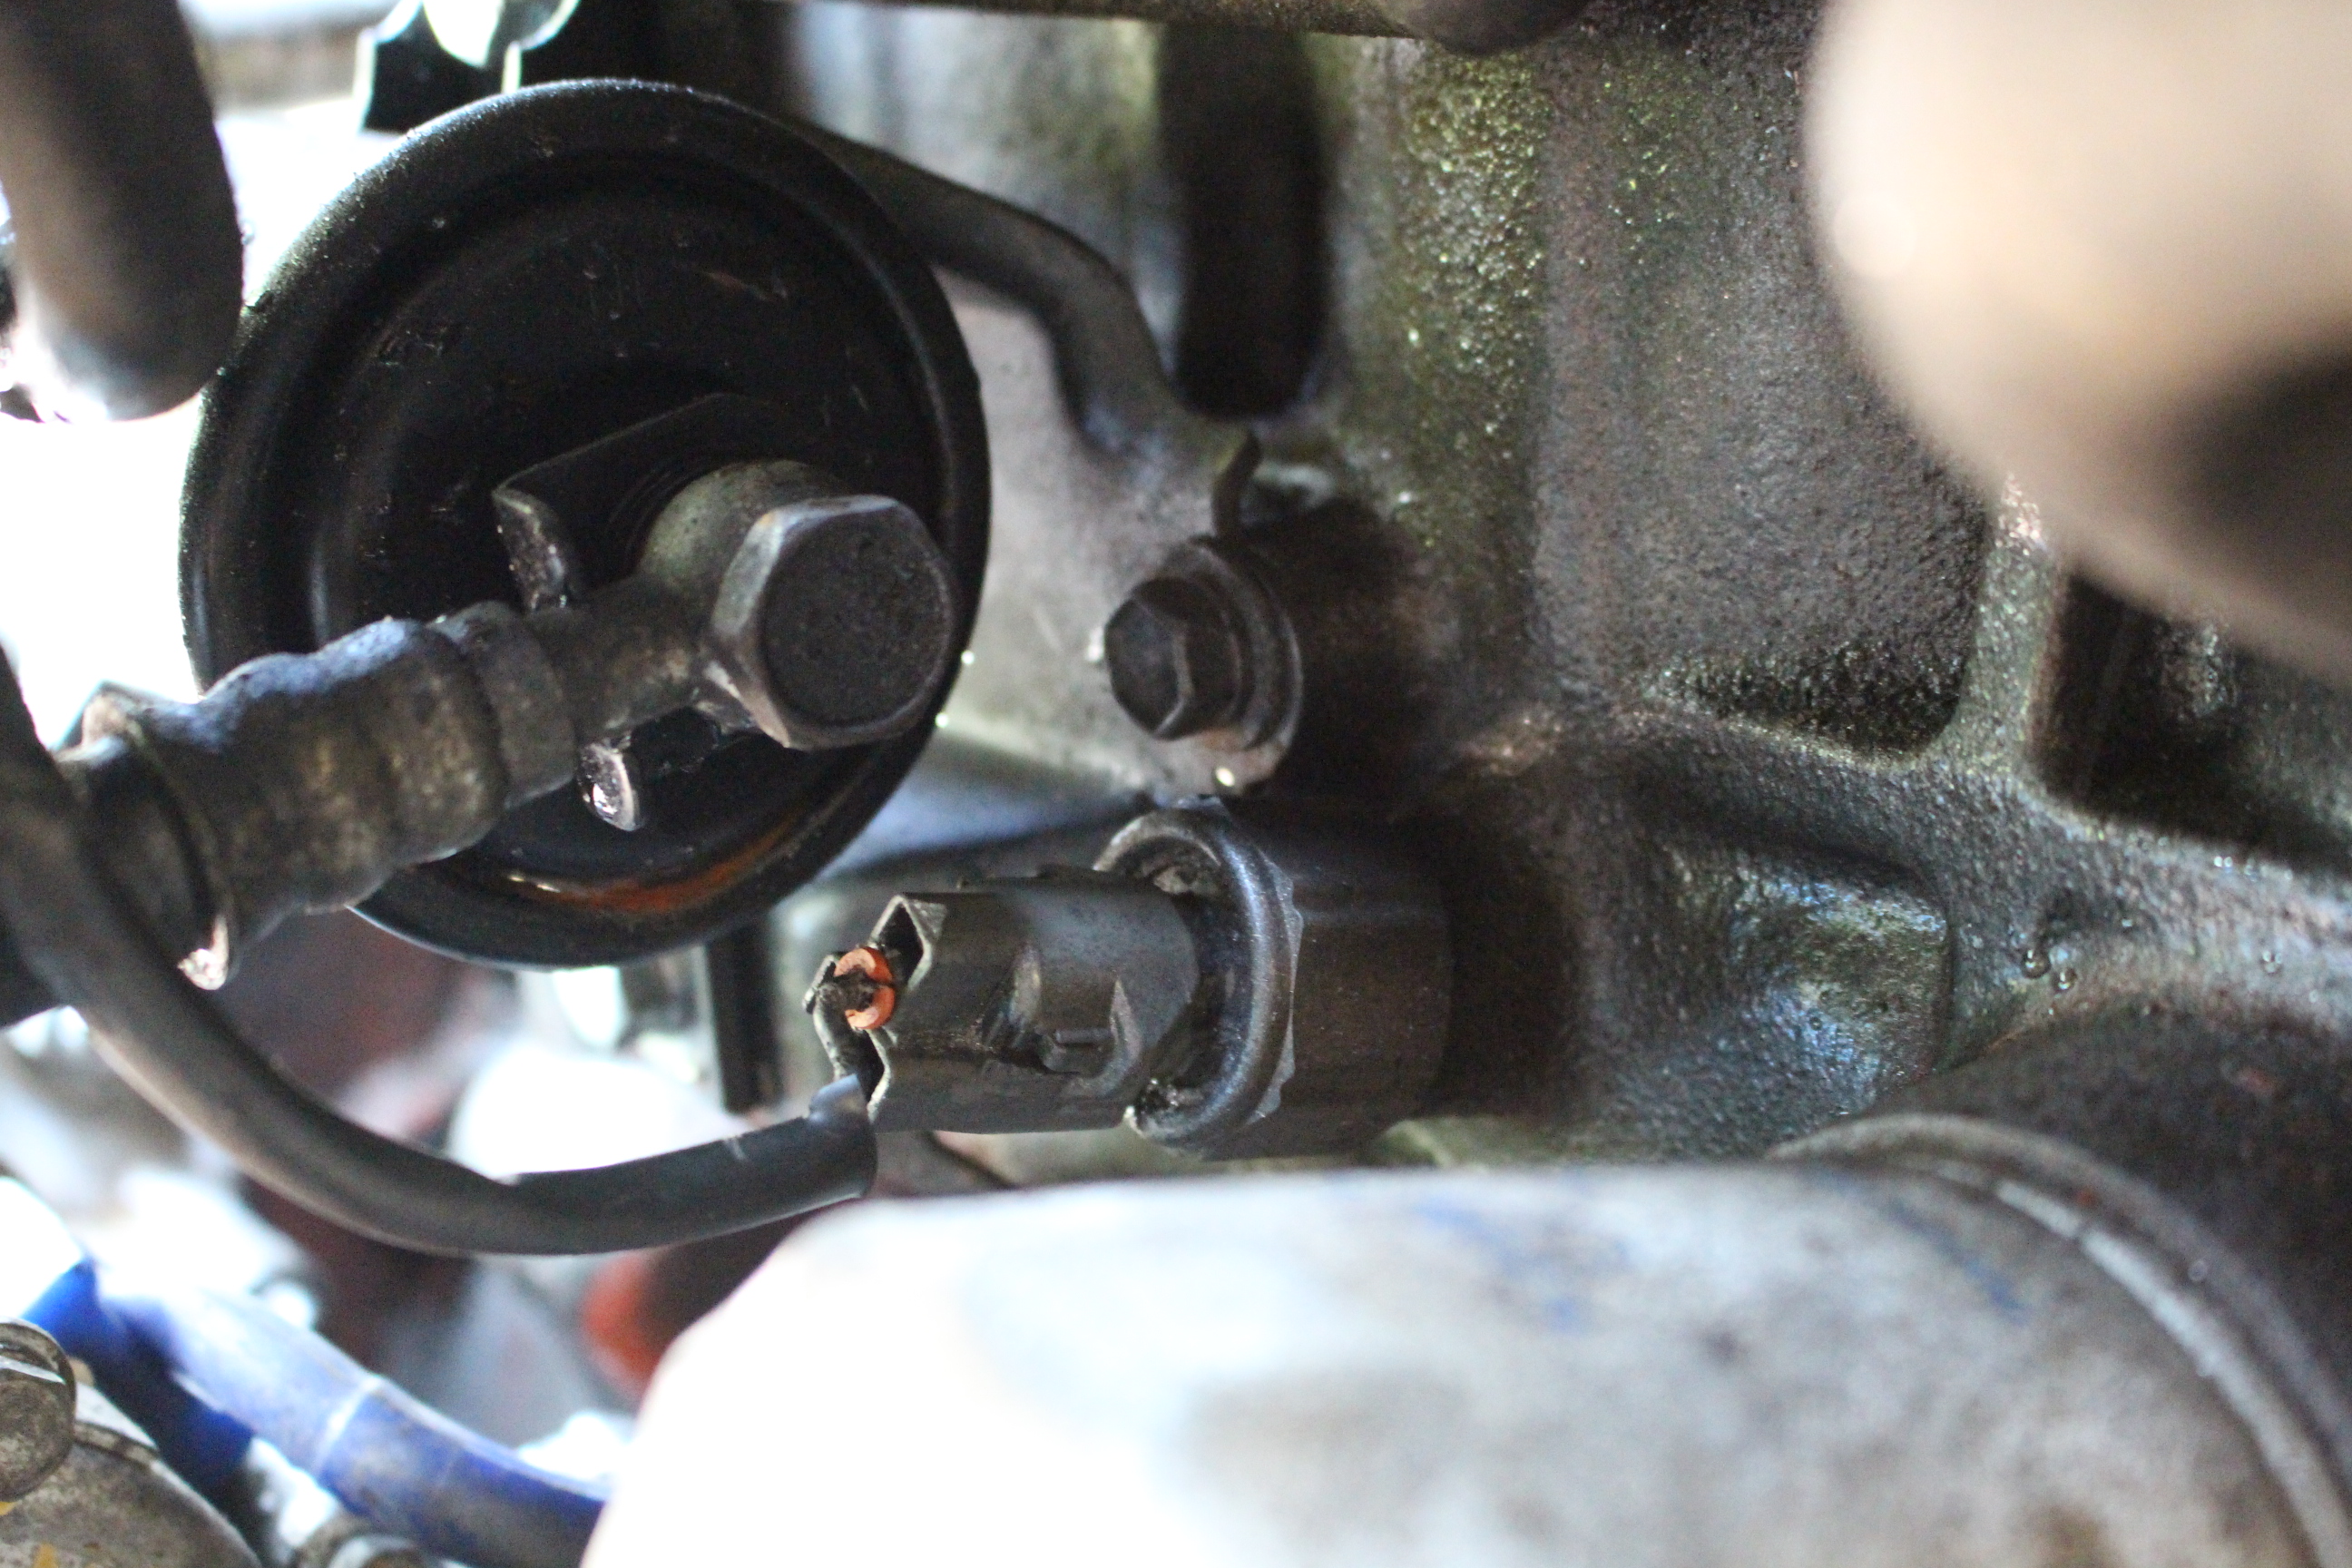
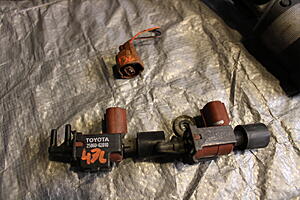
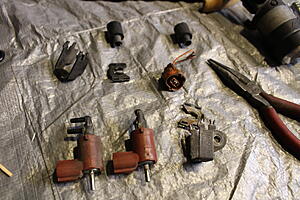
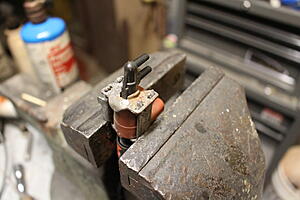
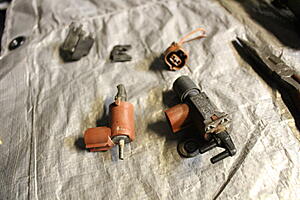
Not a huge update today. Reassembled the coil pack assembly, and fixed that broken wire going to the sensor in the block.
The coil pack had some surface rust and some overspray from when I spray painted the side of
The truck to at least make it one color on that side.

Cleaned it up with some wire wheels in a drill press, and then primed, painted, and matte cleared it.
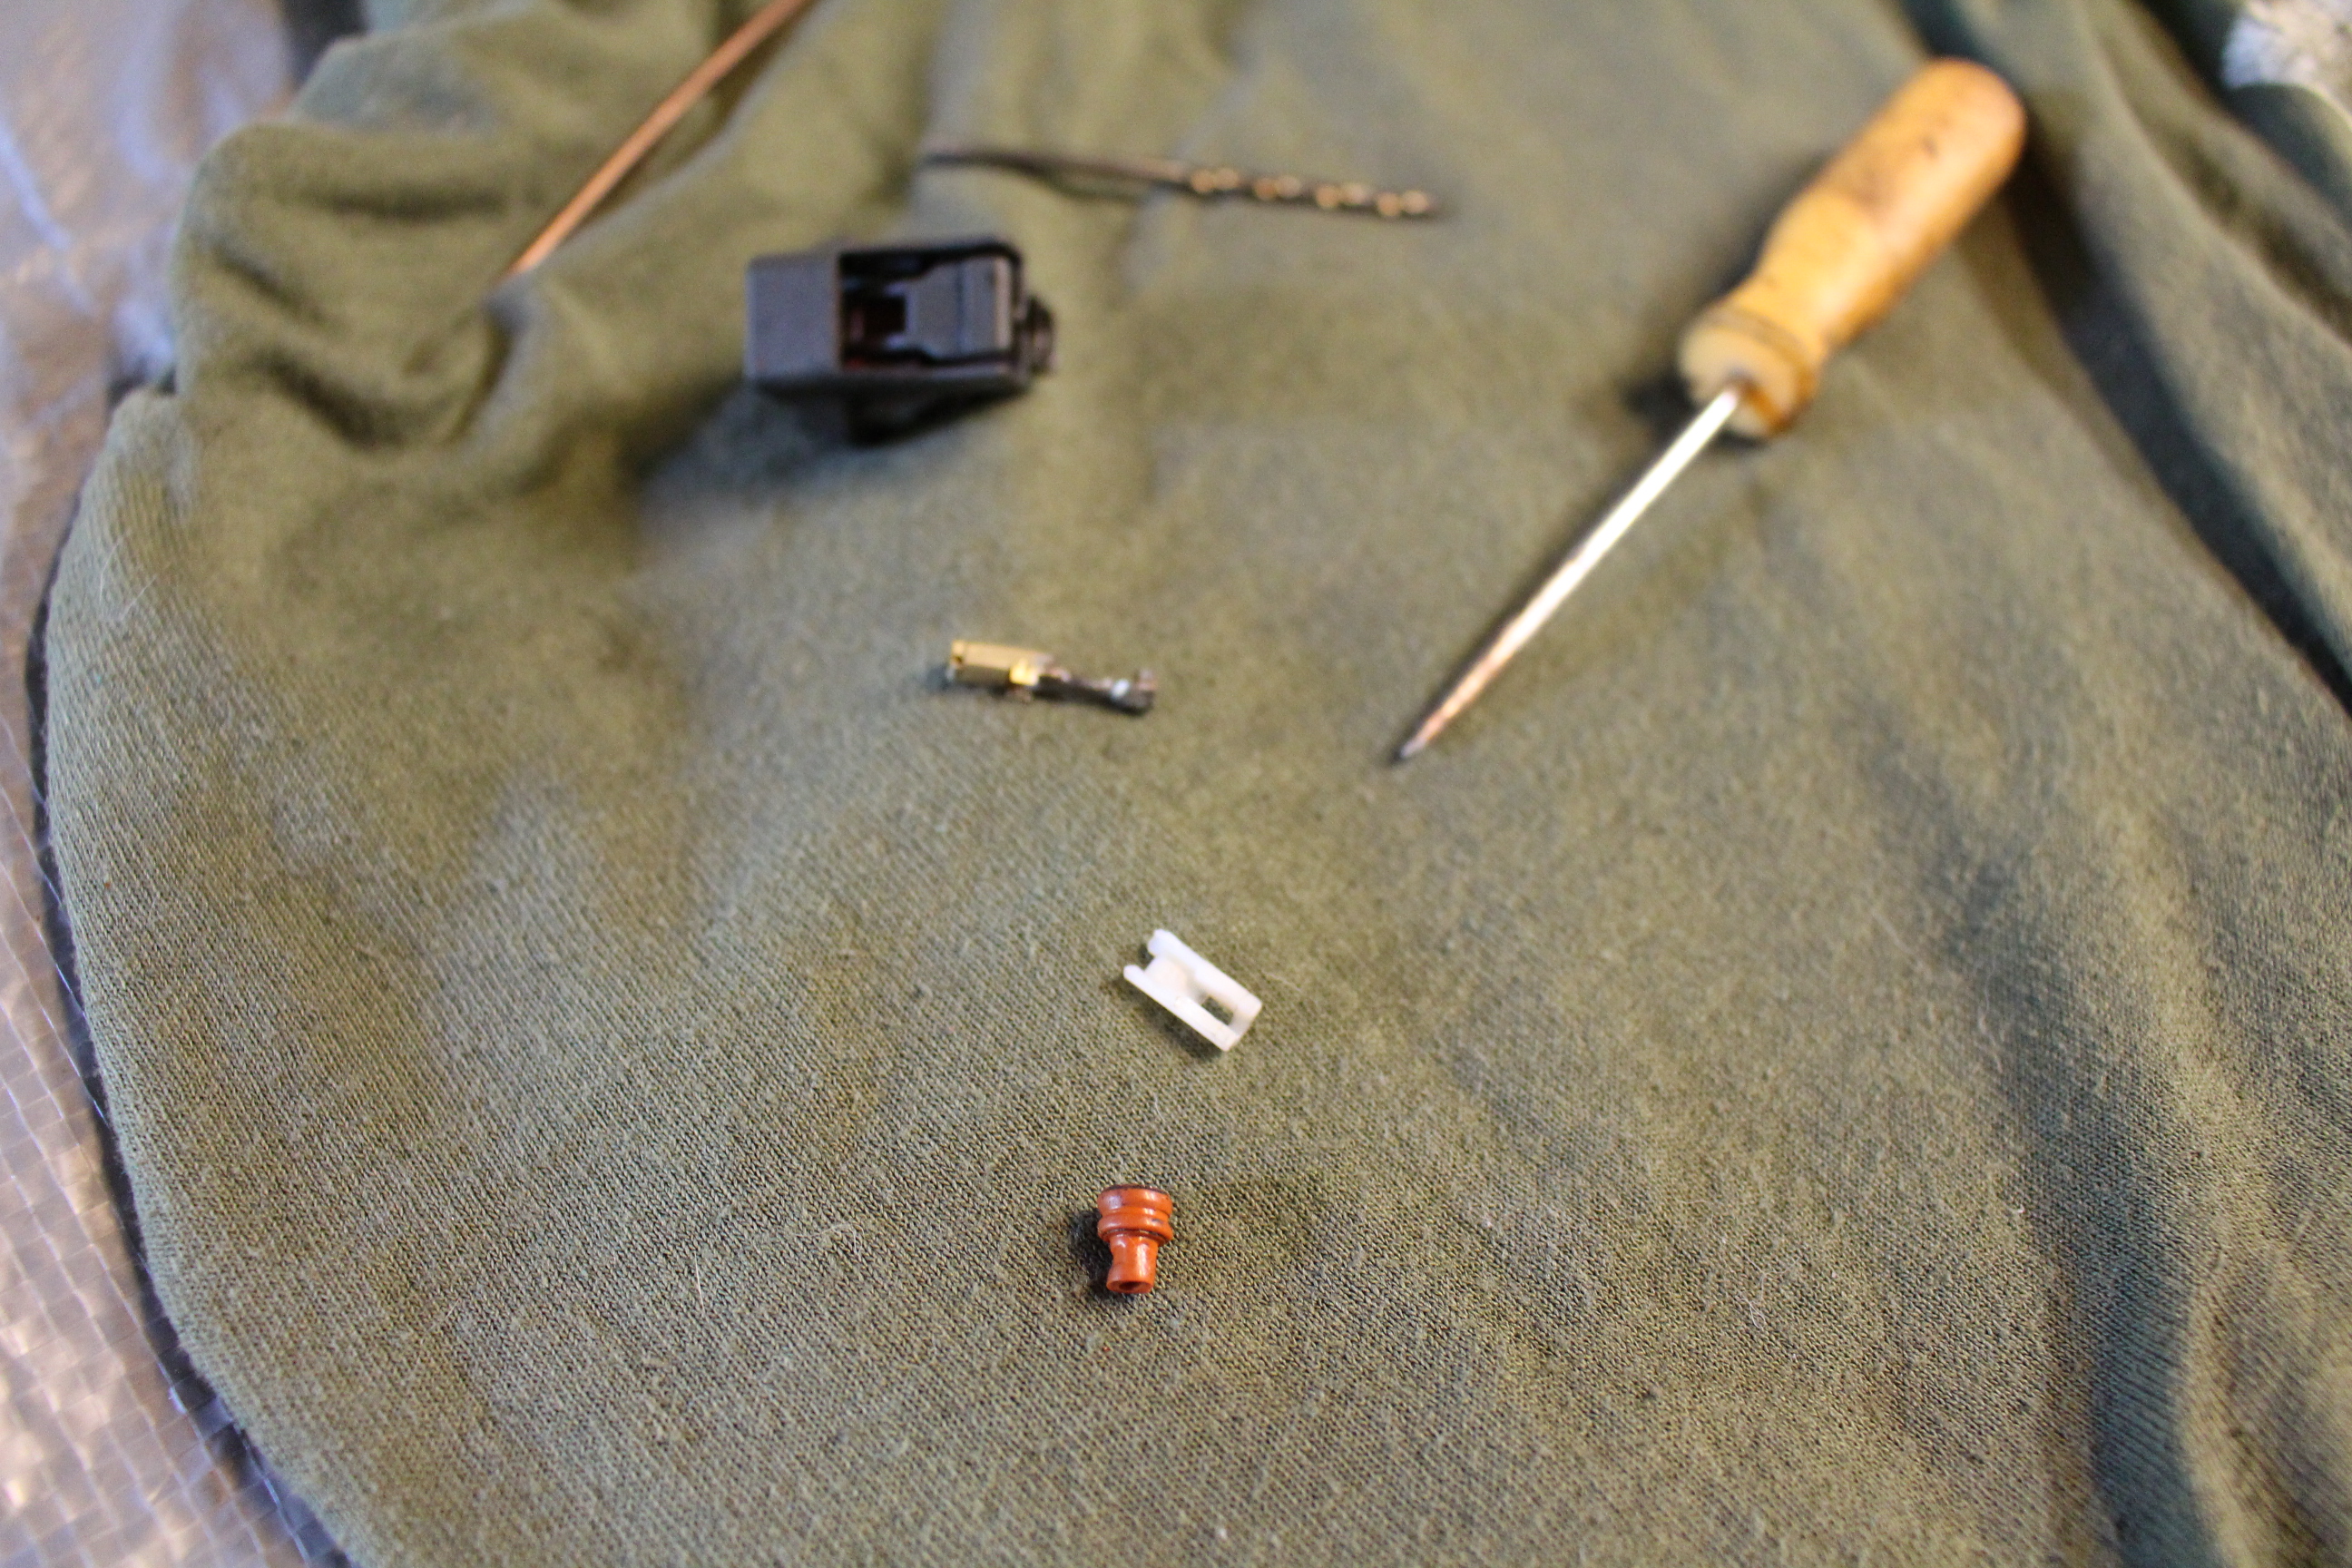
Next I moved onto fixing that wire. No clue what it does but as long as it's fixed I'm happy. Disassembled the plug, soldered the pin back to the wire and recrimped to the wire insulation. It looked like this last step was skipped at the factory putting all the strain directly on the wire.

All fixed!

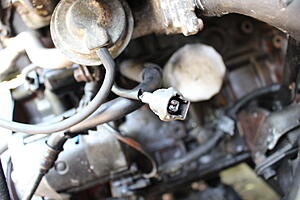
There's still the mystery of this wire. It is yellow with a green tracer. It comes out of the transmission wiring loom at the starter. Right now it just has a blue crimp connector attached to it. Any Toyota wiring gurus here?

The coil pack had some surface rust and some overspray from when I spray painted the side of
The truck to at least make it one color on that side.


Cleaned it up with some wire wheels in a drill press, and then primed, painted, and matte cleared it.

Next I moved onto fixing that wire. No clue what it does but as long as it's fixed I'm happy. Disassembled the plug, soldered the pin back to the wire and recrimped to the wire insulation. It looked like this last step was skipped at the factory putting all the strain directly on the wire.
All fixed!
There's still the mystery of this wire. It is yellow with a green tracer. It comes out of the transmission wiring loom at the starter. Right now it just has a blue crimp connector attached to it. Any Toyota wiring gurus here?
 09-05-2016, 04:45 PM
#14
Registered User
Thread Starter
Join Date: Sep 2016
Posts: 17
Likes: 0
Received 0 Likes
on
0 Posts
Long overdue update!
So It has been a while since I have been able to wrench on the truck. I had to shift gears a bit and get my suzuki and my car ready for a trip down to Tennessee.
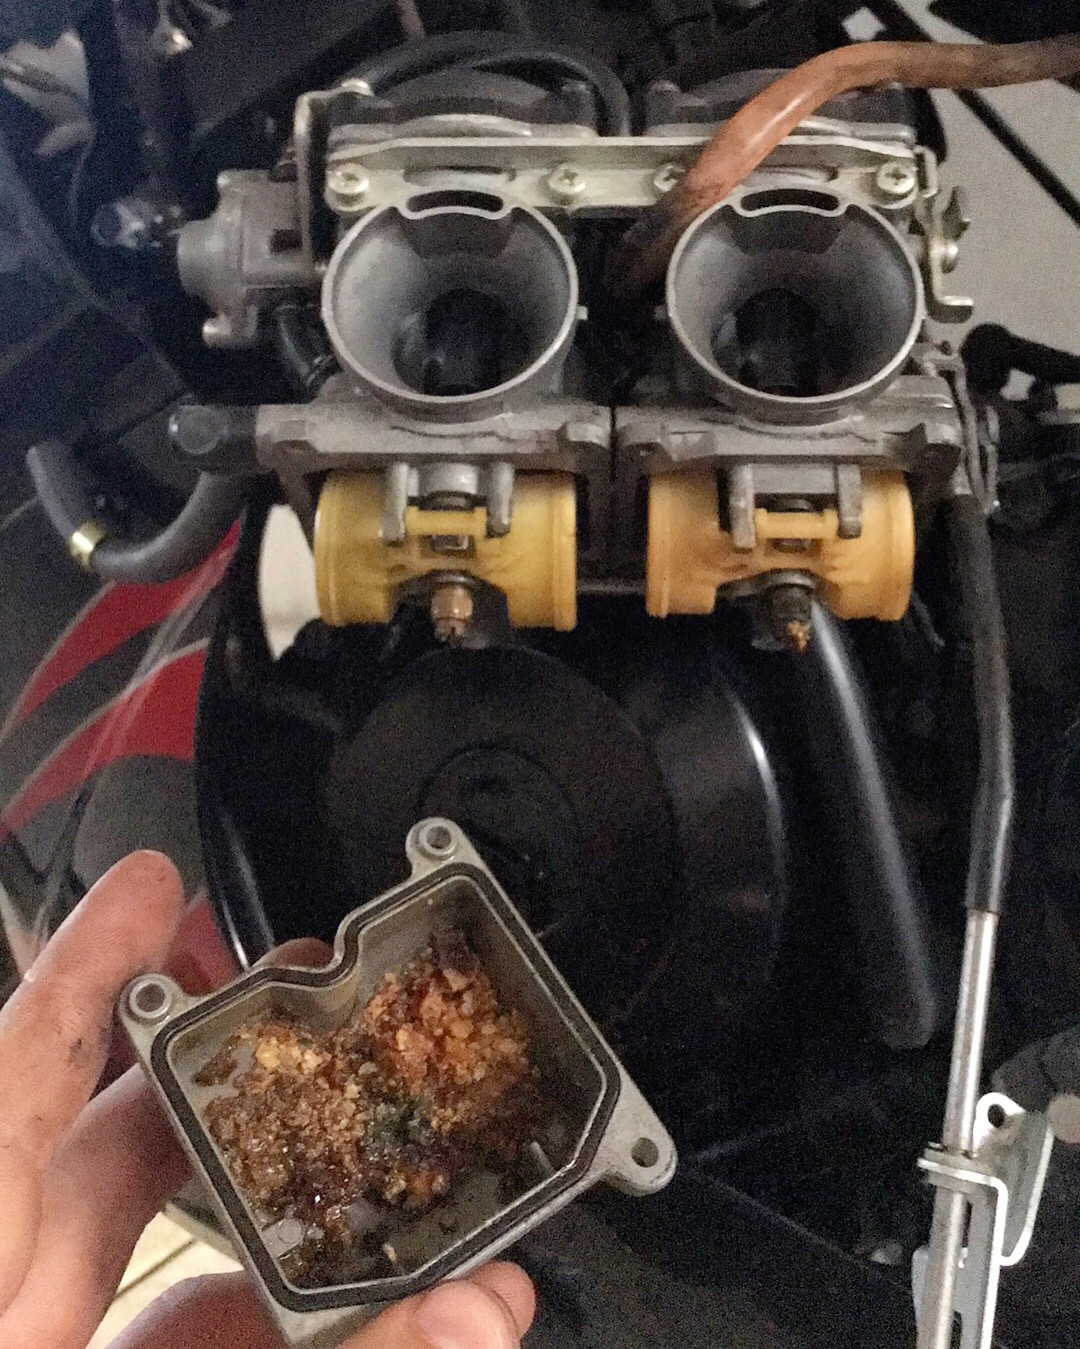
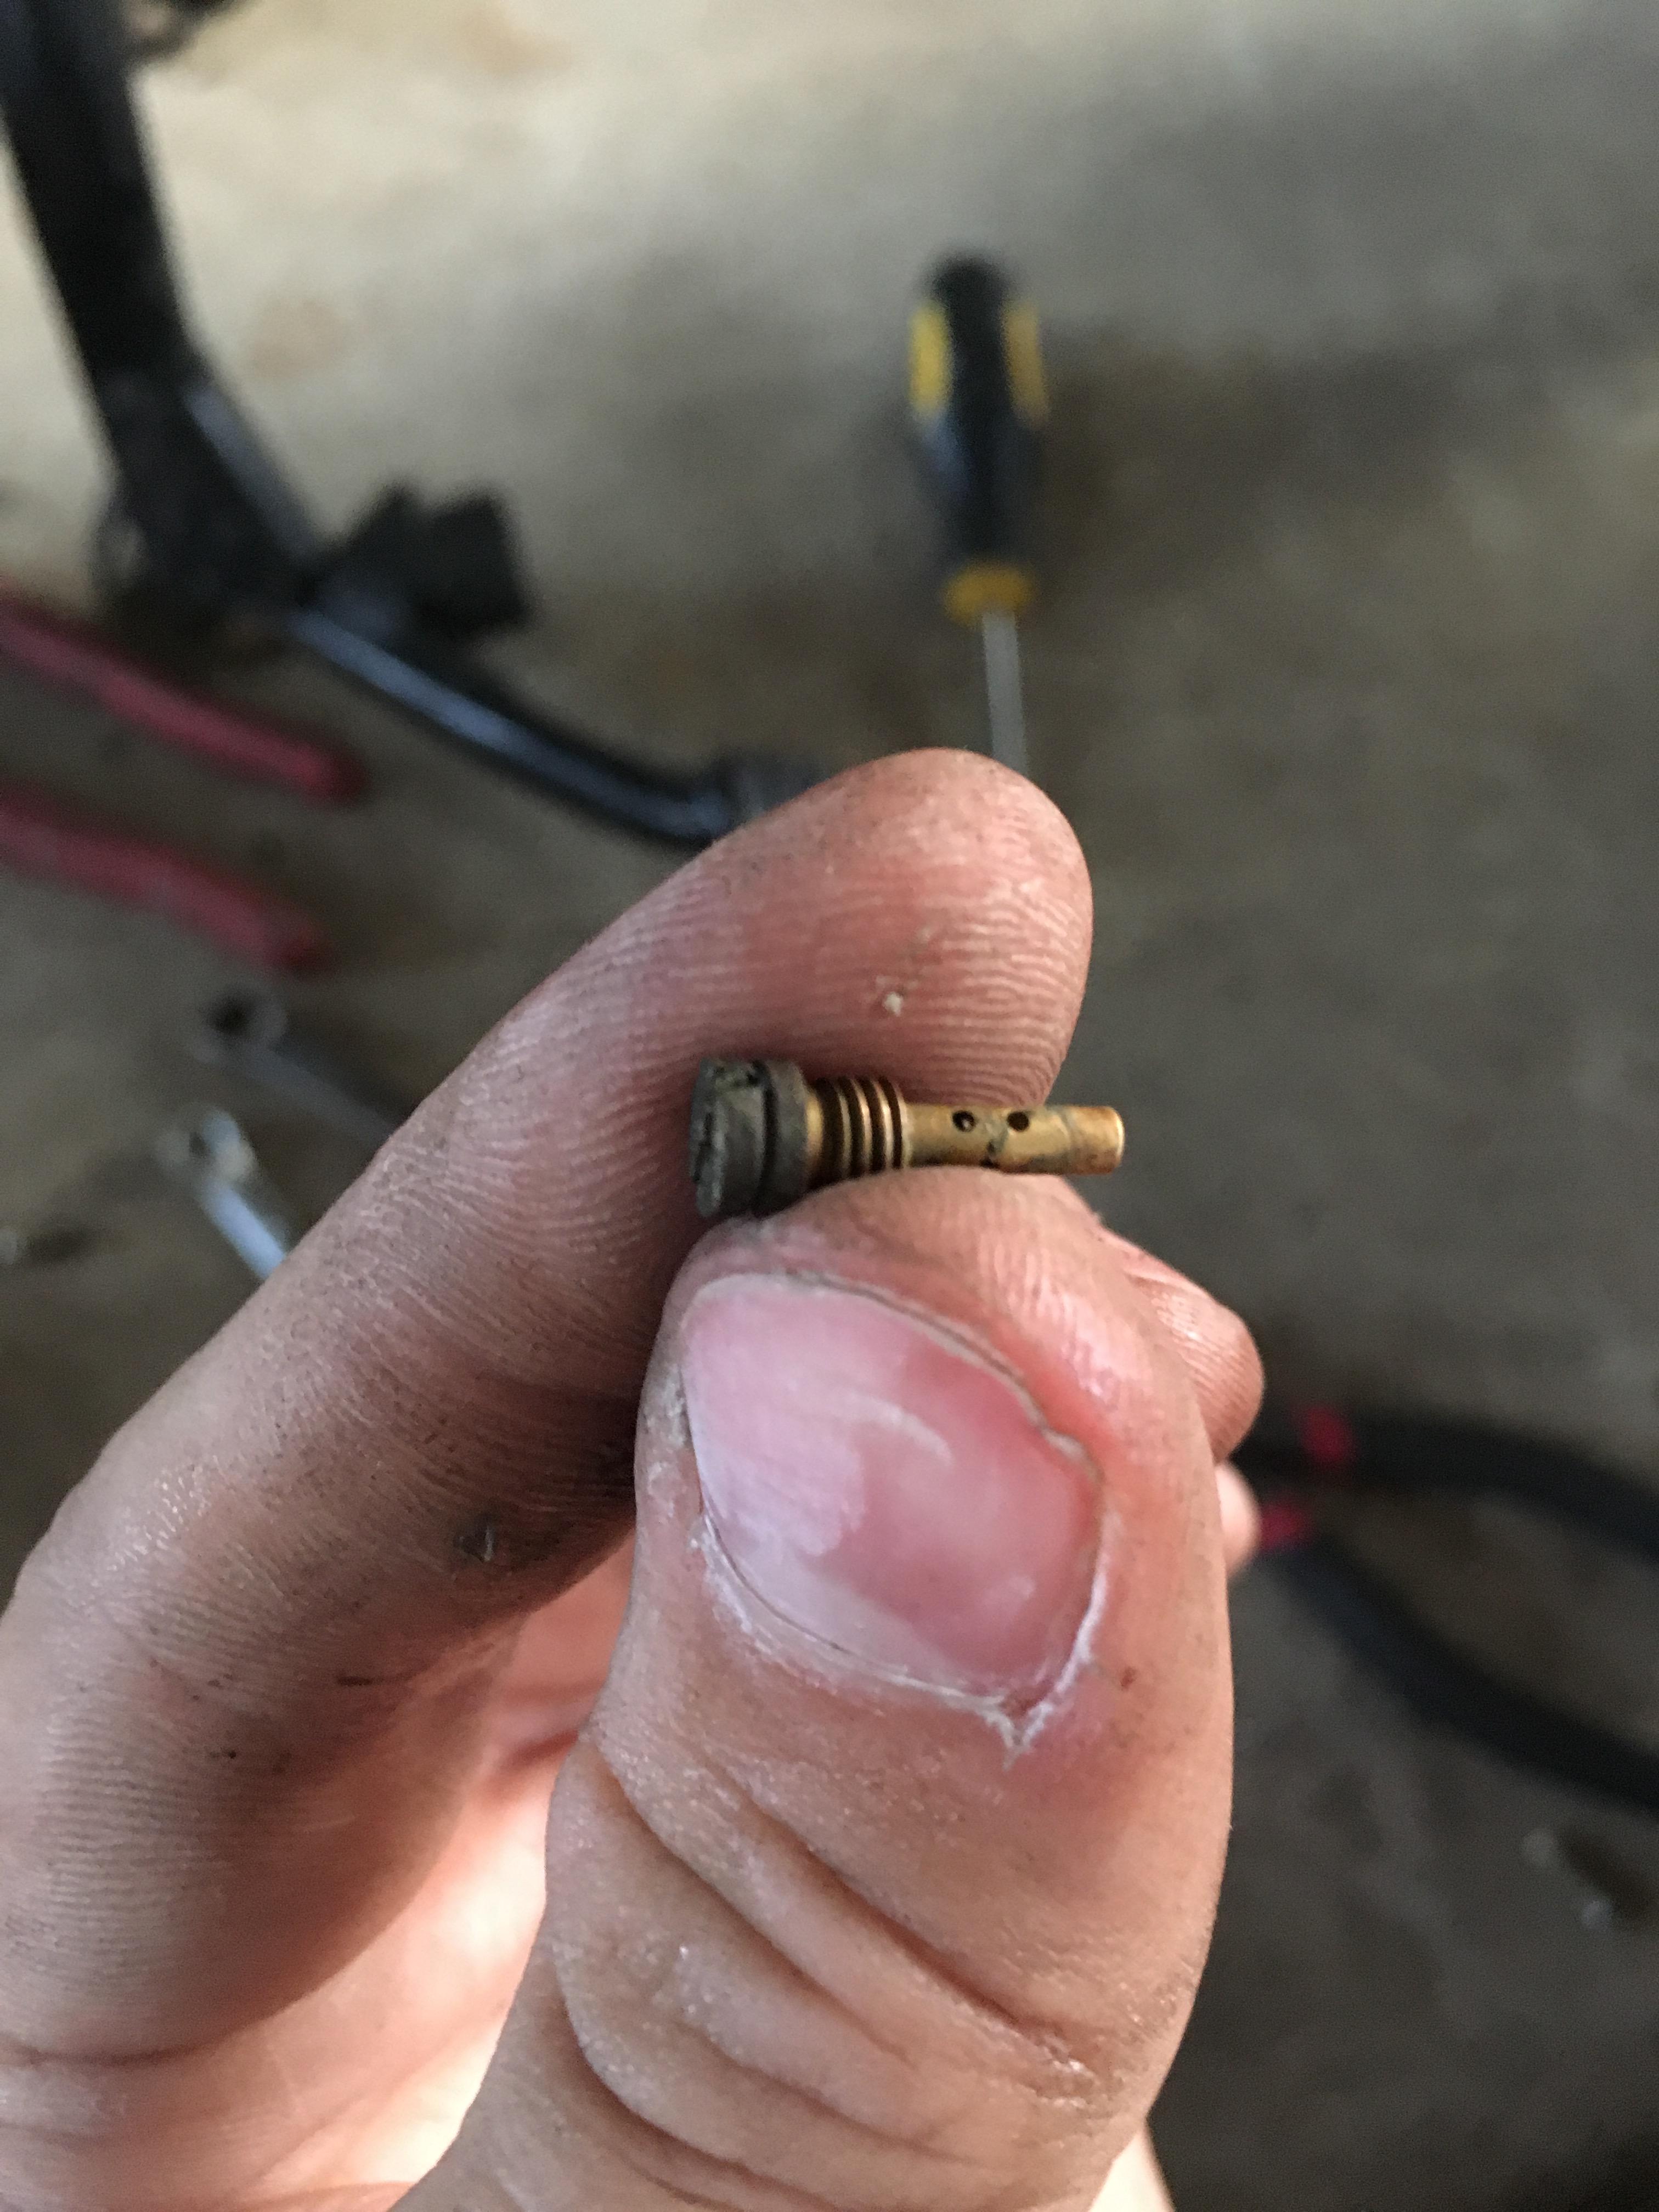
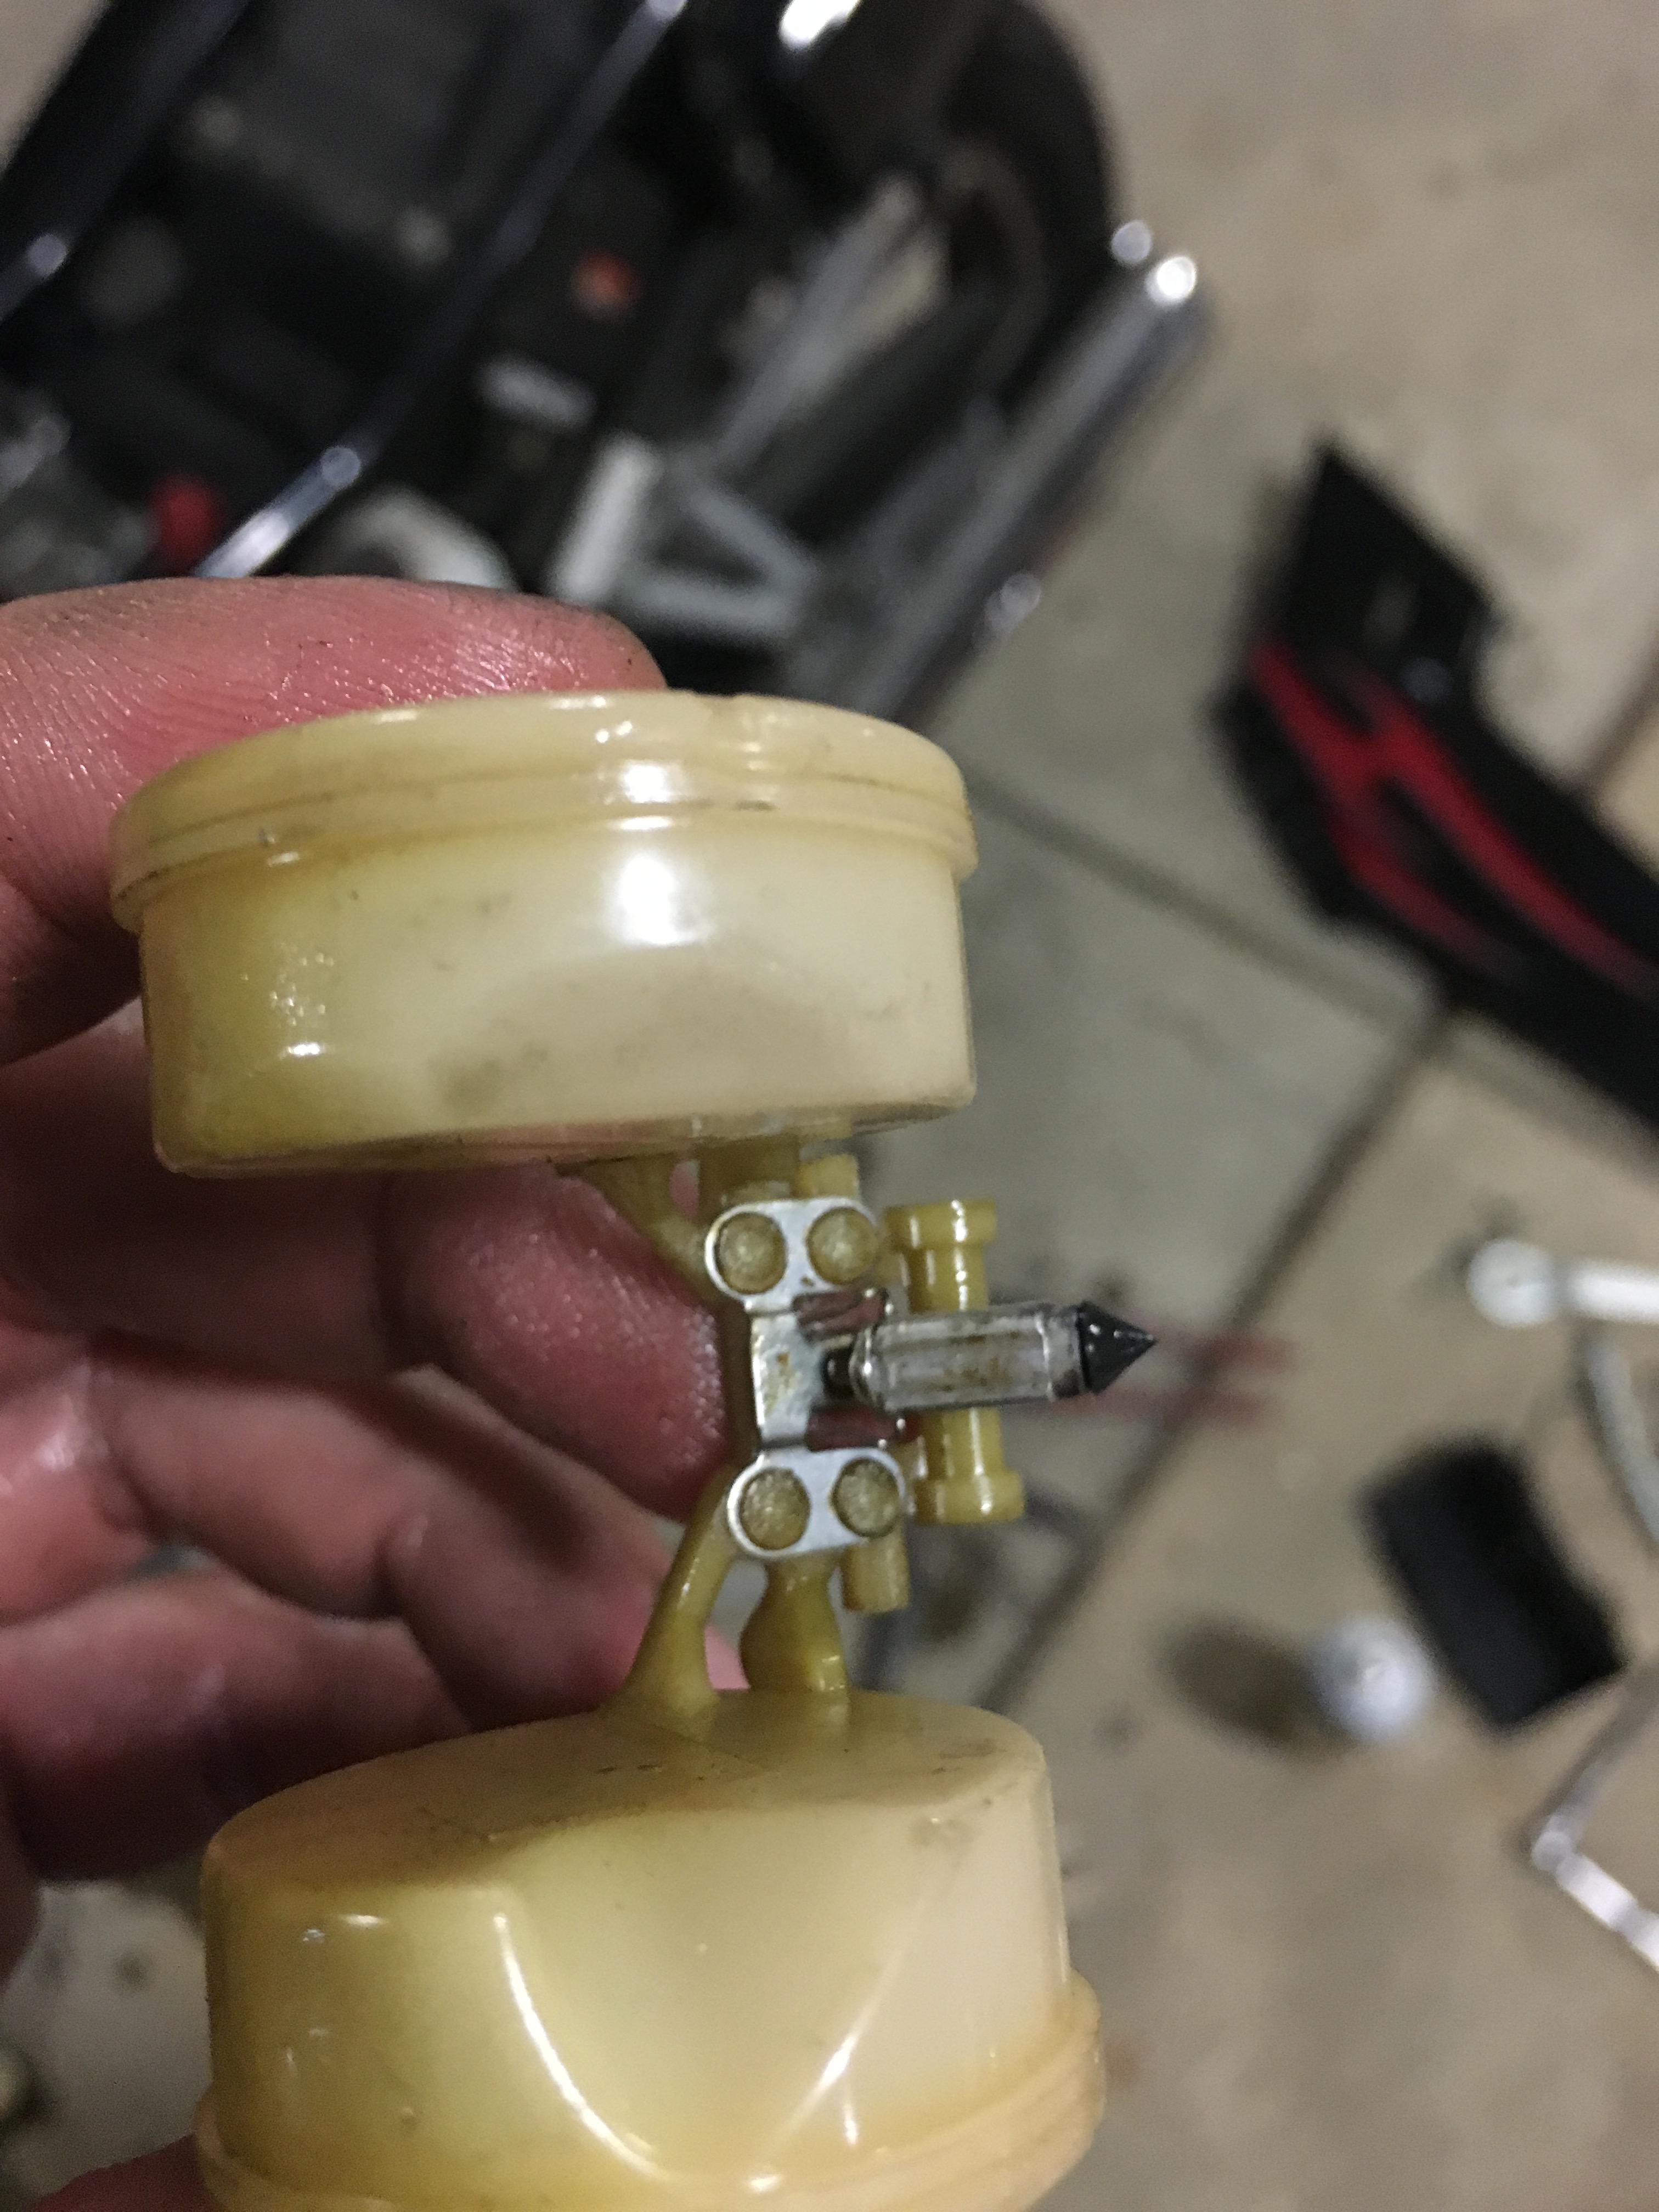
I also got caught up fixing a friends Ninja 250. It was not a pretty sight when I opened the carbs :eek:
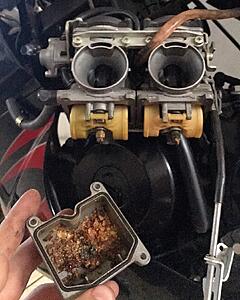

I was able to salvage one float needle, though replacements for both were ordered. However, the second one was absolutely seized in the carb housing by the crystalized fuel. Had to hammer a screw driver into the base of the float needle and turn it like a screw to get it to break loose.
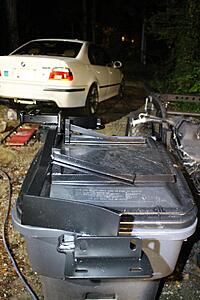
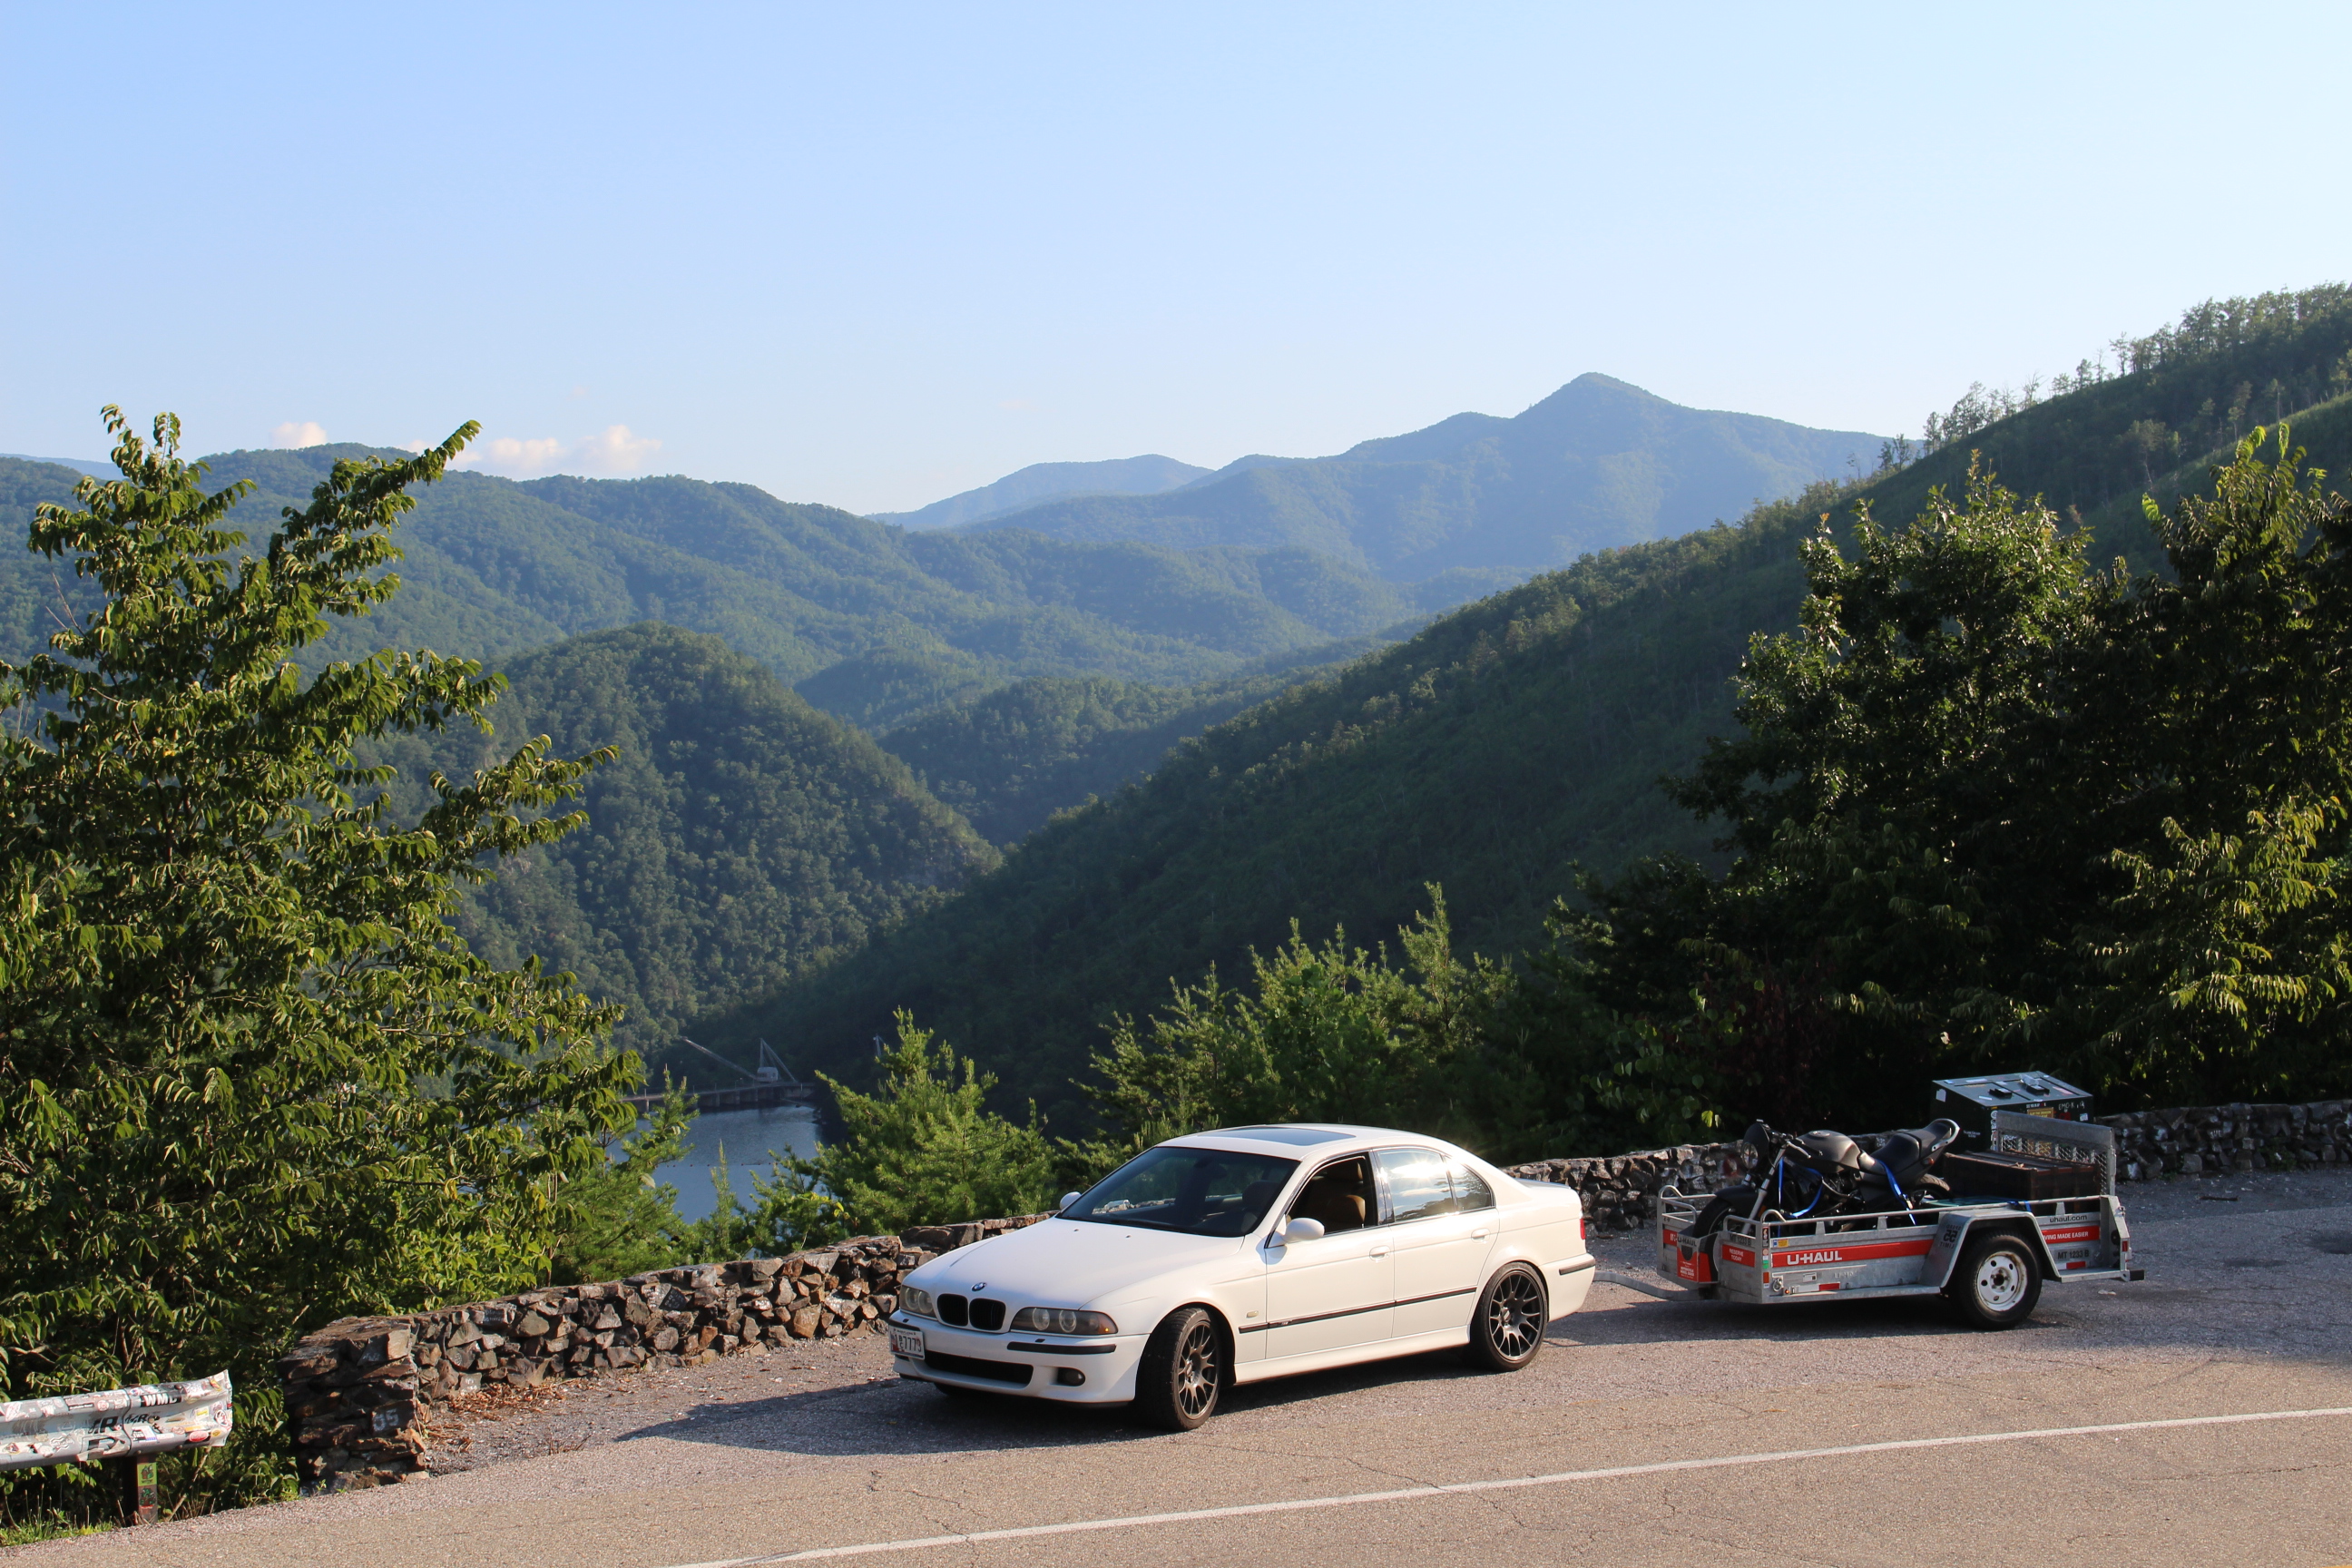
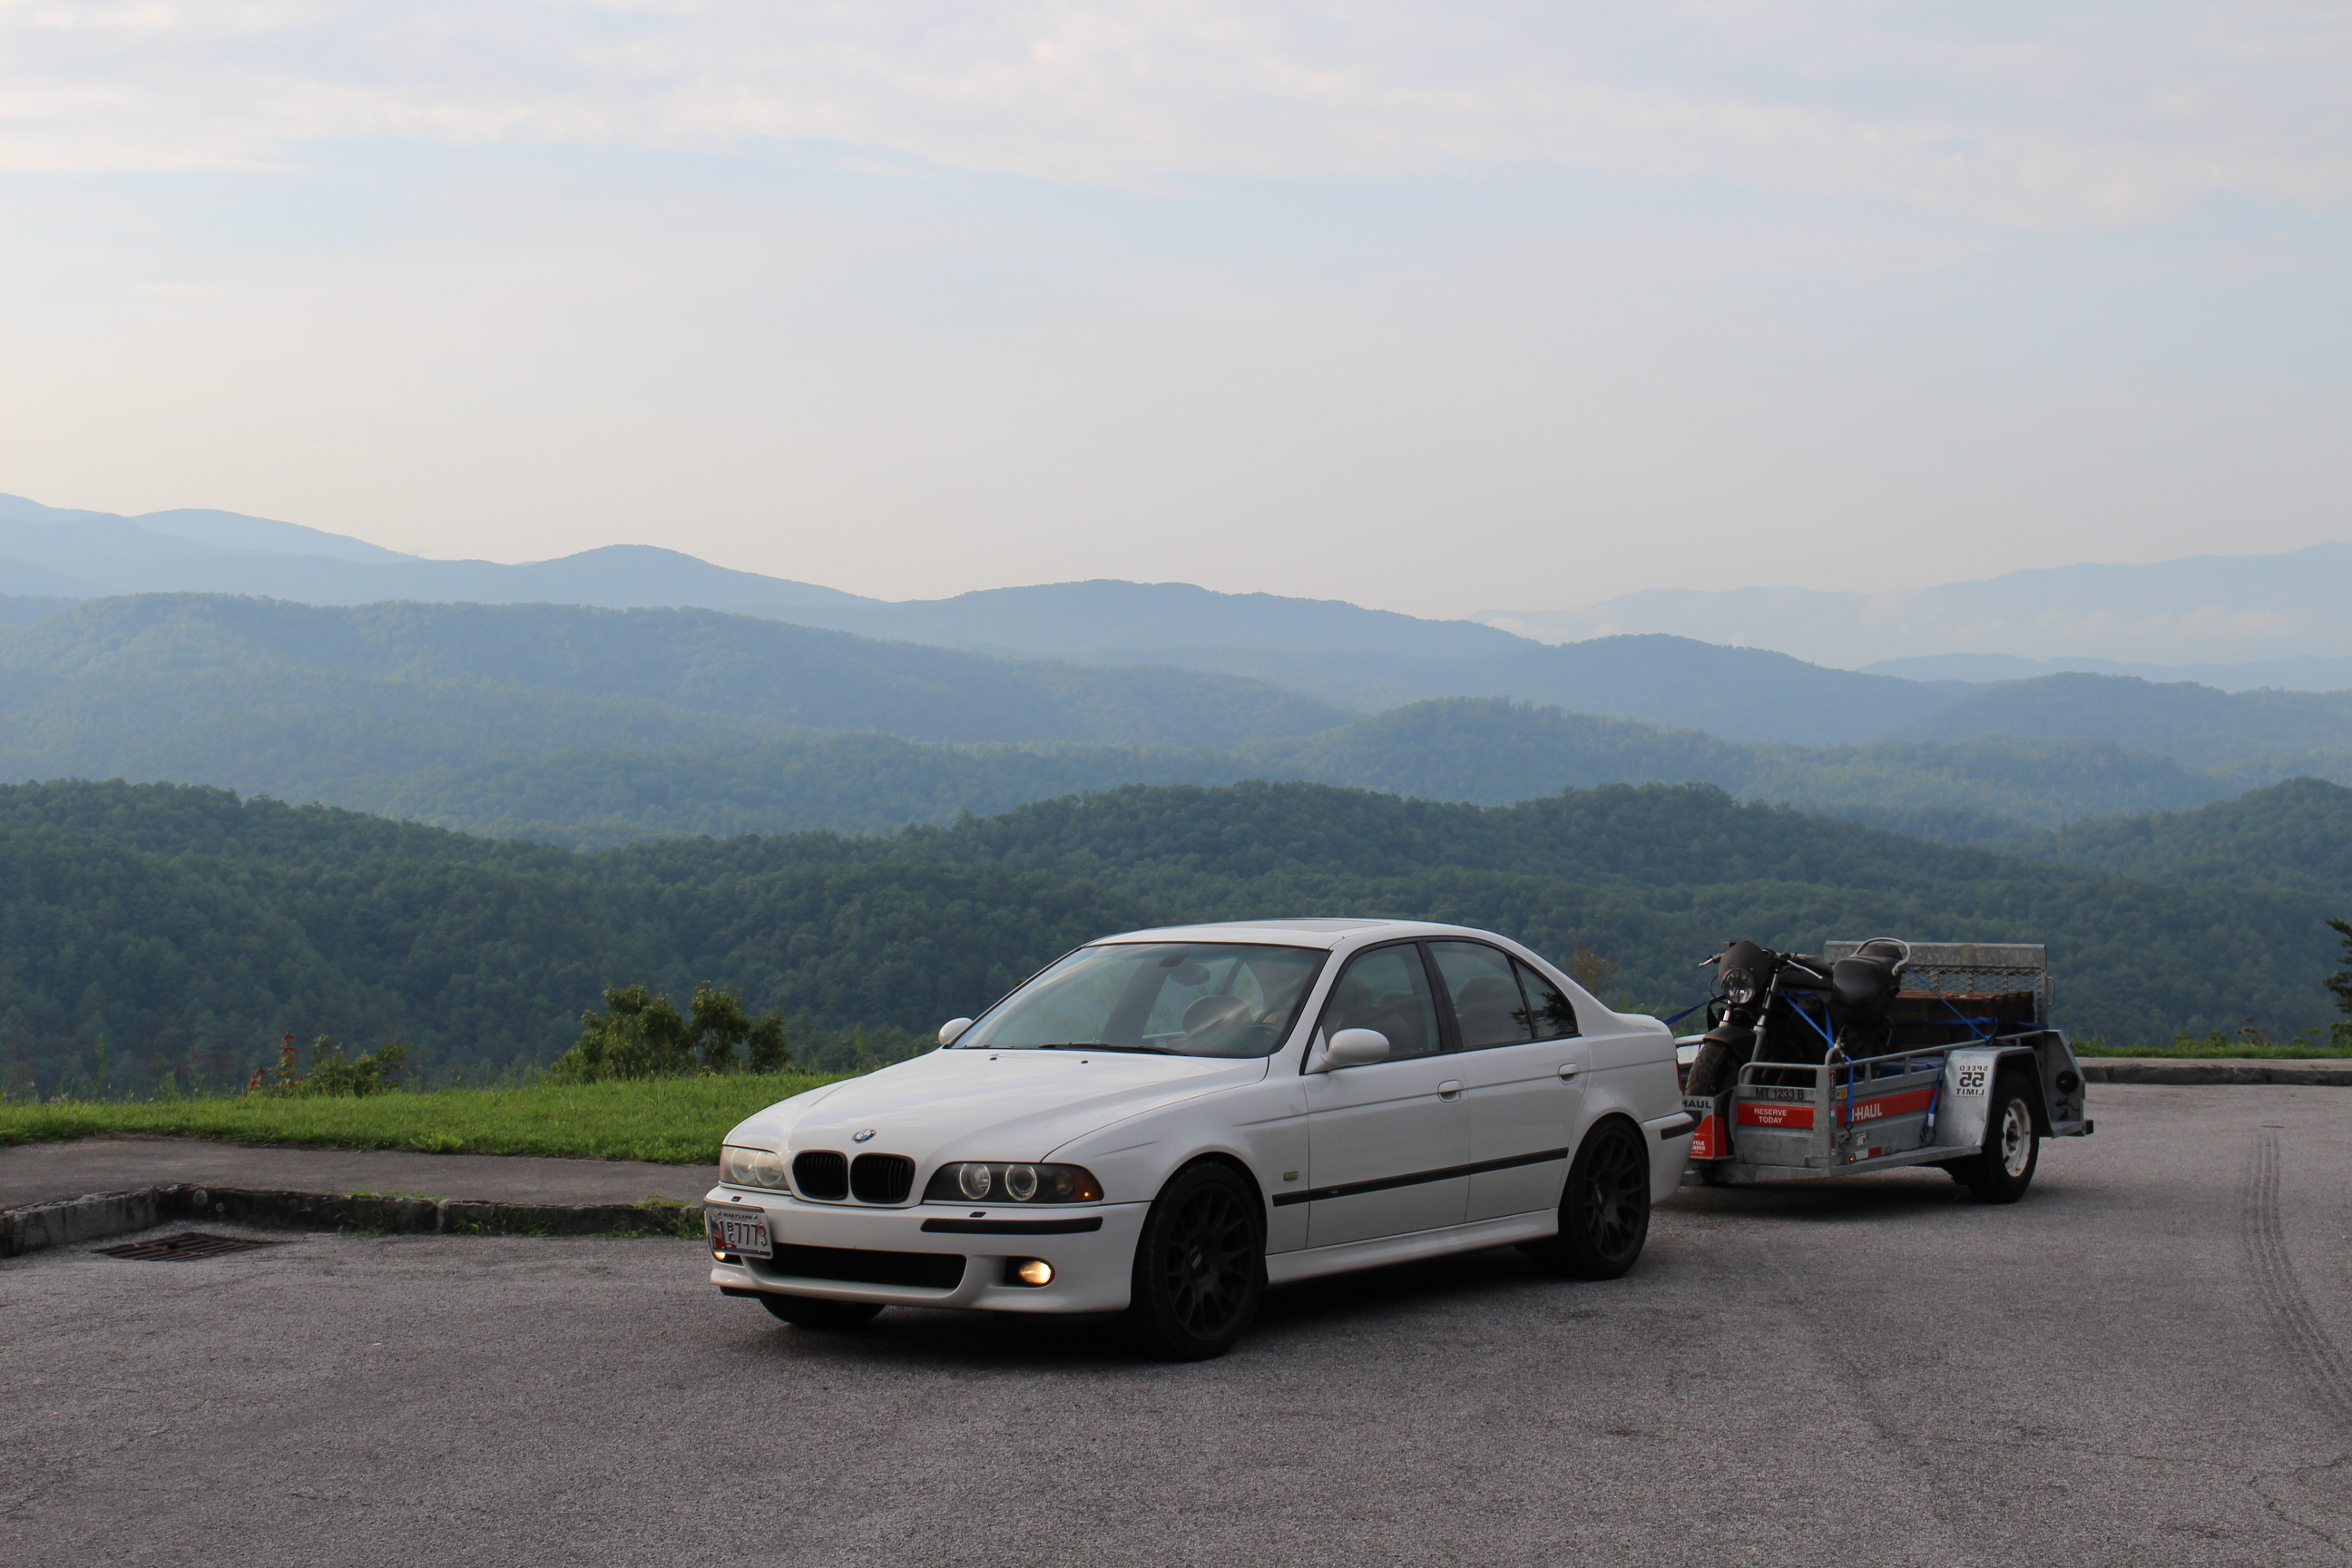
As for my junk, I had to fix a clutch cable on the bike (easy) and fabricate a trailer hitch for the M5 (not hard, but not easy). I bought a trailer hitch off amazon based on its general design and overall width alone. It ended up being for a Kia soul I believe. I cut the end plates off, repositioned them and welded some
1/4" steel plate to them. Next I welded up brackets to tie to other mounting points under the rear. In total, 12 bolts hold this hitch to the car now. I stood on the hitch (190#) and it was solid as a rock. Its maiden voyage was a 1200 mile round trip to Tennessee to the tail of the dragon, and the car performed flawlessly. Even managed almost 16mpg while towing a full 4'x9' trailer behind the car!
600 miles down, zero issues!

For anyone who has never been to the tail of the dragon, imagine a mountain road winding through all those mountains, with 318 turns over the course of 11 miles and no intersections or businesses or anything on it. Driving nirvana!

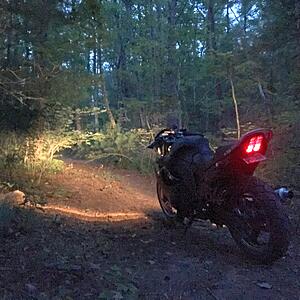
I also put a dual sport tire on the back of my suzuki (Admittedly, I put it on backwards) and took it through some trails in in tennessee and even on a banked dirt track. It was every bit as much fun as you might think

But the summer fun of vacations is over, and it is time to get back in the garage. I got the coil pack mounted up, and reinstalled the intake cover plate that mounts behind the drivers side headlight. There is definitely a layer of dust on the engine bay since I last worked on it. Over the next few days I need to reinstall the brake system, and bend up some new fuel return lines, and then the body can FINALLY go back on the frame

So It has been a while since I have been able to wrench on the truck. I had to shift gears a bit and get my suzuki and my car ready for a trip down to Tennessee.
I also got caught up fixing a friends Ninja 250. It was not a pretty sight when I opened the carbs :eek:

I was able to salvage one float needle, though replacements for both were ordered. However, the second one was absolutely seized in the carb housing by the crystalized fuel. Had to hammer a screw driver into the base of the float needle and turn it like a screw to get it to break loose.
As for my junk, I had to fix a clutch cable on the bike (easy) and fabricate a trailer hitch for the M5 (not hard, but not easy). I bought a trailer hitch off amazon based on its general design and overall width alone. It ended up being for a Kia soul I believe. I cut the end plates off, repositioned them and welded some
1/4" steel plate to them. Next I welded up brackets to tie to other mounting points under the rear. In total, 12 bolts hold this hitch to the car now. I stood on the hitch (190#) and it was solid as a rock. Its maiden voyage was a 1200 mile round trip to Tennessee to the tail of the dragon, and the car performed flawlessly. Even managed almost 16mpg while towing a full 4'x9' trailer behind the car!

600 miles down, zero issues!
For anyone who has never been to the tail of the dragon, imagine a mountain road winding through all those mountains, with 318 turns over the course of 11 miles and no intersections or businesses or anything on it. Driving nirvana!
I also put a dual sport tire on the back of my suzuki (Admittedly, I put it on backwards) and took it through some trails in in tennessee and even on a banked dirt track. It was every bit as much fun as you might think

But the summer fun of vacations is over, and it is time to get back in the garage. I got the coil pack mounted up, and reinstalled the intake cover plate that mounts behind the drivers side headlight. There is definitely a layer of dust on the engine bay since I last worked on it. Over the next few days I need to reinstall the brake system, and bend up some new fuel return lines, and then the body can FINALLY go back on the frame
 09-05-2016, 04:46 PM
#15
Registered User
Thread Starter
Join Date: Sep 2016
Posts: 17
Likes: 0
Received 0 Likes
on
0 Posts
Brake system is back in!
There was some gunk in the clutch master cylinder. A full system flush will be done once it's all back together, but for now I cleaned out the resevoir as best as i could with a paper towel.
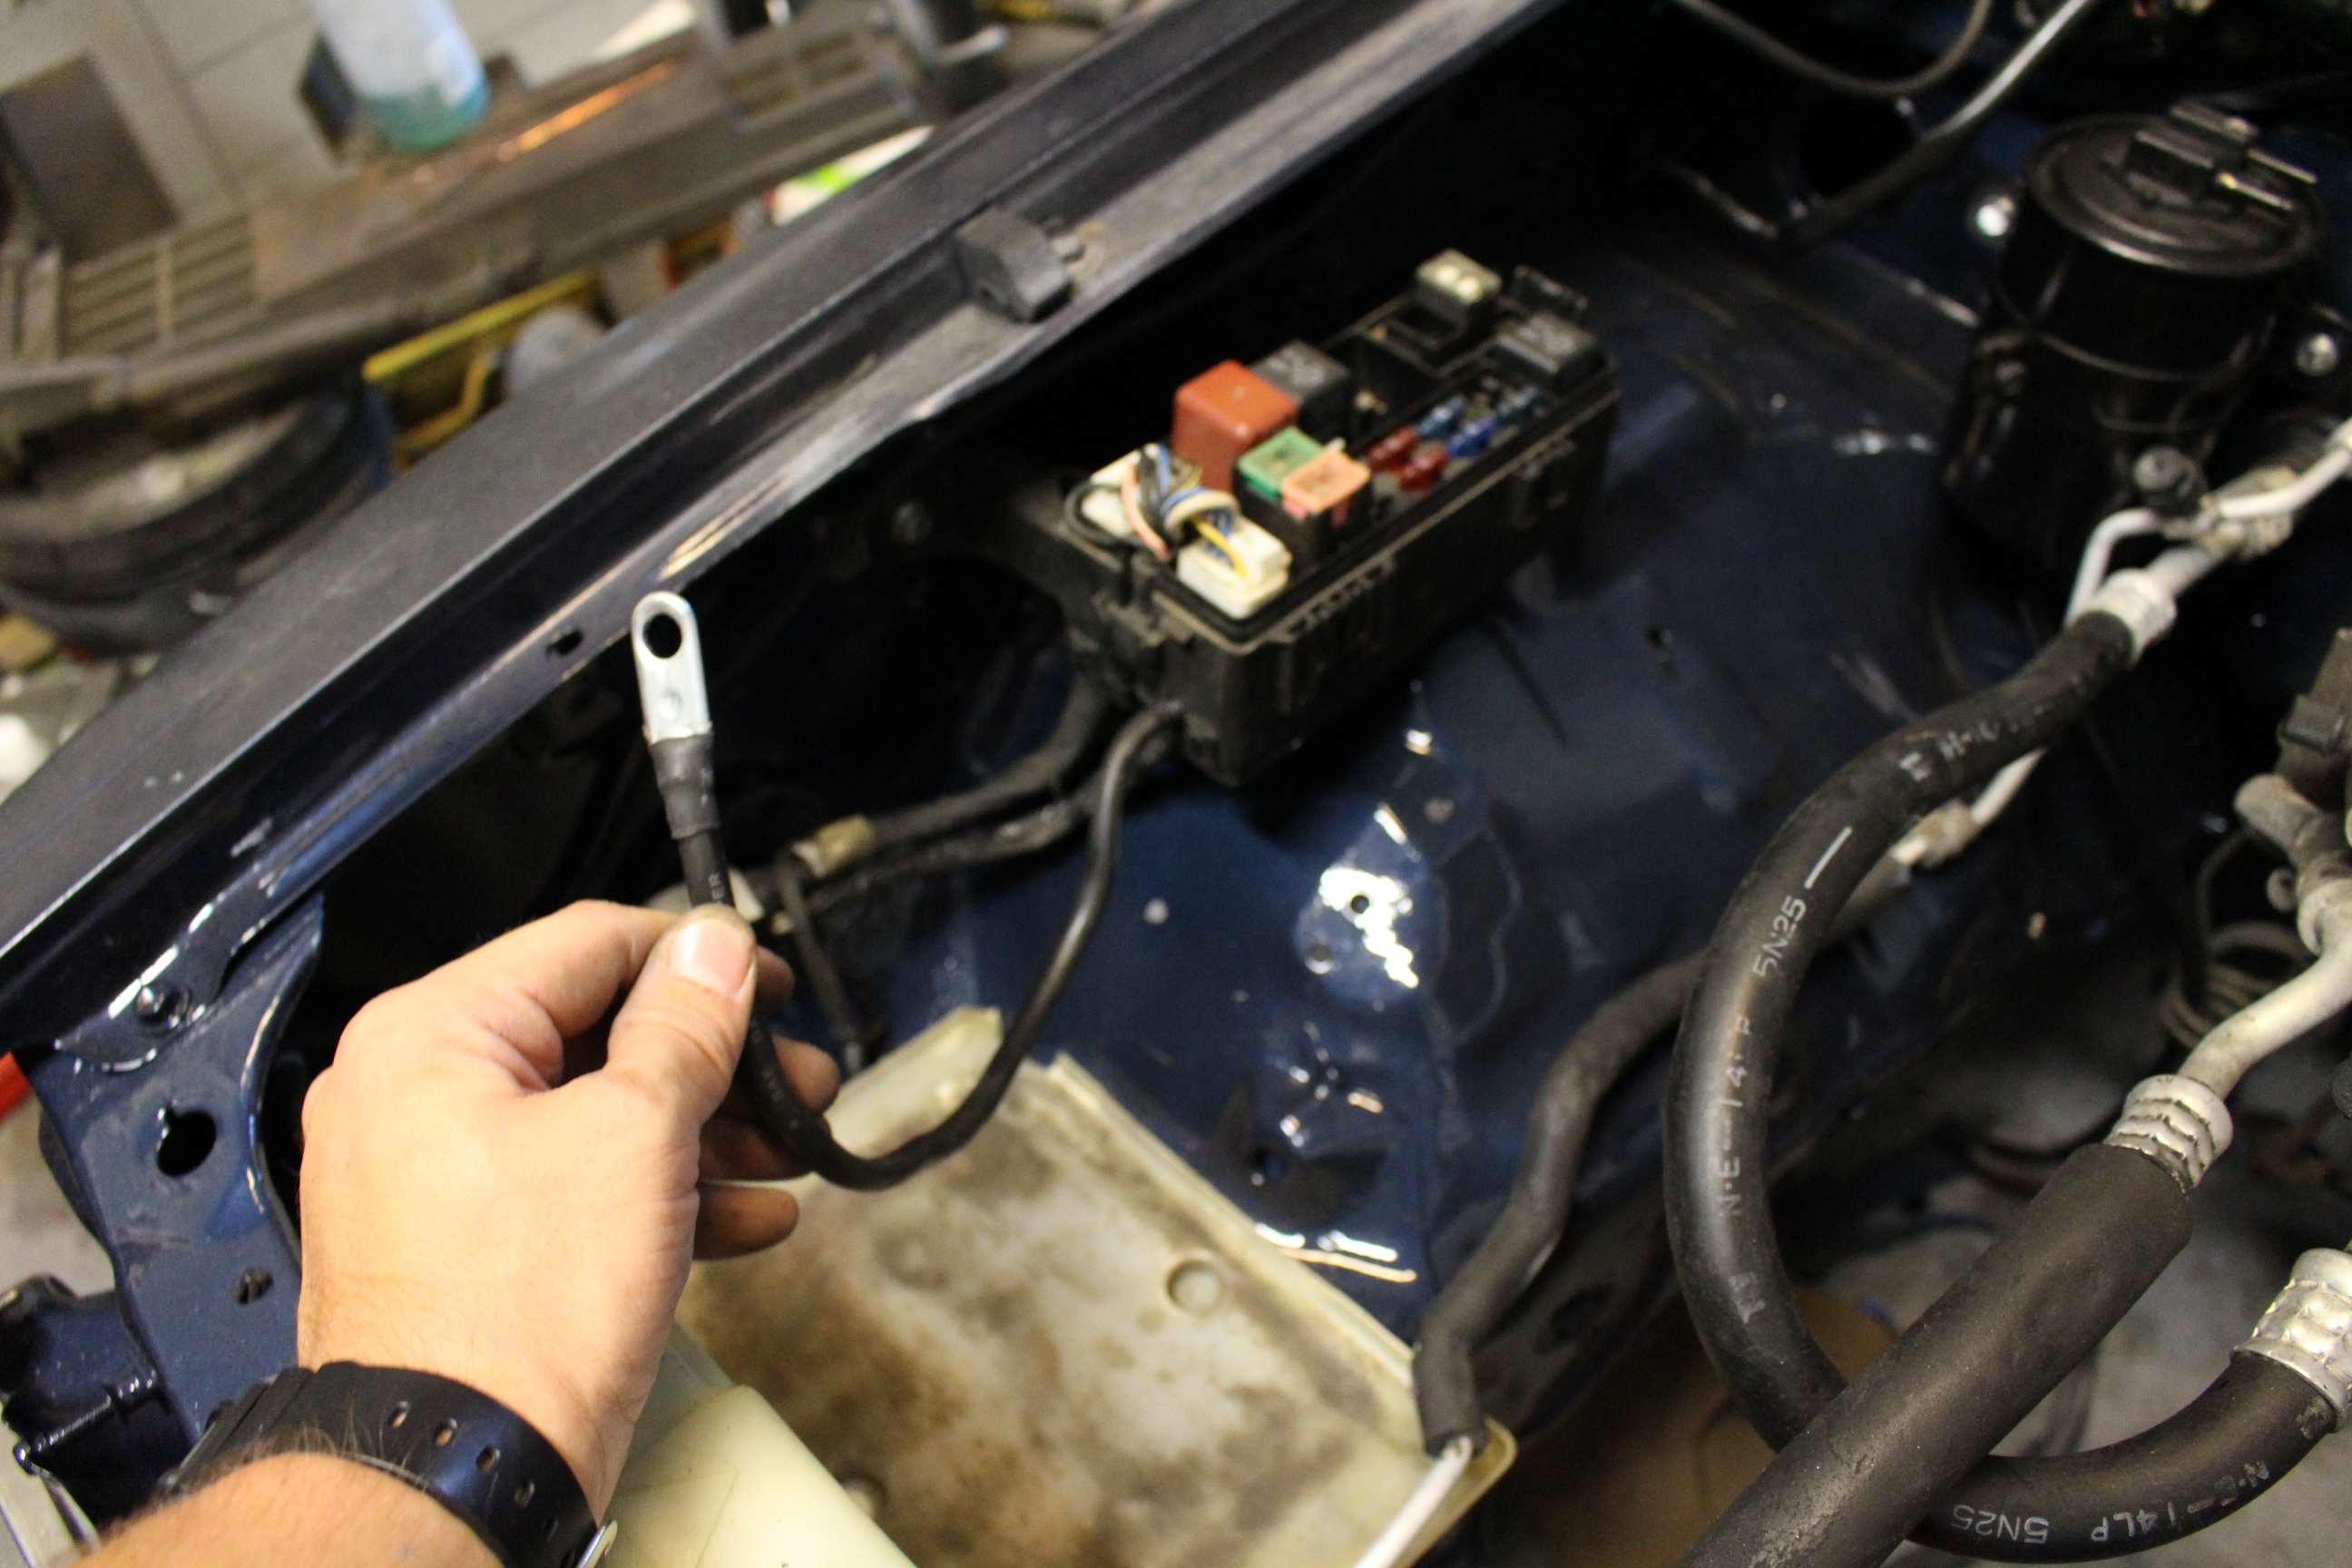
Next up is bending those return lines and reinstalling the charcoal canister sitting on the windshield. And then it's go time!
Charcoal canister in!
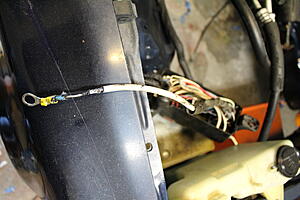
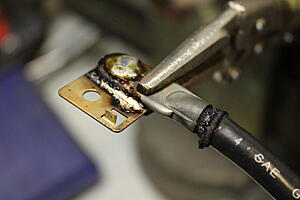
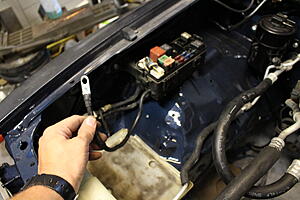
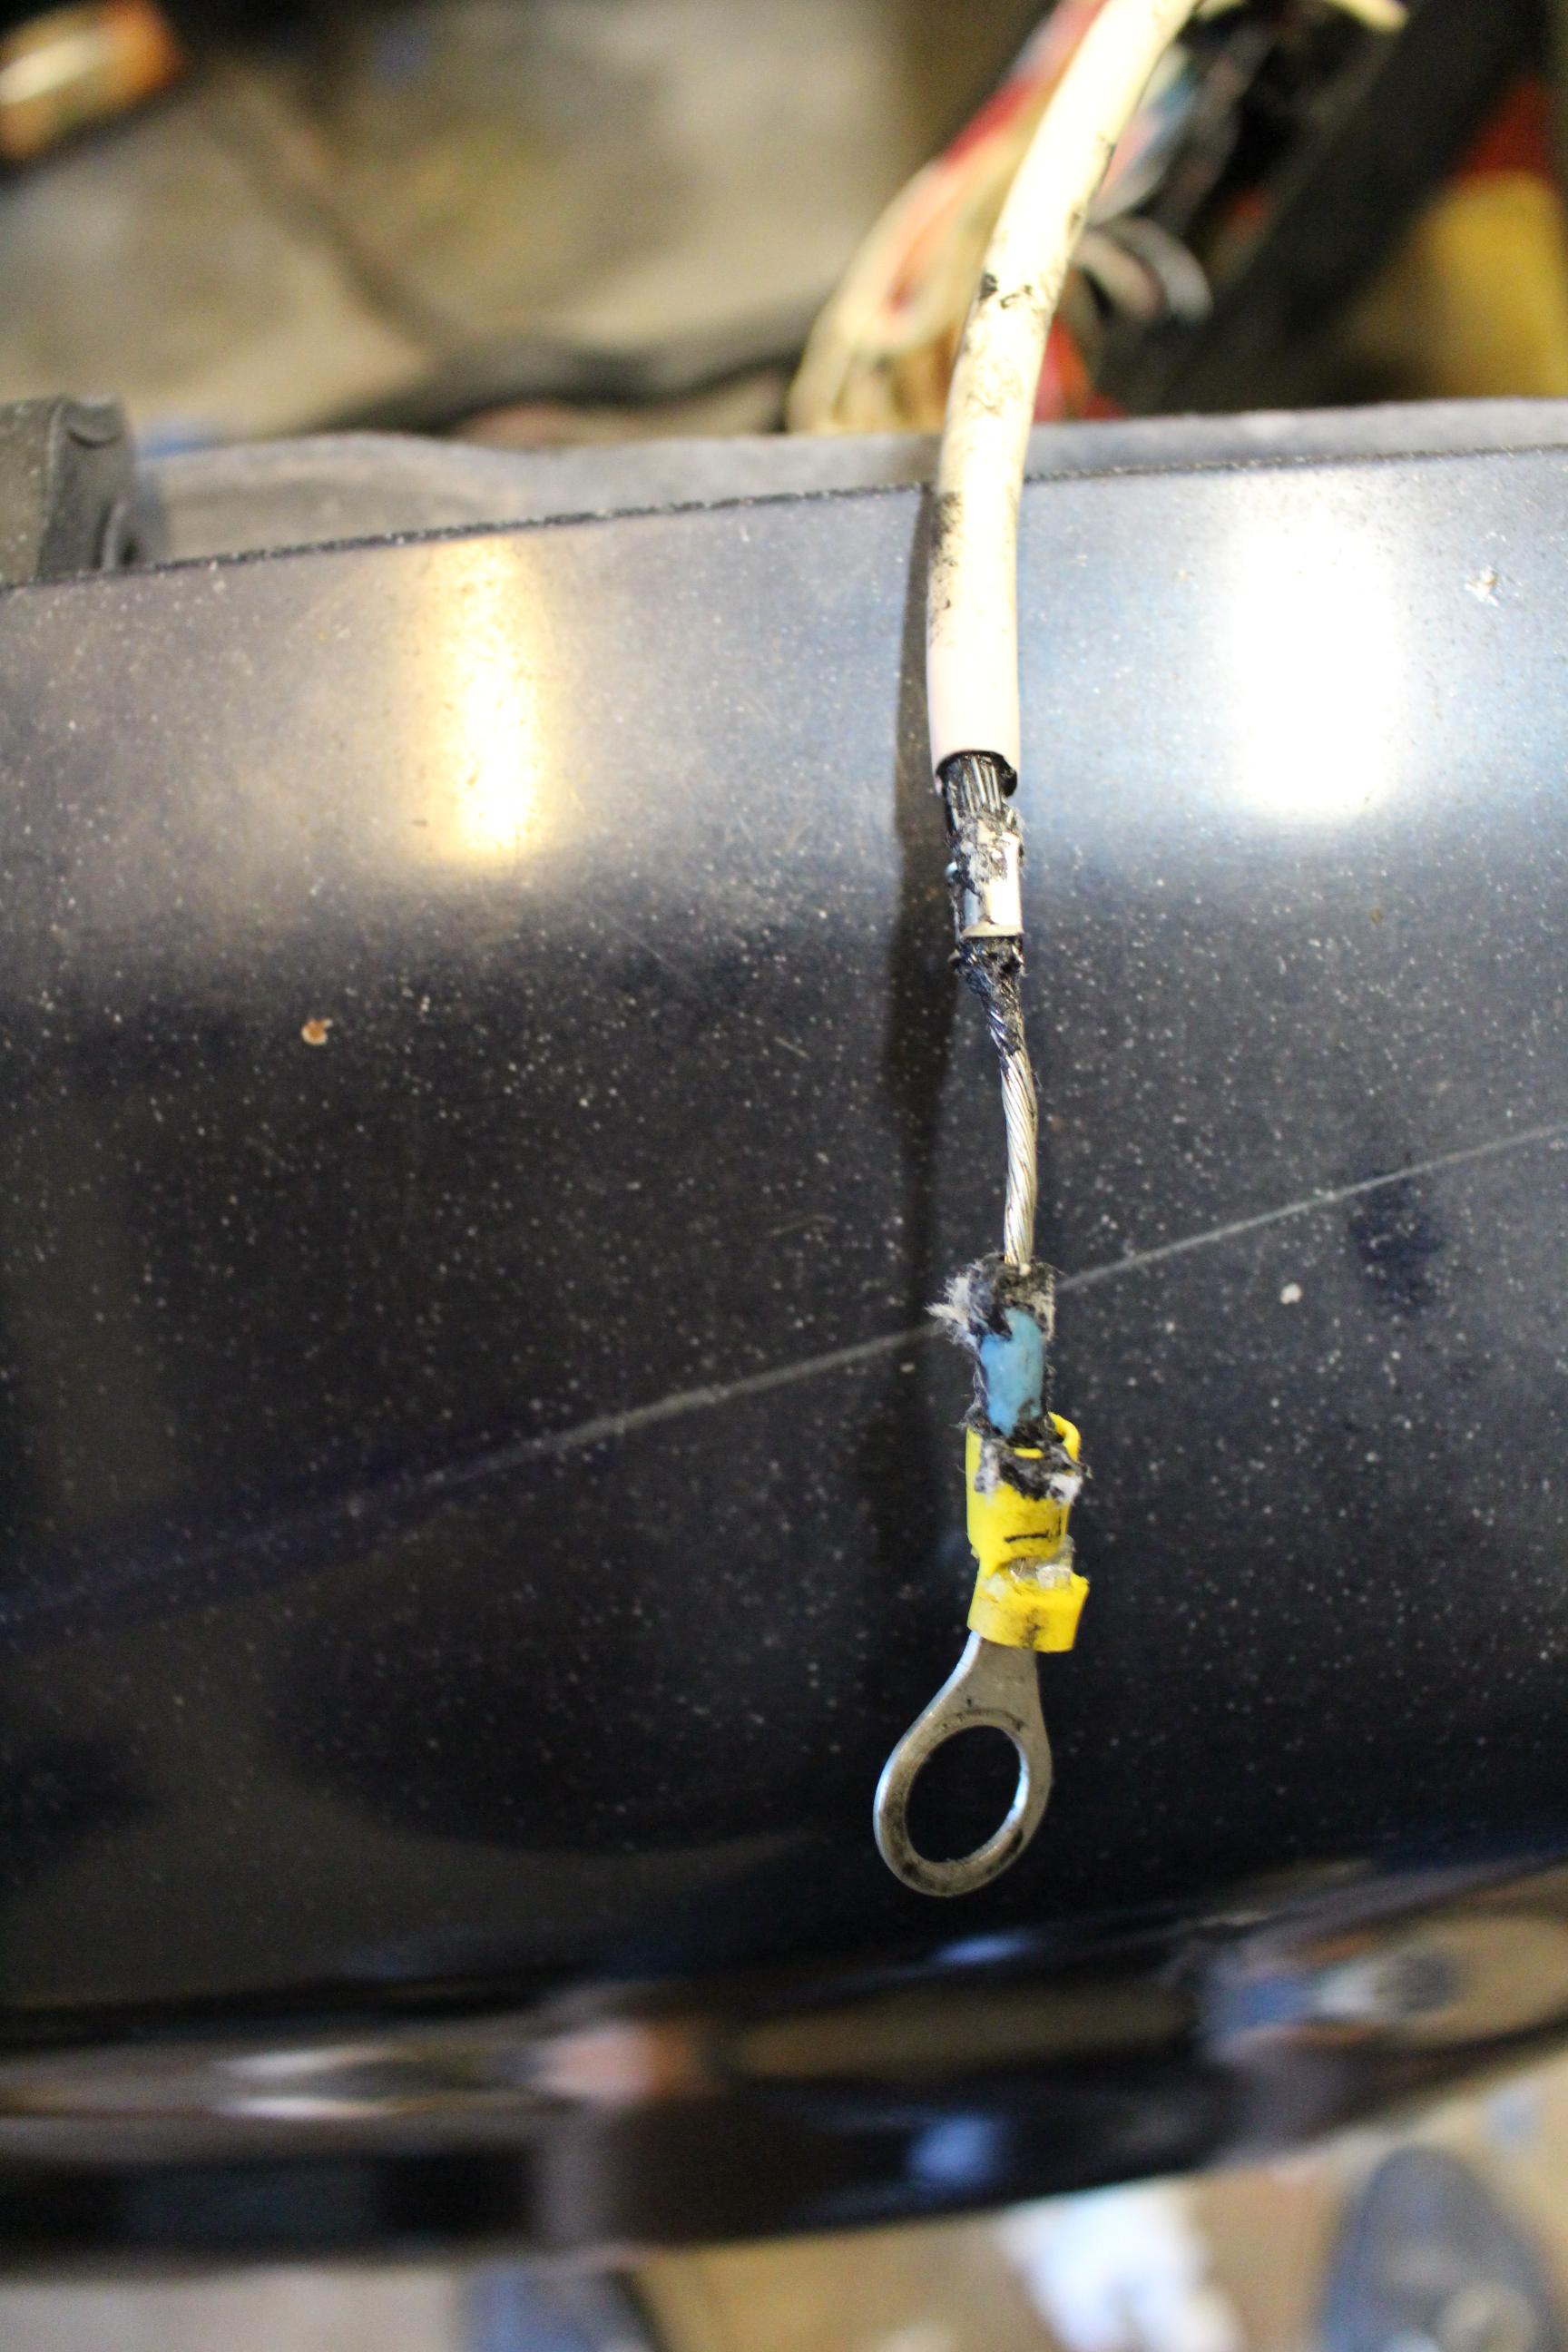
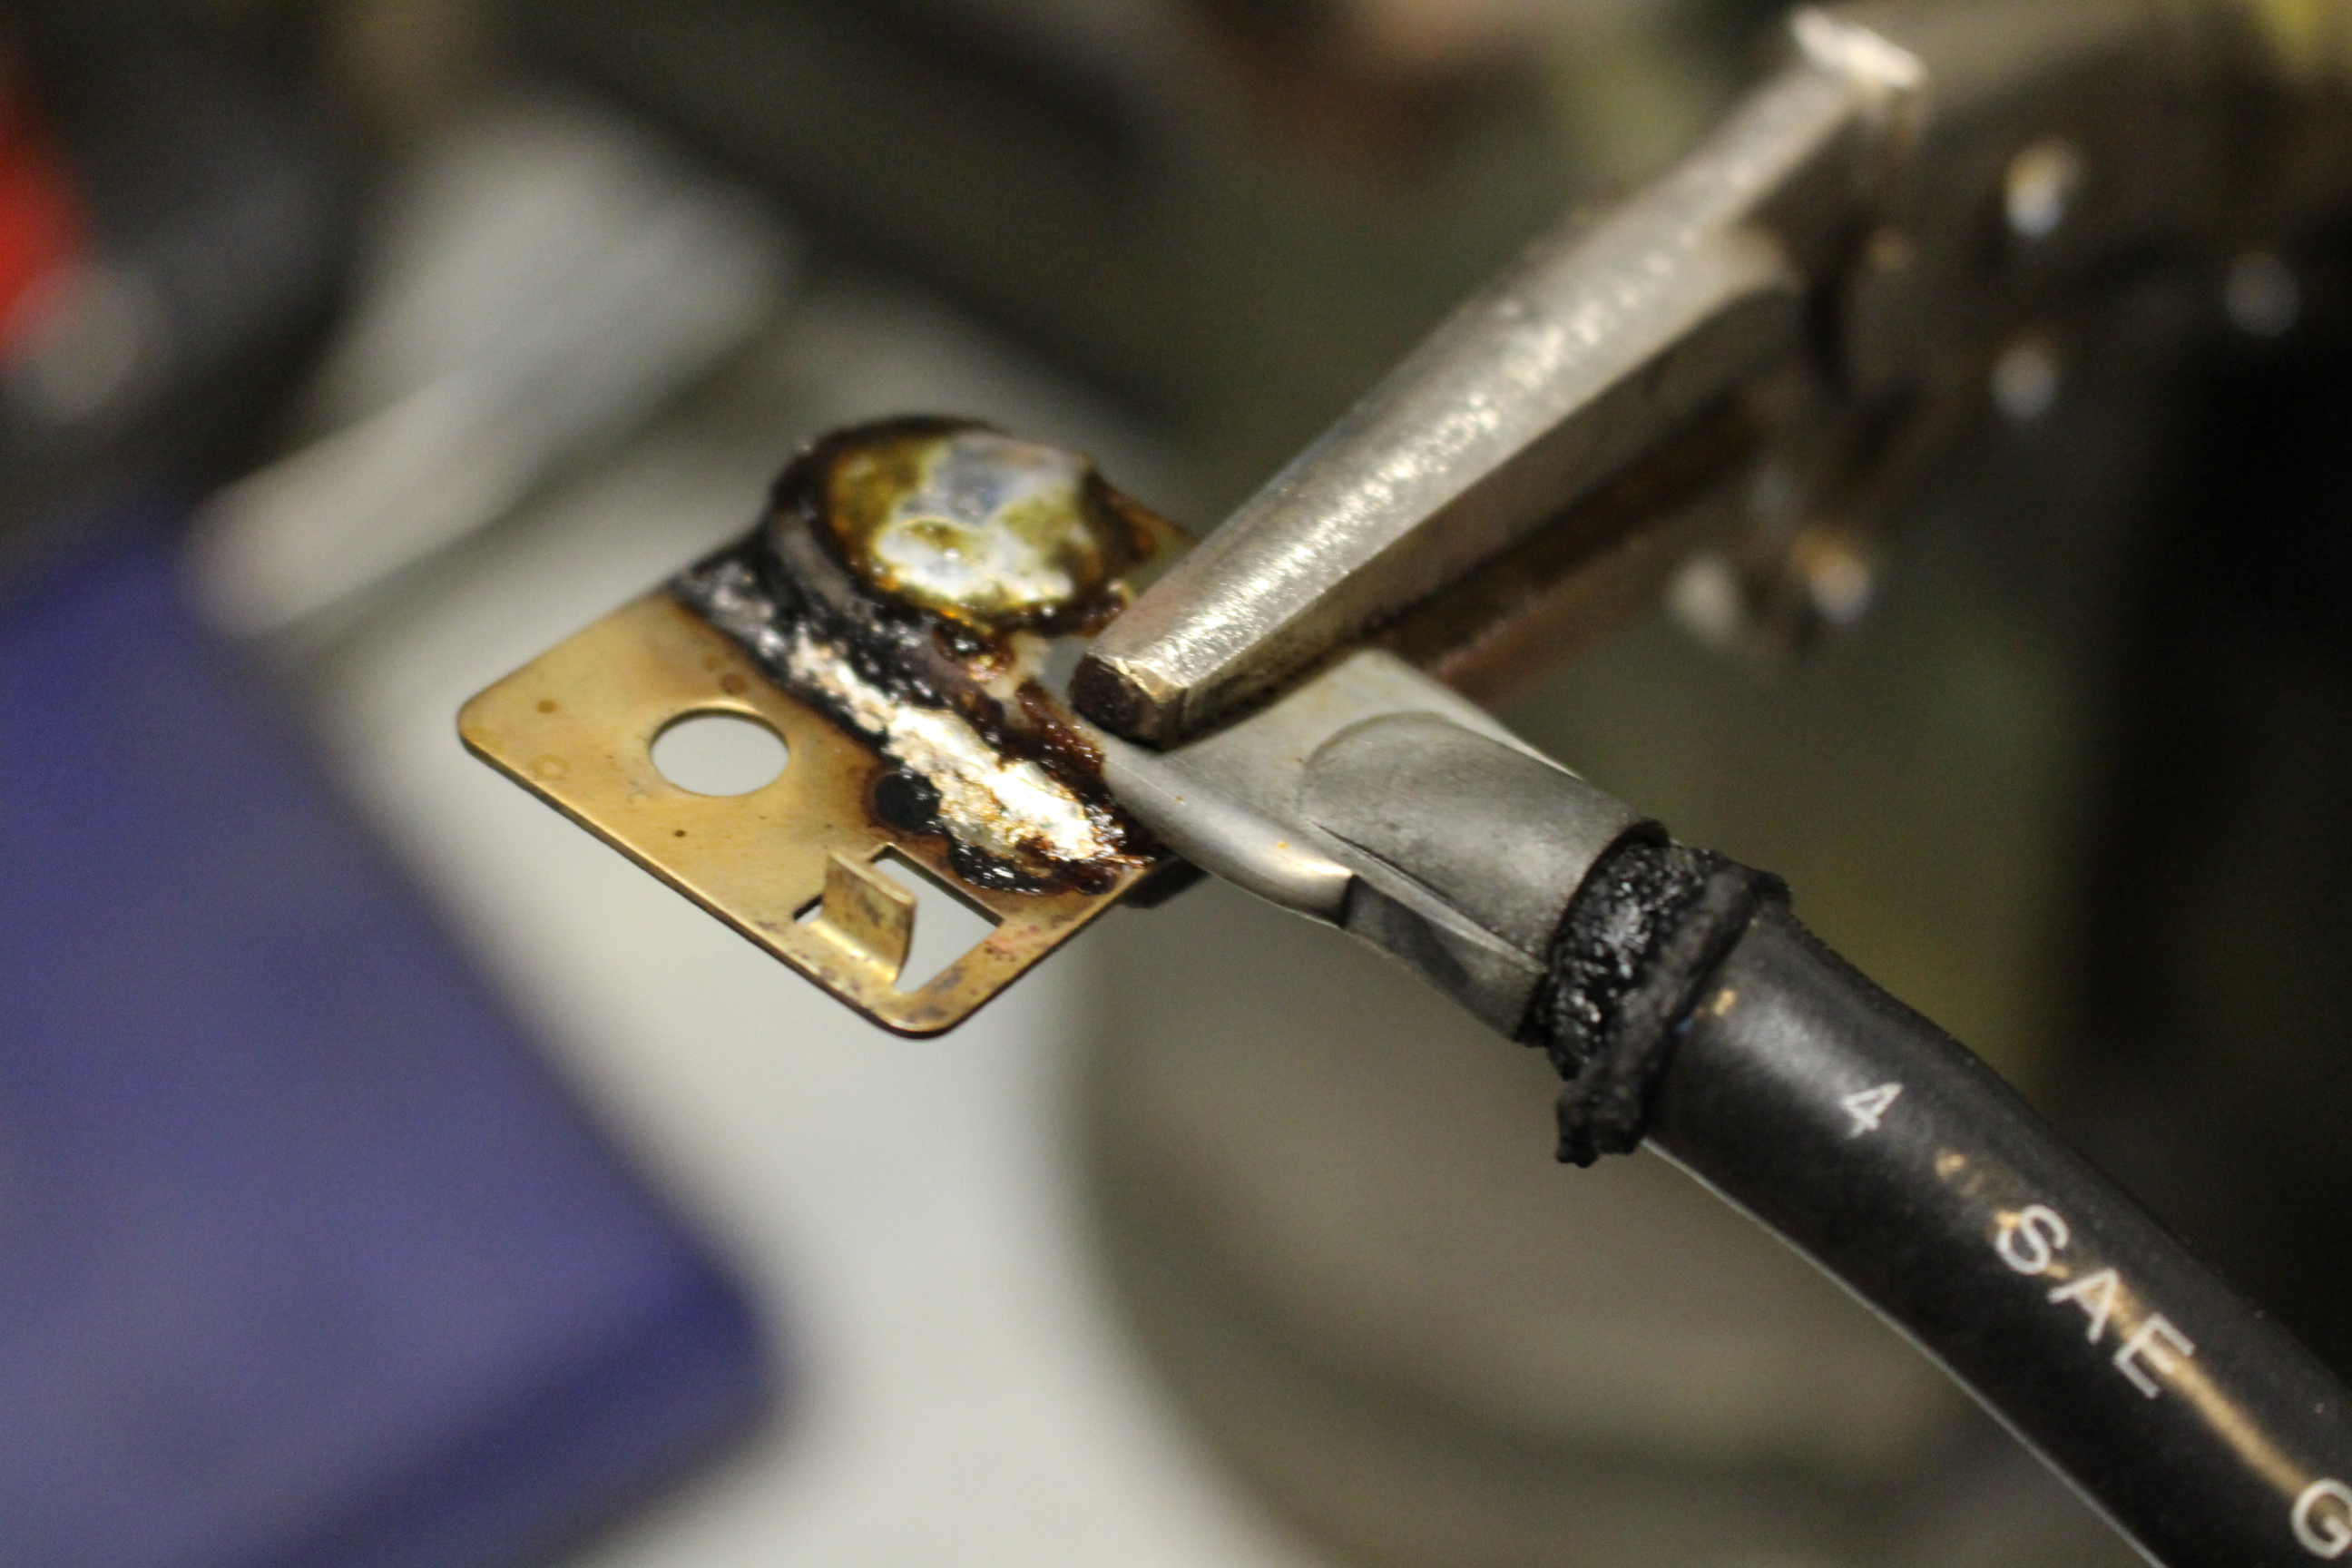
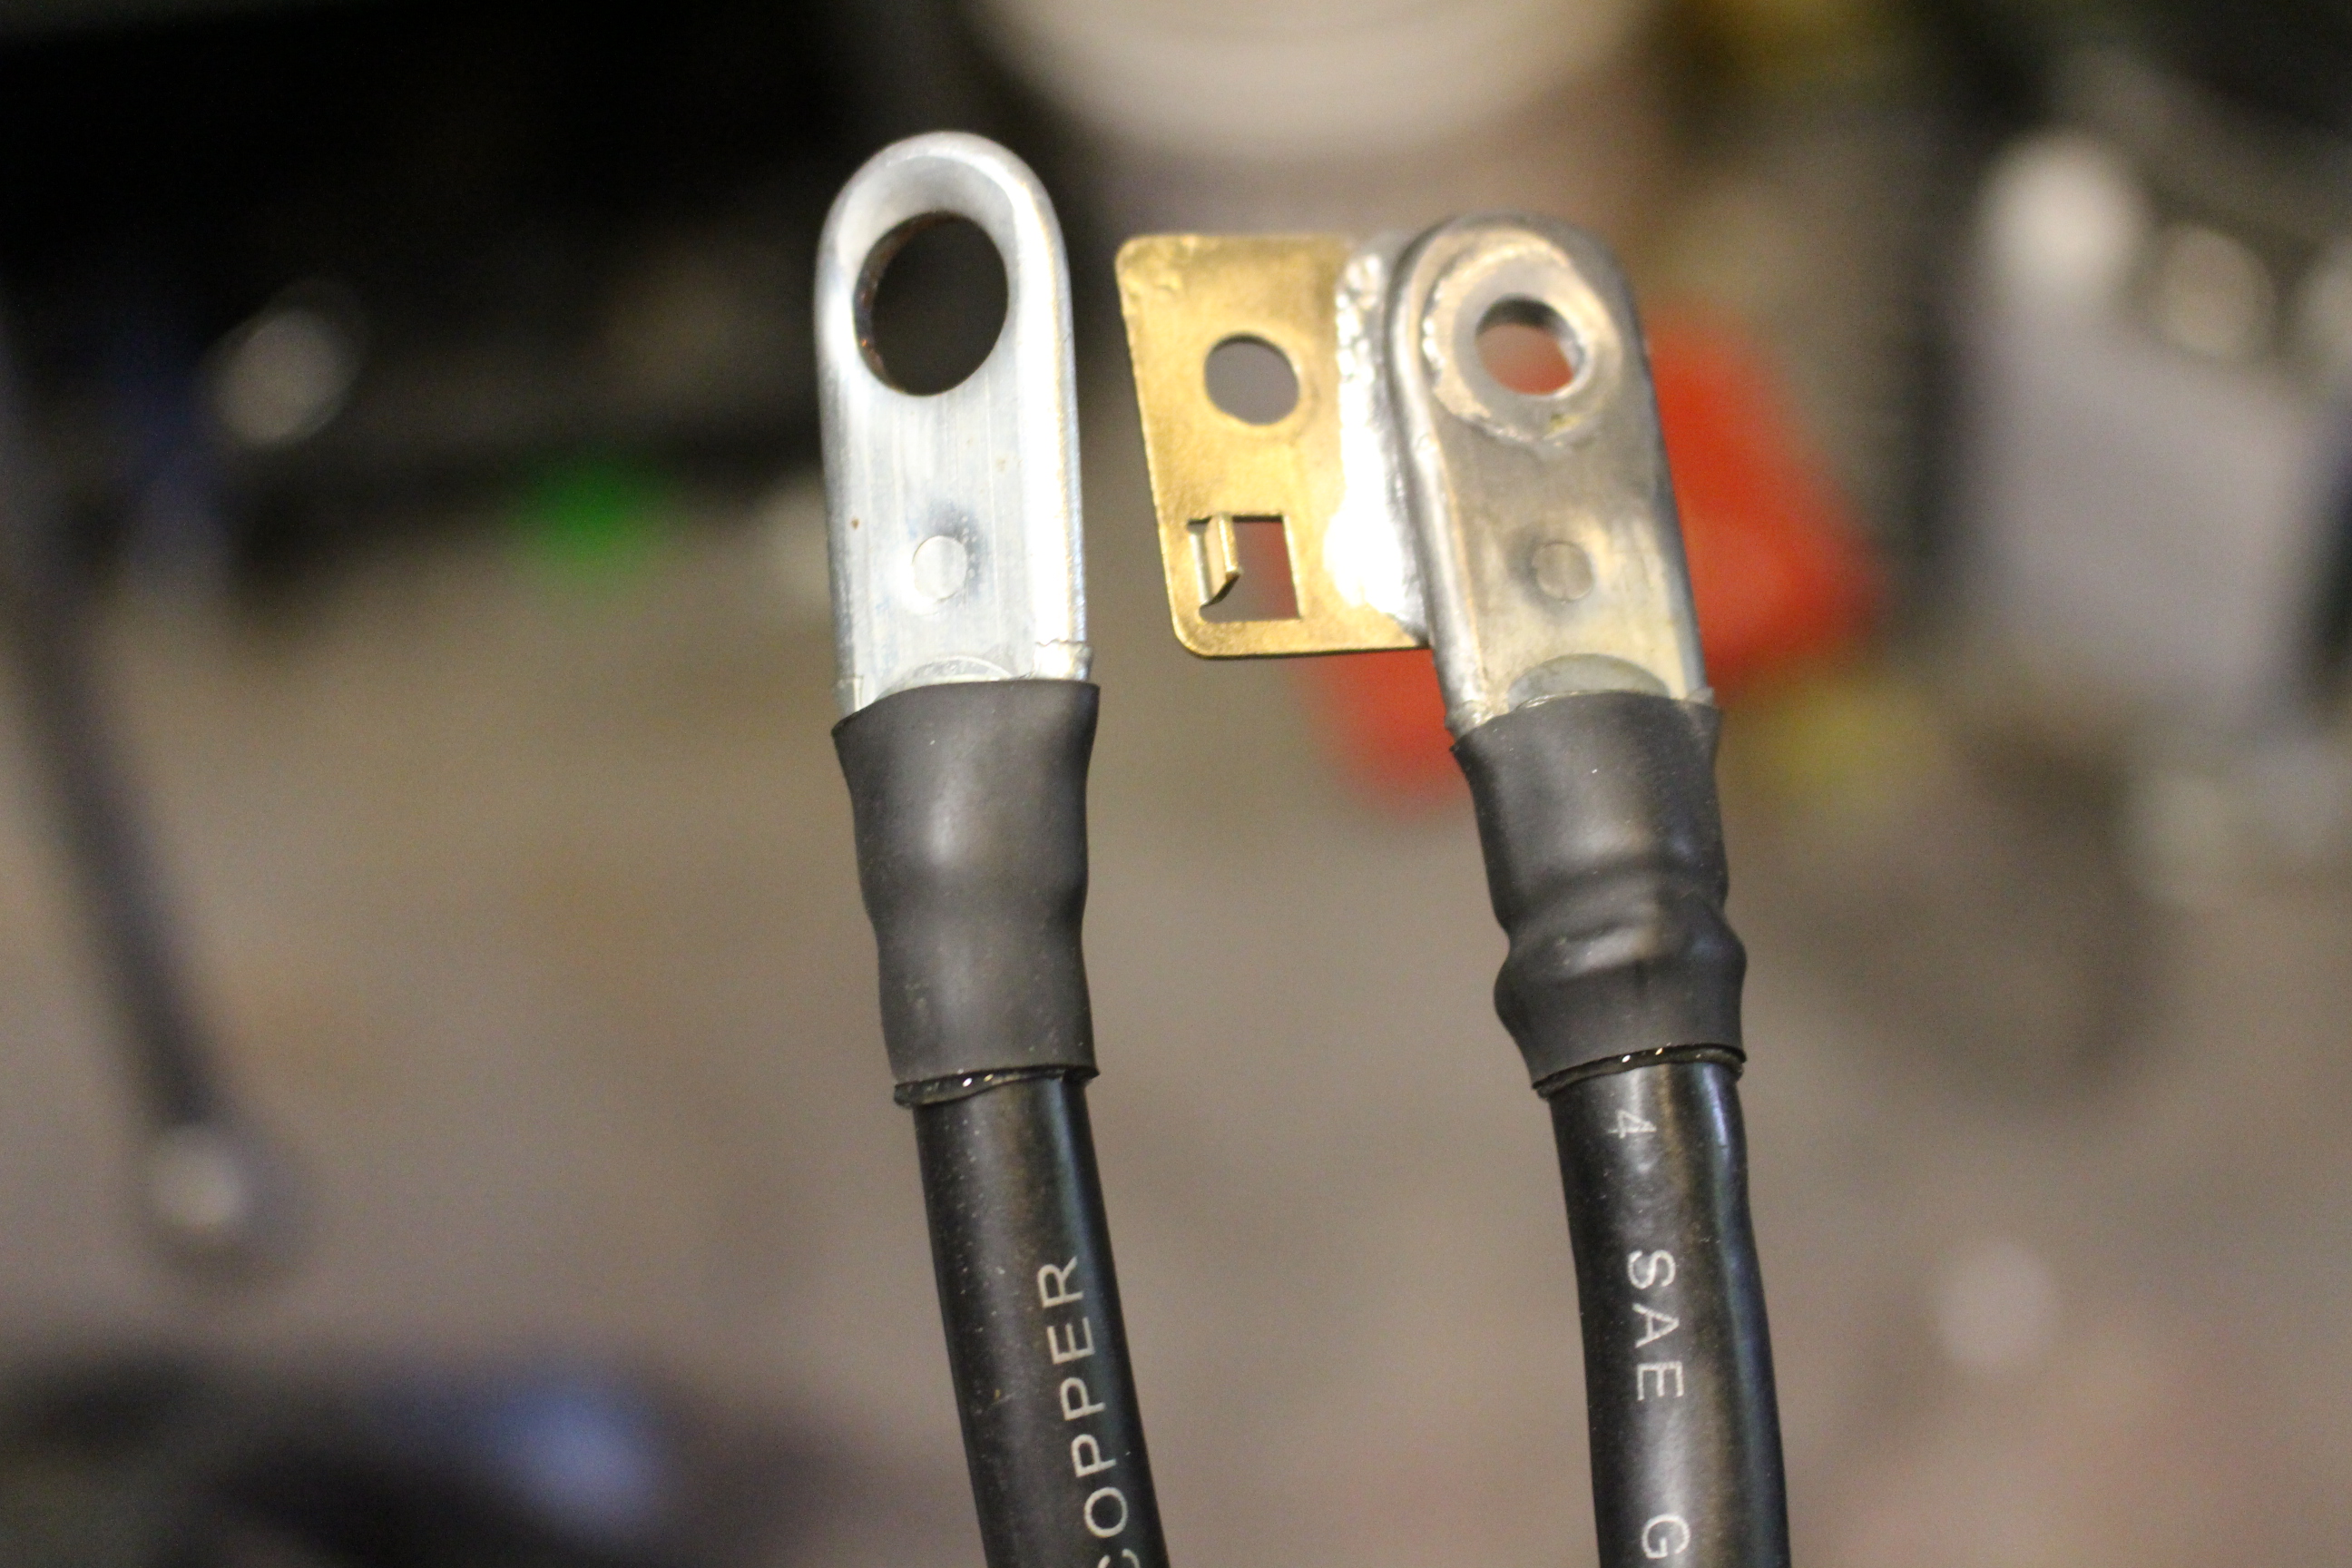
Then I happened to notice something odd about the fuse block wiring. Pulled back the electrical tape and saw this. It's a heavy gauge wire all the way up to the ring terminal, and then a thin gauge wire for 2 inches and then the actua ring terminal. That can't be factory, can it? I know the actual ring terminal isn't factory, but there's no way it came from the factory with two different gauge wires crimped together I would think. The entire fuse panel runs off that small section of wire :O. The main feed wire connects directly to an 80 amp main fuse block. That's gotta be a previous owner hack job I think.

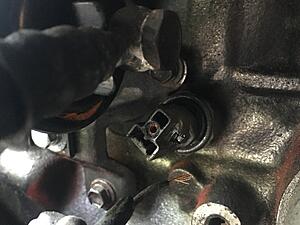
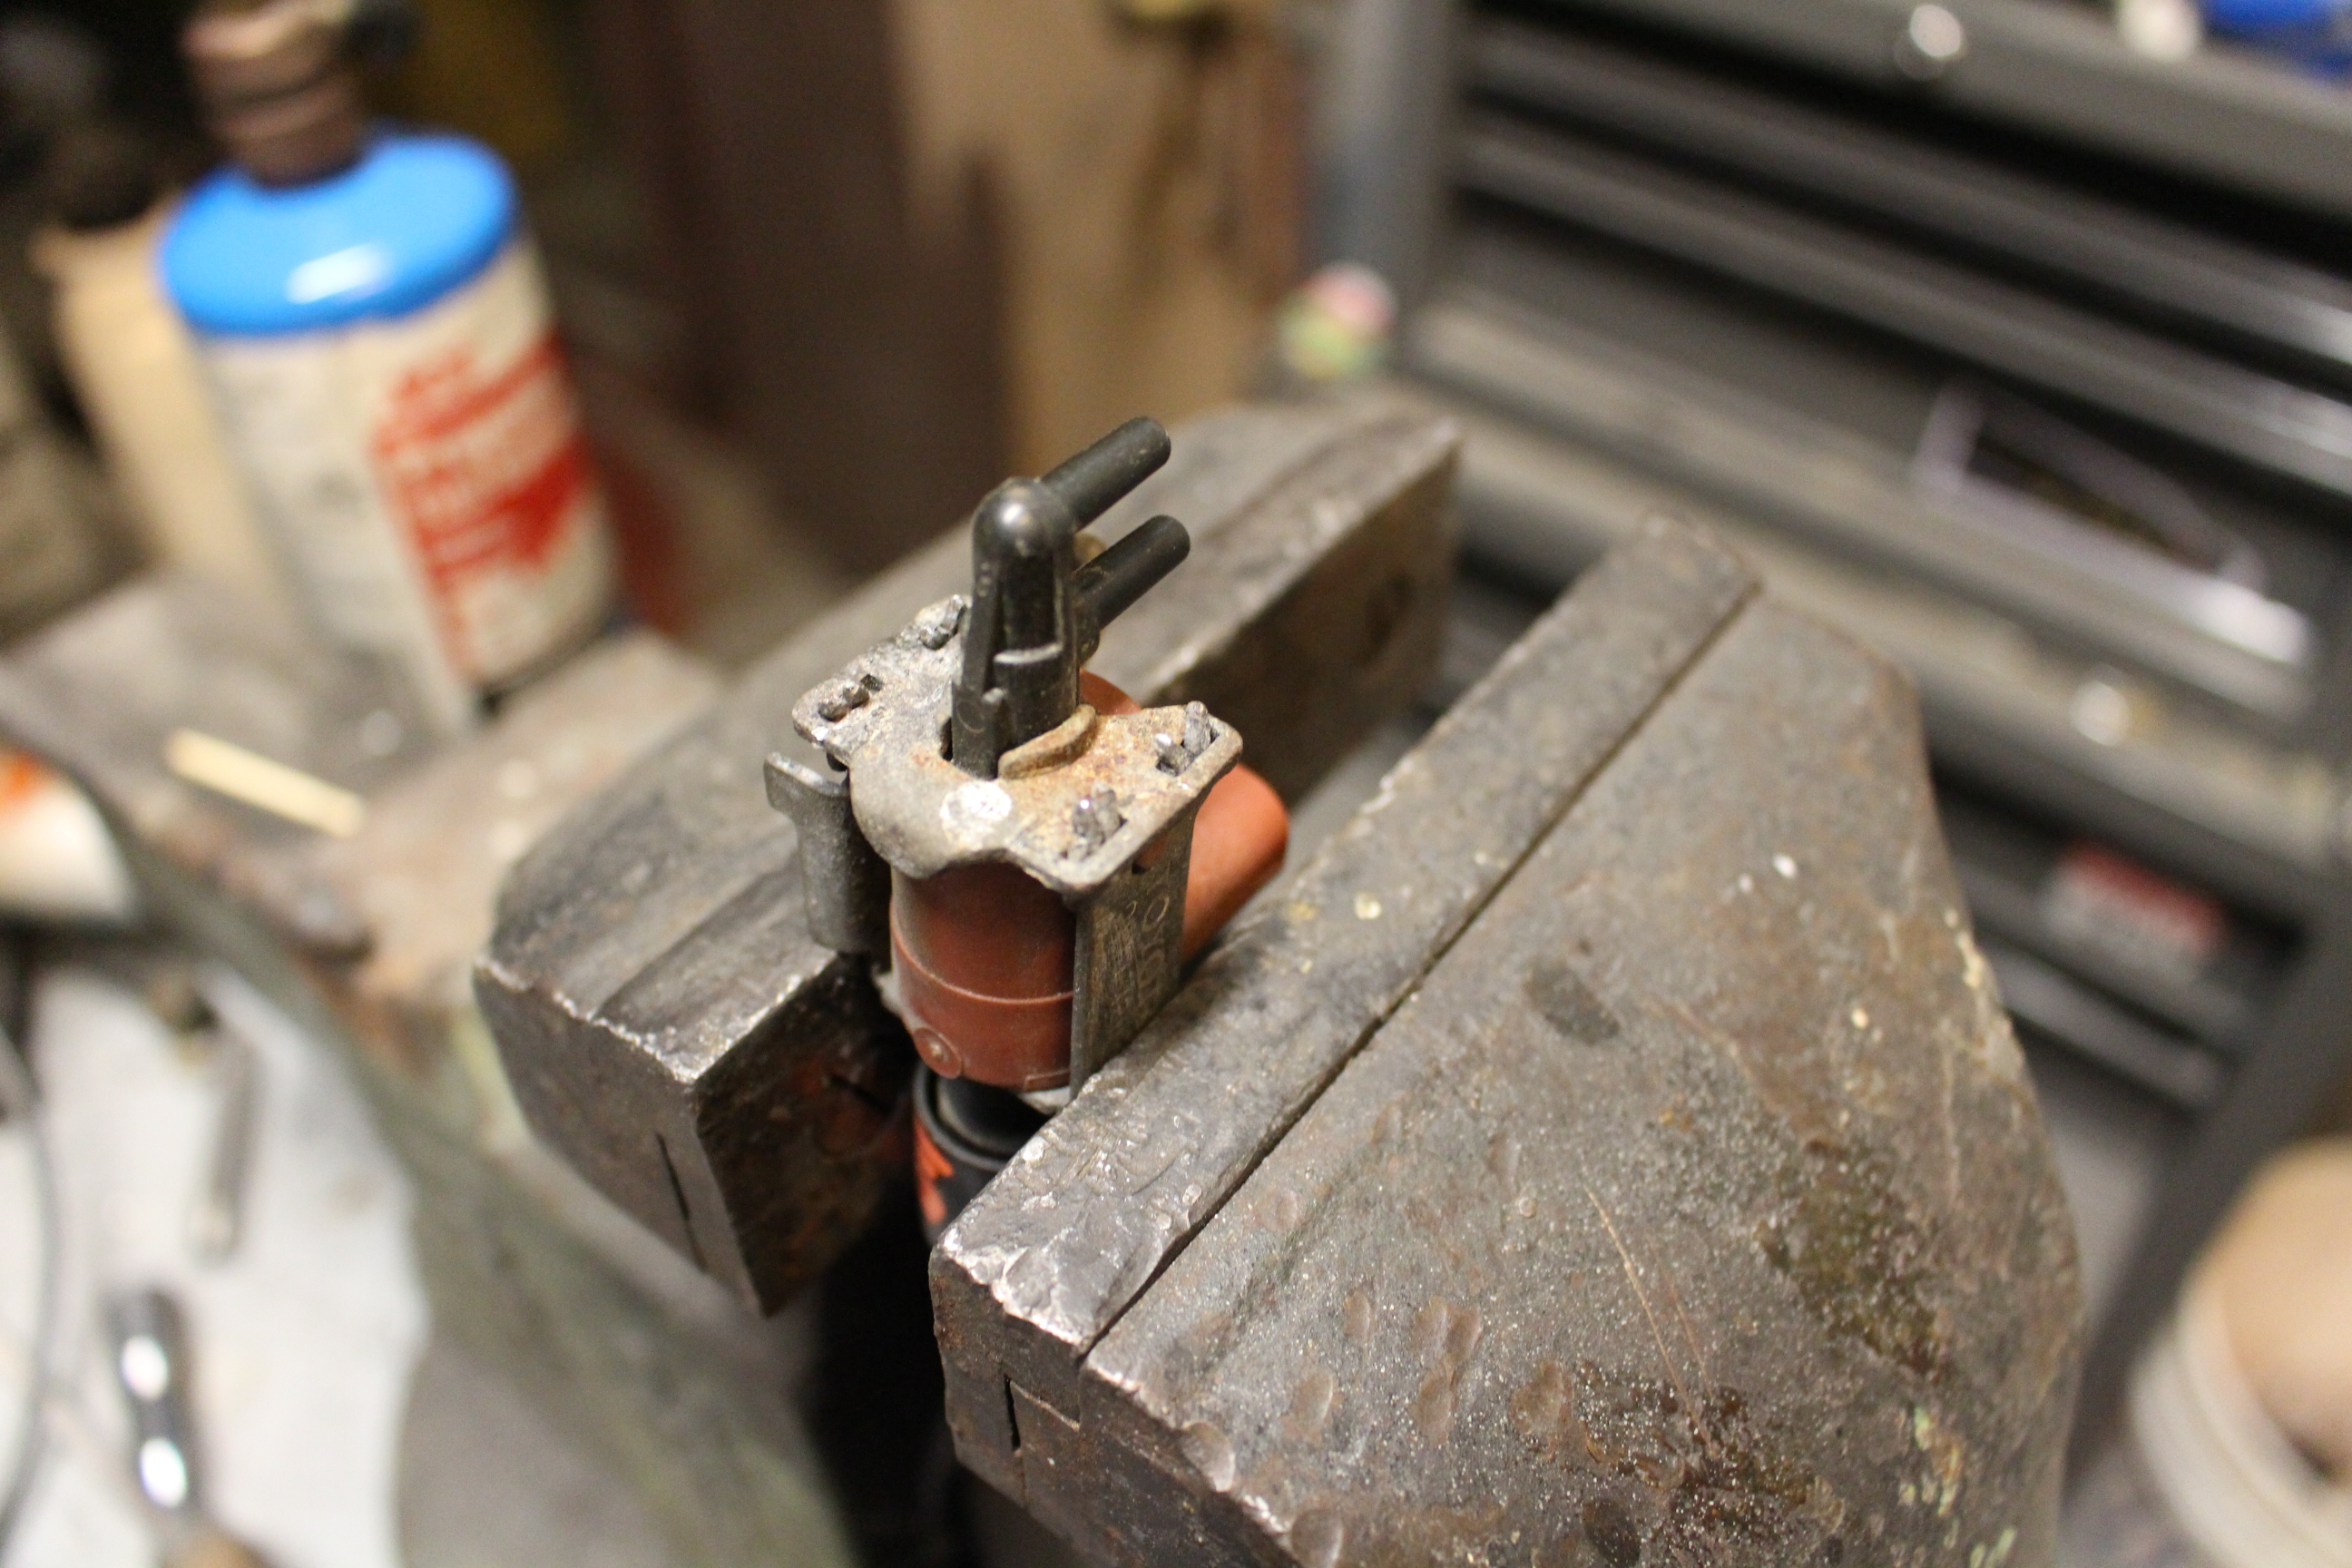
Just as I suspected, the solara emissions solenoid was identical to the 22re one, except half the cost and way newer. <10 minutes of work to swap the mounting bracket and it's fixed!
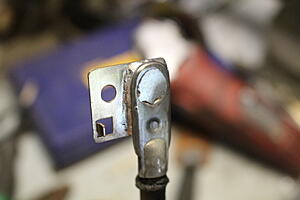
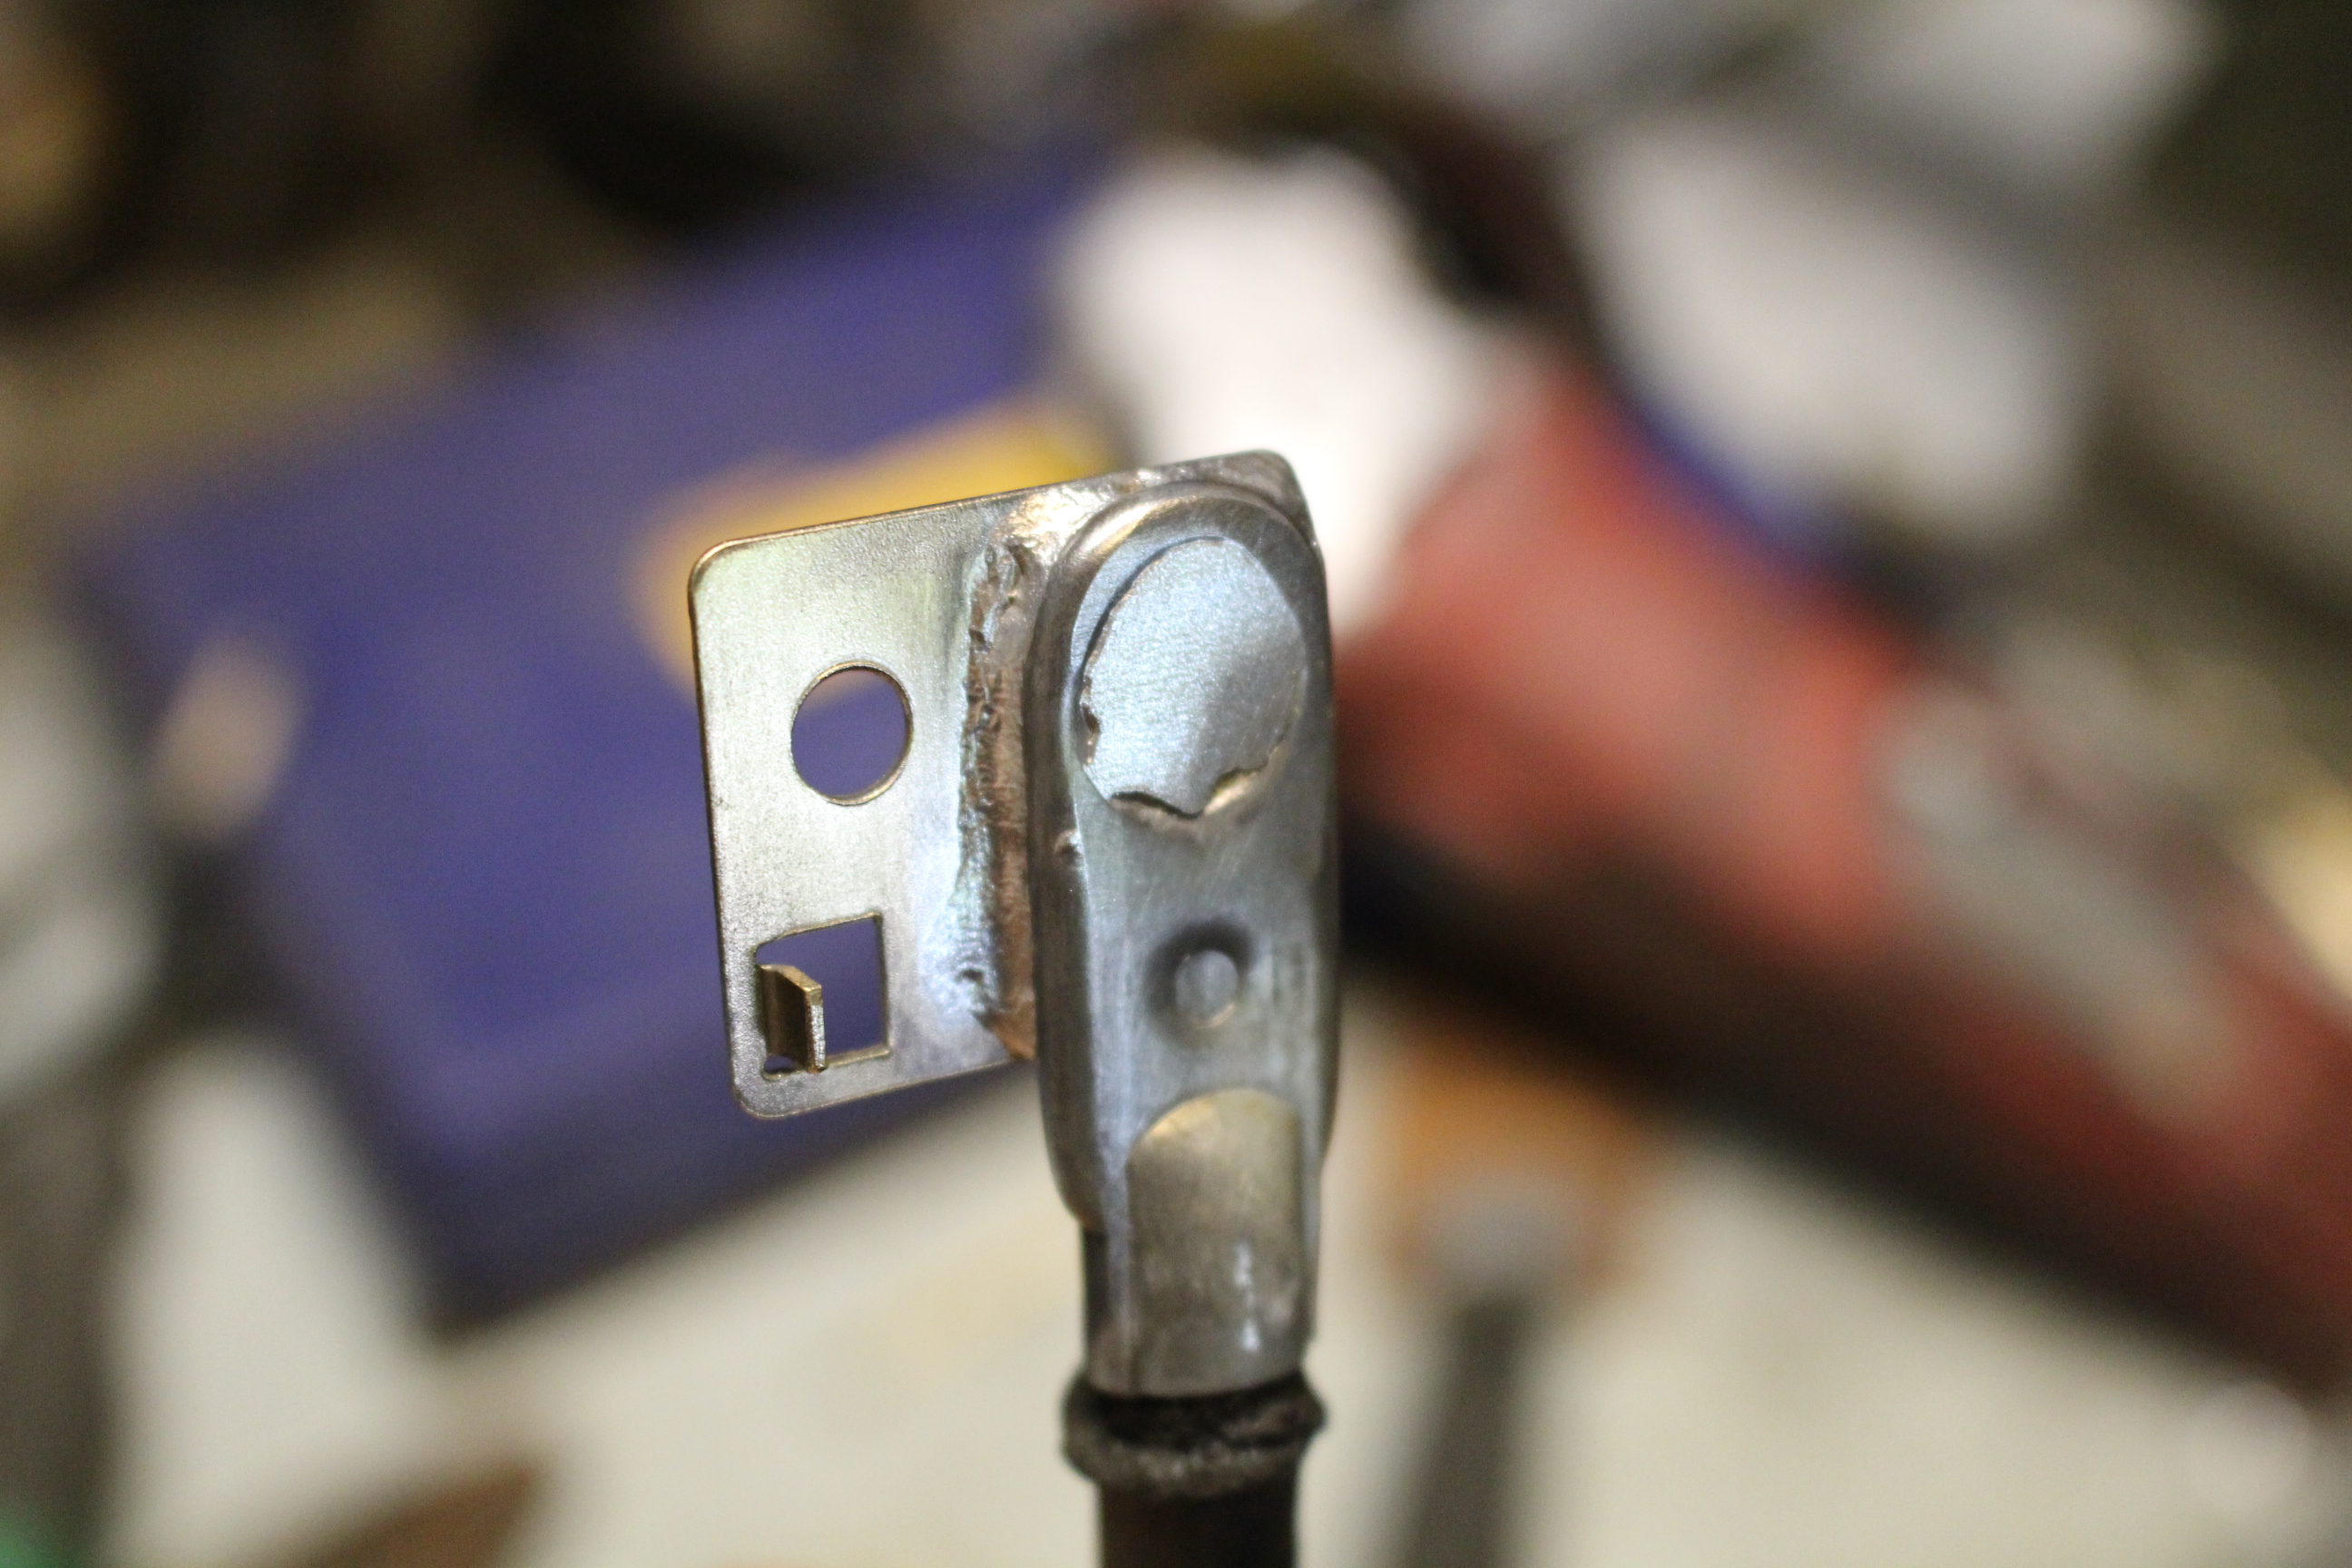
Made a proper replacement for the Fuse box wire.

The crimped on end in the actual fuse box was not a ring terminal, instead it was a square brass plate with two holes in it. I broke the square plate off and discarded the wire.
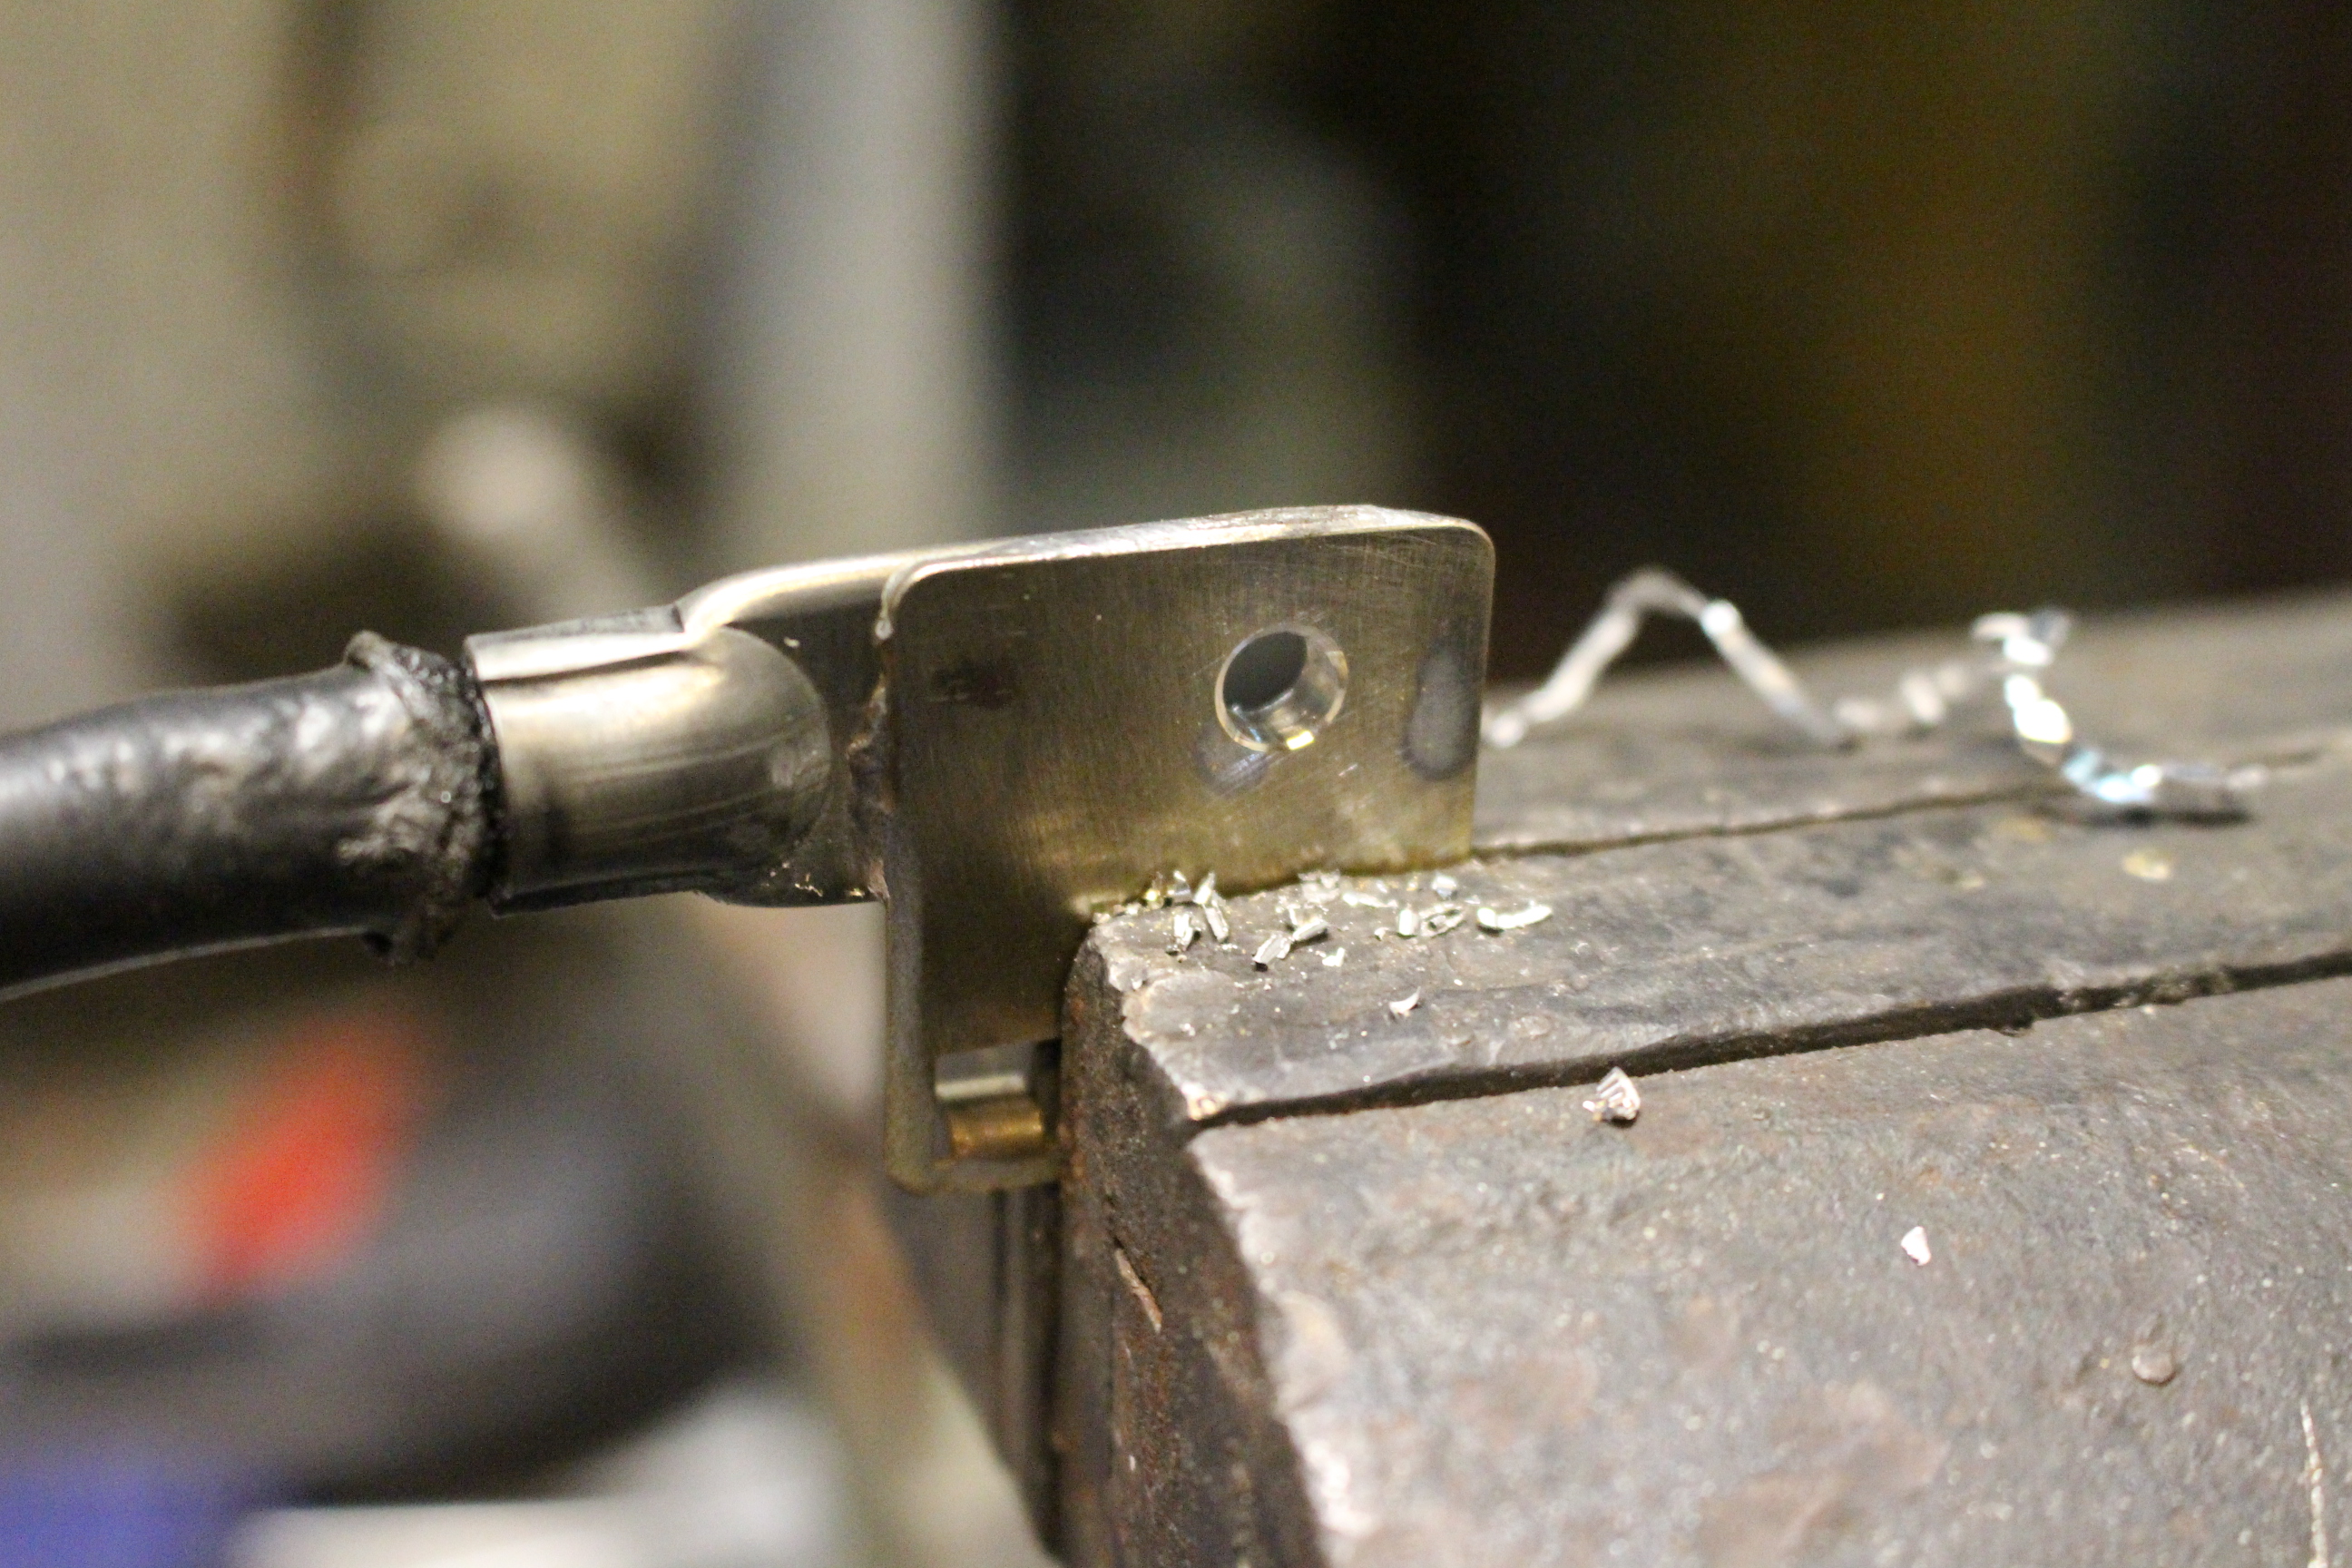
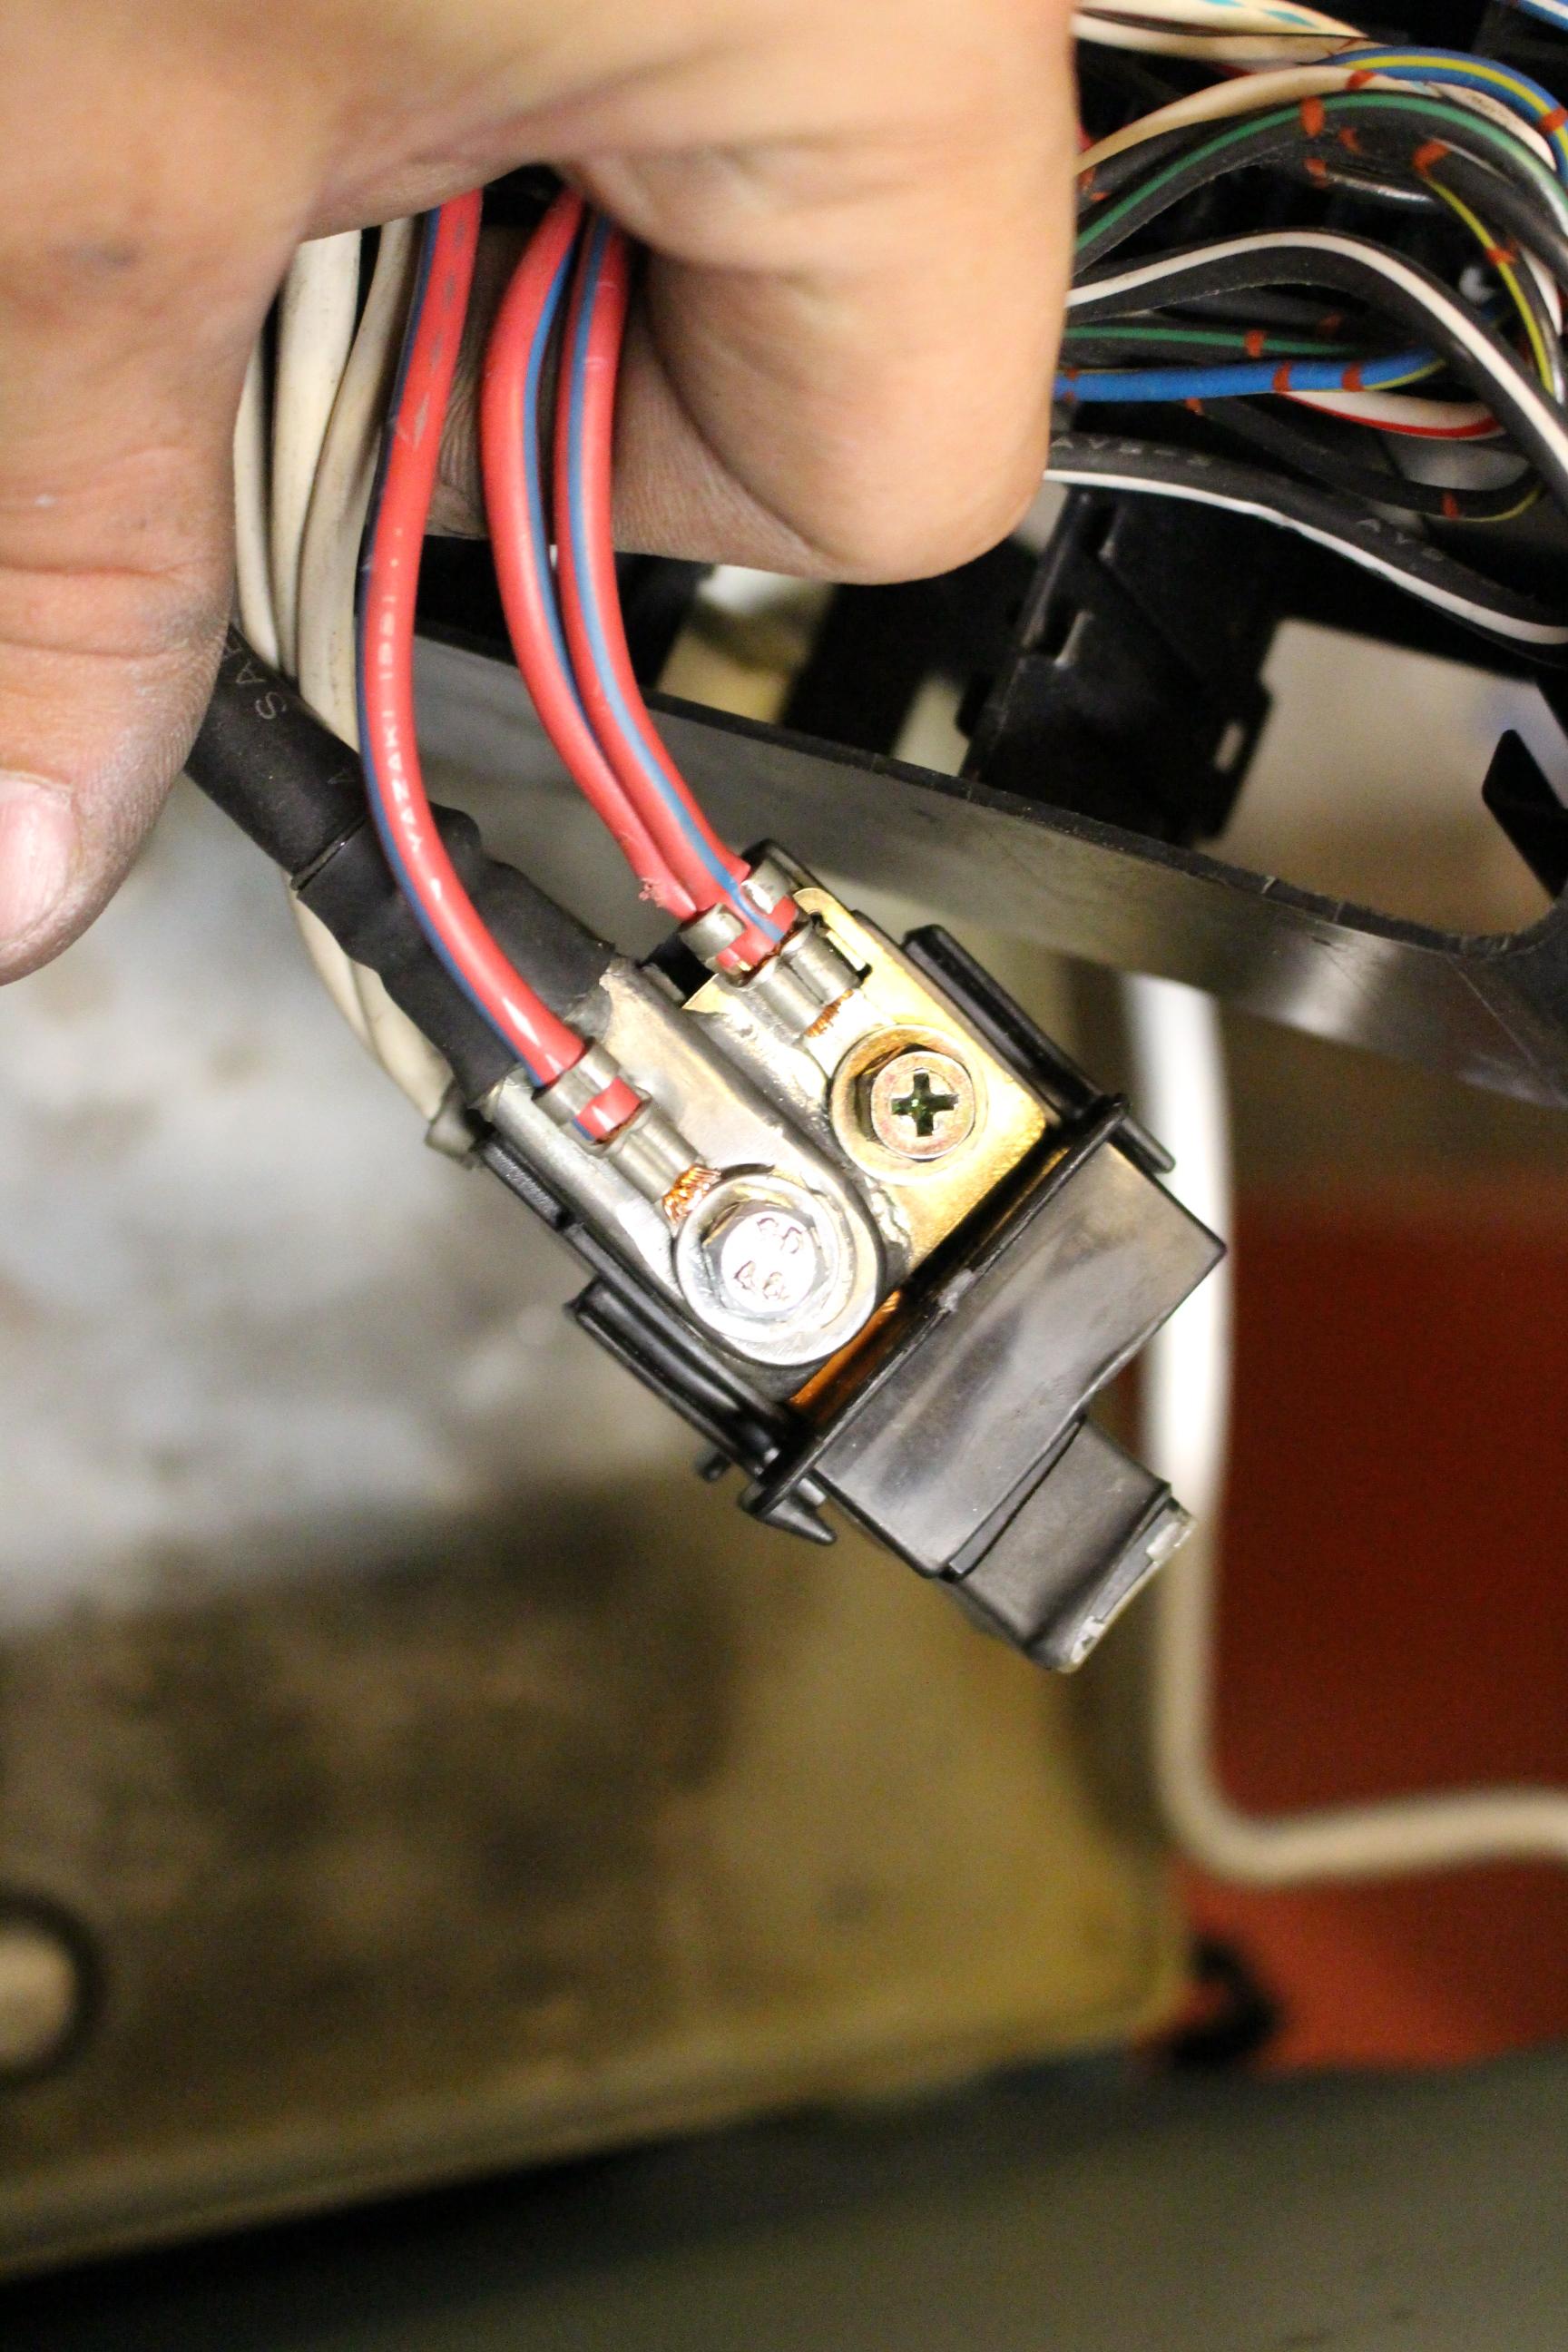
Soldered the new wire to the old plate. Since the new wire was drilled for a 1/2" stud, and the old setup used a small M5 screw, I filled the center with solder as well and redrilled to a more appropriate, smaller diameter.
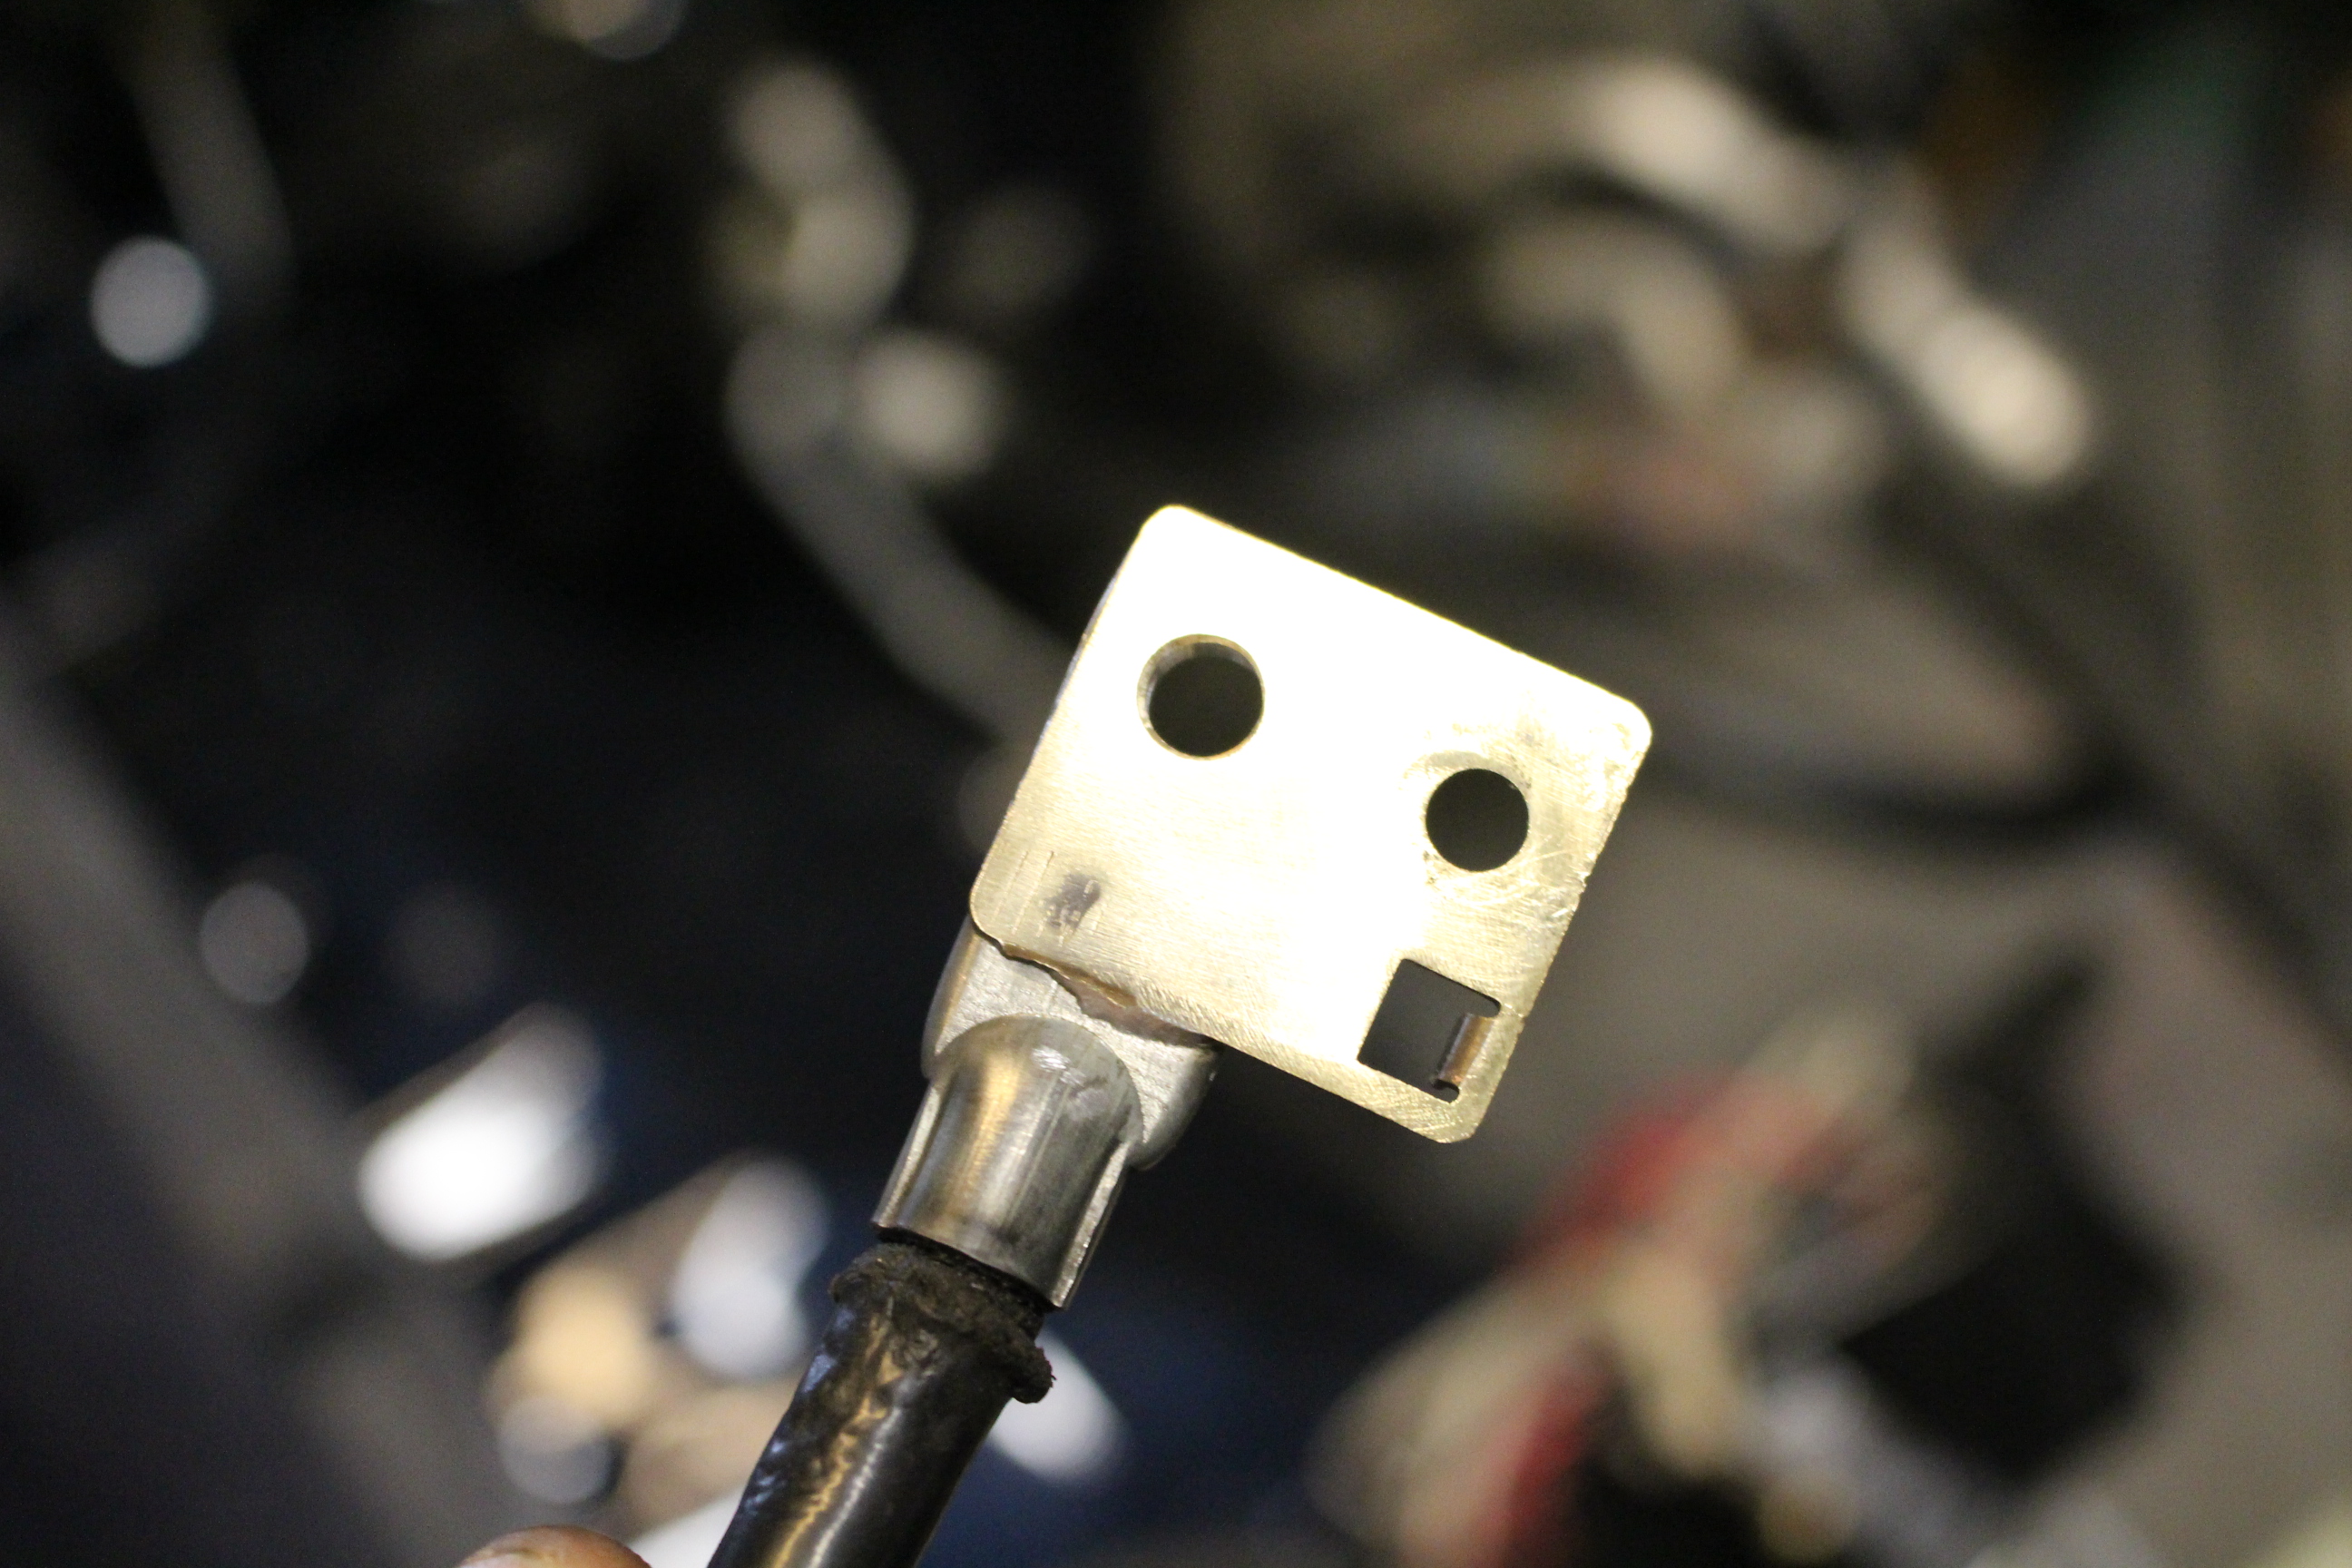
Cleaned up!
Drilled out.

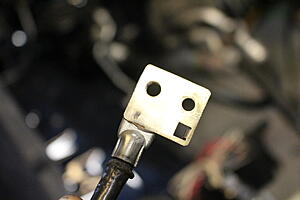
This step might have been overkill. But oh well. Marine grade Adhesive lined heat shrink on the terminals.

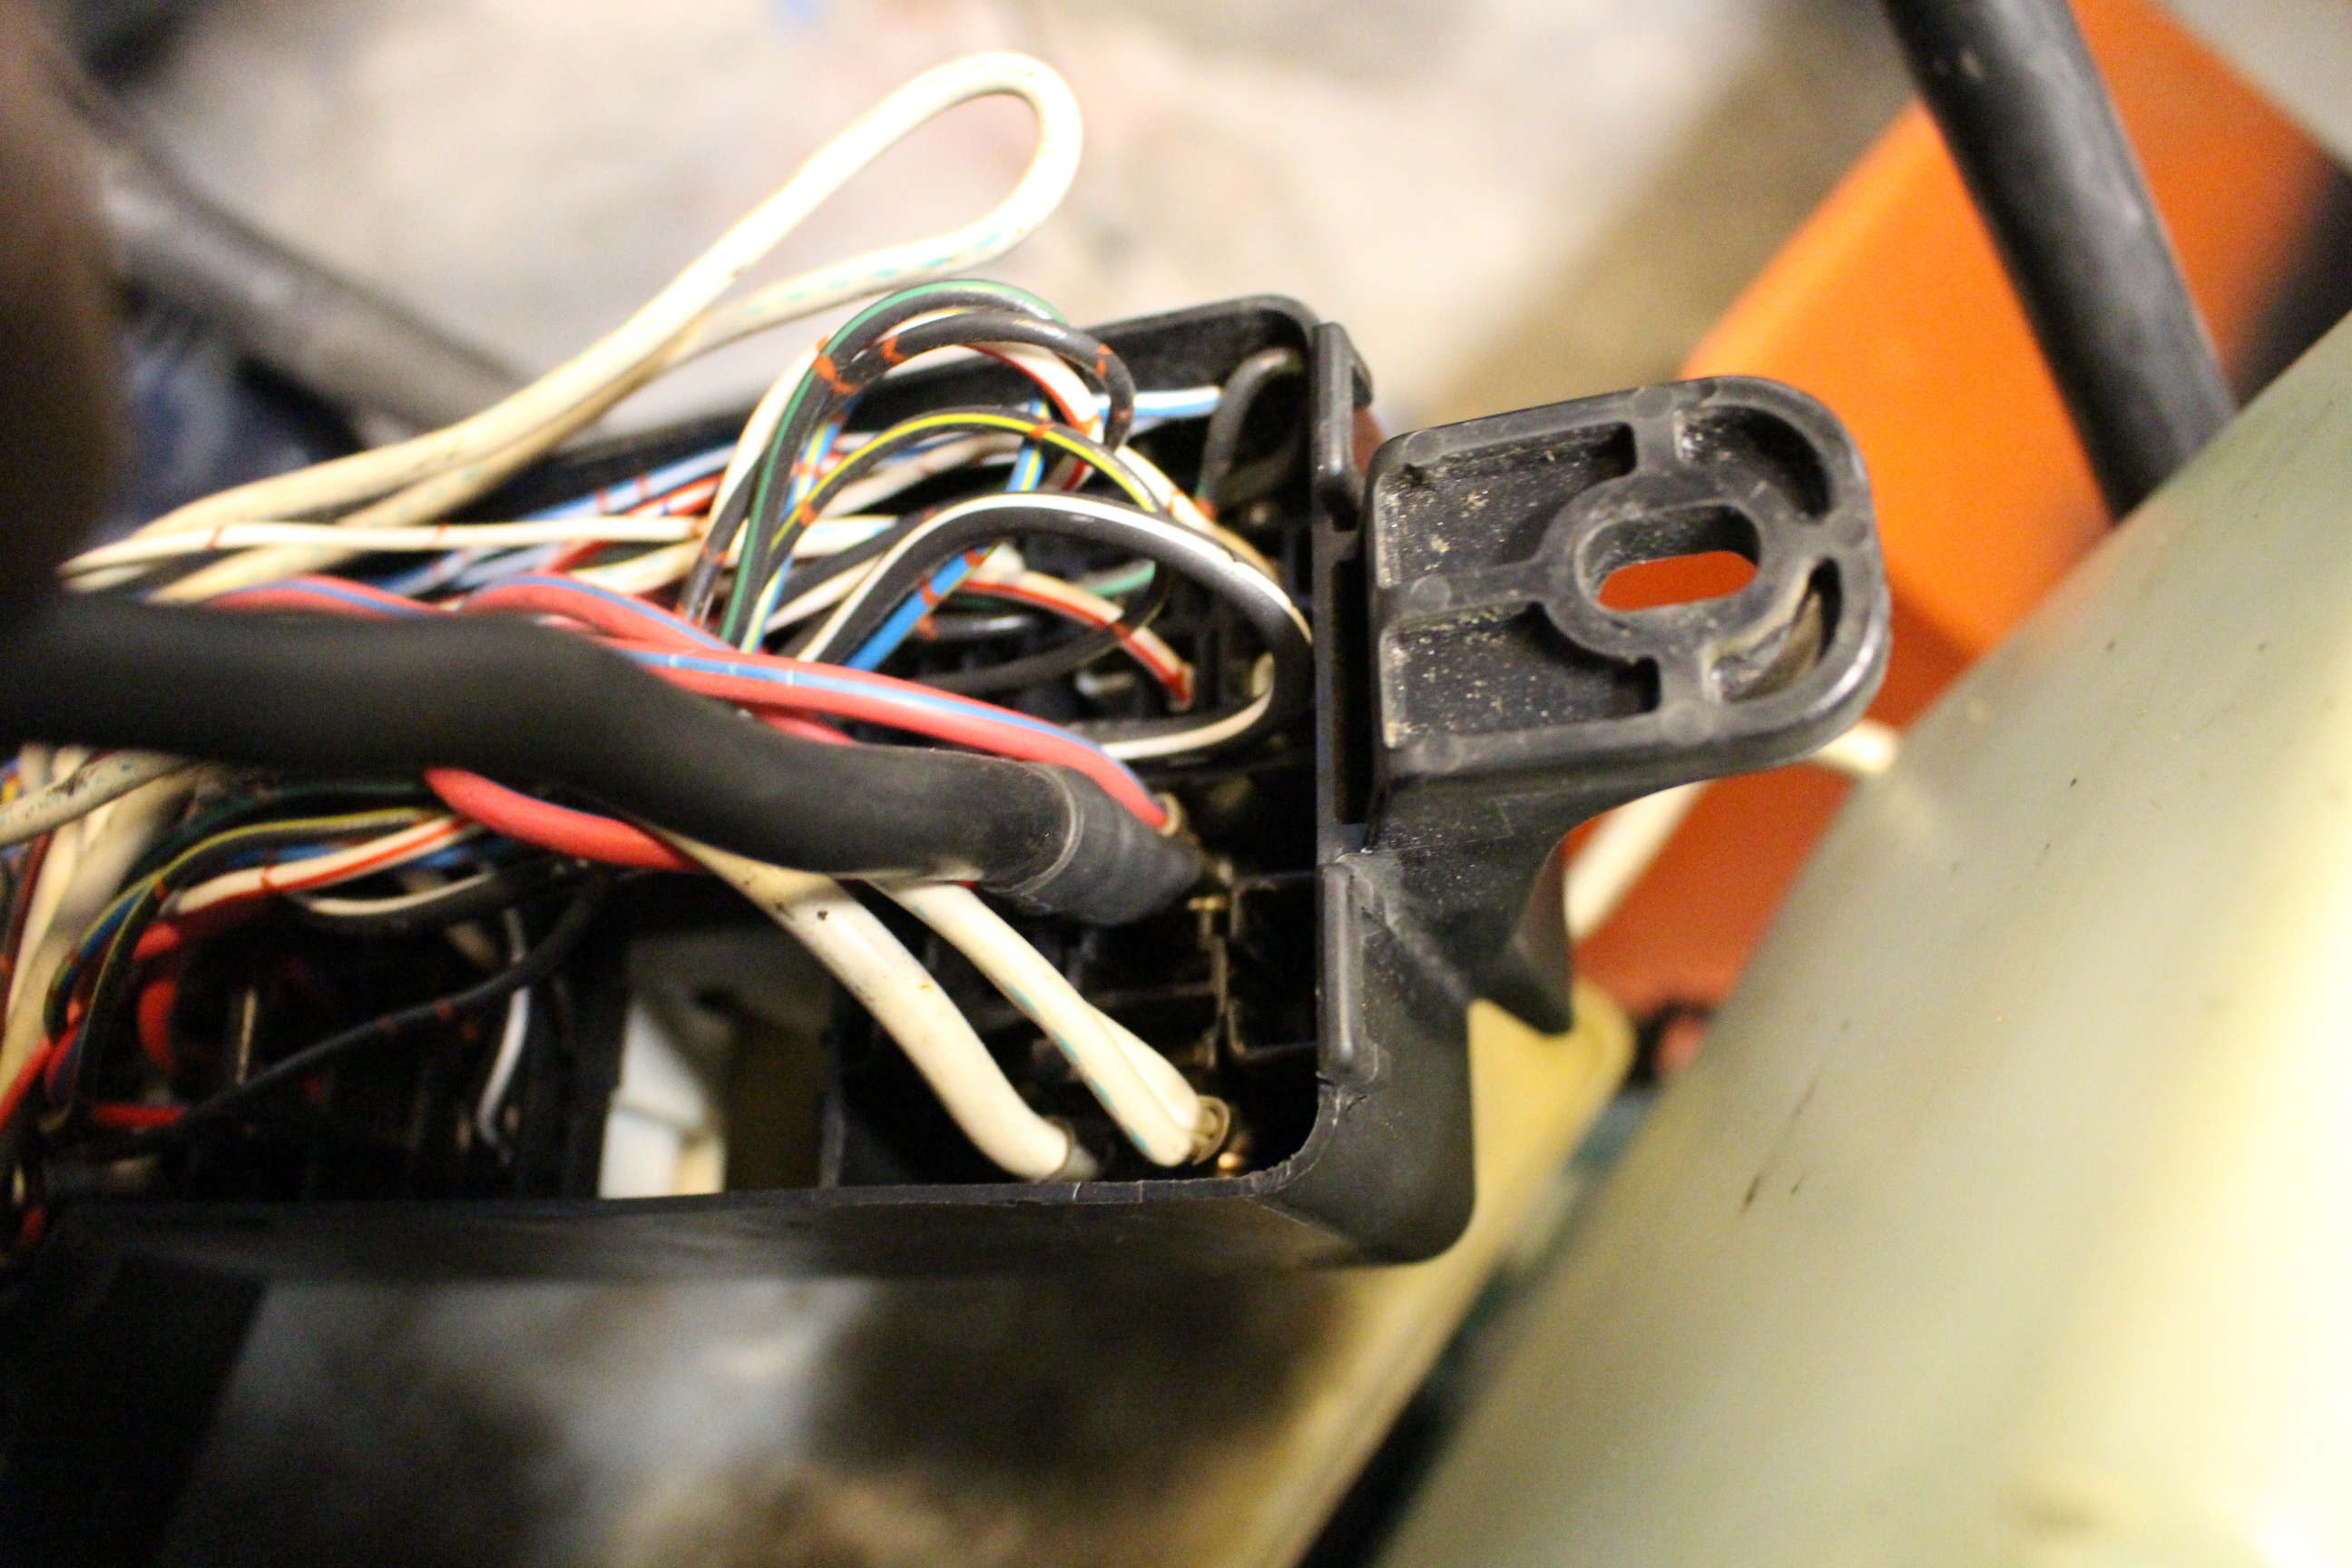
The plate mounted back to the 80 amp main fuse

and back in place.
Mint!
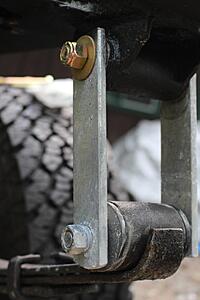
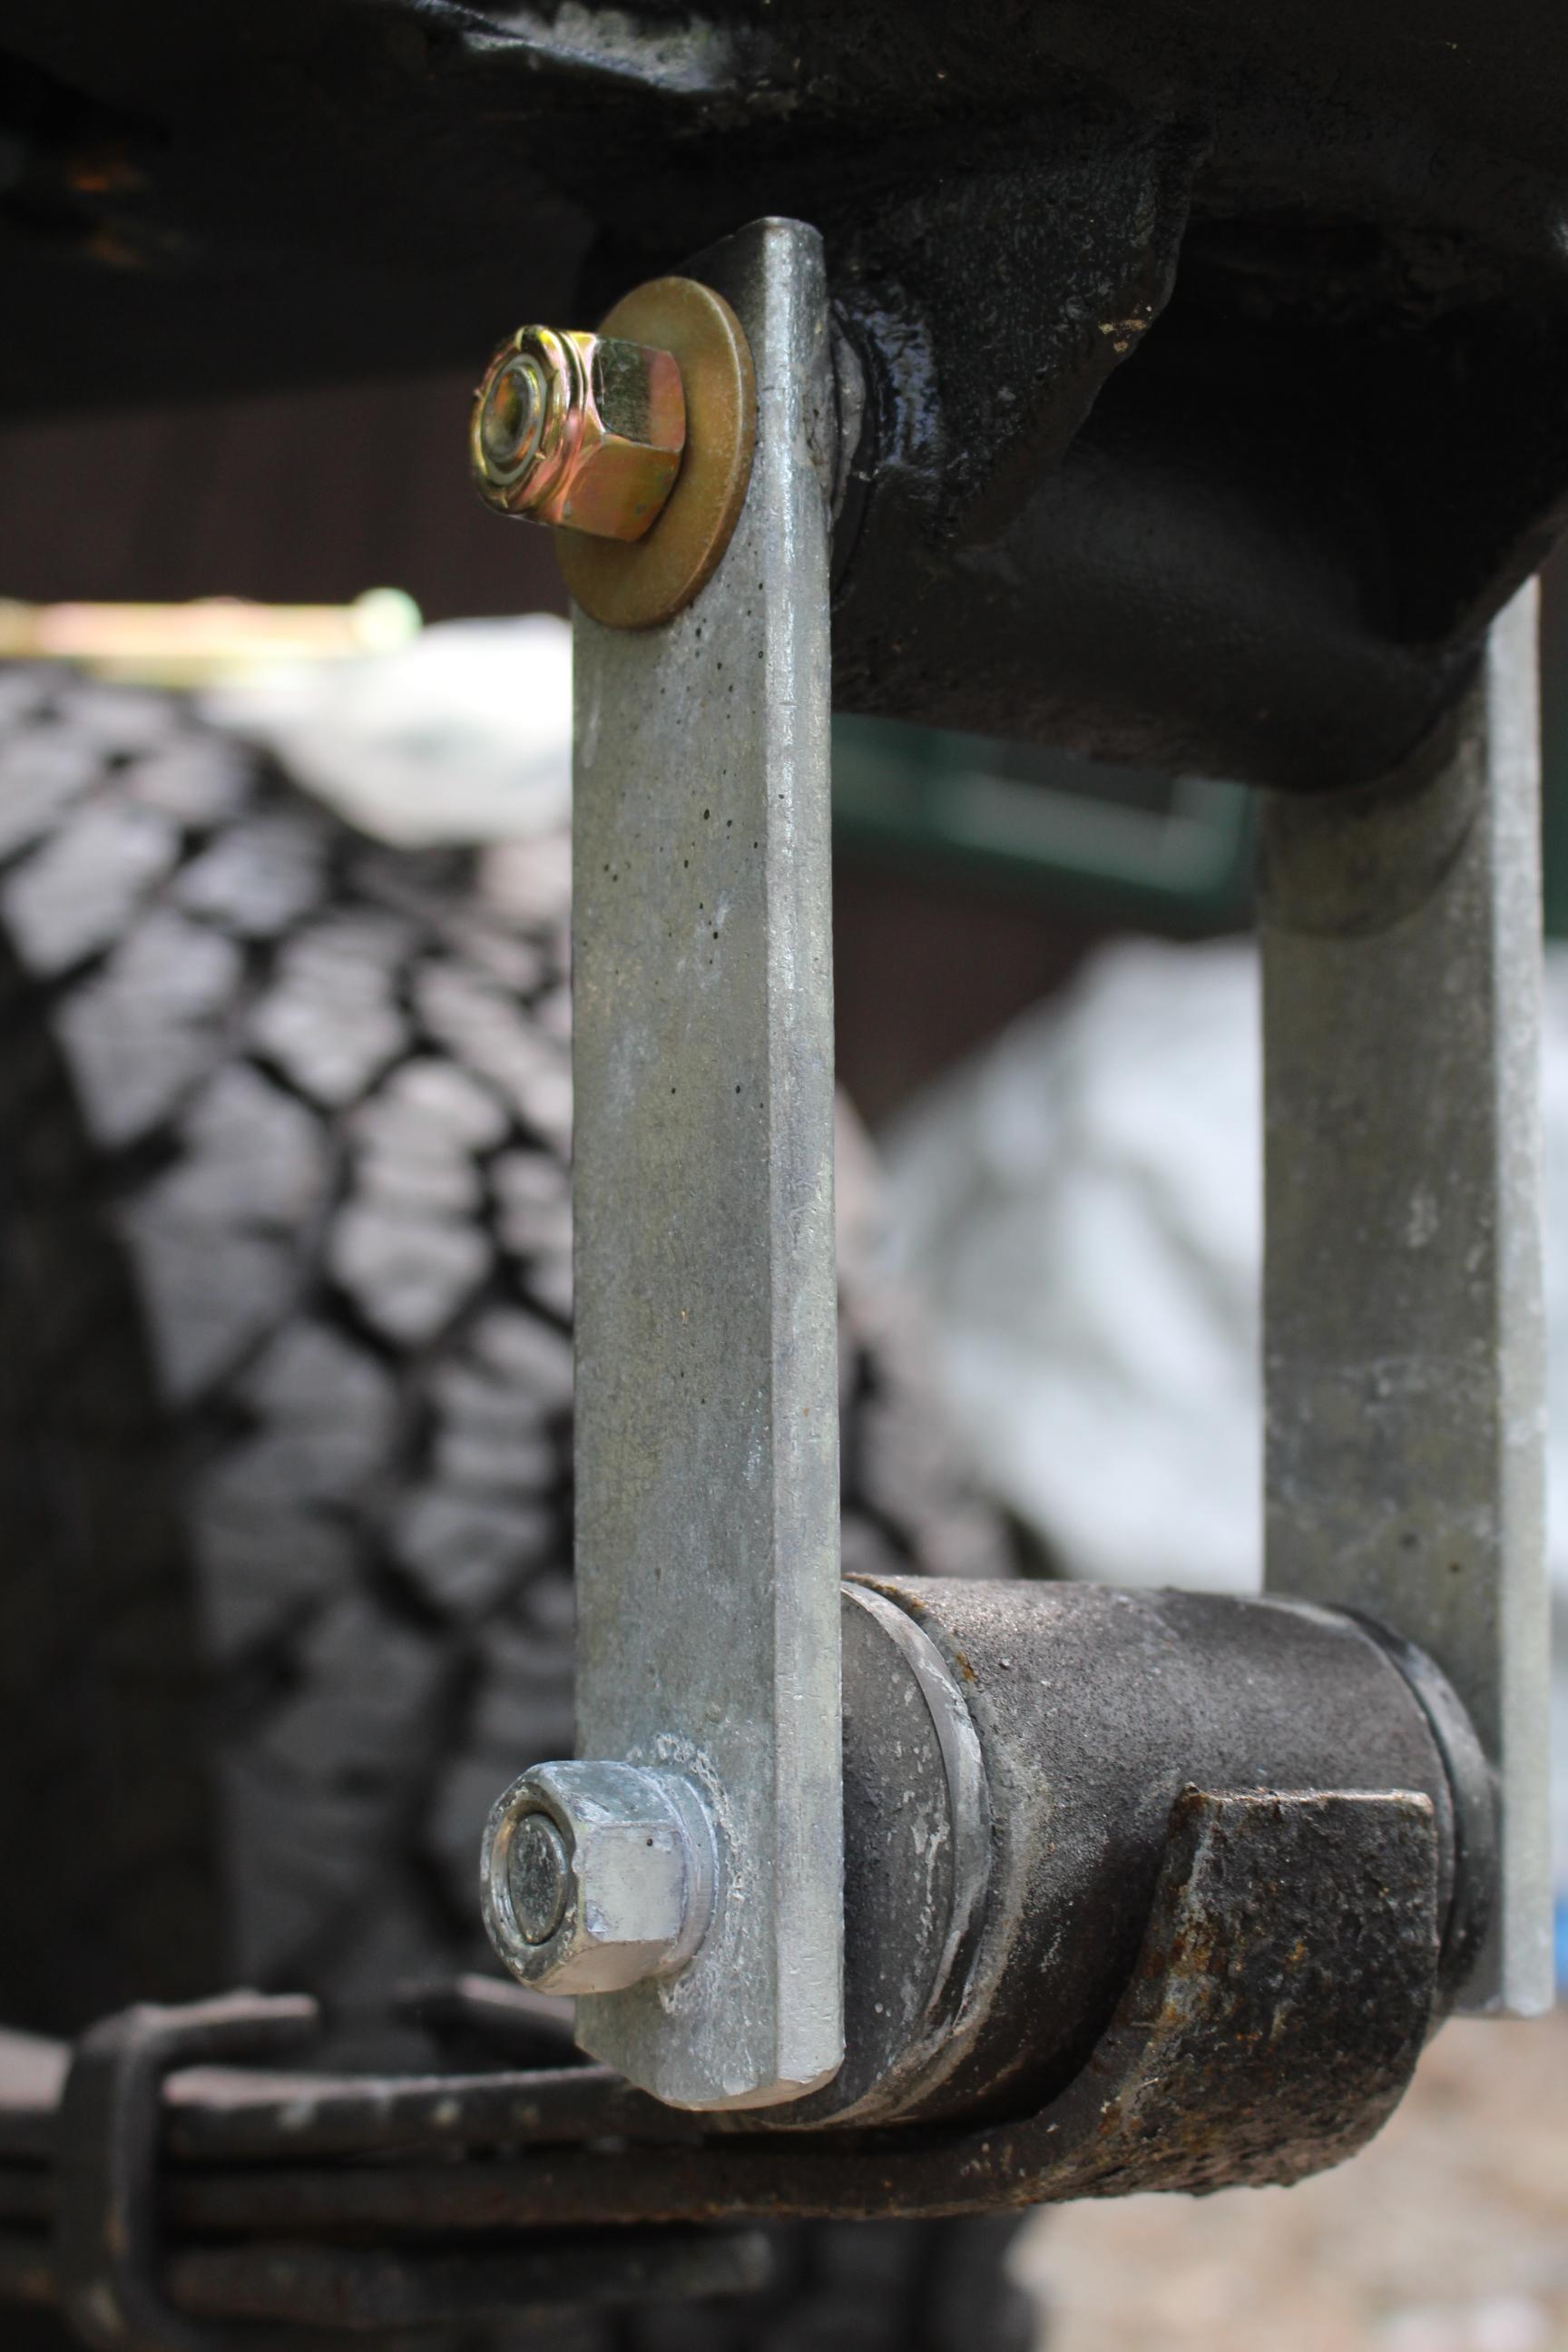
Also replaced the shackle bolts with longer ones and nylon lock nuts. That way I don't have to wrench them down tight to keep them secure. Still haven't decided on what leafs I want to replace these old original ones with. A lot of guys go with the 63" chevy 1/2 ton springs for a softer ride and more flex. I may just go with new stock replacements. Still need to research that. Will replace the struts at the same time. But that can be done down the road when the truck is drivable again.
And here is a random picture of a frog. Every day, I find one in my garage. I don't know what that means.

There was some gunk in the clutch master cylinder. A full system flush will be done once it's all back together, but for now I cleaned out the resevoir as best as i could with a paper towel.
Next up is bending those return lines and reinstalling the charcoal canister sitting on the windshield. And then it's go time!
Charcoal canister in!
Then I happened to notice something odd about the fuse block wiring. Pulled back the electrical tape and saw this. It's a heavy gauge wire all the way up to the ring terminal, and then a thin gauge wire for 2 inches and then the actua ring terminal. That can't be factory, can it? I know the actual ring terminal isn't factory, but there's no way it came from the factory with two different gauge wires crimped together I would think. The entire fuse panel runs off that small section of wire :O. The main feed wire connects directly to an 80 amp main fuse block. That's gotta be a previous owner hack job I think.
Just as I suspected, the solara emissions solenoid was identical to the 22re one, except half the cost and way newer. <10 minutes of work to swap the mounting bracket and it's fixed!

Made a proper replacement for the Fuse box wire.
The crimped on end in the actual fuse box was not a ring terminal, instead it was a square brass plate with two holes in it. I broke the square plate off and discarded the wire.
Soldered the new wire to the old plate. Since the new wire was drilled for a 1/2" stud, and the old setup used a small M5 screw, I filled the center with solder as well and redrilled to a more appropriate, smaller diameter.
Cleaned up!
Drilled out.
This step might have been overkill. But oh well. Marine grade Adhesive lined heat shrink on the terminals.
The plate mounted back to the 80 amp main fuse
and back in place.
Mint!
Also replaced the shackle bolts with longer ones and nylon lock nuts. That way I don't have to wrench them down tight to keep them secure. Still haven't decided on what leafs I want to replace these old original ones with. A lot of guys go with the 63" chevy 1/2 ton springs for a softer ride and more flex. I may just go with new stock replacements. Still need to research that. Will replace the struts at the same time. But that can be done down the road when the truck is drivable again.
And here is a random picture of a frog. Every day, I find one in my garage. I don't know what that means.
 09-05-2016, 04:47 PM
#16
Registered User
Thread Starter
Join Date: Sep 2016
Posts: 17
Likes: 0
Received 0 Likes
on
0 Posts
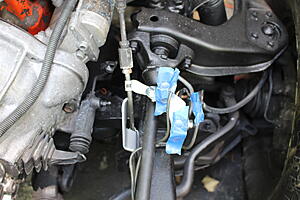
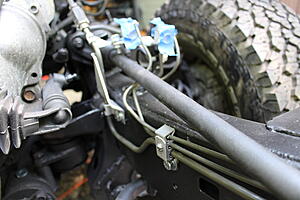
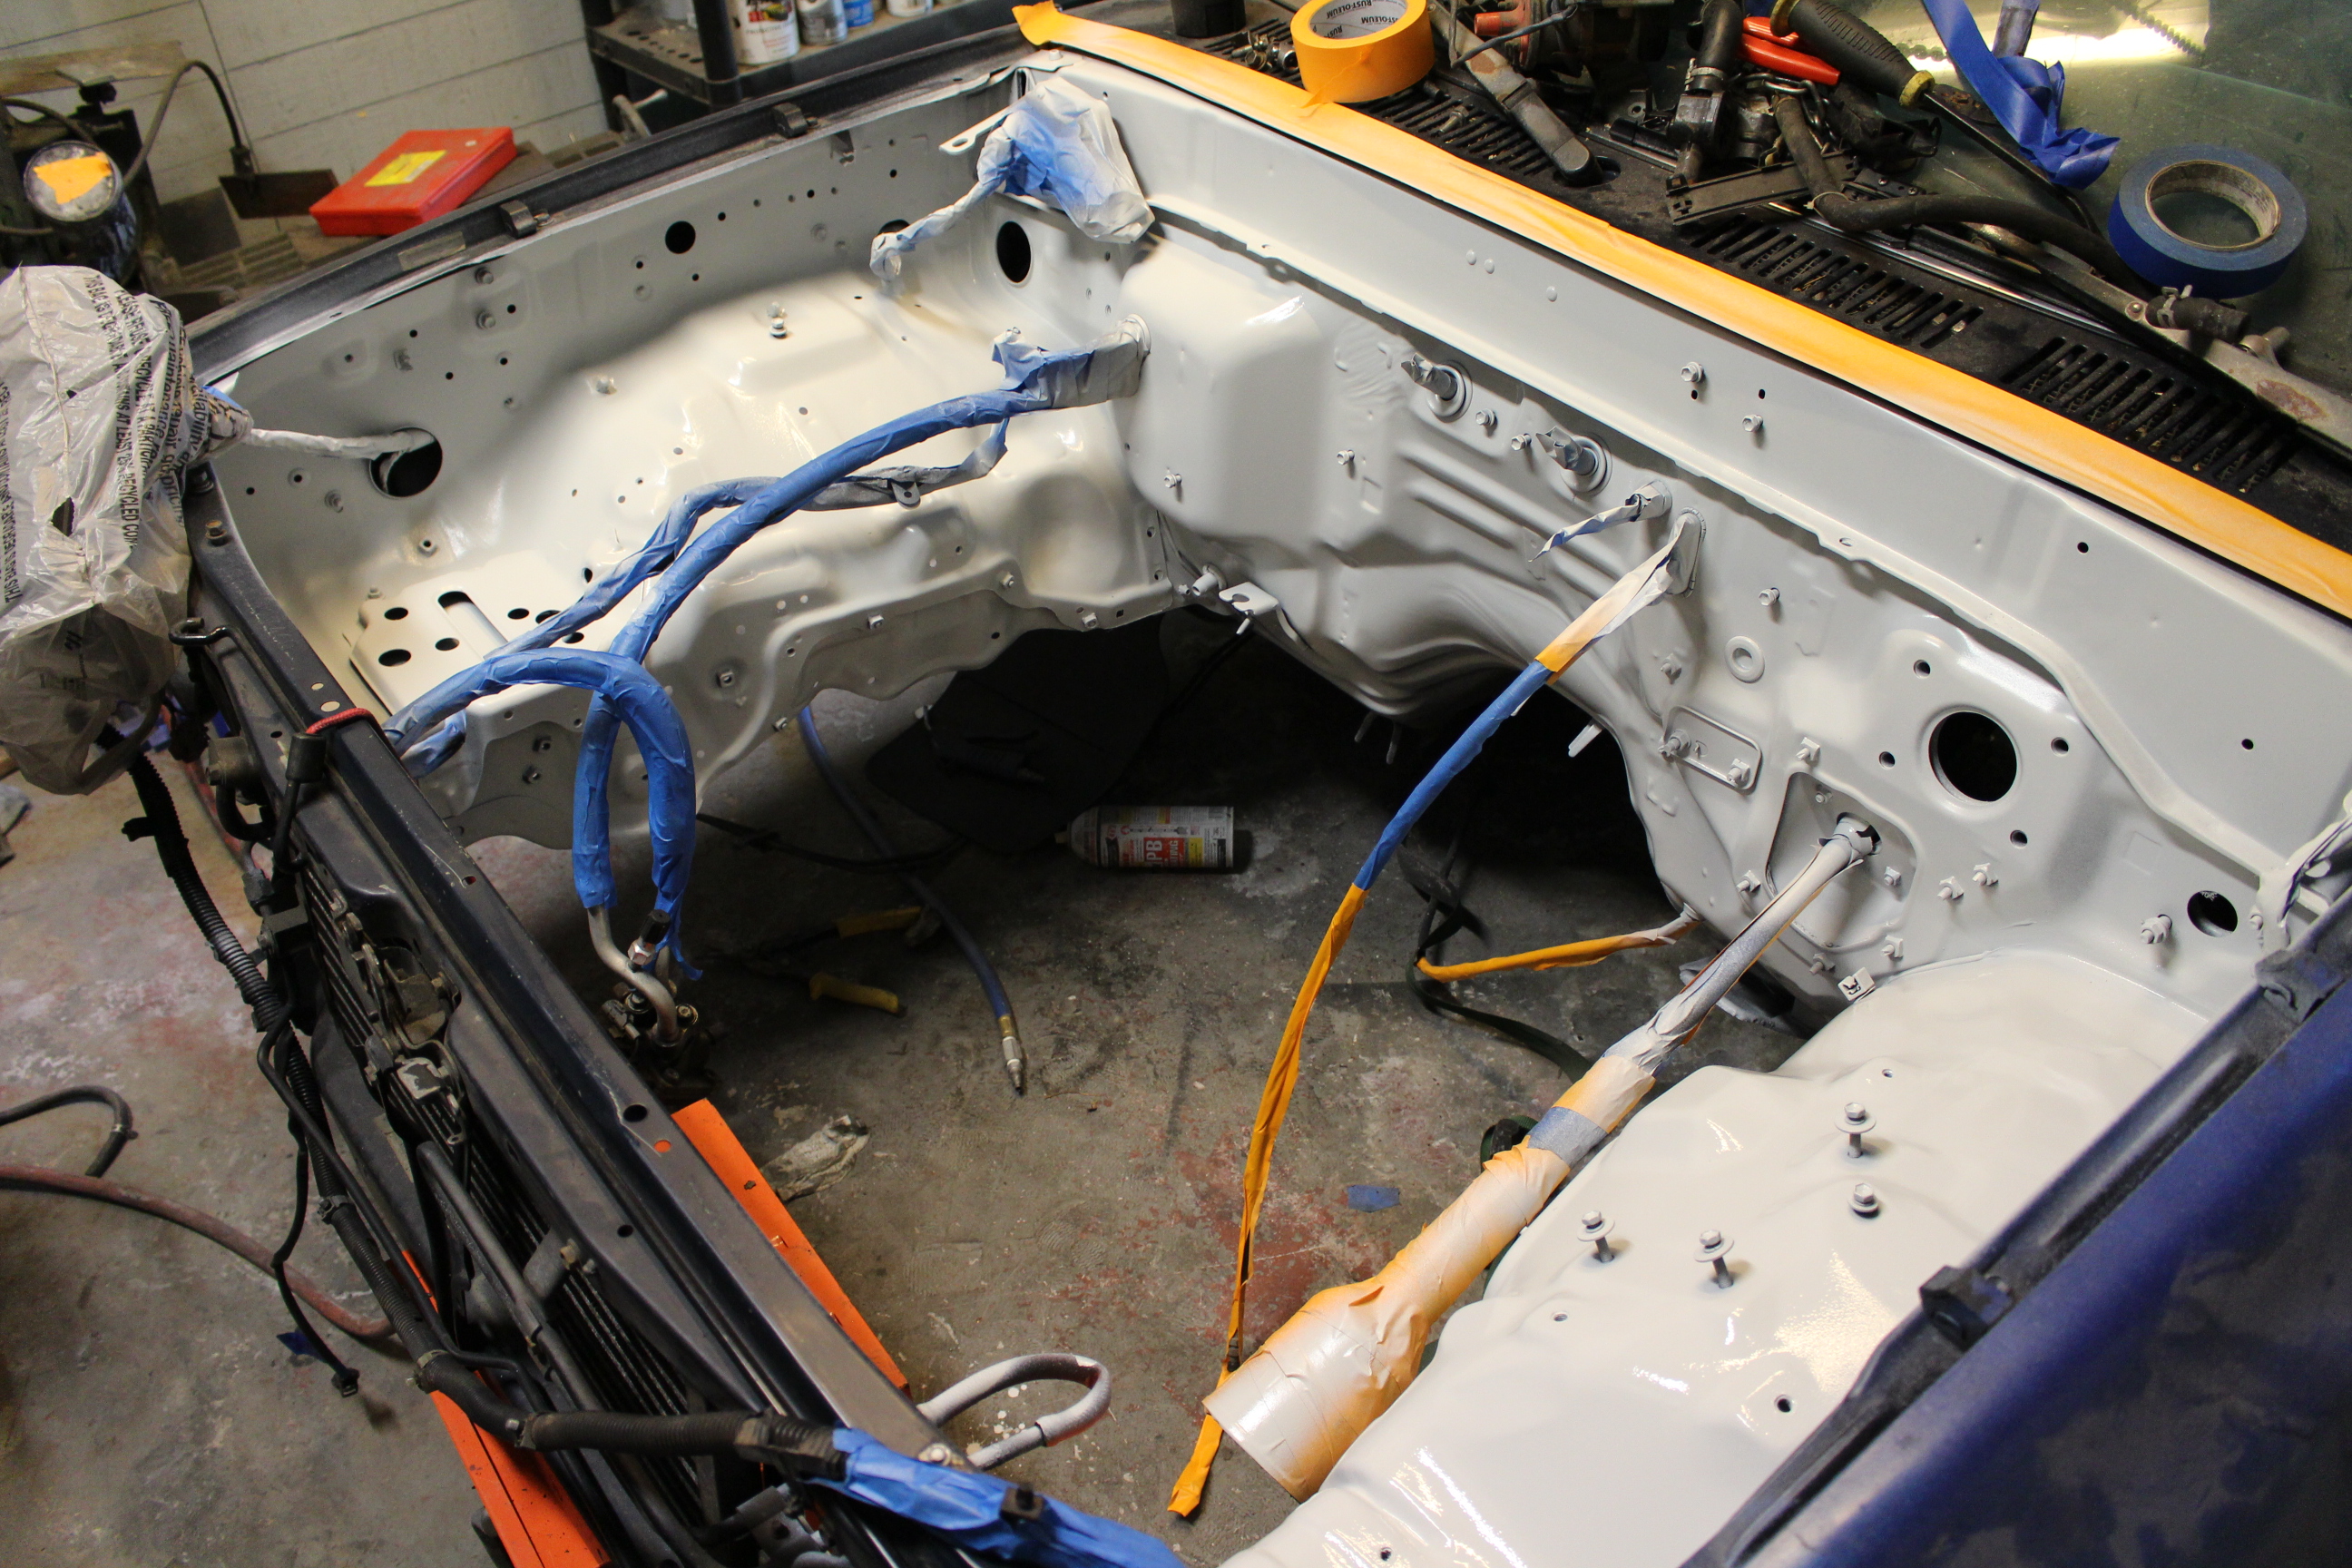
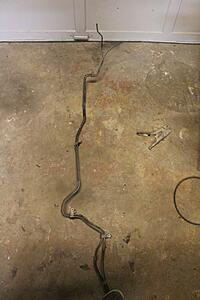
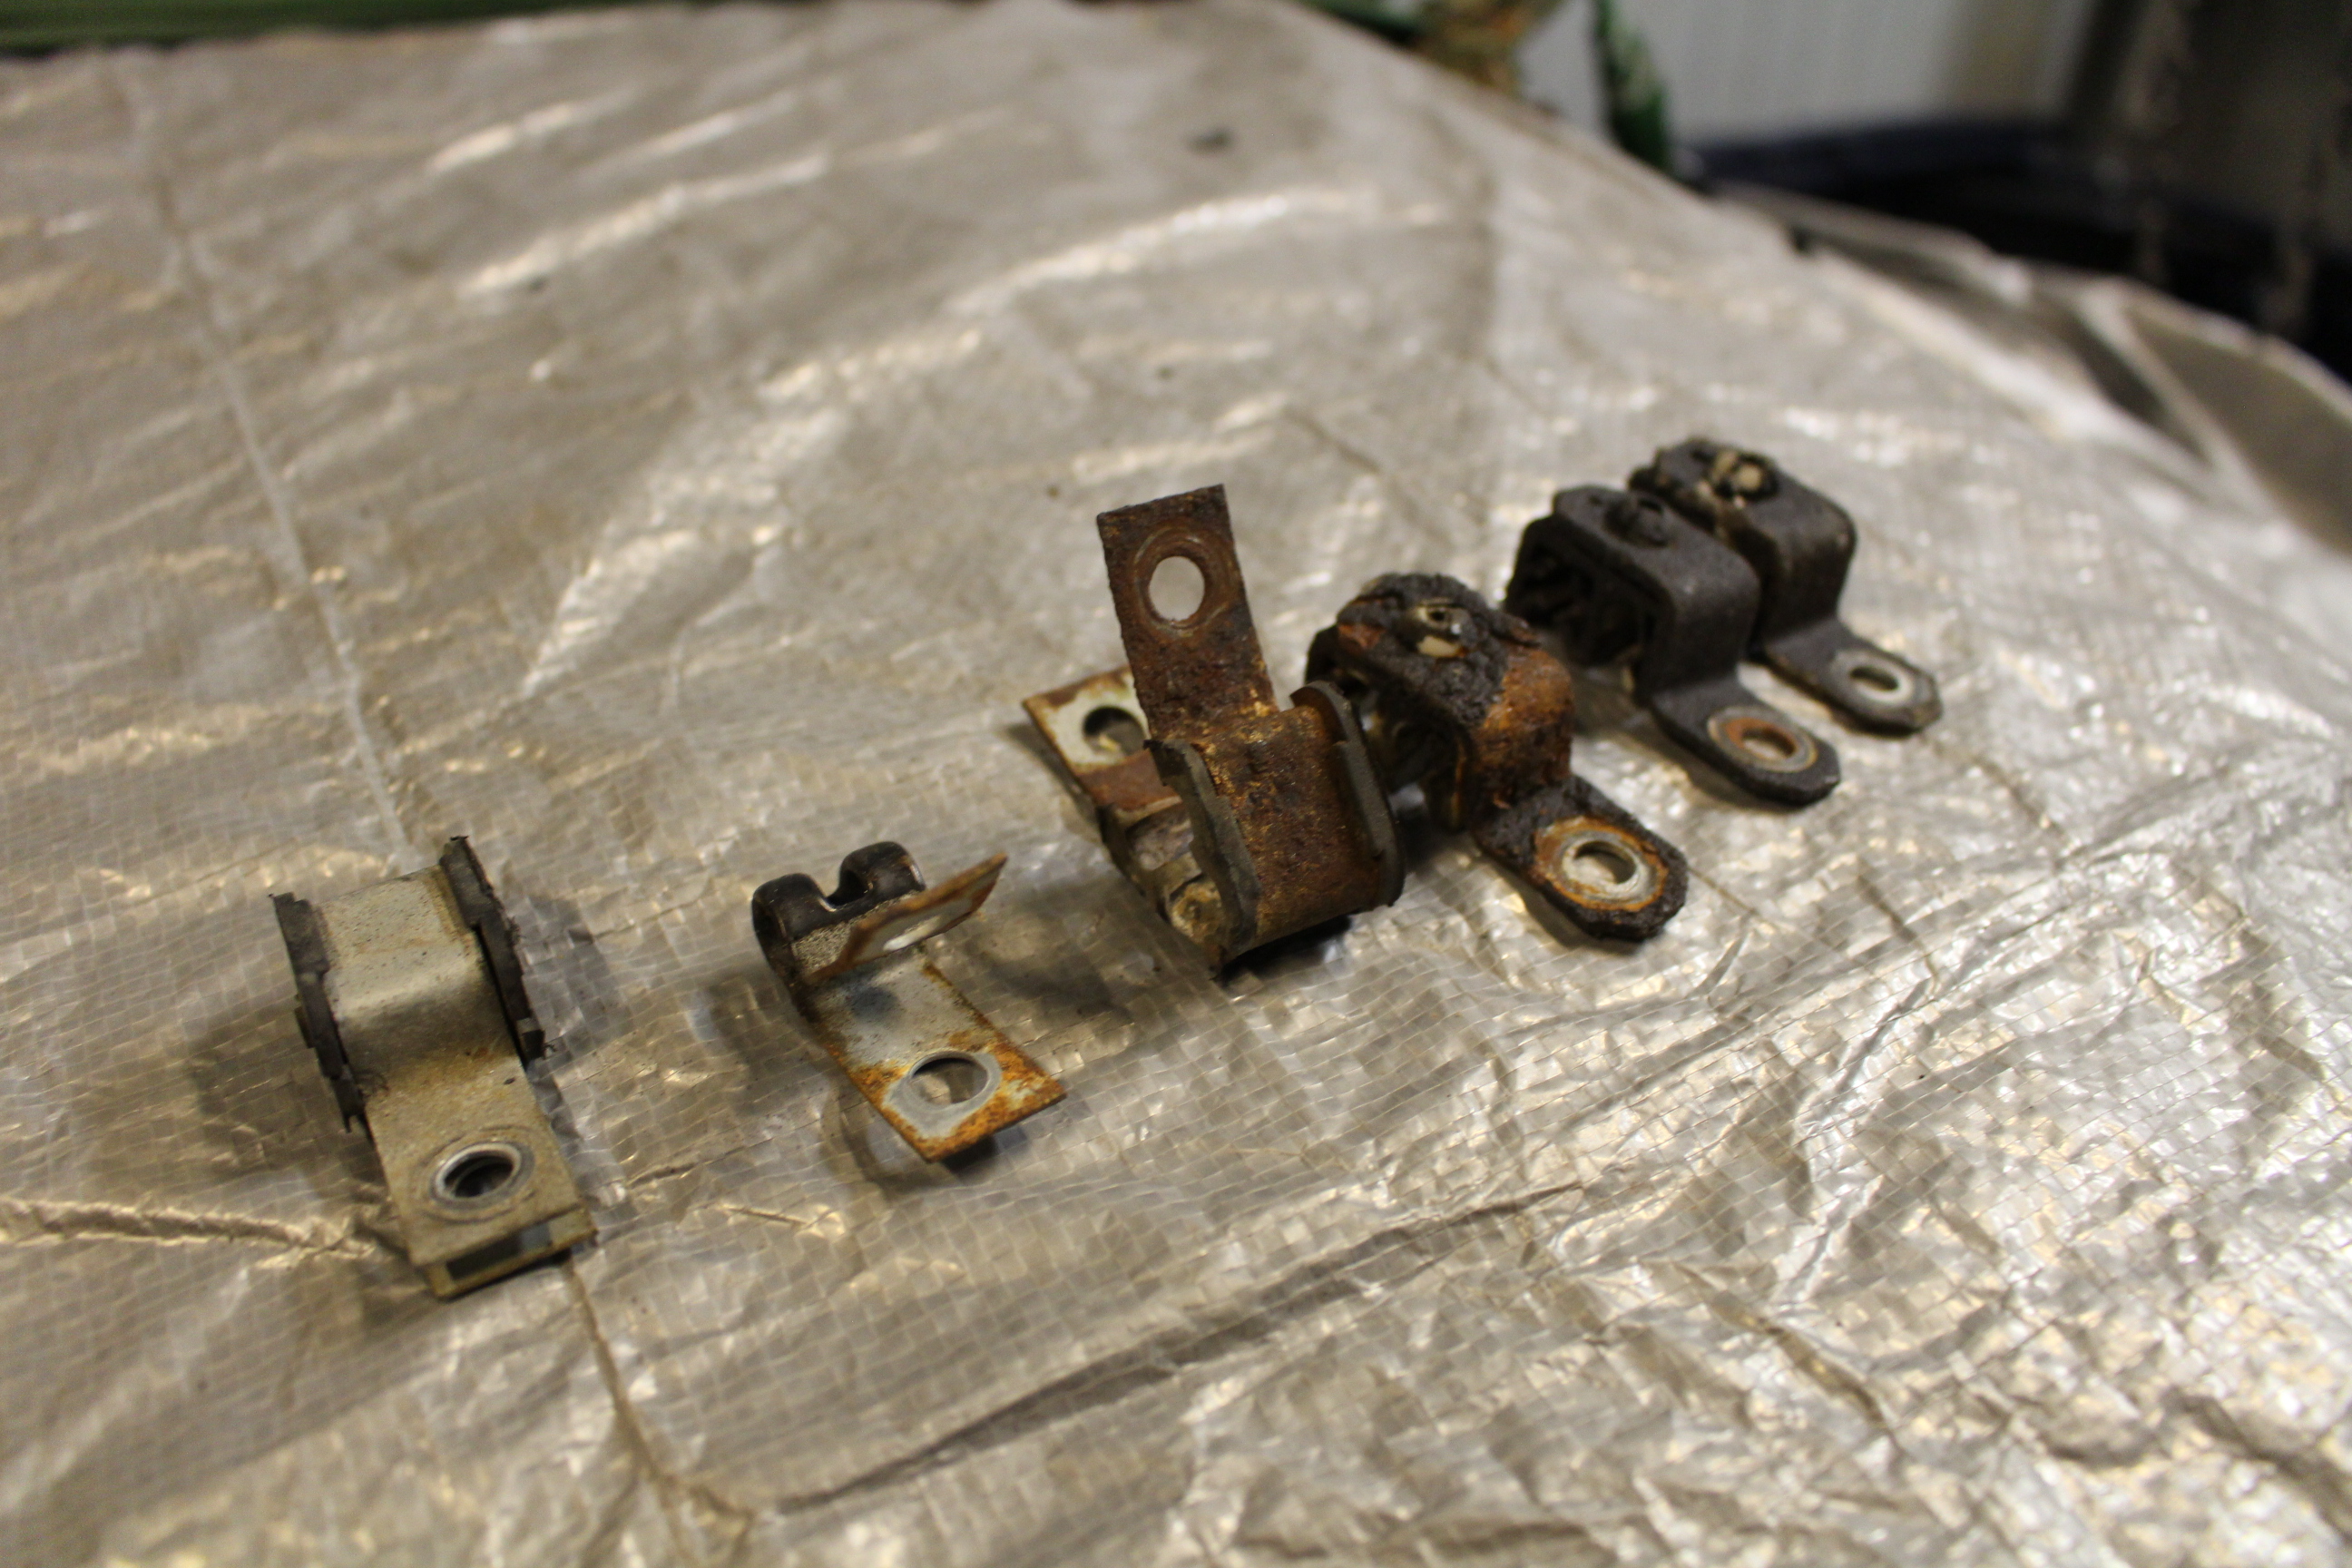
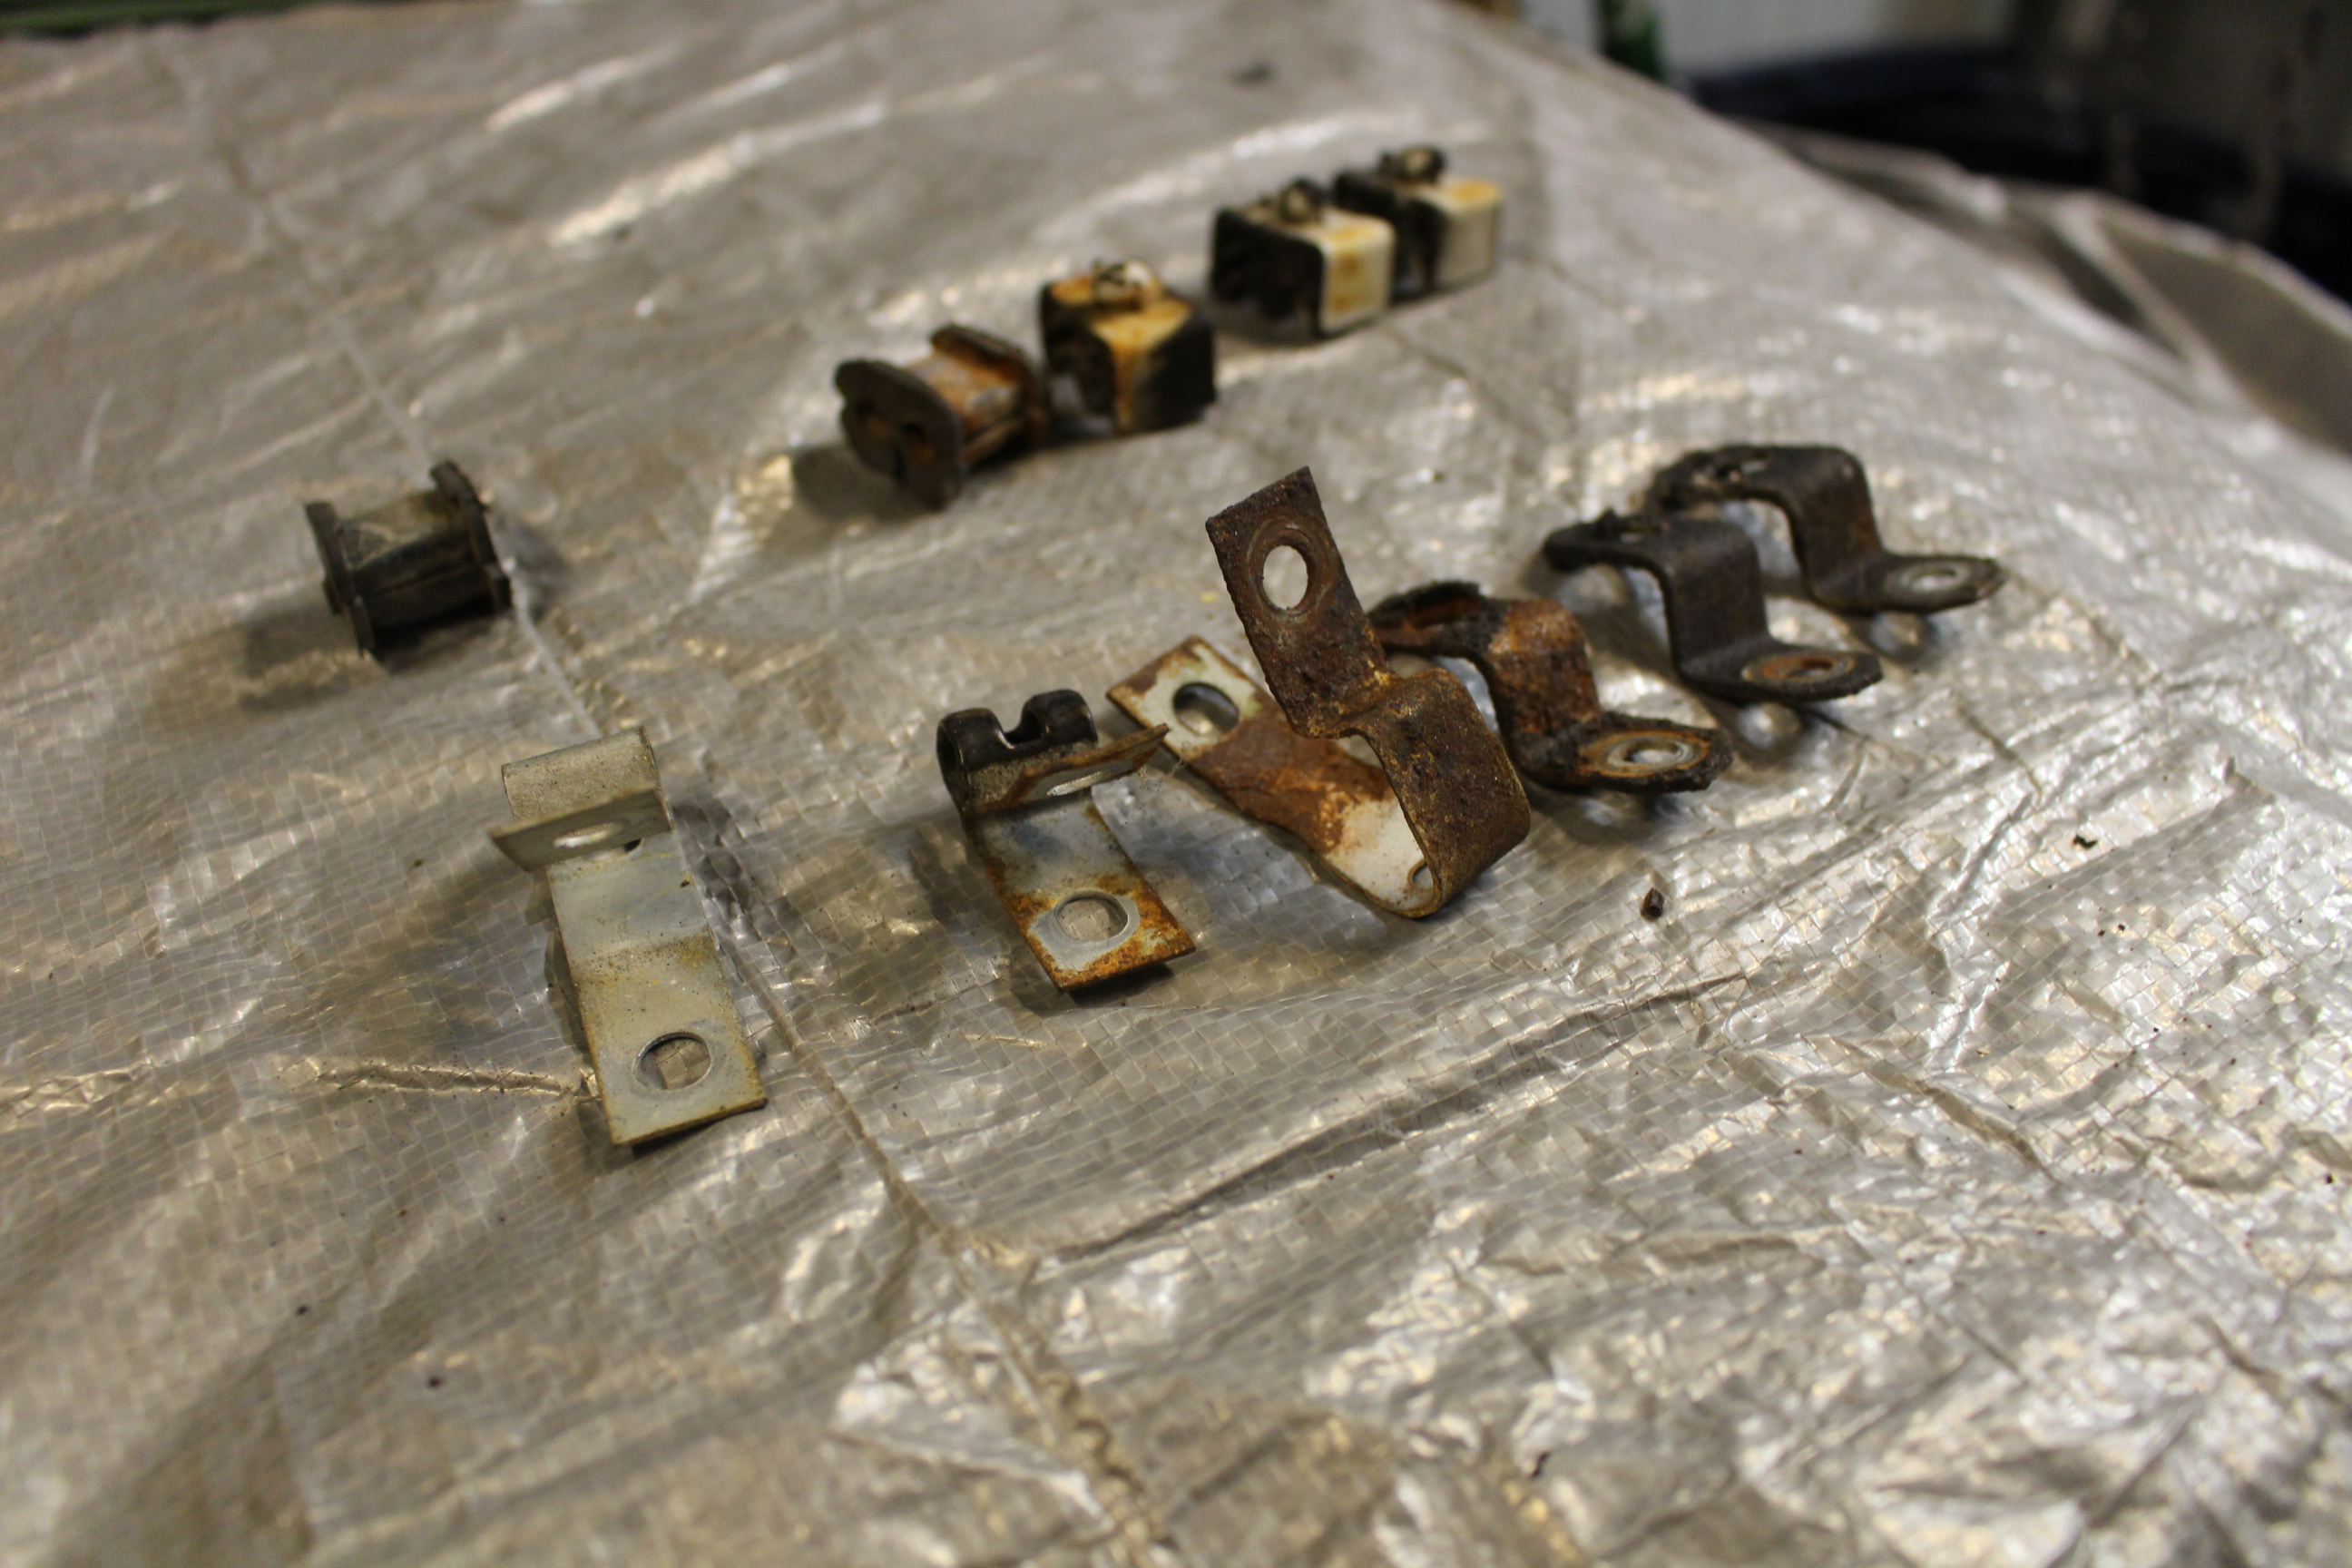
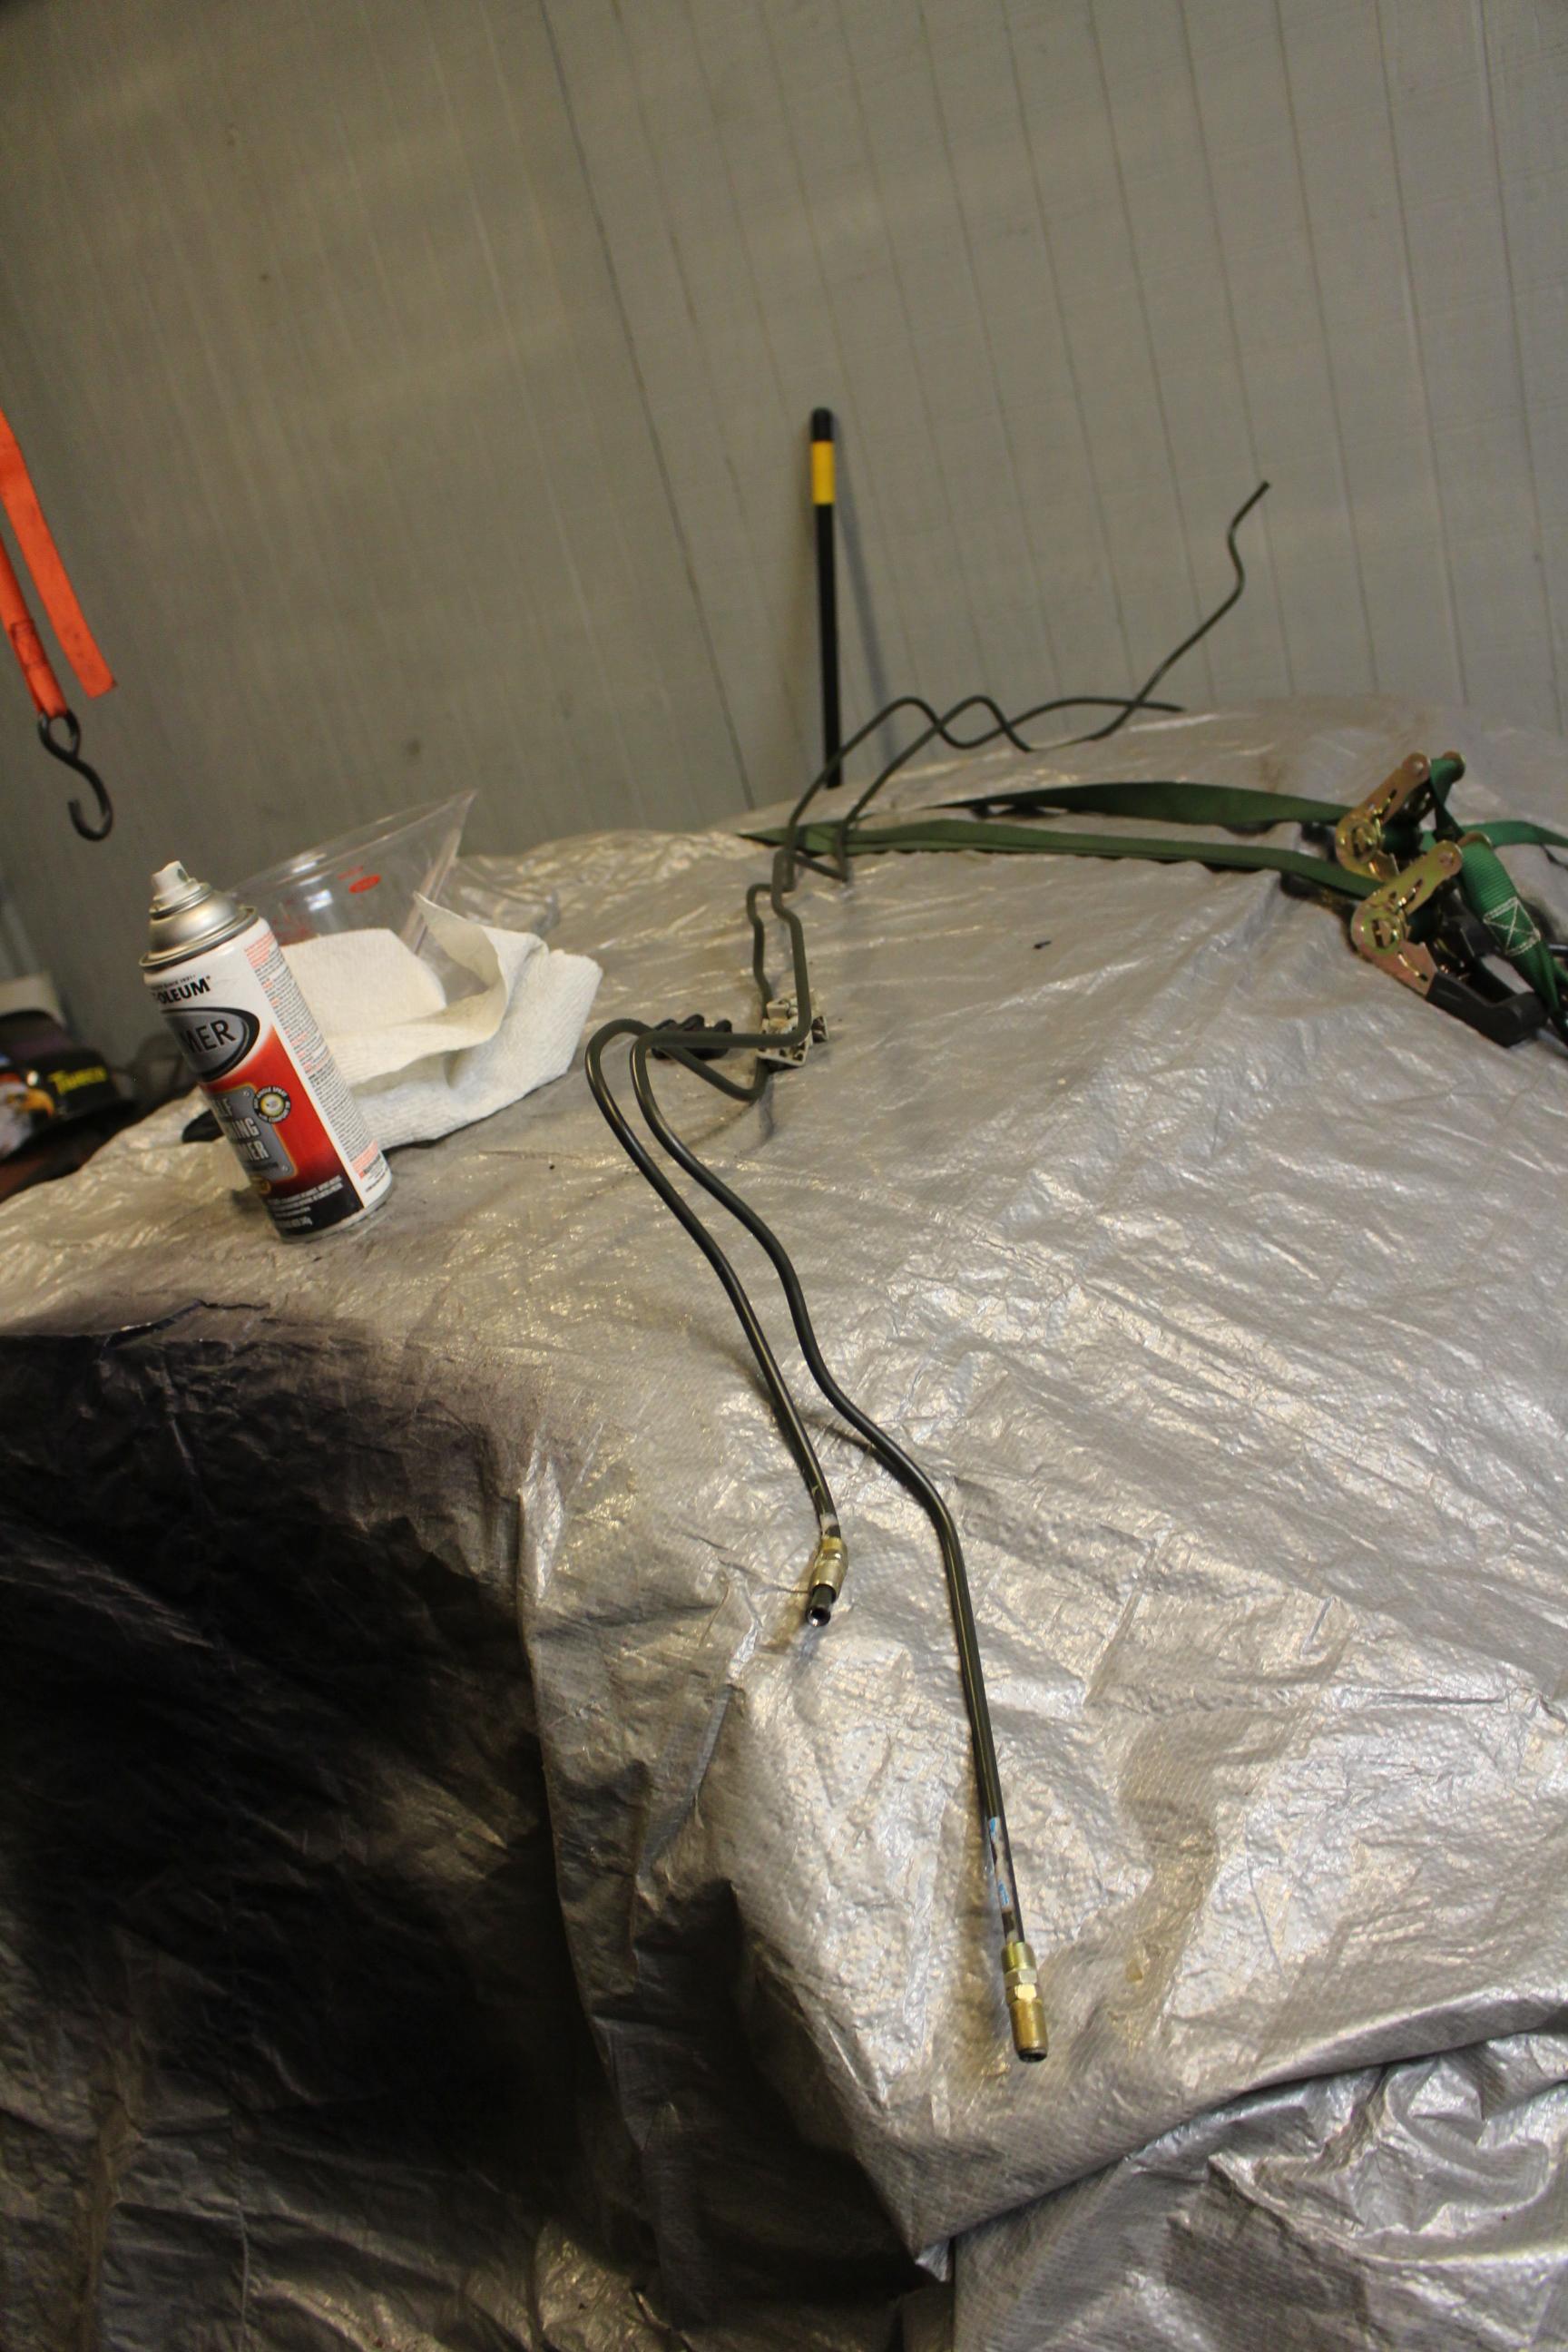
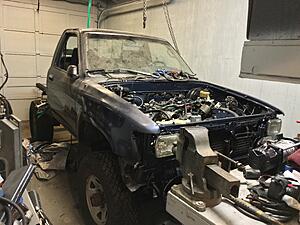
It is finally time for the cab to go back on the frame! It has been a looooong road to this point. The final piece to the puzzle has been the fuel vent lines that run to the charcoal canister area. I Pulled the old lines off, and they were pretty decent except for some rusting in one spot. Not wanting to have to redo these once the body was back on, I set out to bend new lines. I used 1/4" Brake line as it was essentially the same size. Two 6 ft lengths I believe.
Old lines out
Old clamps
Disassembled

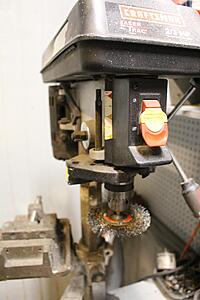
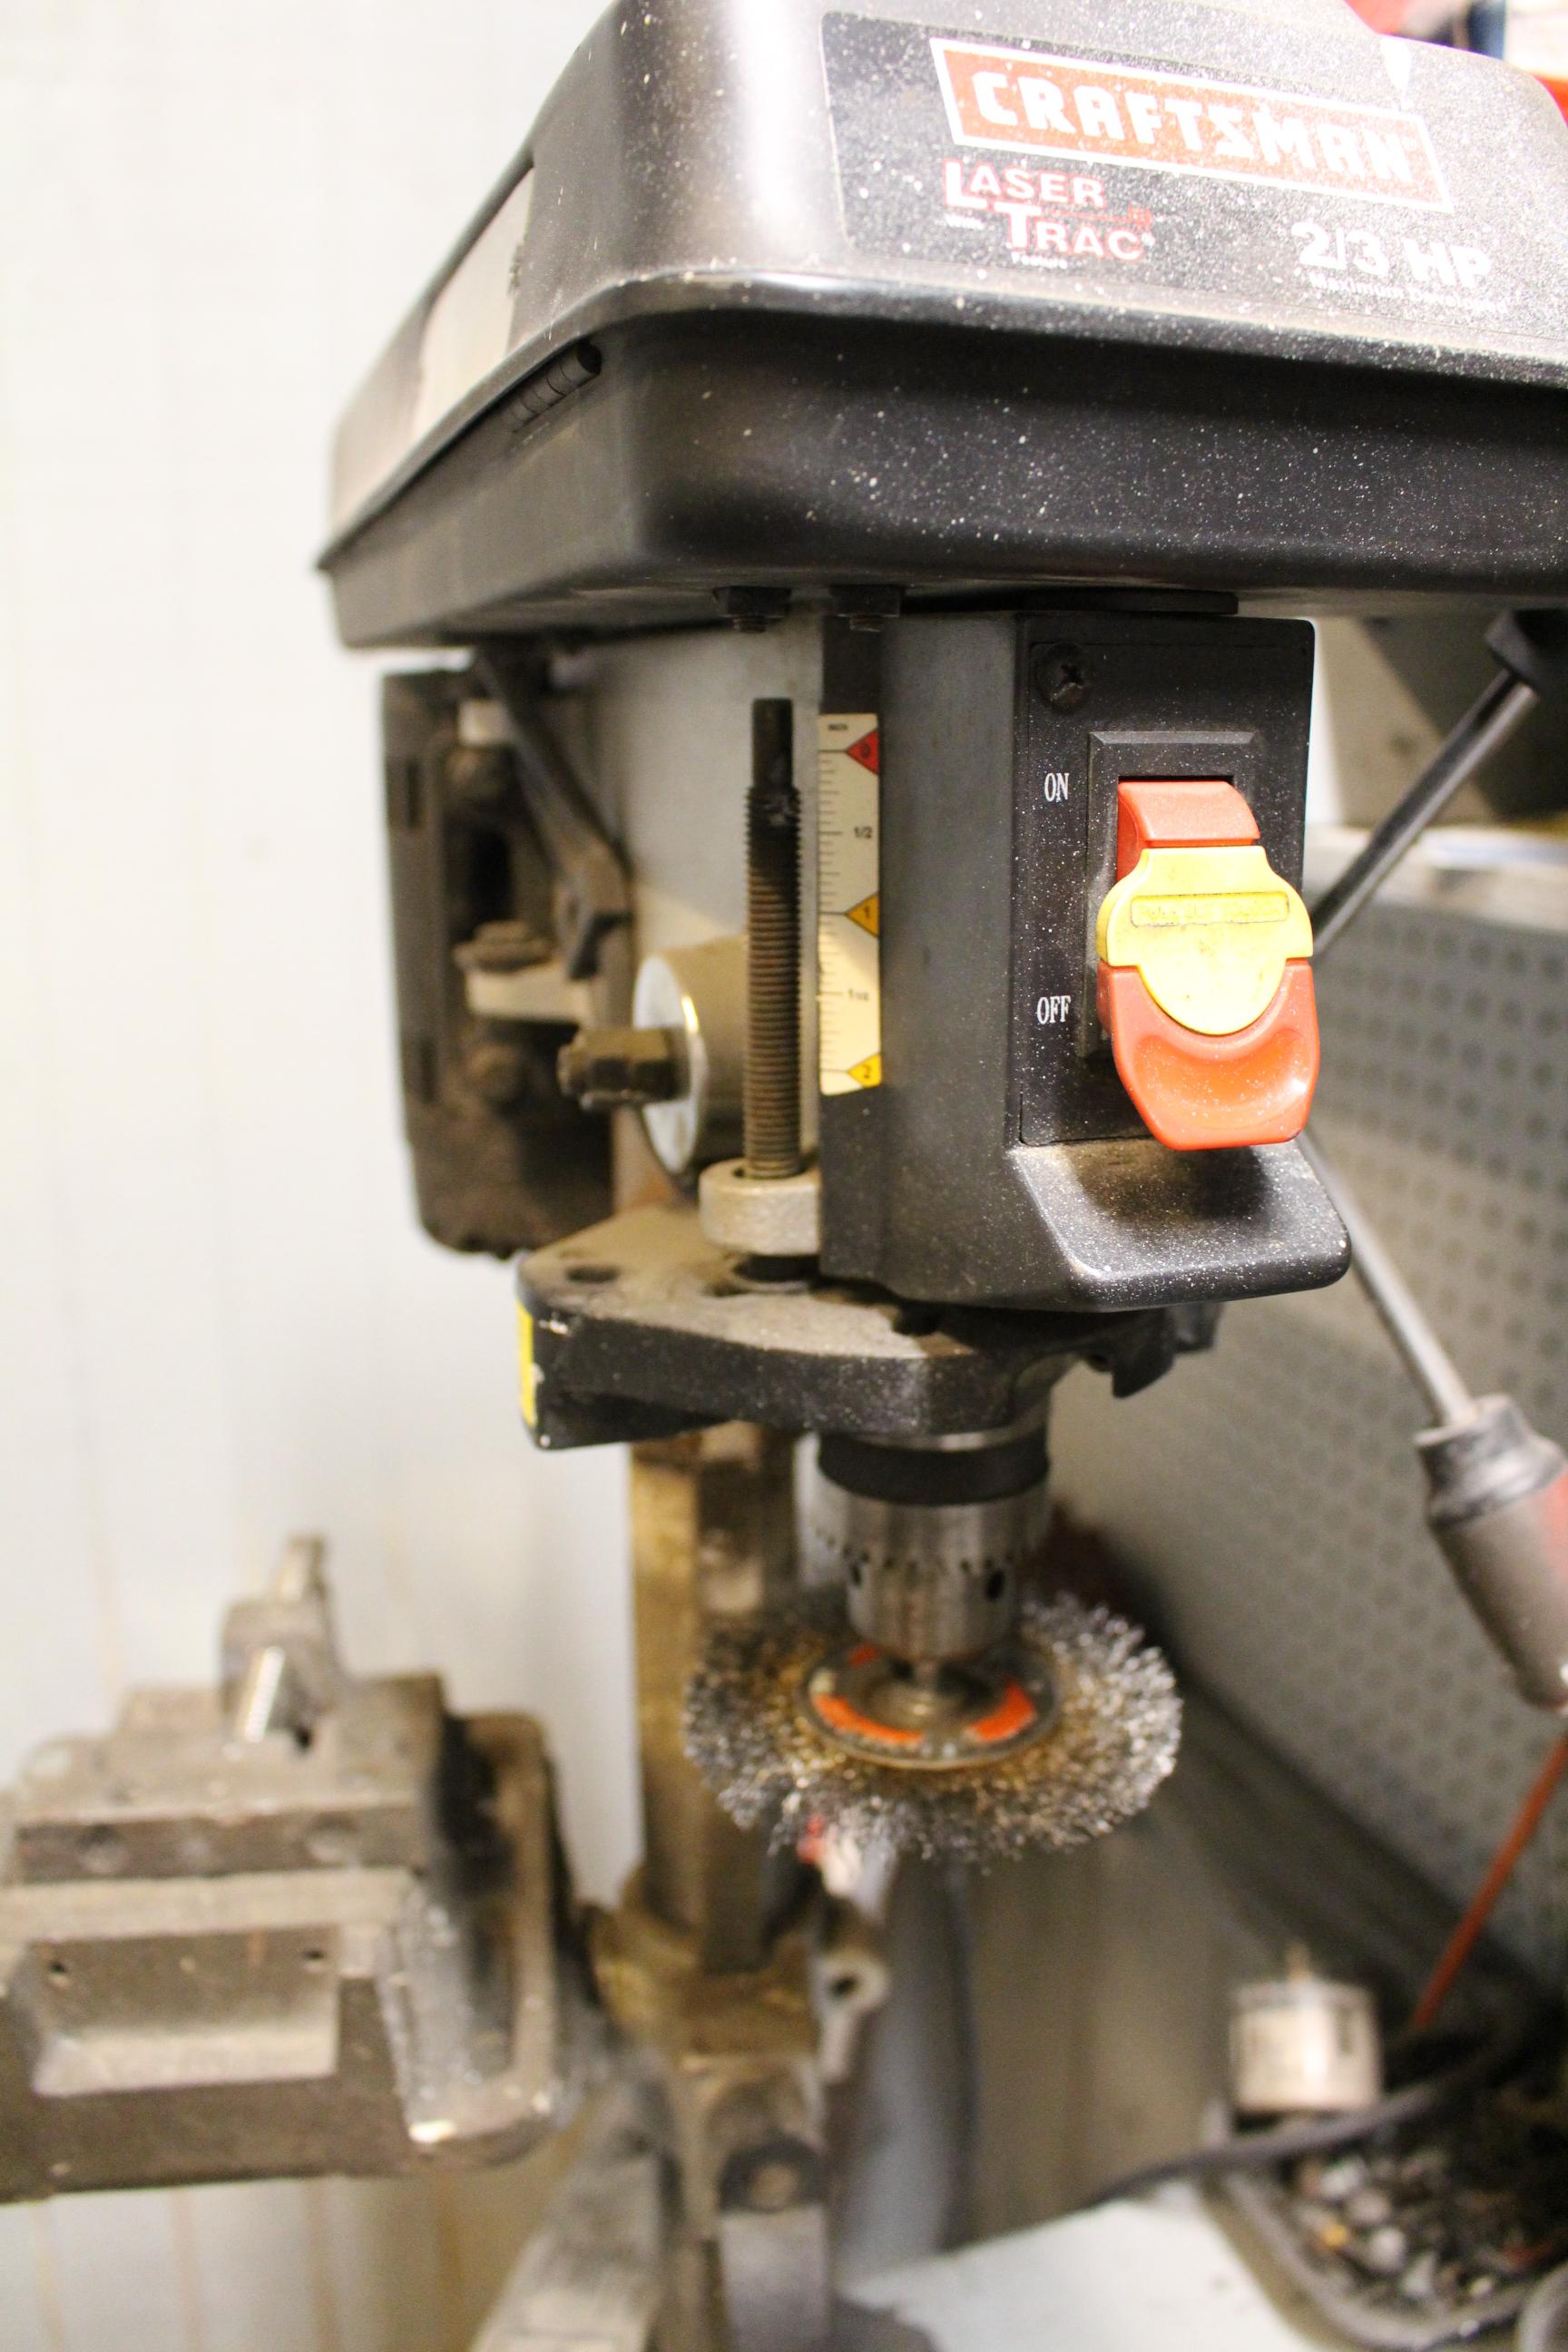
Drill press with a wire wheel, and an angle grinder with a flap wheel were my tools of choice.
much better
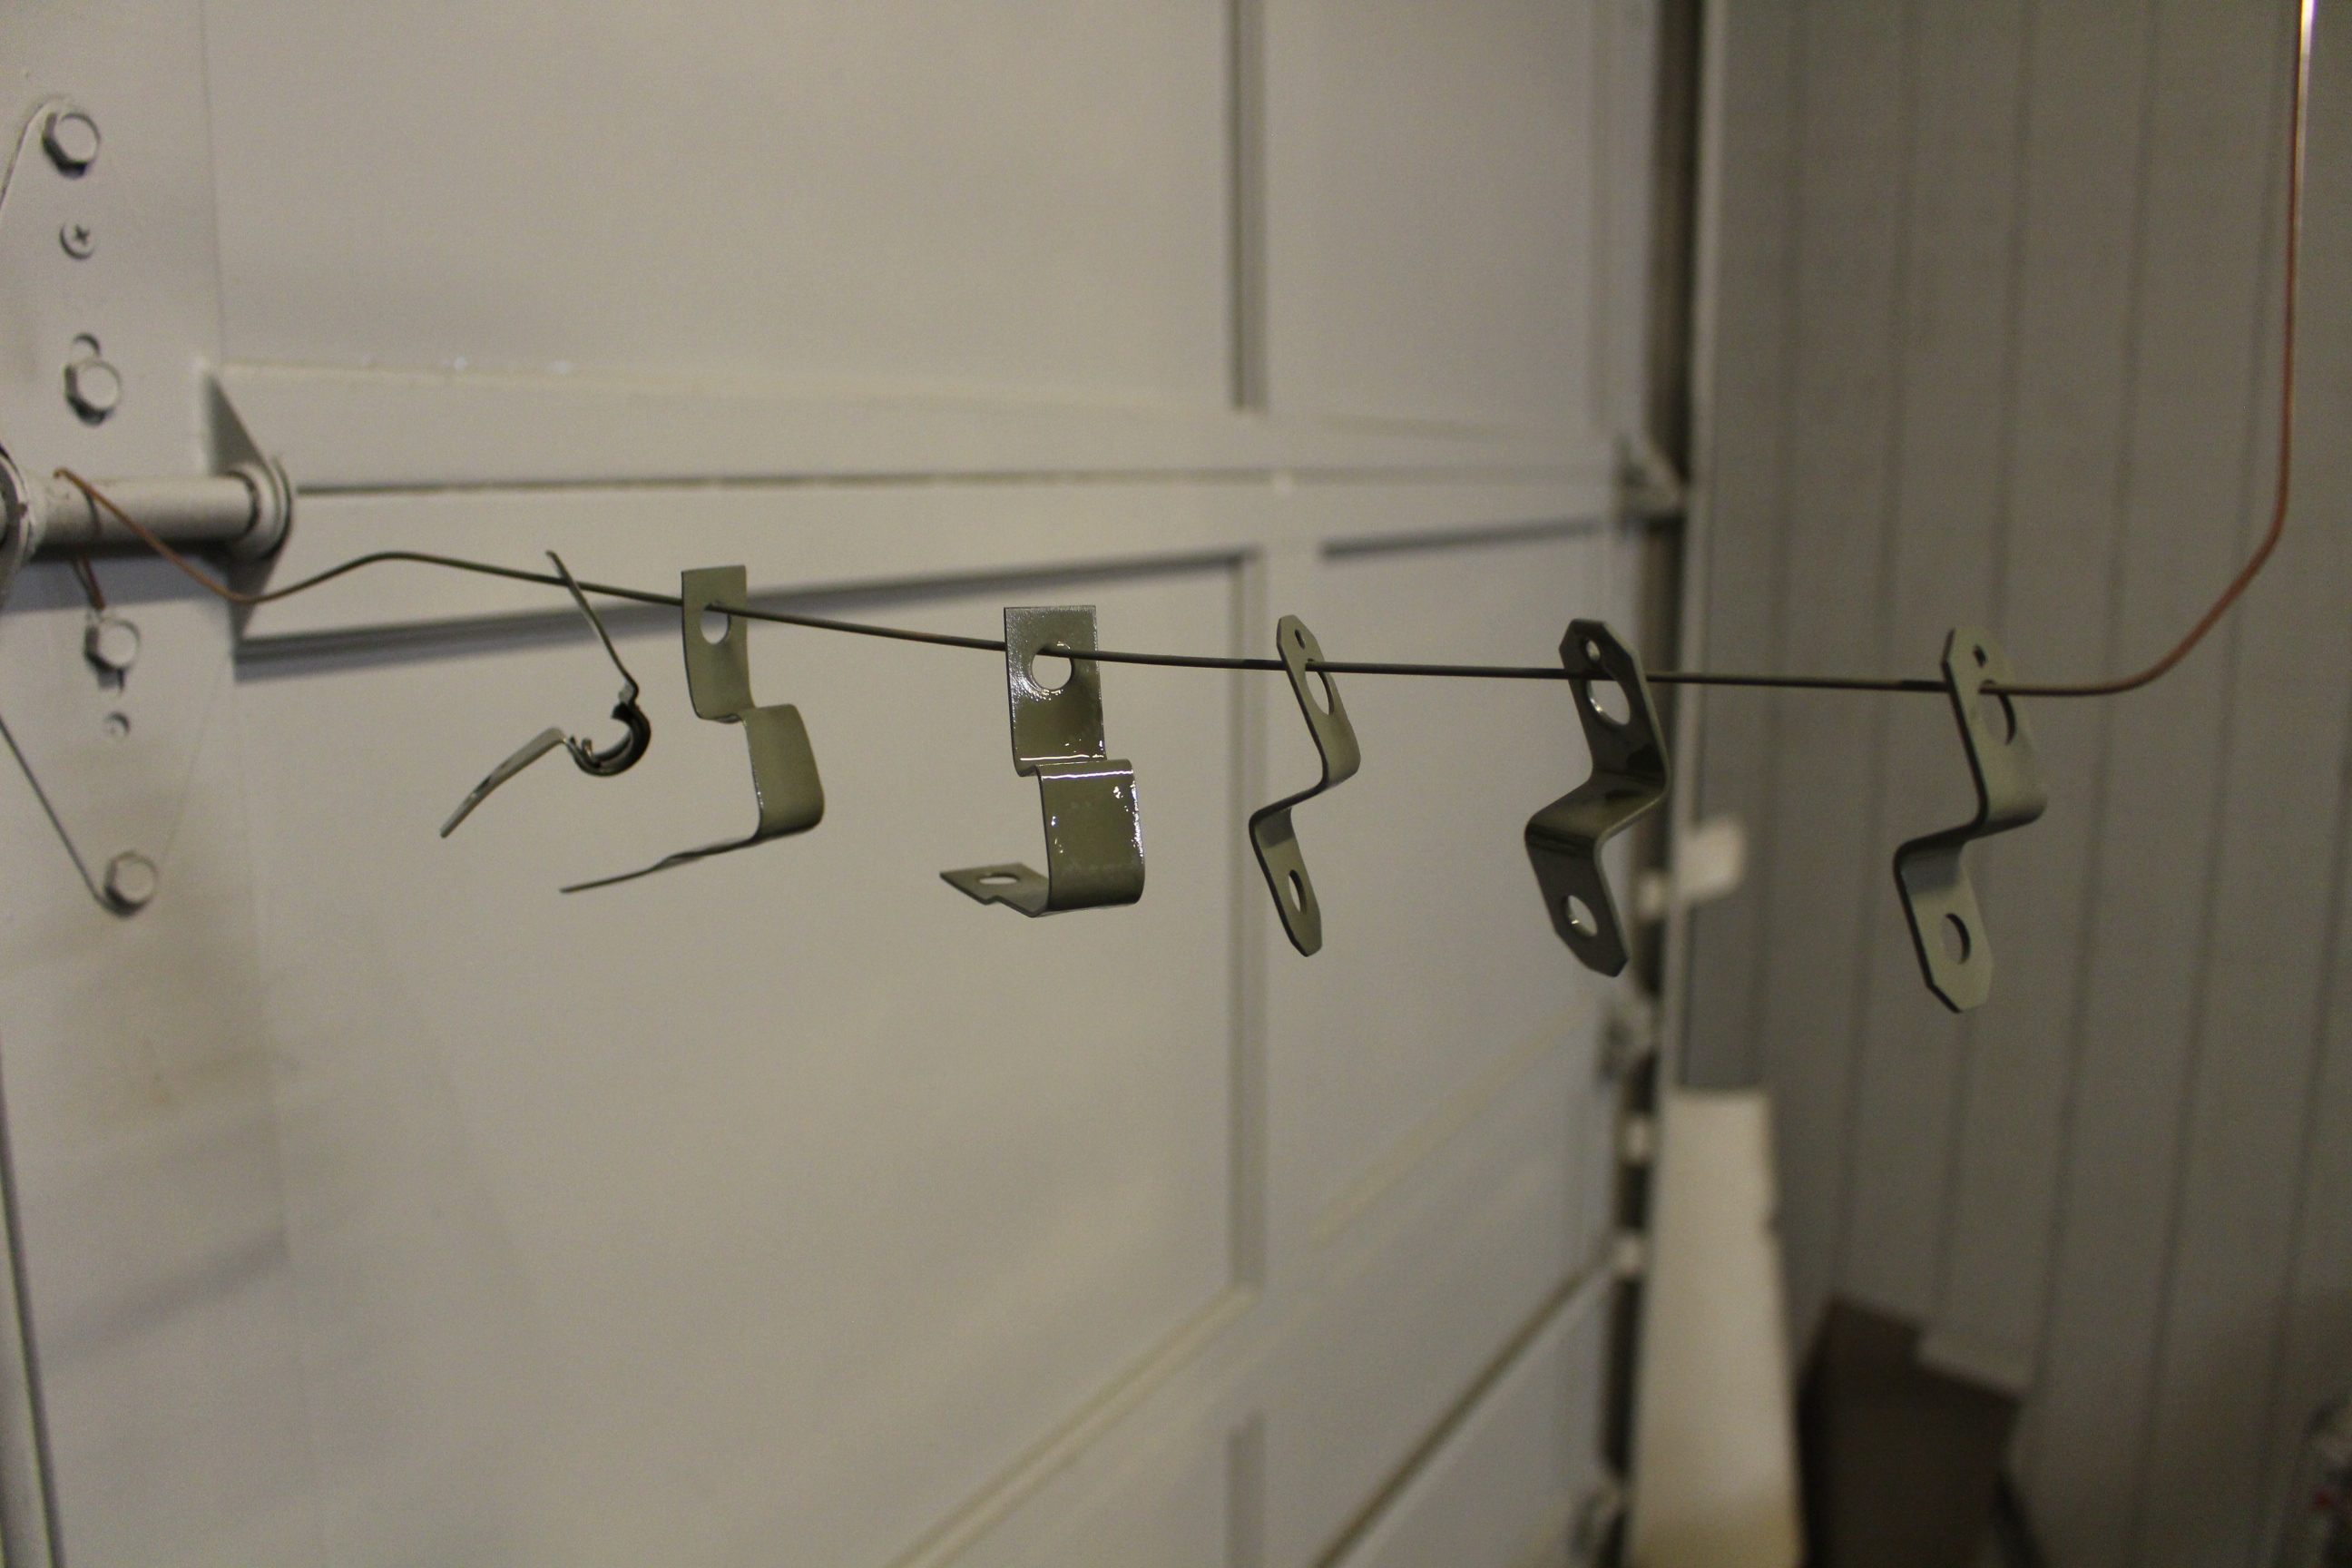
Acid Etch Primed
Couple coats of Aluminum colored rustoleum
Back together. I coated the rubber bushings in the two band clamps with dielectric grease to keep them soft and help prevent corrosion inside the clamp.
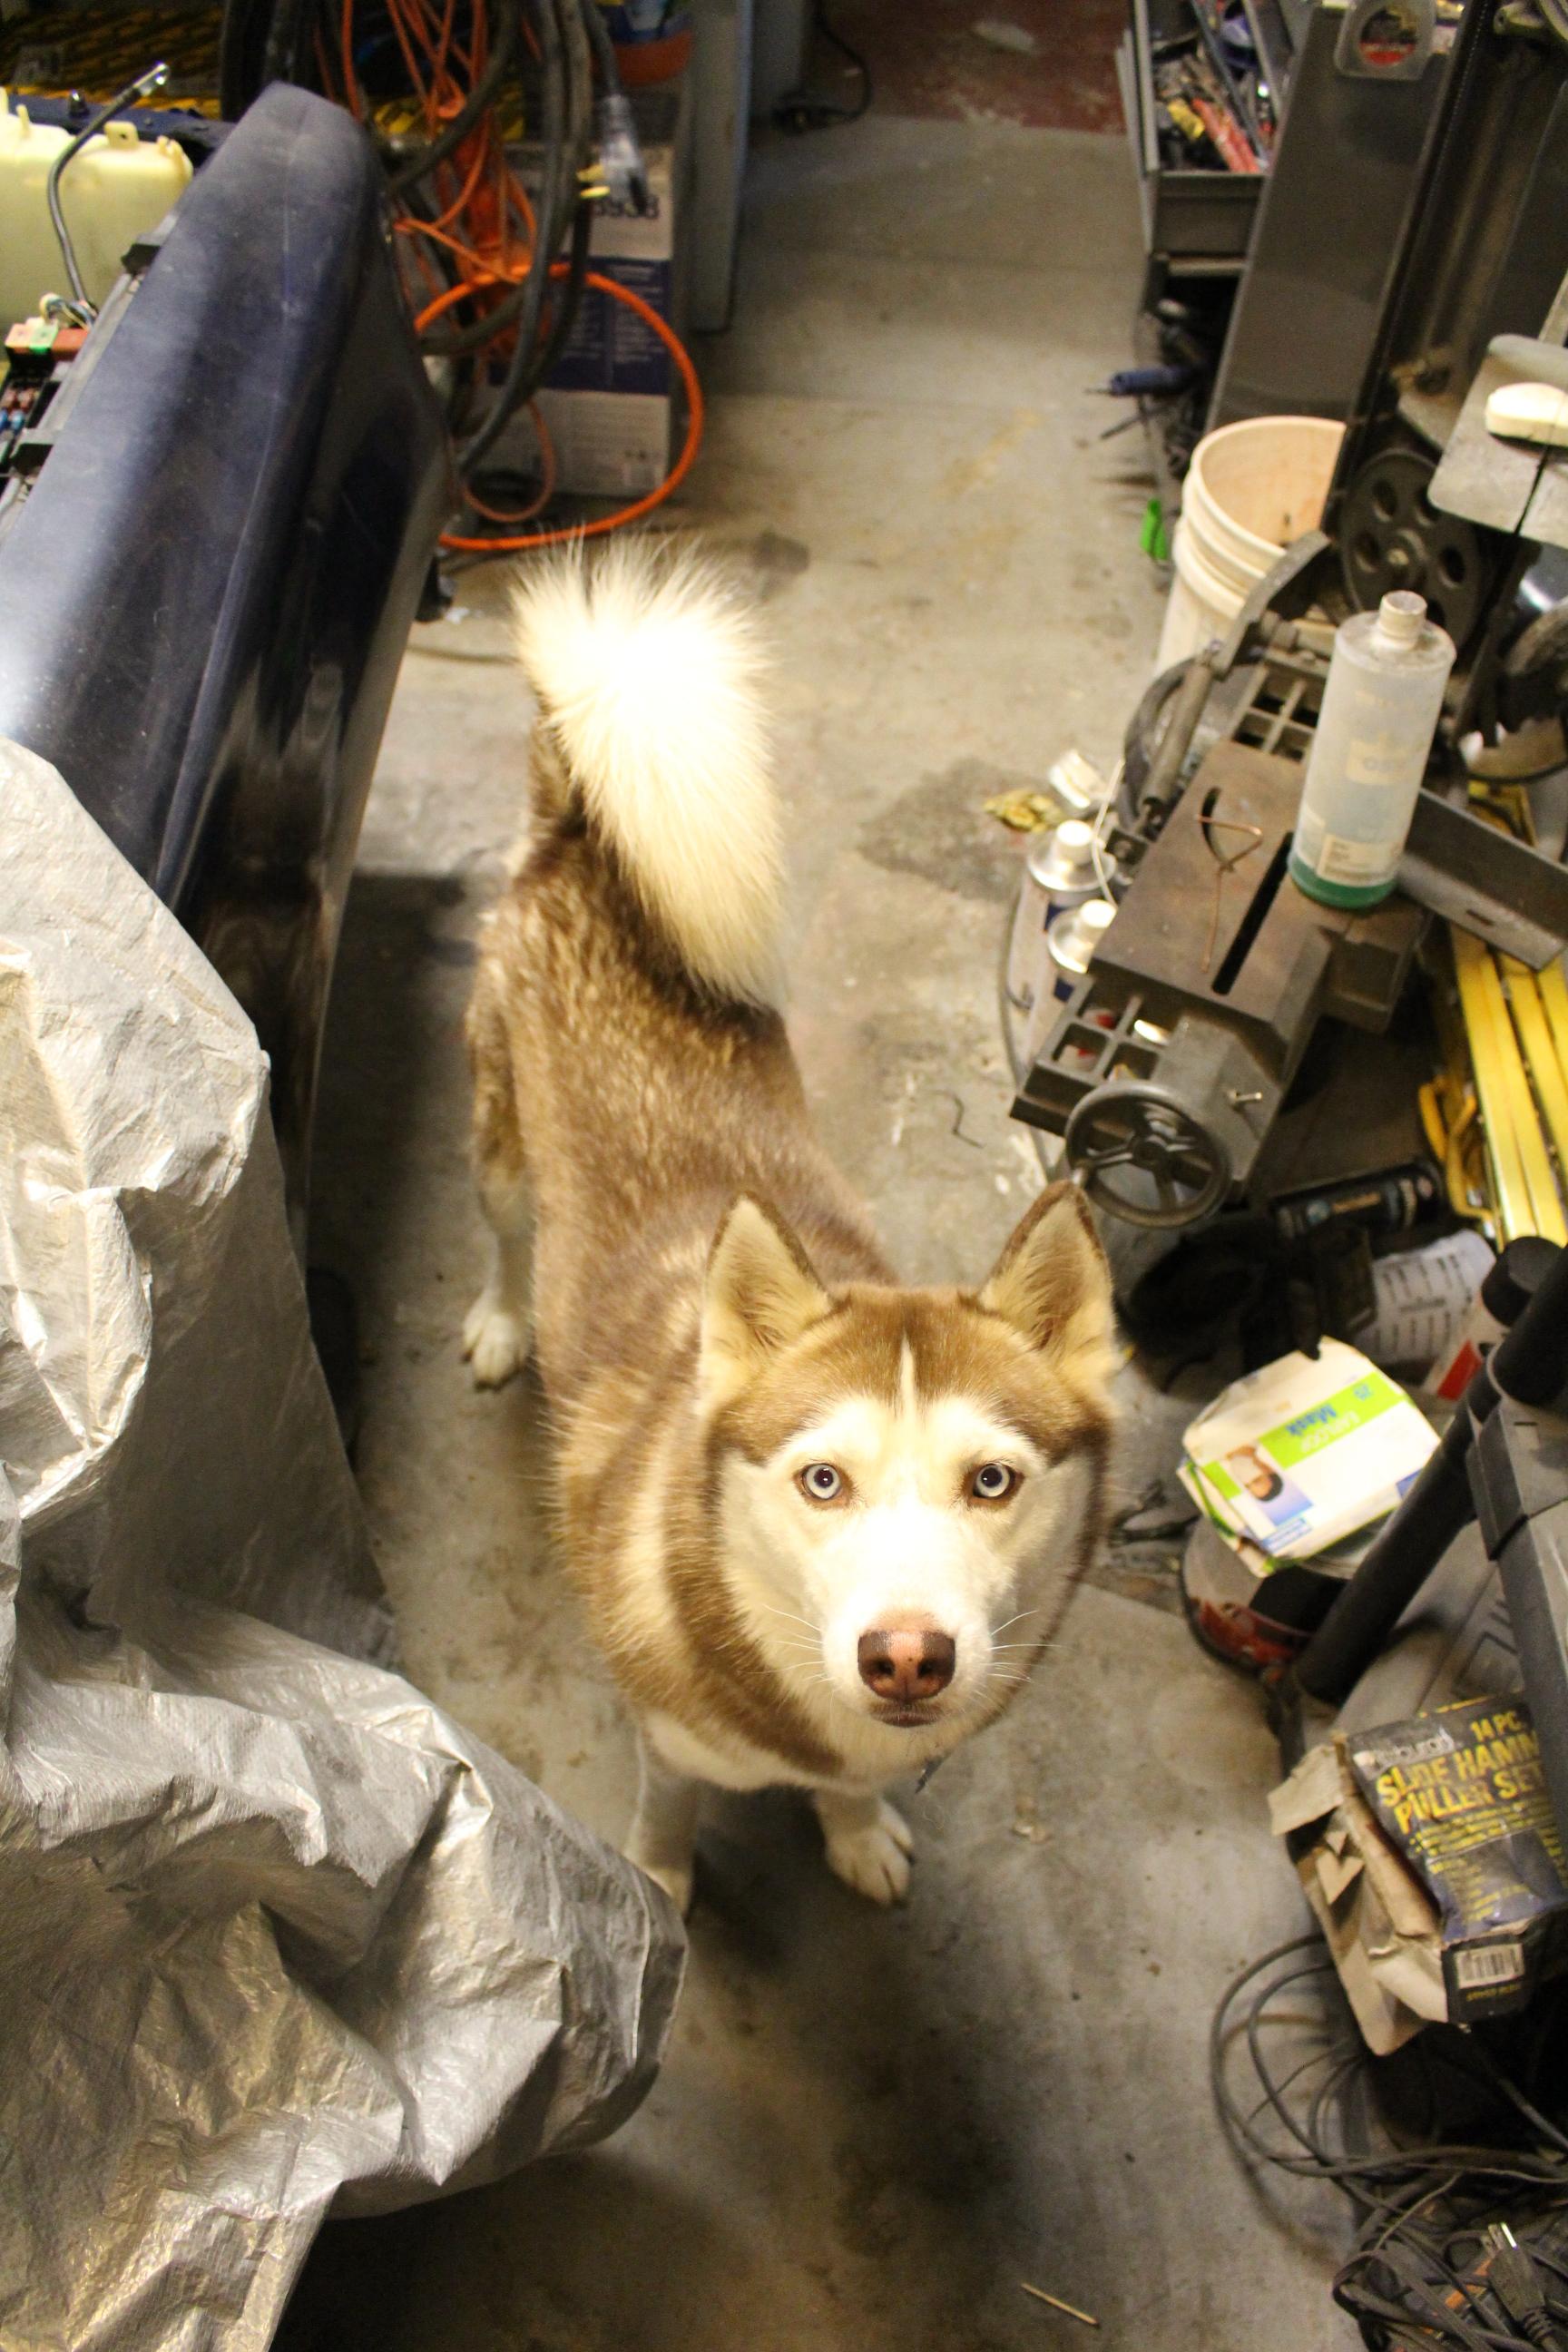
My pup Artemis helping find frogs. Sure enough she found one under the truck!

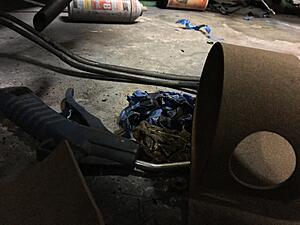
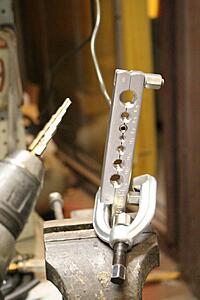
New lines bent up. I used a tubing cutter to cut the flares off one end to remove the nuts since I will be using rubber hose clamped on both ends like stock.

I then used a double flare tool to put an end back off it to keep the hose clamp from slipping off.
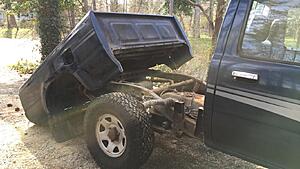
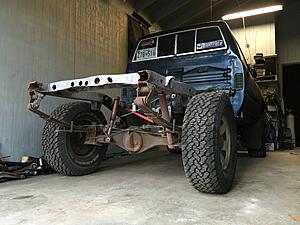
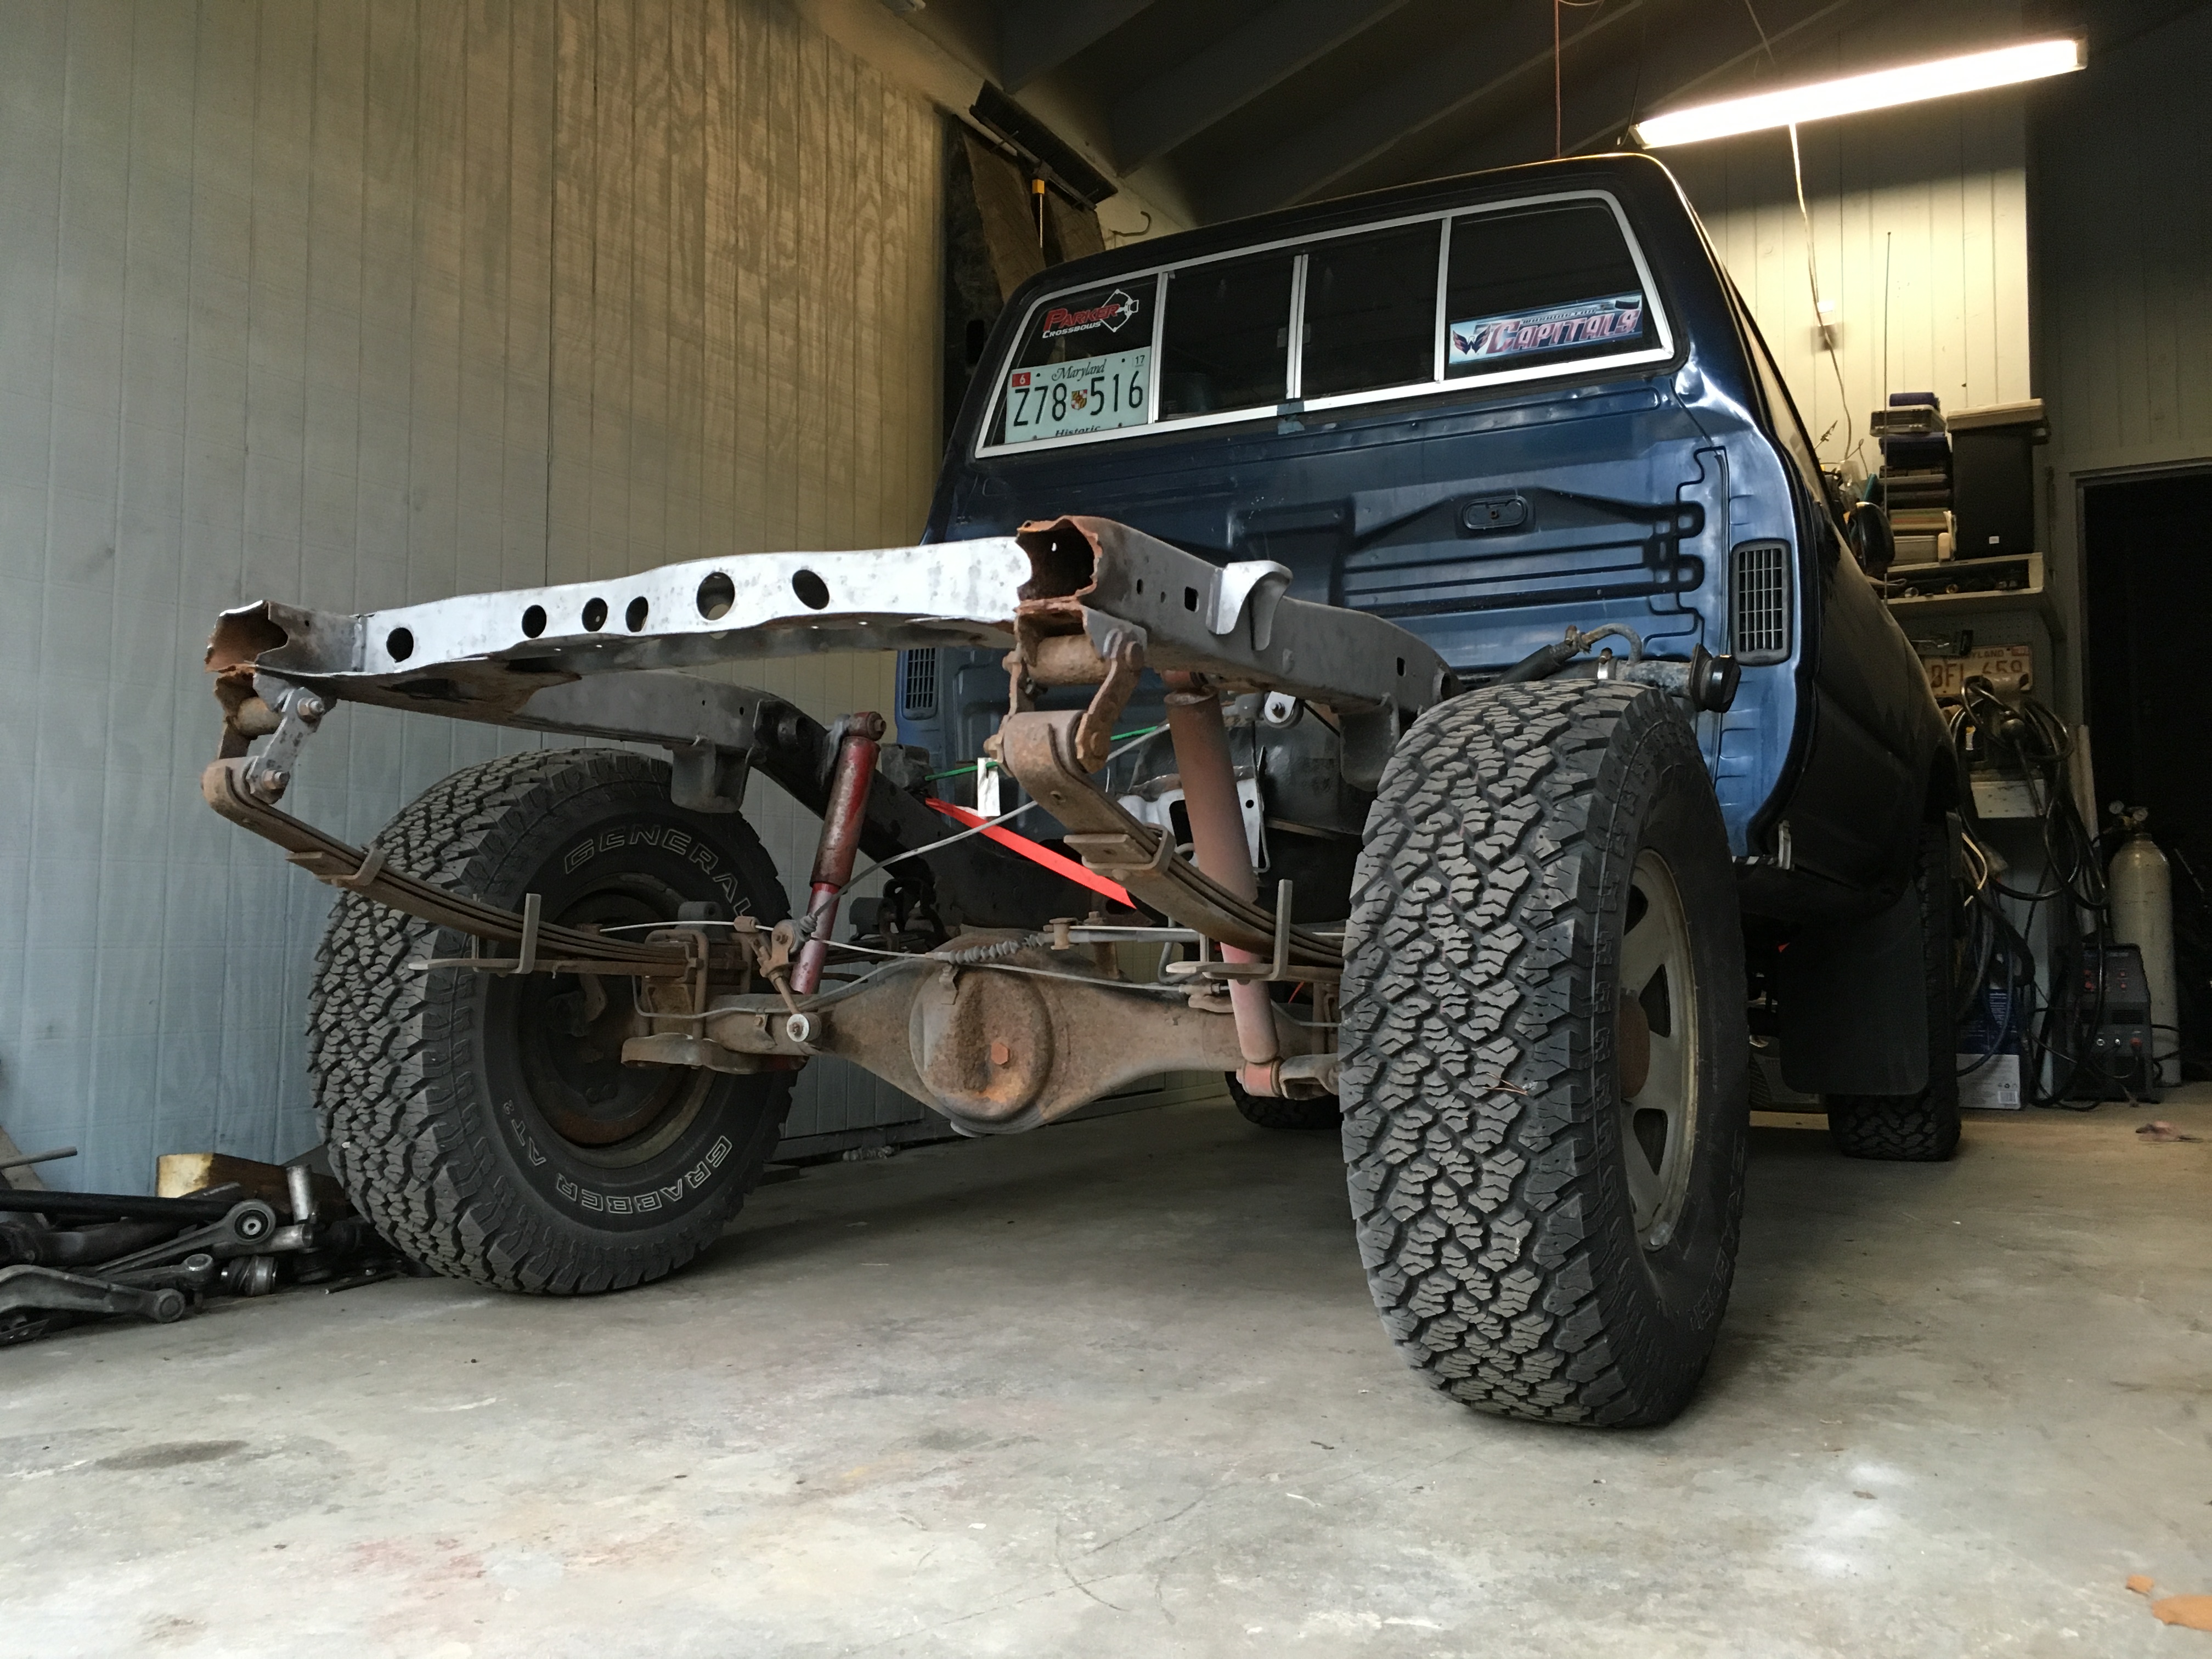
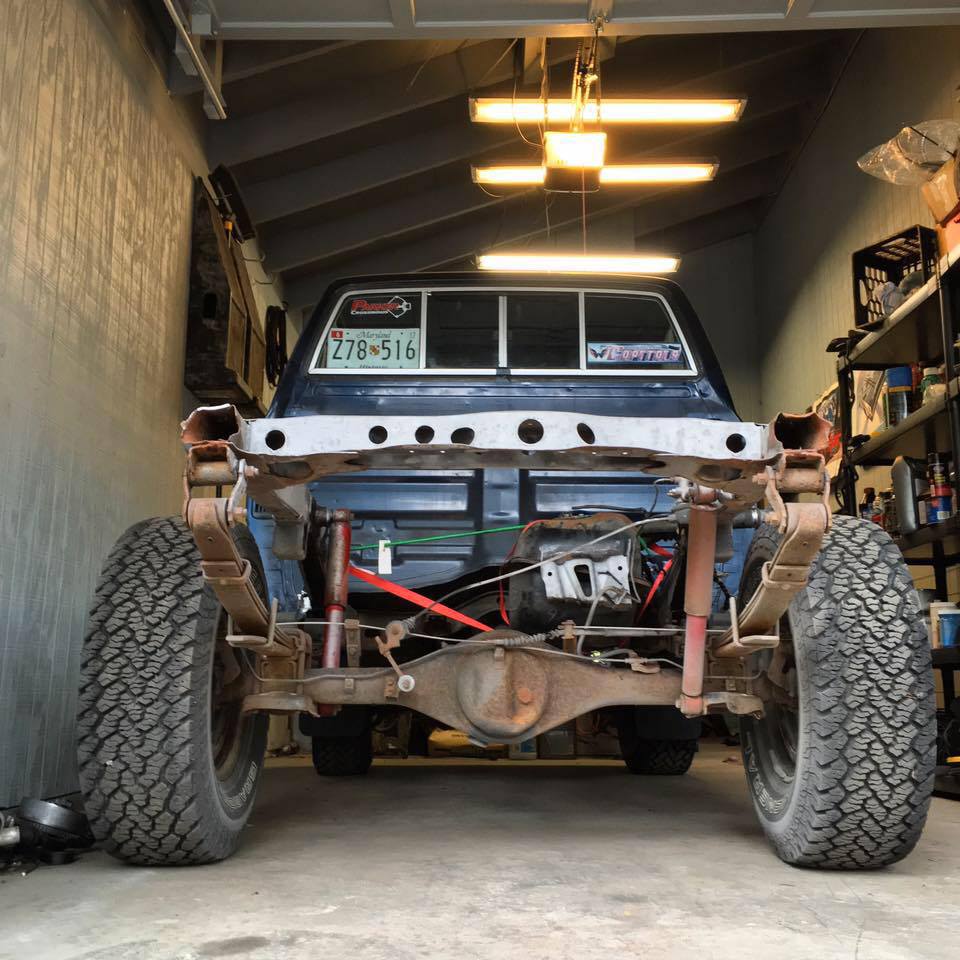
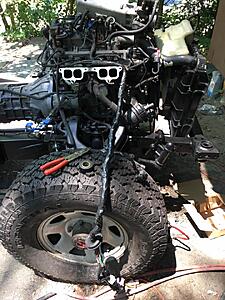
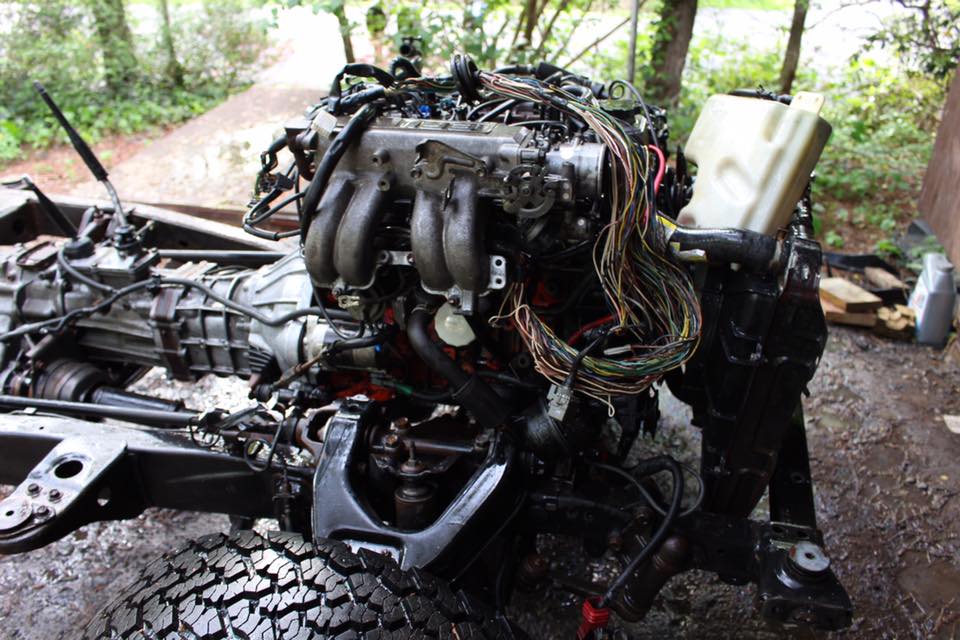
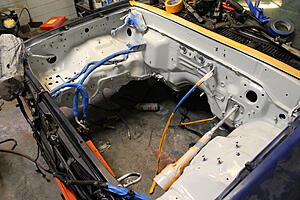
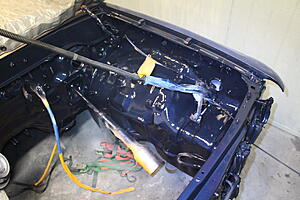
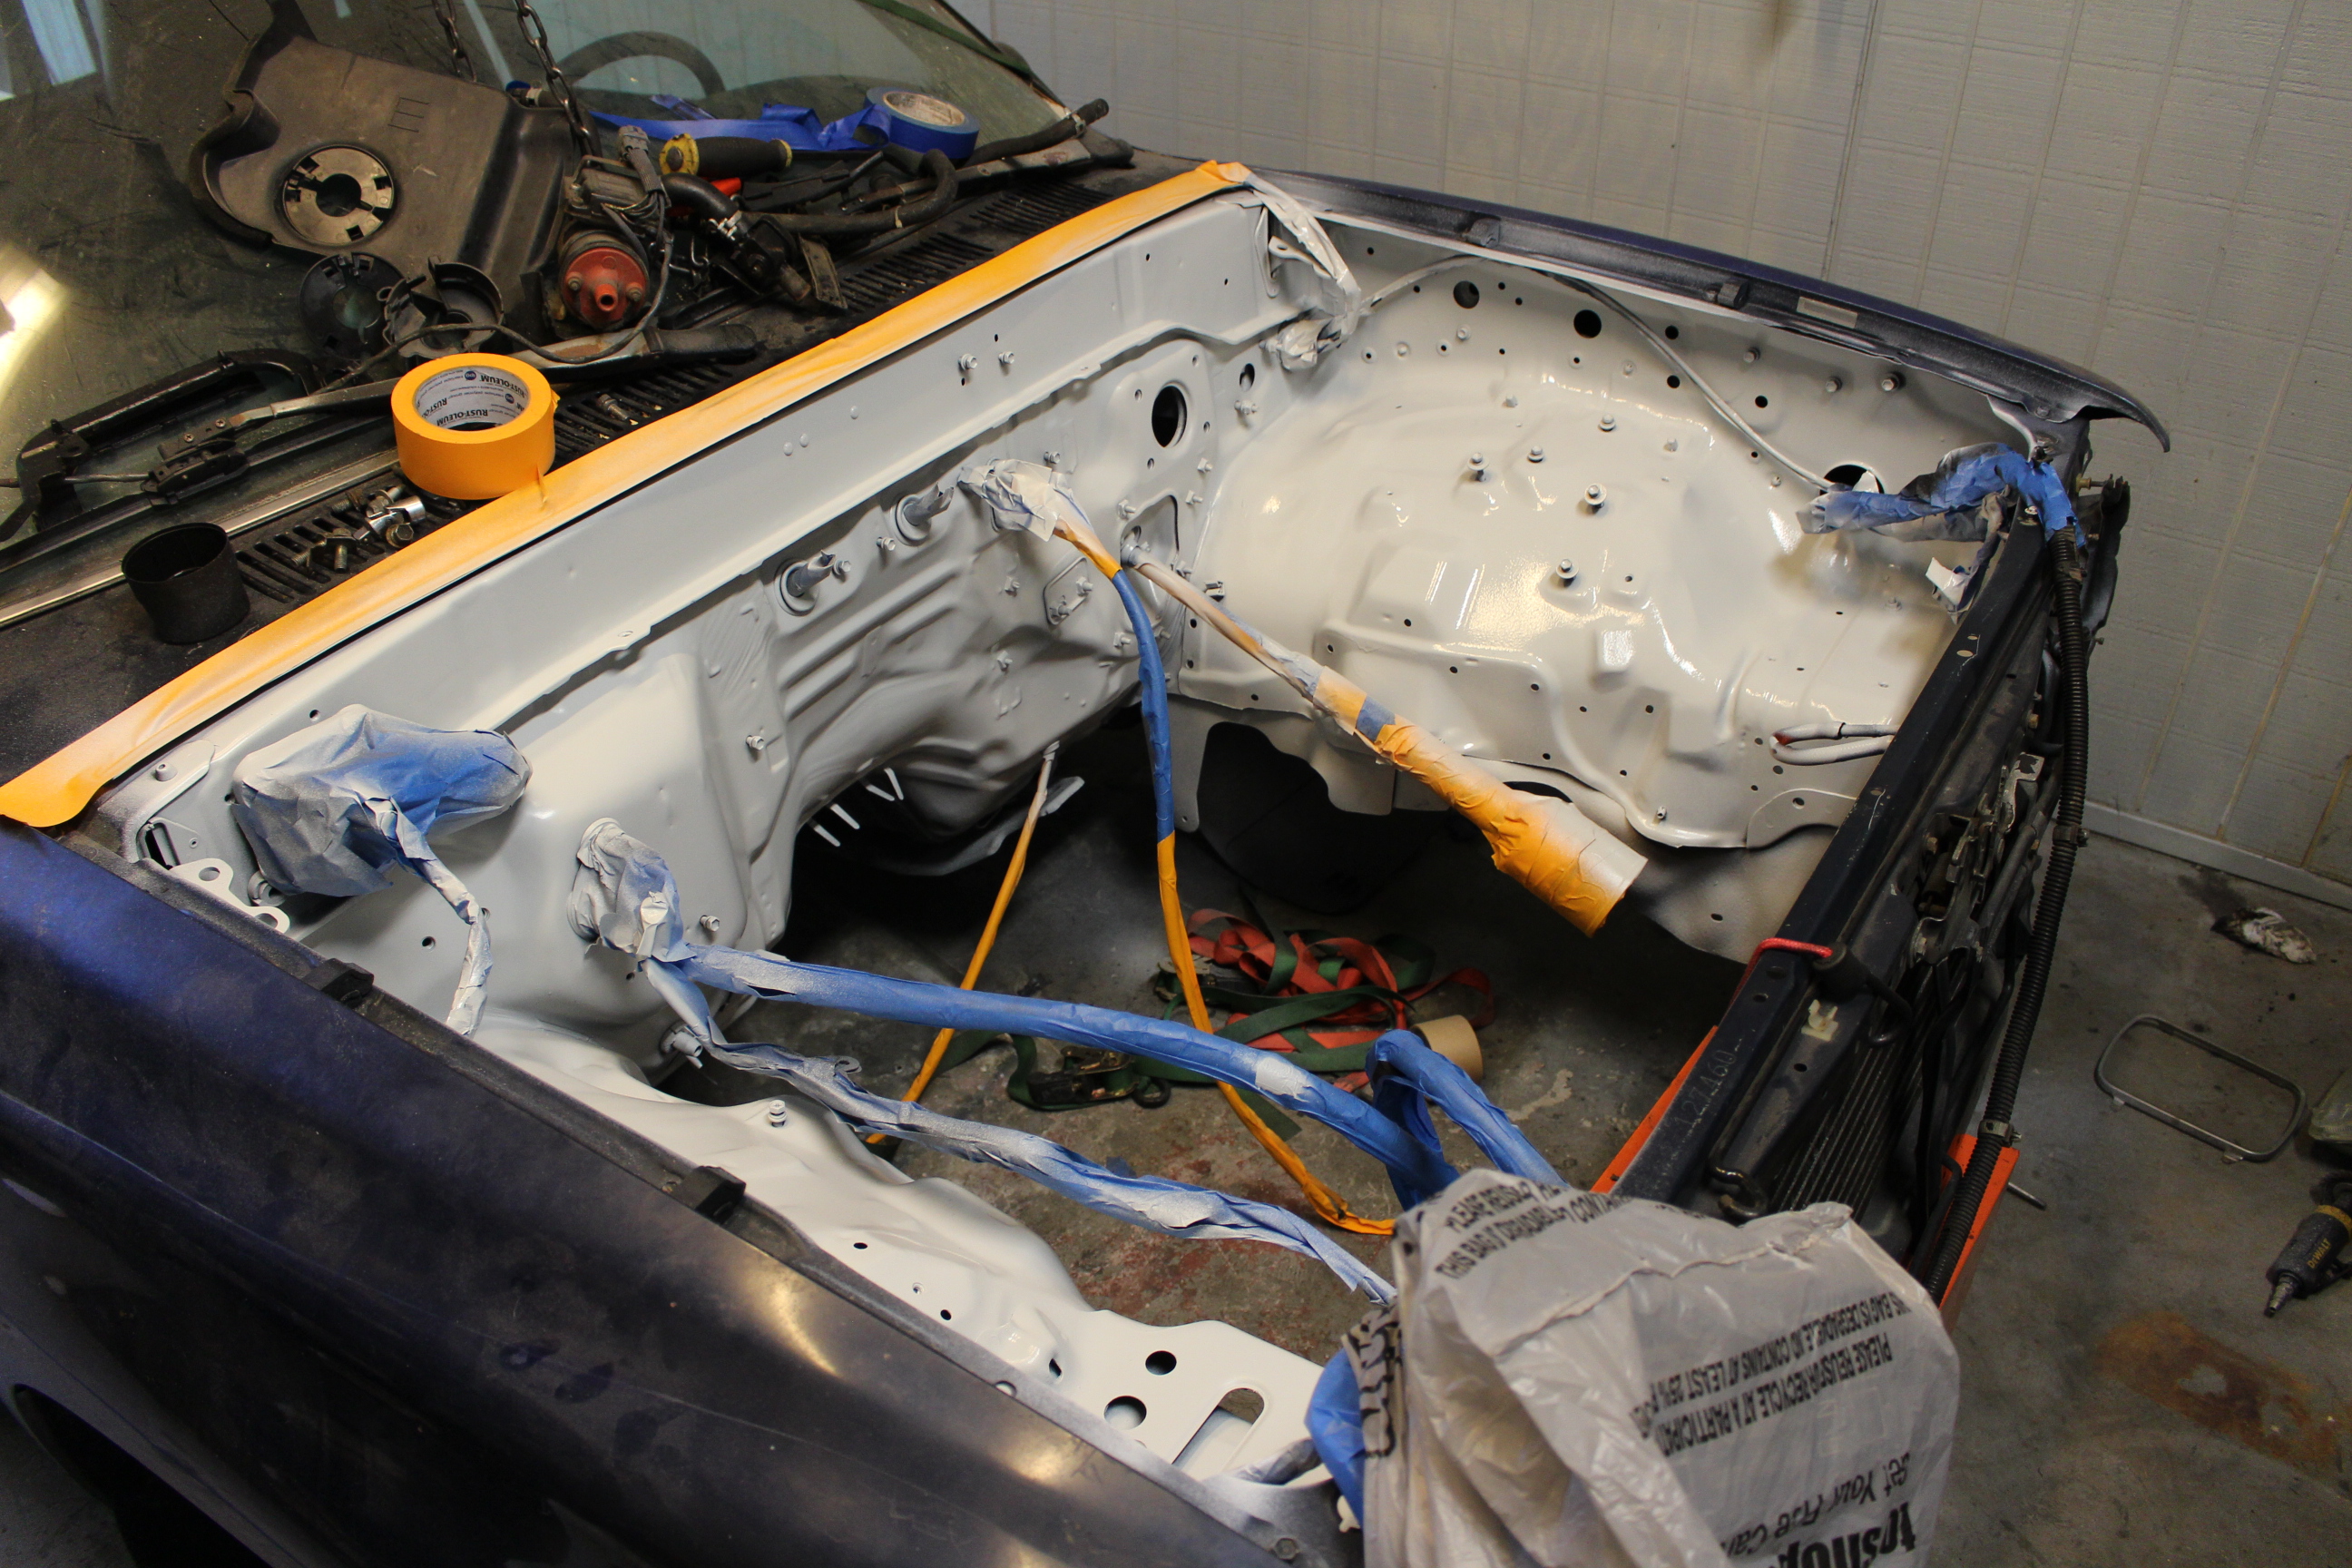
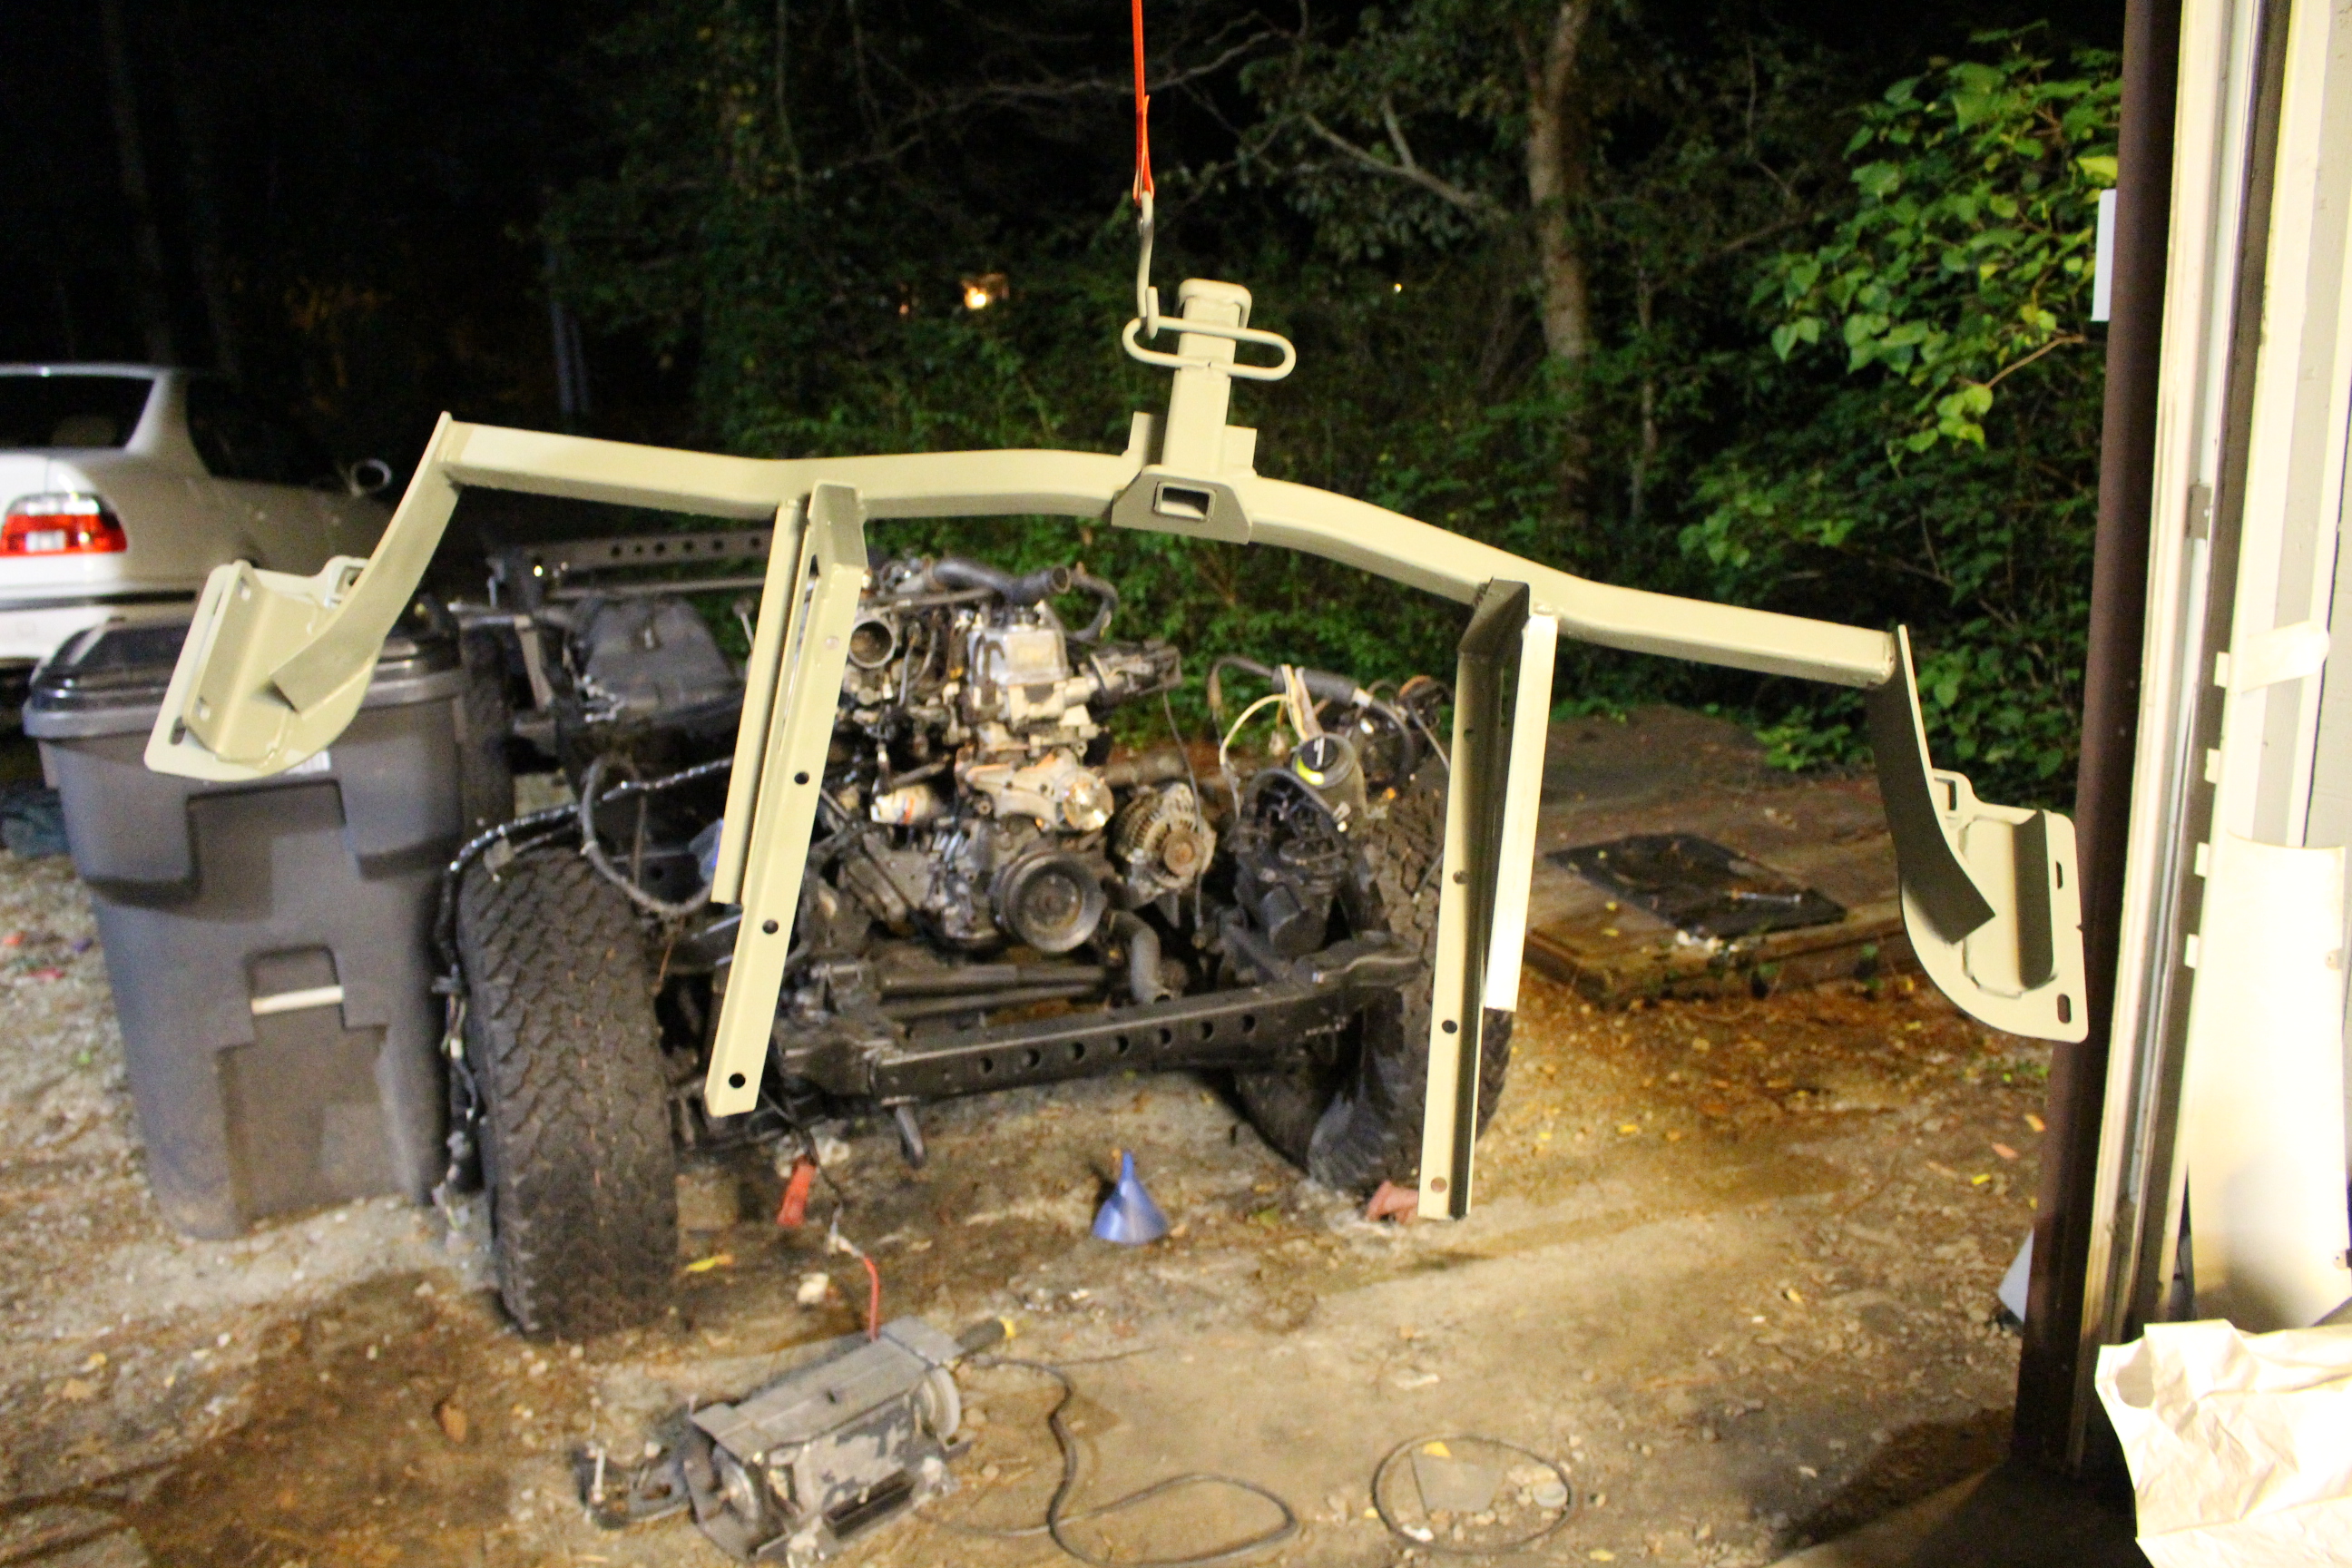
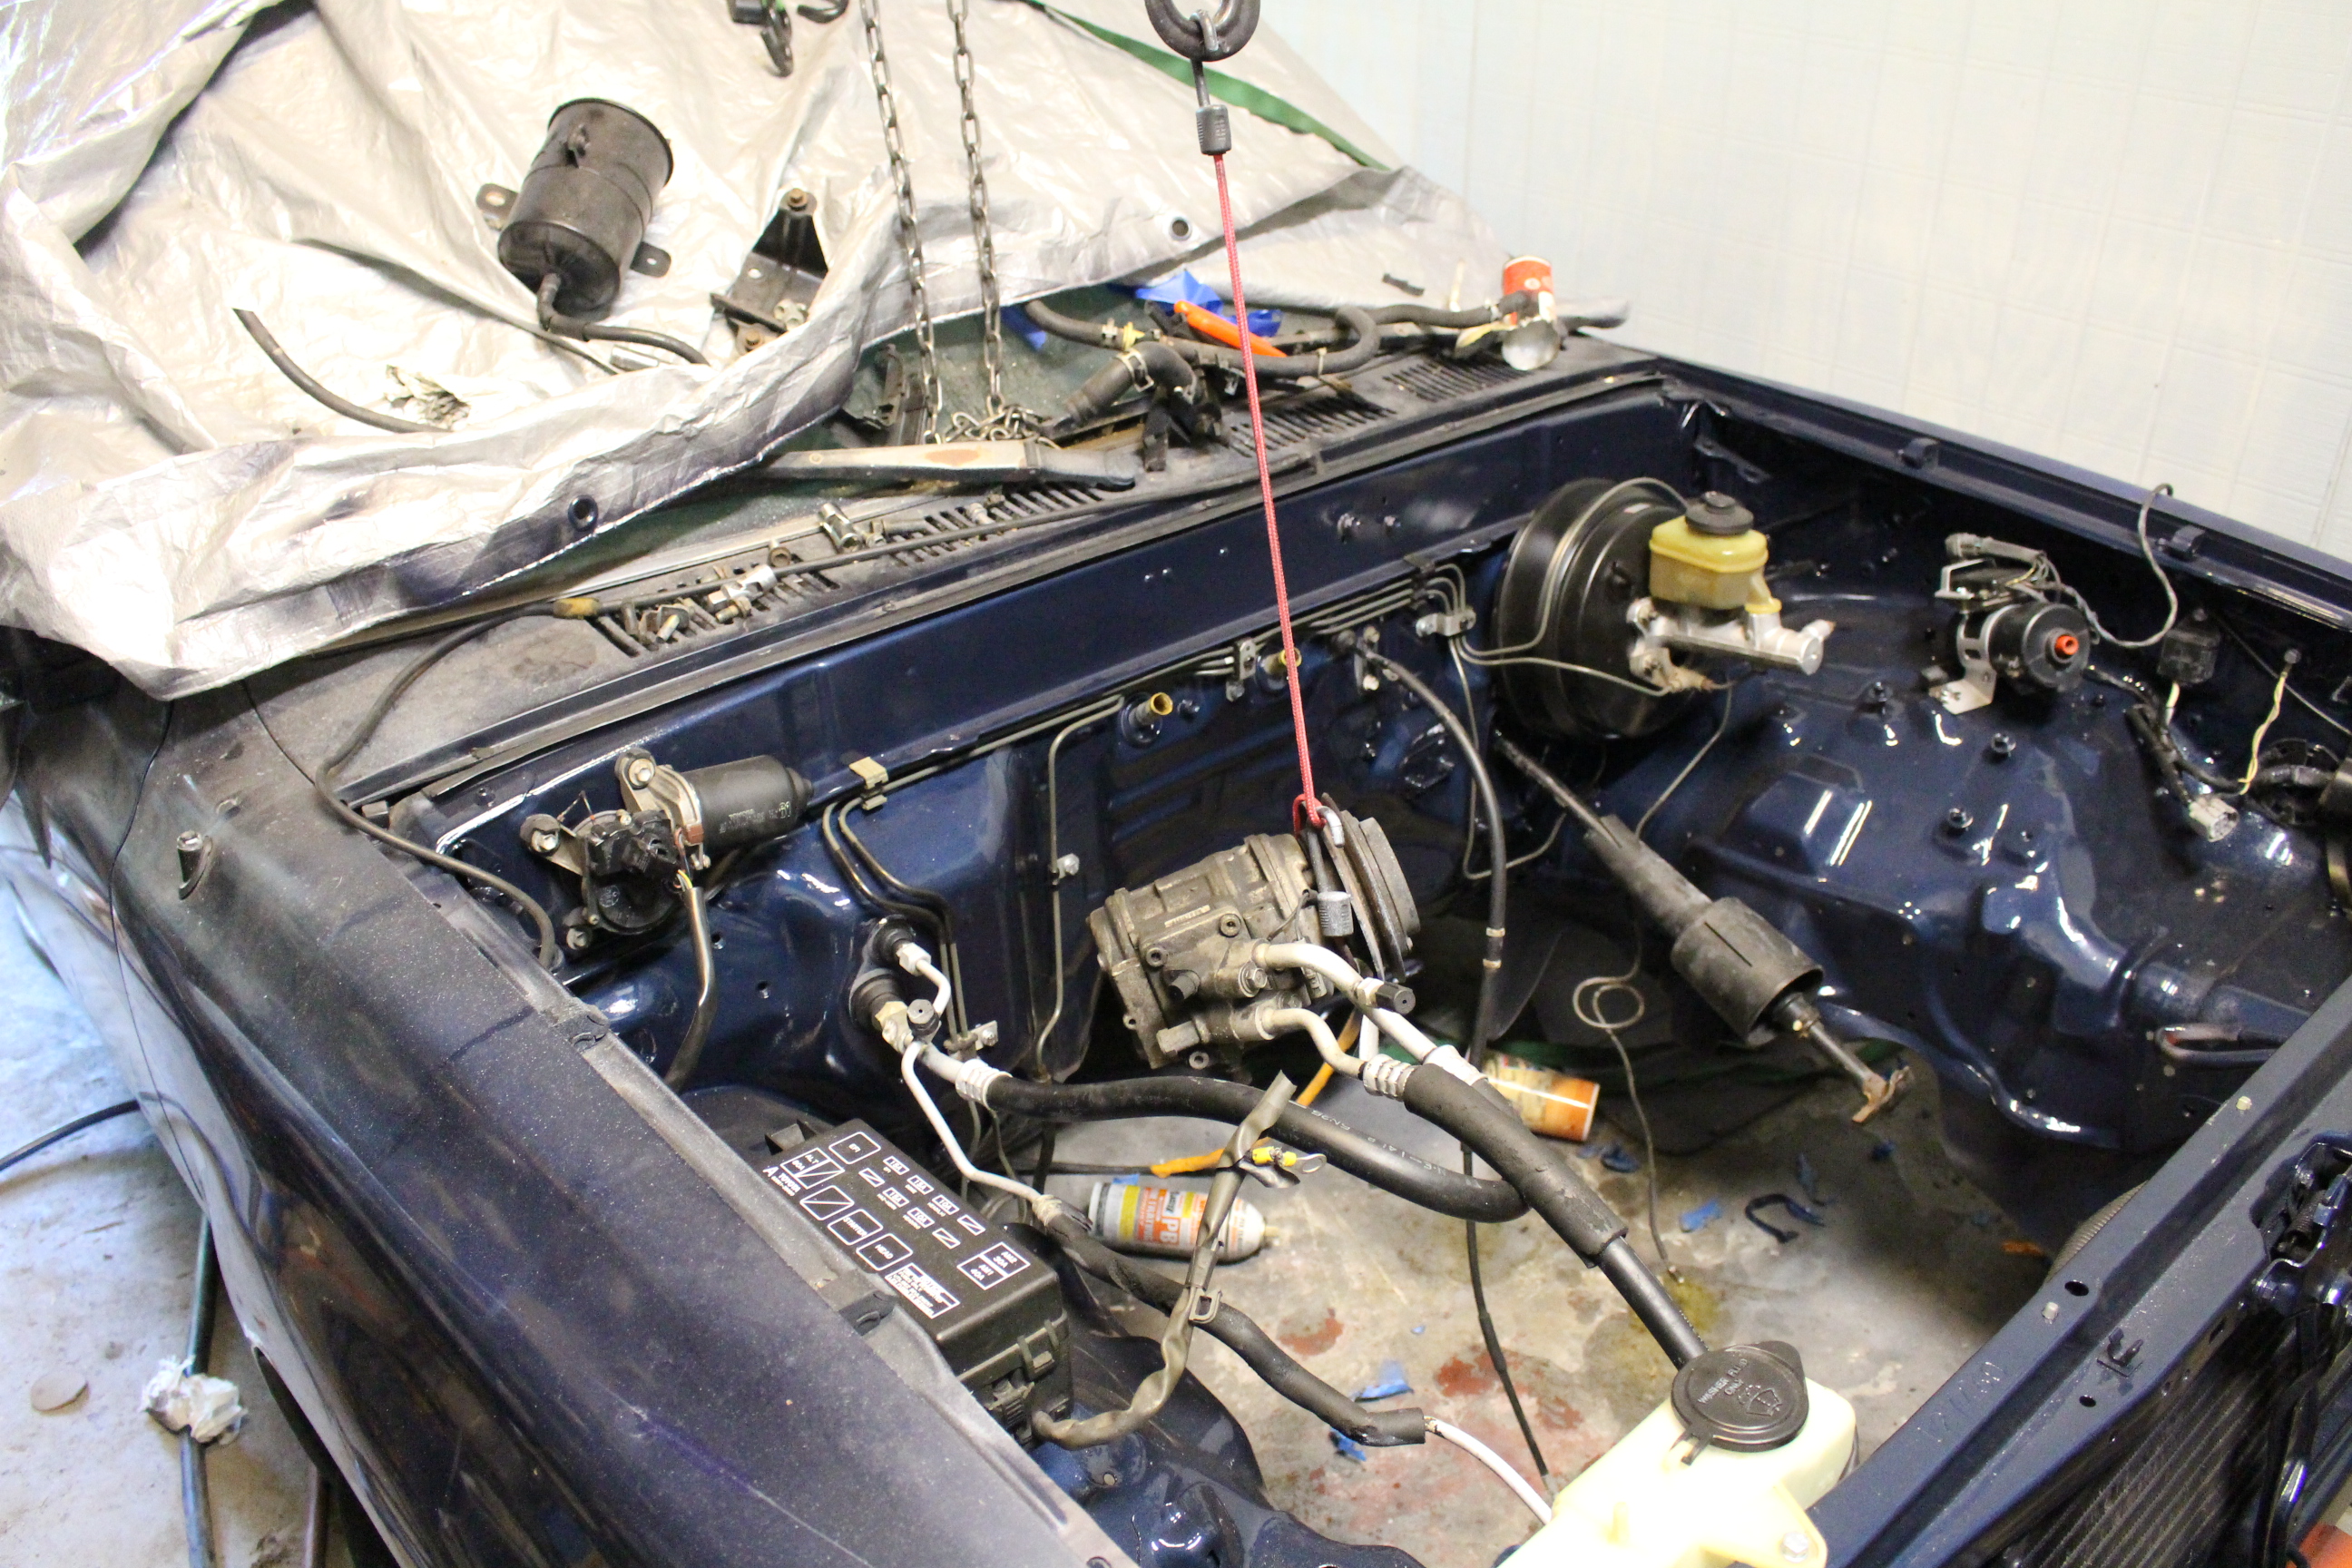
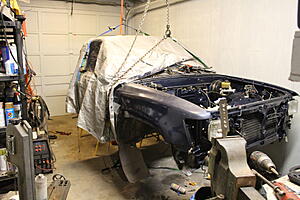
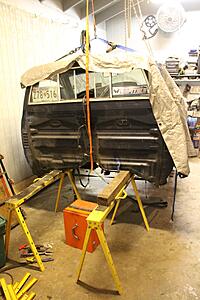
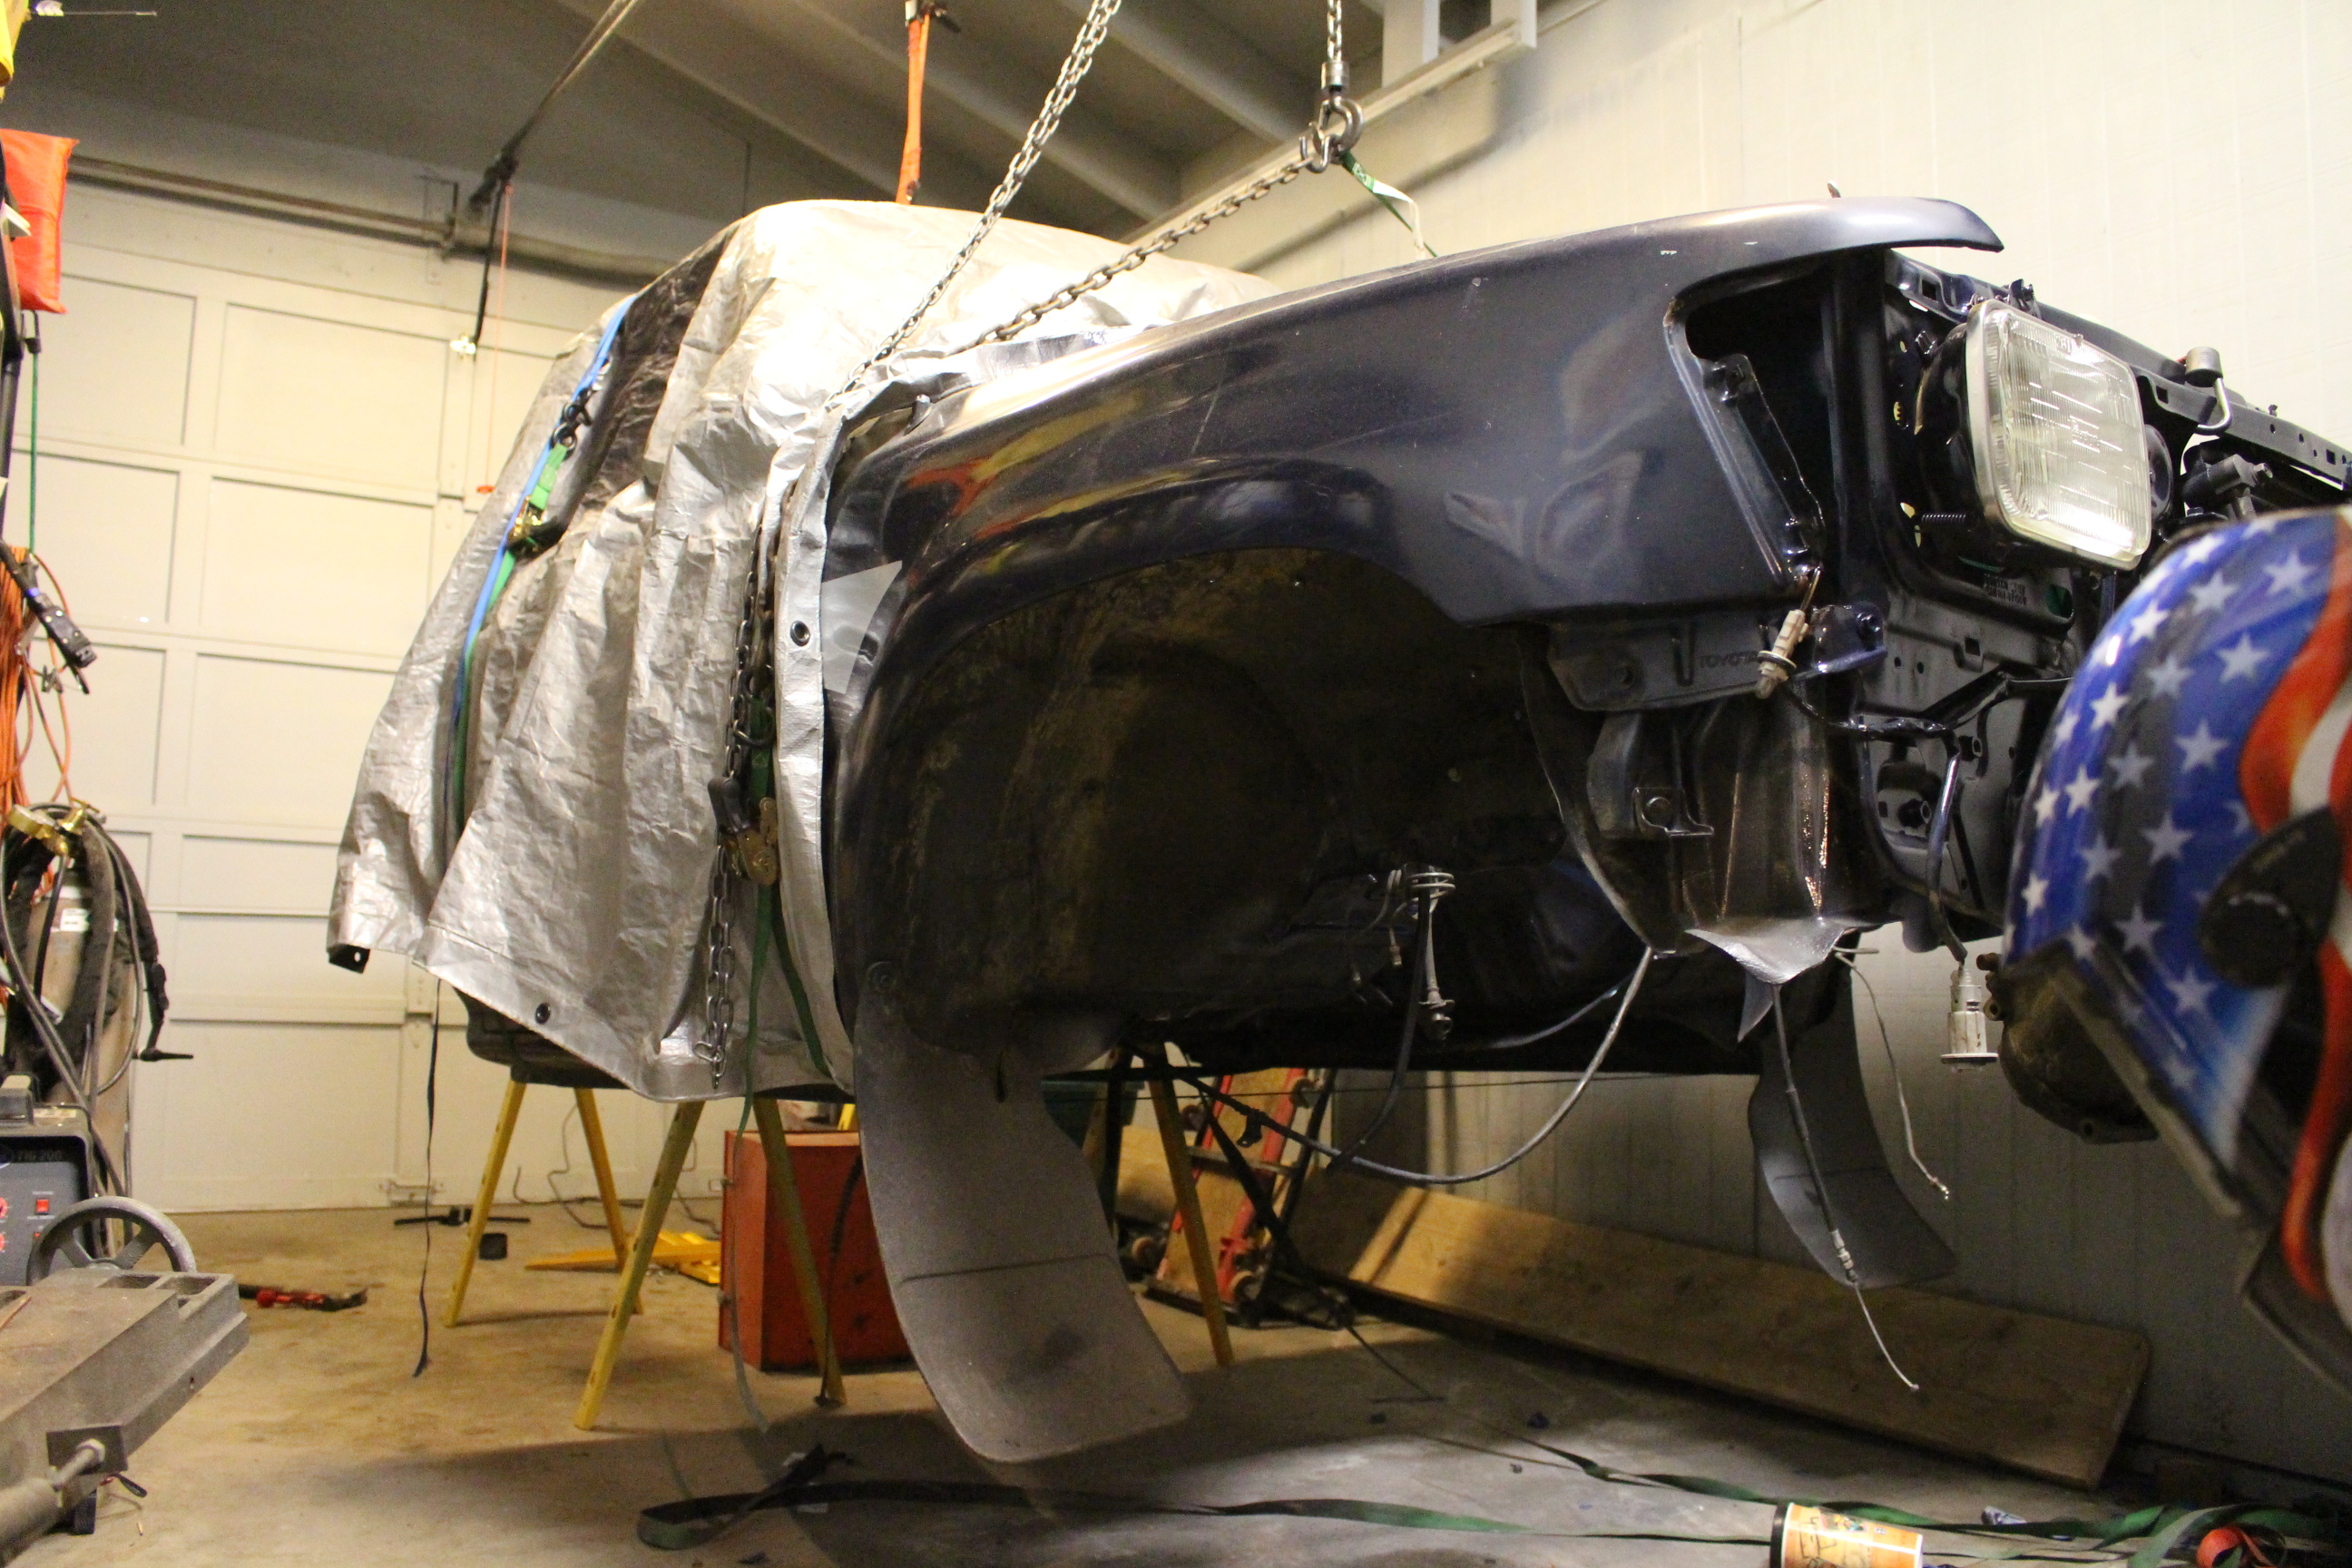
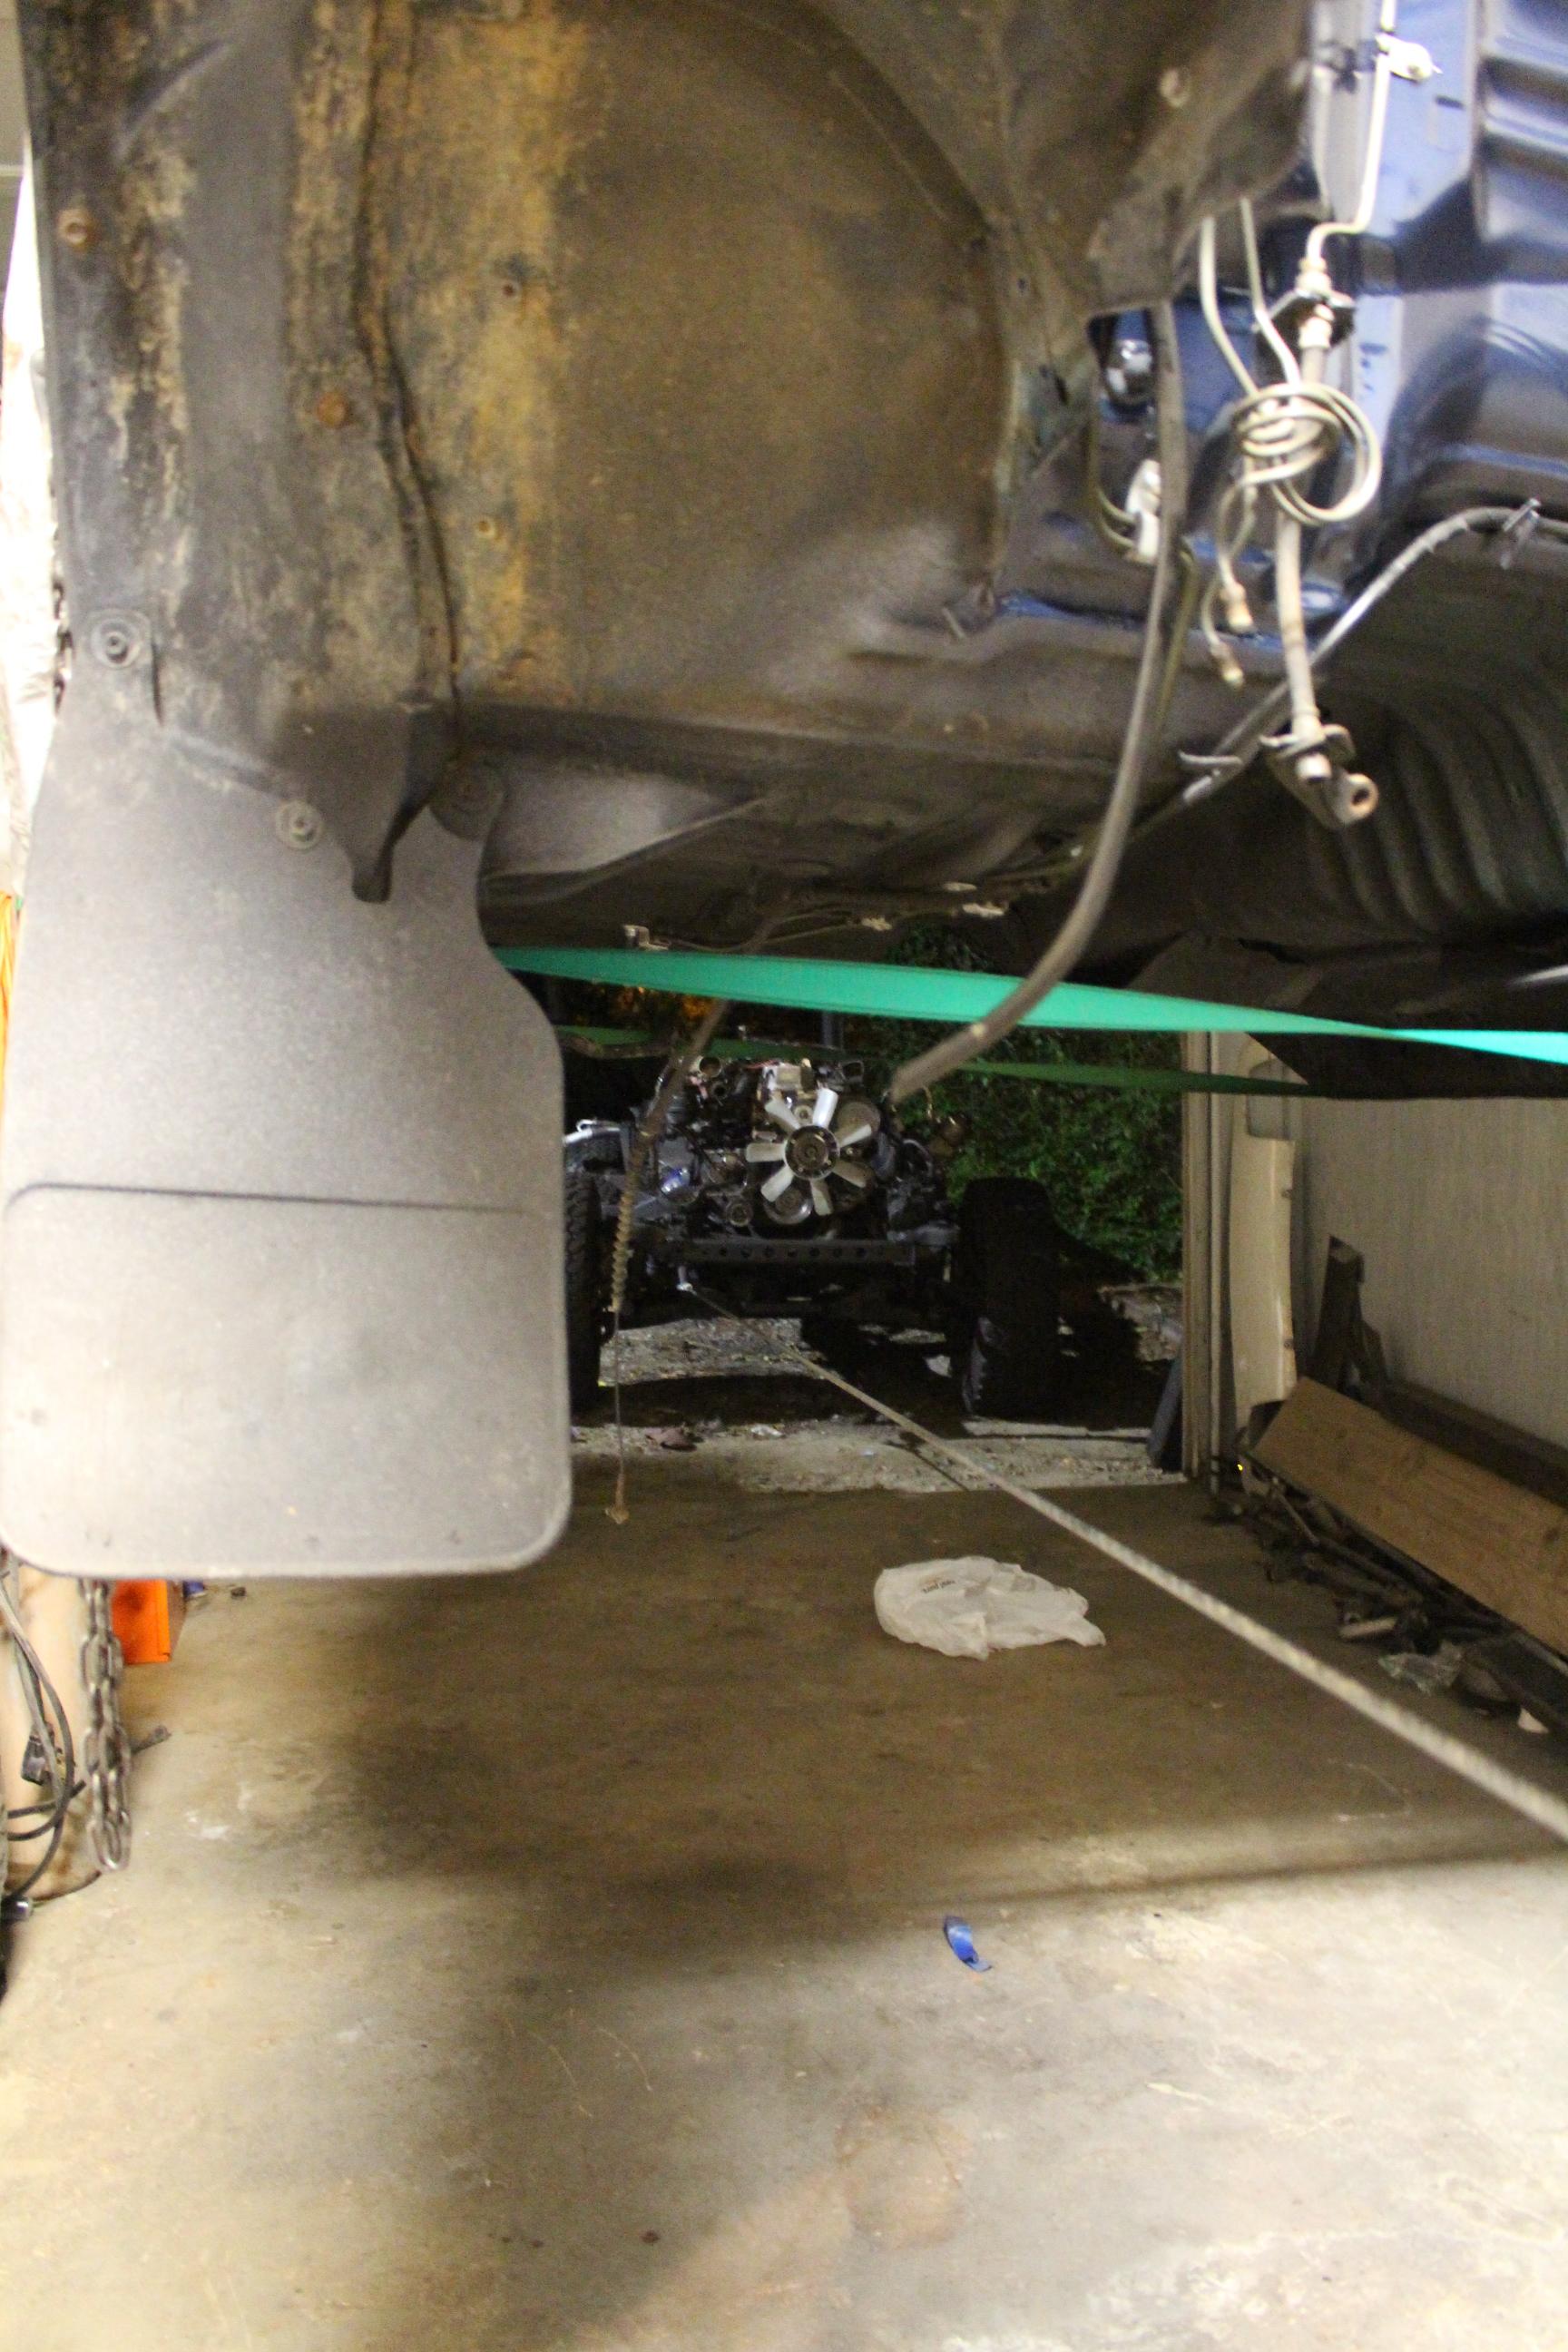
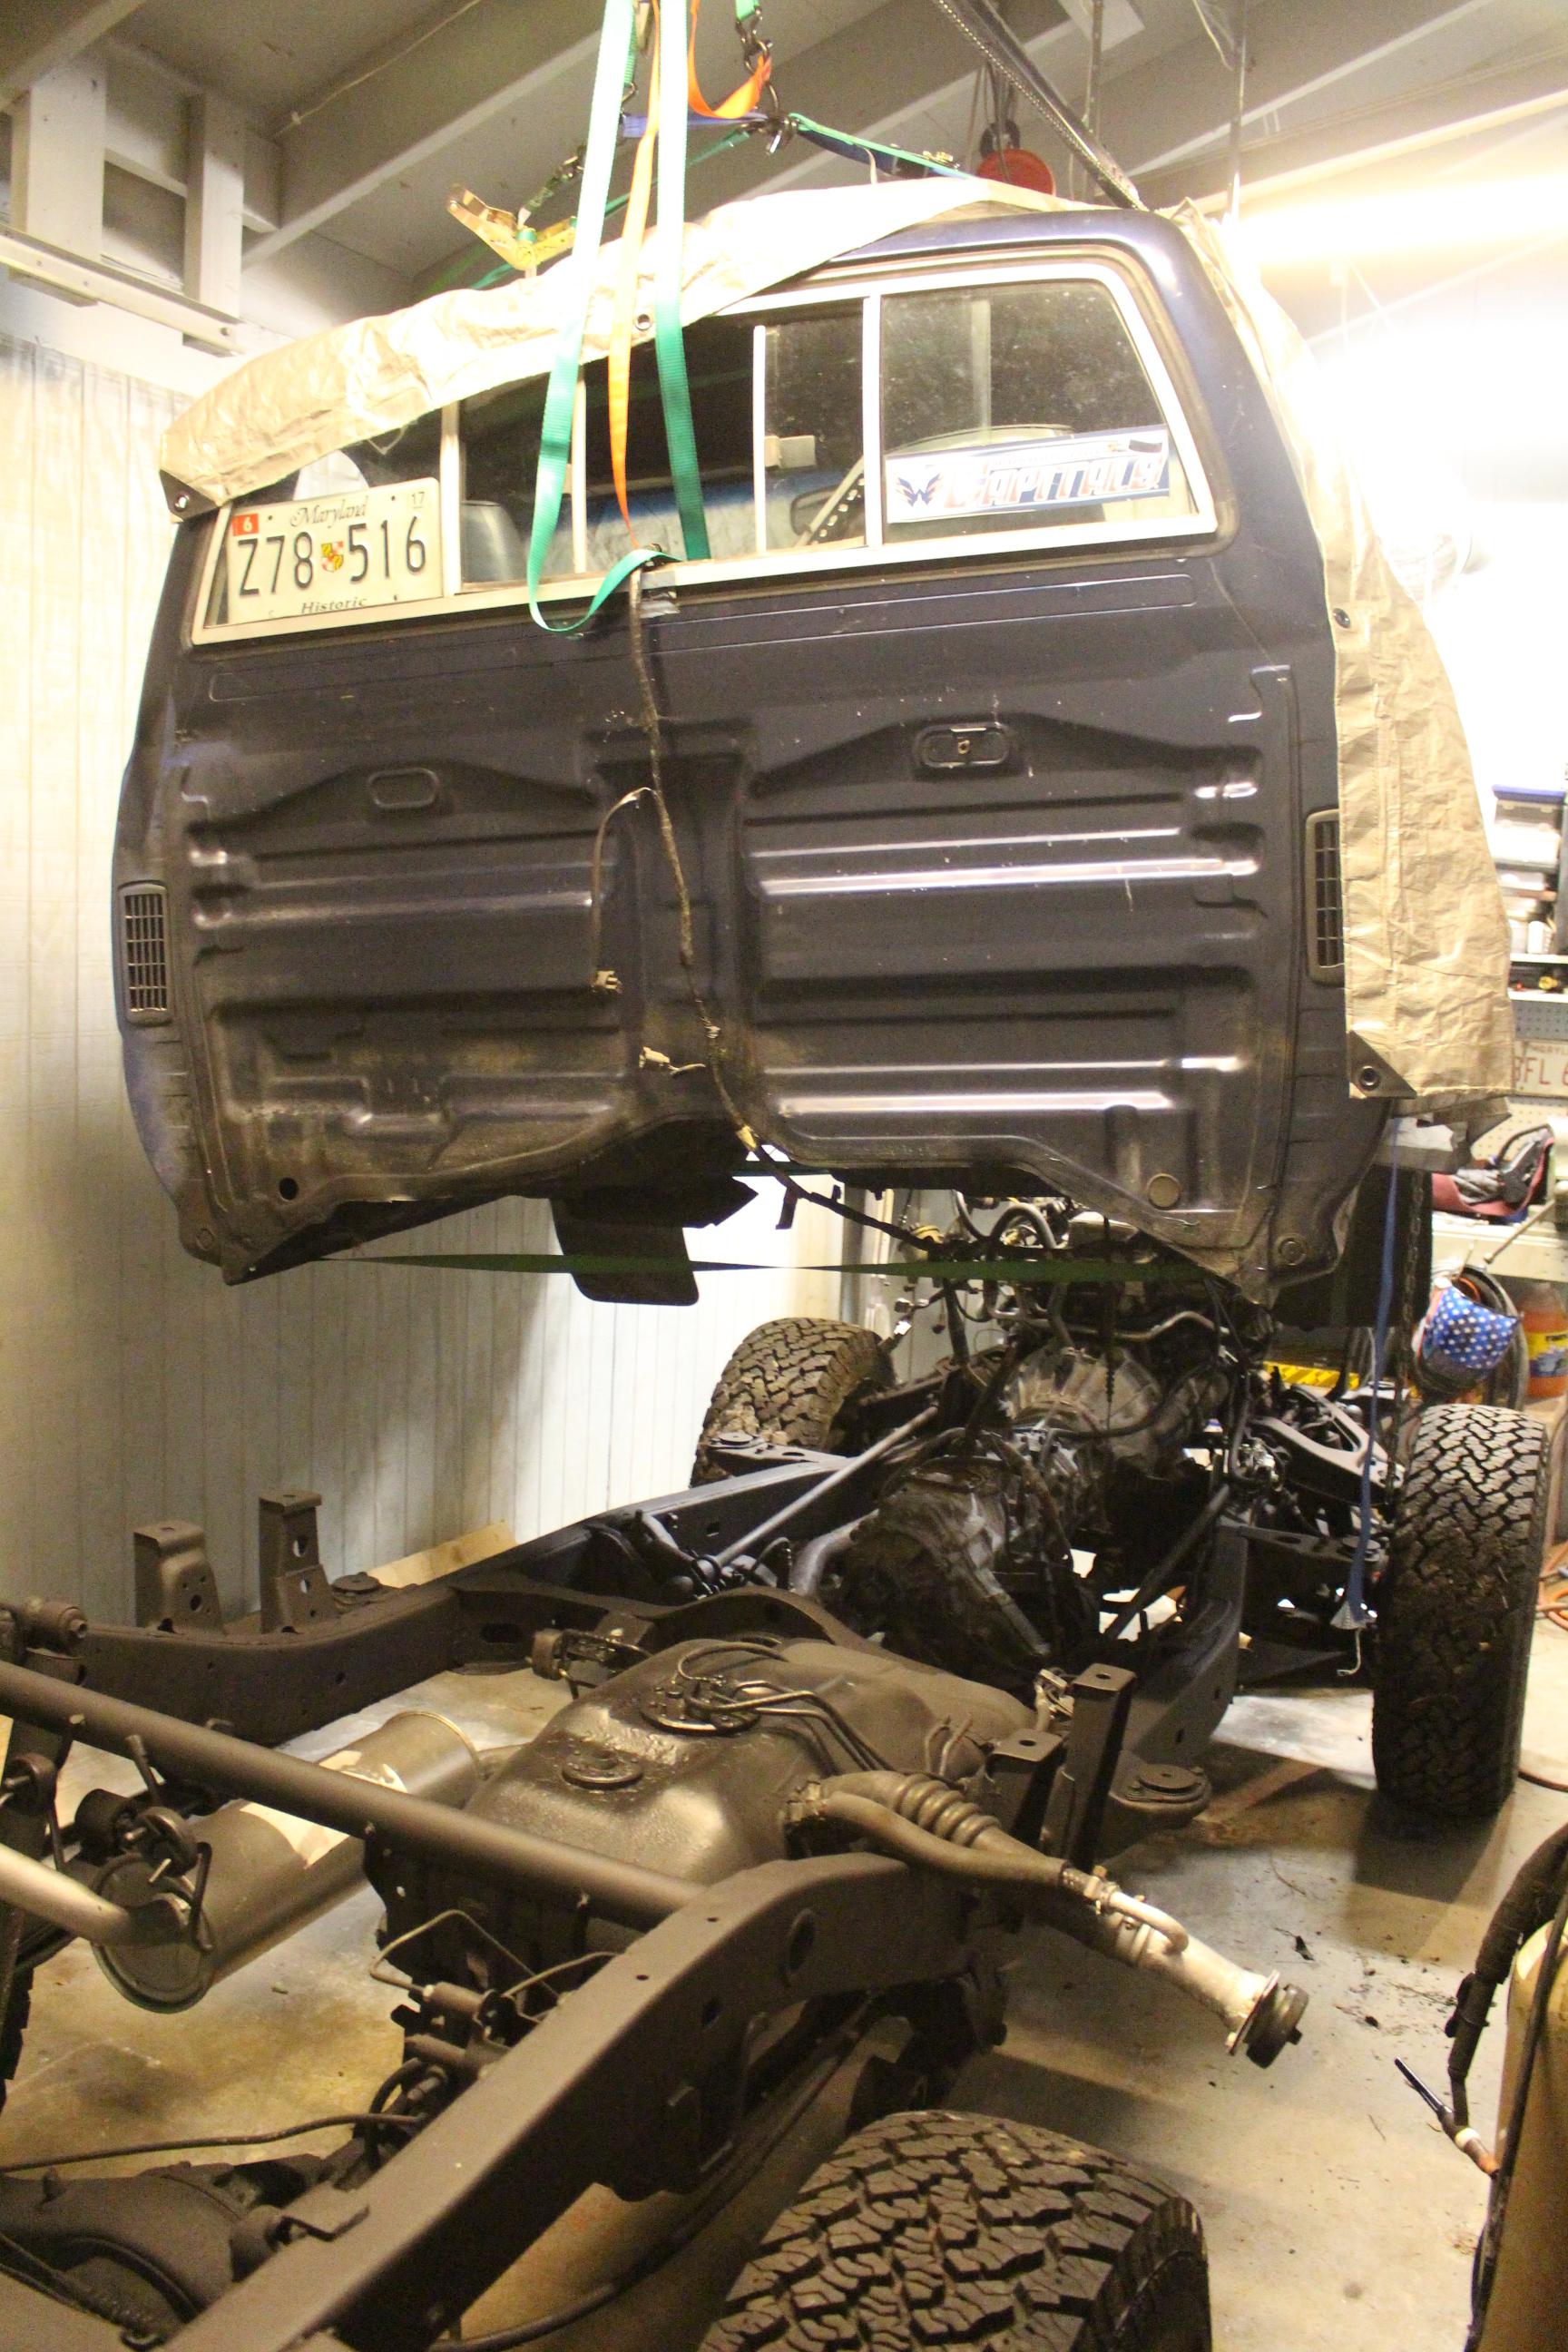
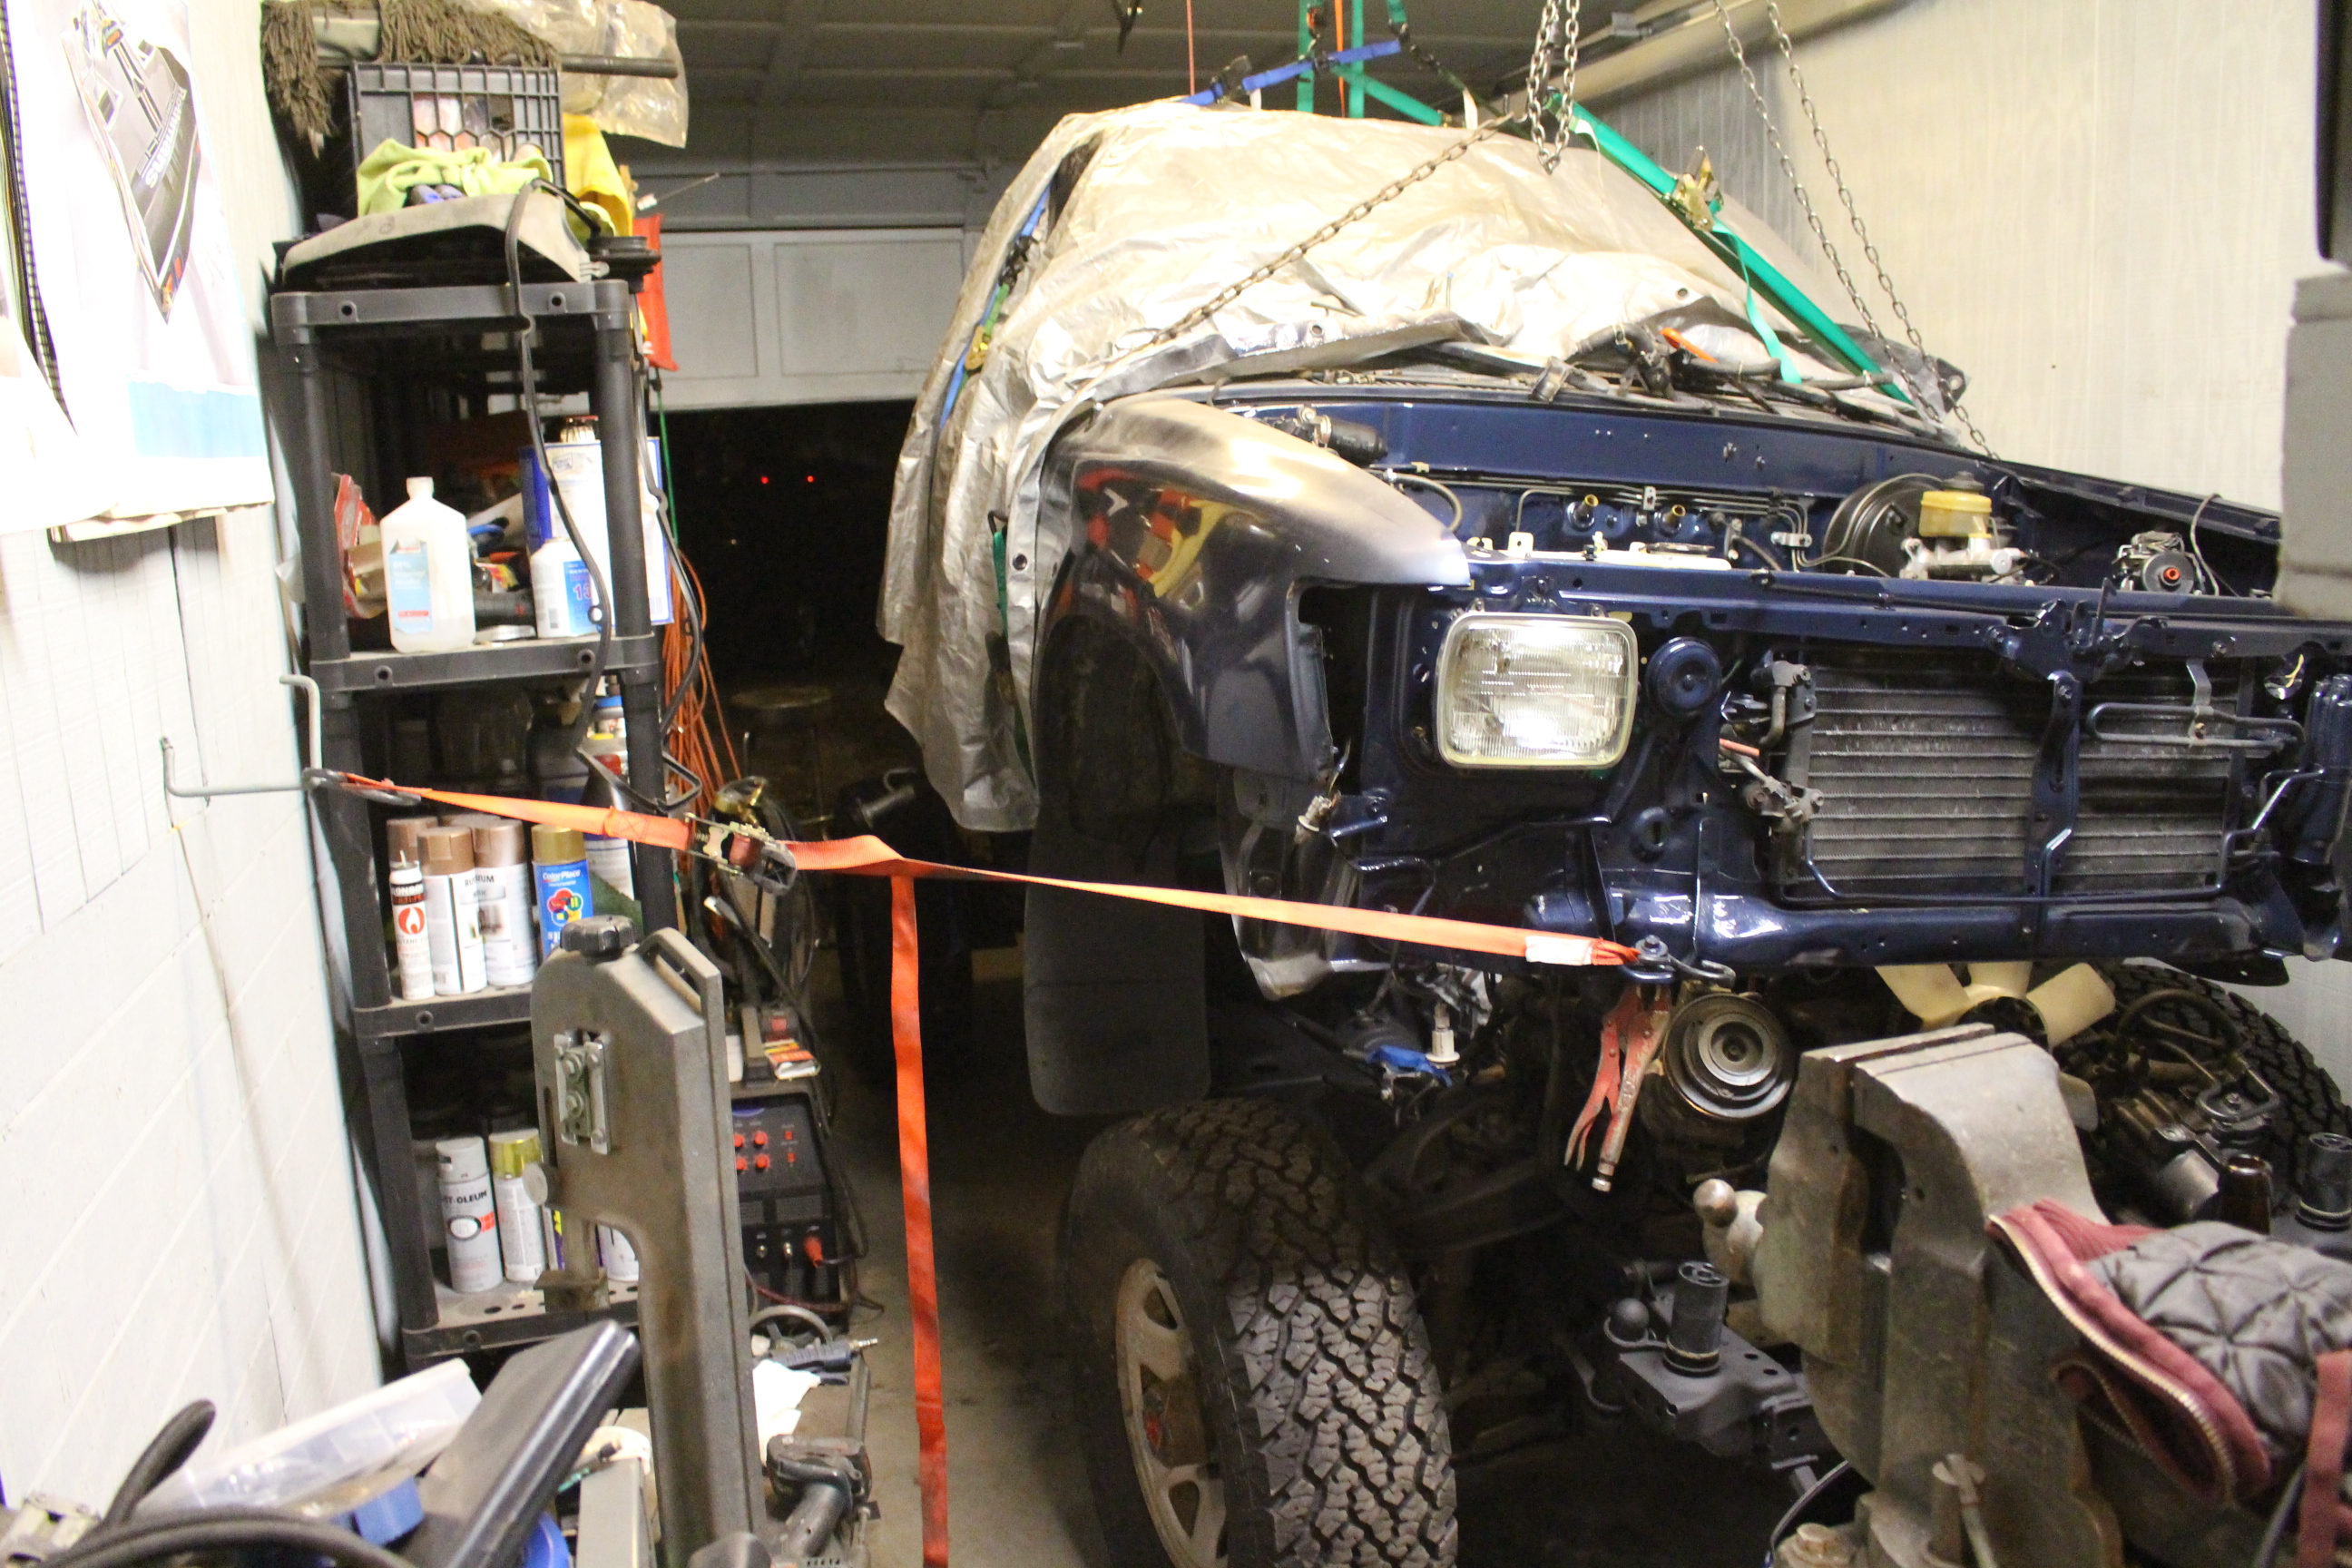
And the body is going back up after being on the ground for months! I should have folded my mudflaps backwards while it sat :banghead: 100% OSHA approved lifting methods going on here, nothing to see! I will put some more backup straps in place before I actually go underneath it, but right now the back is supported by sawhorses as well.

Old lines out

Old clamps
Disassembled
Drill press with a wire wheel, and an angle grinder with a flap wheel were my tools of choice.
much better

Acid Etch Primed
Couple coats of Aluminum colored rustoleum
Back together. I coated the rubber bushings in the two band clamps with dielectric grease to keep them soft and help prevent corrosion inside the clamp.
My pup Artemis helping find frogs. Sure enough she found one under the truck!

New lines bent up. I used a tubing cutter to cut the flares off one end to remove the nuts since I will be using rubber hose clamped on both ends like stock.
I then used a double flare tool to put an end back off it to keep the hose clamp from slipping off.

And the body is going back up after being on the ground for months! I should have folded my mudflaps backwards while it sat :banghead: 100% OSHA approved lifting methods going on here, nothing to see!
I will put some more backup straps in place before I actually go underneath it, but right now the back is supported by sawhorses as well.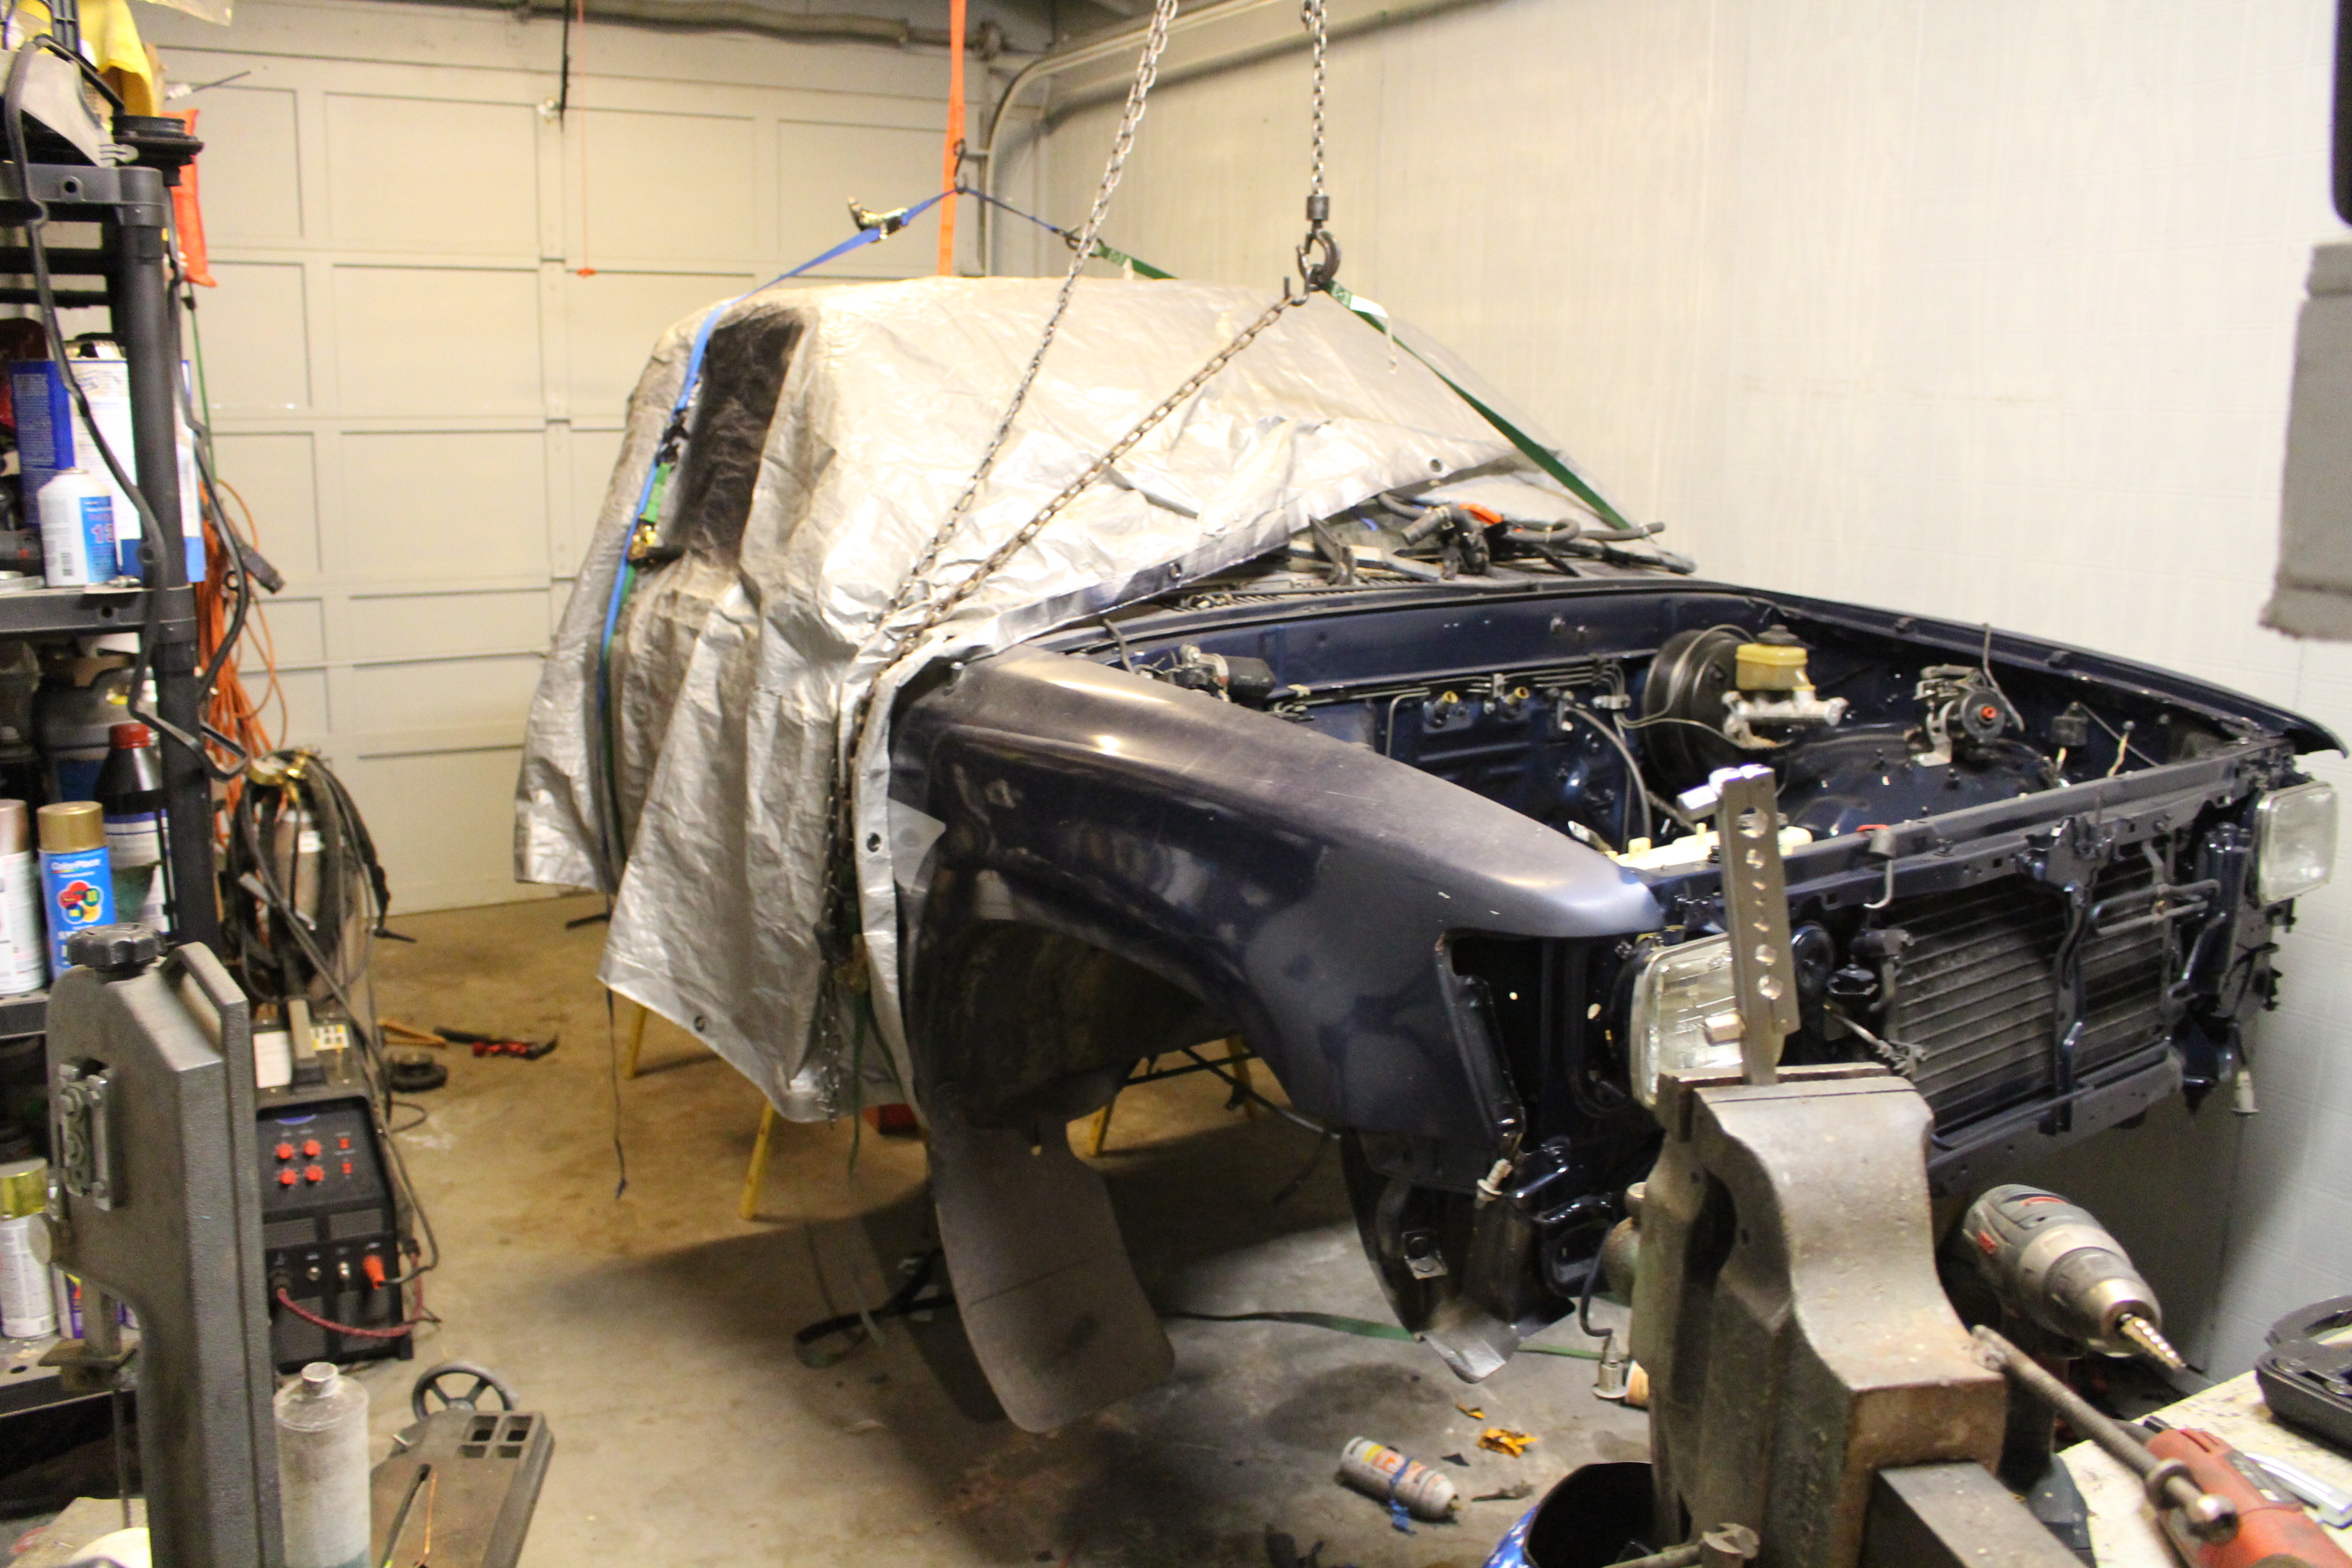
 09-05-2016, 04:47 PM
#17
Registered User
Thread Starter
Join Date: Sep 2016
Posts: 17
Likes: 0
Received 0 Likes
on
0 Posts
Somehow I managed to spend an entire saturday working on the truck. Great things happened
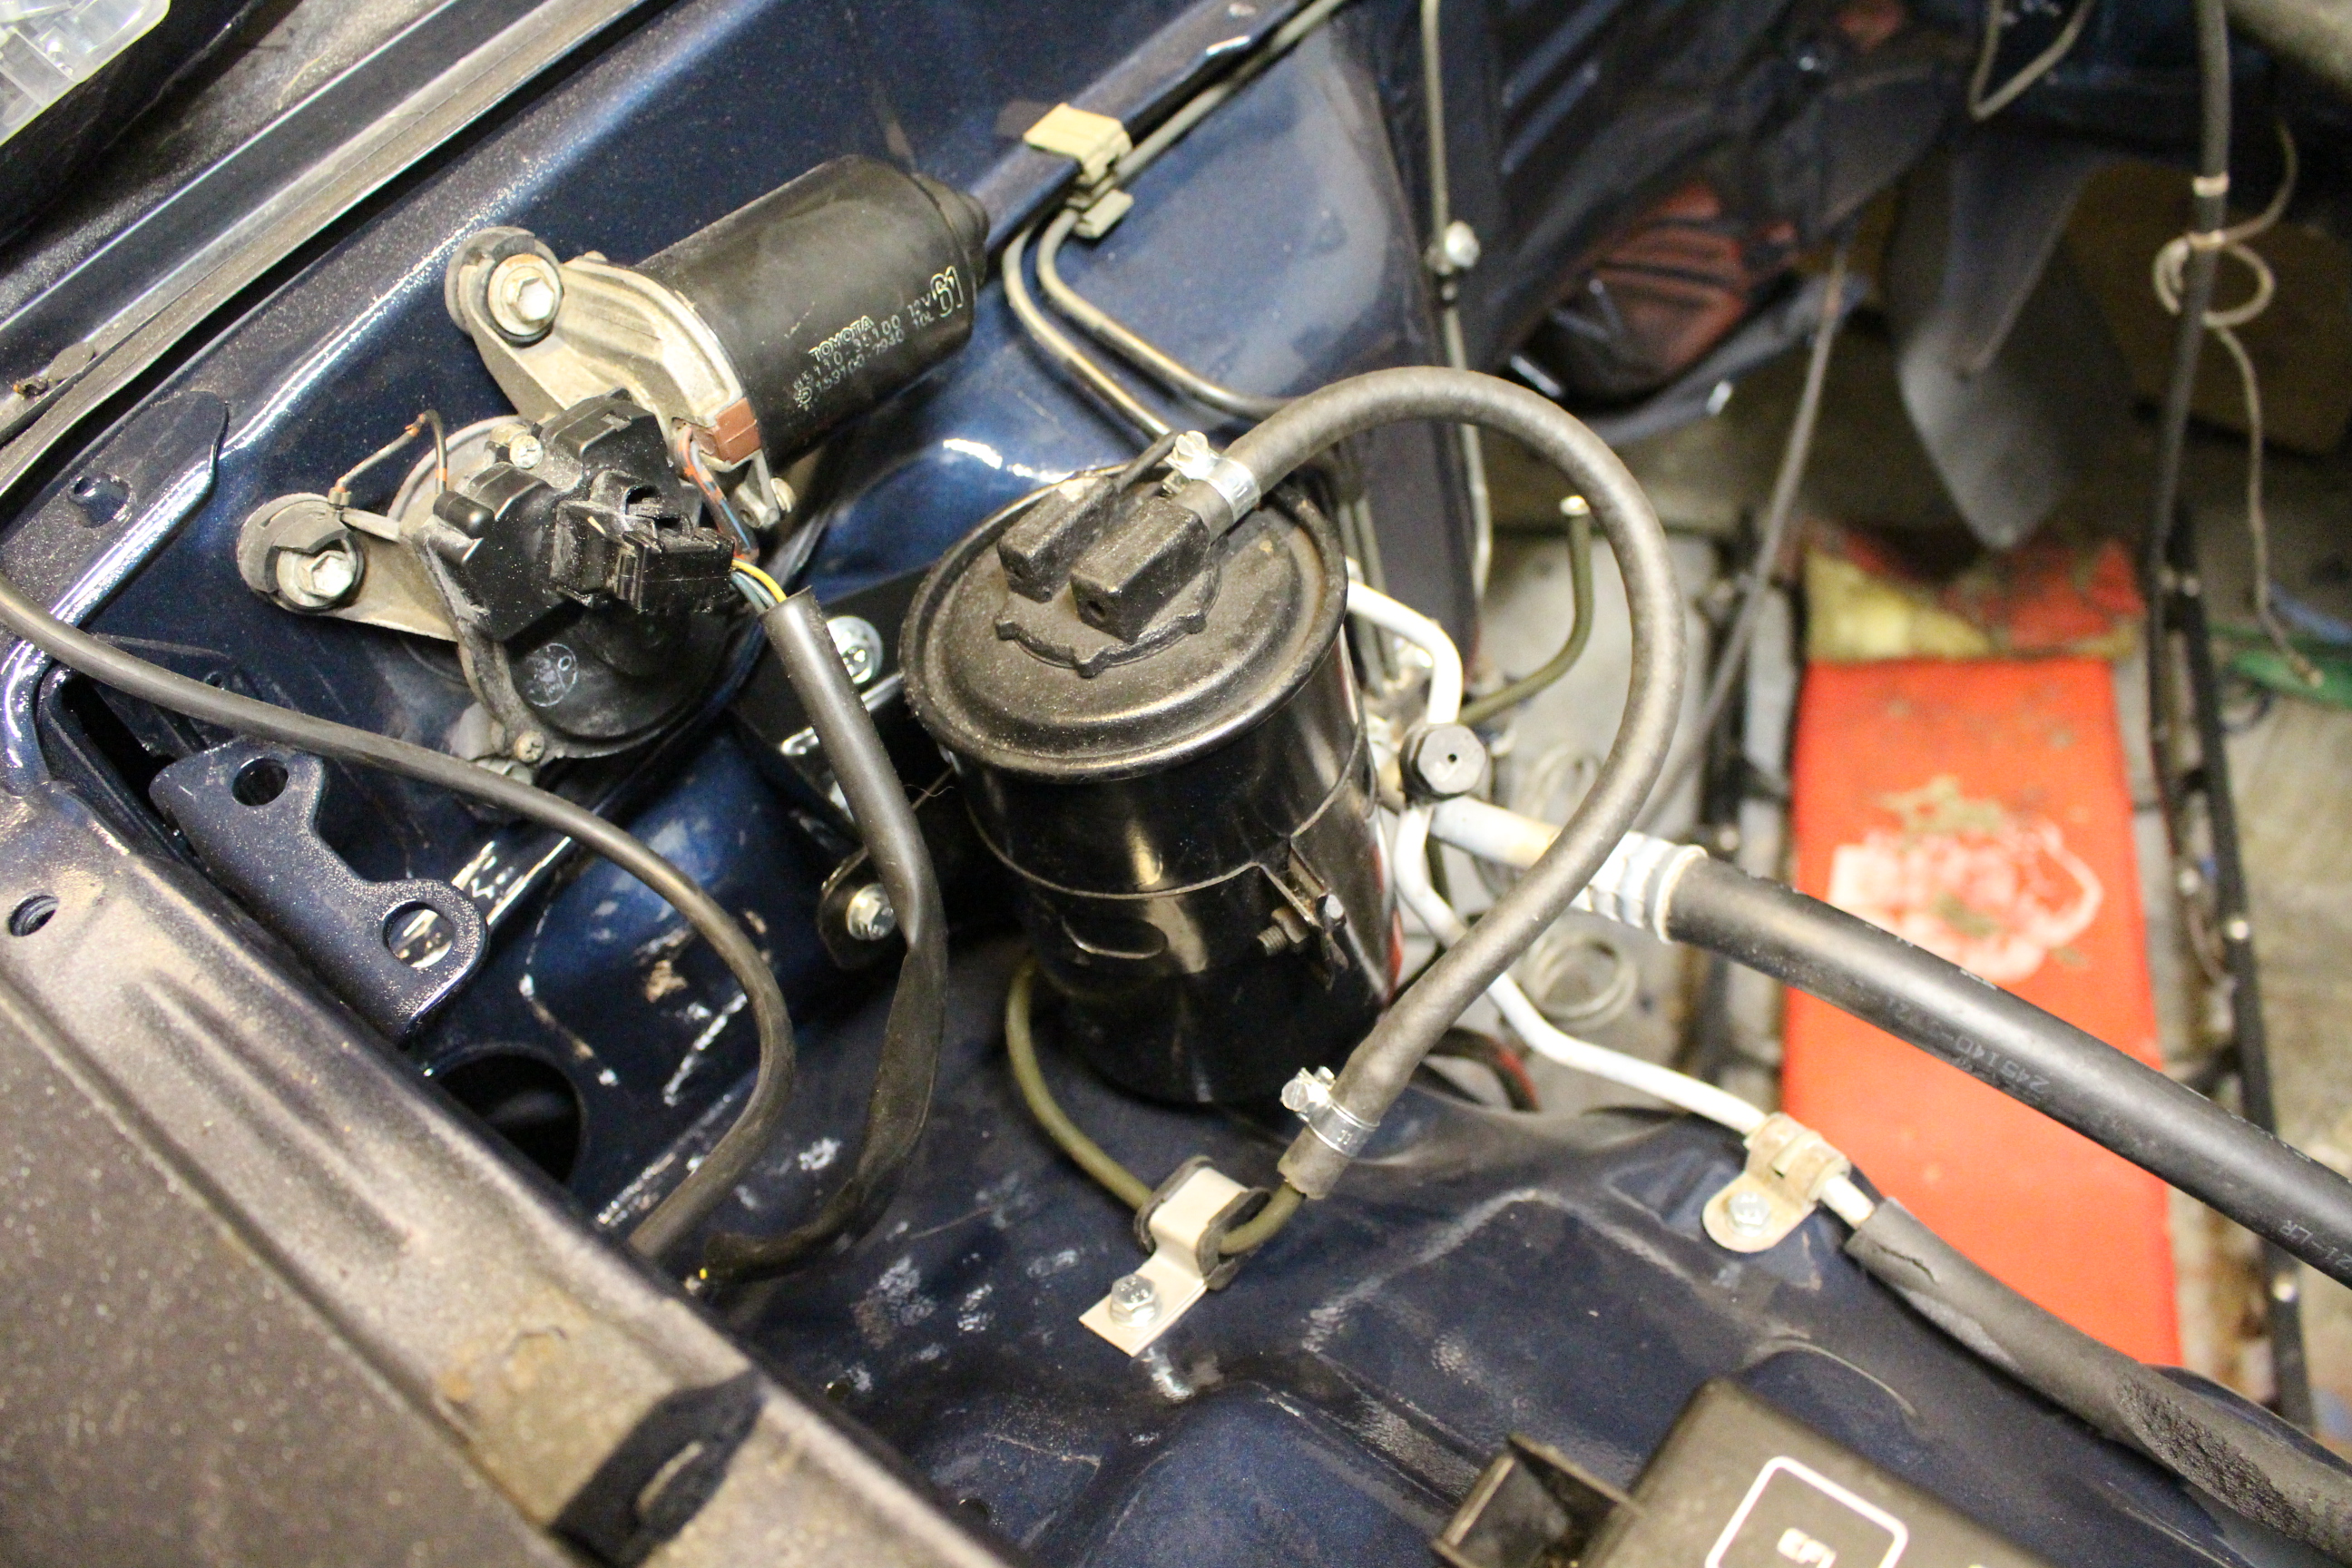
Fuel lines are in.

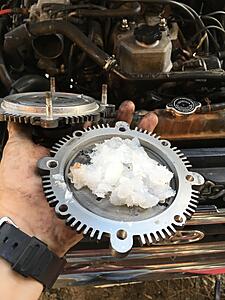
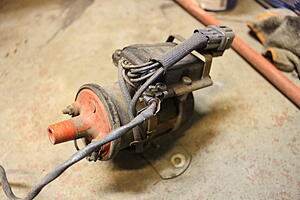
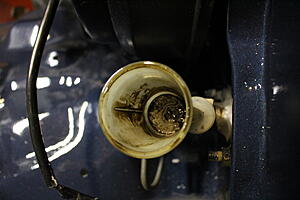
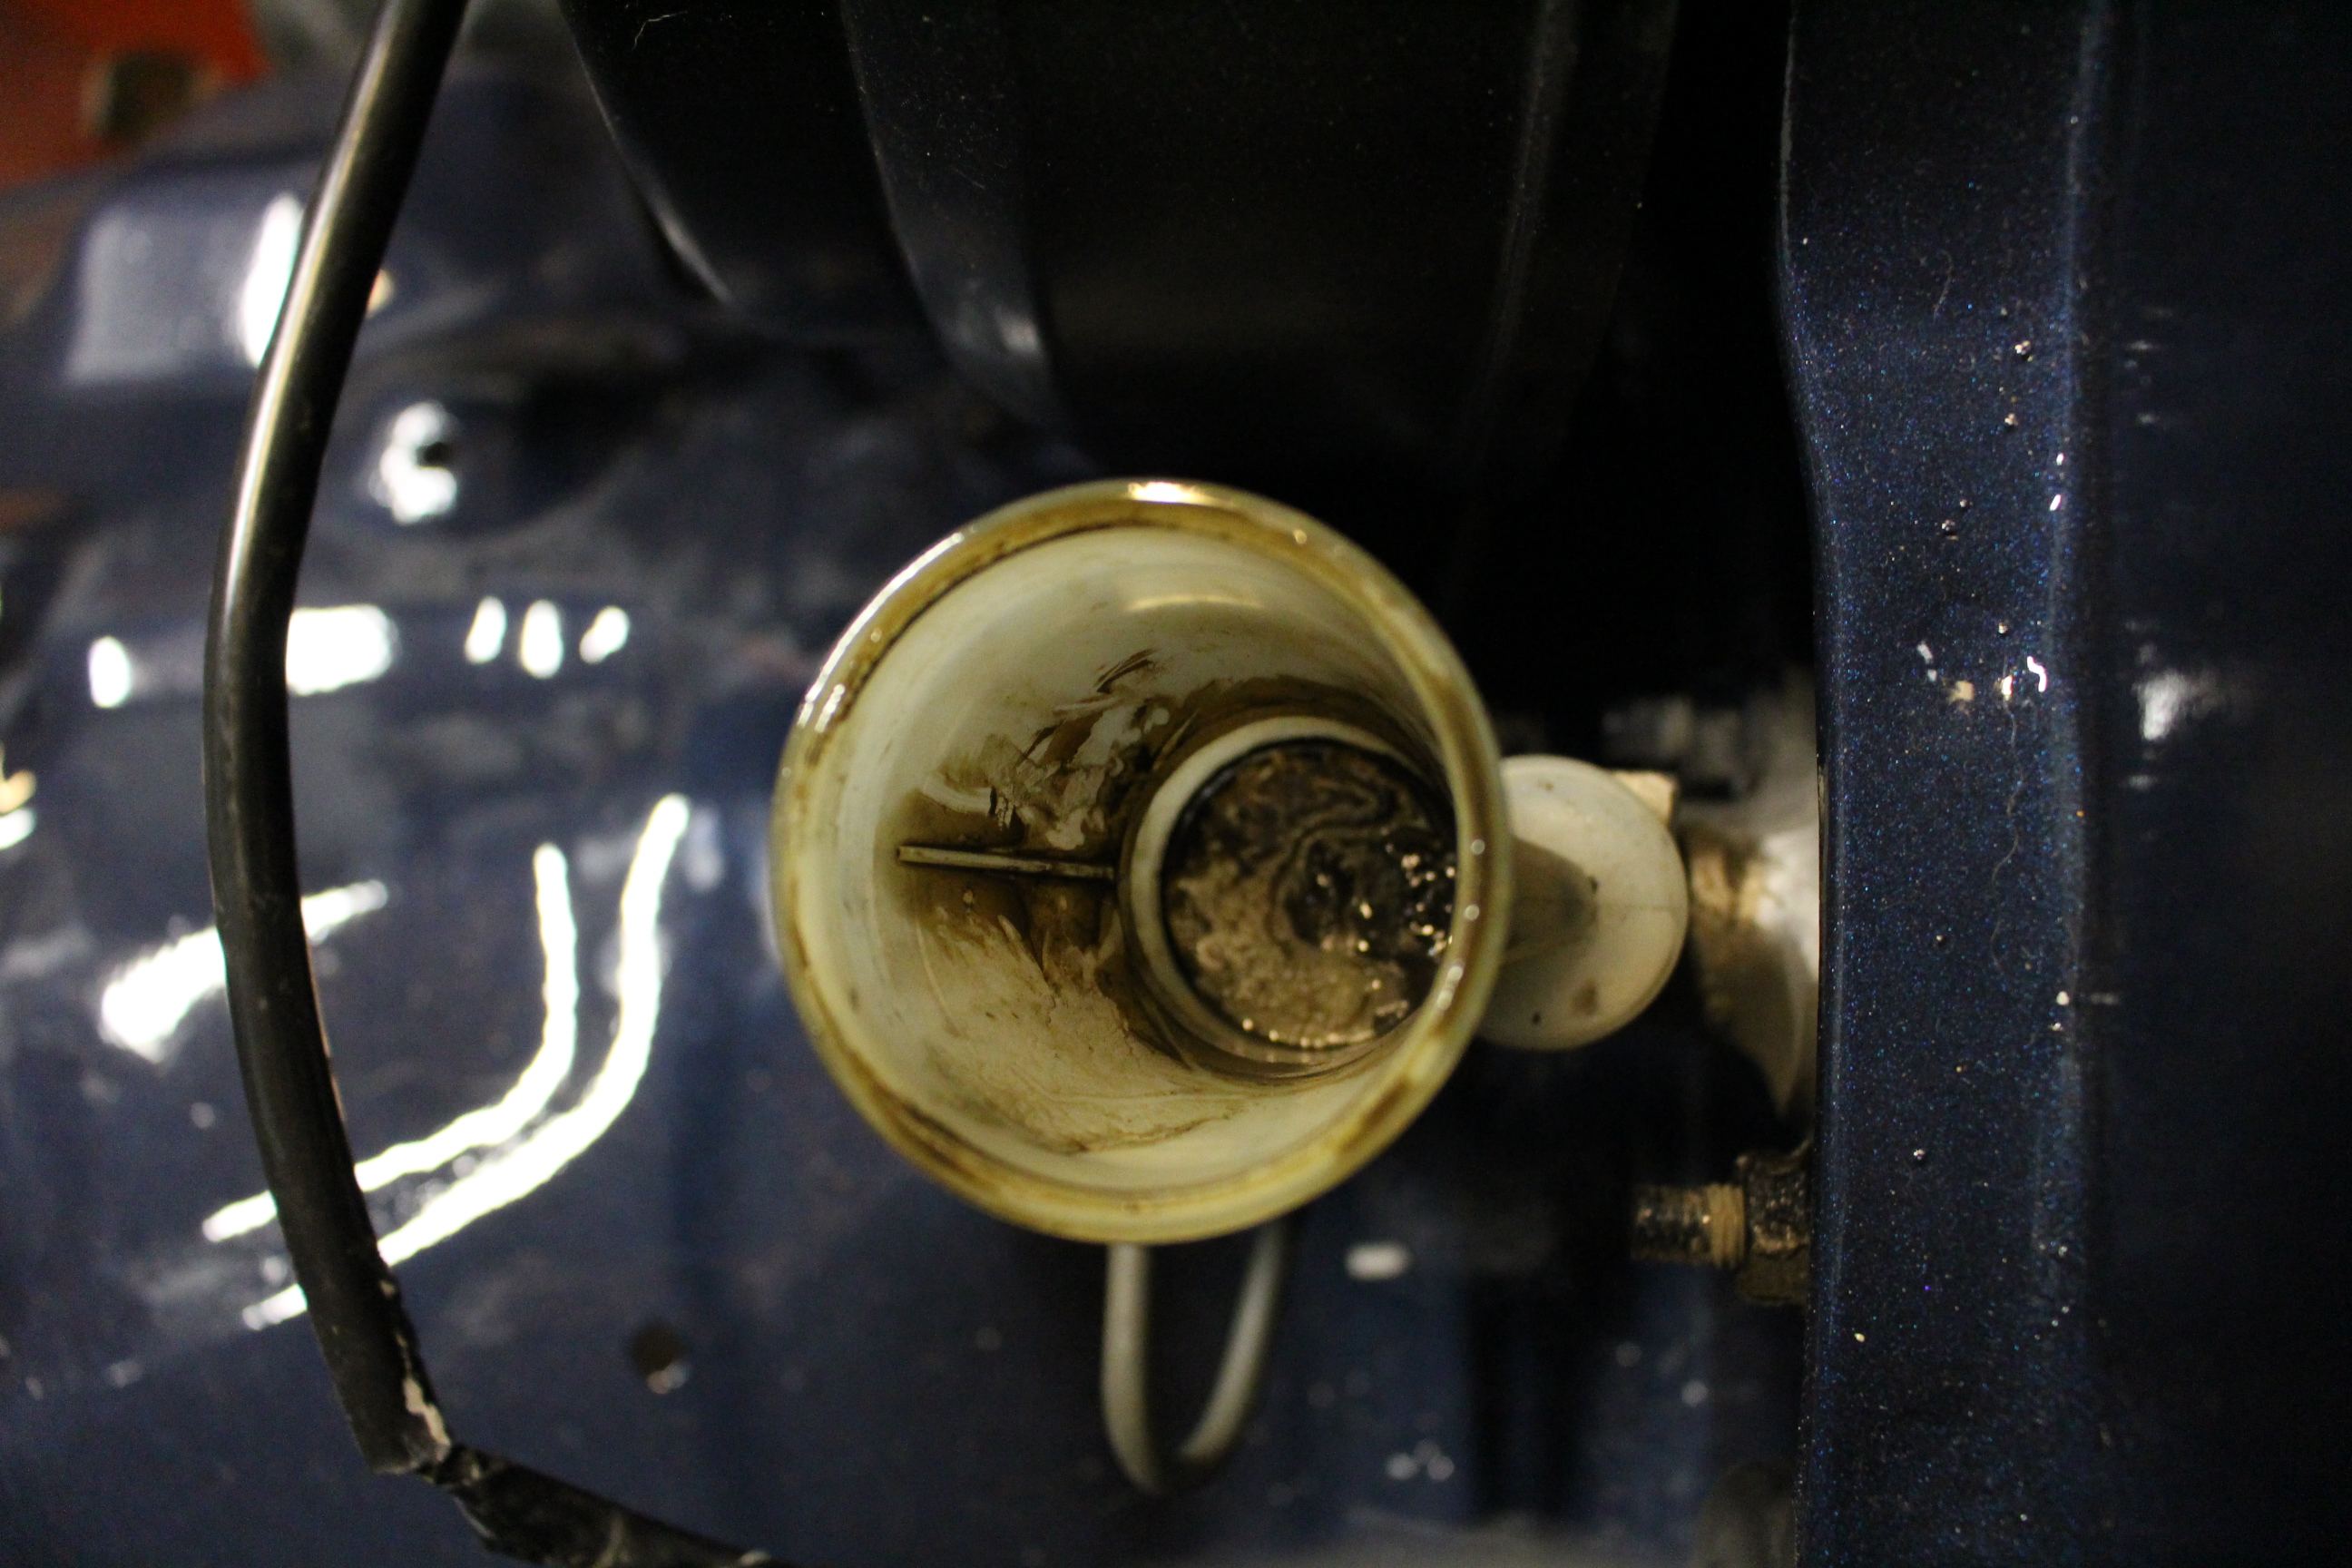
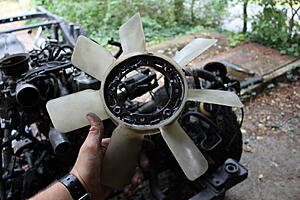
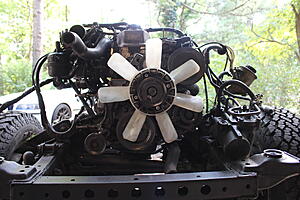
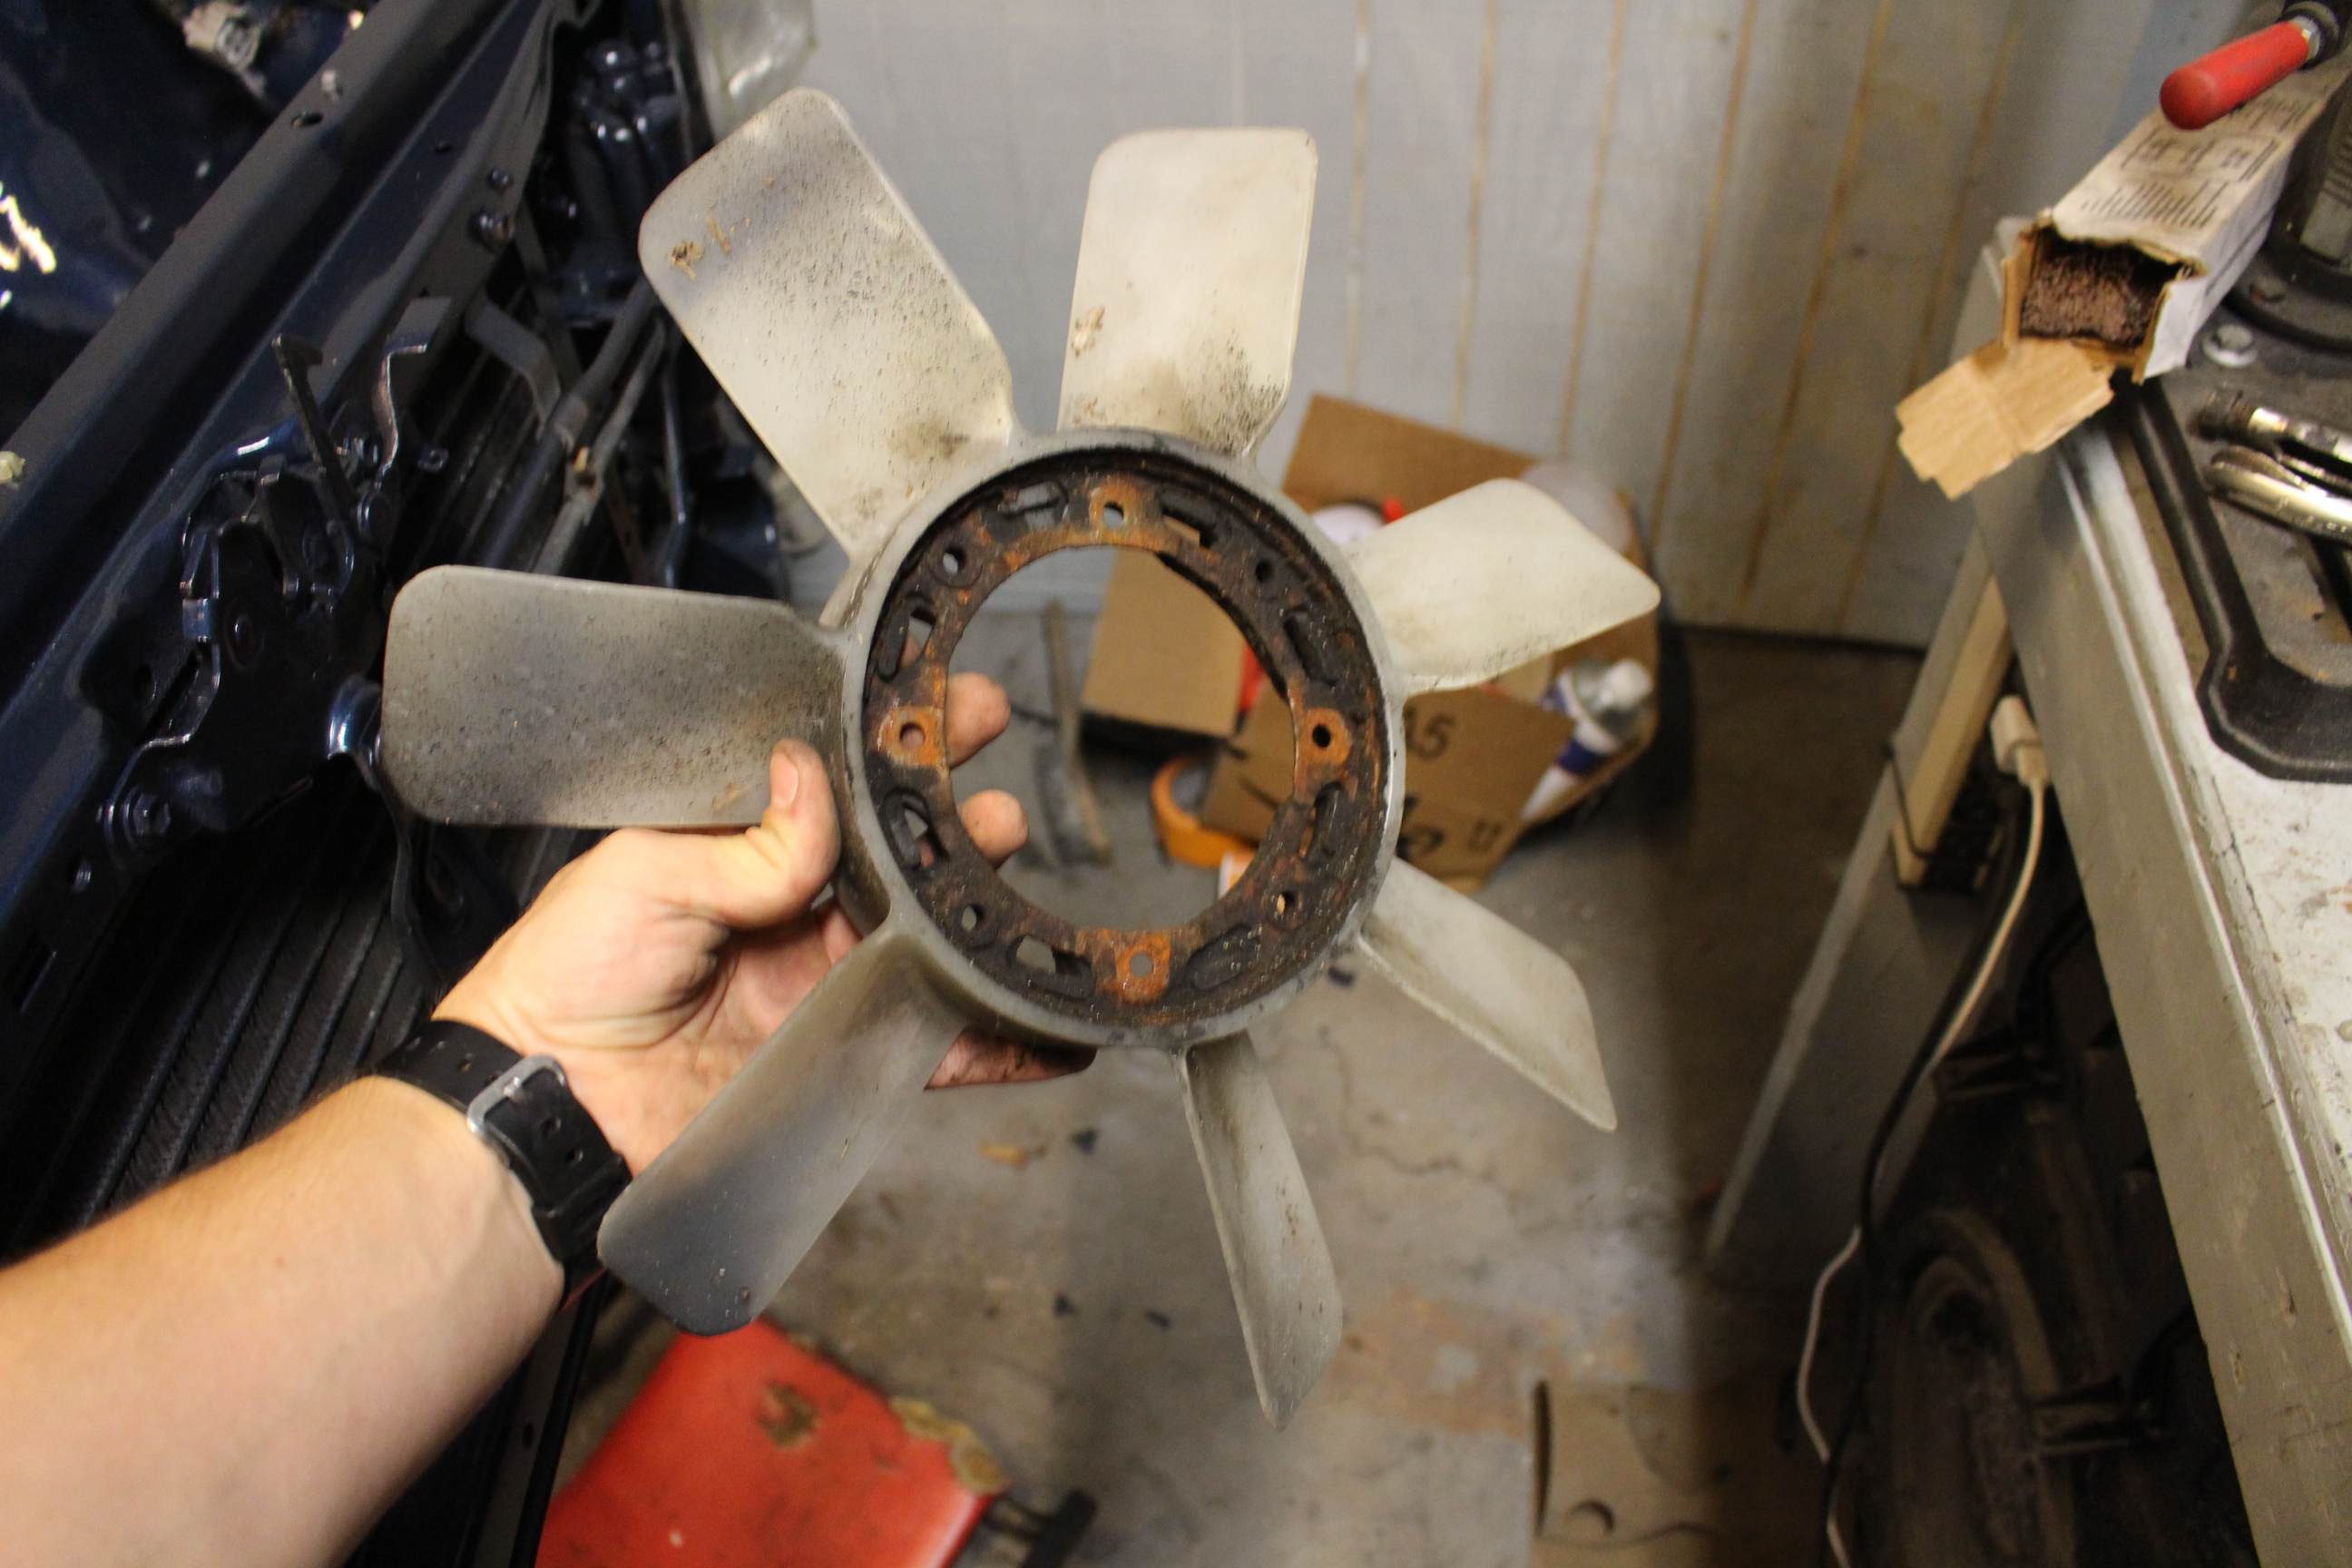
Fan blade was disgusting. Rust and paint overspray. Wire wheel to the rescue! Fan clutch was also dirty so it also got some love.

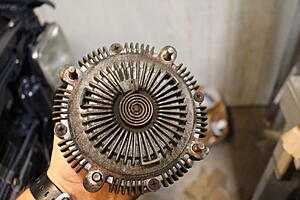
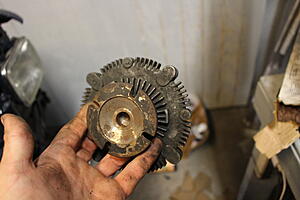
Much better. I also put some oil on the spring in the middle, and then packed it with dielectric grease. If these happen to rust together they stop functioning as they should. I believe the spring is a bimetal that coils and uncoils as its temperature changes, increasing or decreasing fan speed engagement. I could be mistaken though.
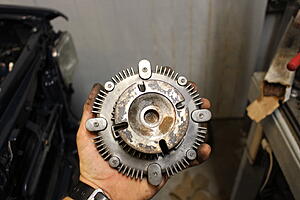

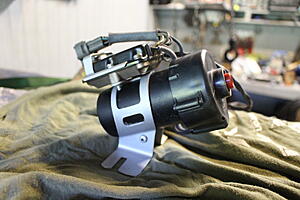
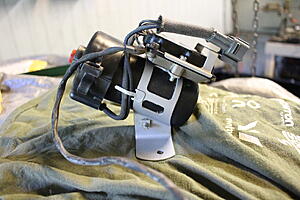
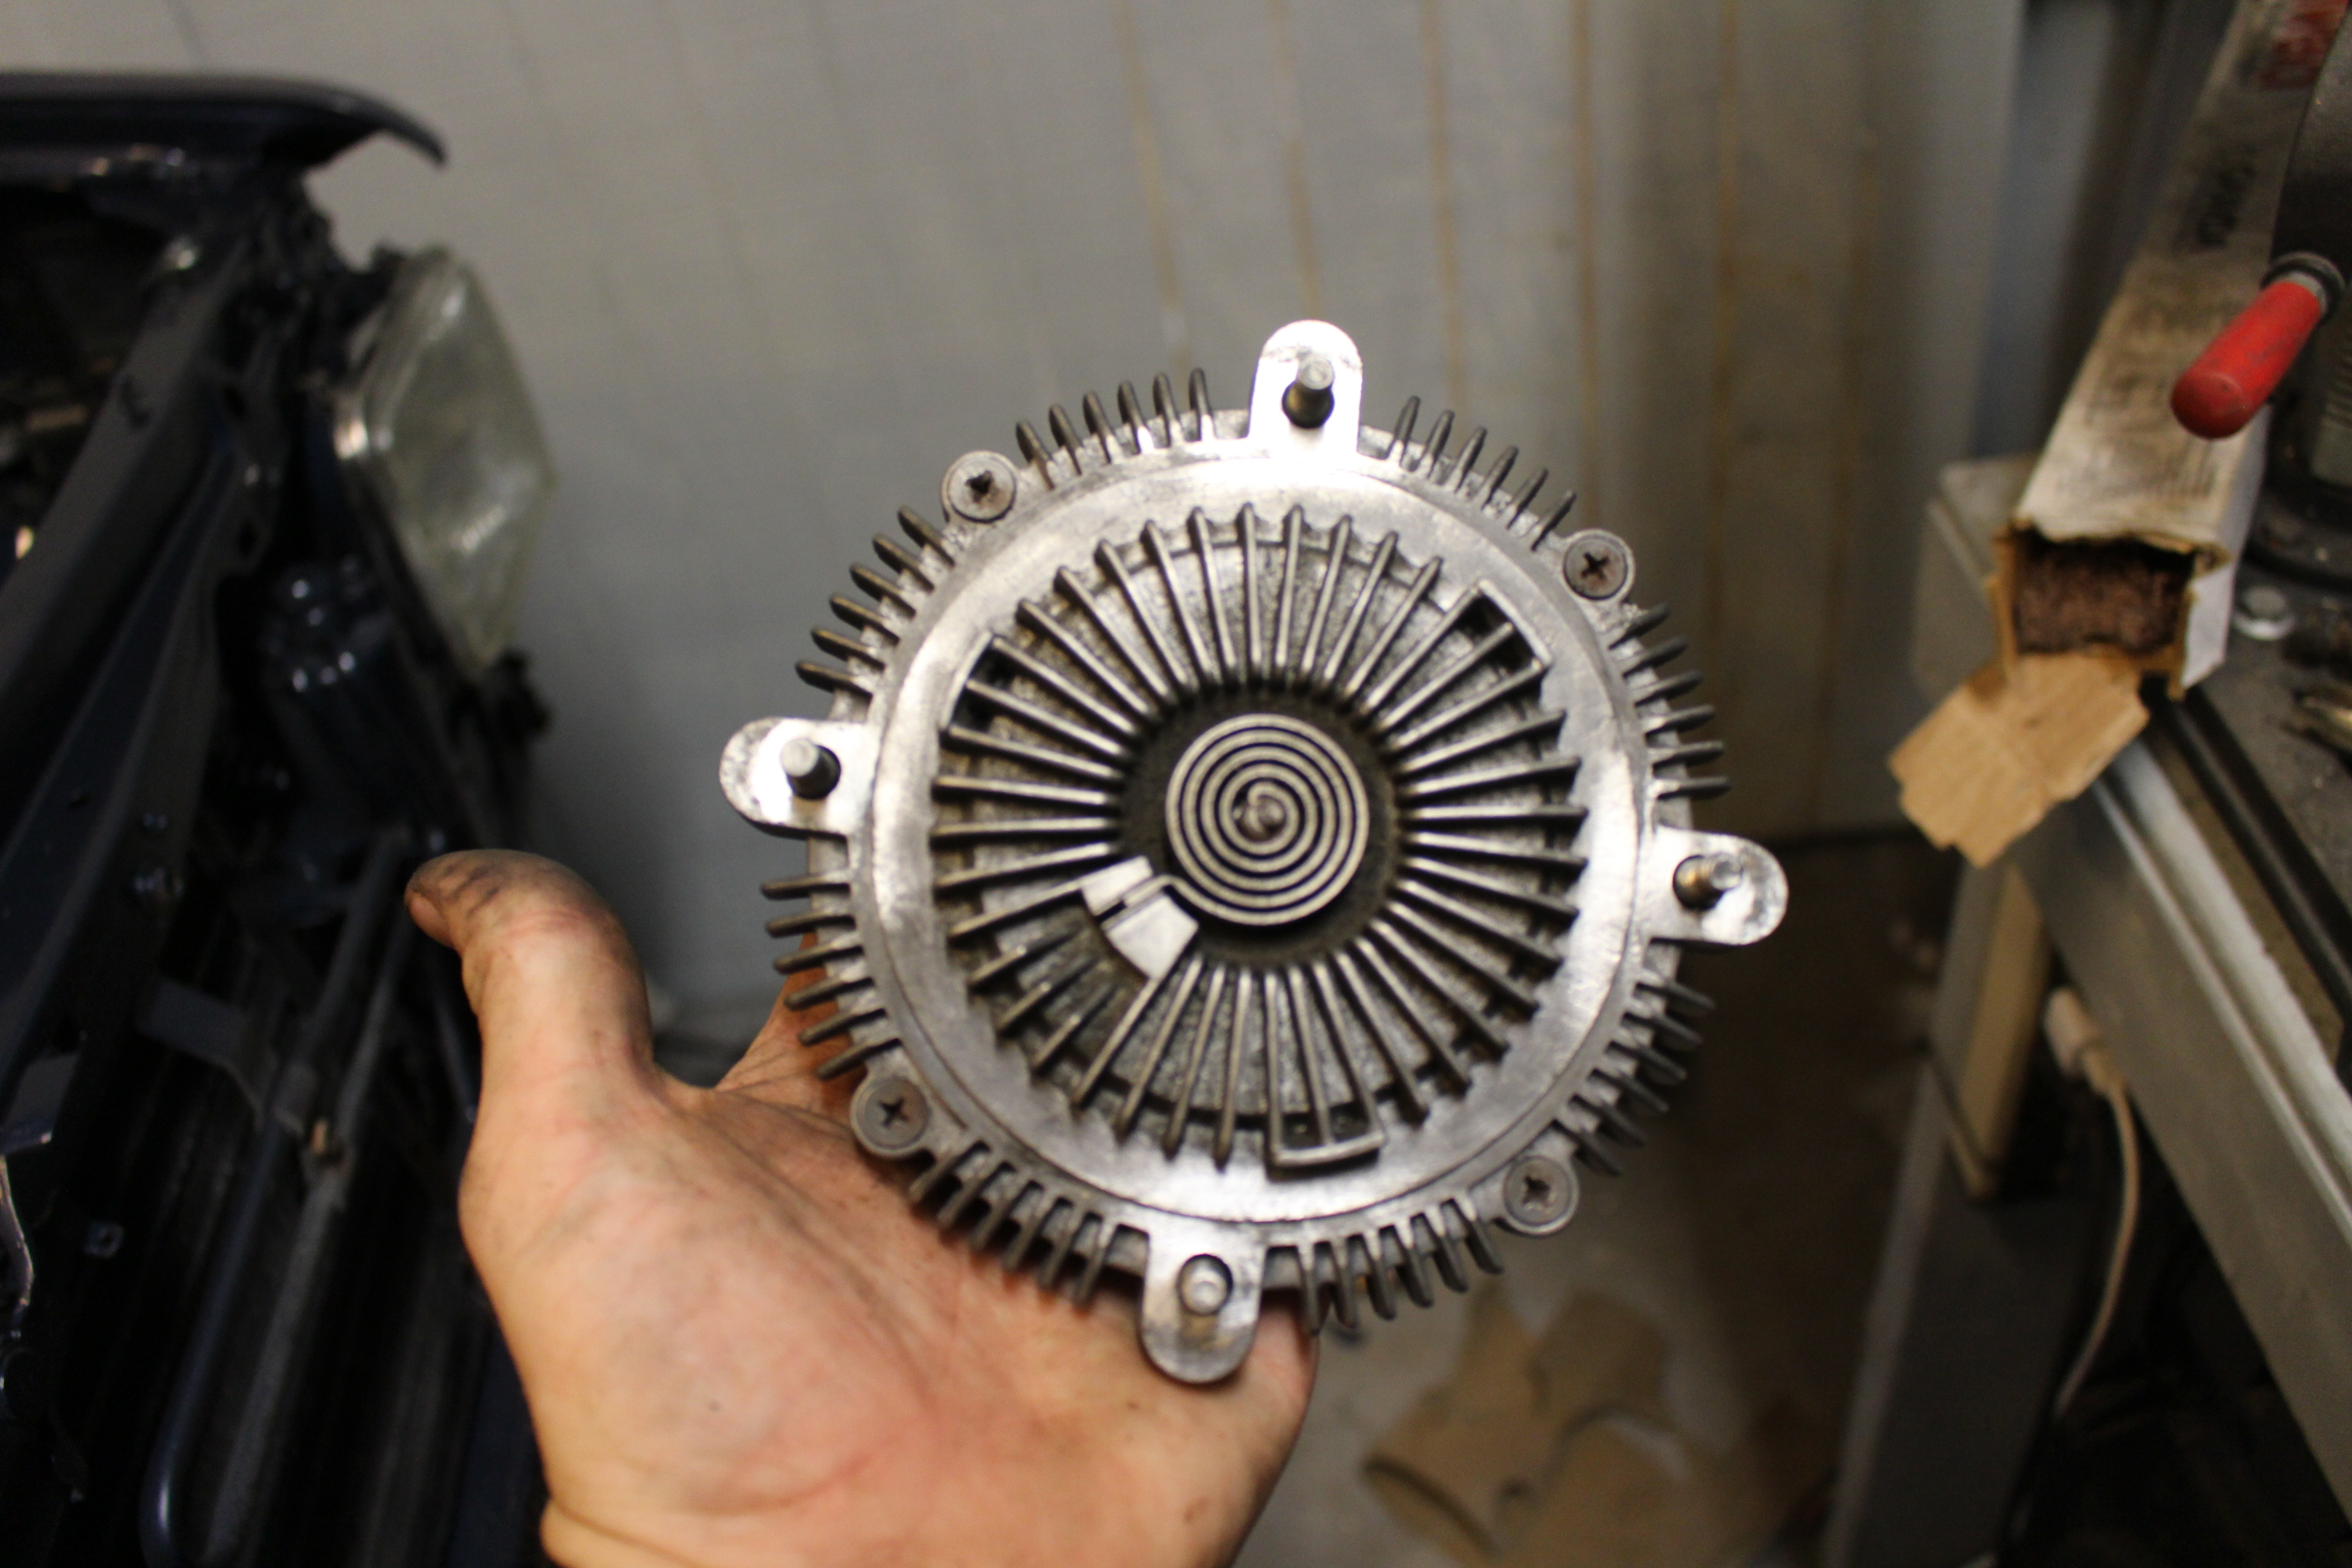
Cleaned up, acid primed and a quick shot of gray.
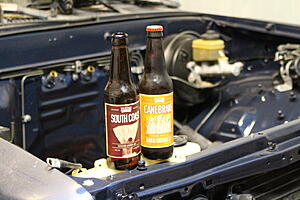
Some fine Louisiana beer from my friends in Baton Rouge. They're going through hell down there and any help you can lend to the area would be much appreciated!
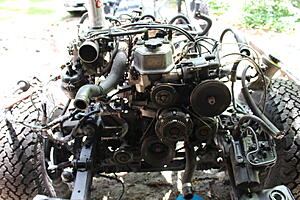
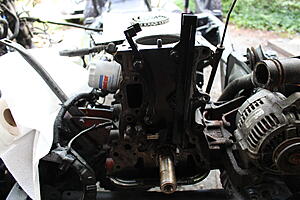
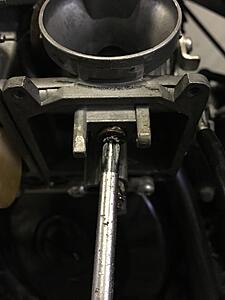
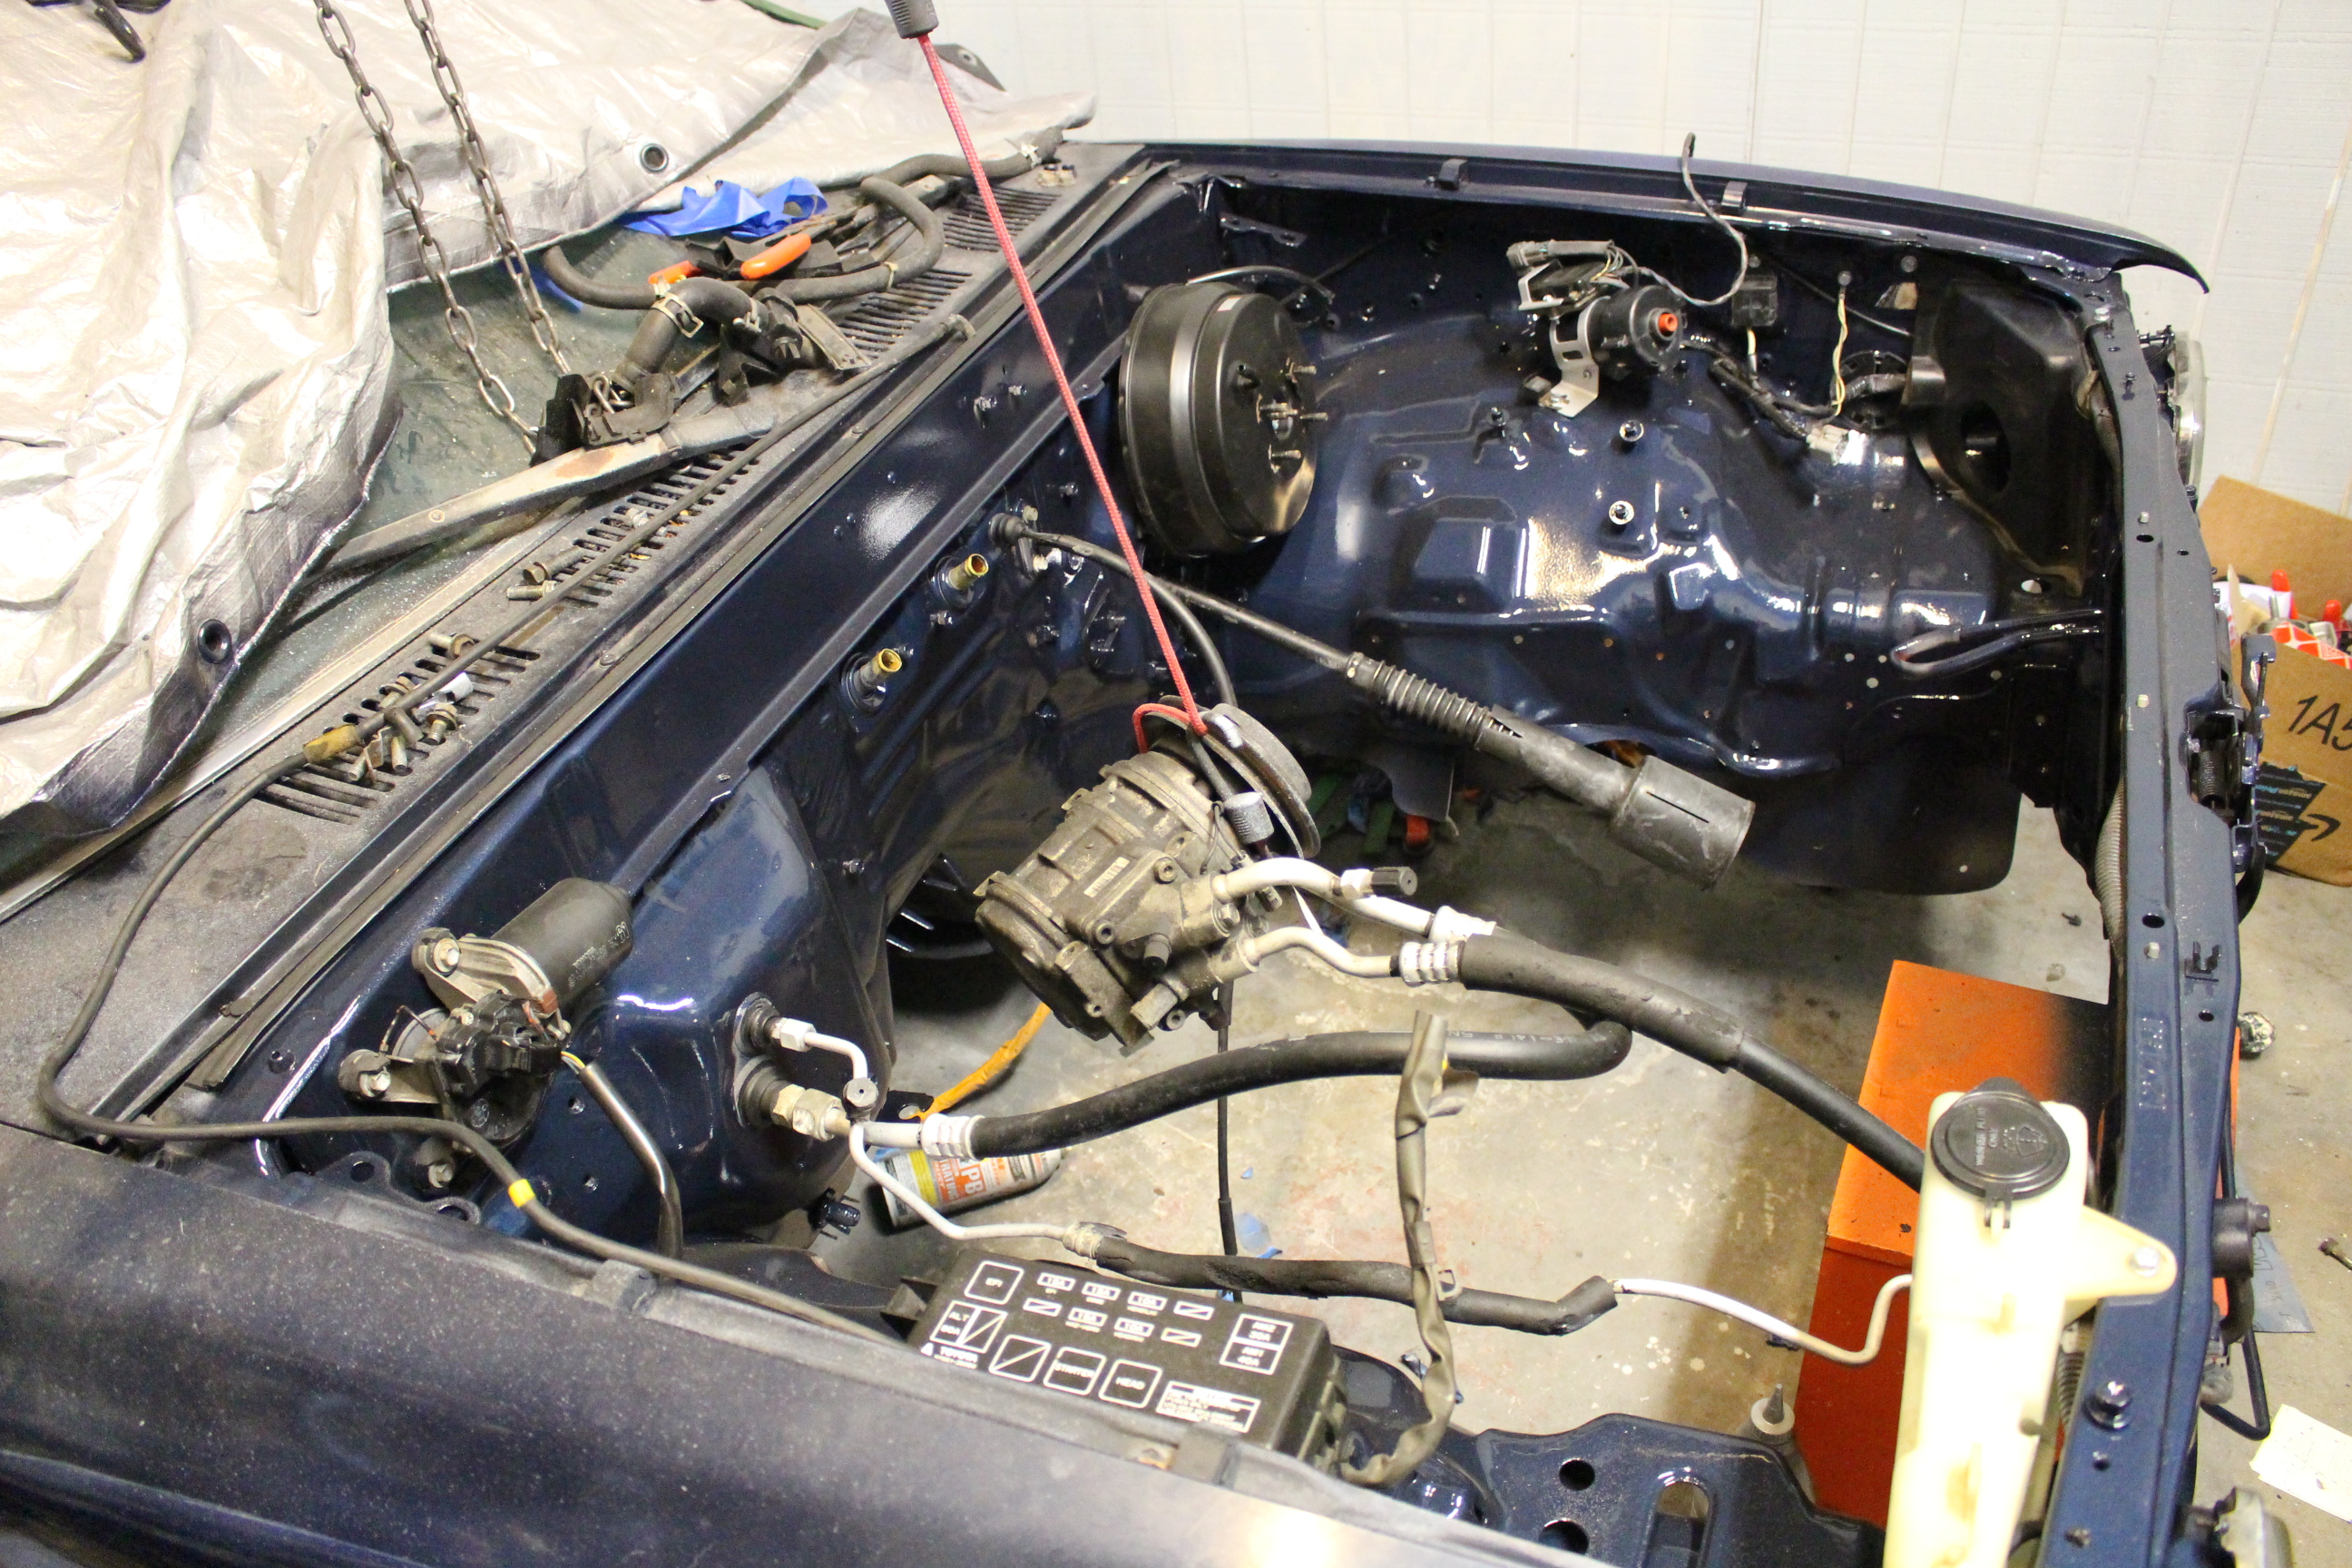
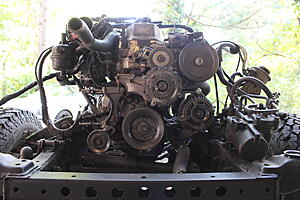
Still needed to put the pulleys back on, and the PS, ALT, and AC brackets. They weren't the best looking things (some orange overspray from the Previous Owner) so I cleaned all of them up, primed and painted them charcoal metallic. I accidentally stripped the threads on the PS pump pulley nut and shaft, so I had to turn the shaft down a bit and recut new threads. That was a small setback but I used a locknut on there once it was fixed so I wouldn't have to tighten it as much since I had less material now. Also pictured is the 93-97 Jaguar XJ6 Alternator upgrade I did a while back. It is 120 amp vs the stock 60, uses the same exact mounting holes and even uses the same wire harness plug. I had to swap over the pulleys since the Jaguar uses a serpentine belt, but otherwise this was pretty straight forward.
New belts

Changed the oil. The fresh oil will only be ran for about 500 miles to flush out the engine, and then another oil change will be done. The old oil looked like milkshake and some coolant came out when I first pulled the plug.
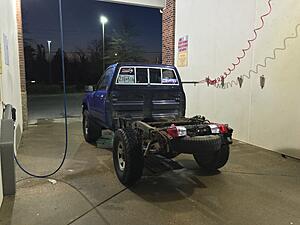
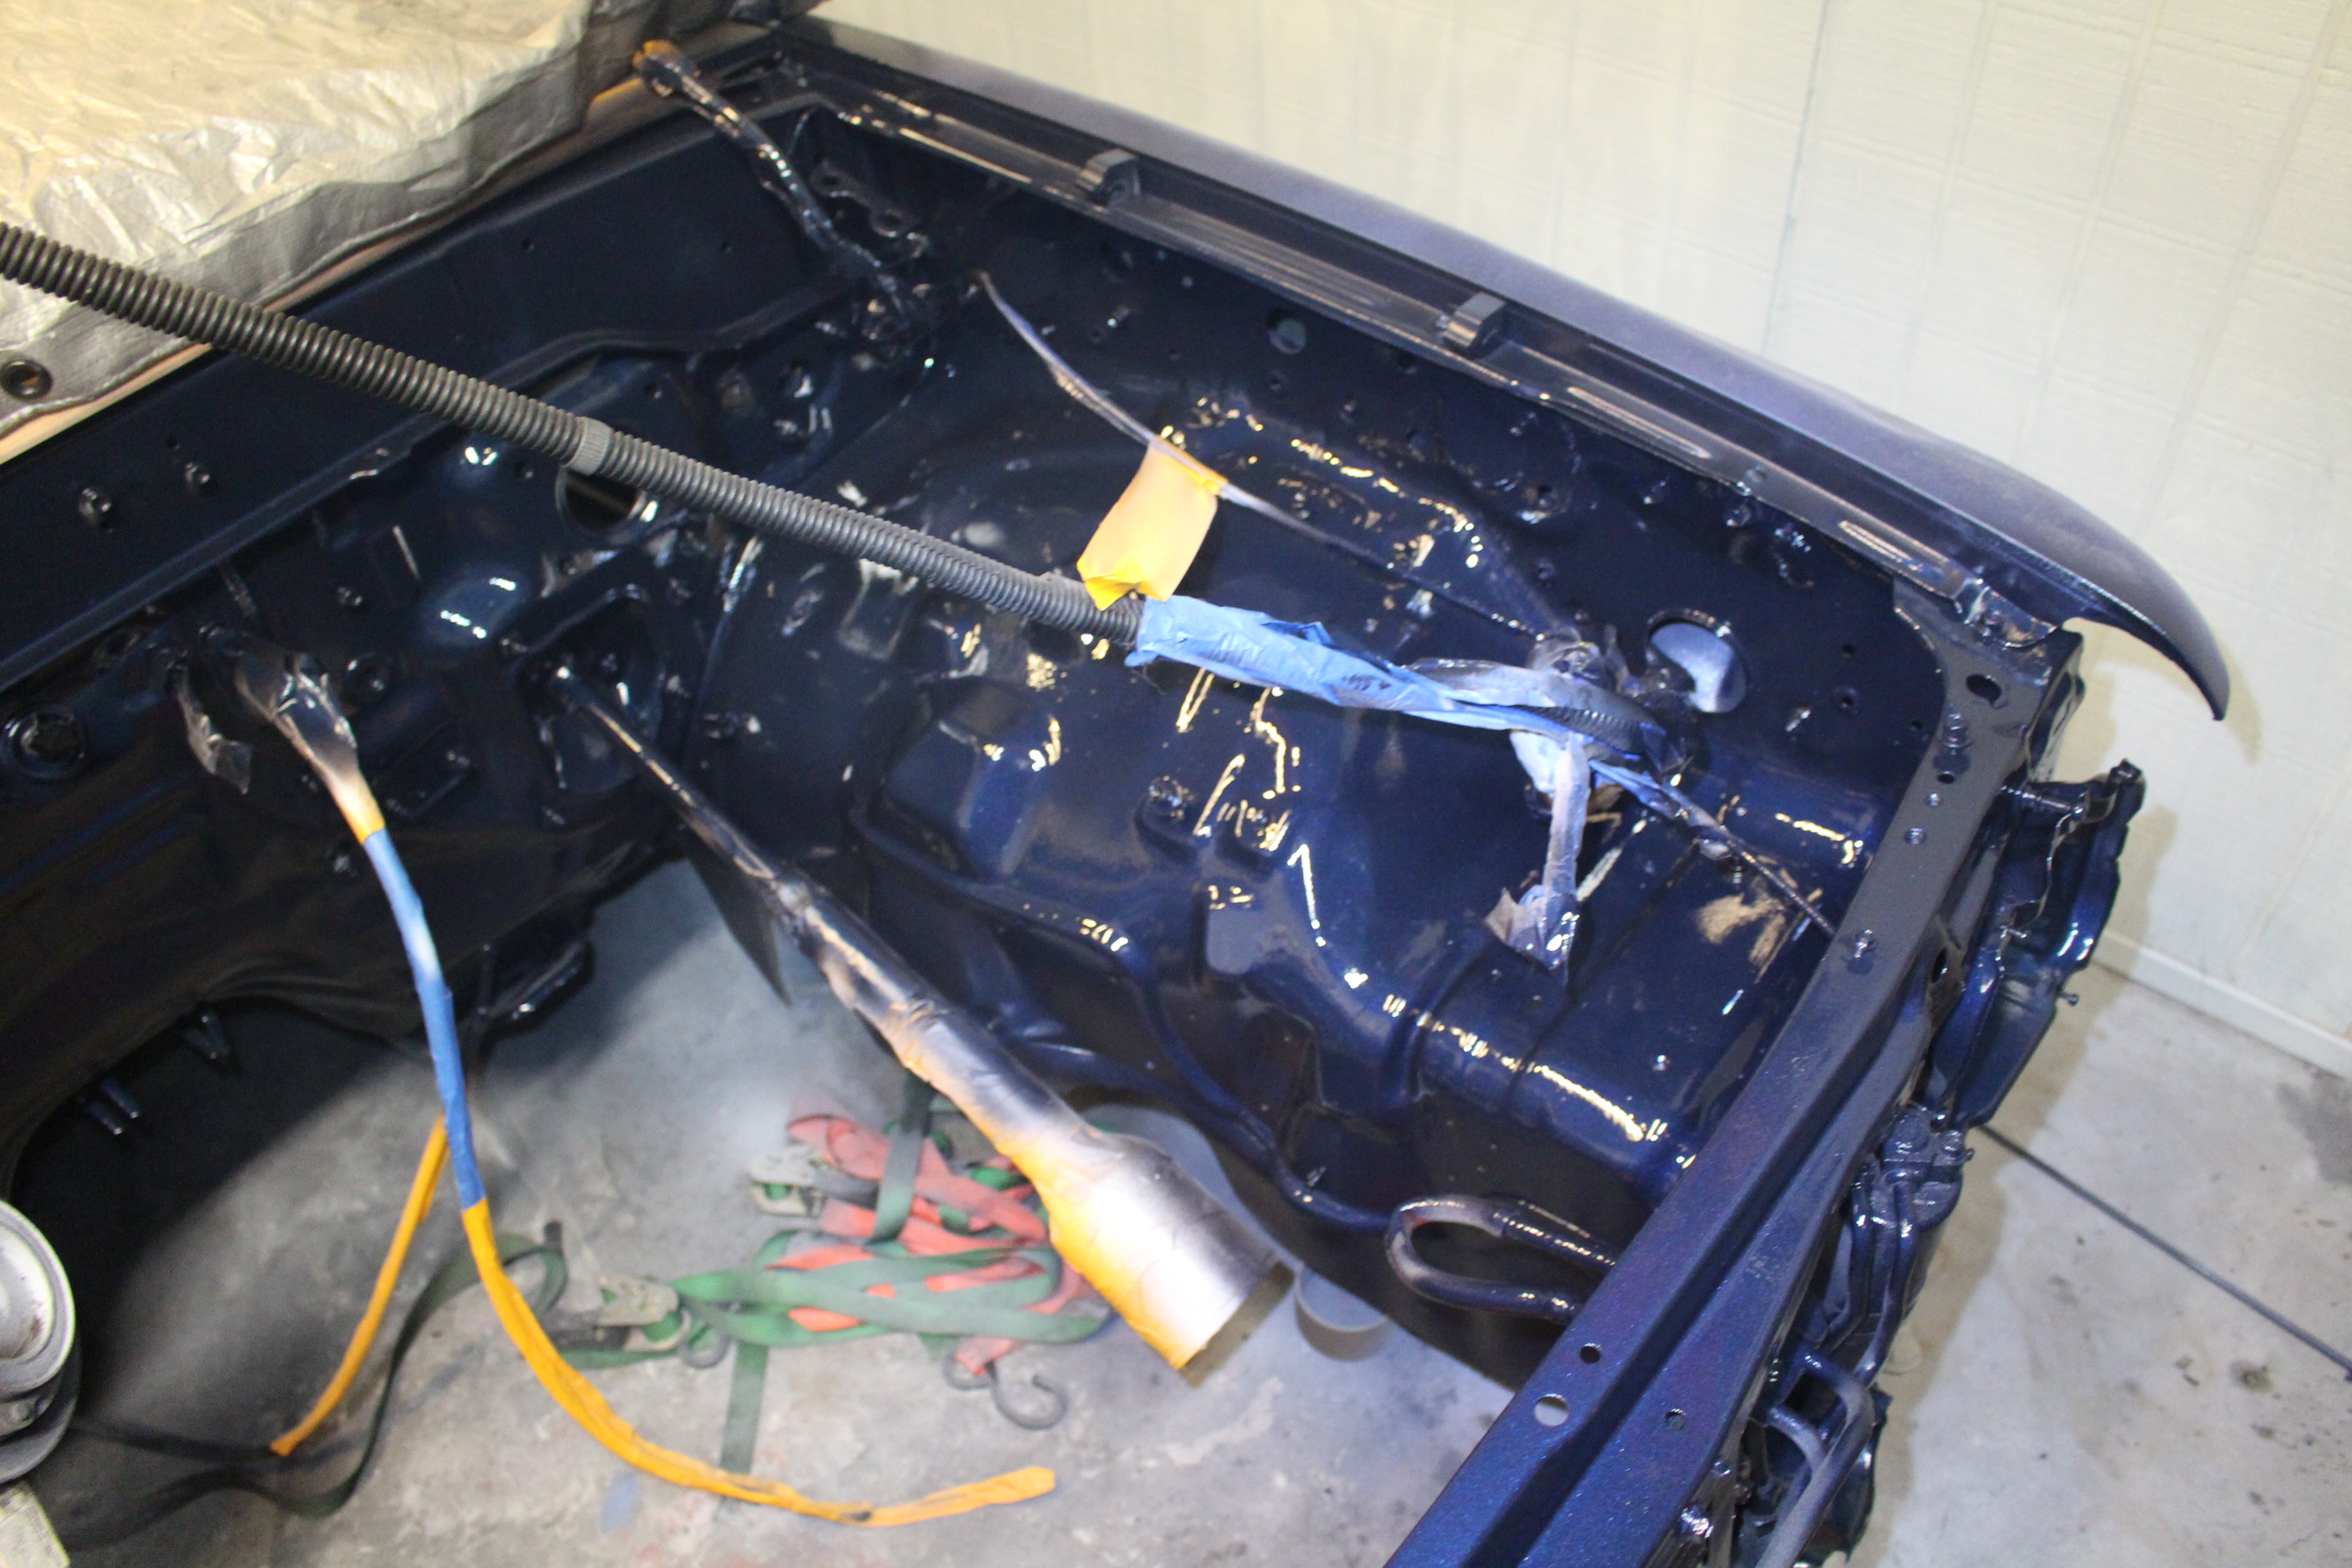
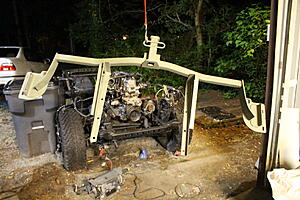
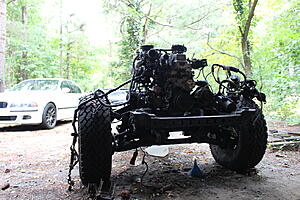
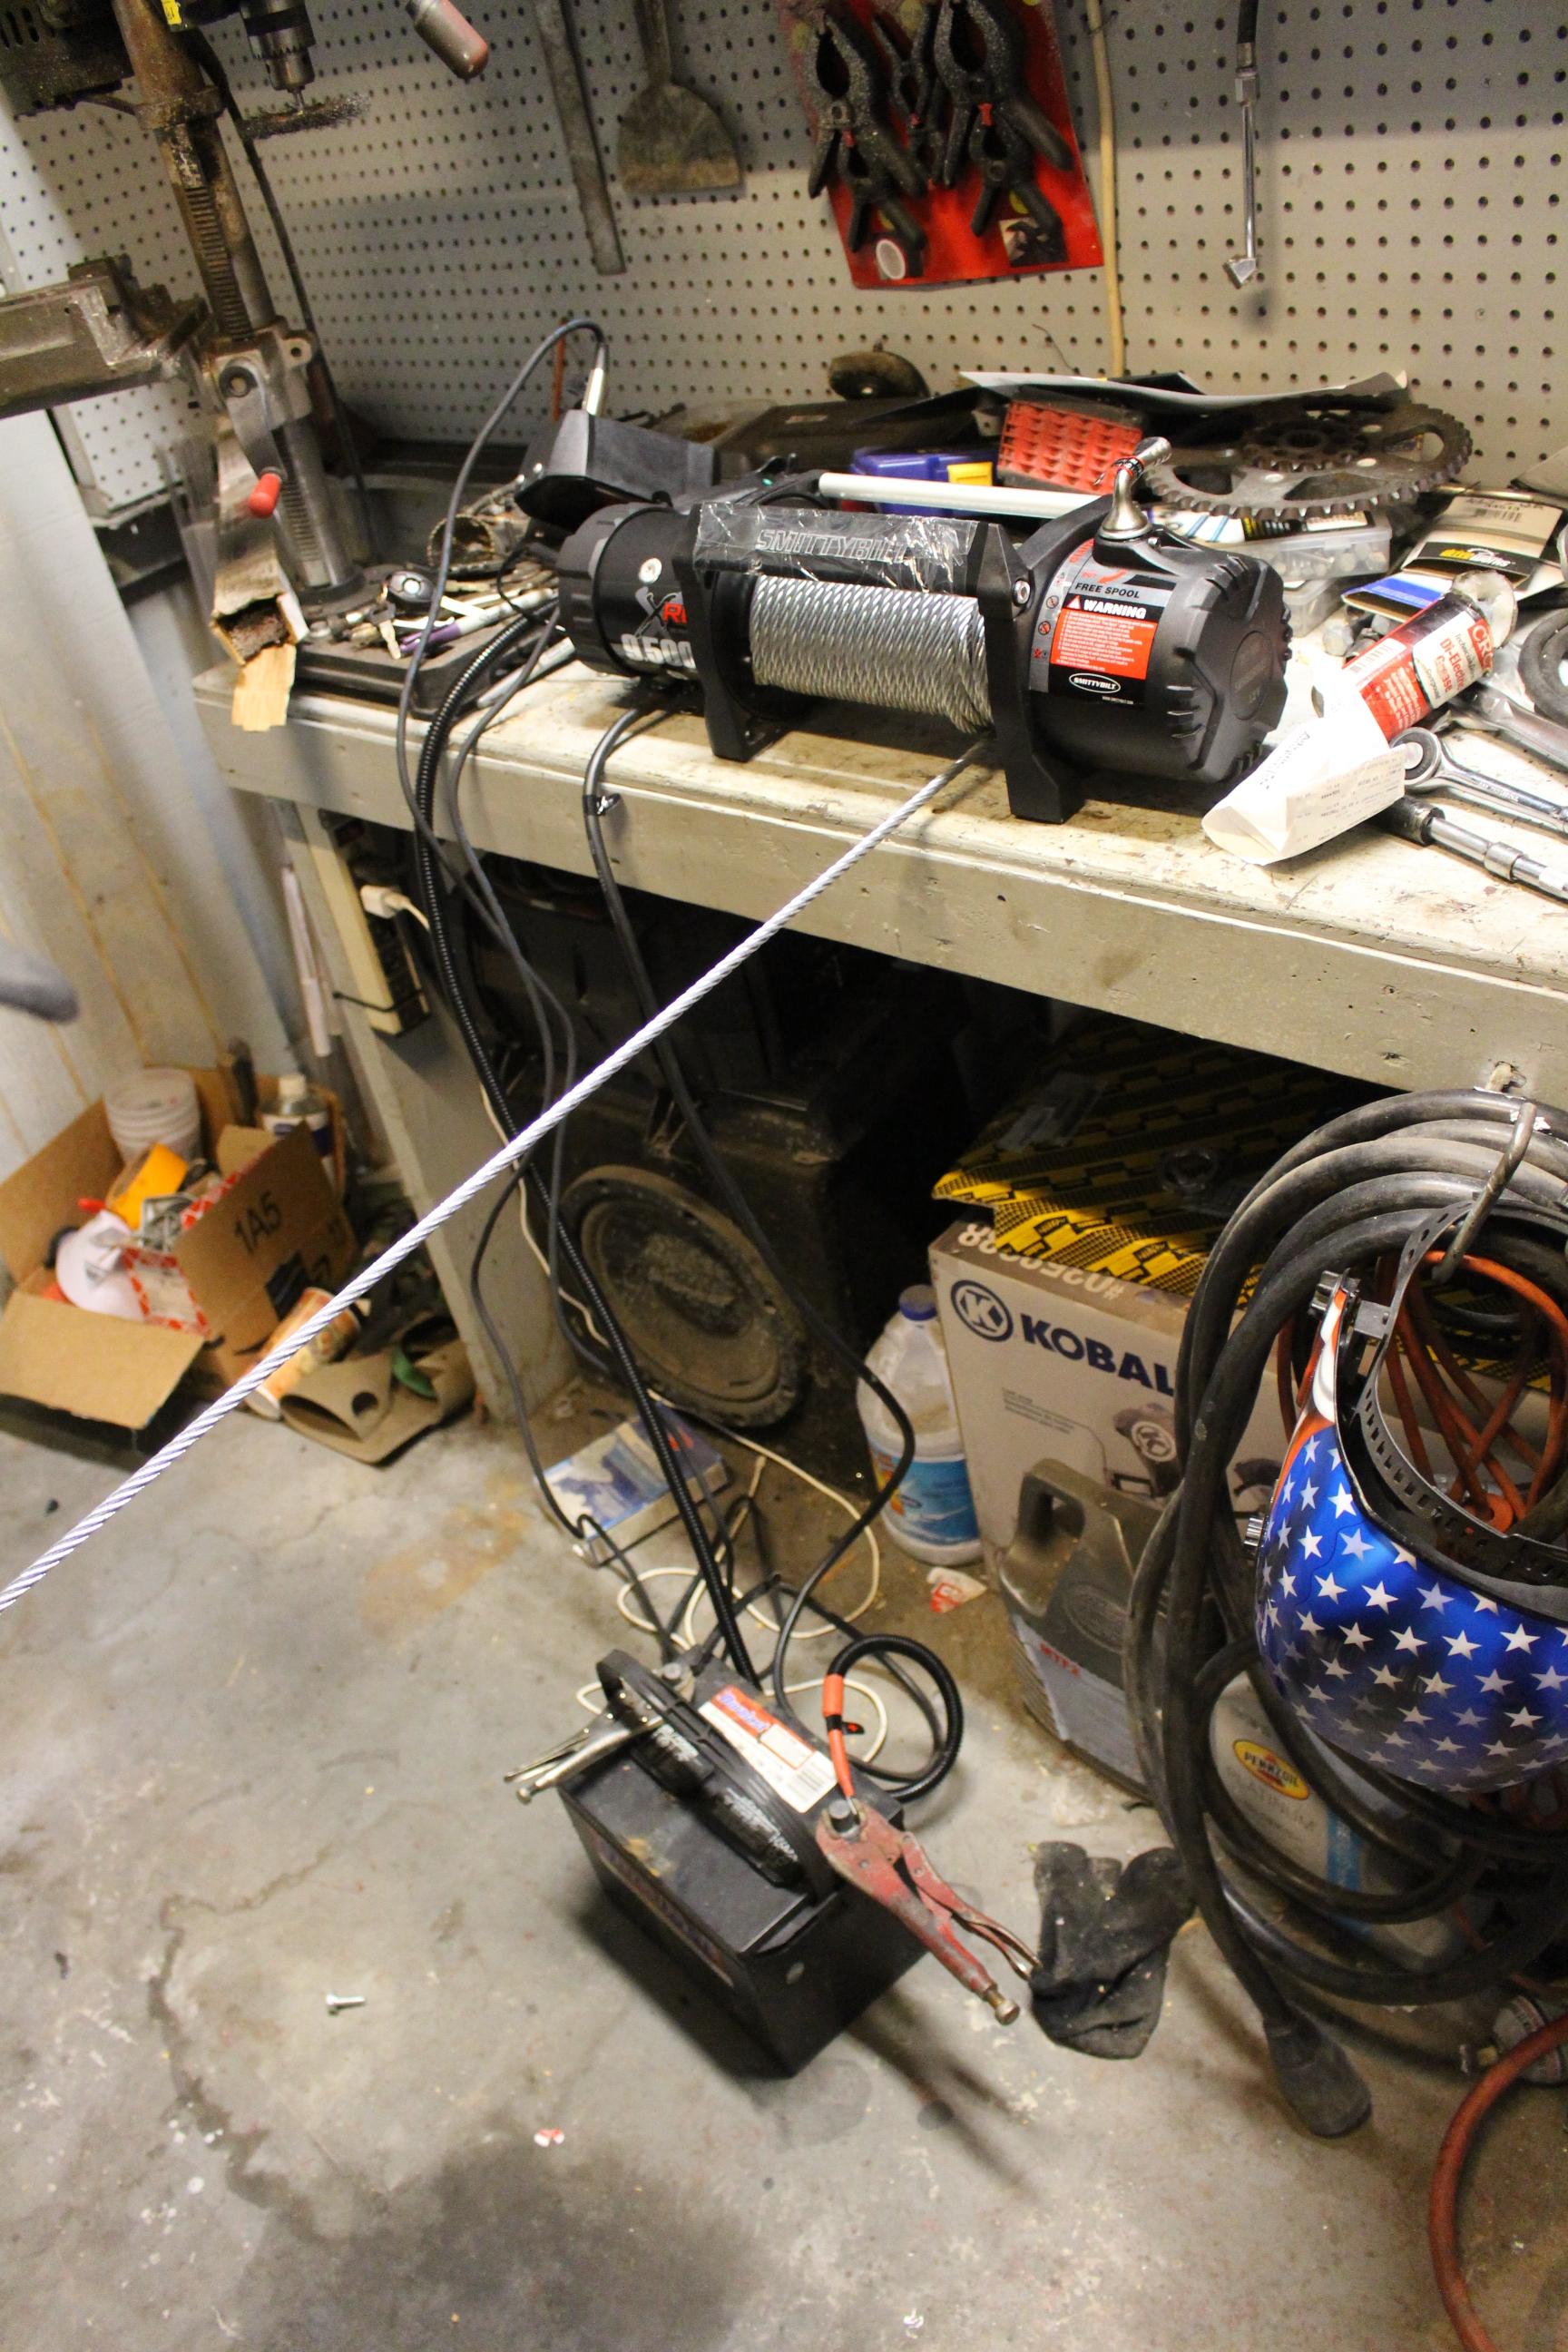
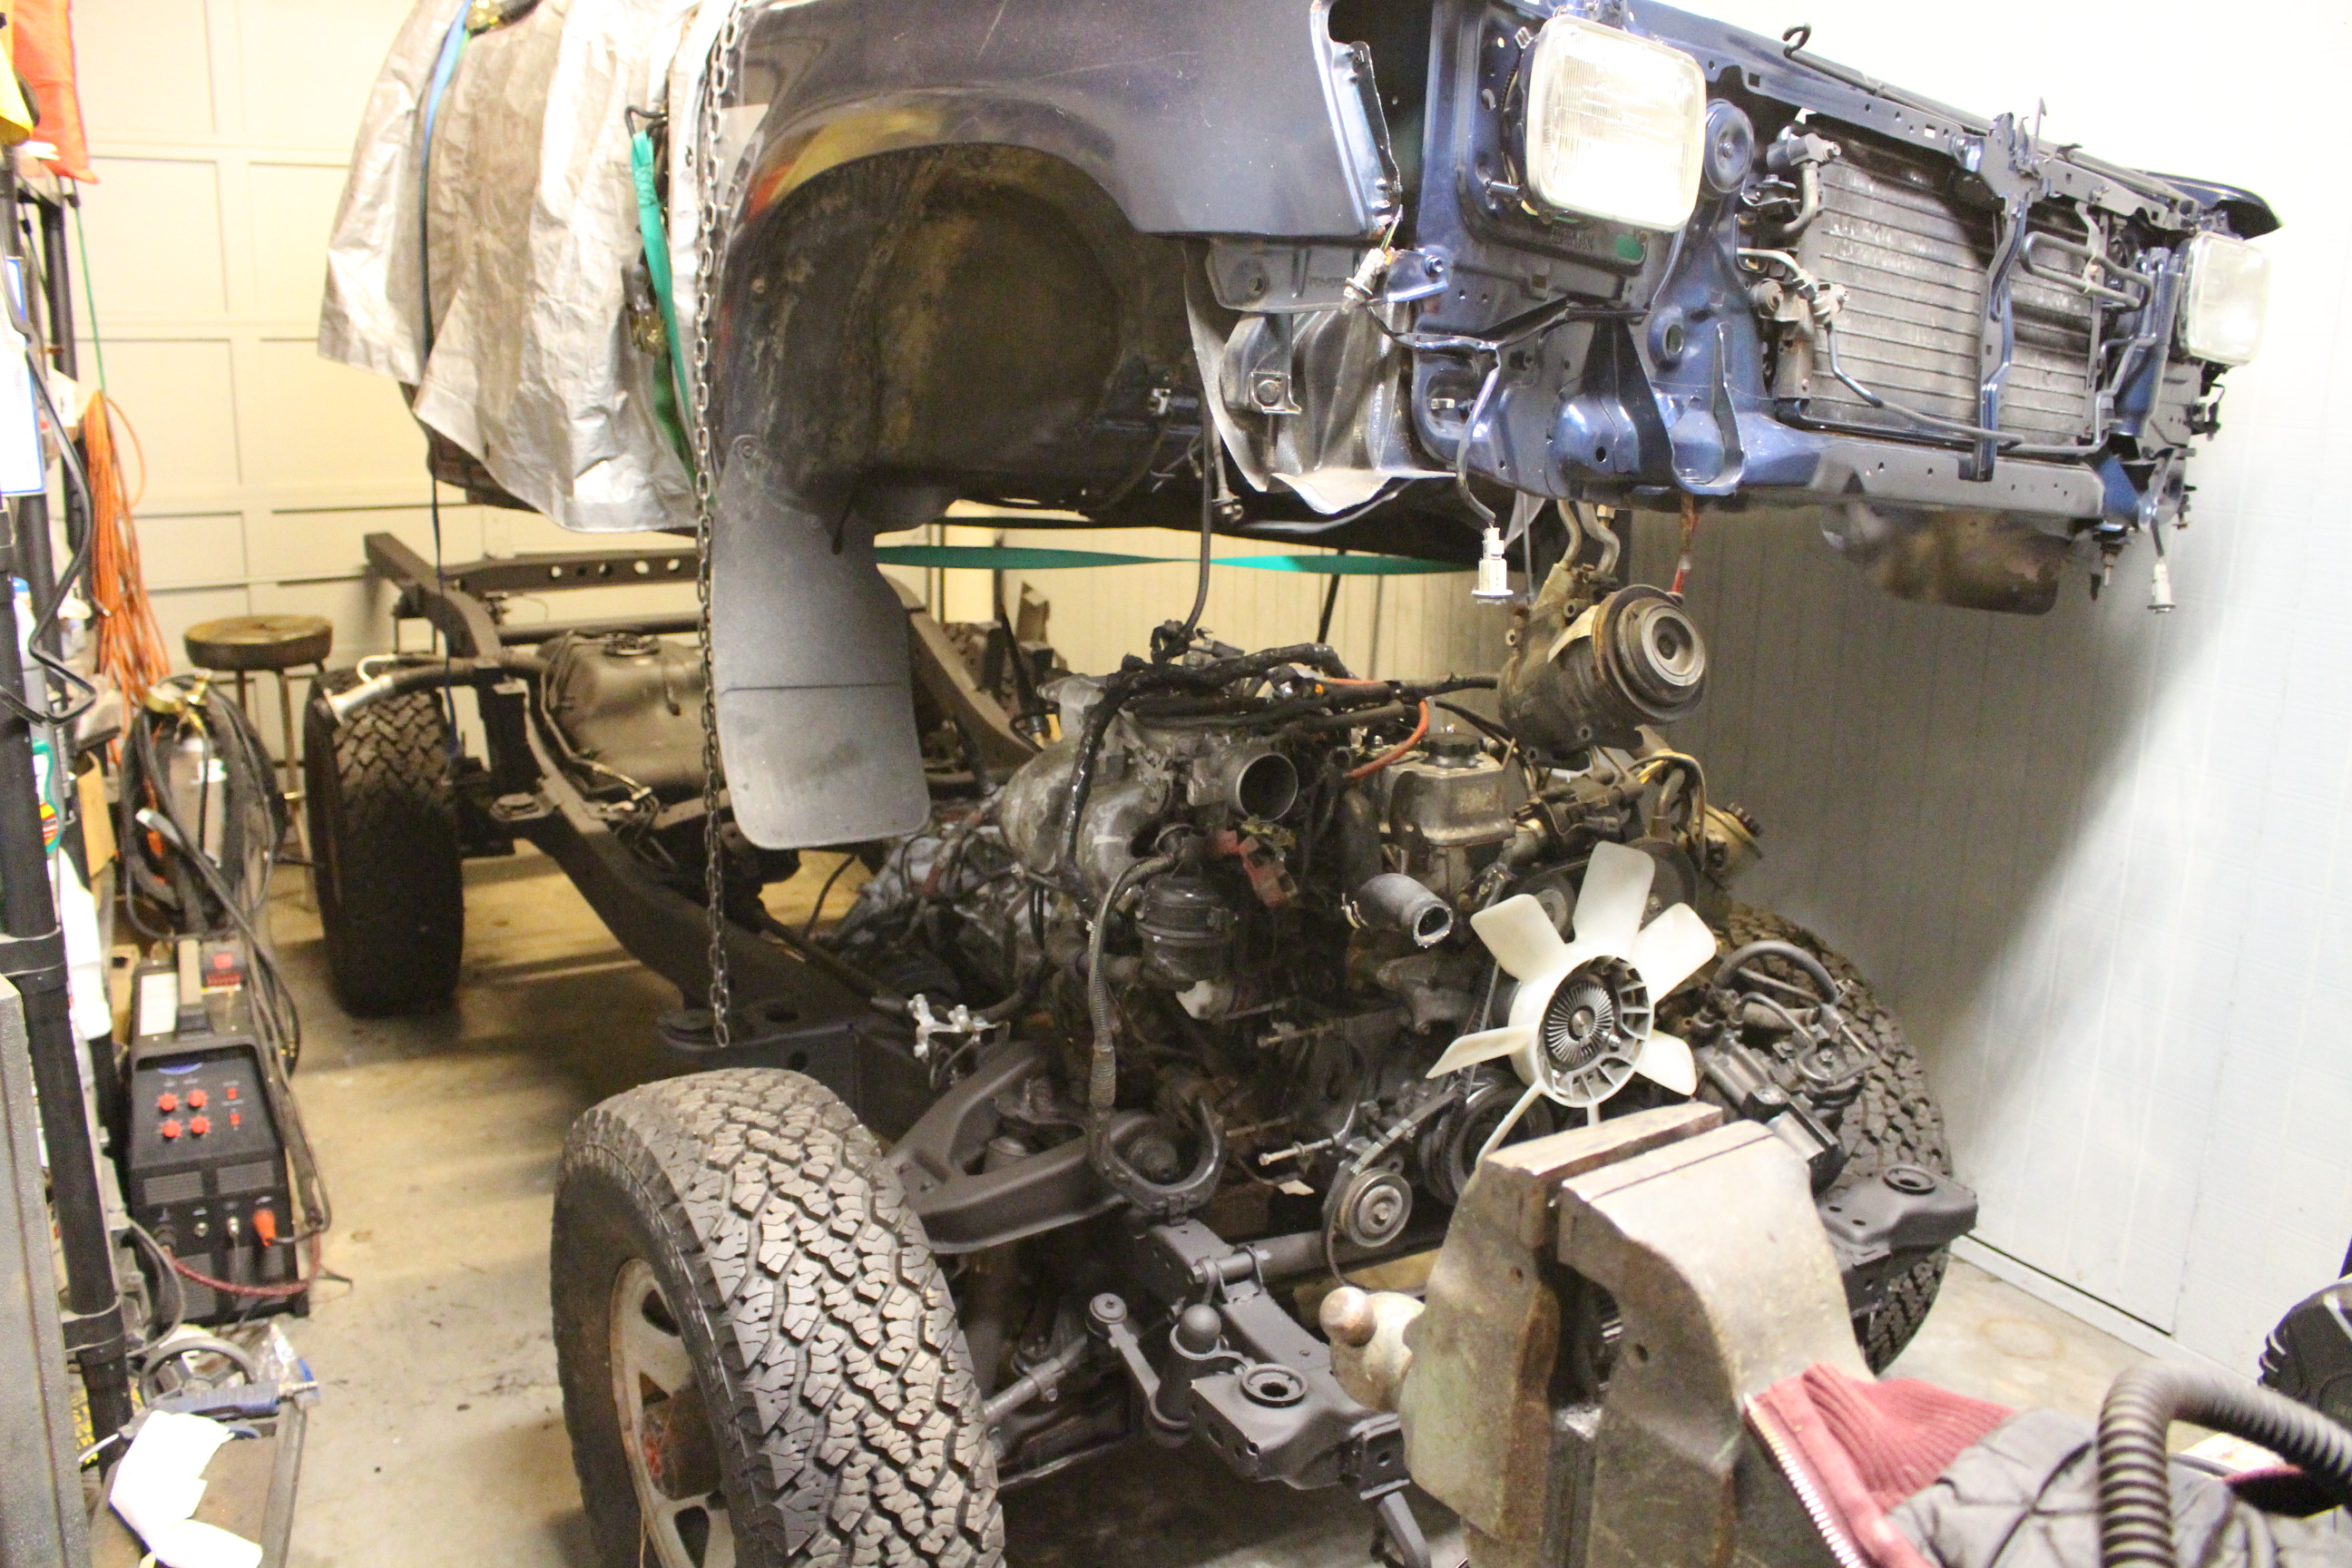
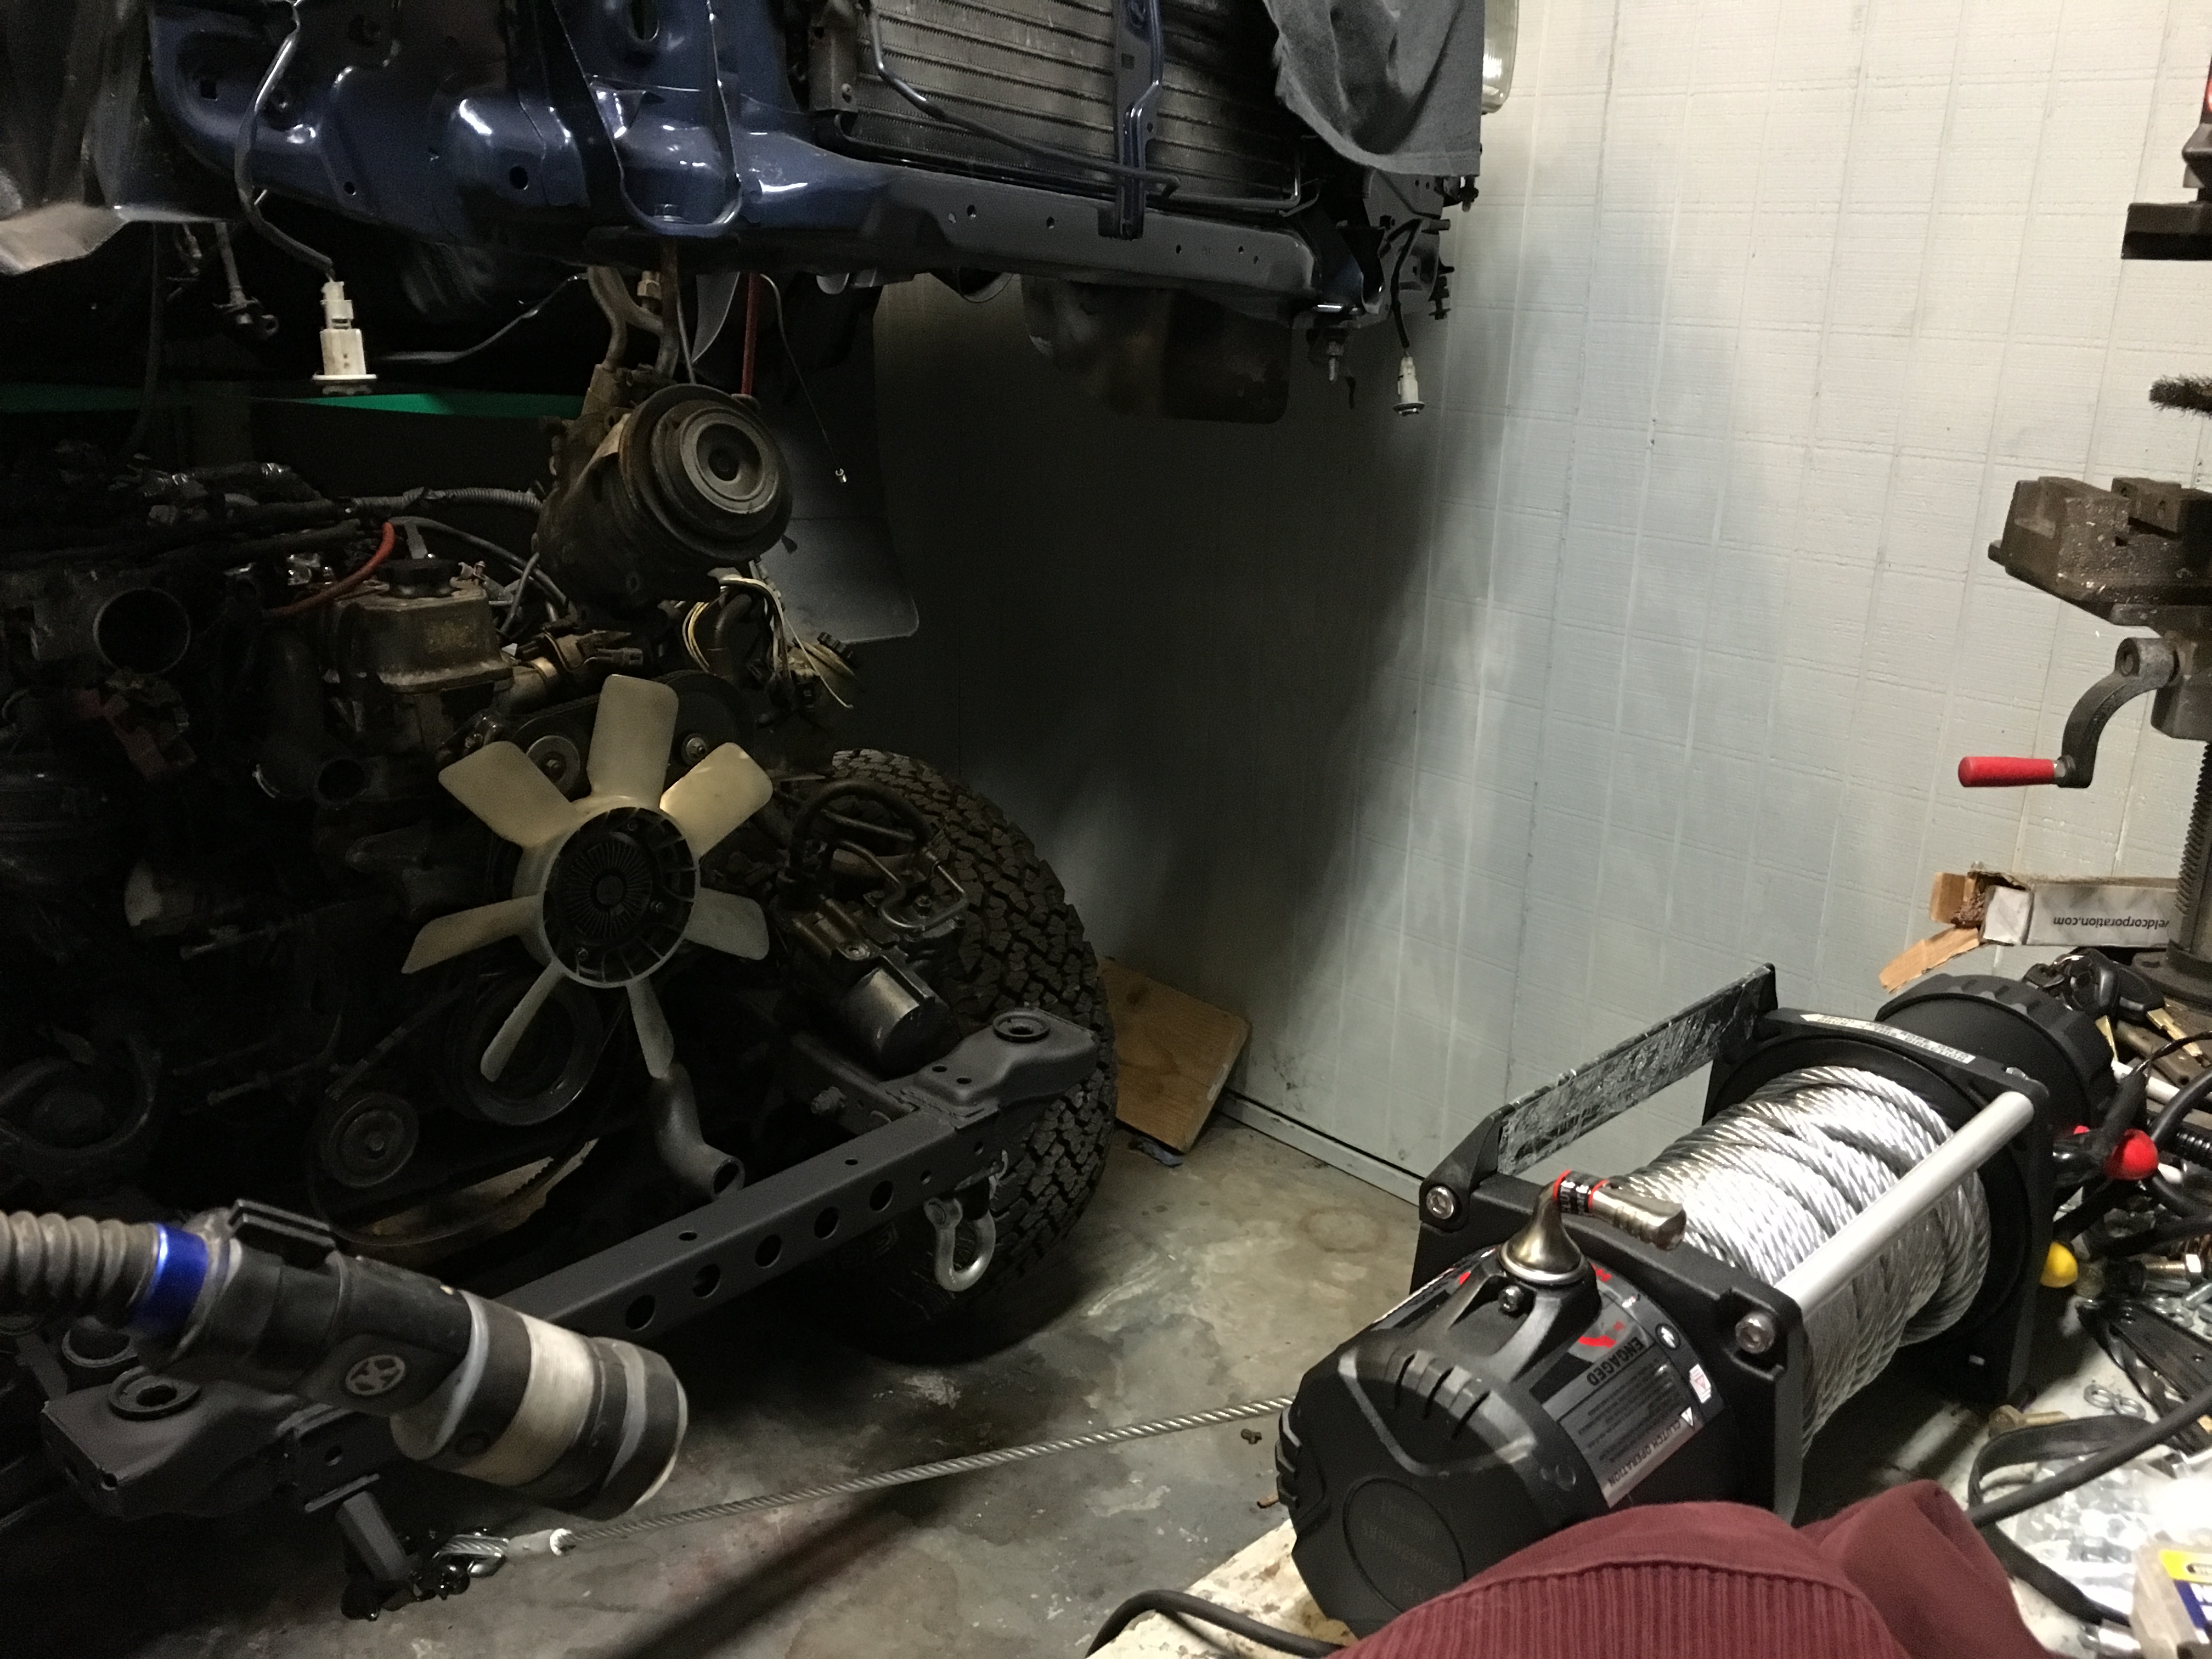
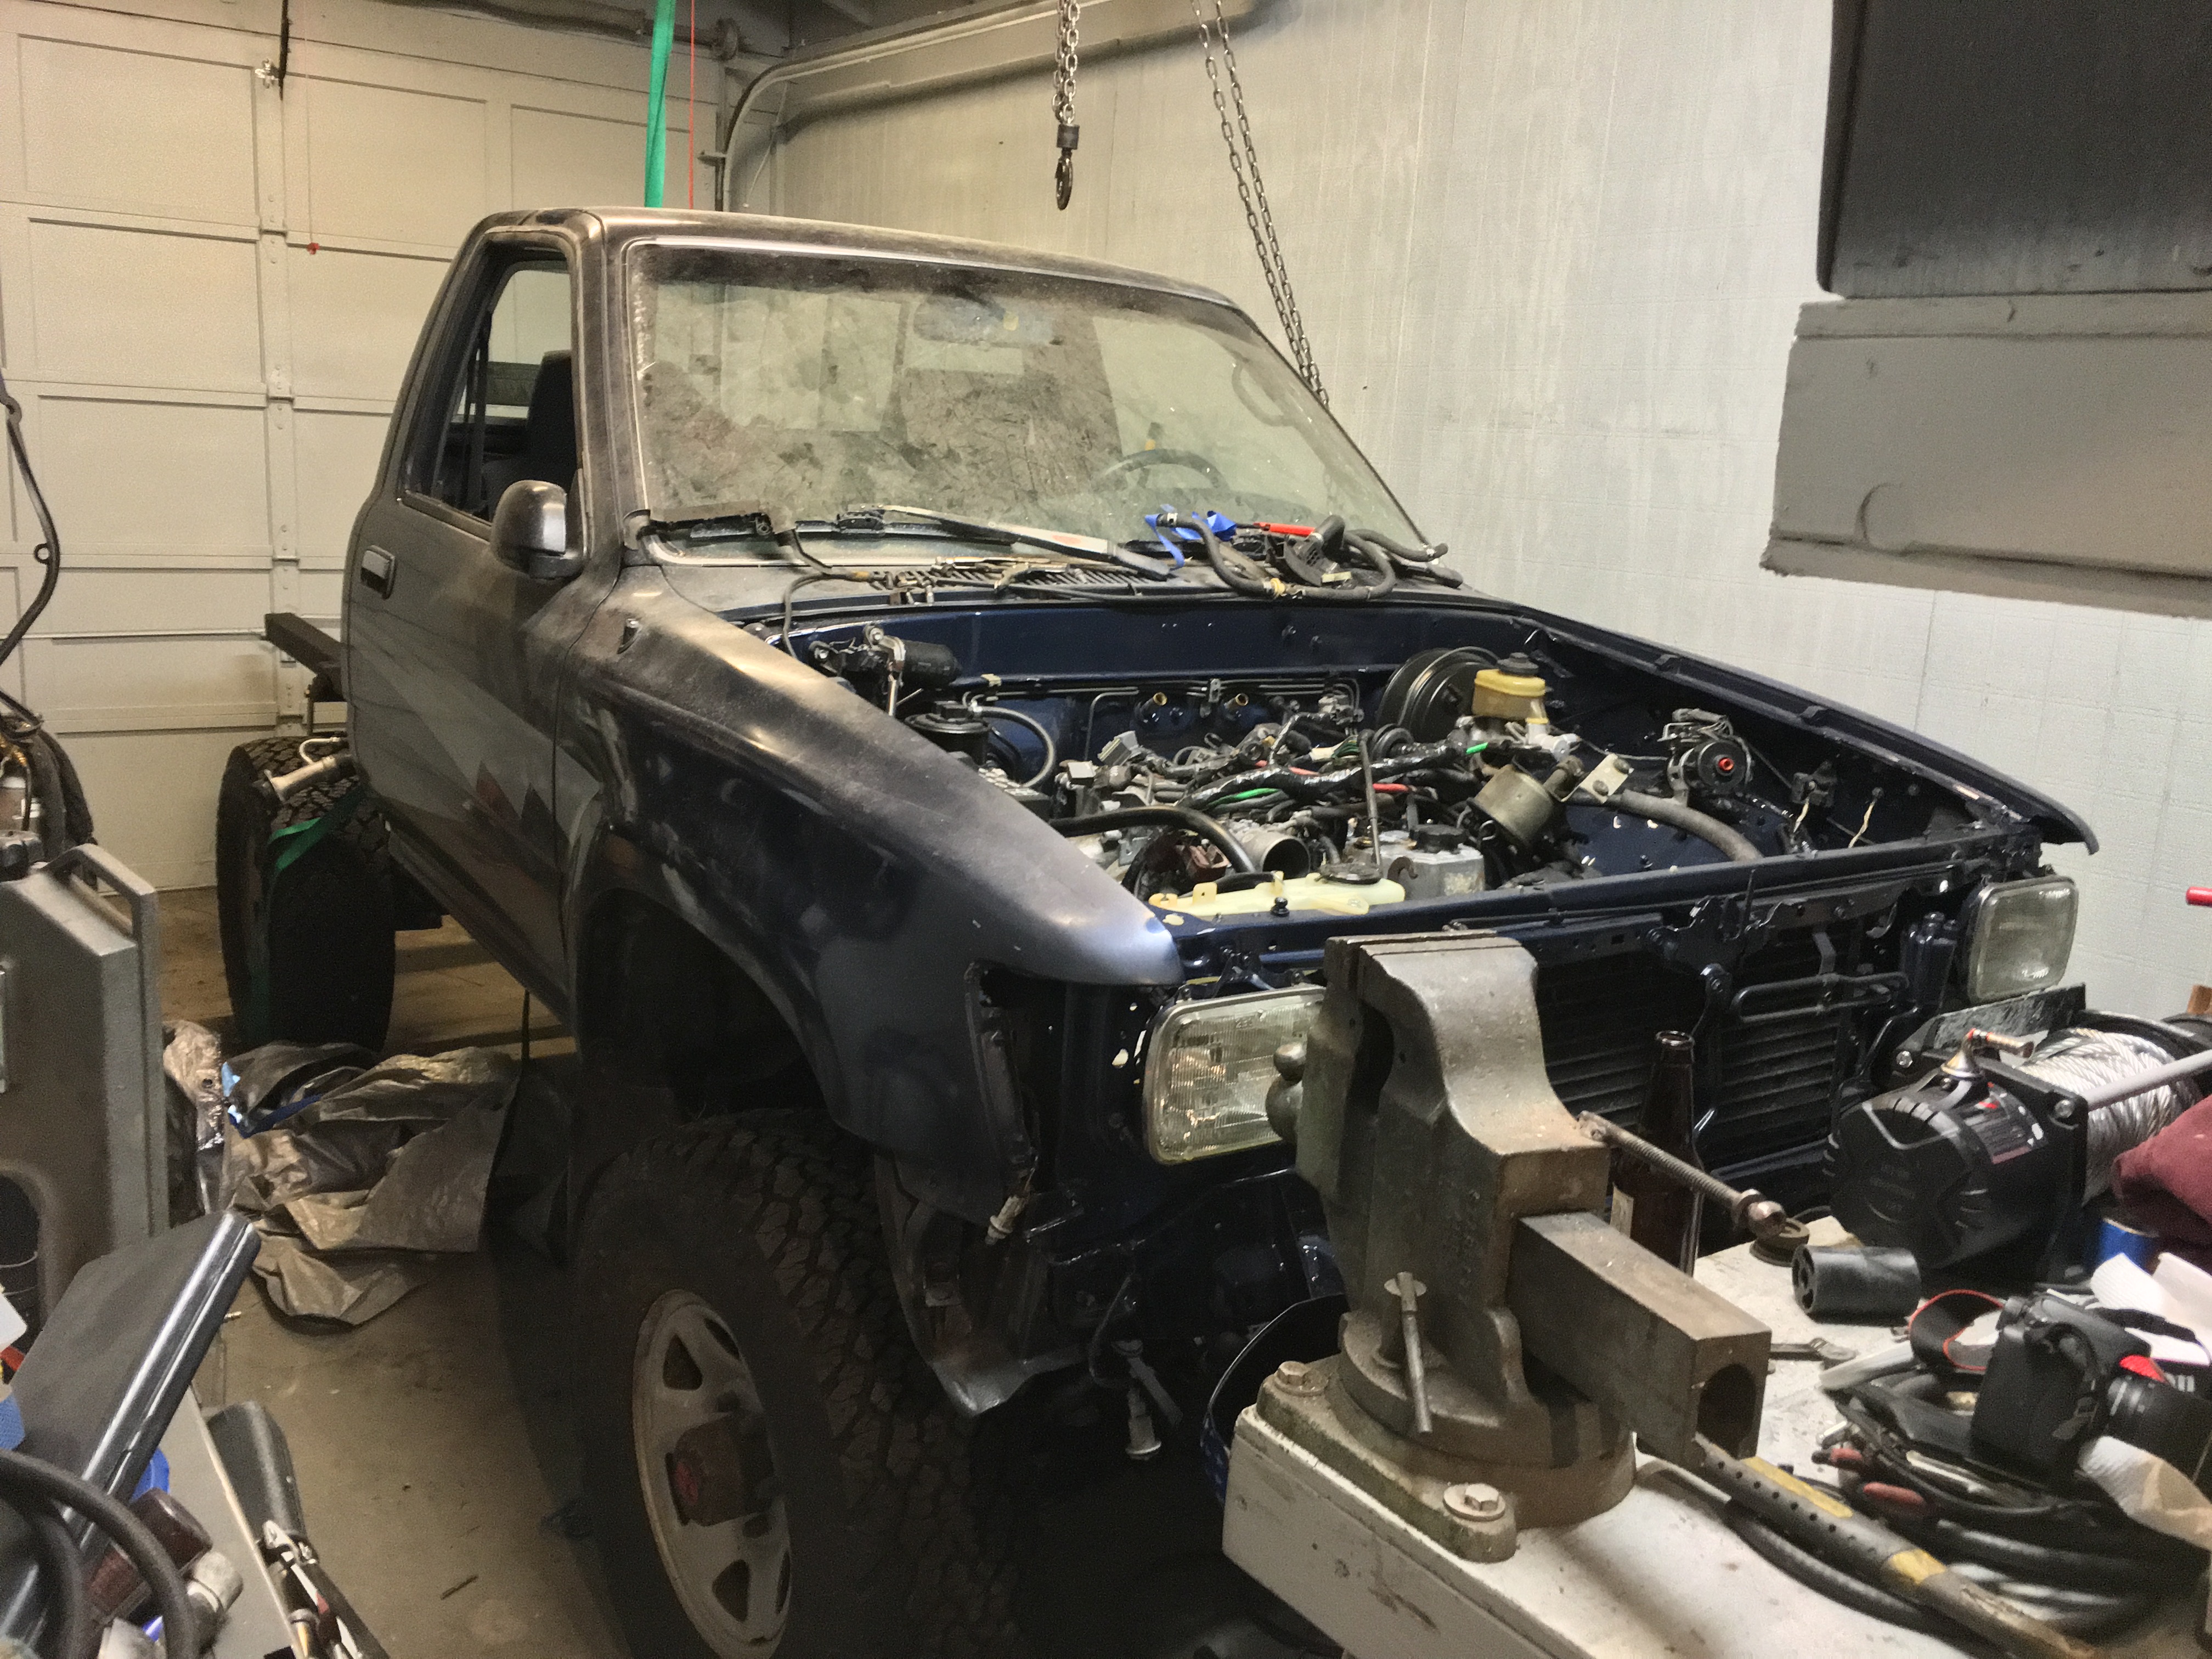
Since there was no way I was going to be able to move the frame myself, I decided to try out my new winch.
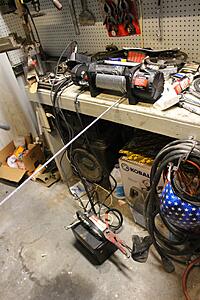
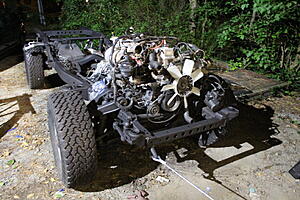
Too easy


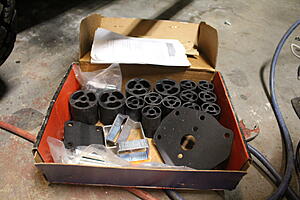
$80 craigslist score! since all the original body mount bolts were trashed, this was the cheapest route to go. 3" body lift.
coming down now. The frame wasn't fully square with the cab so I had to use some sideways straps to keep everything orientated.
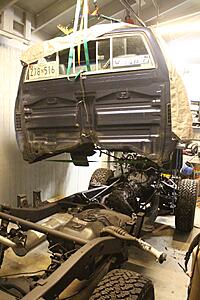
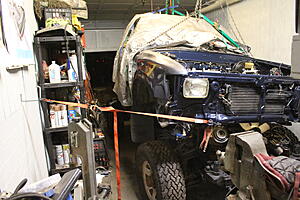
This was a huge victory. Everything up to this point seemed like a never ending project. Now, it is just some odds and ends to button up and some wire harnesses to connect, and then its drivable again

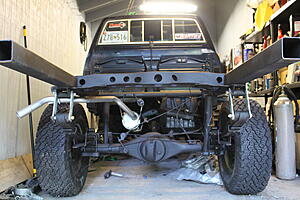
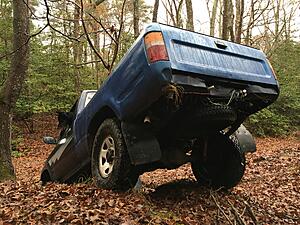
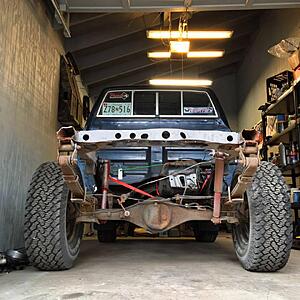
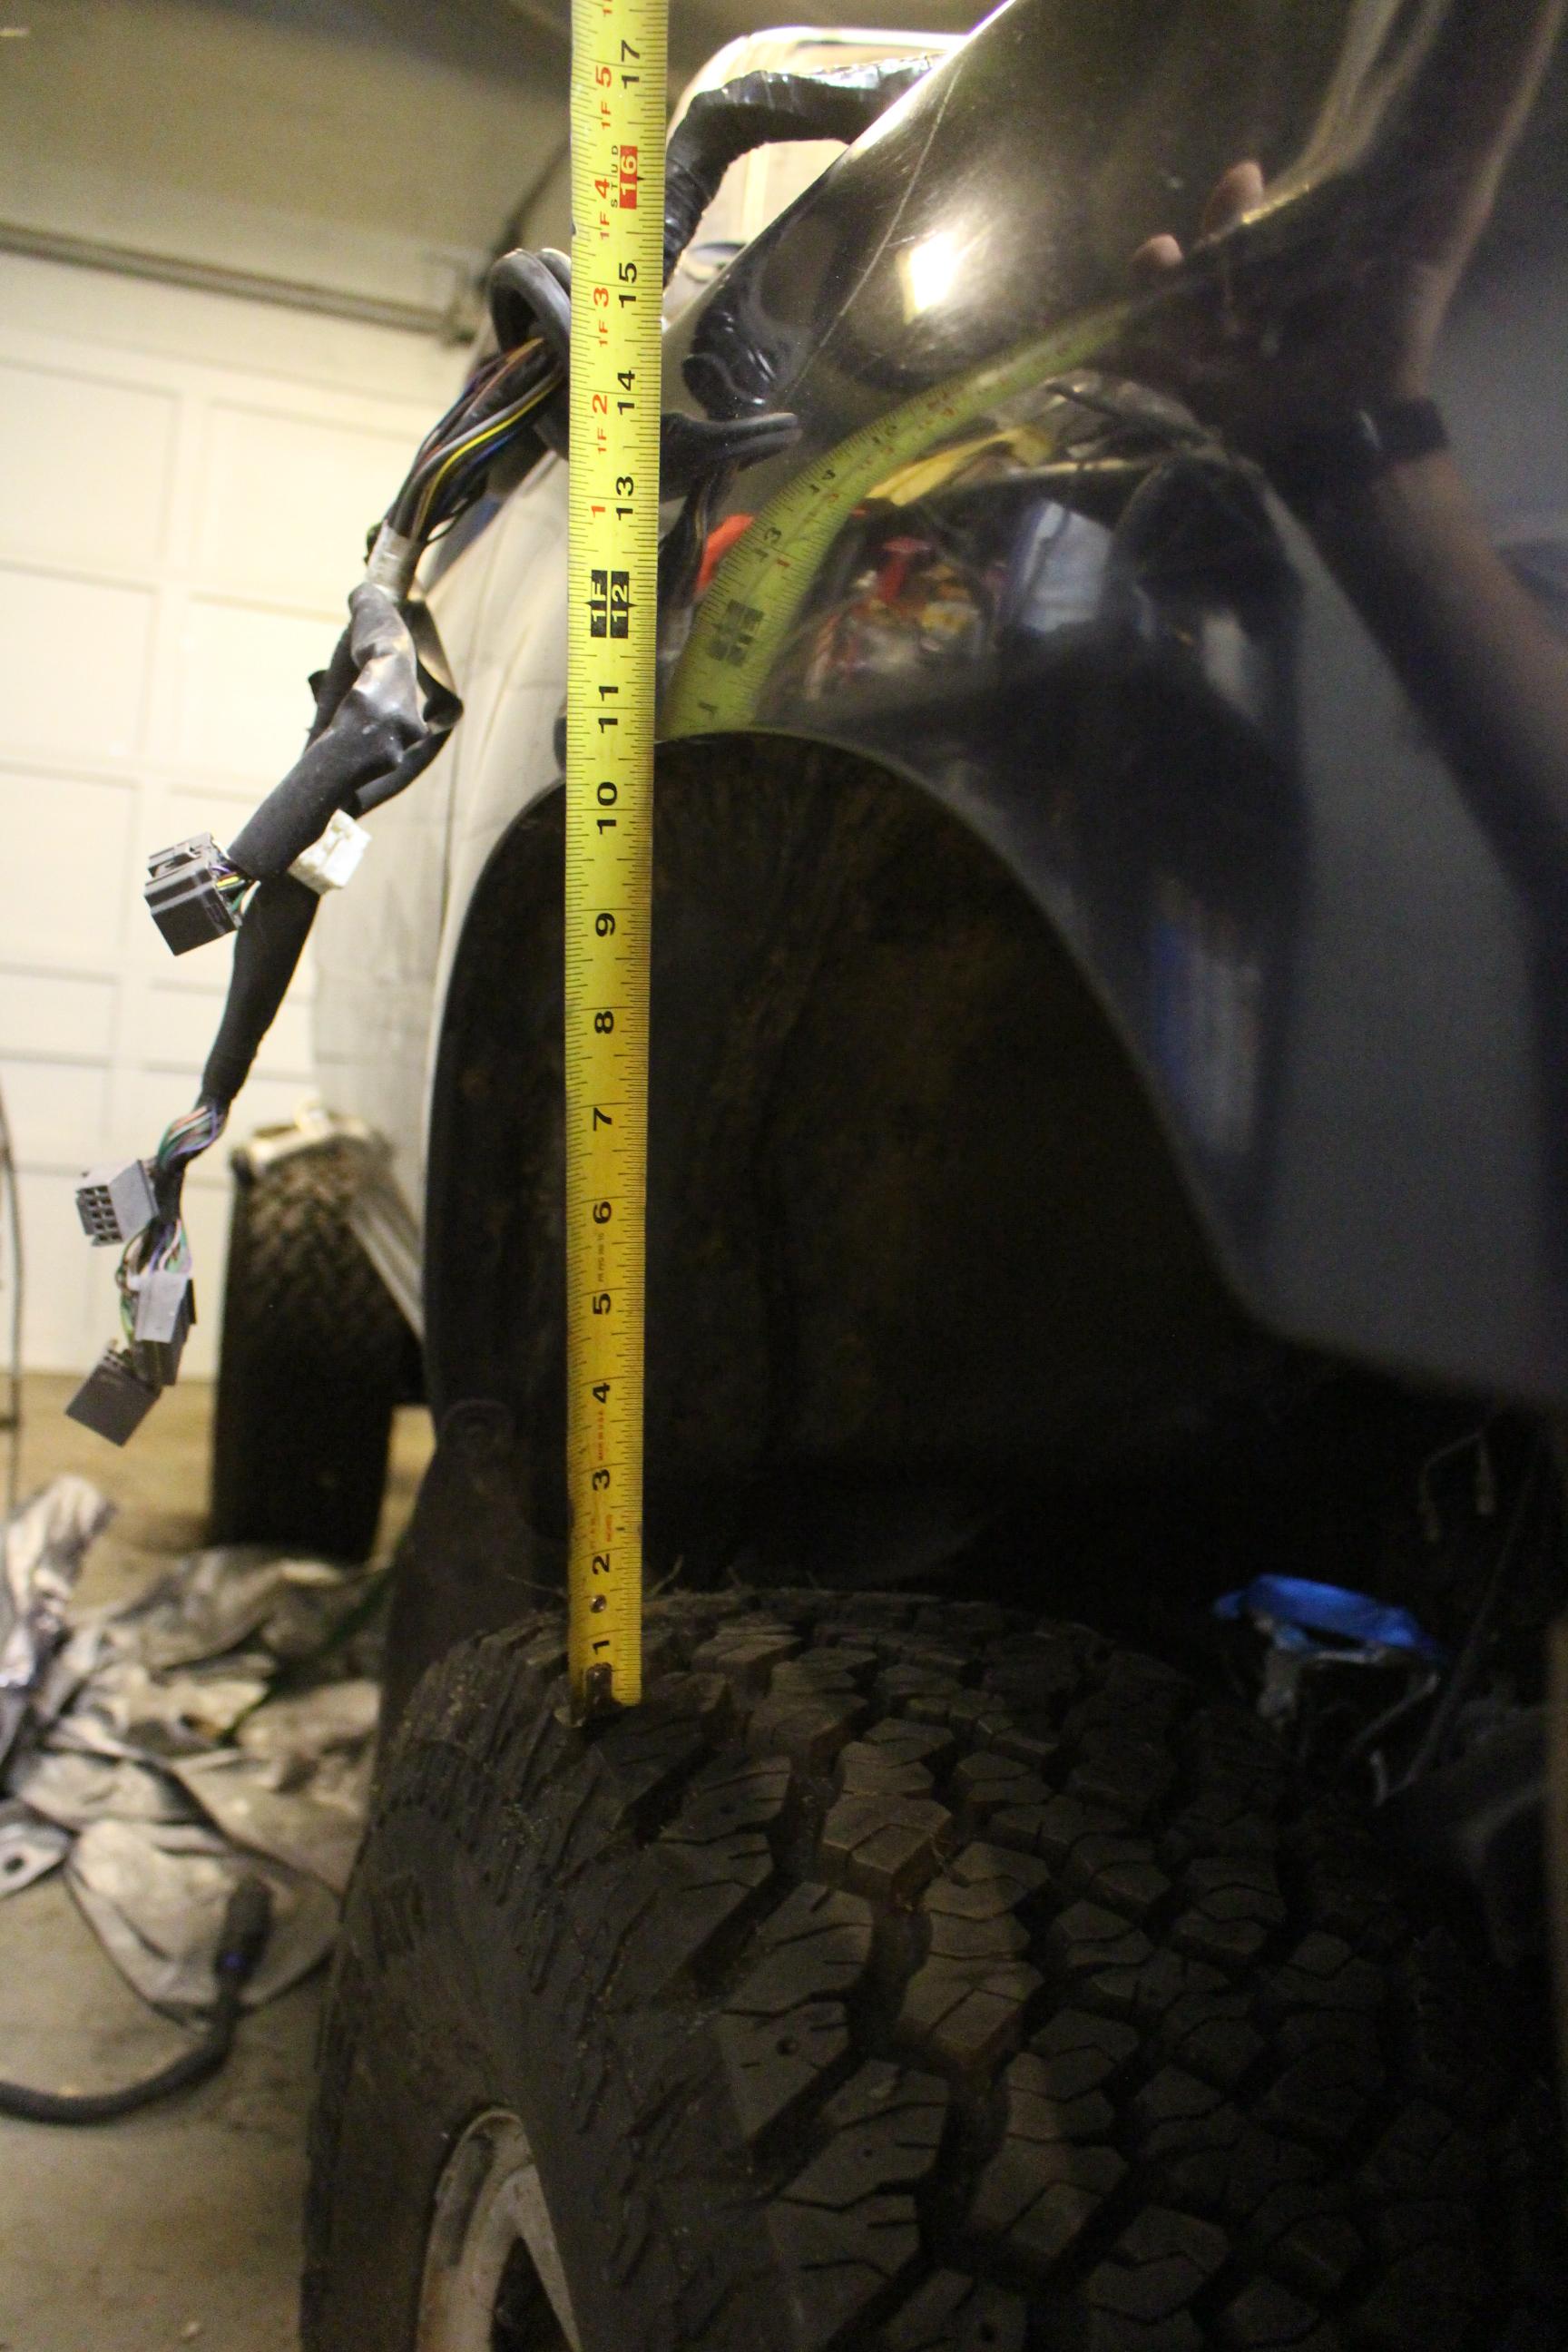
Im thinking I need some long travel suspension in my future :eek: The rear suspension already has the shocks maxed out with still more travel left in the springs (had to compress the rear suspension a little to get the shocks mounted). Some longer travel shocks are in the trucks very near future. Longer front control arms with T-100 axles gives a 6" wider track up front and a T-100 rear axle does the same for the back. The truck is currently sitting on 31" General Grabber AT2's, not sure if I will stick with those or bump up to 33's or 35's. Have to see what it looks like with the bed on.

Fuel lines are in.
Fan blade was disgusting. Rust and paint overspray. Wire wheel to the rescue! Fan clutch was also dirty so it also got some love.


Much better. I also put some oil on the spring in the middle, and then packed it with dielectric grease. If these happen to rust together they stop functioning as they should. I believe the spring is a bimetal that coils and uncoils as its temperature changes, increasing or decreasing fan speed engagement. I could be mistaken though.

Cleaned up, acid primed and a quick shot of gray.
Some fine Louisiana beer from my friends in Baton Rouge. They're going through hell down there and any help you can lend to the area would be much appreciated!

Still needed to put the pulleys back on, and the PS, ALT, and AC brackets. They weren't the best looking things (some orange overspray from the Previous Owner) so I cleaned all of them up, primed and painted them charcoal metallic. I accidentally stripped the threads on the PS pump pulley nut and shaft, so I had to turn the shaft down a bit and recut new threads. That was a small setback but I used a locknut on there once it was fixed so I wouldn't have to tighten it as much since I had less material now. Also pictured is the 93-97 Jaguar XJ6 Alternator upgrade I did a while back. It is 120 amp vs the stock 60, uses the same exact mounting holes and even uses the same wire harness plug. I had to swap over the pulleys since the Jaguar uses a serpentine belt, but otherwise this was pretty straight forward.
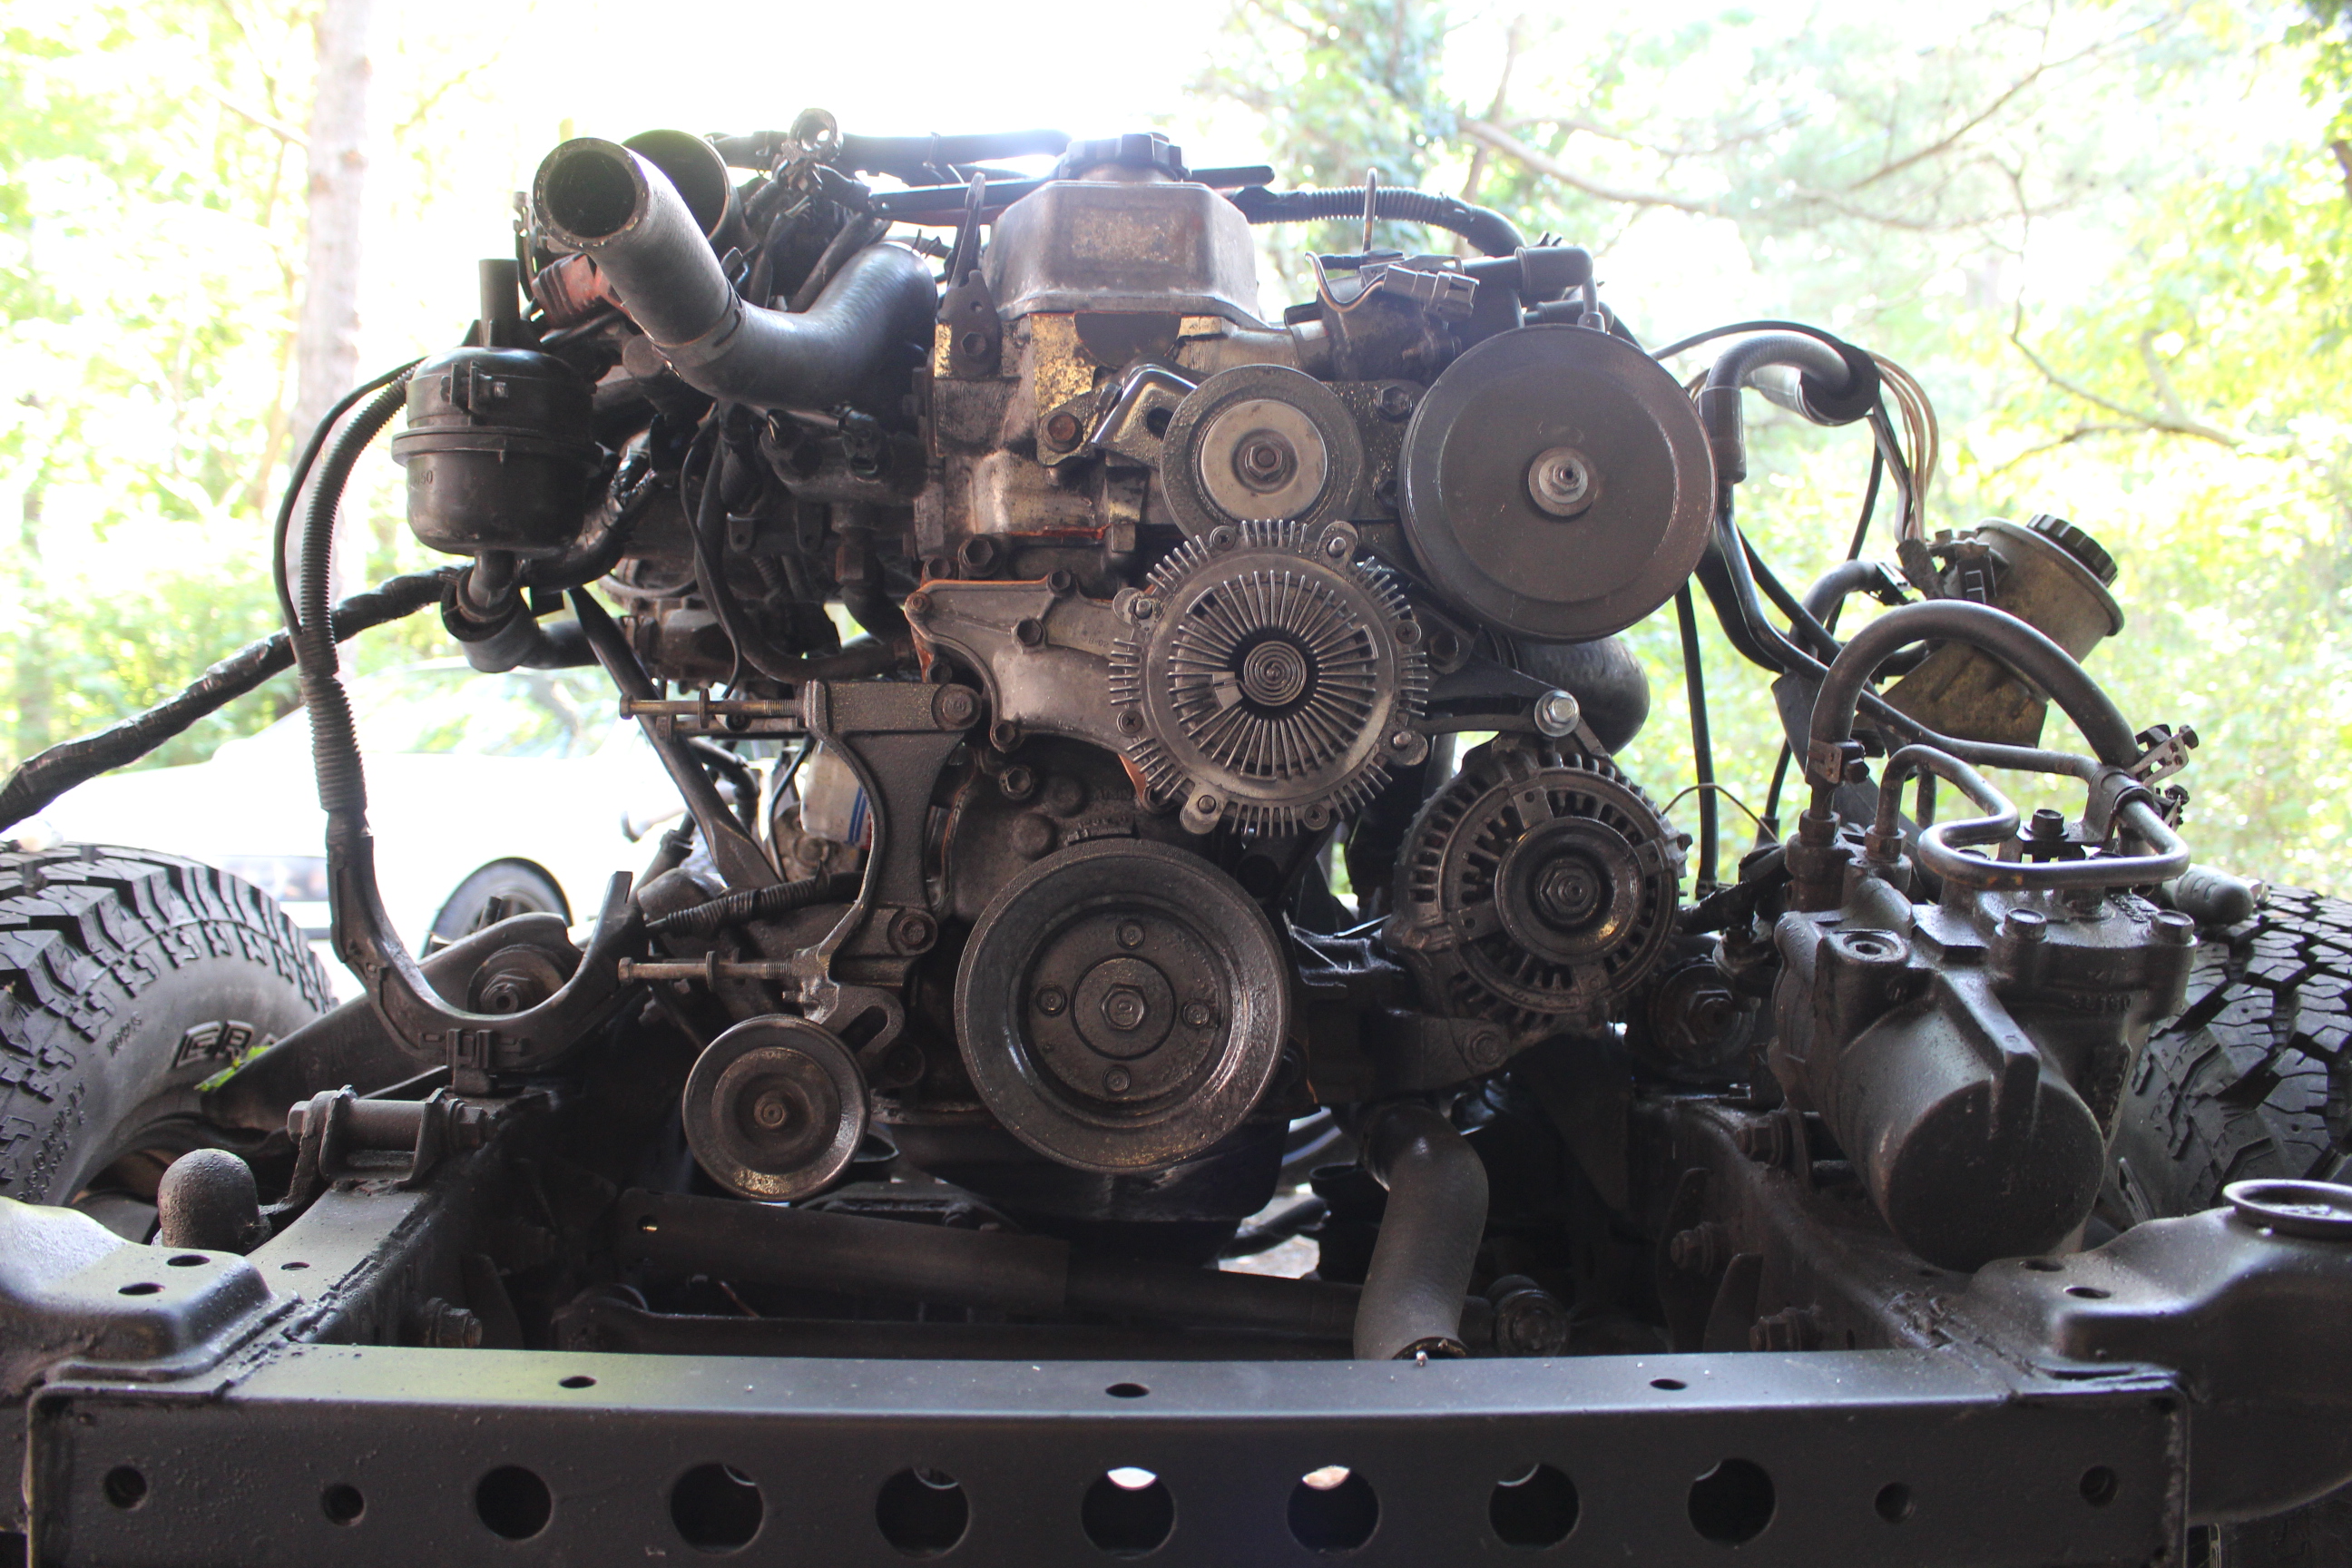

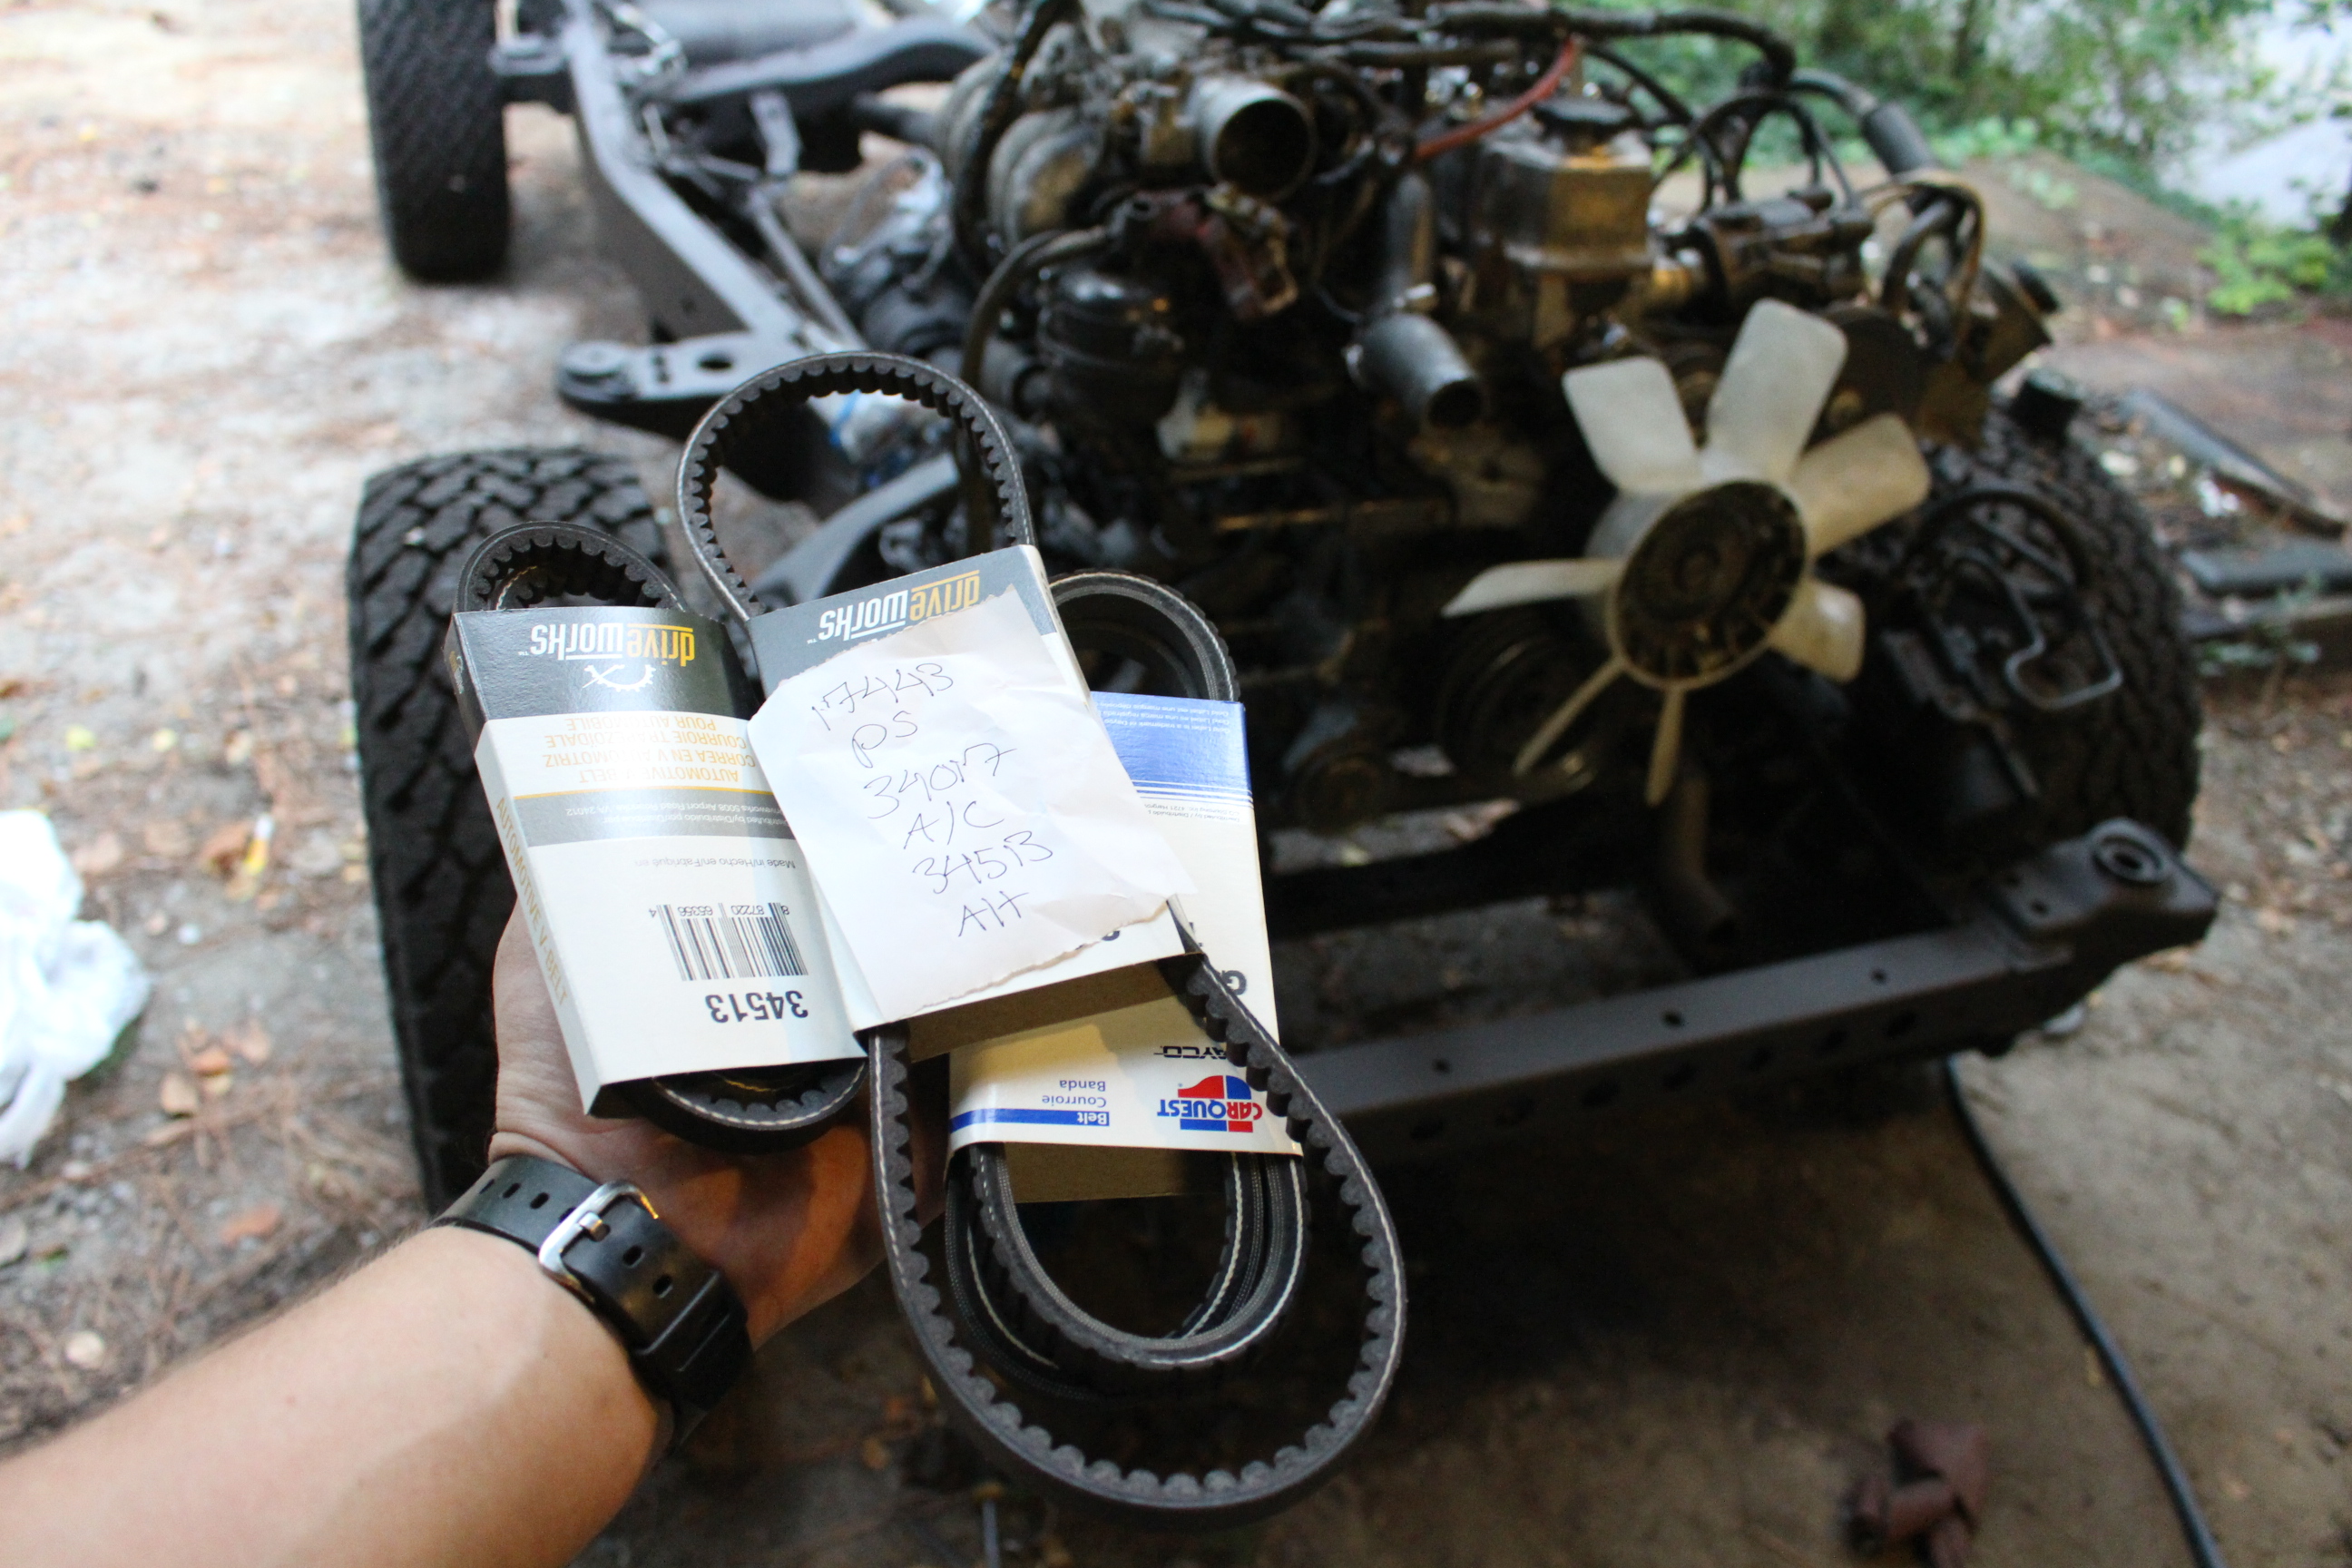
New belts
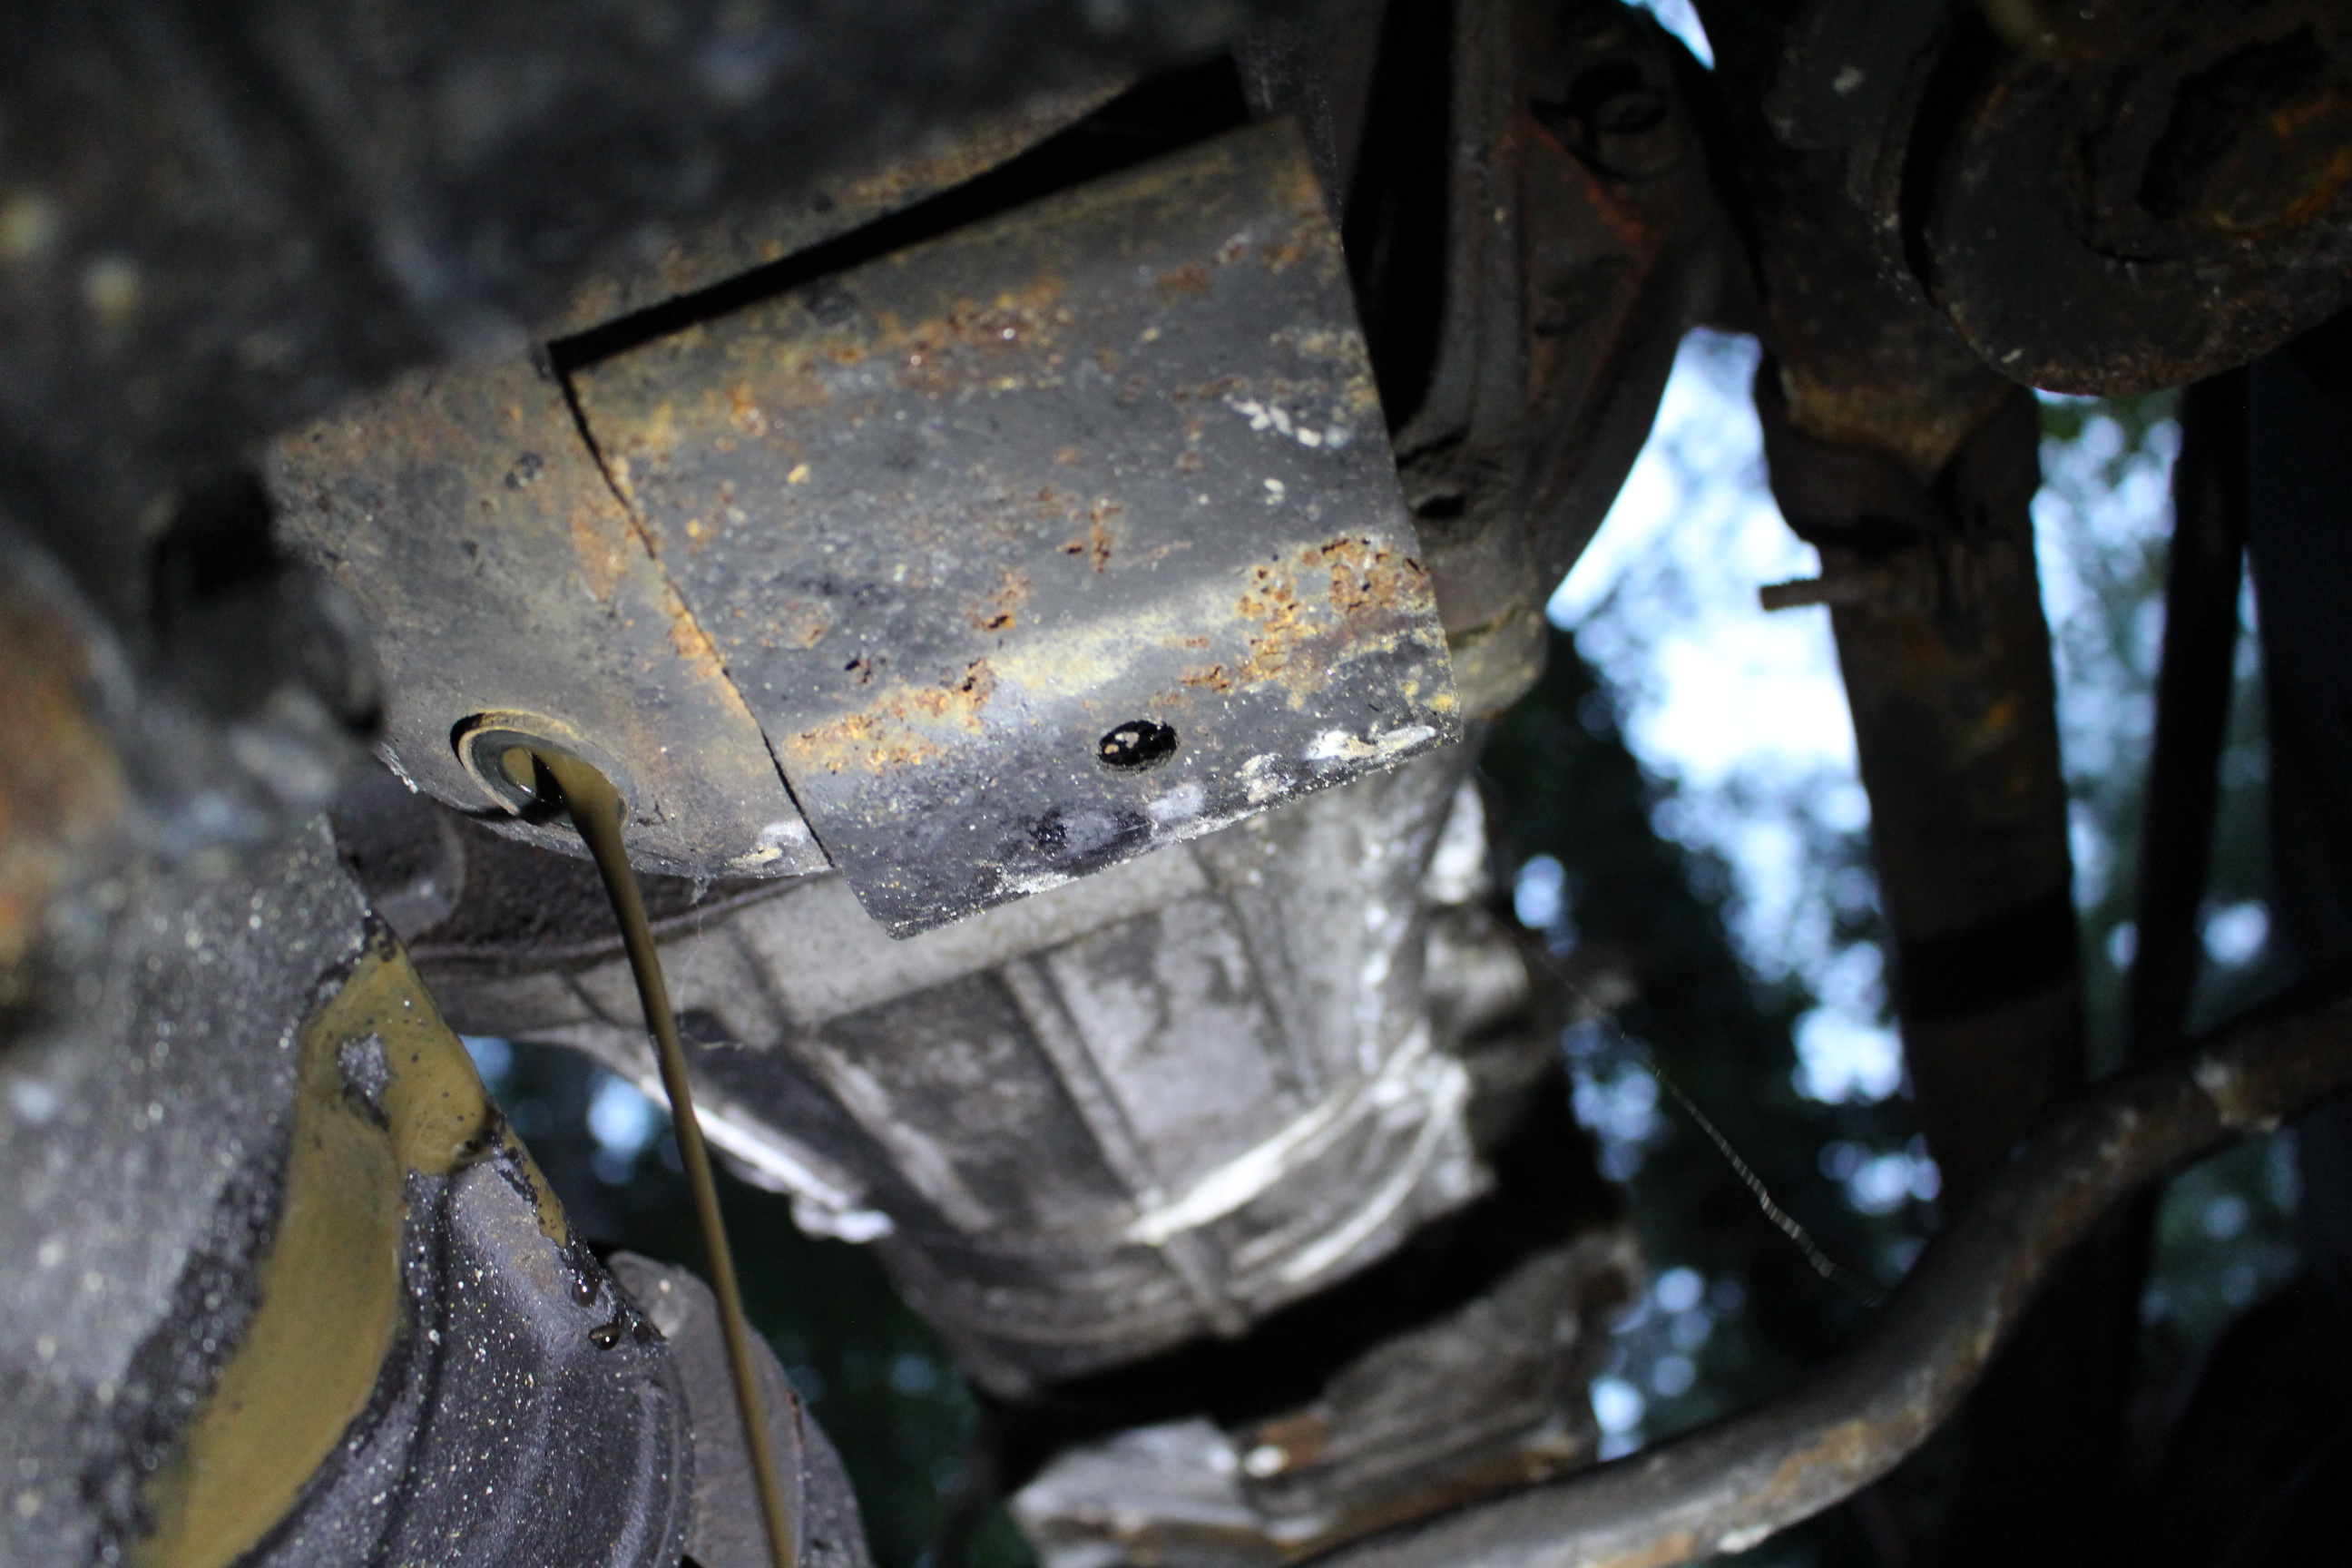
Changed the oil. The fresh oil will only be ran for about 500 miles to flush out the engine, and then another oil change will be done. The old oil looked like milkshake and some coolant came out when I first pulled the plug.
Since there was no way I was going to be able to move the frame myself, I decided to try out my new winch.

Too easy
$80 craigslist score! since all the original body mount bolts were trashed, this was the cheapest route to go. 3" body lift.

coming down now. The frame wasn't fully square with the cab so I had to use some sideways straps to keep everything orientated.
This was a huge victory. Everything up to this point seemed like a never ending project. Now, it is just some odds and ends to button up and some wire harnesses to connect, and then its drivable again
Im thinking I need some long travel suspension in my future :eek: The rear suspension already has the shocks maxed out with still more travel left in the springs (had to compress the rear suspension a little to get the shocks mounted). Some longer travel shocks are in the trucks very near future. Longer front control arms with T-100 axles gives a 6" wider track up front and a T-100 rear axle does the same for the back. The truck is currently sitting on 31" General Grabber AT2's, not sure if I will stick with those or bump up to 33's or 35's. Have to see what it looks like with the bed on.

Thread
Thread Starter
Forum
Replies
Last Post
btu44
86-95 Trucks & 4Runners
12
02-07-2016 06:18 PM


