
xxxtreme22r's 1987 Pickup Build-Up Thread
 04-24-2011, 05:21 PM
#921
Registered User
Thread Starter
Ok, actually got some work done on this thing in between rain.. Sorry for the end photos in advance, finished it up tonight when it was dark out so the photos aren't that great. I'll try and get better ones tomorrow.
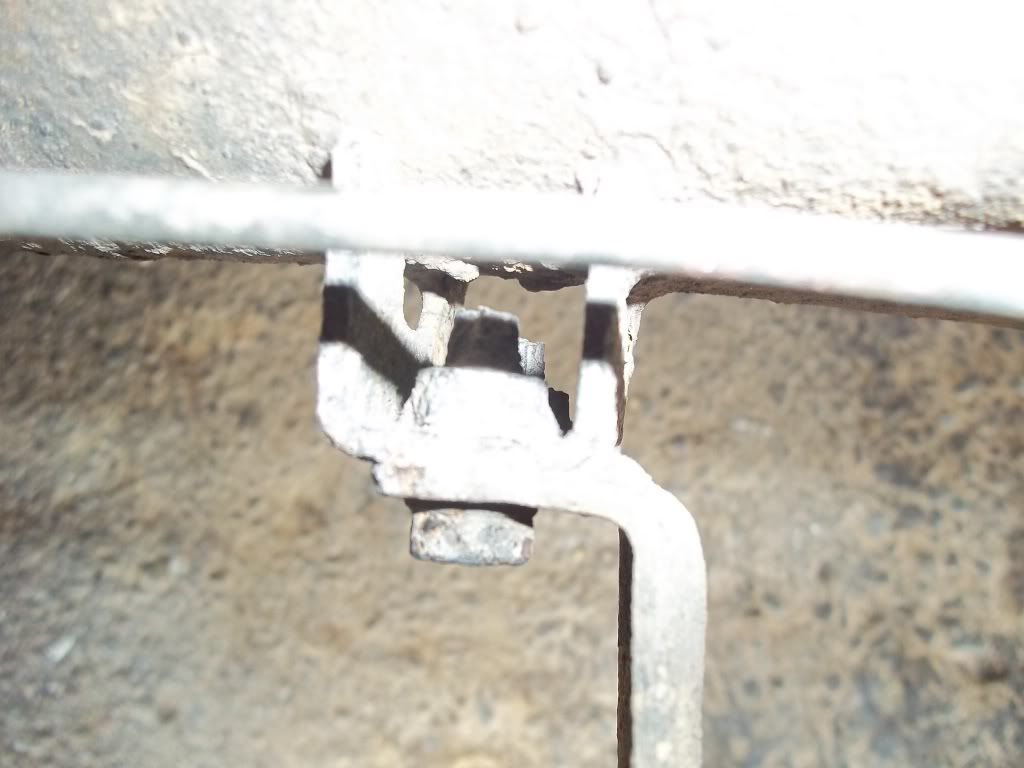
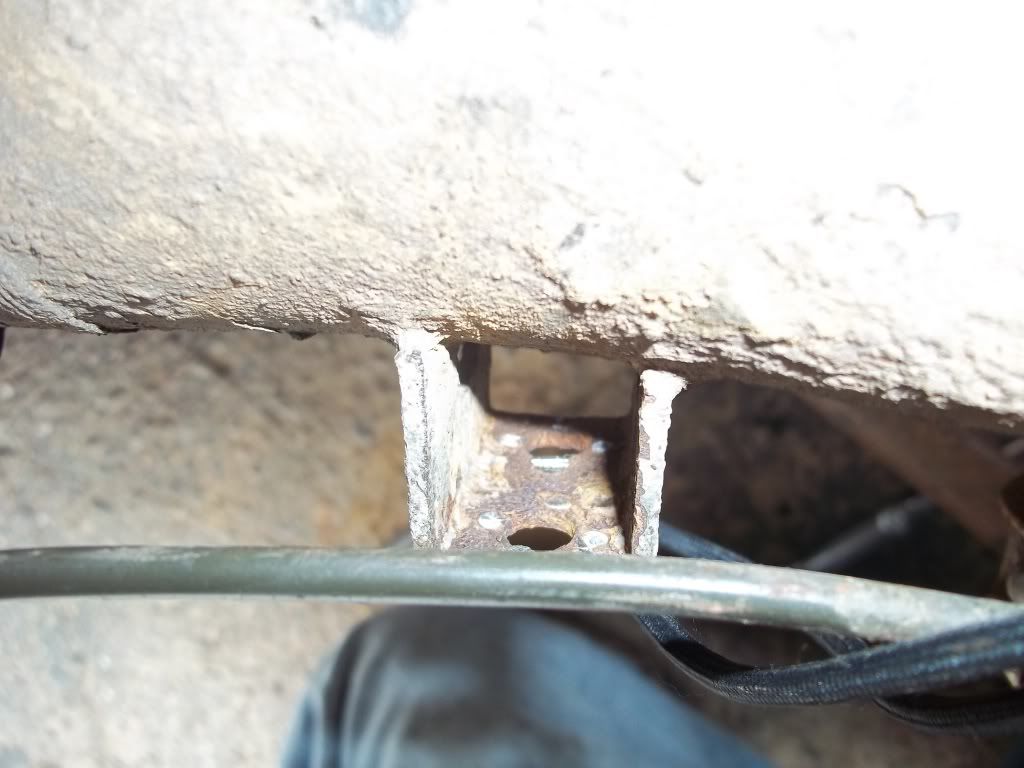
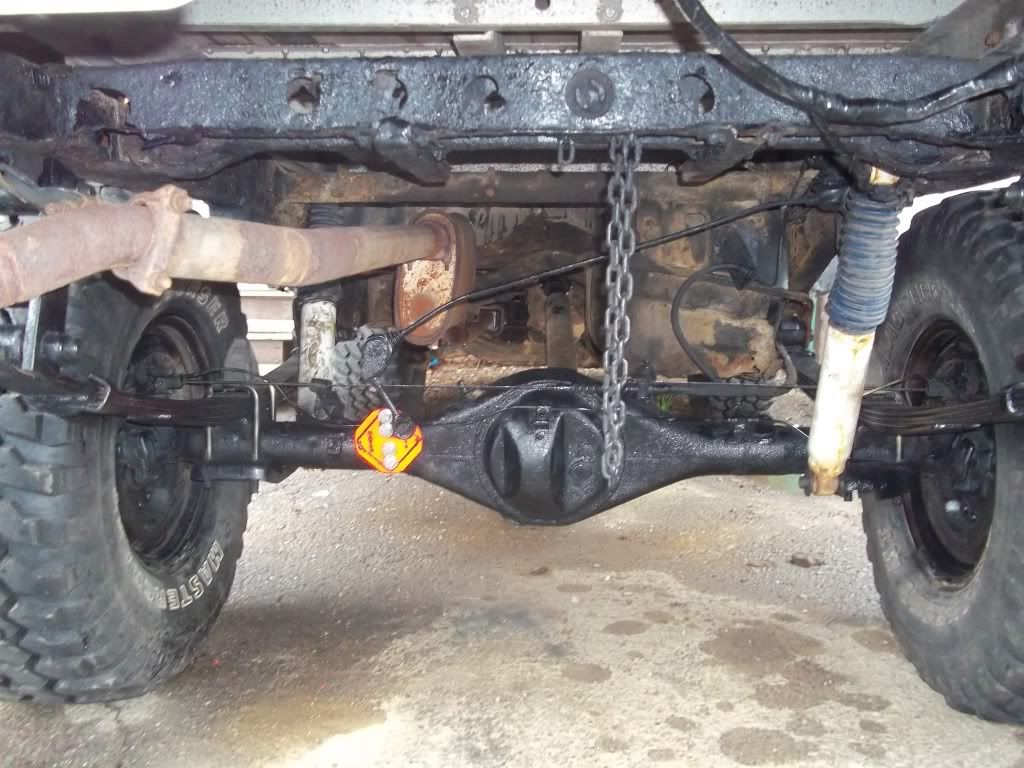
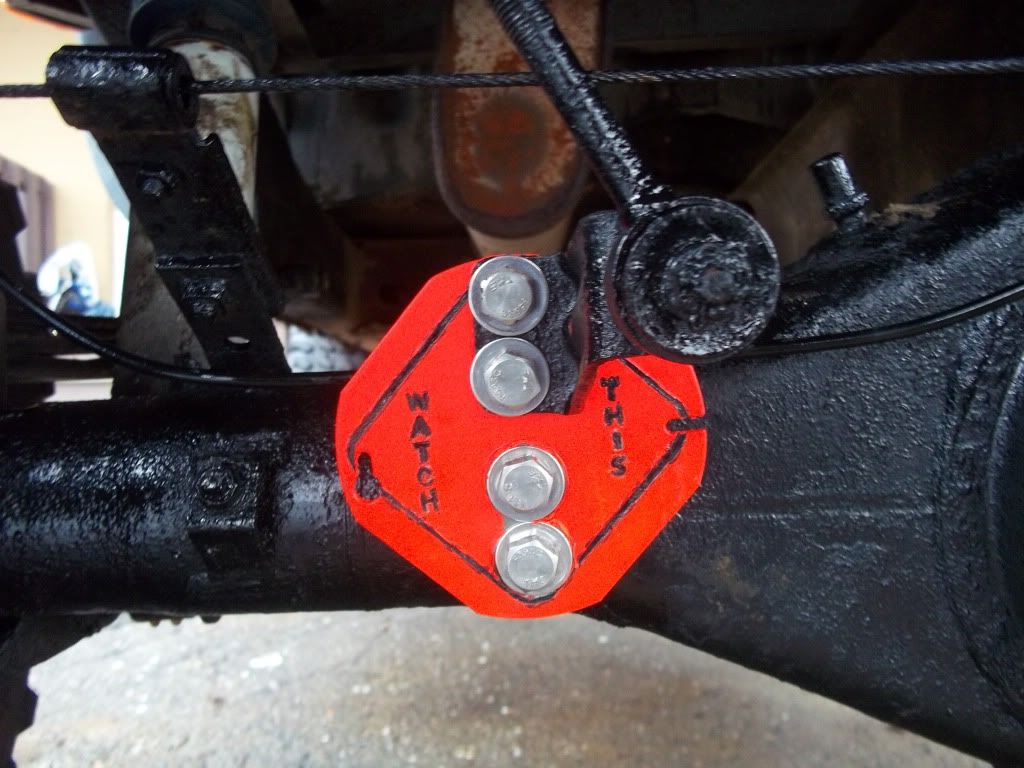
Anyway, my current project was the LSPV extension bracket. Since I got 2-3" off the springs, I thought it would be a good idea to extend the bracket. I decided on starting with 2" and I only saw 3" total from the springs. At least 1" from the tire upsize from 31 to 33.
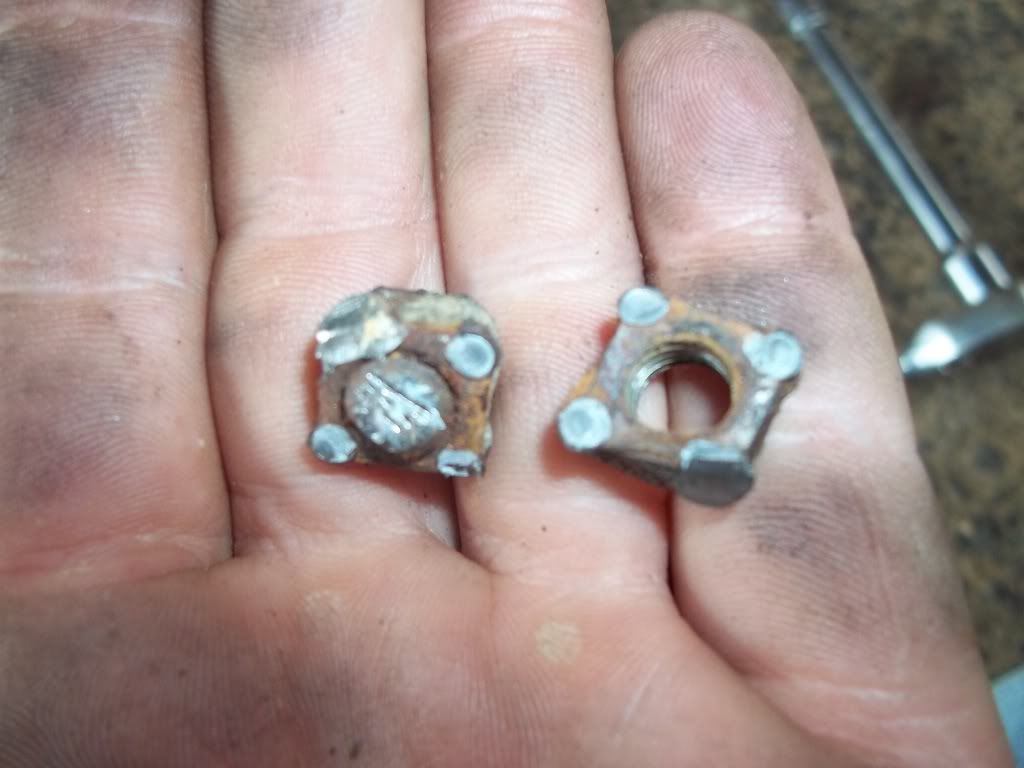
As previously stated earlier until you guys rudely interrupted me. I broke one of the bolts thanks to the PA rust and my mud bogs and consensus was they are spot welded. Which they were as seen below with my broken bolt head.
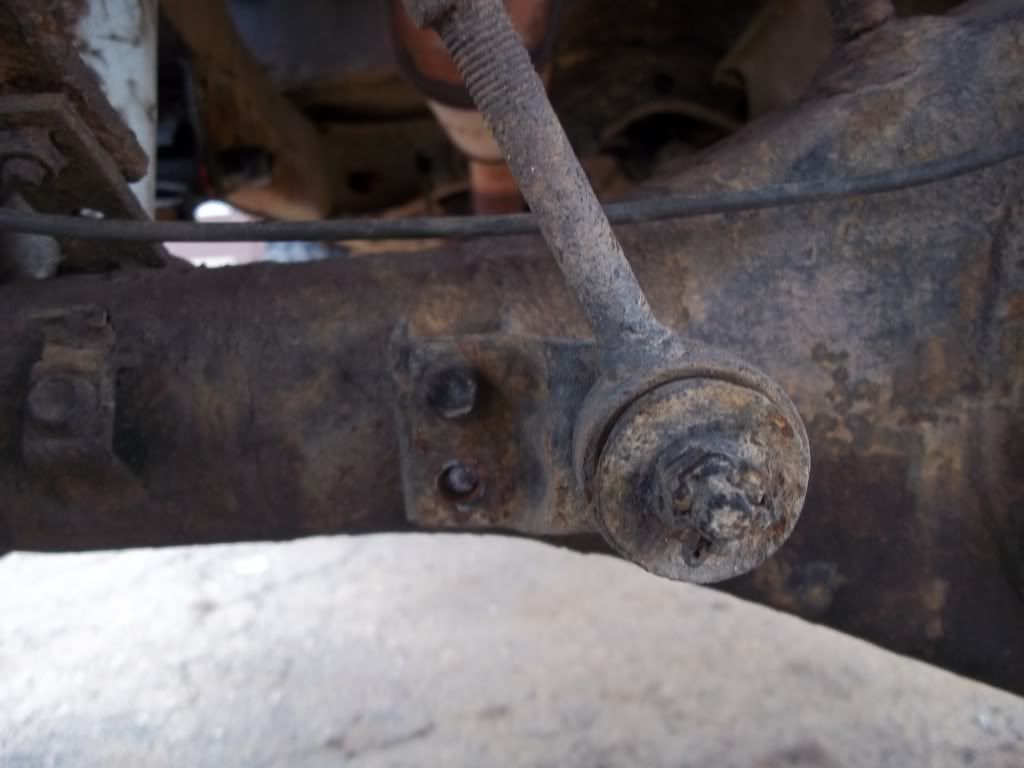
Ran to the hardware store and picked up a 1/2" Cold chisel for the dirty work. With my 4lb mini sledge after several hard taps they came off. Was actually a little harder then I thought. But once the first weld went the rest was cake.
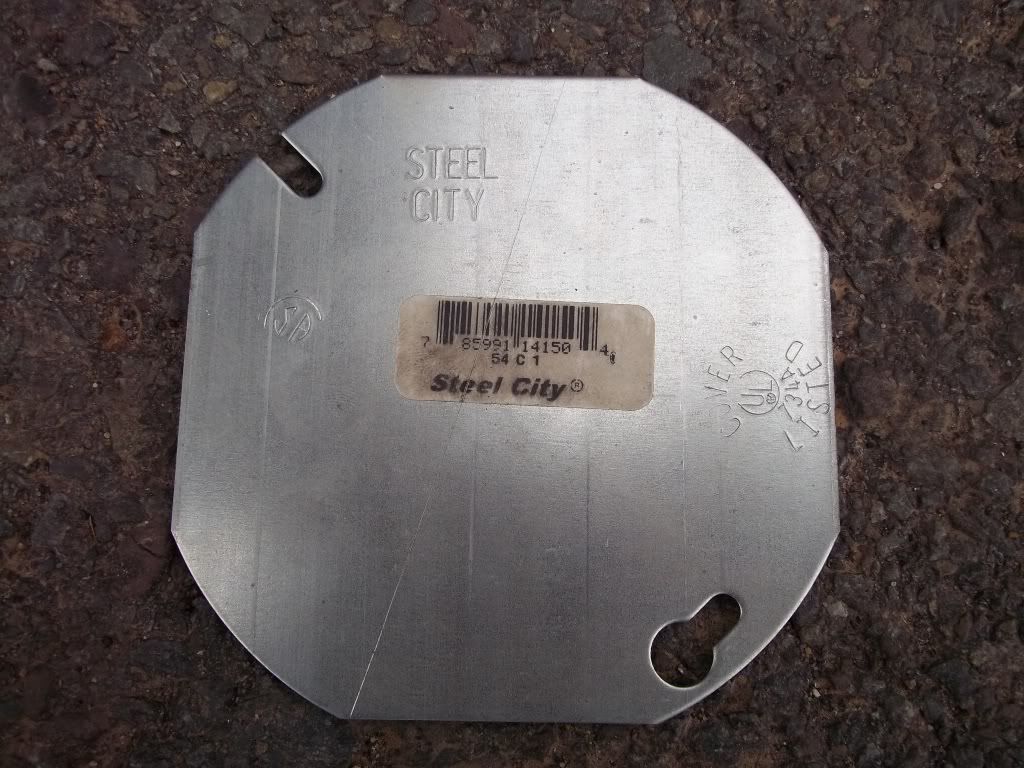
I picked this guy up at lowes for a whopping 63 cents. It's a 4" electrical box cover.
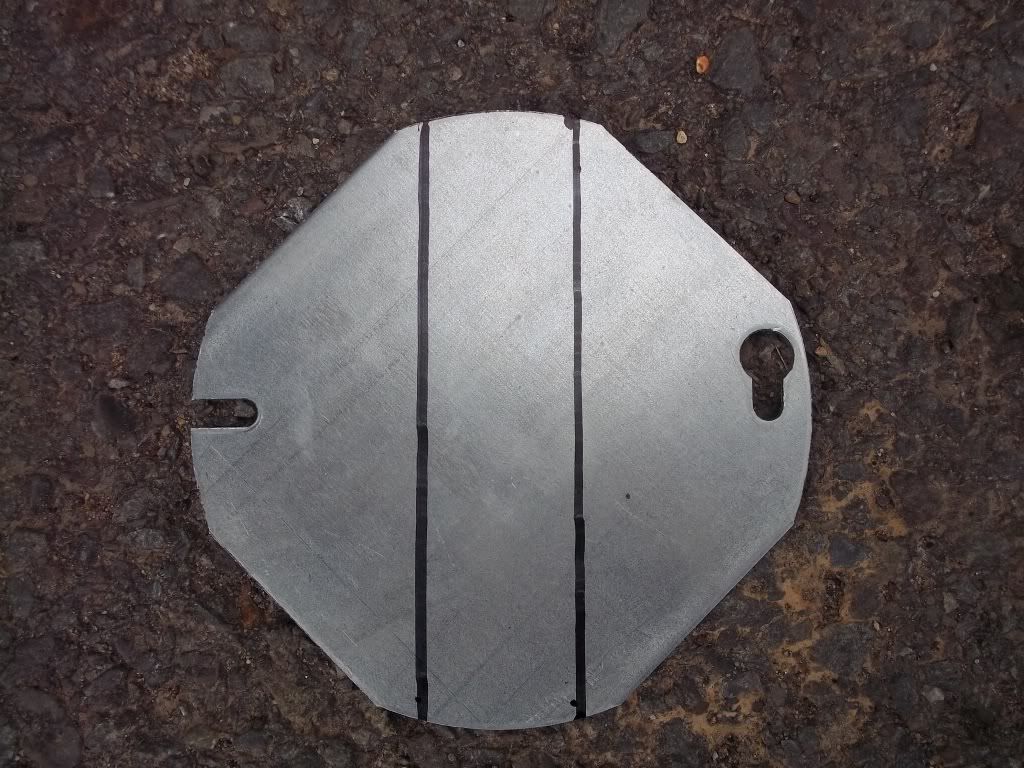
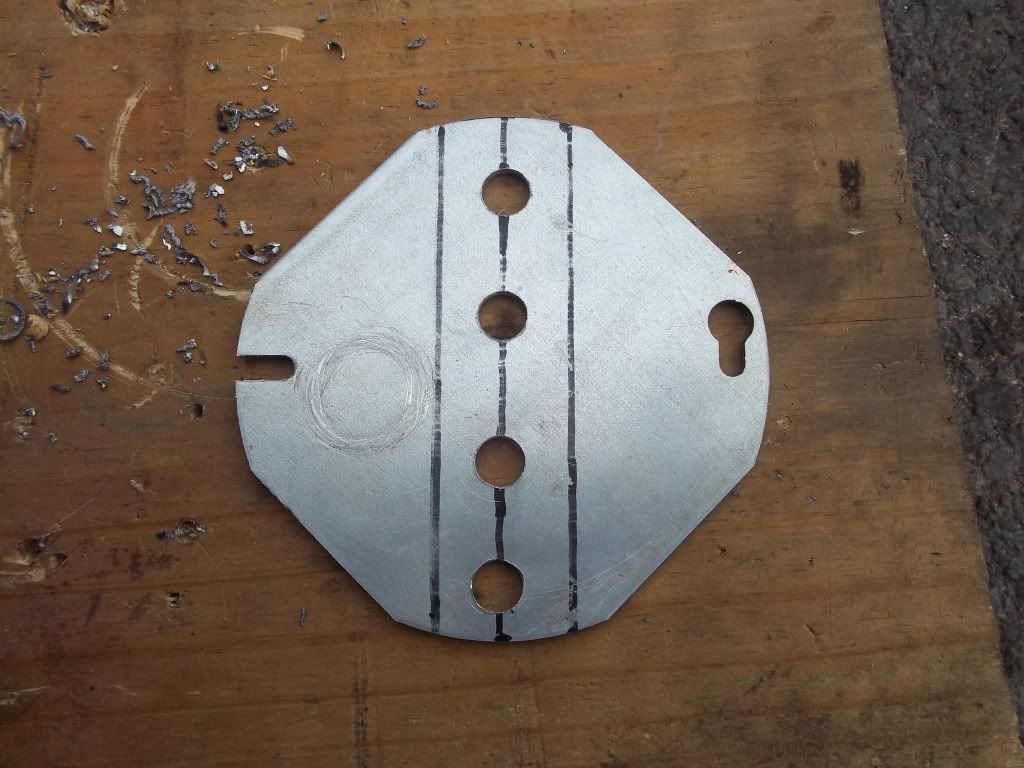
I laid out my lines to guide for cutting. Turns out about 1" wide. Also put in a center line for a guide for the holes.
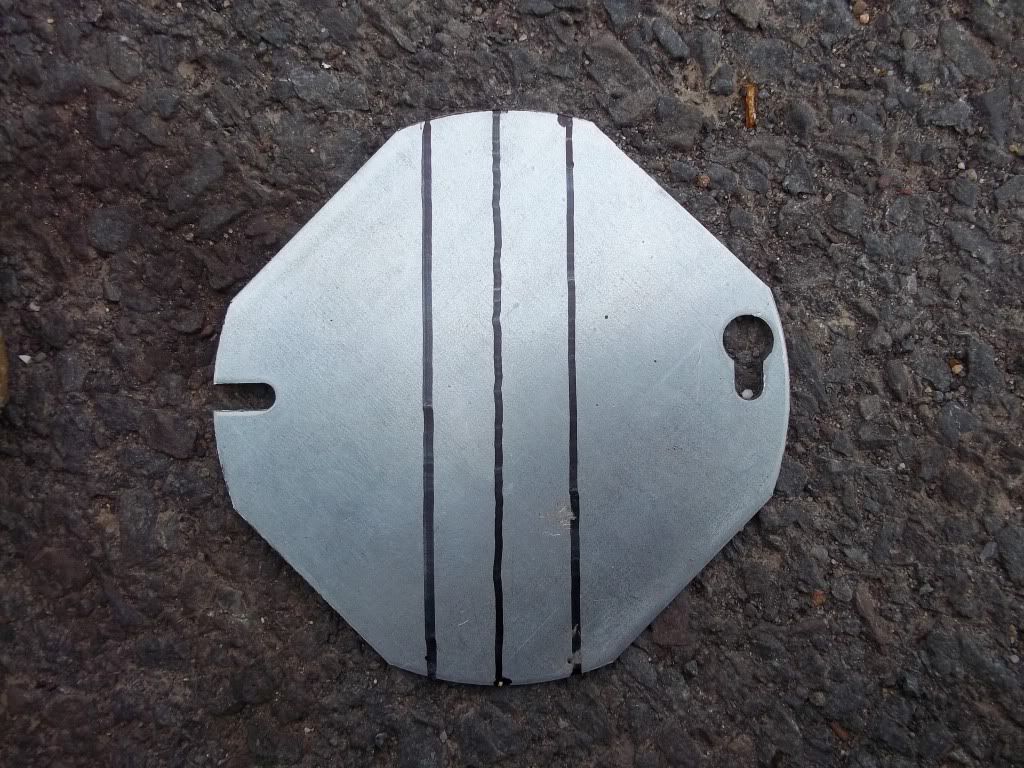
Small pilot holes drilled and then using 2 more steps I finished with 3/8" holes. Slightly larger then the original 8mm hardware. So I also had to run the bit though the bracket on the axle as well. I decided to dril the holes first because I thought it would be easier to hold the cover down with a c-clamp then it would have been if I had cut the piece out. I laid it out like I did lengthwise because it wasn't quite wide enough for the full 4" I needed.
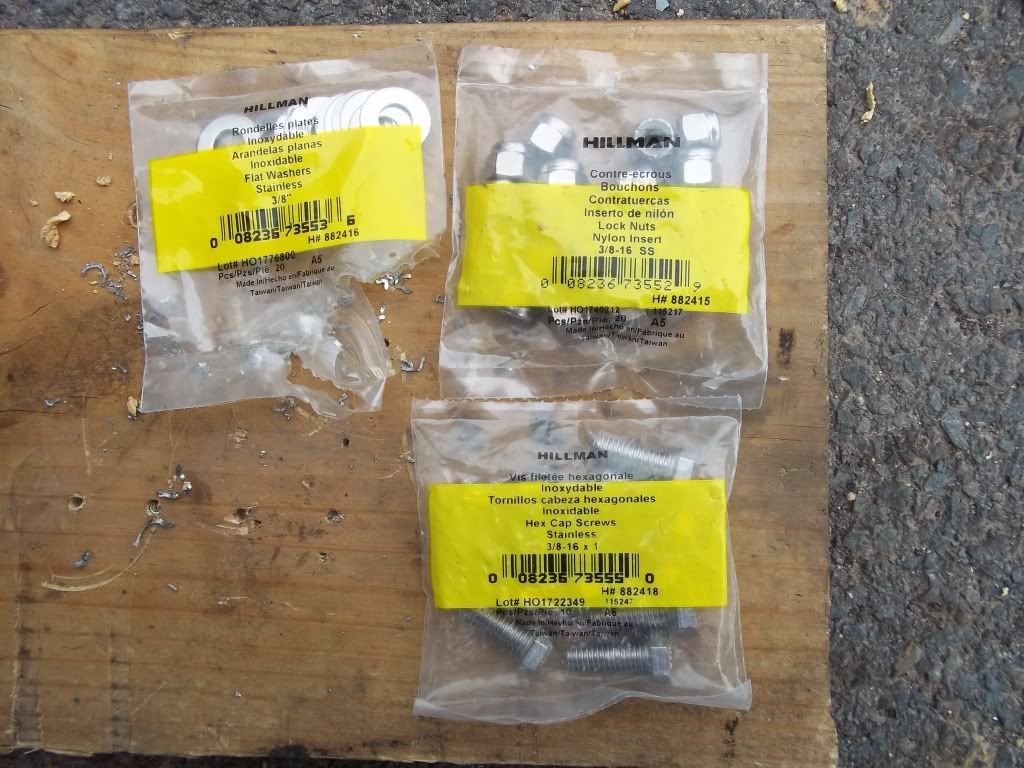
3/8" - 16 1" Stainless bolts, nylock nuts and washers.
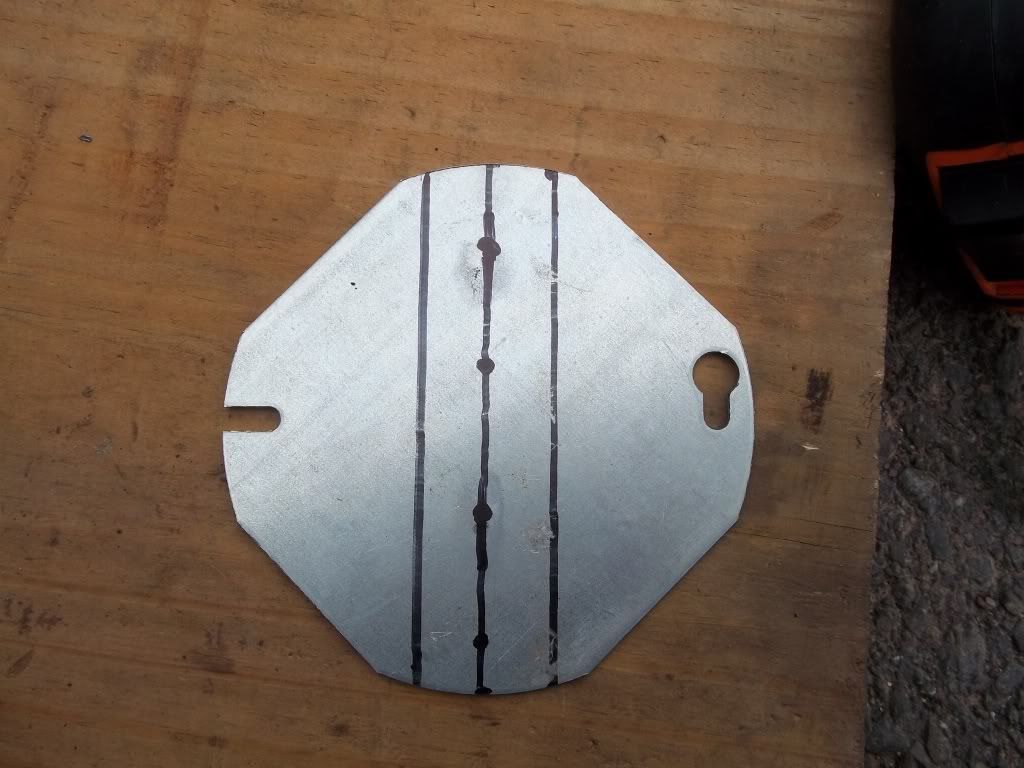
Decided to test fit it to make sure my holes all lined up before cutting the plate down.
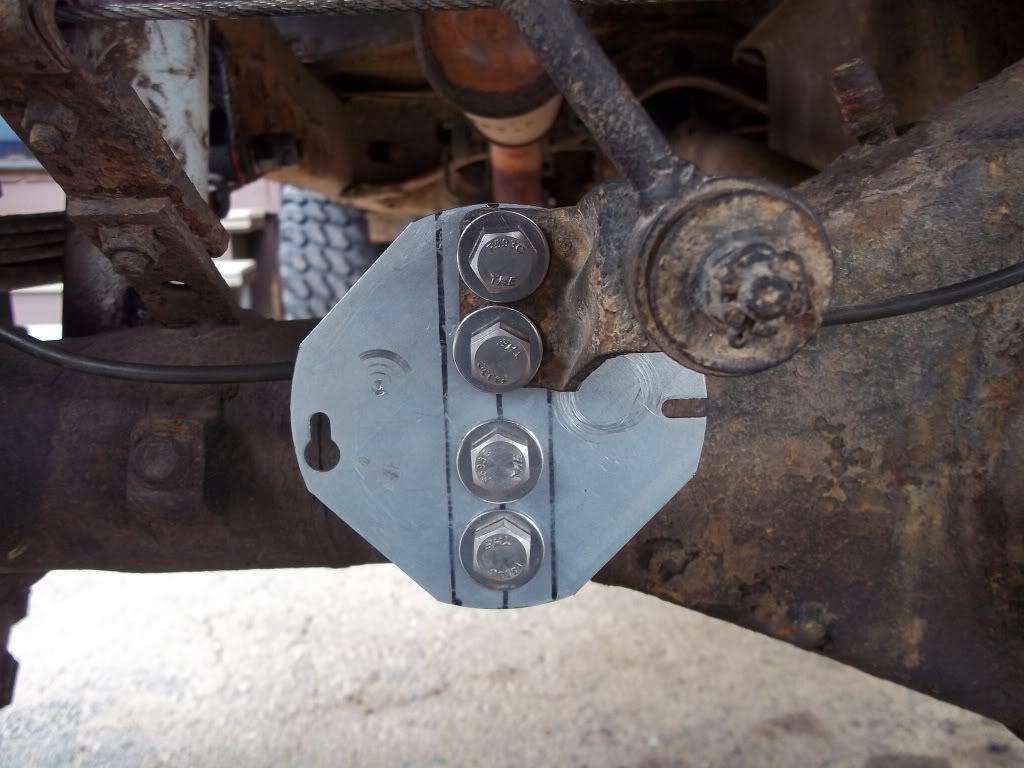
This is where the wheels started turning. I didn't take any photos of the actual process and it didn't come out as good as I would have liked but using my stencil stuff and some photoshopping skills I came up with this for the extension bracket.
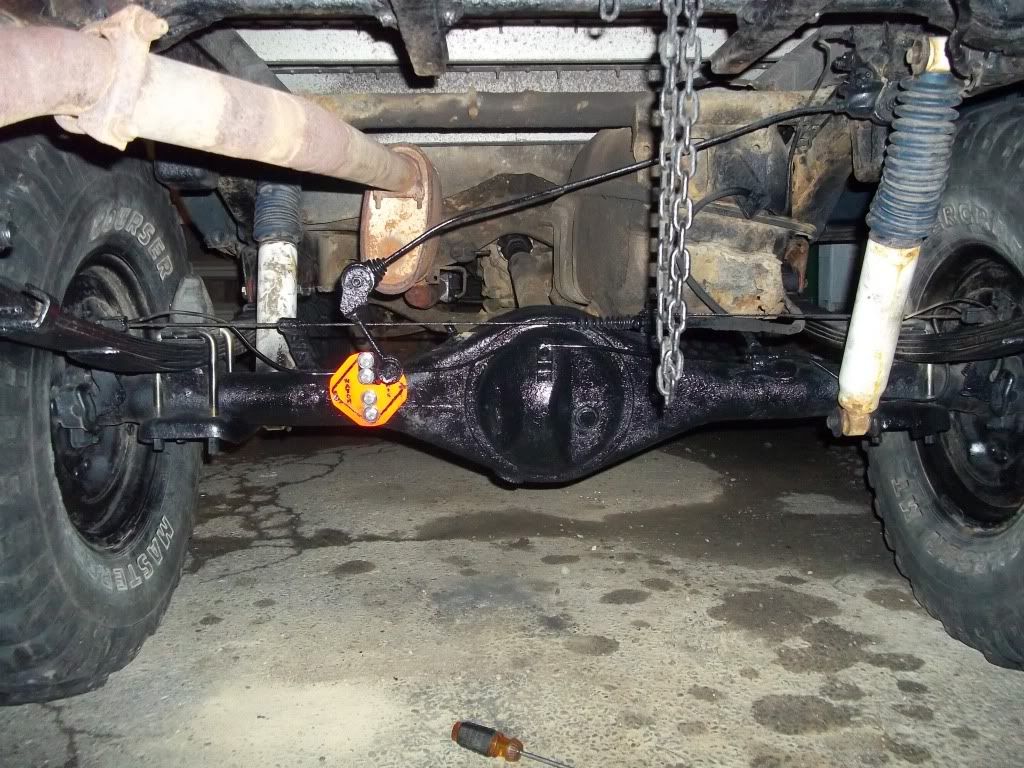
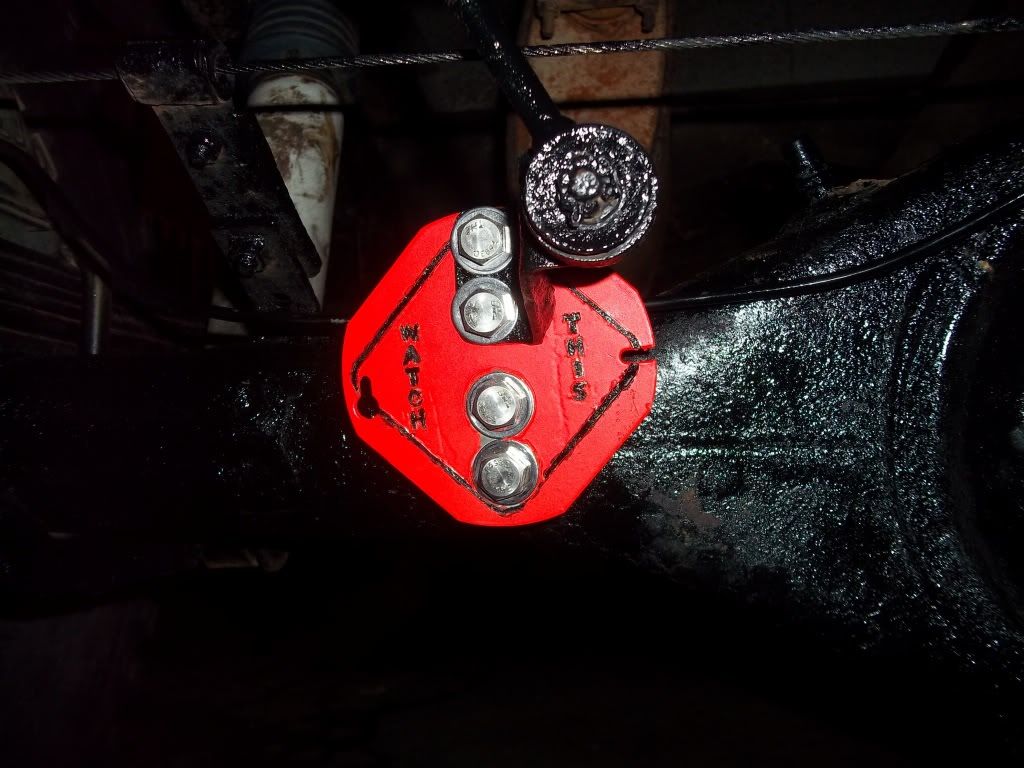
Yes that's florescent orange paint on the bracket and it's supposed to mimic a road construction sign. If you can't read it it says "Watch This"
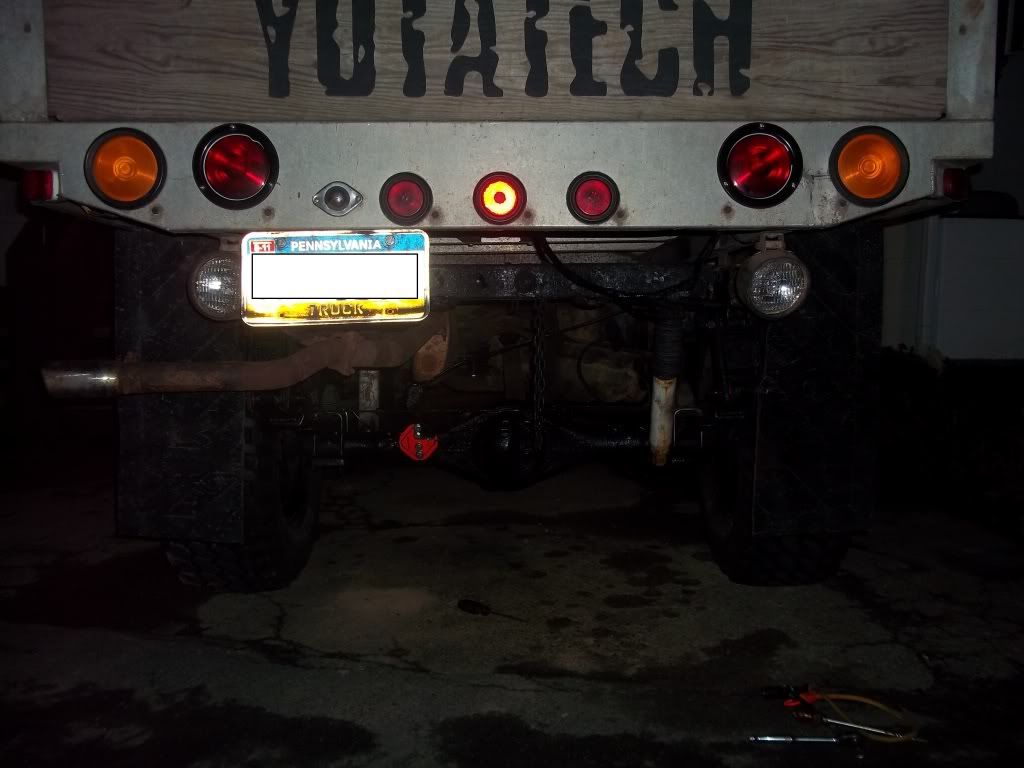
Also take notice I got gloss black spray paint happy with my 3 cans of $1 paint from Lowes as well. I painted almost everything under there from the axle back.
Will try to get more photos tomorrow when it's light outside.
Anyway, my current project was the LSPV extension bracket. Since I got 2-3" off the springs, I thought it would be a good idea to extend the bracket. I decided on starting with 2" and I only saw 3" total from the springs. At least 1" from the tire upsize from 31 to 33.
As previously stated earlier until you guys rudely interrupted me.
I broke one of the bolts thanks to the PA rust and my mud bogs and consensus was they are spot welded. Which they were as seen below with my broken bolt head. Ran to the hardware store and picked up a 1/2" Cold chisel for the dirty work. With my 4lb mini sledge after several hard taps they came off. Was actually a little harder then I thought. But once the first weld went the rest was cake.
I picked this guy up at lowes for a whopping 63 cents. It's a 4" electrical box cover.
I laid out my lines to guide for cutting. Turns out about 1" wide. Also put in a center line for a guide for the holes.
Small pilot holes drilled and then using 2 more steps I finished with 3/8" holes. Slightly larger then the original 8mm hardware. So I also had to run the bit though the bracket on the axle as well. I decided to dril the holes first because I thought it would be easier to hold the cover down with a c-clamp then it would have been if I had cut the piece out. I laid it out like I did lengthwise because it wasn't quite wide enough for the full 4" I needed.
3/8" - 16 1" Stainless bolts, nylock nuts and washers.
Decided to test fit it to make sure my holes all lined up before cutting the plate down.
This is where the wheels started turning. I didn't take any photos of the actual process and it didn't come out as good as I would have liked but using my stencil stuff and some photoshopping skills I came up with this for the extension bracket.
Yes that's florescent orange paint on the bracket and it's supposed to mimic a road construction sign. If you can't read it it says "Watch This"
Also take notice I got gloss black spray paint happy with my 3 cans of $1 paint from Lowes as well. I painted almost everything under there from the axle back.
Will try to get more photos tomorrow when it's light outside.
 04-24-2011, 05:33 PM
#923
Registered User
Thread Starter
haha yeah, I doubt that's gonna stay on long though as I didn't prep one bit, but only ended up using two cans of $1 paint. So for $2 I don't care. lol.
 04-25-2011, 05:18 PM
#928
Registered User
Thread Starter
Well glad that went over well. Was worried about getting flamed for it.... na not really. Girlfriend said well if it didn't look like an electrical box cover it wouldn't be so bad. And I was like "Is that an electrical box cover???" "why yes.....yes it is. redneck engineering at it's finest."
04-25-2011, 05:22 PM
#929
YotaTech Milestone-Two Millionth Post
does it do what you intended??? yes indeed.
is anyone other than all of us going to know what that's all about??....probably not.
still would like to get that truck all one color....besides the bed
is anyone other than all of us going to know what that's all about??....probably not.
still would like to get that truck all one color....besides the bed
04-25-2011, 05:28 PM
#930
Registered User
Thread Starter
Yes Jerry that serves two functions. It actually greatly improved my braking BTW. Still got to tweak that rod, I don't think it's bent the way it's supposed to be. I need to look at Joe's truck to be sure though. In addition to that, it also takes the eyes away from all the rust under there as well.
04-25-2011, 05:29 PM
#931
Great job man, VERY ingenious! Yeah, I'm out of the "watch this" loop I suppose...but still admire your "I can fix that for a couple bux, WATCH THIS!" spirit! lol.
Trucks lookin good man, ...can't wait to see you paint it, ....but I know, I'm sure you have other things that are much more important to you for now. Hey, btw, I got my gears w/locker, ...gonna do that asap. Would love to have 4.56's some day with an SAS, ..but yeah, 'wth, use what i got!', RIGHT? LOL.
PS> Did you come to a final decision on the color you're painting the rig and rest of it? Saw one like yours the other day that was root bear brown and the wood was all stained pretty much the same with like bronze looking metal parts of the flat bed? Looks really nice. I love these flatbeds!
04-25-2011, 05:47 PM
#932
Registered User
Thread Starter
I don't know yet on the color. I guess it depends on twhich route I take. Roll on or rattle can or sray gun. I'm not gonna wind up doing alot of prep work on it, just some light sanding and whatnot just to help the paint stick. Heck I might not even use primer who knows. I need a little more permanent fix to my rocker panels though, the duck tape just isn't cutting it.
I do have a back corner of the aluminum on the bed that needs to get fixed too. Next on my list is the rear tow points. I still have that bumper I had built as well which I might utilize. I am thinking of just extending the flat bar bracket and make it look like it's integrated to the bottom of the bed. I don't know what to do with the shackle mounts though. I really need to learn how to weld.
I do have a back corner of the aluminum on the bed that needs to get fixed too. Next on my list is the rear tow points. I still have that bumper I had built as well which I might utilize. I am thinking of just extending the flat bar bracket and make it look like it's integrated to the bottom of the bed. I don't know what to do with the shackle mounts though. I really need to learn how to weld.
04-26-2011, 01:20 PM
#934
Registered User
Thread Starter
Adjusted my ebrake cable, seems better now. I now don't have to pull the thing out to my knees. (I'm only 5'7" BTW) But I did have to somewhat unstick one (left rear) of my you guess what. Wondering if it sticking was a cause of me pulling slight left. hmmmmmmmmm.......

 I got tired of waiting.
04-26-2011, 04:13 PM
I got tired of waiting.
04-26-2011, 04:13 PM
#939
YotaTech Milestone-Two Millionth Post
so THAT is for real?????
if it is.....looks good. never thought you would do black.....just pictured like a Seattle Seahawks silver / blue / green camo......I LIKE IT.
if it is.....looks good. never thought you would do black.....just pictured like a Seattle Seahawks silver / blue / green camo......I LIKE IT.


