
xxxtreme22r's 1987 Pickup Build-Up Thread
 03-15-2011, 11:54 AM
#701
YotaTech Milestone-Two Millionth Post
yo.
give me a run-down of what needs to be done here.
tell me you've figured out the dealio with those torsion bars.......maybe we should dedicate a shift to just doing that......seeing how it went not so well on that day i don't want to have a huuuuuge list and get 1 thing done.
is there anything you want me to do with those springs while they are here? 2nd coat of pink is probably dry by now.(kidding. i kid. i'm a kidder)
i'm confident the compressor i got and the impact gun will be very helpful. impact wrench should also be very useful.(shipped yesterday from williamsport)
i had to open all the garage doors up to warm it up.....it was probably 15 to 20 degrees colder inside than outside.....like a refrigerator.....it's all good now.
let me know.
Last edited by 92 TOY; 03-15-2011 at 11:56 AM.
 03-15-2011, 12:31 PM
#702
Registered User
Thread Starter
nothing really. Can't do much without the parts or the truck together. And in all seriousness, I want to get this done all in one day. If we do this Saturday it gives me less than 2 weeks to get the truck inspected. I have other stuff I need to get done to the truck that has to wait till I get these tires and stuff on.
I've had the springs for over a month and the tires for almost 3 weeks. I just want to get this done so I can start working on what I need to work on as far as bumper height in the back, body work and fender clearance.
I've had the springs for over a month and the tires for almost 3 weeks. I just want to get this done so I can start working on what I need to work on as far as bumper height in the back, body work and fender clearance.
03-15-2011, 01:46 PM
#703
Man, I wish you were my neighbors, ..... very much "go-get'rs"! I could lend a hand and have someone to lend a hand with whatever comes next(which always seems to be something!) Hope you get it squared away ASAP, Brandon!
PS> if you have any thoughts on my latest issue/concern(what might be a top end tick developing), stop by and let me know, K? Don't mean to highjack, buddy, ...just hitting my limit of patience with this "SOMETHING NEW EVERY WEEK" agenda my rig seems to have!, hahaha.
PS> if you have any thoughts on my latest issue/concern(what might be a top end tick developing), stop by and let me know, K? Don't mean to highjack, buddy, ...just hitting my limit of patience with this "SOMETHING NEW EVERY WEEK" agenda my rig seems to have!, hahaha.
03-17-2011, 04:14 AM
#706
YotaTech Milestone-Two Millionth Post
let me know when you are planning on running up to get those bolts. i need another tube of FIPG. if it's less than $11.95, I will pay for it over the phone and have them give it to you.
03-17-2011, 04:59 AM
#707
Registered User
Thread Starter
Should be later today probably. I got to get my headlights changed out, and mess with my tail lights as one of them is acting up again.
Oh yeah and I might need the VIN number for the FIPG.
Oh yeah and I might need the VIN number for the FIPG.
Last edited by xxxtreme22r; 03-17-2011 at 05:02 AM.
03-17-2011, 05:19 AM
#708
YotaTech Milestone-Two Millionth Post
03-17-2011, 06:03 AM
#709
YotaTech Milestone-Two Millionth Post
they want $13.82.
EBAY...$11.50
so I'm going to order it from EBAY.
cuz I'm a cheap SOB.
EDIT: I just ordered it
EBAY...$11.50
so I'm going to order it from EBAY.
cuz I'm a cheap SOB.
EDIT: I just ordered it
Last edited by 92 TOY; 03-17-2011 at 06:06 AM.
03-17-2011, 06:40 AM
#713
YotaTech Milestone-Two Millionth Post
03-20-2011, 02:20 AM
#715
YotaTech Milestone-Two Millionth Post
OK....I'll chime in 1st, as Brandon is probably still aspleed and needs to update this thread w/ pics.
so here is a copy-and-paste from another thread
well....very sore today.
again, I'll say that even though it took forever to do, it WAS a success on changing the leafs etc etc etc. IF it ever has to be done again, there were several parts that i would do differently. but considering the 2 of us never did this before, it went pretty well.
the bulk of the time was spent getting stuff unbolted, which, in this area is a near impossible task. other time wasting things were cutting bolts (9, if I remember correctly) with an air cutoff wheel....which is quite the little hog using alot of air. 12 gallon compressor is good , but wish it had a bigger motor to recover.
air tools are an absolute must and were used heavily. the little air ratchet....perfecet for the shocks and for snugging bolts. air gun....absolutely used heavily and was pretty dang strong for $19.
inhaled enough spray paint / PB Blaster / dirt to last me for a while too.
this probably should have taken 3 or 4 hours, tops, to do if we lived in a normal area without rust.
and boy did it get cold later....and was snowing a bit.
03-20-2011, 02:22 AM
#716
YotaTech Milestone-Two Millionth Post
OH yeah....I converted Brandon to allowing me to paint stuff. gloss-rusty-metal paint. cleaned everything up by doing that.....also maybe will prevent some future issues with rust....hopefully
03-20-2011, 04:02 AM
#717
Registered User
Thread Starter
Disclaimer for anyone wanting to change springs out and are in a rust belt or has a truck from the rust belt, Make sure you have air tools, BFH, and cut-off tools (4" wheels preferred.) This job would not have taken place without hem. Maybe without the air tools, but would have taken at least another full day to do.
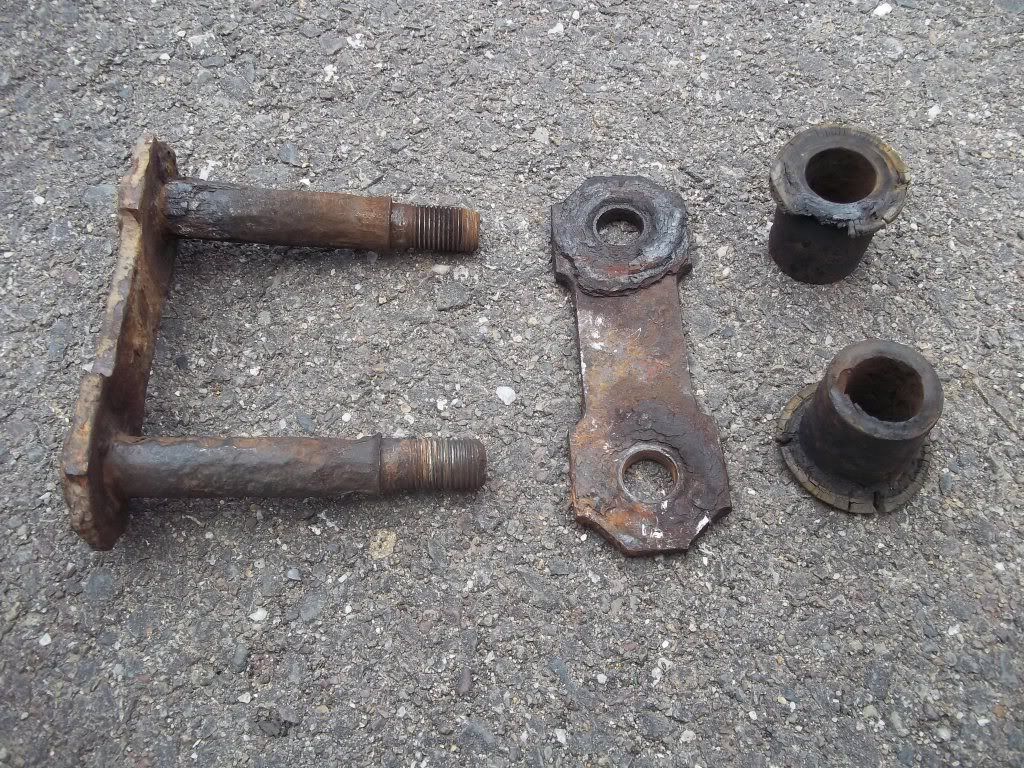
Hard task of the day was taking the leaf spring shackles out. I cannot stress this enough, get greasable shackle bolts for the shackles and the hangers. And make sure you have them before attempting to remove them. Pick up a 3/4" drill bit while your at it as I believe the only greasable bolts that are available are the larger diameter ones and not the smaller 14mm diameter ones for the front hanger.
Anyway onto the good stuff.
03-20-2011, 04:44 AM
#718
Registered User
Thread Starter
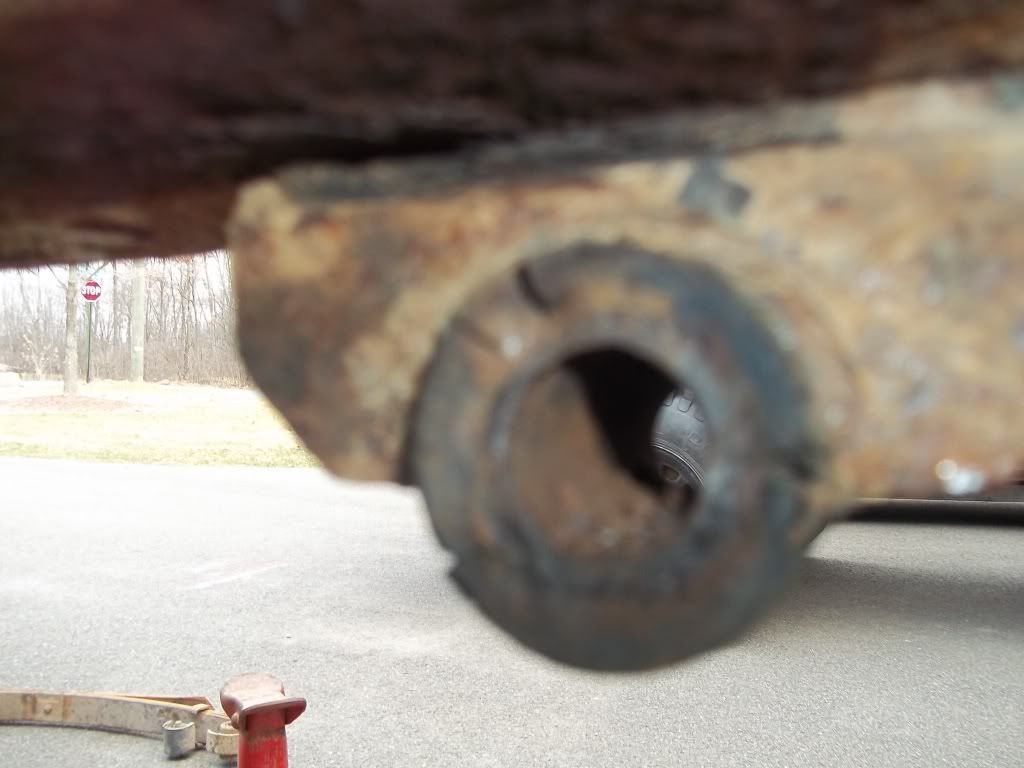
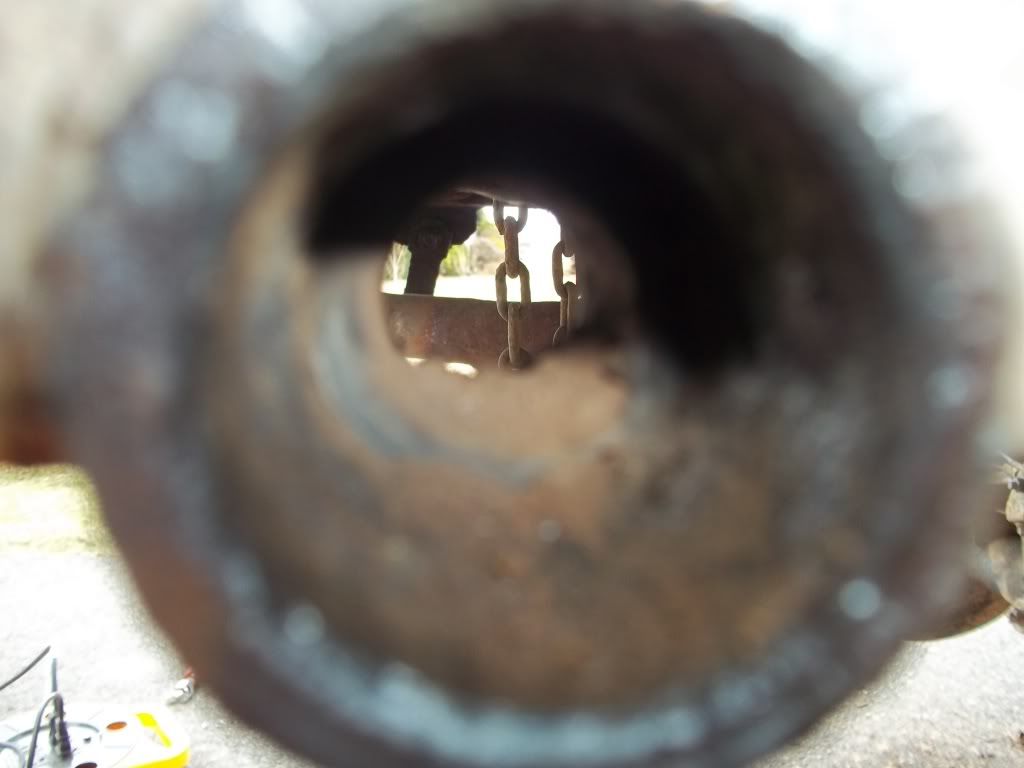
We started on the easier side that we have already tried taking off prior to this. But again had issues with the original shackle coming out of both the spring and the upper hanger. Mostly the upper hanger. The rubber in the bushings were so shot and petrified I think it actually glued the shackle into place and was definitely difficult to swing even with a 2ft pry bar. Ended up taking a sever beating by a BFH to get out. No doubt this was holding up my rear spring flex do to the amount of resistance this was providing against the ability for the shackle to move. Probably also played a part in the stiffness of them as well. Coupled with the flat springs it was very stiff.
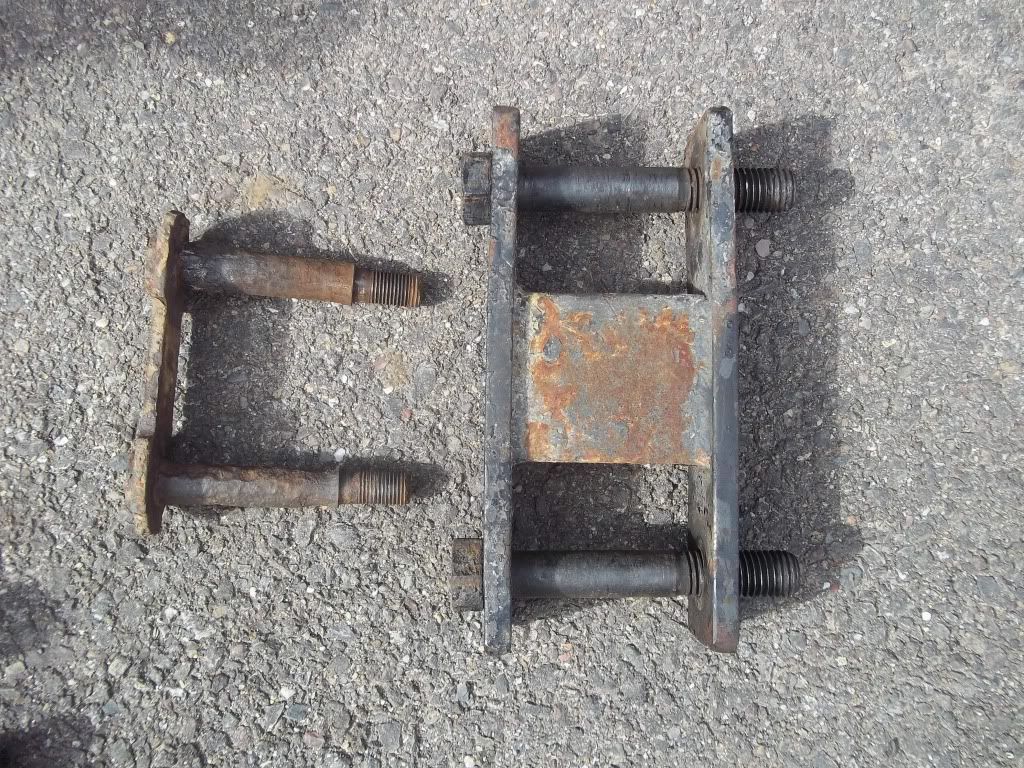
Some photos of the old springs, shackles and bushings.
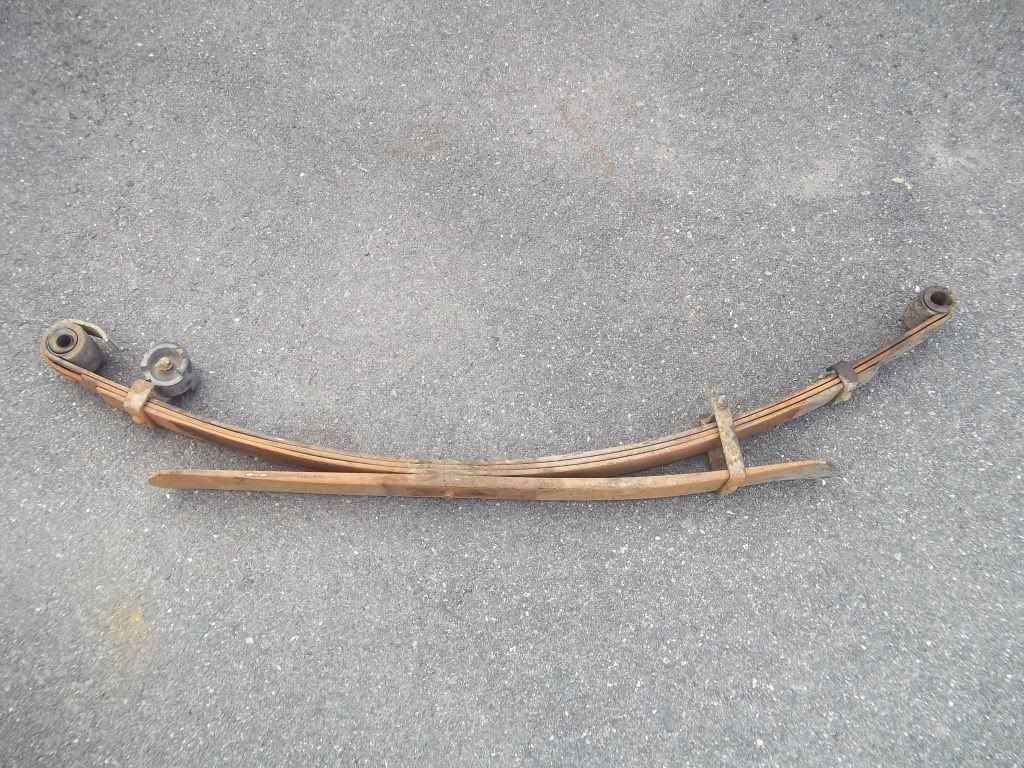

Old vs "new" 6" shackle. 3.5" vs 6".
While I was cutting down the u-bolt threads to properly fit a deep well socket, I decided to allow Jerry to proceed to paint the springs, hangers and shackles with Krylon Gloss Black that he had laying around. I typically don't like using other people's consumables but he pretty much insisted.
Overall I think the paint looks ok and is not as glossy as I thought it would be, probably due to the fact that the surfaces due to the rust are not exactly smooth by any means.
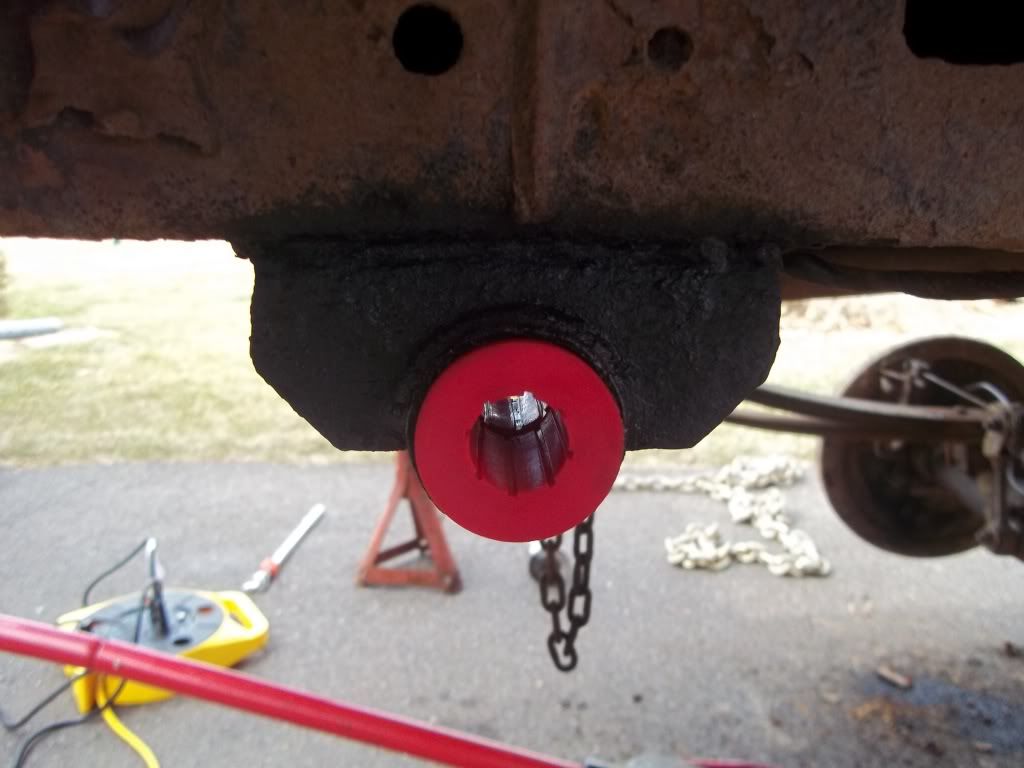
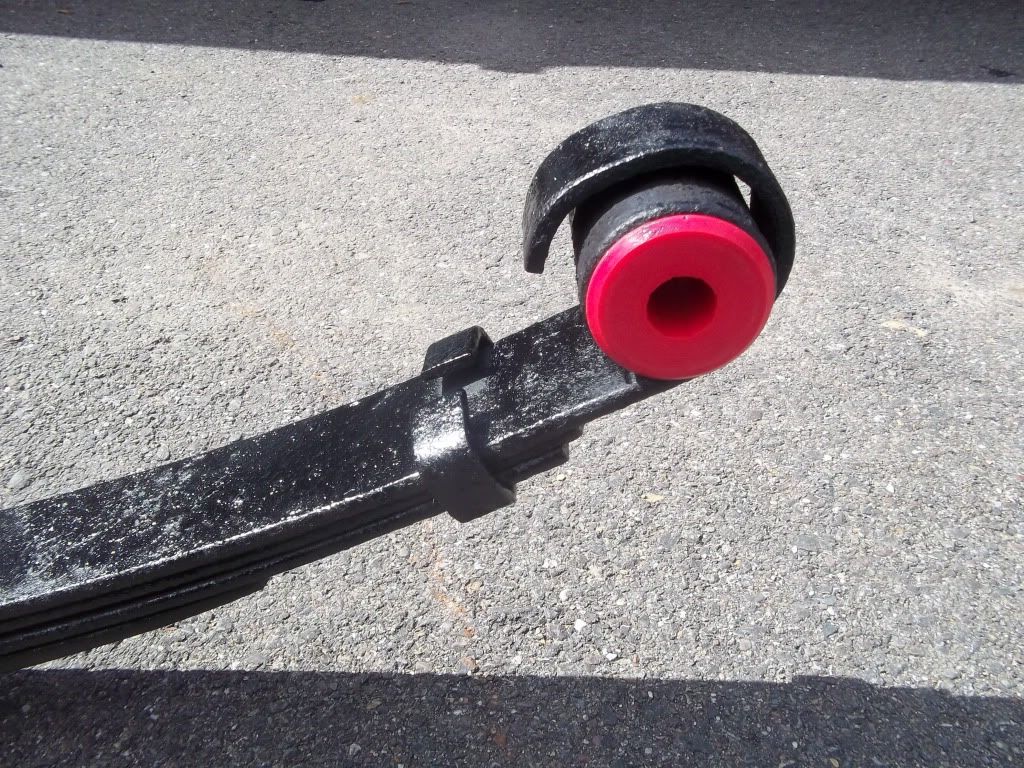
Painted and new Energy Suspension Red Poly bushings installed. I used the two tubes of Lube that came with the bushings for the outsides of the bushings between them and the steel parts. I didn't use it for the bolt holes because I didn't like the fact of how sticky the grease actually was. Then I coated with insides for the bolts using my favorite green water proof grease. Which will eventually be the grease I use in the future for the greasable bolts I put in.
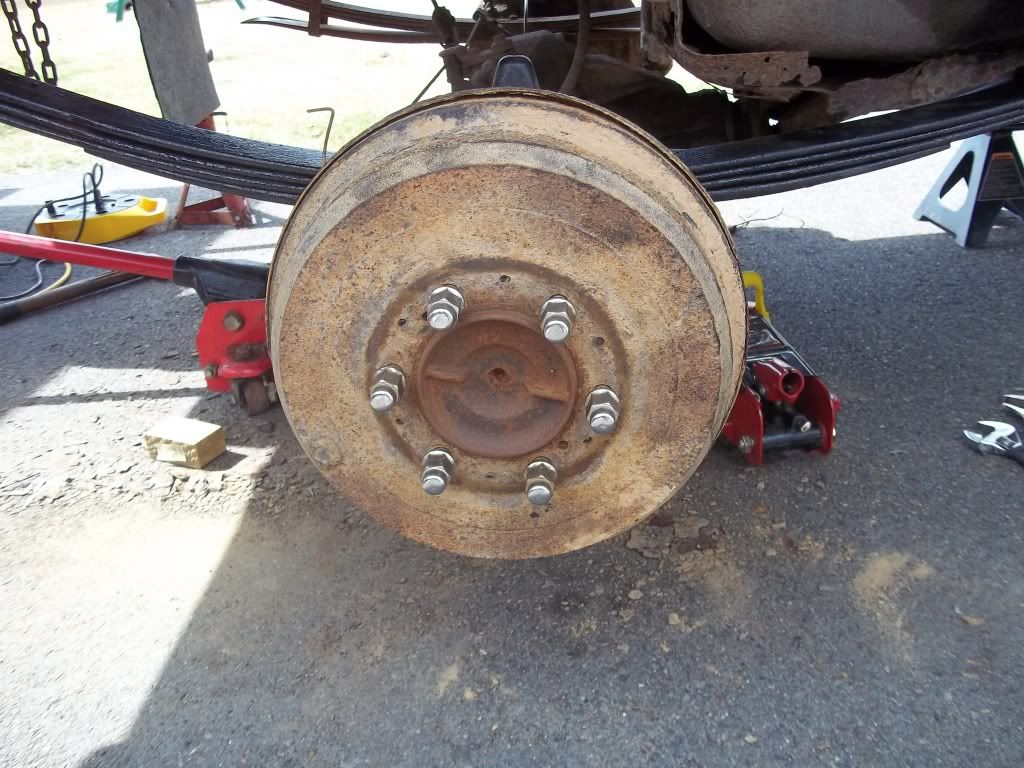
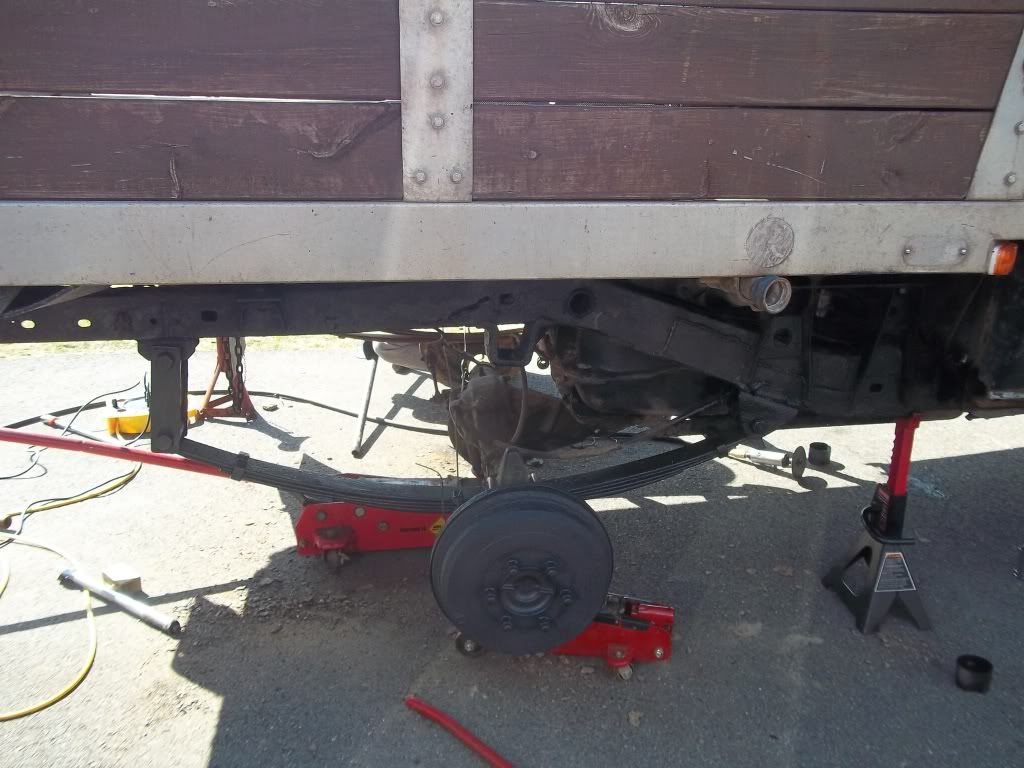
I did wind up painting my rear drums with the same K-Mart special Flat Black paint after taking a hammer to them to knock some of the rust and stuff off them.
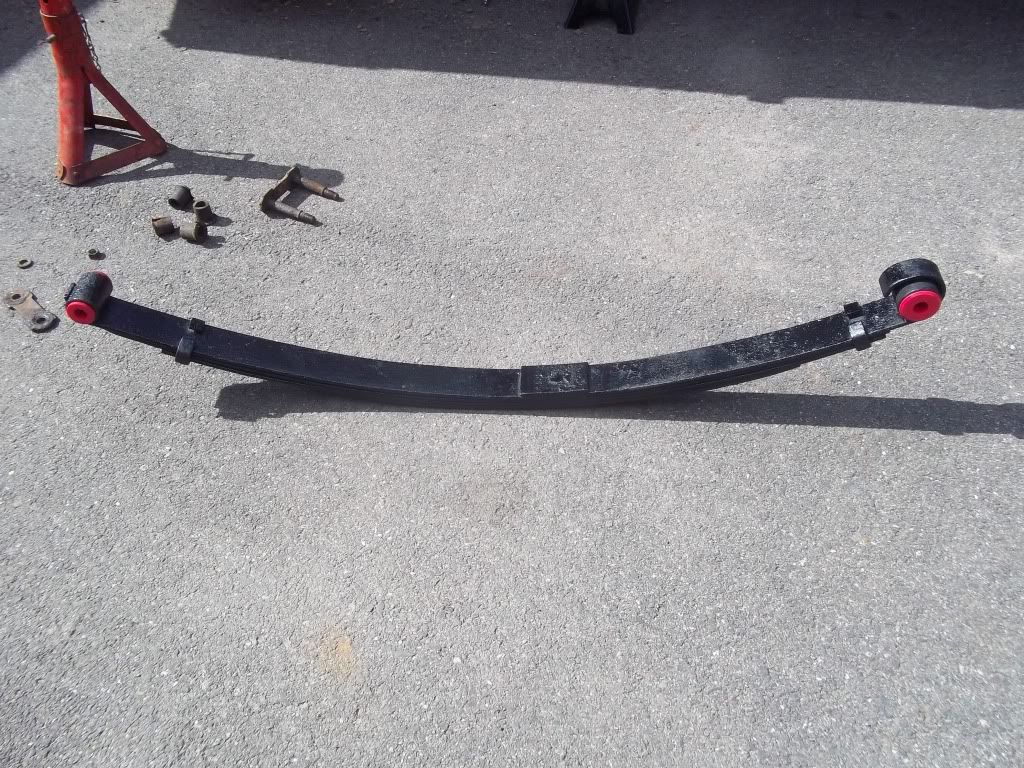
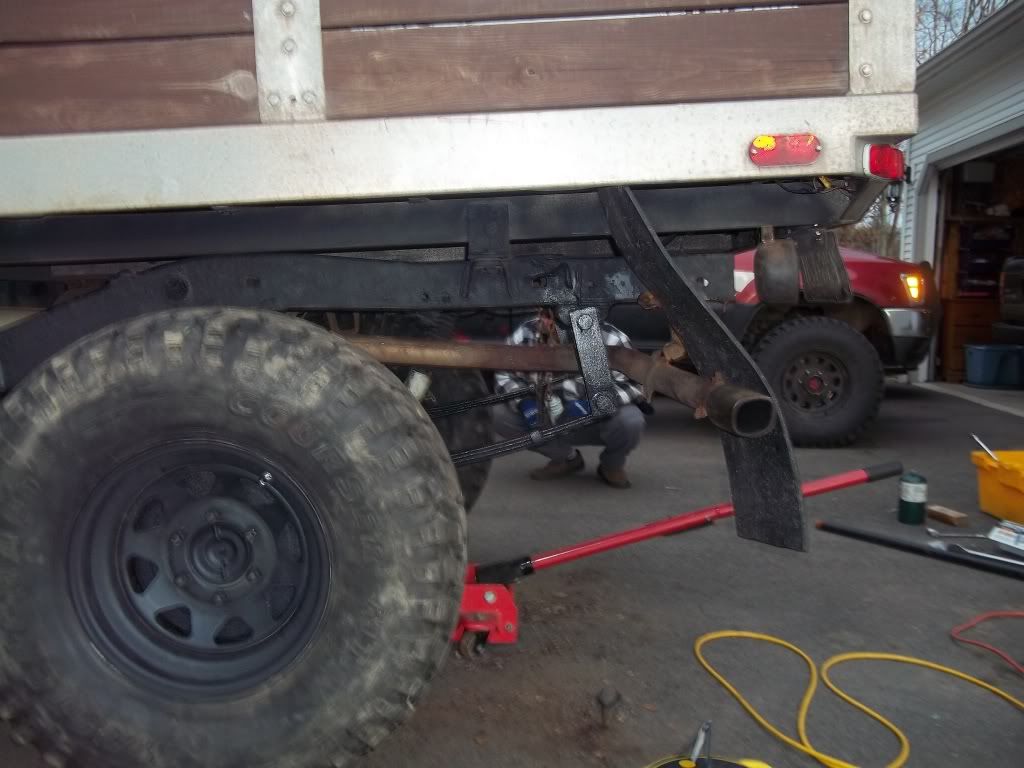
Passenger side spring installed. Jerry also coated the rest of the frame rail and bottom rail of the bed with the Krylon Glass black.
Drivers side got the same treatment as well as also having to cut out the hanger bolt.
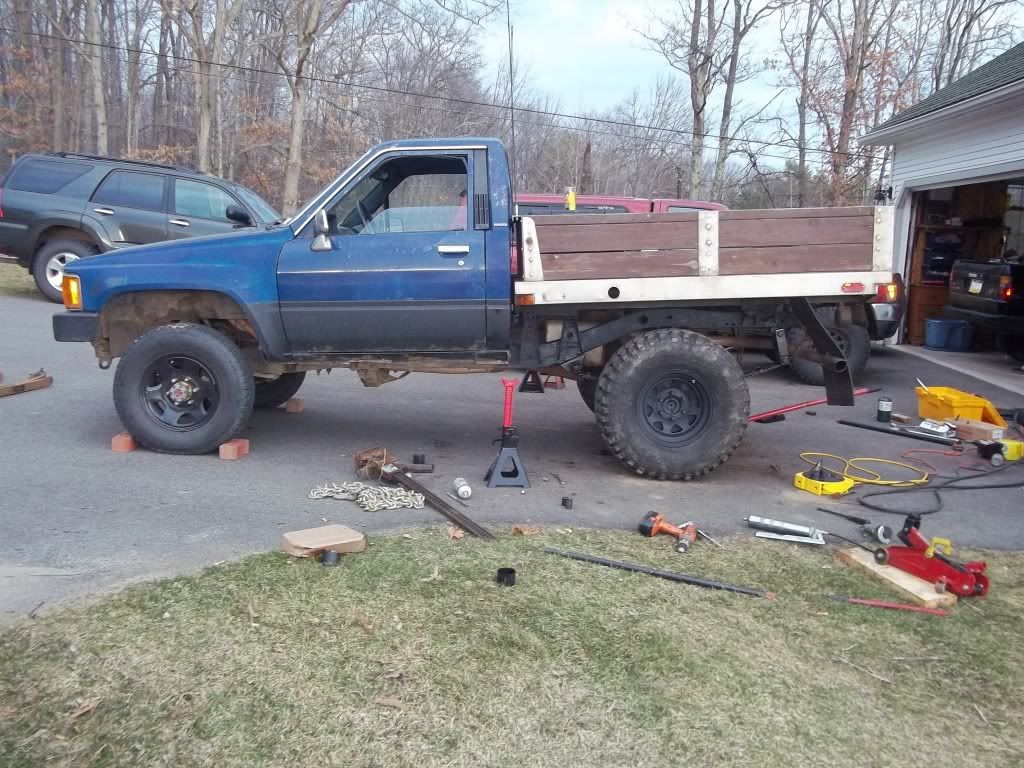
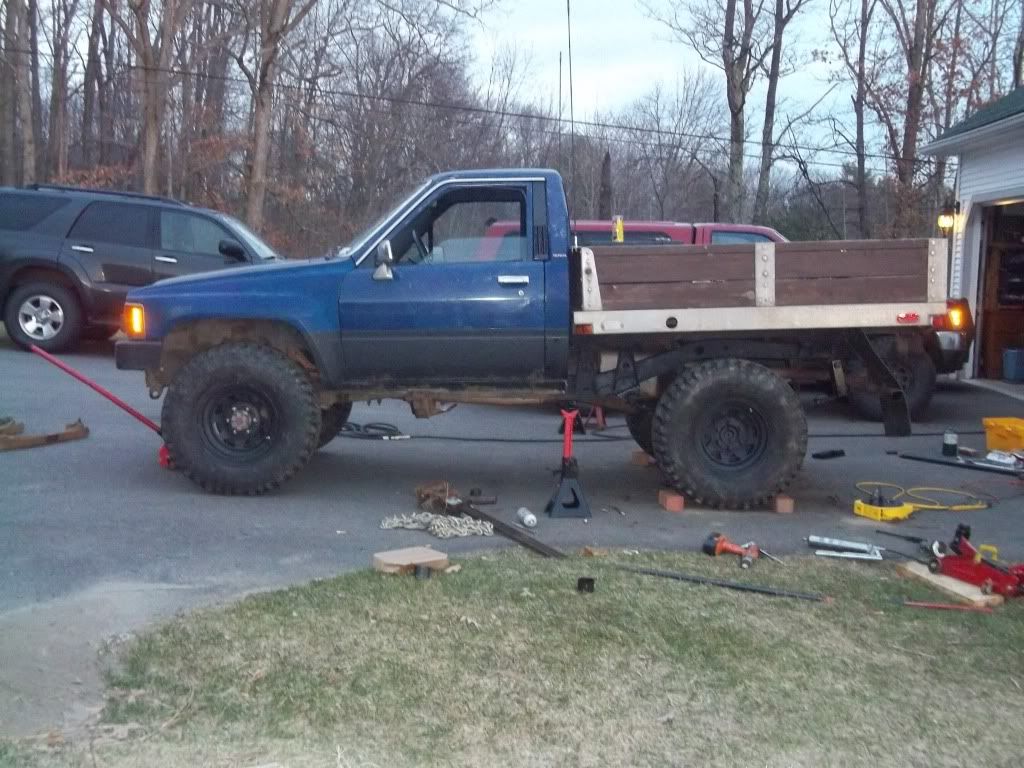
Funny picture that I had to take. Rear off the jacks and the 33's installed, but the 225's are still one the front. Picture doesn't do it justice though. I also decided to run without the rear center caps for the wheels.
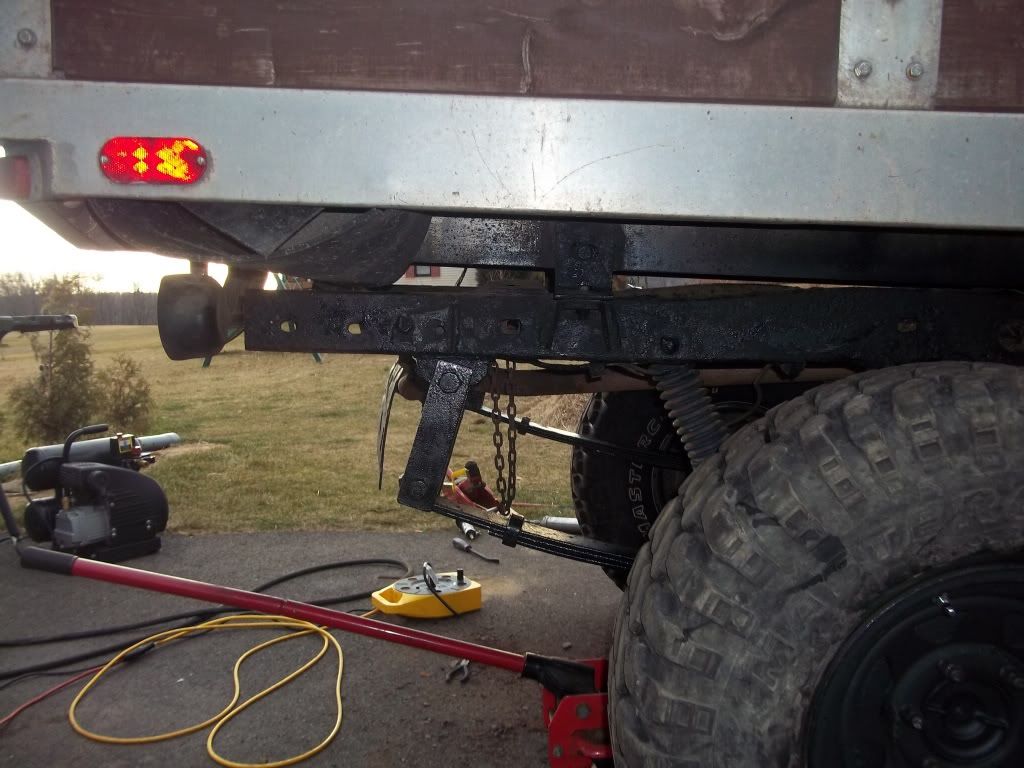
Shackle angles at full rest no stands or jacks. I have no clue as to what is good and what is bad here. I've tried asking here before and got little responses.
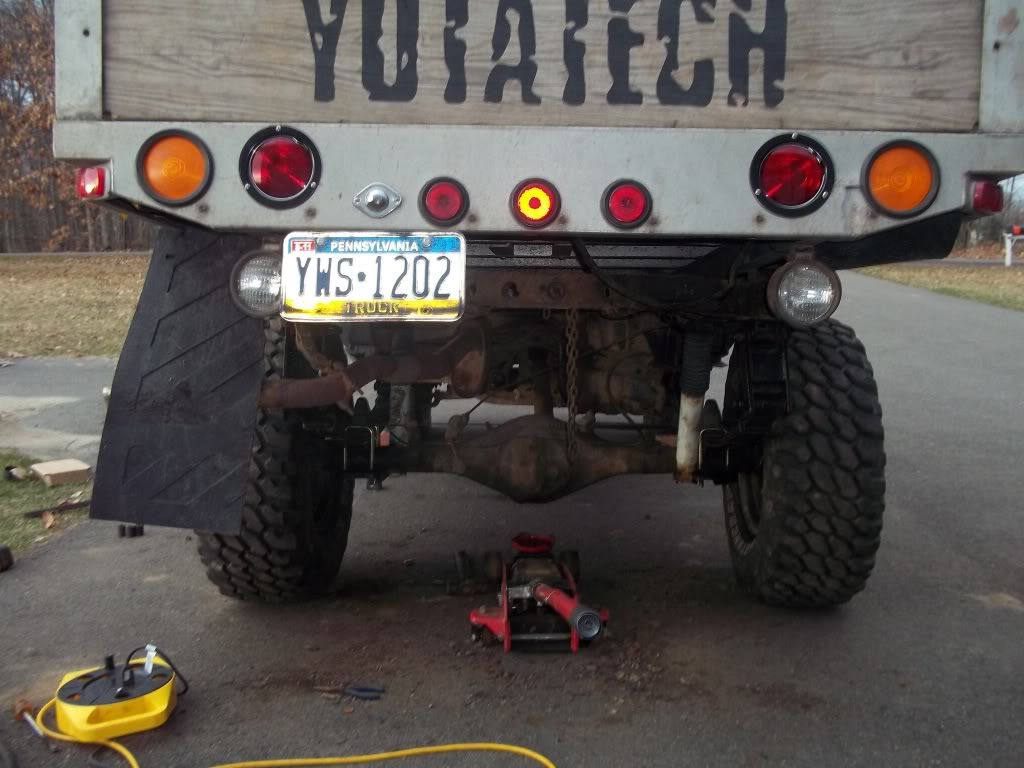
What is the meaning of pictures on Yotatech without a shot of a rear.
We were running out of light and time to mess with the torsion bars so this is the overall stance of the truck right now. A little noticeable rake but will be taken care of later on.
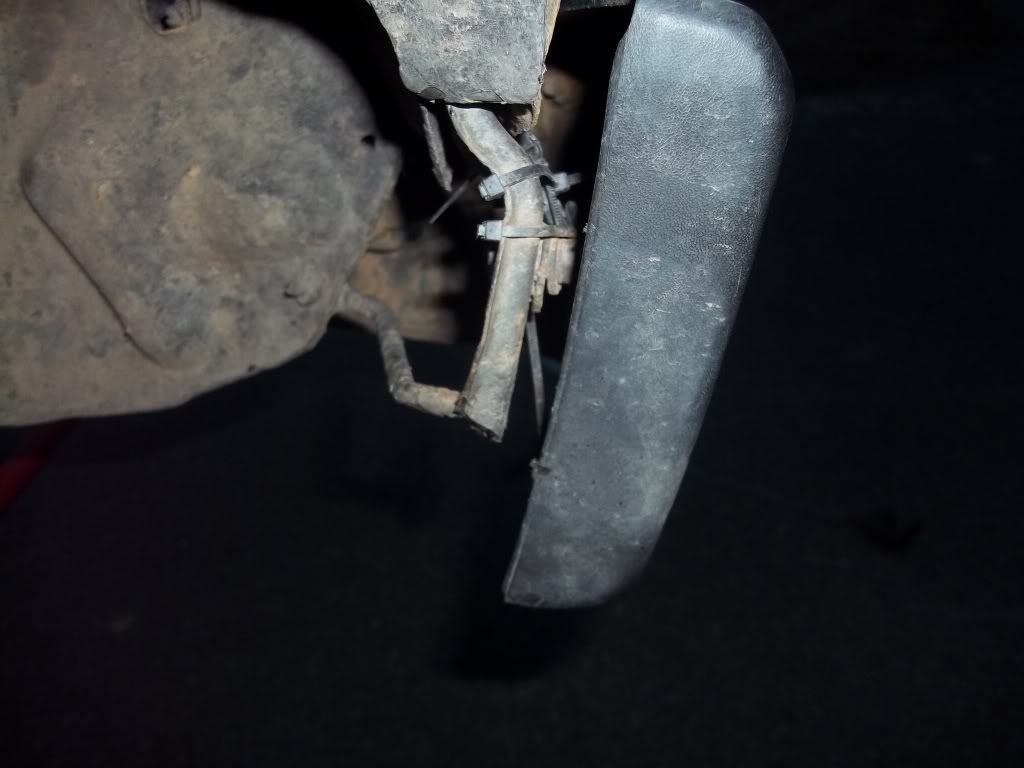
For the time being I just clearanced the body to tire rub during normal driving. Will need more though to stuff the tires. Ended up pounding on the pinch weld and some of the bottom of the fenders as well as cut the bracket behind the plastic corner caps on the bumpers. Also cutaway some of the wheel well liners.

More photos of the clearance work sometime today since it was dark when I was doing this.
When putting the truck up on the jack the springs didn't seem to flex upwards like the original springs and had me a little worried about how stiff these were gonna be. But I tell you what, these springs although a little bouncy seem pretty soft. I can't make a recommendation though as I do not know who made them. I don't know if I am right or not and hopefually I am not, but Having the springs side by side (I thought I took a photo of that but....) They almost look like stock springs with the overload removed and a thick long add-a-leaf in them. But I don't want to say that for sure. All I care about really is the ride quality.
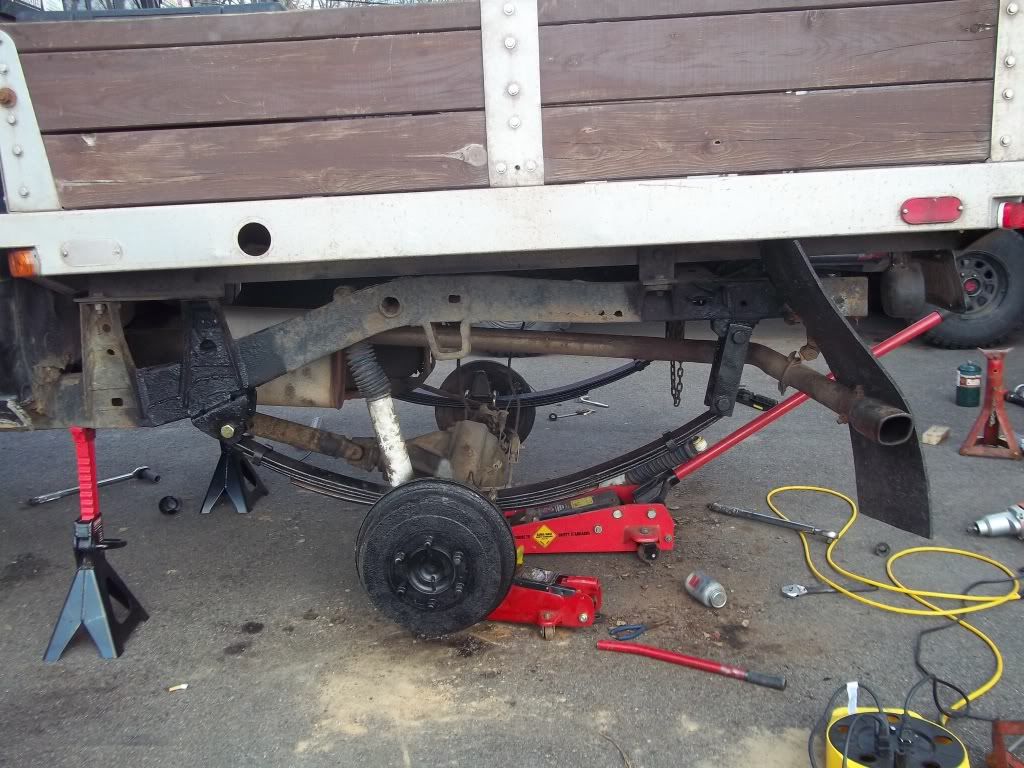
Also looks like as far as length of the shocks go, they are now about 1.5-2" too short to reach the axle at full droop. I think I measured 23 or 25" from mounting pin to mounting pin with the rear off the jack and the frame still on stands. I should write these down. I always forget numbers. I didn't get a collapsed length though as we ran outta time.
Some issues nothing major though. Truck pulls with hands off the wheels to the left a little, but that might be because of the rake. Some hopping sensations but that might be because the wheels aren't balanced yet.
The vibration I had posted about a day or two ago in a separate thread now seems to be gone, could be the change in pinion angle due to the new shackles or could simply be that I greased the rear driveshaft stuff as well.
That's it for now.
Some photos of the old springs, shackles and bushings.
Old vs "new" 6" shackle. 3.5" vs 6".
While I was cutting down the u-bolt threads to properly fit a deep well socket, I decided to allow Jerry to proceed to paint the springs, hangers and shackles with Krylon Gloss Black that he had laying around. I typically don't like using other people's consumables but he pretty much insisted.
Overall I think the paint looks ok and is not as glossy as I thought it would be, probably due to the fact that the surfaces due to the rust are not exactly smooth by any means.
Painted and new Energy Suspension Red Poly bushings installed. I used the two tubes of Lube that came with the bushings for the outsides of the bushings between them and the steel parts. I didn't use it for the bolt holes because I didn't like the fact of how sticky the grease actually was. Then I coated with insides for the bolts using my favorite green water proof grease. Which will eventually be the grease I use in the future for the greasable bolts I put in.
I did wind up painting my rear drums with the same K-Mart special Flat Black paint after taking a hammer to them to knock some of the rust and stuff off them.
Passenger side spring installed. Jerry also coated the rest of the frame rail and bottom rail of the bed with the Krylon Glass black.
Drivers side got the same treatment as well as also having to cut out the hanger bolt.
Funny picture that I had to take. Rear off the jacks and the 33's installed, but the 225's are still one the front. Picture doesn't do it justice though. I also decided to run without the rear center caps for the wheels.
Shackle angles at full rest no stands or jacks. I have no clue as to what is good and what is bad here. I've tried asking here before and got little responses.
What is the meaning of pictures on Yotatech without a shot of a rear.
We were running out of light and time to mess with the torsion bars so this is the overall stance of the truck right now. A little noticeable rake but will be taken care of later on.
For the time being I just clearanced the body to tire rub during normal driving. Will need more though to stuff the tires. Ended up pounding on the pinch weld and some of the bottom of the fenders as well as cut the bracket behind the plastic corner caps on the bumpers. Also cutaway some of the wheel well liners.
More photos of the clearance work sometime today since it was dark when I was doing this.
When putting the truck up on the jack the springs didn't seem to flex upwards like the original springs and had me a little worried about how stiff these were gonna be. But I tell you what, these springs although a little bouncy seem pretty soft. I can't make a recommendation though as I do not know who made them. I don't know if I am right or not and hopefually I am not, but Having the springs side by side (I thought I took a photo of that but....) They almost look like stock springs with the overload removed and a thick long add-a-leaf in them. But I don't want to say that for sure. All I care about really is the ride quality.
Also looks like as far as length of the shocks go, they are now about 1.5-2" too short to reach the axle at full droop. I think I measured 23 or 25" from mounting pin to mounting pin with the rear off the jack and the frame still on stands. I should write these down.
I always forget numbers. I didn't get a collapsed length though as we ran outta time. Some issues nothing major though. Truck pulls with hands off the wheels to the left a little, but that might be because of the rake. Some hopping sensations but that might be because the wheels aren't balanced yet.
The vibration I had posted about a day or two ago in a separate thread now seems to be gone, could be the change in pinion angle due to the new shackles or could simply be that I greased the rear driveshaft stuff as well.
That's it for now.
Last edited by xxxtreme22r; 03-20-2011 at 04:47 AM.
03-20-2011, 06:26 AM
#719
Registered User
Join Date: Feb 2010
Location: N. Lake Tahoe/Chico CA
Posts: 1,934
Received 0 Likes
on
0 Posts
shackle angles look fine, the drivers side is a little vertical but it should be fine. most people like them at about 40-45 degrees, but some people like them at 30 degrees. just depends on what you prefer i guess
03-20-2011, 06:41 AM
#720
Registered User
Thread Starter
Oh forgot about that and never really went back to check. In two of the photos you can see the axle at full droop with no shocks and the drivers side goes negative a little where the passengers side stayed straight. Jerry had noticed the passenger side shackle was tilted a little, after looking into it I had noticed the spring wasn't exactly sitting in the perch straight. I contributed that to the fact we tightened the ubolts without the shackle on on that side and the other side we had the shackle on. So a note on that, put the springs in the hangers and the shackle on to ensure the spring is seated properly in the perch. I think we got most of it out as it's now pretty straight. I'll wait a little while to see if it goes perfect as I know the bushings will settle in a little.
But as of right now to me anyway, maybe not in the photos, both sides look about the same when sitting on the ground as far as standard shackle angle is concerned. Although I think they could be sitting a little more angled then they are. Maybe the springs will settle as well, but not counting on it as these are used springs and not new ones. I haven't gone out to look yet, but I also took into account the shocks needed to settle down as well since they were extended out most of the day.
Time for me to buy an angle finder. lol.


