
Toyota~Boys SAS pickup build
 07-17-2013 | 05:46 PM
#22
Thread Starter
Registered User
iTrader: (2)
Joined: Oct 2006
Posts: 1,514
Likes: 2
From: Kenna, WestVirginia
Figured I'd update this since its been awhile.....
To get things started I will pulling the engine in a day or so along with the tranny so I can unbolt and remove the cab. I will be using my 22r in my 93 as soon as I get it EFI swapped. I bought myself a real nice 4.3 chevrolet engine with only 60,000 miles on it to go into my 87 once its swapped.
I called a man at YotaMaster.com yesterday and received a whole lot of useful information from him. The only things that will need to be purchased for my SAS is the IFS eliminator kit and a IFS steering box mount. Thens its balls out from there. Since I'm going big I've decided to go with the 5" HD lift springs for the front which will be plenty enough lift for 37's and my 4.3 should turn them with ease since my gears are 4.88's. I was dead set on running chevy 63's in the rear however YotaMaster talked me out if that. In order to gain the 5" of lift needed to match the front I'd have to at least fun a 2" block, drop shackle, and add a leaf. So I'm not going that route. I'm gonna go the 5" classic rear lift with the double shackle method to gain maximum flex. As noted this will not be a DD. trail use only.
So now that all this is said is there anyone needing any parts from the suspension of a 87 IFS rig. This includes 1.5" BJ spacers if anyone's interested. Feel free to PM me as none of this stuff is use to me anymore.
I'm also in need of a set of SA hubs. I'd not interested in buying however I can trade out parts of someone is interested. As I will not buy them until the last minute as I may run across a set at home.
07-17-2013 | 07:40 PM
#24
Thread Starter
Registered User
iTrader: (2)
Joined: Oct 2006
Posts: 1,514
Likes: 2
From: Kenna, WestVirginia
Hey man nice to see ya drop in. I will have some competition for ya once this bad boy toy gets done. I'm going to bank tomorrow to see about borrowing some money to get this thing done. I've saved for awhile now and I'm still behind abut so maybe they can help 
07-18-2013 | 08:45 AM
#26
Thread Starter
Registered User
iTrader: (2)
Joined: Oct 2006
Posts: 1,514
Likes: 2
From: Kenna, WestVirginia
On 84-95 the mounts are all the same. Now the 89-95 pickups look different only because the bumper mounts to the frame differently. However you can still put a 84 onto a 95 or vise versa. It's a bolt on and go configuration.
07-19-2013 | 06:35 PM
#27
Thread Starter
Registered User
iTrader: (2)
Joined: Oct 2006
Posts: 1,514
Likes: 2
From: Kenna, WestVirginia
Update: 7-19-13
I was gonna pull the engine and tranny today however I changed my mind.
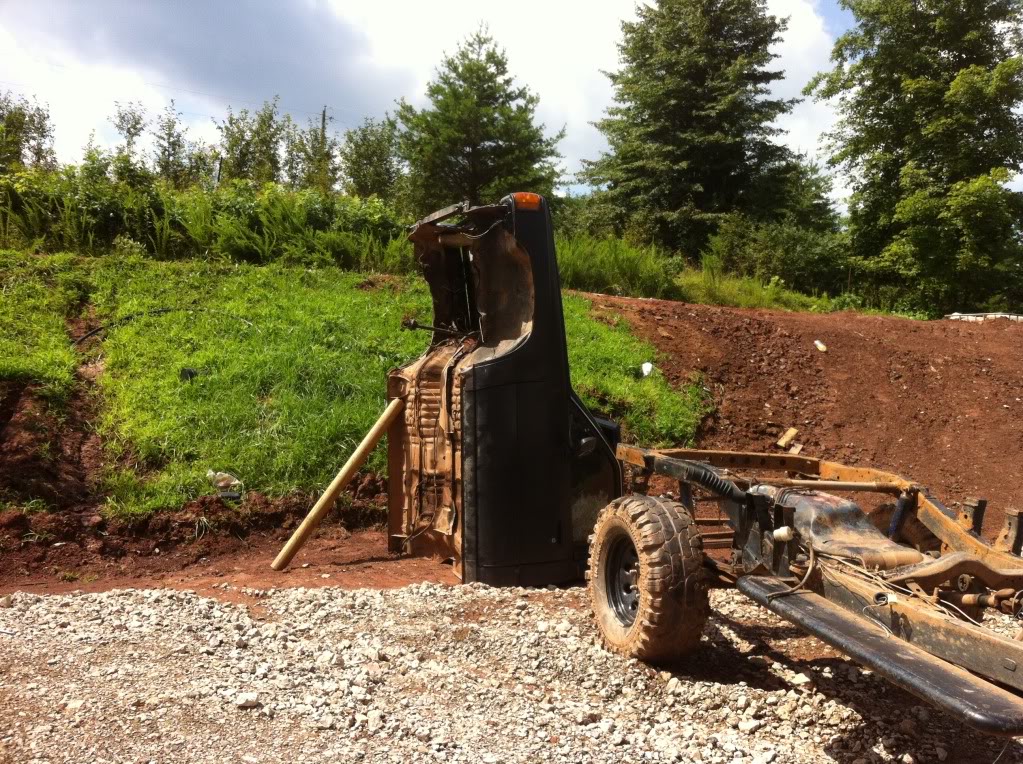
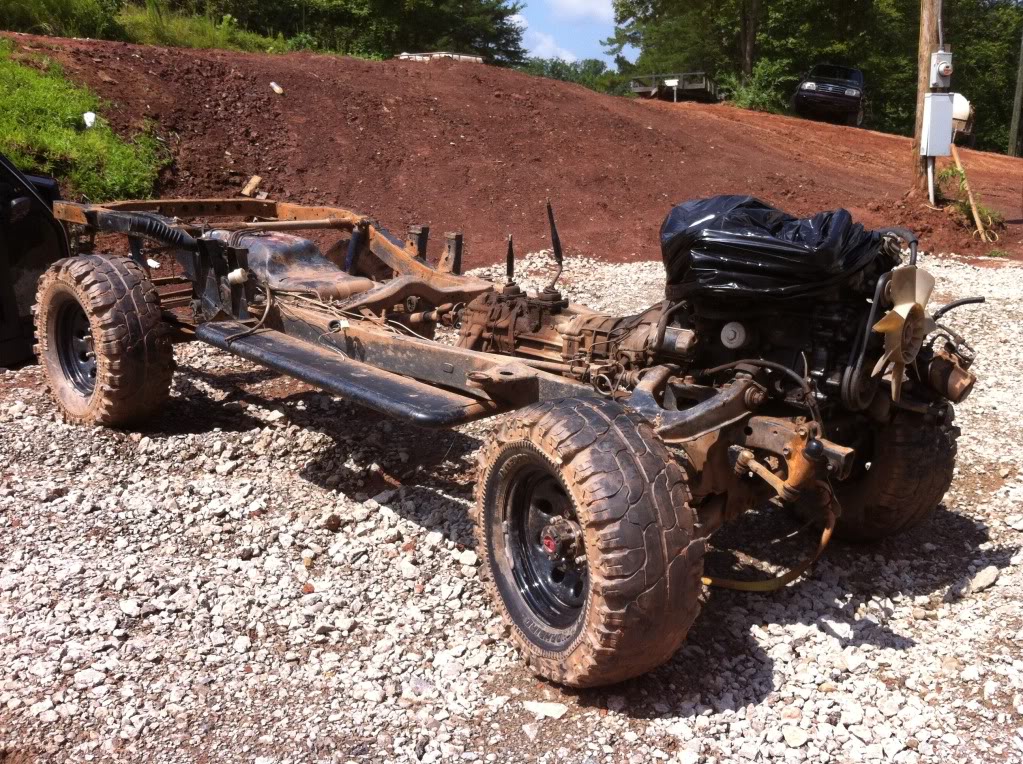
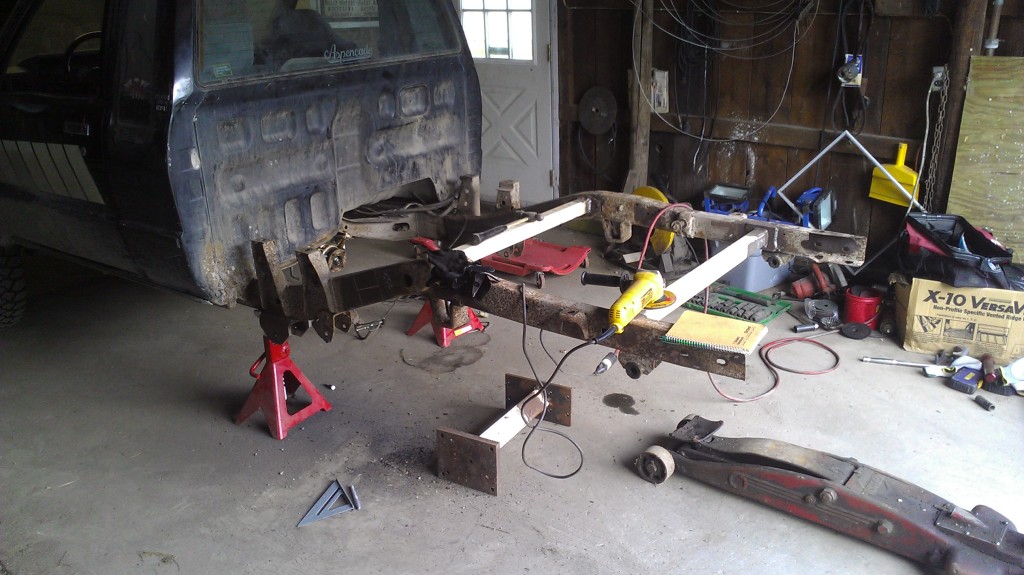
I decided to get my cab ready to pull instead. I started with the wiring which is really easy because my truck is a factory carbureted truck. So once the wiring was all unplugged I started with the 6 body mounts. Those were really easy since I just installed a 1" body lift a few months back. After that I unbolted the radiator and unhooked all the power steering hoses. Once that was done I unhooked the better part of the brake lines and clutch. Most of which I cut do to being rotted and what not. Once I was done which only took about 1 hour I called a good friend of mine to help me remove the cab safely. To remove the cab we laid 4x4's onto my rock sliders on the passenger side. We then picked up the drivers side and let it slide slowly down the 4x4's until the passenger side was on the ground. I then used the 4x4's to prop the body up while I pulled my frame out from under. Once done we laid the cab done on the ground then stood it up on its rear so I can pressure wash the under side of it which is extremely filthy
I do not have pics because it started storming like crazy when we finished. I plan on taking pics in the morning.
I was gonna pull the engine and tranny today however I changed my mind.
I decided to get my cab ready to pull instead. I started with the wiring which is really easy because my truck is a factory carbureted truck. So once the wiring was all unplugged I started with the 6 body mounts. Those were really easy since I just installed a 1" body lift a few months back. After that I unbolted the radiator and unhooked all the power steering hoses. Once that was done I unhooked the better part of the brake lines and clutch. Most of which I cut do to being rotted and what not. Once I was done which only took about 1 hour I called a good friend of mine to help me remove the cab safely. To remove the cab we laid 4x4's onto my rock sliders on the passenger side. We then picked up the drivers side and let it slide slowly down the 4x4's until the passenger side was on the ground. I then used the 4x4's to prop the body up while I pulled my frame out from under. Once done we laid the cab done on the ground then stood it up on its rear so I can pressure wash the under side of it which is extremely filthy
I do not have pics because it started storming like crazy when we finished. I plan on taking pics in the morning.
07-19-2013 | 06:49 PM
#29
Thread Starter
Registered User
iTrader: (2)
Joined: Oct 2006
Posts: 1,514
Likes: 2
From: Kenna, WestVirginia
What I love the most is if I ever roll this thing once finished without destroying the frame then I can just stick another cab on it. Or I can upgrade to 3rd gen
 07-20-2013 | 10:33 AM
#31
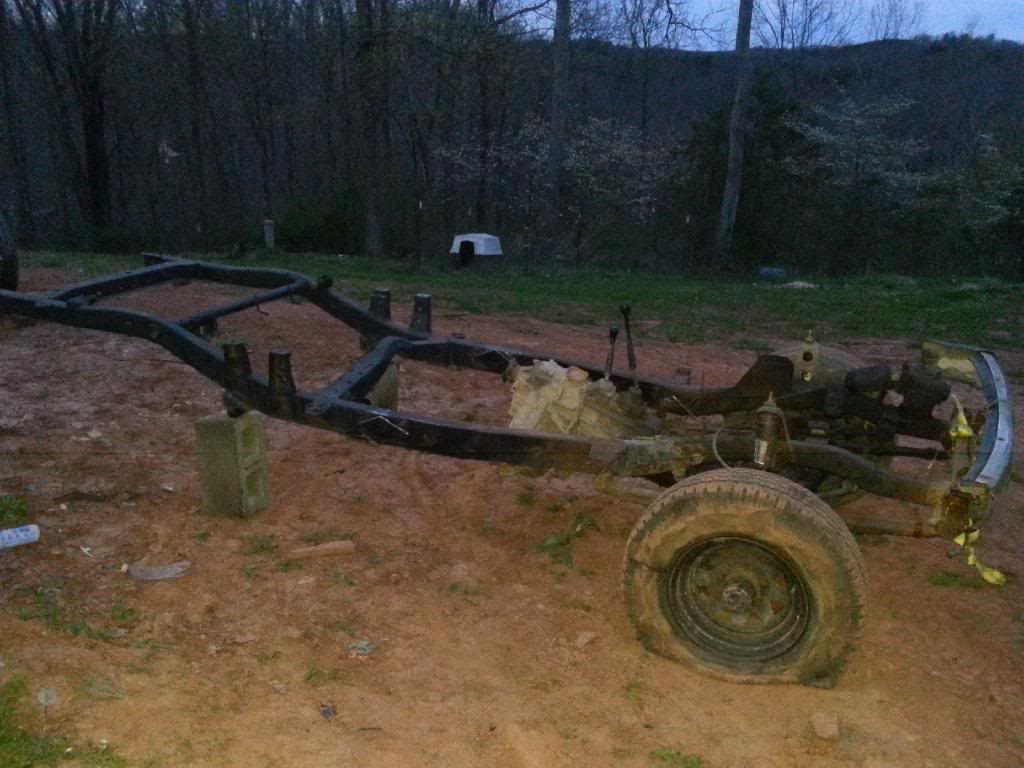
Hmmmmm,...... I SWEAR is missing something..... AHHHHH, an antenna, yeahhhhh, that's it! hahaha. ......
THE FUN BEGINS! Nice, Tboy
By the way that is a very interesting lot. I'm sure it's just gravel and high brick content Soil? Its just so freaking green in that first pic! I like it!
hahaha. ...... THE FUN BEGINS! Nice, Tboy
By the way that is a very interesting lot. I'm sure it's just gravel and high brick content Soil? Its just so freaking green in that first pic! I like it!
07-20-2013 | 10:46 AM
#32
Thread Starter
Registered User
iTrader: (2)
Joined: Oct 2006
Posts: 1,514
Likes: 2
From: Kenna, WestVirginia
Hmmmmm,...... I SWEAR is missing something..... AHHHHH, an antenna, yeahhhhh, that's it! hahaha. ......
THE FUN BEGINS! Nice, Tboy
By the way that is a very interesting lot. I'm sure it's just gravel and high brick content Soil? Its just so freaking green in that first pic! I like it!
hahaha. ......THE FUN BEGINS! Nice, Tboy
By the way that is a very interesting lot. I'm sure it's just gravel and high brick content Soil? Its just so freaking green in that first pic! I like it!
I had a little over $6,000.00 saved up for my SAS build. Then when I got ready to order parts disaster struck.
First off was $1,300.00 in gravel. Then I had to replace my well pump $200.00 following the hot water tank and plumbing $500.00 then the wife decided she wanted a new porch which I built 12'x16' that costed roughly $600.00 and its still not roofed. Now I've got to replace some flooring and start getting ready for winter. So basically my SAS went down the drain rather quickly. I went to the bank to get a small personal loan of $2,500.00 to get my front and rear swap kit and I was denied because I currently have 2 loans with the bank which are only $240.00 per month for both.
So in the mean time I figured I'd get my cab and everything switched over and start getting stuff mocked up for my 4.3 which won't be installed until I get the Bellhousing kit so I can retain my transmission.
So basically I'm completely broke and just trying to make the best of not. Not to say I haven't worked for 3 weeks now due to this piss poor weather. I in construction and can't roof in the rain
 07-20-2013 | 10:57 AM
#33
Damn man! I'm really sorry... many of us know how that works, but like you said, you have plenty to do to get ready... so you will get it done here sooner than later. I sure miss that green of north eastern Washington... I don't miss the freezing winters of course but I do miss how green and full it was. It looks like beautiful land, bud!... just having that should console you a bit huh? haha. Sounds like the wife is focused huh? Well heck, ain't nothing wrong with the solid functional porch idea... just sucks to not be able to order your parts, I know. I'll be watching man, very interesting
07-20-2013 | 02:44 PM
#34
Thread Starter
Registered User
iTrader: (2)
Joined: Oct 2006
Posts: 1,514
Likes: 2
From: Kenna, WestVirginia
Yeah chef I live in the western part of WV. I'm about 65-75 miles from then big mountains but I really enjoy we're I'm at. I'm also about 30 miles from Ohio as well. I'm located In a area that doesn't suffer from 2+ feet of snow. I mean I am in WV so yeah we're still mountainous terrain and rough winters but nothing like the northern counties ya know. I've been here my whole life. I grew up in a little town called sissonsville about 20 mile from we're I'm at now. Spent my life growing up with most of the cast from BuckWild the MTV show. At 17 I moved to a neighboring county to live with my girl friend at the time. From there I finished school in This county as well. Then at 19 I met my wife only to be married 7 months later. As of 7-16-13 we been married 3 years. We reside on 17 Acres of property that was giving to my wife at her mothers death. I have 20 acres of property back were I grew up that I purchased back in 2010. It's really beautiful land and great hunting. It's also virgin land as well. No roads anywhere and its never been timbered. I purchased it for security incase something would ever happen I'd always have something to fall back on.
07-22-2013 | 11:56 PM
#35
I enjoy seeing frame off rebuilds and indepth work. You got alot going on and looks good. Seems like no matter how much you plan something always comes up and tries to get in the way of a project. I know that feeling. Looking forward to see what you do next.
03-07-2014 | 06:32 PM
#36
Thread Starter
Registered User
iTrader: (2)
Joined: Oct 2006
Posts: 1,514
Likes: 2
From: Kenna, WestVirginia
Its been along time since I posted here so I figured I'd give a good update.
I bought another toyota last week. Its a 1985 Toyota 4x4 SR5. The truck that I bought was a parts truck. I bought it from a parts yard for $200.00. So that meant know title. The cab has been pretty much parted out. No engine either. The chassis is 100% complete. The frame is severely rotted from the rear spring mounts back. The front of the frame is spotless tho.
So my intentions is to cut the 85 frame in half and add my 2WD frame to it. In return this will save me a ton of money and make things easier for me.
Now before people start to criticize me, let me explain some things. I am a WV certified welder. I'm very familiar with frame repair. Now I'm not just cutting two frames in half and welding them back together. Once I get my measurement instill then cut both frames in half at a 45 degree angle. Once their cut I will slide a peice of 1/8" rectangular tubing 12" into the 85 frame on both sides. Leaving 12" hanging out to slide the 2WD frame onto. Then I will weld my frames together. Once welded I will do some plug welds. This will eliminate the risk of my frame cracking under stress. I've done this once before on a old IFS truck I had. If I remember correctly 2x4 rectangular tubing fits great into our frames. You do have to use a hammer to get it in there tho. Its a very snug fit.
Once I get this done I will have a complete strait axle rolling chassis on stock suspension. Thus allowing me to transplant my 4.3 engine and mounting my 87 cab. Putting me that much closer to having a finished toy.
I have already stripped the 85 down to just a rolling chassis. I done that today. I will update with some pictures soon.
So what do you all think?
 04-24-2014 | 05:08 PM
#38
Thread Starter
Registered User
iTrader: (2)
Joined: Oct 2006
Posts: 1,514
Likes: 2
From: Kenna, WestVirginia
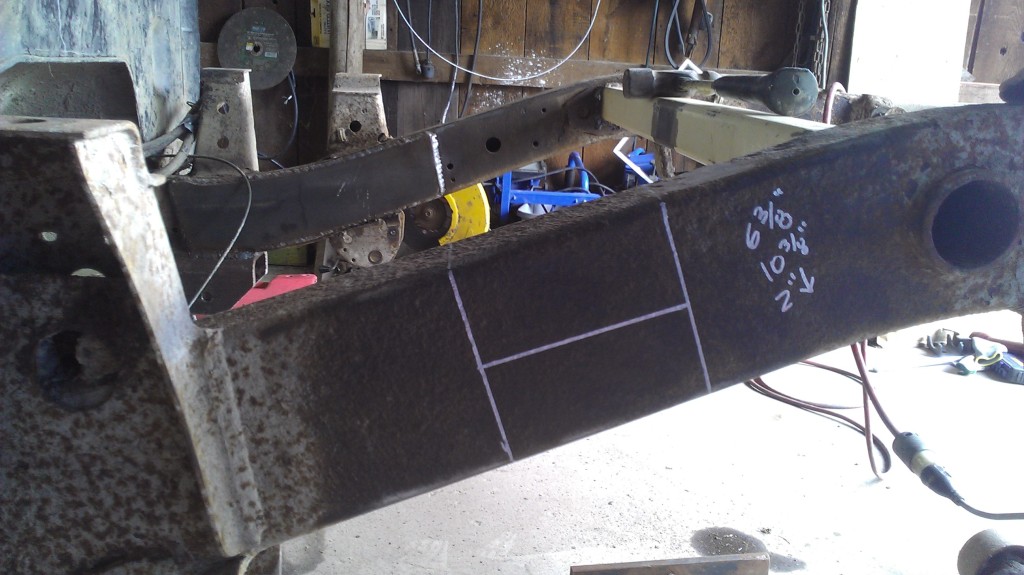
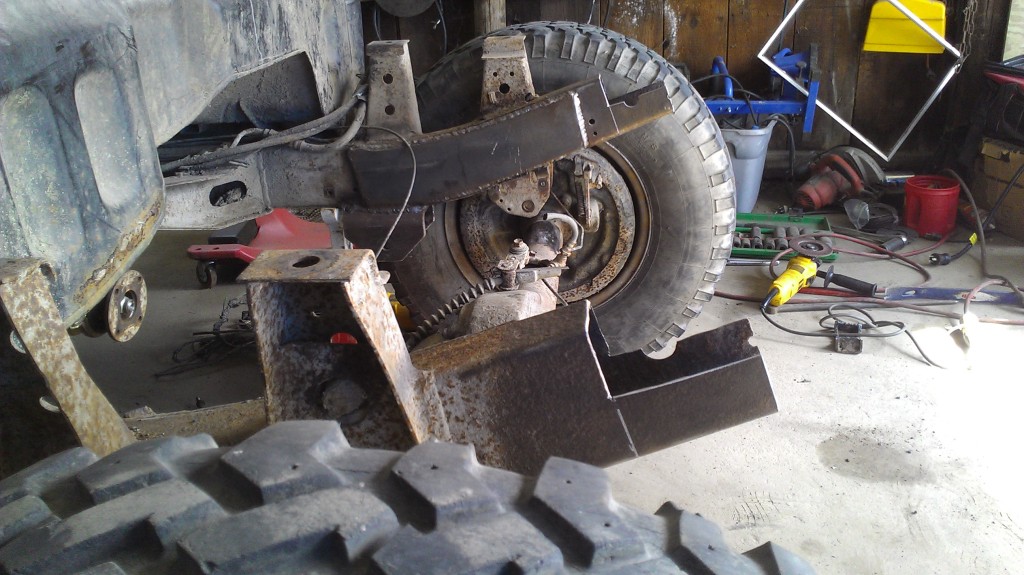
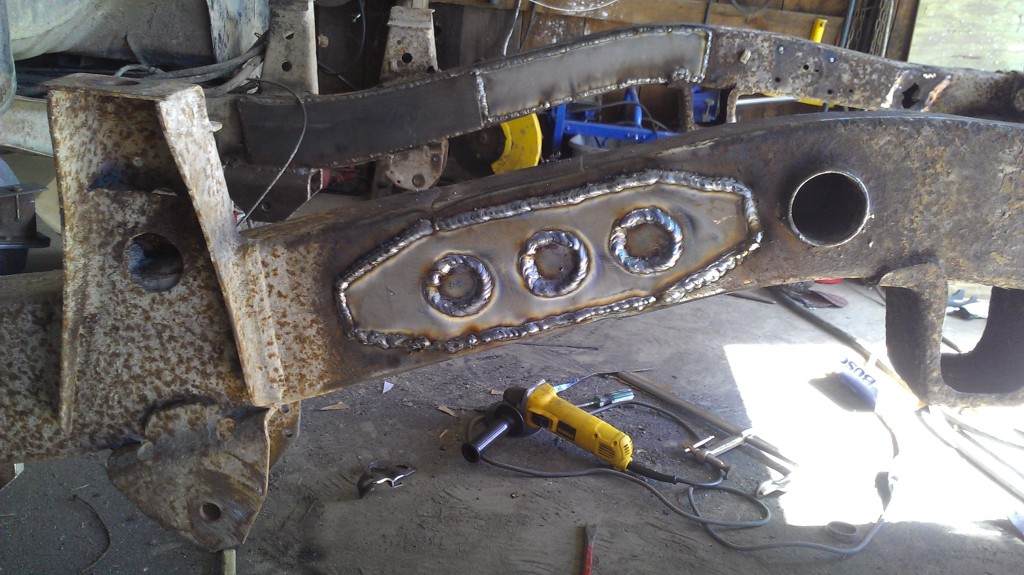
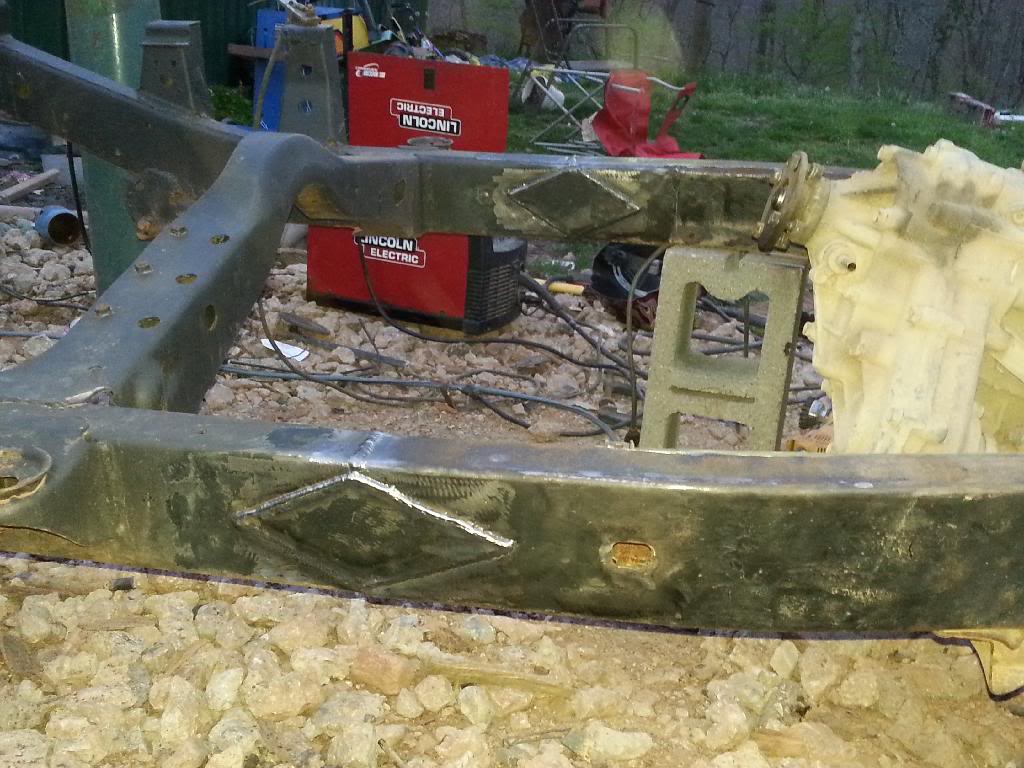
I know its been awhile since I fooled with this project so I decided to work on it some this evening. After thinking long and hard on it I decided to cut my 85 frame in half and just replace the rear section. After taking 100 measurements I made my marks and done my cuts with a angle grinder. Putting this back together was quite hard. But anyways after tak welding things back together I pulled measurements to double check that I was straight and level. Then I welded it up solid. I didnt take alot of pics but I did take a few.
Once the frame was cut I slid 2/4 square tubing into the front half 6" and left 6" hanging out to slide the rear section onto. Not only did this help hold me straight its also extra support in the frame. After sliding things together I welded them solid all the way around. Then I made a few punch welds to the square tubing. Once done I grinded my welds flat and diamond plated my frame on the inside and out. I don't think she will ever break. Do you?

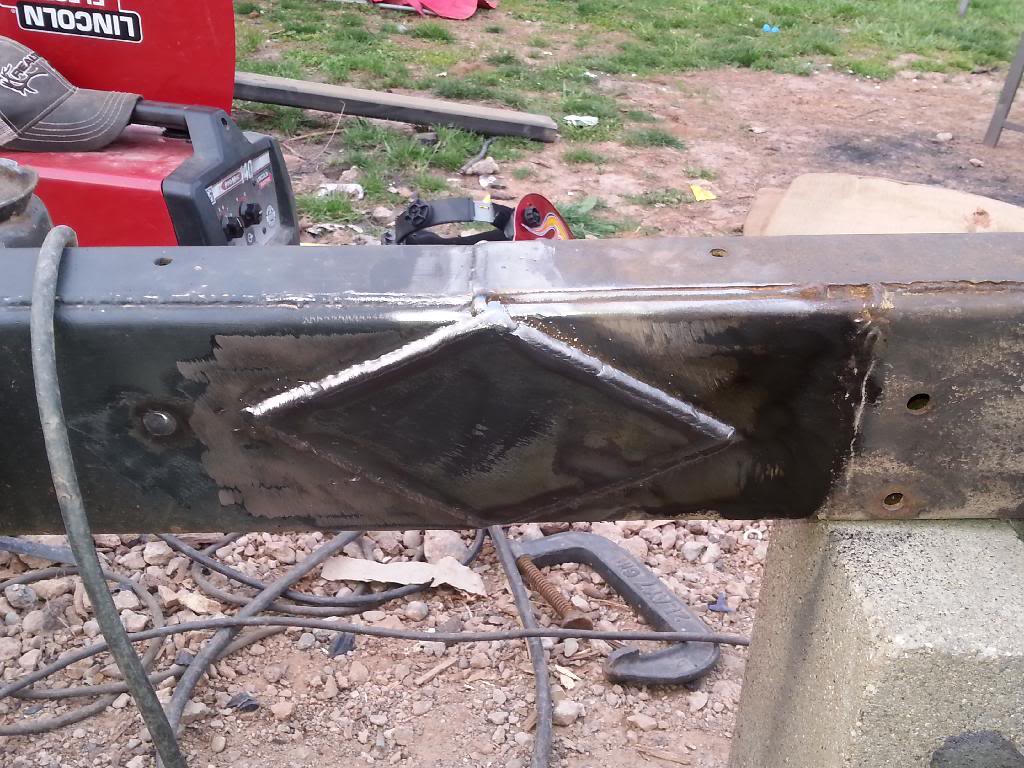
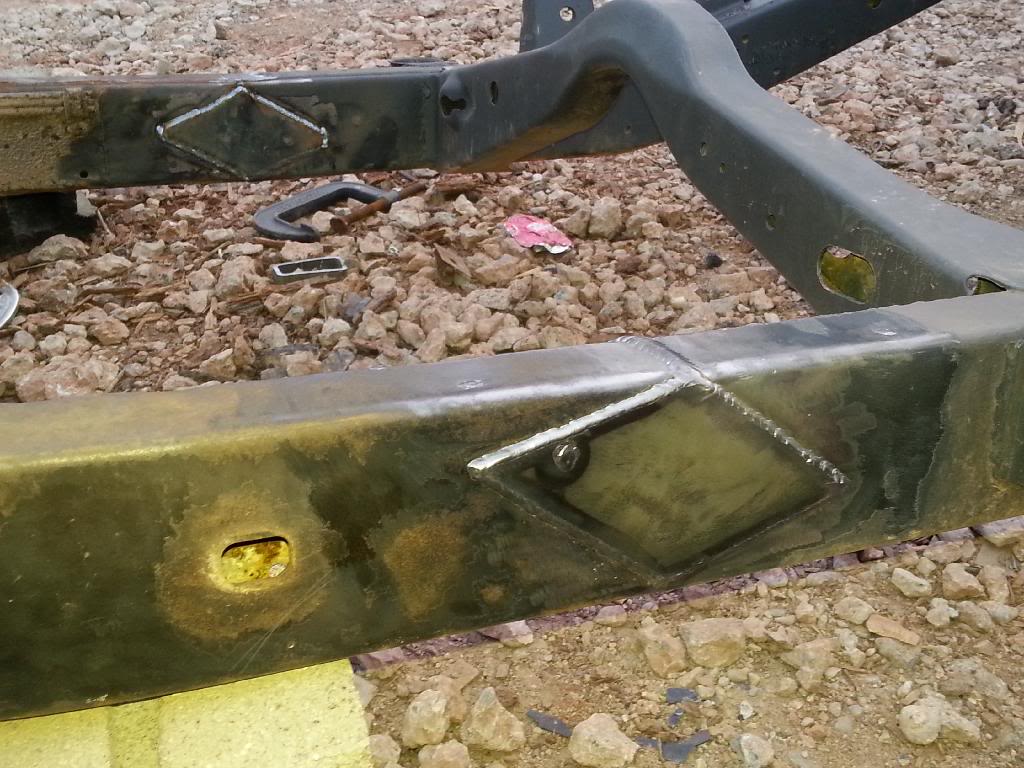
Once the frame was cut I slid 2/4 square tubing into the front half 6" and left 6" hanging out to slide the rear section onto. Not only did this help hold me straight its also extra support in the frame. After sliding things together I welded them solid all the way around. Then I made a few punch welds to the square tubing. Once done I grinded my welds flat and diamond plated my frame on the inside and out. I don't think she will ever break. Do you?
04-24-2014 | 08:00 PM
#40
Thread Starter
Registered User
iTrader: (2)
Joined: Oct 2006
Posts: 1,514
Likes: 2
From: Kenna, WestVirginia
Thanks man..
This has been a really long build lol.. I'm kinda not financially able to complete it as soon as I'd like. Every time I get the money to do it I end up having to use it for bills or somthing we as a family need. So I'm just taking my time and doing it one step at a time.
My next step is to clean up the front of the frame and repaint the entire thing again. From there I'd like to either order the front or rear kit for it. This truck will be a buggy only so I'm thinking really hard on Dove Nosing the front clip. Its also gonna receive a complete new rear end design. Ive been looking at several designs on Google and FaceBook. My biggest thing is I wanna get the chassis done!


