
Terrys87 88 Truck Build
 08-27-2012, 10:19 AM
#181
Super Moderator
Staff
Thread Starter
iTrader: (1)
Join Date: Aug 2008
Location: Anderson Missouri
Posts: 11,788
Likes: 0
Received 25 Likes
on
22 Posts
Hello Mark..That littl trick works great. 12 oclock and then it moves to where it needs to be. I got that where have some adjustments now. Beats me how I get all of the poorly rigged trucks. I have a some more pics to post of the poor wiringjob that I need o take care of. I will get some pics of it when I get to that stage. Slowly but surely I will get there.
Hello RAD4Runner.. I was hoping to get to work on my Runner and get you a pic of what it would look like with out the trim. It will leave a gap. I will try and get you a pic tomorrow.
Hello RAD4Runner.. I was hoping to get to work on my Runner and get you a pic of what it would look like with out the trim. It will leave a gap. I will try and get you a pic tomorrow.
 08-27-2012, 10:36 AM
#182
Super Moderator
Staff
Thread Starter
iTrader: (1)
Join Date: Aug 2008
Location: Anderson Missouri
Posts: 11,788
Likes: 0
Received 25 Likes
on
22 Posts
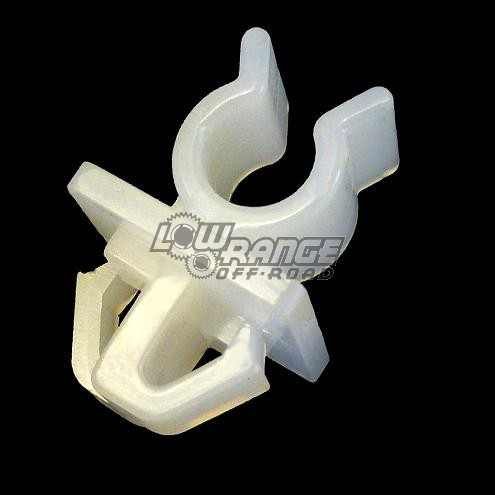
I found the hood prop clip and you can get it from Low Range Offroad. I will update the links to it when I get to my laptop. Also found the part number to the hood prop grommet. It is on my laptop as well.
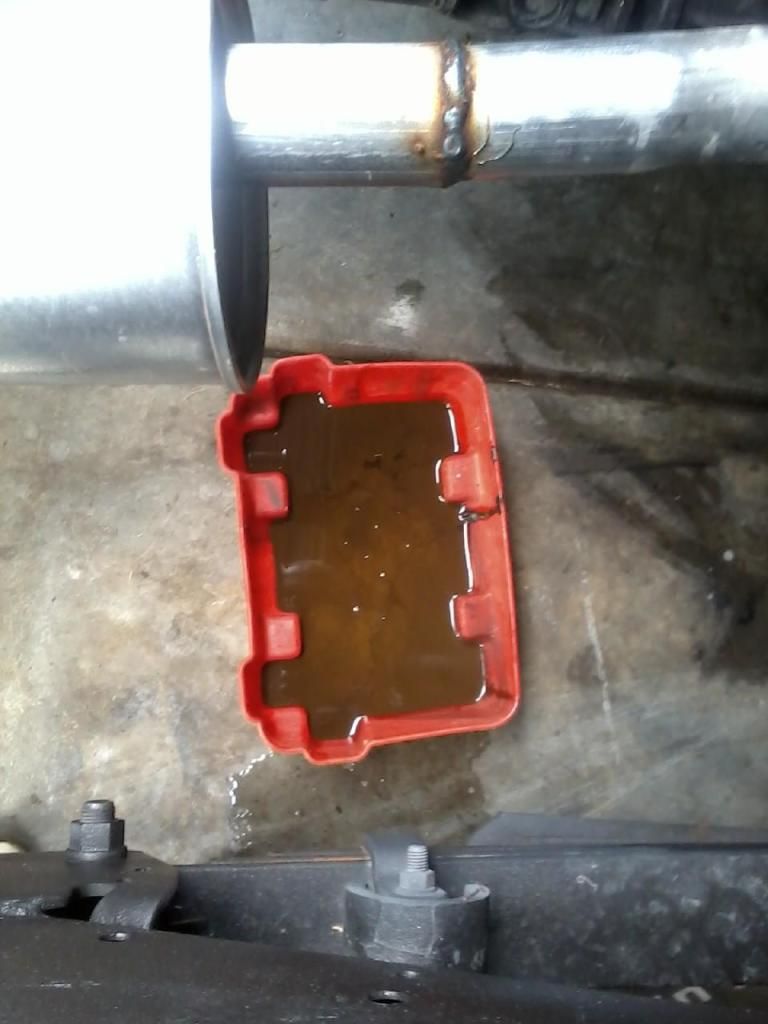
Changed out the rear diff oil. I will change it again after it has had time to flush the system real well.
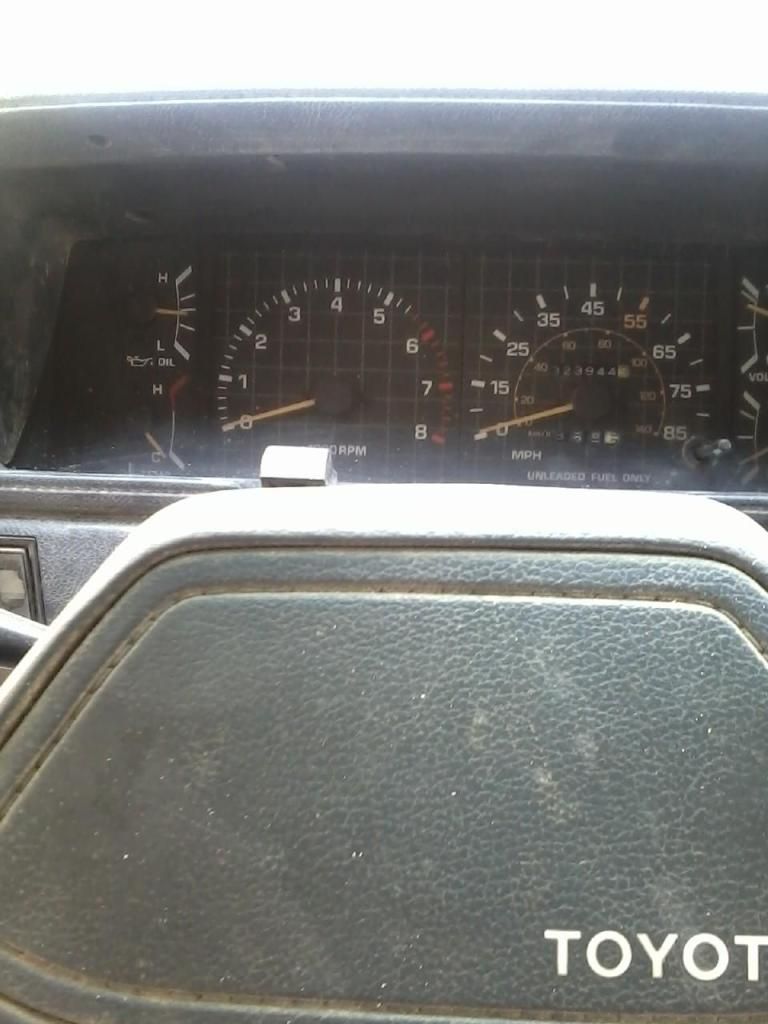
Got the SR5 guage swap done. The temp gauge works, just need to re do the wiring to the sensor, that is another hack job that I get to fix. The tachometer doesnt work, I need to run a wire from the ground side of the coil to a screw on the back of the tach. I have done this before, just dont remember which screw and need to look into it again.
Removed the dashpad so as I can start cleaning and get the heater controls fixed. I have a video of getting the one dash pad out.
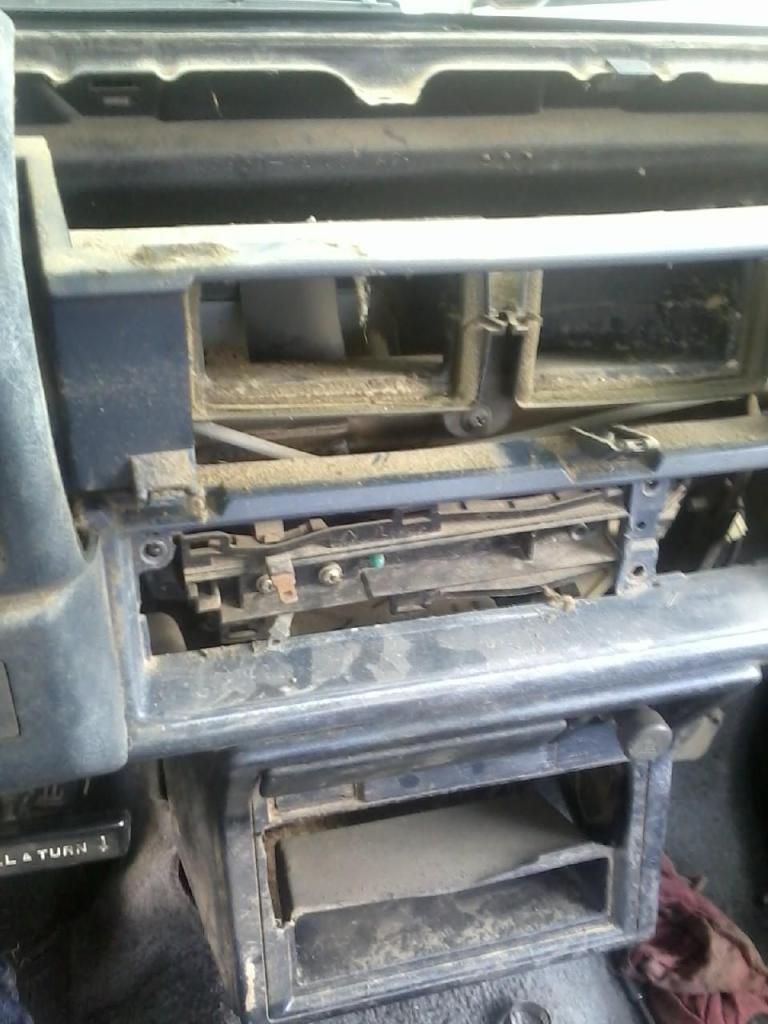
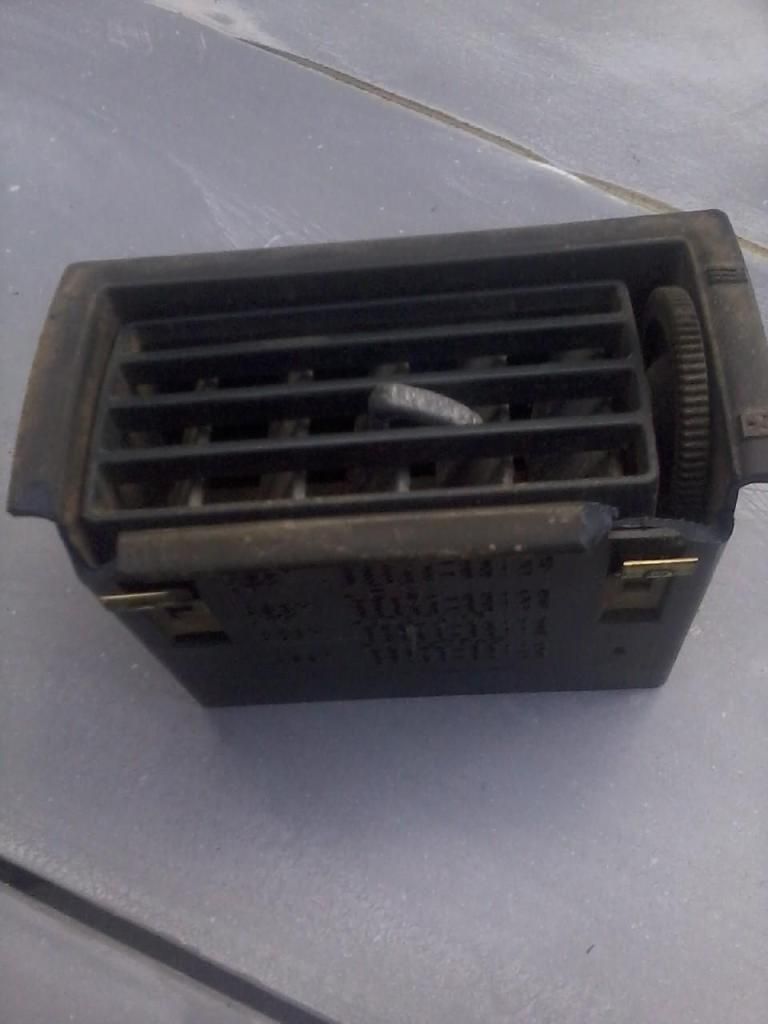
The passenger vent is brittle. I have taken several vents out and still crack one occasionly. I have the pieces and may super glue it or just replace it.
Video of getting dash pad nut out.
Changed out the rear diff oil. I will change it again after it has had time to flush the system real well.
Got the SR5 guage swap done. The temp gauge works, just need to re do the wiring to the sensor, that is another hack job that I get to fix. The tachometer doesnt work, I need to run a wire from the ground side of the coil to a screw on the back of the tach. I have done this before, just dont remember which screw and need to look into it again.
Removed the dashpad so as I can start cleaning and get the heater controls fixed. I have a video of getting the one dash pad out.
The passenger vent is brittle. I have taken several vents out and still crack one occasionly. I have the pieces and may super glue it or just replace it.
Video of getting dash pad nut out.
Last edited by Terrys87; 08-27-2012 at 02:19 PM.
 ........ no? hahahaha. JK.
08-27-2012, 10:54 AM
........ no? hahahaha. JK.
08-27-2012, 10:54 AM
#184
PS> Waiting for that link, whenever you have time... THANKS! THAT'S DEFINITELY something I need.
PSS> I wonder if I can maybe replace my heater control valve with that plastic one, lube up the cable for heat/cold control, lube up the gate linkage and pivot grommet... and then look for anything it might be 'catching' or 'binding' on, all from underneath, ... >>> PULLING THE STEREO OUT to see? I seem to remember a pic of someone's deck out and I could see all the cable assembly. Might that not be a nice window into things, there, without risking breaking my dash clips/components, etc.?(not forgetting to mention 'all the extra work I would save?' )
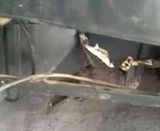
PSSS> (hehe)>>> Need to find that write up my buddy did on fixing the "MY TAILGATE HAS A HAMMERING GNOME LIVING IN IT!" syndrome! lol.. You know, when the tailgate retaining arms pivot bushing wears out and the those arms BANG, INCESSANTLY???? lol. He put a bicycle tire tube of certain size over the arm on each side and VOILA! No more noise, and he didn't have to replace that bushing which only works for so long..... BUT, I tried one time to remove that large screw, ...and it felt like it was starting to strip So I don't wanna mess with it until I know I can loosen that!
Ok, sorry, no more PSSSSSSSS>'s lol
lol
PSS> I wonder if I can maybe replace my heater control valve with that plastic one, lube up the cable for heat/cold control, lube up the gate linkage and pivot grommet... and then look for anything it might be 'catching' or 'binding' on, all from underneath, ... >>> PULLING THE STEREO OUT to see? I seem to remember a pic of someone's deck out and I could see all the cable assembly. Might that not be a nice window into things, there, without risking breaking my dash clips/components, etc.?(not forgetting to mention 'all the extra work I would save?' )
PSSS> (hehe)>>> Need to find that write up my buddy did on fixing the "MY TAILGATE HAS A HAMMERING GNOME LIVING IN IT!" syndrome! lol.. You know, when the tailgate retaining arms pivot bushing wears out and the those arms BANG, INCESSANTLY???? lol. He put a bicycle tire tube of certain size over the arm on each side and VOILA! No more noise, and he didn't have to replace that bushing which only works for so long..... BUT, I tried one time to remove that large screw, ...and it felt like it was starting to strip
So I don't wanna mess with it until I know I can loosen that! Ok, sorry, no more PSSSSSSSS>'s
lol
08-27-2012, 02:16 PM
#185
Super Moderator
Staff
Thread Starter
iTrader: (1)
Join Date: Aug 2008
Location: Anderson Missouri
Posts: 11,788
Likes: 0
Received 25 Likes
on
22 Posts
Hello Mark...I would enjoy coming out to Cali..Cant believe it has been 10 years since I have been there. I almost stayed and one day hope to get back out that way but the cost of gas shut alot of my running around down. Sure am glad I traveled when I had the chance. Been looking for a good excuse to get bak out there.heheh
I am hoping to get to the heater controls in the next few days. I am going to be getting to it soon if everything goes right. I want to try and take care of several things while this far into the dash. Fix the tachometer,clean the ventilation system, heater controls, and probably some kind of wiring issues in there. That wouldnt surprise me. I removed some speaker wire from the engine compartment to the bumper.
I havent had any luck with trying to lube the cables. Might be some way to though. One reason I pull the dash pad is so that you can remove the dual vents and it makes getting to the controls so much easier. The first controls I did, I just went thru the contols openings and it was a bear and I was worried about putting a kink in the cable and then it is done for, may as well as replace it.
Those vents are brittle, I have removed several and go the way Toyota says to and I still crack one. I grab all of the passenger vents I can when I am in the boneyard just for this reason.
I have the same rattle n my 86 runner that you are talking about as those screws are worn out. I will be looking forward to that thread yo are talking about. Last nite, I couldnt get on Yotatech for some reason. Think the site was down. I have several threads I want to catch up on and will get those links up. Also that hood grommet was 2 to 3 dollars from what I found. The only place I could find it was Toyota. The hood prop I found every where.
08-27-2012, 02:25 PM
#186
Super Moderator
Staff
Thread Starter
iTrader: (1)
Join Date: Aug 2008
Location: Anderson Missouri
Posts: 11,788
Likes: 0
Received 25 Likes
on
22 Posts
I got the fuel leaks fixed, corrected the timing,removed some poor wiring that the PO had in, and got the valve cover gasket and half moons replaced. Hoping to get the last of the hack wiring removed soon. I have some picture of some of it I will post later. I have seen this kind of hack jobs on alot of used cars and trucks. Just cant believe people do that. I may not care for it but it has taught me alot on the wiring on these trucks. Getting to know what goes where, so there has been some good to come out of it.
08-27-2012, 03:36 PM
#187
Registered User
I found the hood prop clip and you can get it from Low Range Offroad. I will update the links to it when I get to my laptop. Also found the part number to the hood prop grommet. It is on my laptop as well.
Got the SR5 guage swap done. The temp gauge works, just need to re do the wiring to the sensor, that is another hack job that I get to fix. The tachometer doesnt work, I need to run a wire from the ground side of the coil to a screw on the back of the tach. I have done this before, just dont remember which screw and need to look into it again.
Got the SR5 guage swap done. The temp gauge works, just need to re do the wiring to the sensor, that is another hack job that I get to fix. The tachometer doesnt work, I need to run a wire from the ground side of the coil to a screw on the back of the tach. I have done this before, just dont remember which screw and need to look into it again.
i so want to do the SR5 gauge mod/upgrade i need a tach an dont much like idjit lights
08-27-2012, 09:59 PM
#188
Super Moderator
Staff
Thread Starter
iTrader: (1)
Join Date: Aug 2008
Location: Anderson Missouri
Posts: 11,788
Likes: 0
Received 25 Likes
on
22 Posts
Here are the links to the Clips and Grommet.
http://www.clipsandfasteners.com/Toy...s_p/a17611.htm
http://www.lowrangeoffroad.com/index...stay-clip.html
http://www.ebay.com/itm/Toyota-Pickup-Truck-Tacoma-4Runner-Etc-HOOD-PROP-ROD-HOLDER-CLIP-/160873043964?hash=item2574c7d7fc&item=160873043964&pt=Motors_Car_Truck_Parts_Accessories&vxp=mtr
Hood Grommet PN 53430B http://www.utoyot8.com/Picture.aspx?...ccode=&ppName=
Where to buy http://www.villagetoyotaparts.com/sh...ssembly=332649
Last edited by Terrys87; 11-17-2013 at 12:40 PM.
08-27-2012, 11:17 PM
#190
One hood prop clip..... ORDERED! lol.... Thanks again, Terry... I feel like I need to go look something up or hit up pick-your-part for ya or something, ya know? hahaha.
PS> I might be going VERY soon.... as I want to pick up some Plenum Ports for my diff breather job I'll be doing.
PSS> Was watching that diff breather video on www.triggertravel.com (an Aussie in post your pics slapped it up there regarding tracks(4WD trails) you can take while out in Australia! WOOT, doesn't that sound awesome, man? (drooling) haha. Anyway, you should watch that video... it's just a REALLY NICE KIT, and I mean nice! haha.. They do filters on their kits in this video/for that company-4WD outfitter type guy...... Fuel line is fine I'm sure, as it's VERY durable in any weather, ya know? Now just to find the rest of the stuff and choose a place to mount em
08-28-2012, 12:19 AM
#192
Super Moderator
Staff
Thread Starter
iTrader: (1)
Join Date: Aug 2008
Location: Anderson Missouri
Posts: 11,788
Likes: 0
Received 25 Likes
on
22 Posts
Your welcome guys. I have a few more parts that I am going to post mostly for my future reference. I have ordered parts from Backseat Auto before on ebay and went under advanced search and cant find them. It is for the sliding backglass latch. PN#76689. I posted all of these on page 3 of the 88 runner build if you need these for future reference. Denso plug wires were cheapest that I have seen. Forgot to check shipping though and that is where it can add up.
Mark if all goes well I will do a video on the cables tomorrow.
Computer is running slow. Need to shoot it and put it out of its misery. Will reboot and see what happens. Just restored it too. Here are other parts I will check into eventually.
http://www.ebay.com/itm/84-88-Toyota...4a353d&vxp=mtr
http://www.ebay.com/itm/New-Bumper-F...0fd500&vxp=mtr
http://www.ebay.com/itm/DENSO-671-61...414de8&vxp=mtr
http://www.ebay.com/itm/New-Valance-...a1b629&vxp=mtr
08-28-2012, 01:43 AM
#193
Registered User
yep bumper an end caps are saved in my list the valence as well my door gaskets are is good shape
terry how do you get the slider windows trim off? both of mine are pulling that rusting in the corner thing since im doing the rust cooking i should get them too
terry how do you get the slider windows trim off? both of mine are pulling that rusting in the corner thing since im doing the rust cooking i should get them too
08-28-2012, 08:53 AM
#194
Super Moderator
Staff
Thread Starter
iTrader: (1)
Join Date: Aug 2008
Location: Anderson Missouri
Posts: 11,788
Likes: 0
Received 25 Likes
on
22 Posts
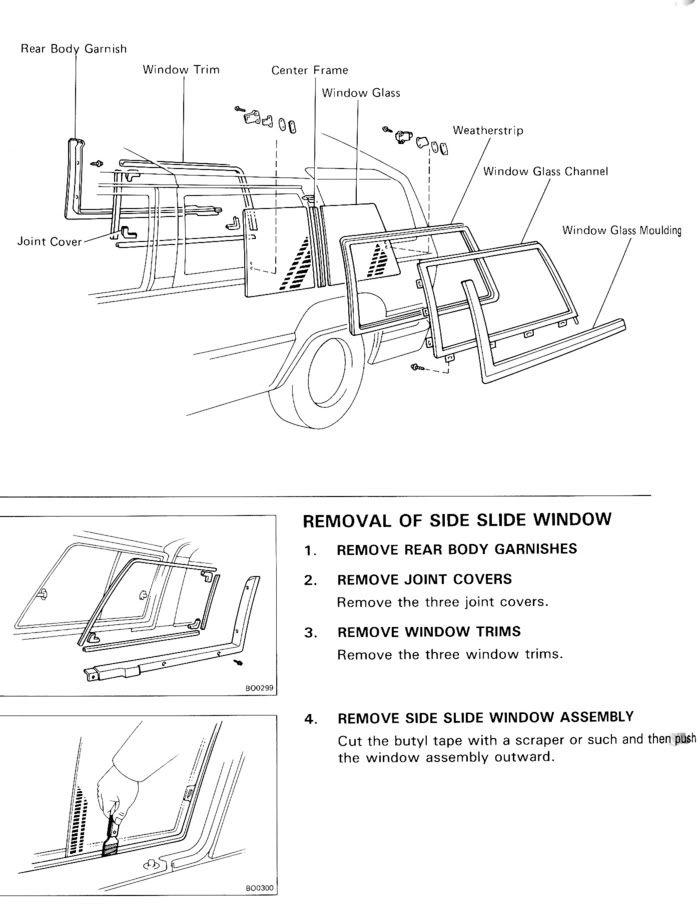
You have to remove the interior trim and then if I recall right some metal trim like the picture. I hear using a hairdryer helps. I think it may be the same stuff they use for the windshield. The side glass comes out by being inside and pushing it to the outside.
What I do is start at the very front upper corner with window closed, then start pushing out on the very edge where it has the frame and is most solid. I then put my other arm thru the open window when it starts to break the seal, just in case it was to pop out all of a sudden which hasnt been a problem for me but just in case. It is some tough glue. I kind of use a scraper and try and cut the seal a and gently pry on it some.
The screws are easy once the glass is out. It is just glue that holds it in, but it is tough. They say you can reuse the seal if you dont damage it to bad. I have only taken them out.
Next time I take an L trim off I will do a video of it.
Here is Slackers link as well. http://www.toyotafiberglass.com/l_trim_install.htm
08-28-2012, 09:48 AM
#195
Registered User
You have to remove the interior trim and then if I recall right some metal trim like the picture. I hear using a hairdryer helps. I think it may be the same stuff they use for the windshield. The side glass comes out by being inside and pushing it to the outside.
What I do is start at the very front upper corner with window closed, then start pushing out on the very edge where it has the frame and is most solid. I then put my other arm thru the open window when it starts to break the seal, just in case it was to pop out all of a sudden which hasnt been a problem for me but just in case. It is some tough glue. I kind of use a scraper and try and cut the seal a and gently pry on it some.
The screws are easy once the glass is out. It is just glue that holds it in, but it is tough. They say you can reuse the seal if you dont damage it to bad. I have only taken them out.
Next time I take an L trim off I will do a video of it.
Here is Slackers link as well. http://www.toyotafiberglass.com/l_trim_install.htm
What I do is start at the very front upper corner with window closed, then start pushing out on the very edge where it has the frame and is most solid. I then put my other arm thru the open window when it starts to break the seal, just in case it was to pop out all of a sudden which hasnt been a problem for me but just in case. It is some tough glue. I kind of use a scraper and try and cut the seal a and gently pry on it some.
The screws are easy once the glass is out. It is just glue that holds it in, but it is tough. They say you can reuse the seal if you dont damage it to bad. I have only taken them out.
Next time I take an L trim off I will do a video of it.
Here is Slackers link as well. http://www.toyotafiberglass.com/l_trim_install.htm
08-28-2012, 01:00 PM
#196
You have to remove the interior trim and then if I recall right some metal trim like the picture. I hear using a hairdryer helps. I think it may be the same stuff they use for the windshield. The side glass comes out by being inside and pushing it to the outside.
What I do is start at the very front upper corner with window closed, then start pushing out on the very edge where it has the frame and is most solid. I then put my other arm thru the open window when it starts to break the seal, just in case it was to pop out all of a sudden which hasnt been a problem for me but just in case. It is some tough glue. I kind of use a scraper and try and cut the seal a and gently pry on it some.
The screws are easy once the glass is out. It is just glue that holds it in, but it is tough. They say you can reuse the seal if you dont damage it to bad. I have only taken them out.
Next time I take an L trim off I will do a video of it.
Here is Slackers link as well. http://www.toyotafiberglass.com/l_trim_install.htm
What I do is start at the very front upper corner with window closed, then start pushing out on the very edge where it has the frame and is most solid. I then put my other arm thru the open window when it starts to break the seal, just in case it was to pop out all of a sudden which hasnt been a problem for me but just in case. It is some tough glue. I kind of use a scraper and try and cut the seal a and gently pry on it some.
The screws are easy once the glass is out. It is just glue that holds it in, but it is tough. They say you can reuse the seal if you dont damage it to bad. I have only taken them out.
Next time I take an L trim off I will do a video of it.
Here is Slackers link as well. http://www.toyotafiberglass.com/l_trim_install.htm
08-28-2012, 01:45 PM
#197
Dang you, Terry! NOW I have to work on the top, touch it up with a coat of red on ONLY THE TOP and get started on my Con-Ferr and Aluminum dual layer side rail install! grrrr! hAHAHAHAHAHAHA. JK, ... grateful for ya, no h8, playa! lol.
Great links..... and that site is interesting.. I've been there on other things... but that's a new one to me. Hmmmm, yep, keeper right there. Mine is flawless...but never know, that could change, and I'm trying to find an extra top to custom up, ya know? I wanted to avoid drilling through my original since it's in perfect condition inside and trim and etc.,... but these guys are asking 200$!!! I couldn't hardly GIVE mine away.. (from the wrecked white one), ... but then slapped it back up on CL and voila, it sold for 150$ with all the trim pieces and window wiper motor cover in tact and liner looking good(tan too!).... I DID find a couple along the way.. but always missing a window or no wiper motor or SOMETHING wrong... around 75$.
OBVIOUSLY wishing I never sold that white top.. But, it DID take up space, for sure! CATCH-22, as usual, right?
08-28-2012, 02:42 PM
#198
Super Moderator
Staff
Thread Starter
iTrader: (1)
Join Date: Aug 2008
Location: Anderson Missouri
Posts: 11,788
Likes: 0
Received 25 Likes
on
22 Posts
Hello Cyberhorn..Your welcome. It is a tough seal though.
Hello junk4u..Mine are actually in great shape. But I had thought of laying down some kind of seal of some kind. Maybe like a rubber or felt type that you could just leave on the truck.
Hello Mark..I sometimes would like a spare topper for myself just to try out different ideas. One thing I do like to do is practice on different parts or old ones when I have them available.
08-28-2012, 02:54 PM
#199
Super Moderator
Staff
Thread Starter
iTrader: (1)
Join Date: Aug 2008
Location: Anderson Missouri
Posts: 11,788
Likes: 0
Received 25 Likes
on
22 Posts
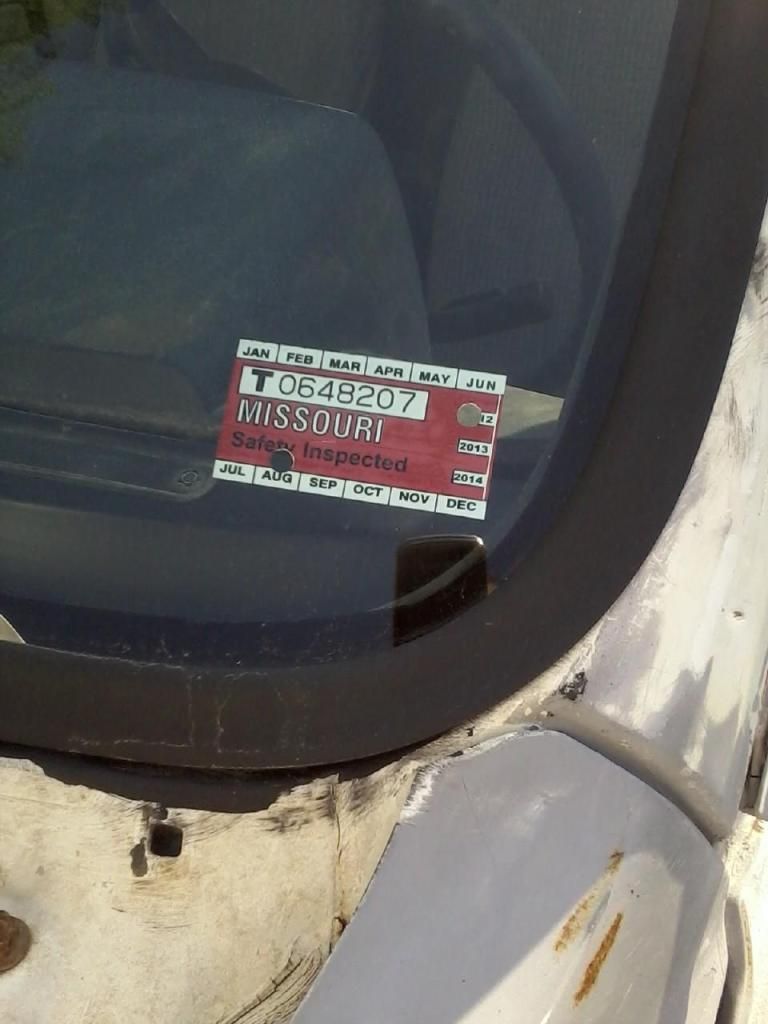
Truck passed inspection. Wahoo!! should get it tagged tomorrow and will start taking it on short runs and get a start on some problems I am sure to come.
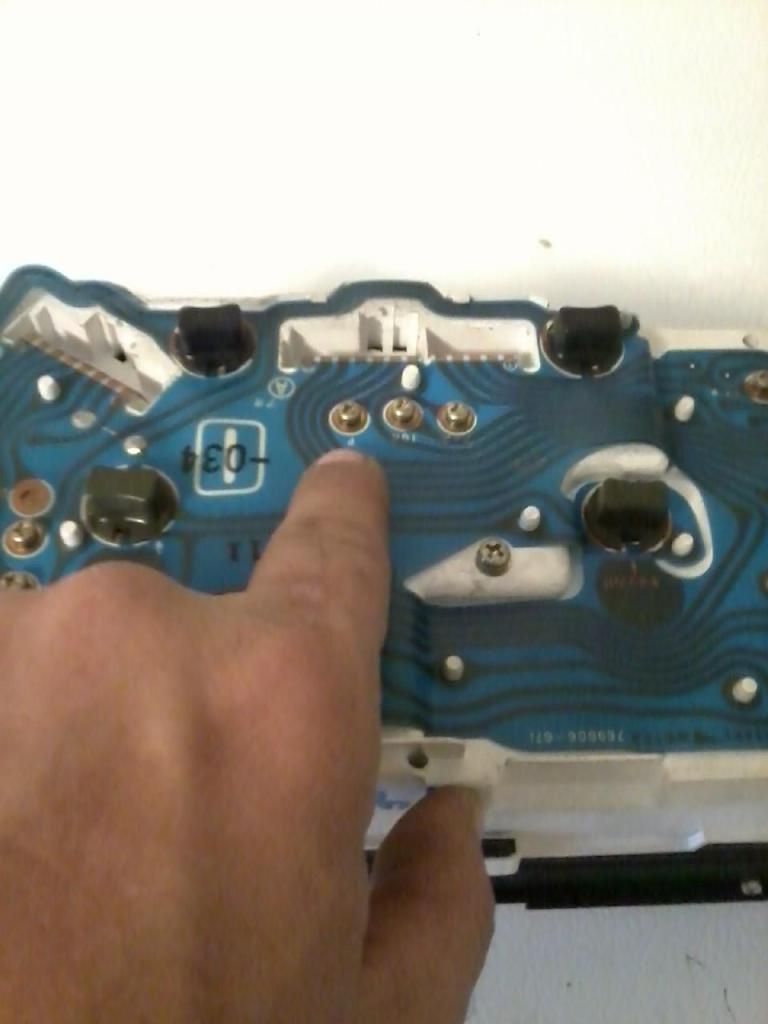
I am starting on getting the tach working. I found this on getting the tach wired up if it doesnt have the factory wiring. I will post good pics if this works.
LINK>>>> I found http://www.siestaoffroad.com/clustertech.html
Back of guage is marked with a "p".
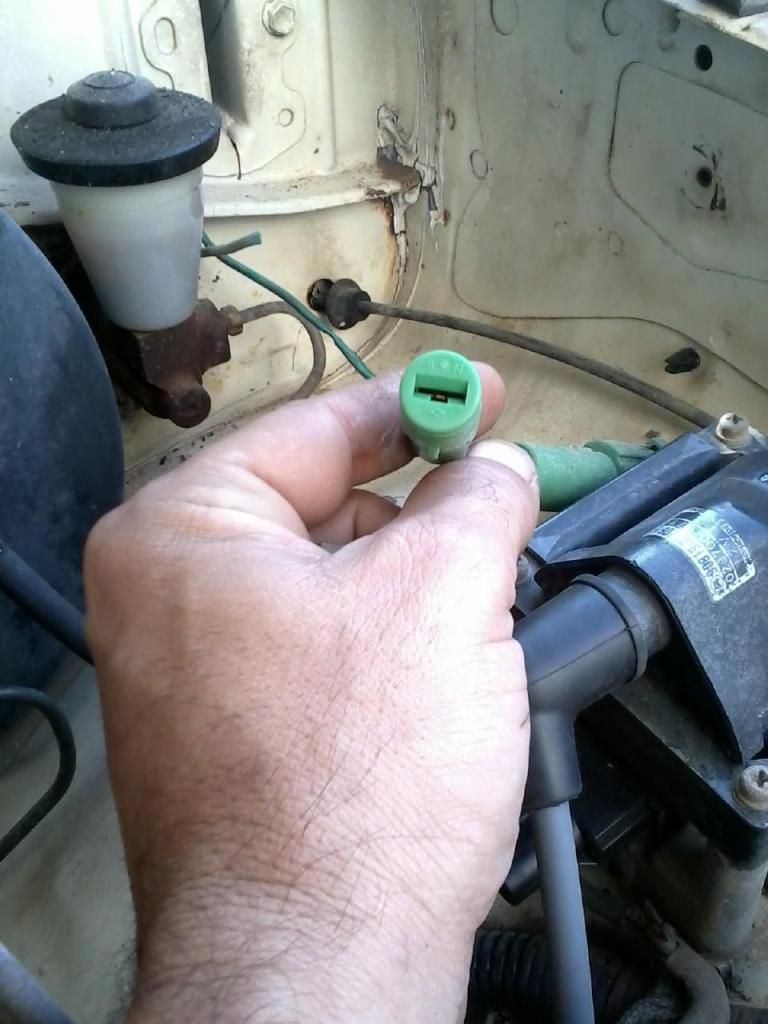
Supposed to be this connection for the negative off of coil. A little different from the typical coil.
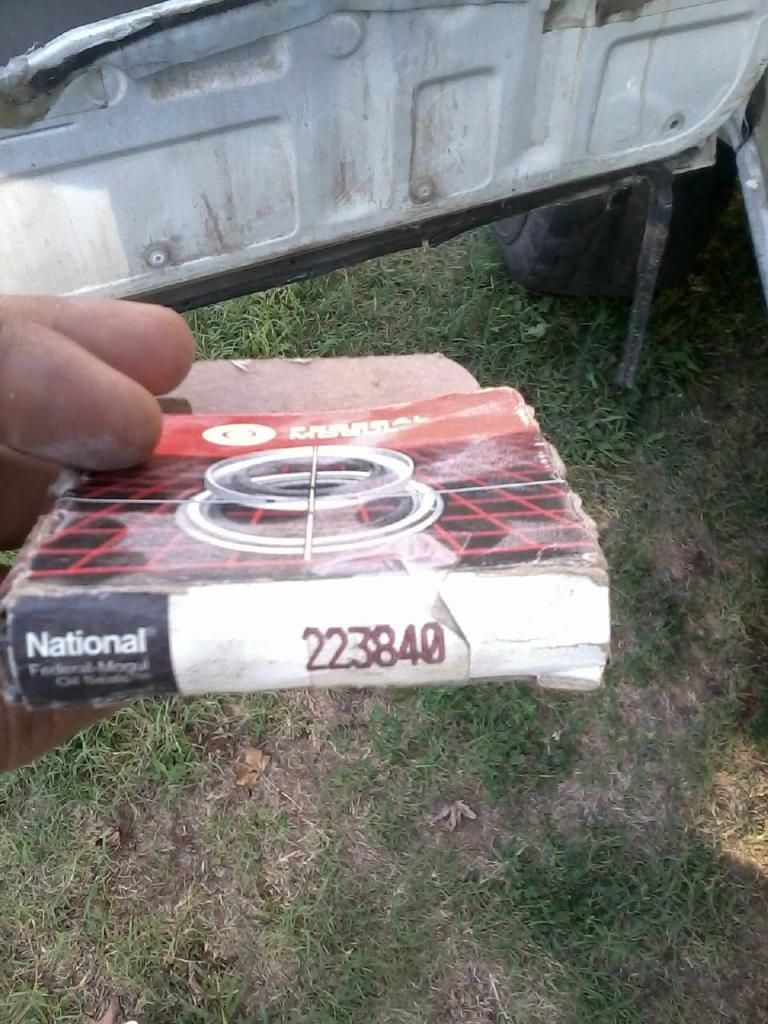
Will change Pinion Seal. Part I use.
I am starting on getting the tach working. I found this on getting the tach wired up if it doesnt have the factory wiring. I will post good pics if this works.
LINK>>>> I found http://www.siestaoffroad.com/clustertech.html
Back of guage is marked with a "p".
Supposed to be this connection for the negative off of coil. A little different from the typical coil.
Will change Pinion Seal. Part I use.
Last edited by Terrys87; 11-20-2015 at 10:10 PM.
08-28-2012, 02:56 PM
#200
Registered User
Hello Cyberhorn..Your welcome. It is a tough seal though.
Hello junk4u..Mine are actually in great shape. But I had thought of laying down some kind of seal of some kind. Maybe like a rubber or felt type that you could just leave on the truck.
Hello Mark..I sometimes would like a spare topper for myself just to try out different ideas. One thing I do like to do is practice on different parts or old ones when I have them available.
Hello junk4u..Mine are actually in great shape. But I had thought of laying down some kind of seal of some kind. Maybe like a rubber or felt type that you could just leave on the truck.
Hello Mark..I sometimes would like a spare topper for myself just to try out different ideas. One thing I do like to do is practice on different parts or old ones when I have them available.


