
Terrys87 88 4Runner Restoration/Build thread

 12-21-2016, 02:26 PM
#1362
Super Moderator
Staff
Thread Starter
iTrader: (1)
Join Date: Aug 2008
Location: Anderson Missouri
Posts: 11,788
Likes: 0
Received 25 Likes
on
22 Posts
Thanks bootscootboogie...I have a Weber for quite some time. Just now getting around to getting it converted. I got it back in the summer and it is sitting in the box. Just was not looking forward to having to switch it over from 22re to 22r. I like the 22r just not having to convert one. A real pain in the rear. Thanks again.
12-21-2016, 02:38 PM
#1363
Super Moderator
Staff
Thread Starter
iTrader: (1)
Join Date: Aug 2008
Location: Anderson Missouri
Posts: 11,788
Likes: 0
Received 25 Likes
on
22 Posts
We had the Main Harness and the Fuse box out in 1 1/2 hours. I put the whole family to work on this. They have been wanting to get it back on the road and did not like not using it this summer. I just have been putting it off as I have way to much time in trying to trouble shoot the Cherry Manifold.
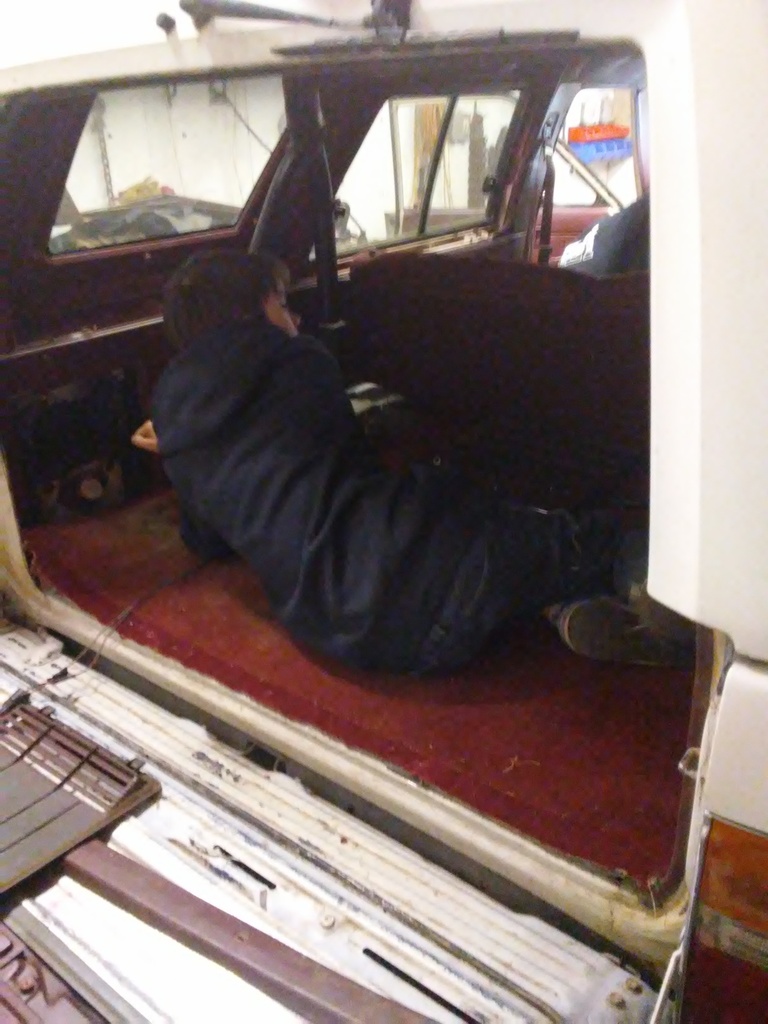
Hunter took the rear panels out and the rear seats.
Misty and Justin got the dash and front seats out. Misty got company so left after the dash was out. Hunter fizzled out on me and was done after the dash.
I got started on getting the Fuse box Harness out but the three of them kept me busy showing what to remove next.
Was making good time until Justin and me had to start repairing the donor harness. 1 hour and 45 minutes to get it mostly stripped.
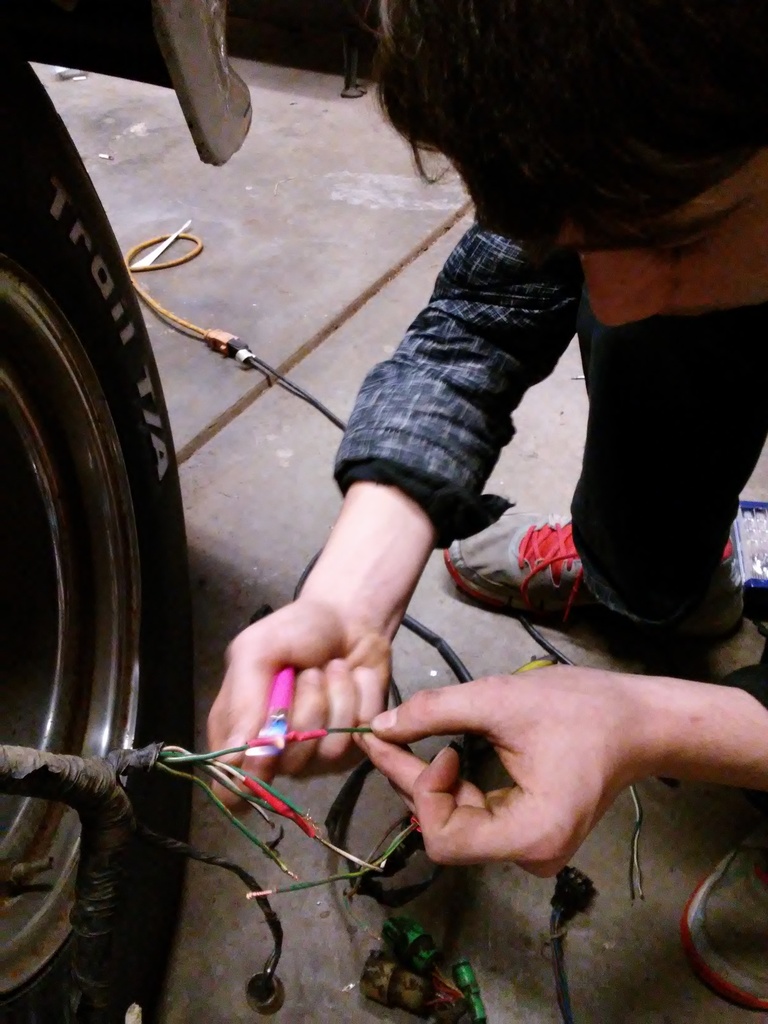
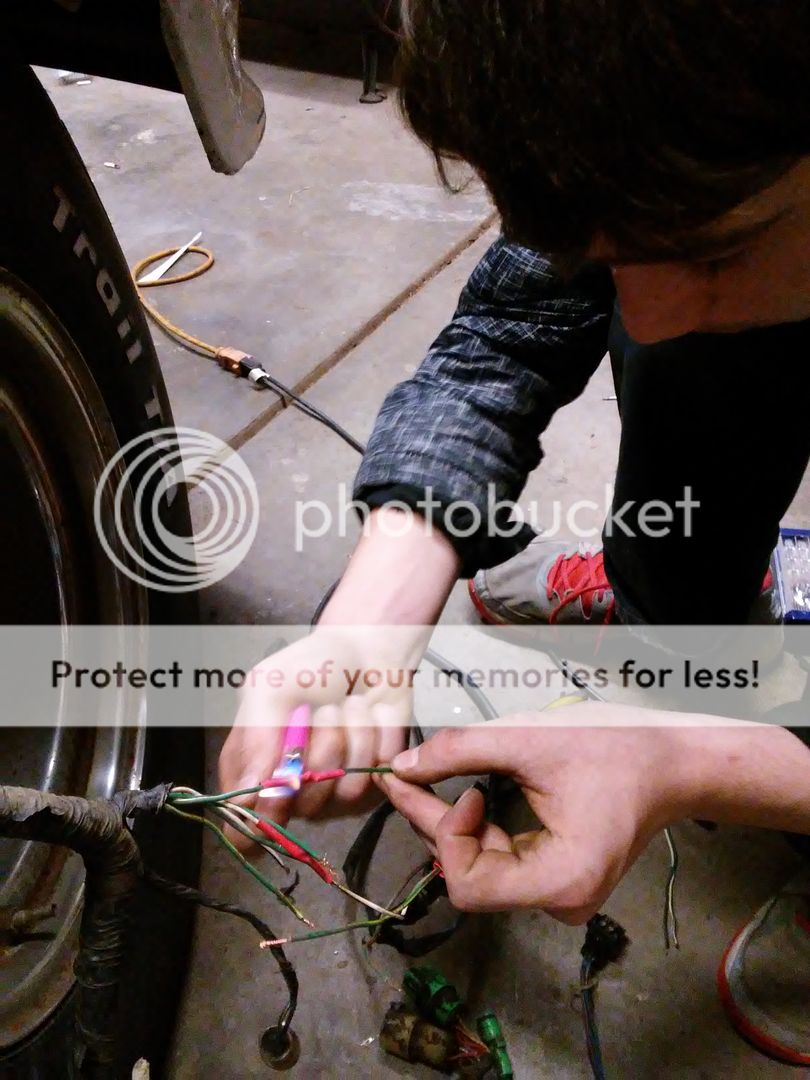
Justin doing his first solder job.
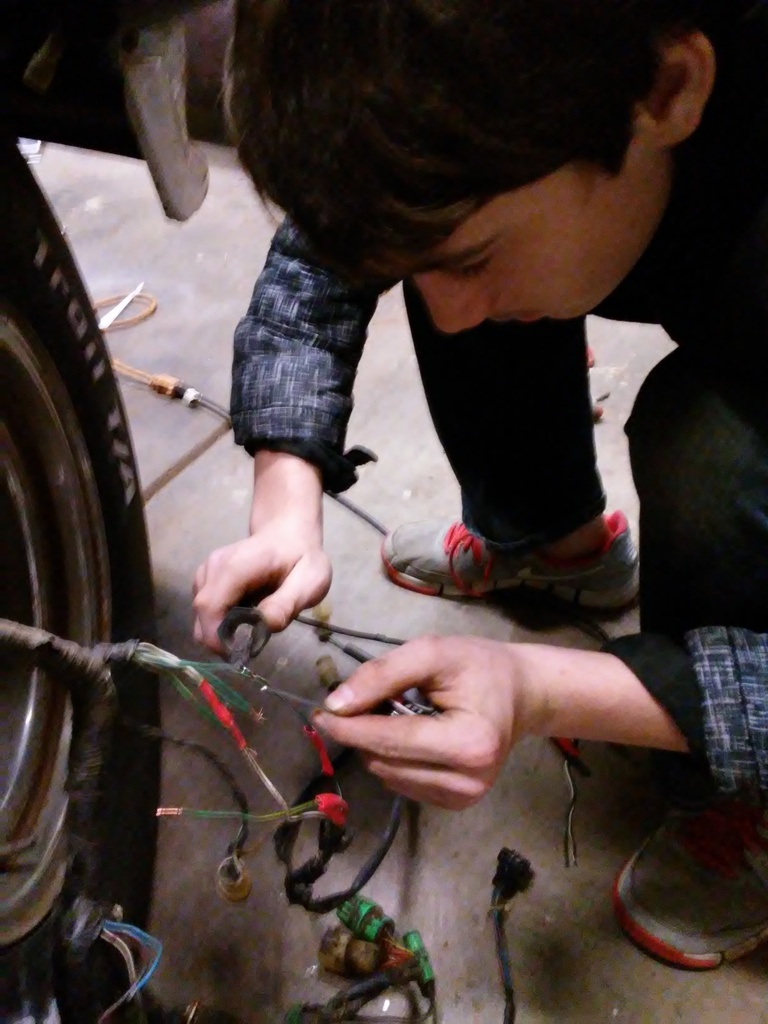
And his first shrink wrap job. He liked getting to do some repairs and chasing wires and figuring out where they all went to.
As fast as we got it a part Misty thought we would have it done today. Just got 5 hours into it. A friend and me have done several swaps and it is easy a 40 hour job when doing it correctly. Add repair wiring and it adds up quick.
Hunter took the rear panels out and the rear seats.

Misty and Justin got the dash and front seats out. Misty got company so left after the dash was out. Hunter fizzled out on me and was done after the dash.

I got started on getting the Fuse box Harness out but the three of them kept me busy showing what to remove next.

Was making good time until Justin and me had to start repairing the donor harness. 1 hour and 45 minutes to get it mostly stripped.

Justin doing his first solder job.

And his first shrink wrap job. He liked getting to do some repairs and chasing wires and figuring out where they all went to.

As fast as we got it a part Misty thought we would have it done today. Just got 5 hours into it. A friend and me have done several swaps and it is easy a 40 hour job when doing it correctly. Add repair wiring and it adds up quick.
12-21-2016, 04:19 PM
#1364

And his first shrink wrap job. He liked getting to do some repairs and chasing wires and figuring out where they all went to.
As fast as we got it a part Misty thought we would have it done today. Just got 5 hours into it. A friend and me have done several swaps and it is easy a 40 hour job when doing it correctly. Add repair wiring and it adds up quick.
As fast as we got it a part Misty thought we would have it done today. Just got 5 hours into it. A friend and me have done several swaps and it is easy a 40 hour job when doing it correctly. Add repair wiring and it adds up quick.
 I will nitpick over the lighter, yeah we probably all have done it but for his first time you should have showed him how to do it with the iron and explained why using a lighter isn't the right tool..and in case you didn't know. A: It IS flamable, B: To cold the adhesive doesn't activate and it's not water tight. C: To hot, over shrinkage makes it brittle.
12-22-2016, 02:42 PM
I will nitpick over the lighter, yeah we probably all have done it but for his first time you should have showed him how to do it with the iron and explained why using a lighter isn't the right tool..and in case you didn't know. A: It IS flamable, B: To cold the adhesive doesn't activate and it's not water tight. C: To hot, over shrinkage makes it brittle.
12-22-2016, 02:42 PM
#1365
Super Moderator
Staff
Thread Starter
iTrader: (1)
Join Date: Aug 2008
Location: Anderson Missouri
Posts: 11,788
Likes: 0
Received 25 Likes
on
22 Posts
Hello CO 94 Pu... I need to get a better solder gun and show him the correct way of shrinking tubing, he would probably find that more interesting with the solder gun. I am ready to get this project completed. Repairing wires is taking some time and I found out today that I am missing the short section of harness that connects the starter to the Fuse box harness. Another trip to the junk yard.
12-22-2016, 02:57 PM
#1367
Super Moderator
Staff
Thread Starter
iTrader: (1)
Join Date: Aug 2008
Location: Anderson Missouri
Posts: 11,788
Likes: 0
Received 25 Likes
on
22 Posts
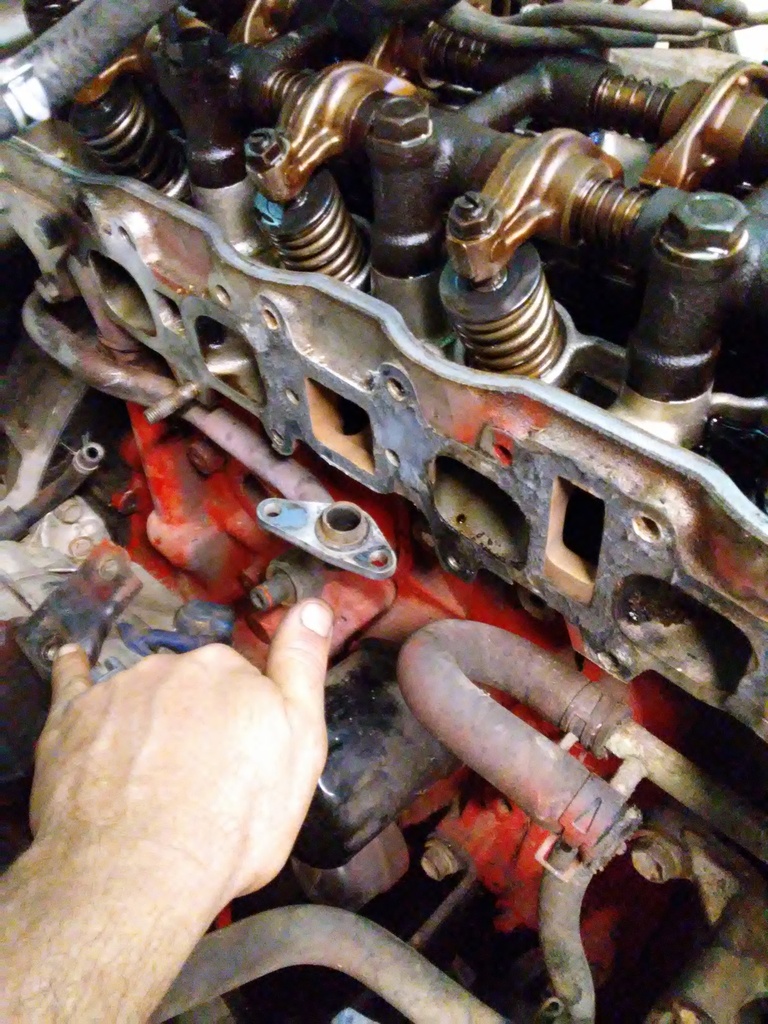
Justin got a little over aggressive with an Intake bolt and snapped the head off of the bolt. I am sure he did not have the socket sitting square on the head, at a slight angle and snapped it right off. Also I showed him when loosening bolts to take his time as broken bolts is a common problem on trucks and can make a situation bad. I was concerned that if the stud had broken any deeper in the head that it would require some machine work to get it out. Luckily I was able to get it with a pair of vise grips. We got the EFI Intake system off and the Main Harness in the cab installed but did not get as much done as I would of liked.
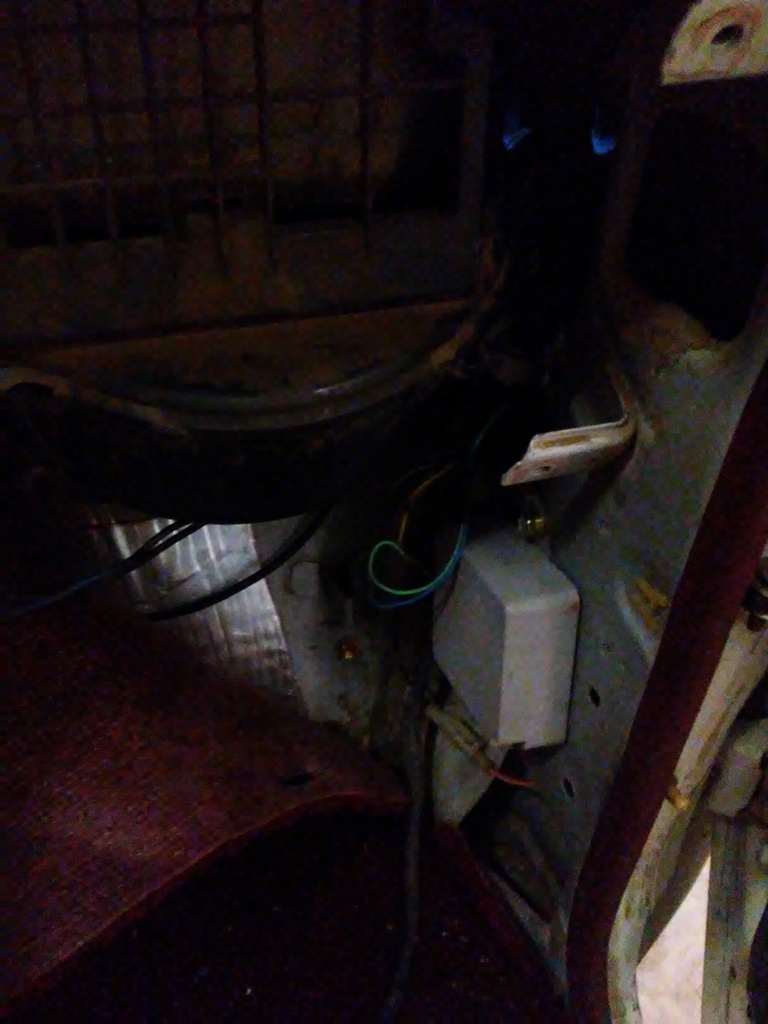
The harness I am installing did not have Wiper Delay installed on it. I have installed Wiper Delay in other trucks. It has been a while since I have done it but if I recall correctly all you need is the Wiper Stalk on the Steering Column and the Wiper Delay boxand Wiper Delay Harness in the passenger kick panel.
In the Passenger Kick Panel, if you have this jumper installed, your truck does not have the Wiper Delay.
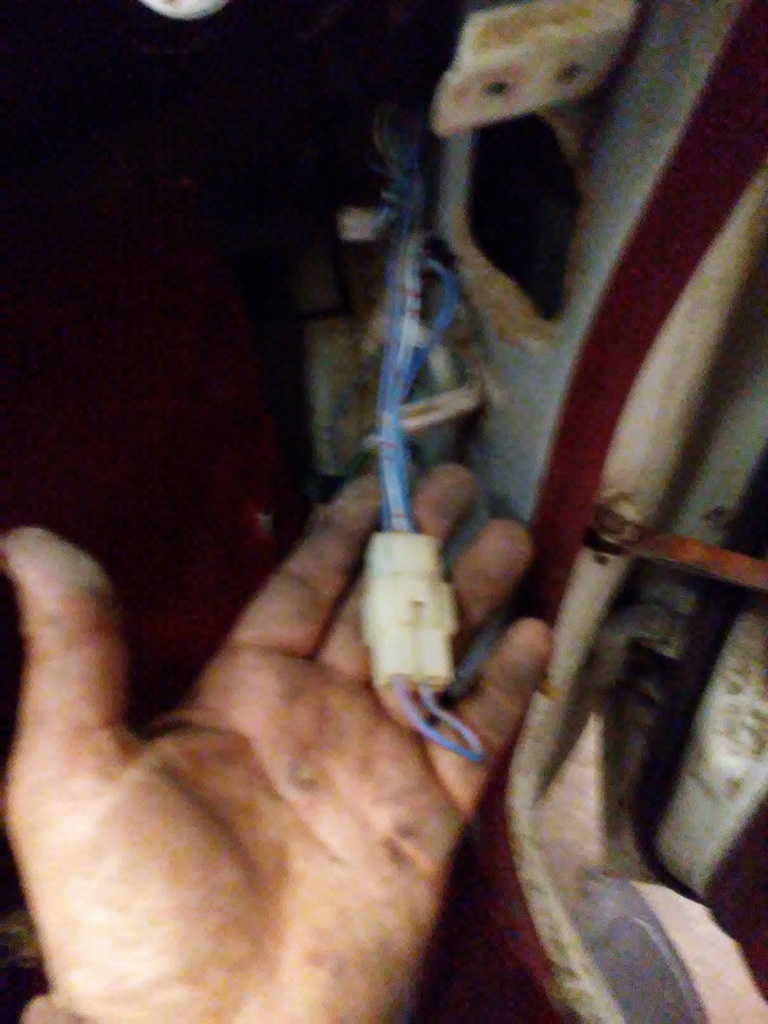
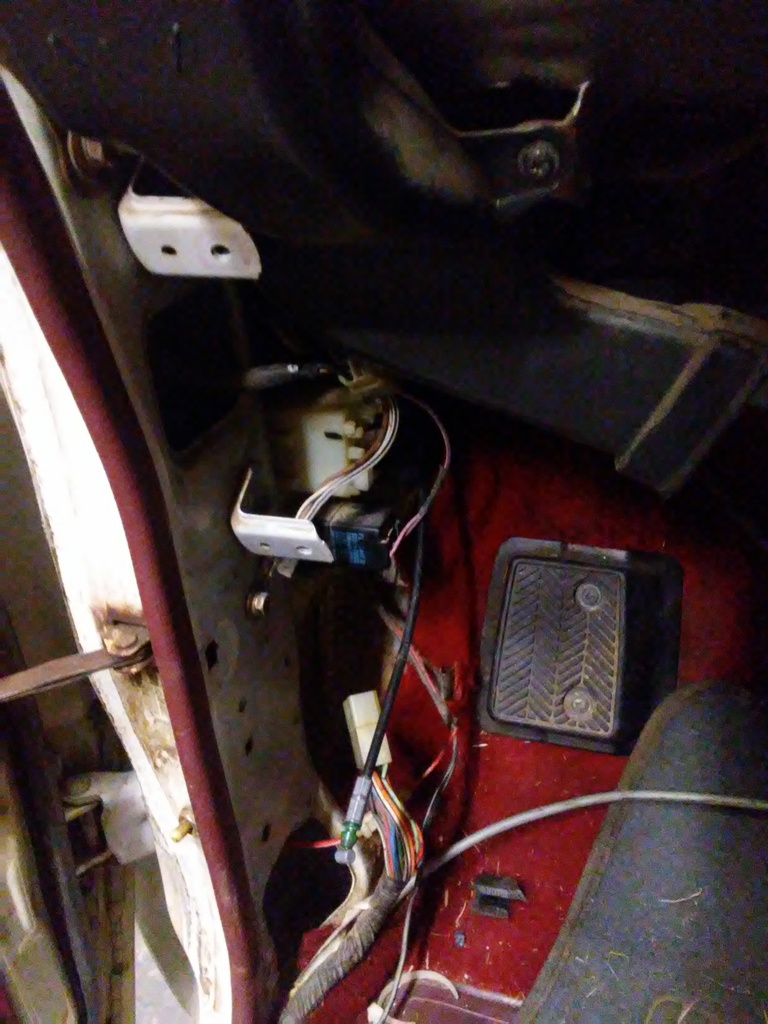
Remove the jumper and connect the Wiper Harness to the Wiper Delay box. One end of the harness will go where the factory jumper was at and there is another plug that is taped up from the factory tucked up inside with the rest of the Main Harness. You will need to get the Stalk for the Steering Column.
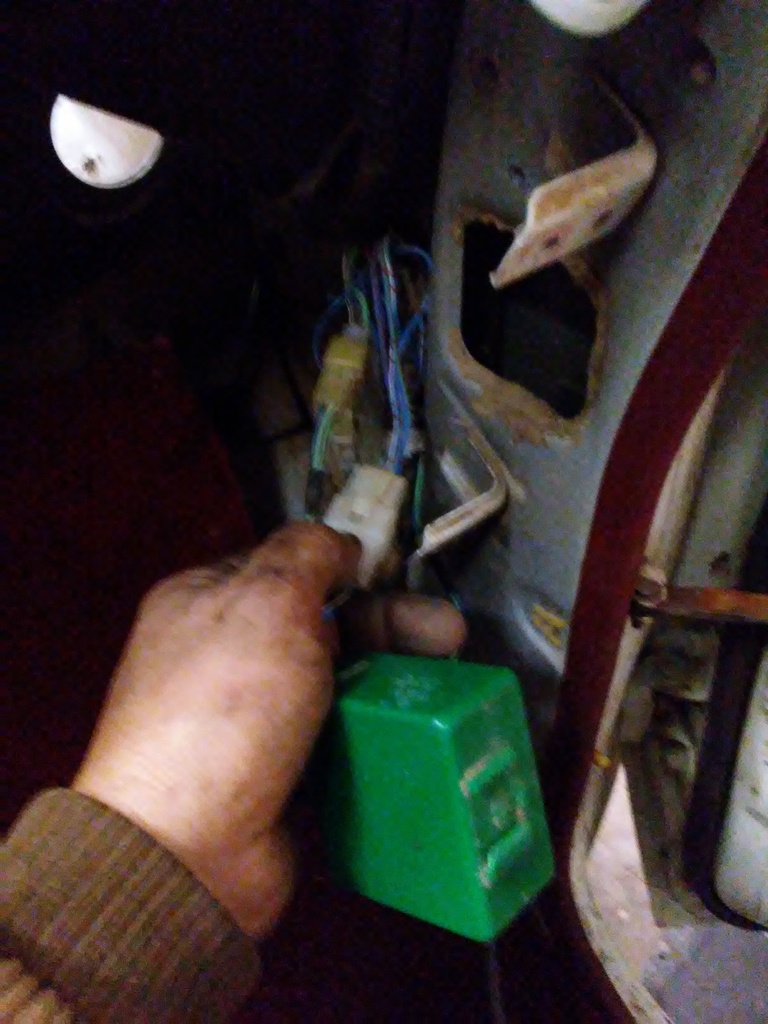
Where my finger is pointing is where the top of the Wiper Delay box mounts inside the A Pillar. On EFI trucks you will need to remove the computer to access the mounting tab.

The harness I am installing did not have Wiper Delay installed on it. I have installed Wiper Delay in other trucks. It has been a while since I have done it but if I recall correctly all you need is the Wiper Stalk on the Steering Column and the Wiper Delay boxand Wiper Delay Harness in the passenger kick panel.
In the Passenger Kick Panel, if you have this jumper installed, your truck does not have the Wiper Delay.

Remove the jumper and connect the Wiper Harness to the Wiper Delay box. One end of the harness will go where the factory jumper was at and there is another plug that is taped up from the factory tucked up inside with the rest of the Main Harness. You will need to get the Stalk for the Steering Column.

Where my finger is pointing is where the top of the Wiper Delay box mounts inside the A Pillar. On EFI trucks you will need to remove the computer to access the mounting tab.
 12-22-2016, 02:58 PM
#1368
12-22-2016, 03:12 PM
#1369
Super Moderator
Staff
Thread Starter
iTrader: (1)
Join Date: Aug 2008
Location: Anderson Missouri
Posts: 11,788
Likes: 0
Received 25 Likes
on
22 Posts
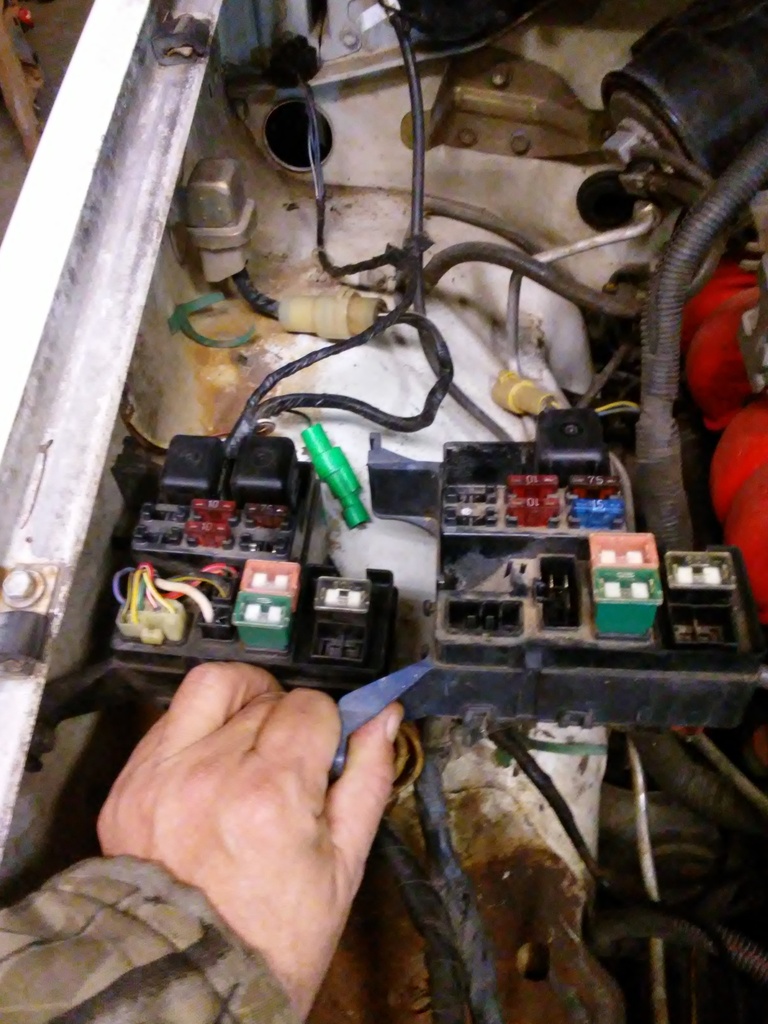
I also got the Fuse box/Headlight Harness swapped out. I know from helping a friend do a 22re to 22r swap in the past, that even though the Fuse box looks the same, the 22r has an extra relay in it. You could probably add the relay but the problem we ran into is that the white wire that you will see in a wiring diagram is routed differently and controls you heater blower speed. You need to swap fuse boxes if you do decide to do a 22r/22re swap.
On another note, yesterday I was on the Interstate and a Hi Lux passed me. It looks nothing like a Tacoma at all. I thought it was Ugly. I have tried to google a picture of one and cant find a good picture of one. It had Hi Lux badges and Toyota and was a newer model. I would say it might have been a year model between '14-'17.
Relay boxes are different between 22r/22re
 12-24-2016, 11:51 AM
#1371
Super Moderator
Staff
Thread Starter
iTrader: (1)
Join Date: Aug 2008
Location: Anderson Missouri
Posts: 11,788
Likes: 0
Received 25 Likes
on
22 Posts
Hello Co 94 PU... I am not positive but I think in the early 90's like 92, Toyota changed something in the Wiper system. Seems like 92 was also a change for the Door Buzzer and Electric Speedometer. I have my manuals at work and one is a FSM. I will post some pictures of it in the FSM when I go back to work in a few days.
12-24-2016, 12:09 PM
#1372
Super Moderator
Staff
Thread Starter
iTrader: (1)
Join Date: Aug 2008
Location: Anderson Missouri
Posts: 11,788
Likes: 0
Received 25 Likes
on
22 Posts
Not sure why but even the 22r has a mini computer with it. Mounts on passenger kick panel.
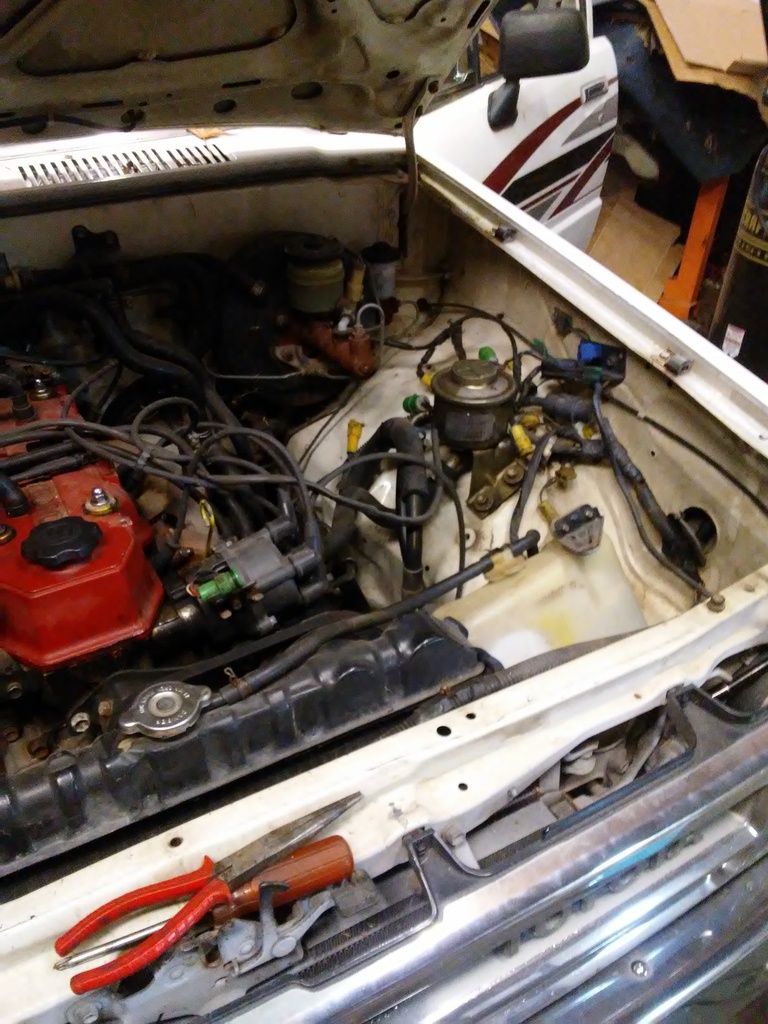
Got the Fuse box mounted, Ventilation System, and most of the dash back in.
I have used the original Steering Wheel and electrical plugs with the steering column.
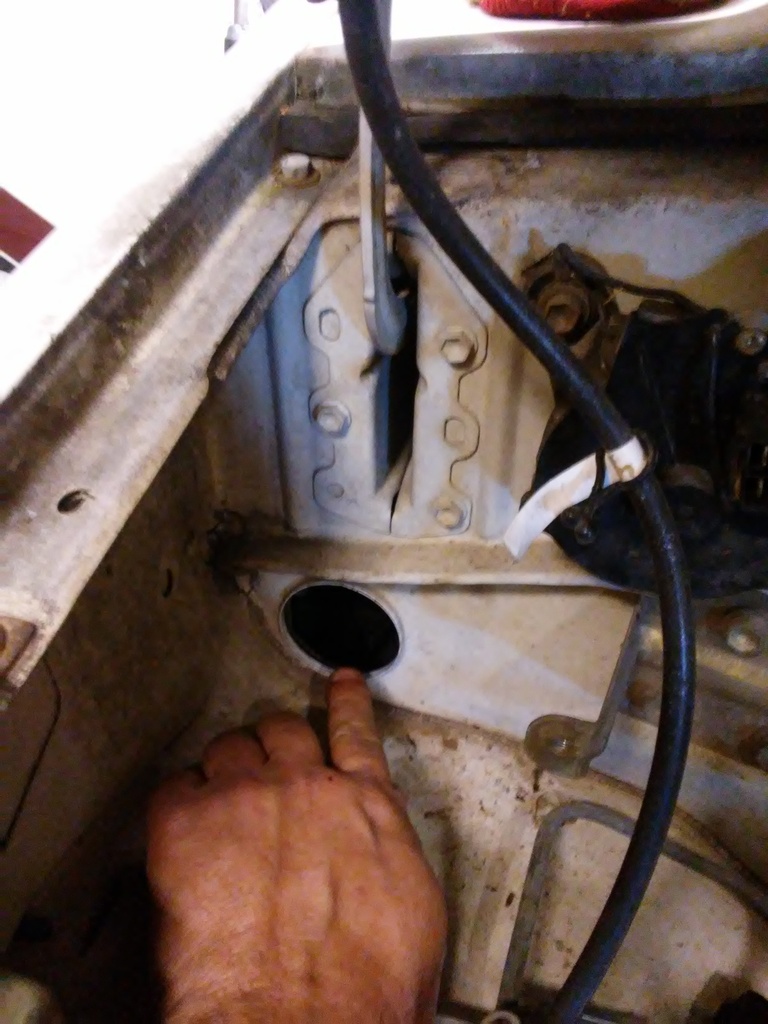
I will get a rubber plug to cover the Injection Harness port.
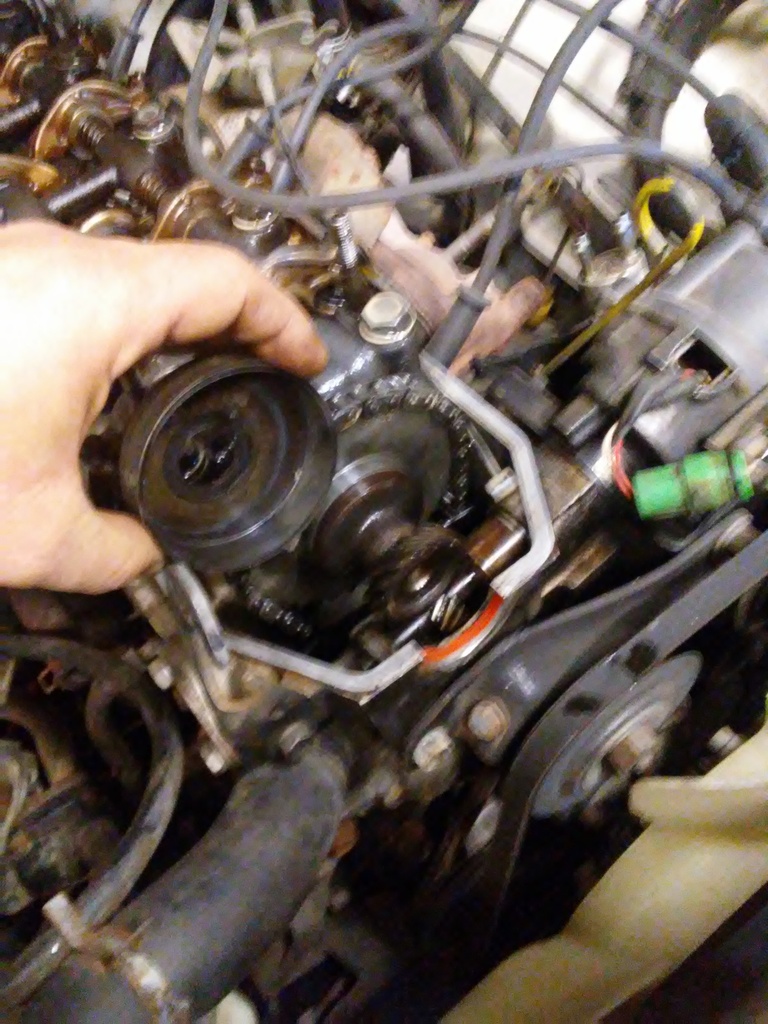
When converting to 22r, you have to add the dish that drives the mechanical pump.
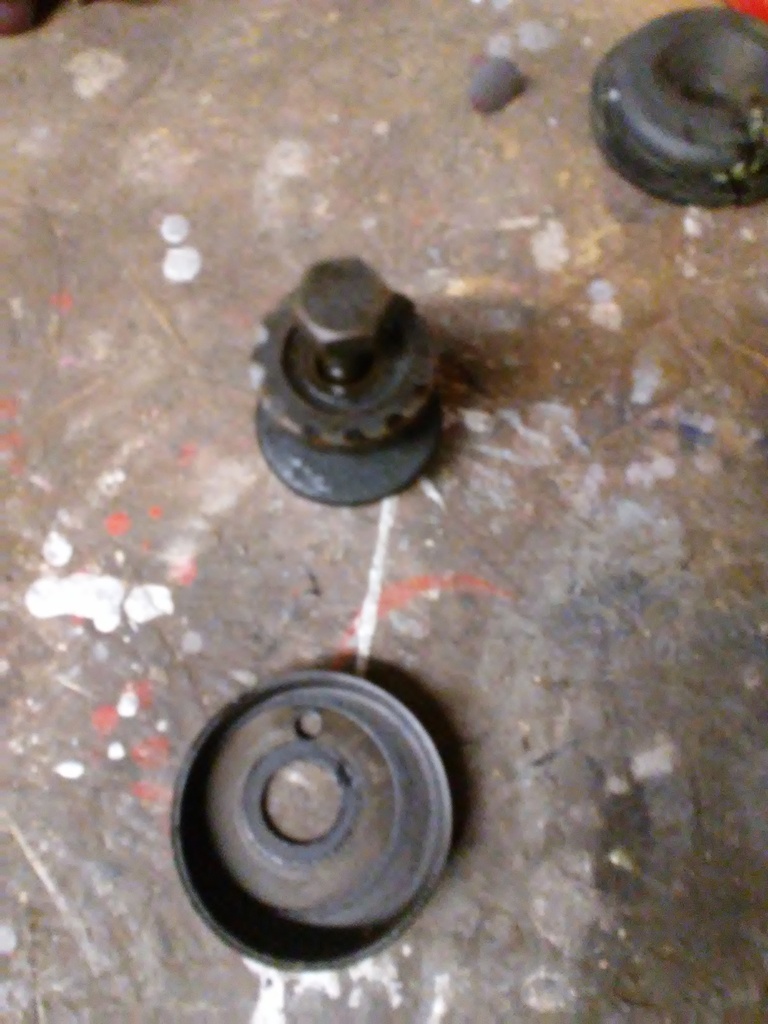
I need to go buy a mechanical pump and will remove this plate for it at a later time.
Removed the Fuel Filter for the EFI system. I am going to leave the Knock Sensor. I ever need one I know where a spare is.
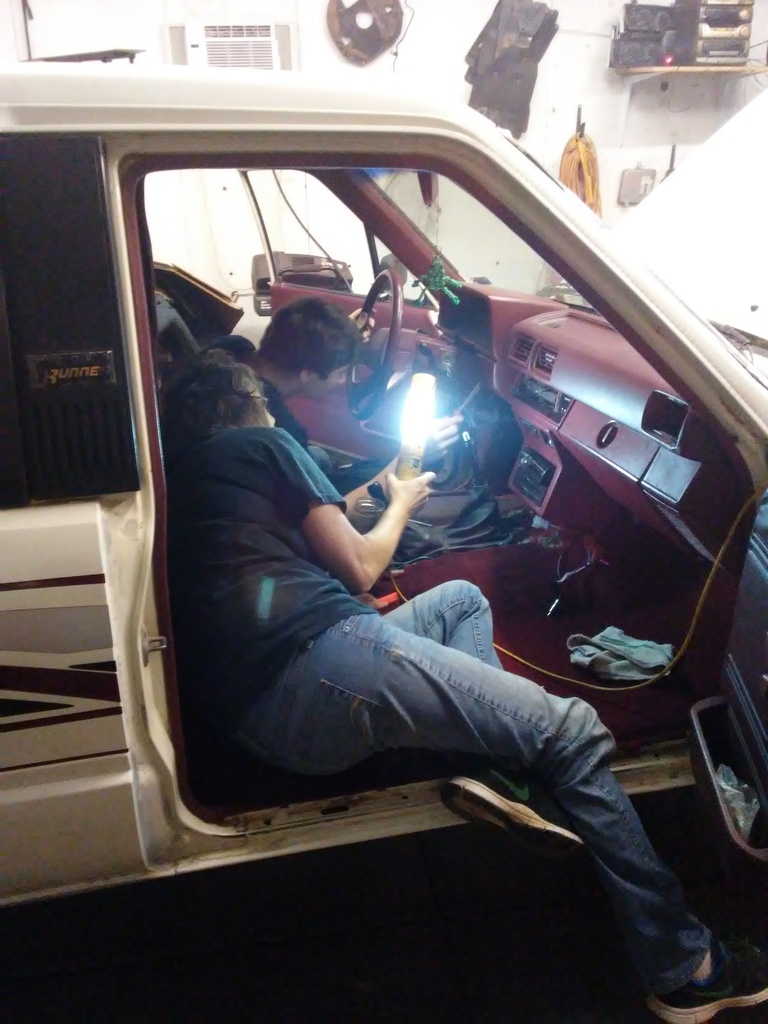
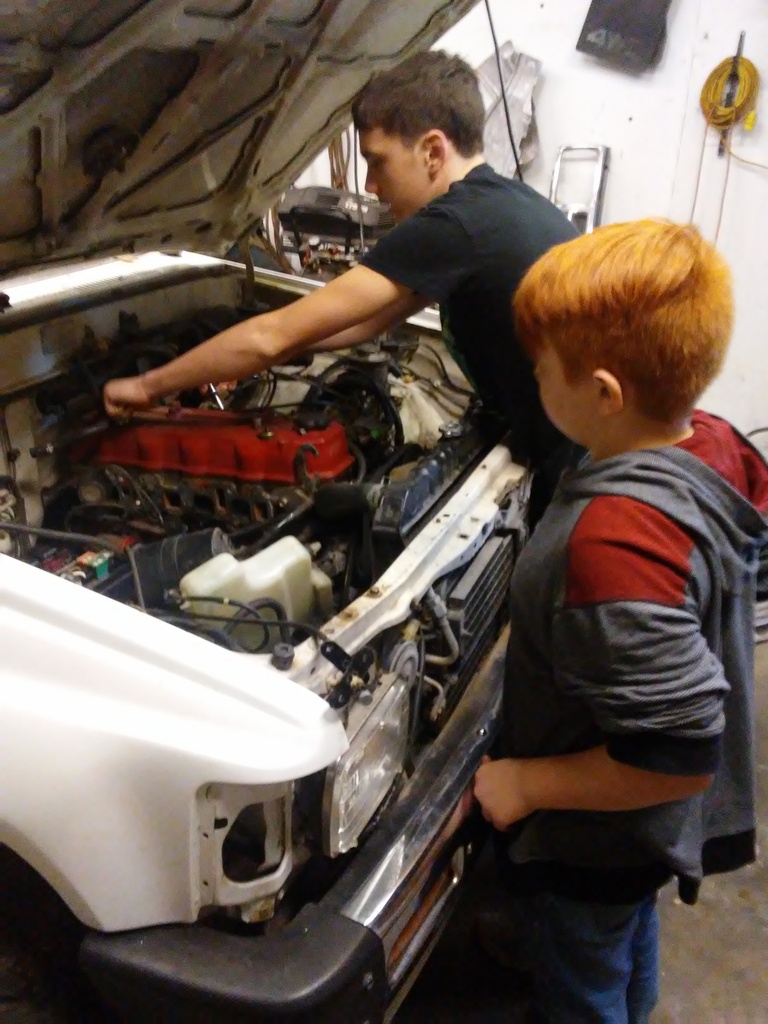
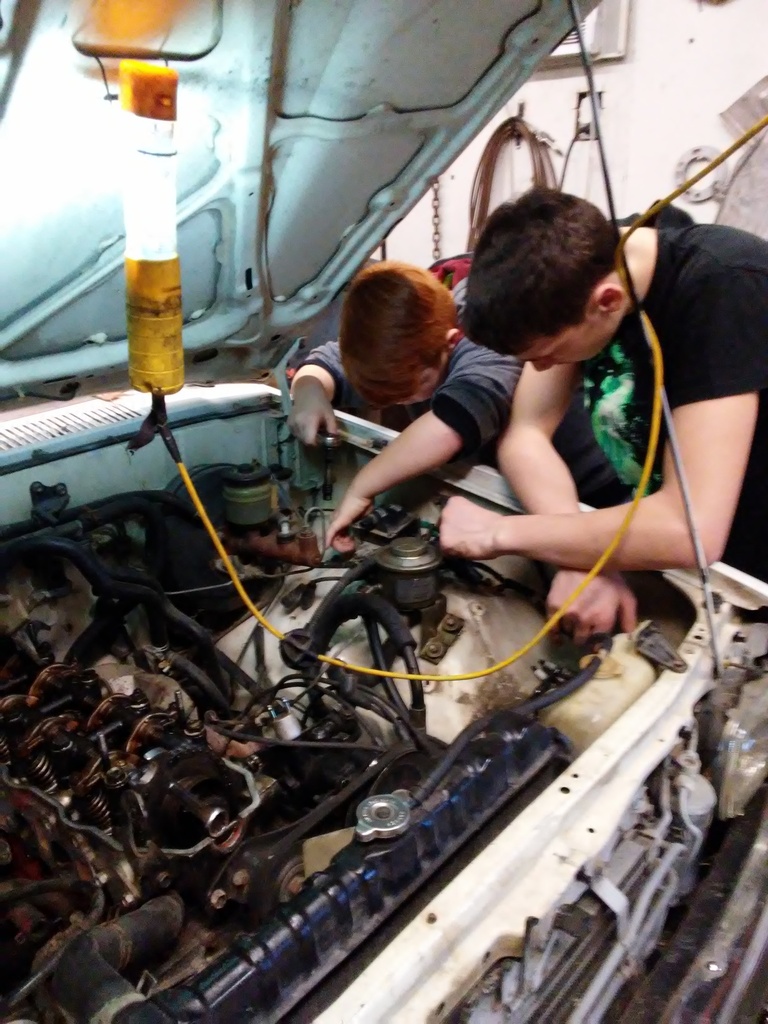
Things are going slow but I am taking my time to explain how the distributor and 4 stroke system works to the kiddos. Here is a neighbor kid helping out.
When installing the dish, I was verrry careful not to knock the sprocket off of the cam.
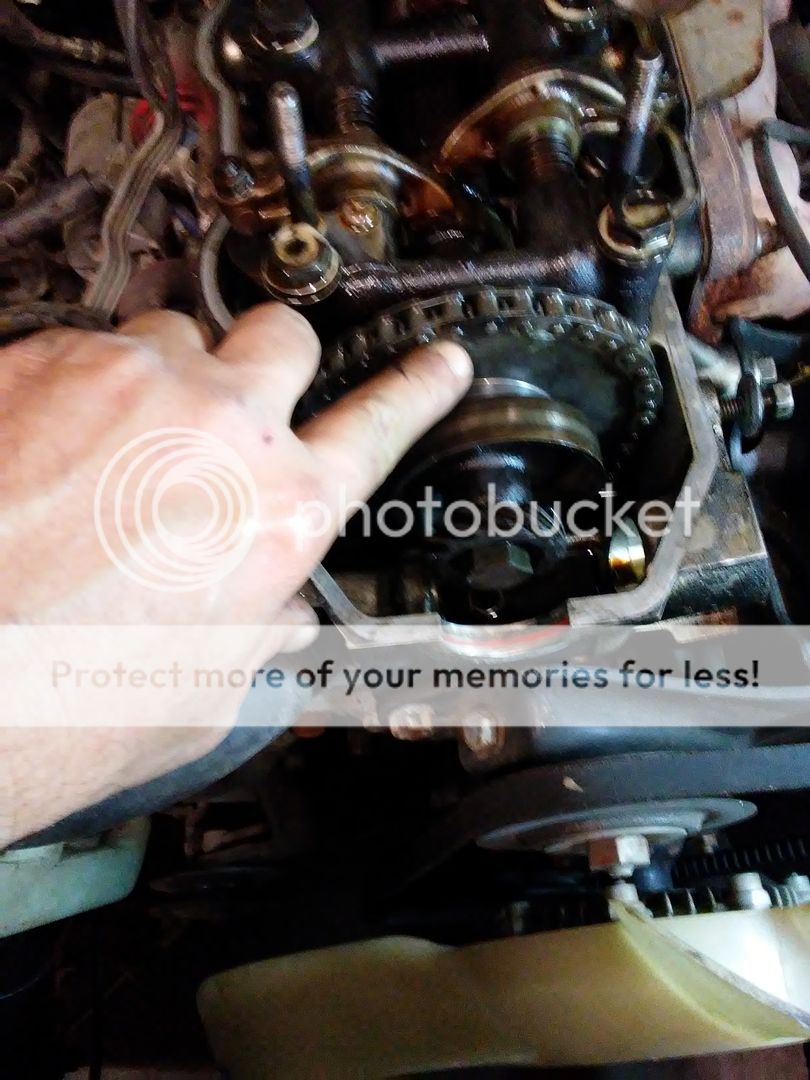
A duh moment. I should of removed the distributor before installing the dish for the mechanical pump. I do not have a 22r distributor at this time but will be getting one in the next few day. Same with an Intake Manifold as mine are bad. A friend of mine has them parts and will be getting them soon.
You may not be able to see it but the bright link and the Crank Shaft is at 0. Took some time explaining TDC to Justin and the neighbor kid.
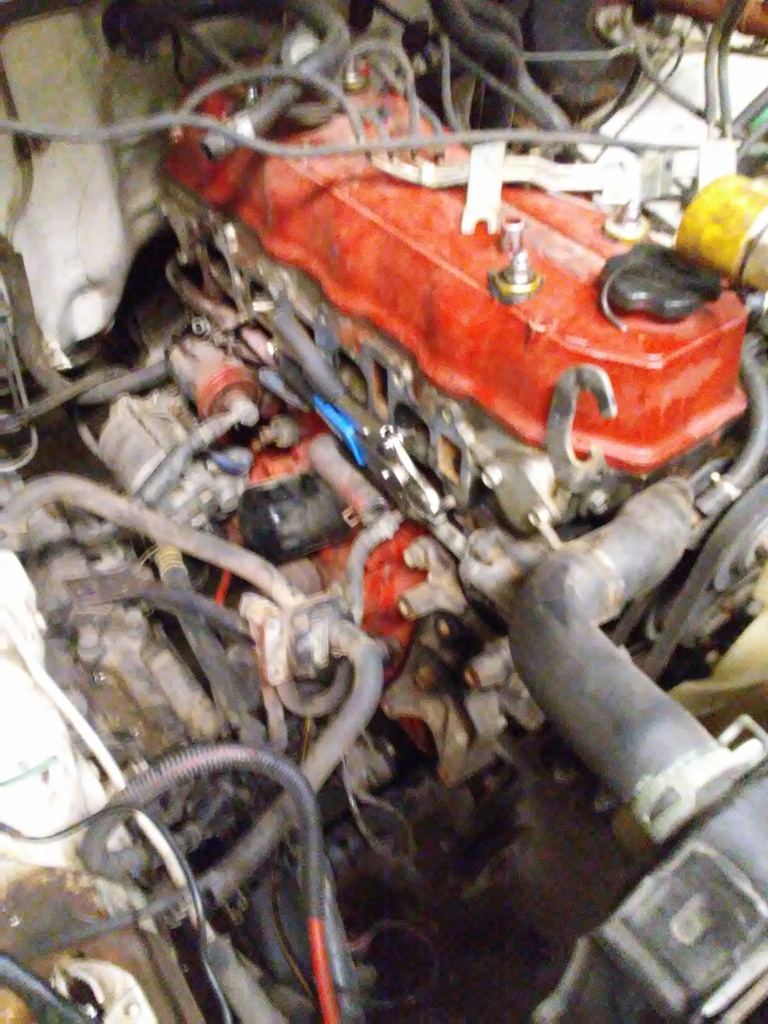
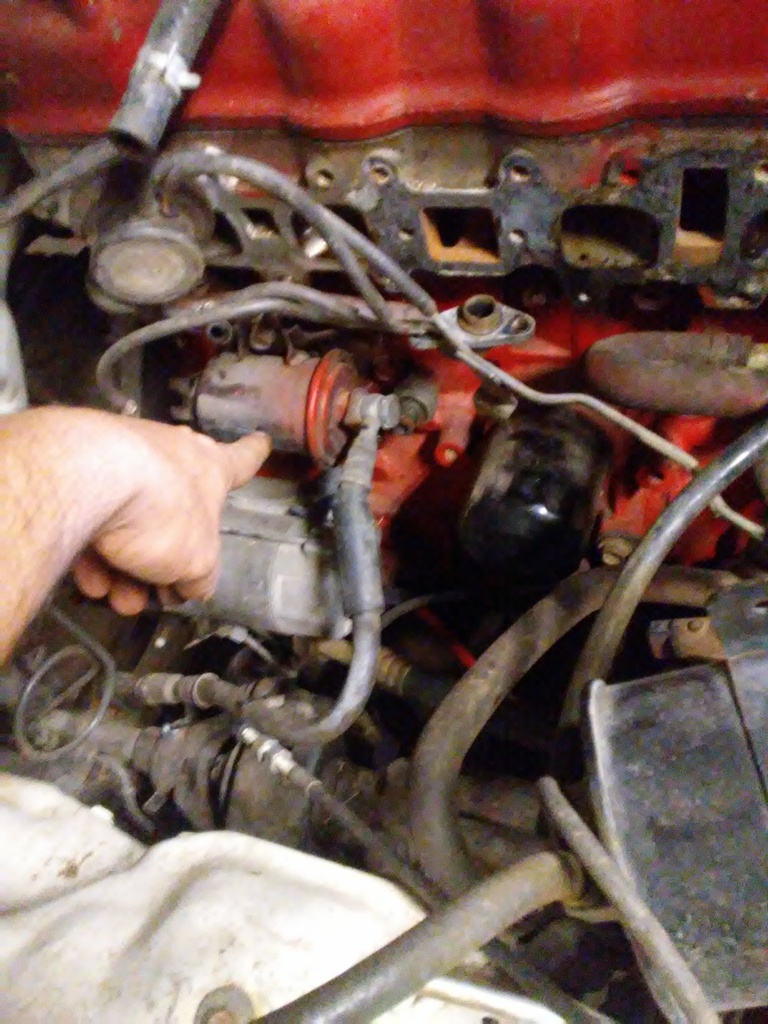
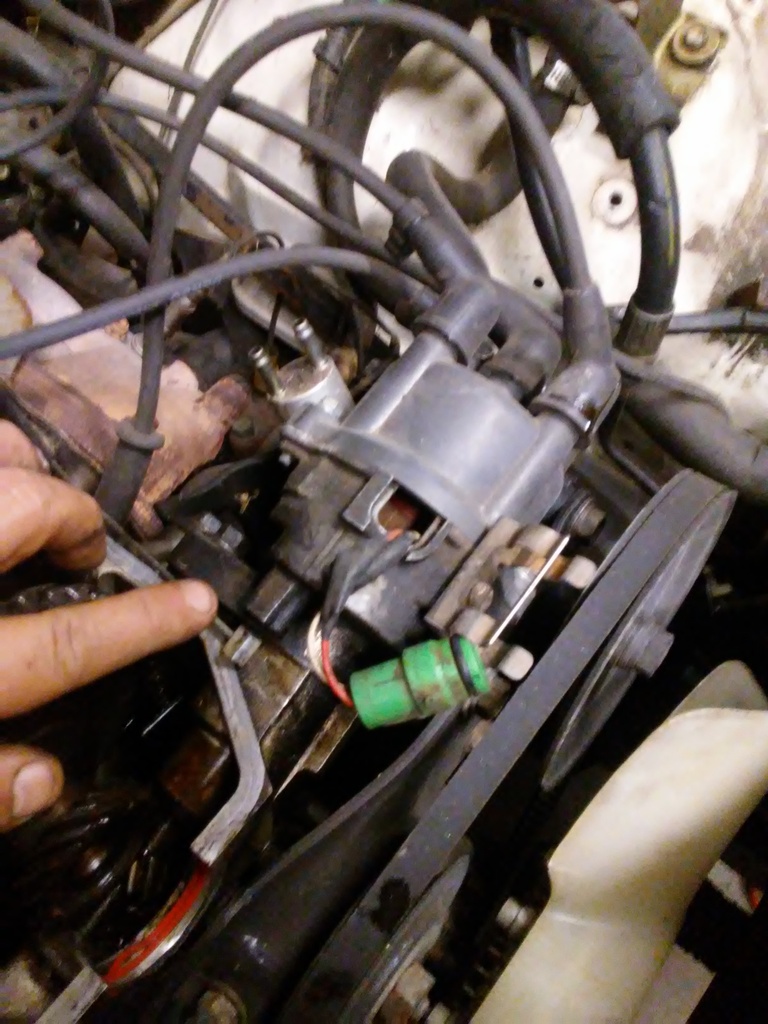
I did get the 22r Coil and Igniter installed. It is the one on the left. I have seen where people have tried to convert a 22re to a 22r and it is always a hack job. I am using all 22r parts.

Neighbor kid installing the 22r Coil and Igniter.
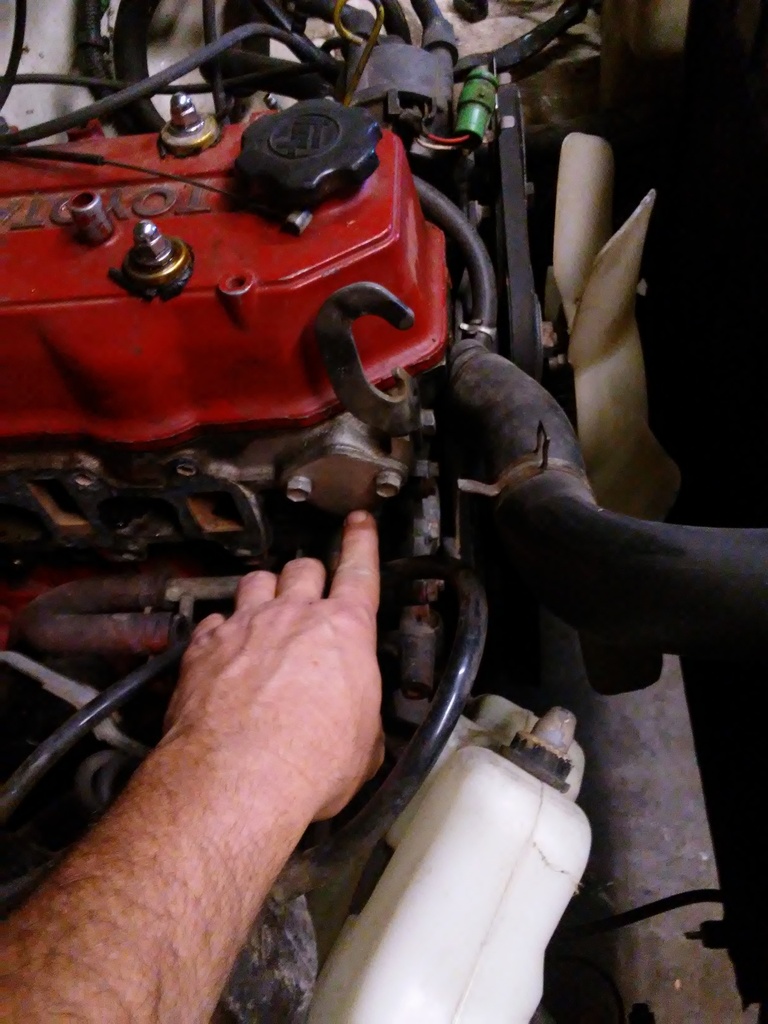
You will need to use the water pipe for the conversion. On a 22re, I use a new rubber O-Ring and even use sealant on the connection. On a 22re, if this is leaking, it is about impossible to access it with most of the Intake System installed. Take your time on this connection and make sure it is sealed on a 22re.

Got the Fuse box mounted, Ventilation System, and most of the dash back in.

I have used the original Steering Wheel and electrical plugs with the steering column.

I will get a rubber plug to cover the Injection Harness port.

When converting to 22r, you have to add the dish that drives the mechanical pump.

I need to go buy a mechanical pump and will remove this plate for it at a later time.

Removed the Fuel Filter for the EFI system. I am going to leave the Knock Sensor. I ever need one I know where a spare is.

Things are going slow but I am taking my time to explain how the distributor and 4 stroke system works to the kiddos. Here is a neighbor kid helping out.

When installing the dish, I was verrry careful not to knock the sprocket off of the cam.

A duh moment. I should of removed the distributor before installing the dish for the mechanical pump. I do not have a 22r distributor at this time but will be getting one in the next few day. Same with an Intake Manifold as mine are bad. A friend of mine has them parts and will be getting them soon.

You may not be able to see it but the bright link and the Crank Shaft is at 0. Took some time explaining TDC to Justin and the neighbor kid.

I did get the 22r Coil and Igniter installed. It is the one on the left. I have seen where people have tried to convert a 22re to a 22r and it is always a hack job. I am using all 22r parts.

Neighbor kid installing the 22r Coil and Igniter.

You will need to use the water pipe for the conversion. On a 22re, I use a new rubber O-Ring and even use sealant on the connection. On a 22re, if this is leaking, it is about impossible to access it with most of the Intake System installed. Take your time on this connection and make sure it is sealed on a 22re.
 12-24-2016, 02:31 PM
#1373
The 22r computer is found in the 88 manual on EC-25,26. The cali version has a larger plug 22 pin vs 12 pin which doesn't have the ox sensor(?). Assuming they followed the norm, input is on the right and output on the left of the schematic. Takes sensor input and turns it into switch, solenoid, and coil activation for all the emission "magic" to happen. On the stock carburetor there is the CMH and a Solenoid for electrical control/connection. I don't remember which carb' you are using a factory carb I think.
That water pipe in the last image it's hanger attaches to the EGR cooling plate lower bolt also. I got bit during assembly on my long block by that hanger on the back. So far no leaks from pulling the one bolt after sealing that EGR coolant passage to attach the hanger. I was not following the FSM or any manual for assembly order, so my fault for not thinking it thru of following directions. I sealed and assembled the rear first while it was still hanging on the hoist so that was "all done" before I put it on the engine stand. Then did the hot side before the intake, it had lots of cure time before I had to mess with it.
That water pipe in the last image it's hanger attaches to the EGR cooling plate lower bolt also. I got bit during assembly on my long block by that hanger on the back. So far no leaks from pulling the one bolt after sealing that EGR coolant passage to attach the hanger. I was not following the FSM or any manual for assembly order, so my fault for not thinking it thru of following directions. I sealed and assembled the rear first while it was still hanging on the hoist so that was "all done" before I put it on the engine stand. Then did the hot side before the intake, it had lots of cure time before I had to mess with it.
12-25-2016, 10:54 AM
#1374
Super Moderator
Staff
Thread Starter
iTrader: (1)
Join Date: Aug 2008
Location: Anderson Missouri
Posts: 11,788
Likes: 0
Received 25 Likes
on
22 Posts
Hello Co 94 PU.. I have seen some with the O2 sensor. This truck will be getting desmogged so I am thinking that I can get rid of that box. I am going to use a Webber. That Aisin carb is to complicated and the Webber is such an improvement with its simplicity. When a Webber is set up correctly, one or two pumps of the gas pedal and a 22r will fire up within one revolution of a motor. They are quick starting motor. No more CEL either. With a Webber, you have all kinds of room under the hood.
When assembling the back side of the head, you are correct, it can be a pain to get sealed up from leaks and getting access to it. I am so glad I dont have to mess with that metal pipe. I have had to mess with it in the past and am no hurry to have to mess with it again.
When assembling the back side of the head, you are correct, it can be a pain to get sealed up from leaks and getting access to it. I am so glad I dont have to mess with that metal pipe. I have had to mess with it in the past and am no hurry to have to mess with it again.
12-25-2016, 11:01 AM
#1375
Super Moderator
Staff
Thread Starter
iTrader: (1)
Join Date: Aug 2008
Location: Anderson Missouri
Posts: 11,788
Likes: 0
Received 25 Likes
on
22 Posts
Making some progress. I have converted trucks from 22re to 22r and vise versa. This is my first time doing a 4Runner and is quite a bit more complicated just because you have to chase the wires out for the rear tail light on the drivers side. Trucks are much more easier to do. Of course, Toyota has changed a couple of wire colors, mostly the stripes and plugs from one year to the other and not my first time experencing that issue.
I have got the headlights, tail lights, horn, blinkers, blower, wiper motor, dome light, dash lights, and clock working. I still need to chase out the reverse lights chased out.
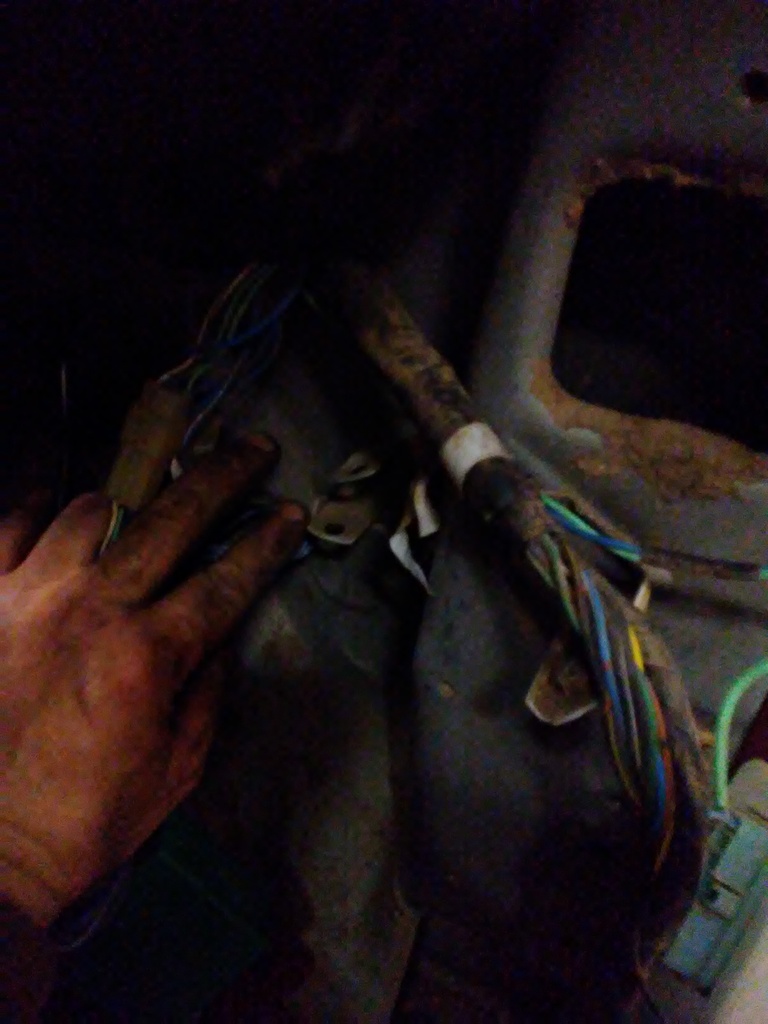
Future reference picture for me.
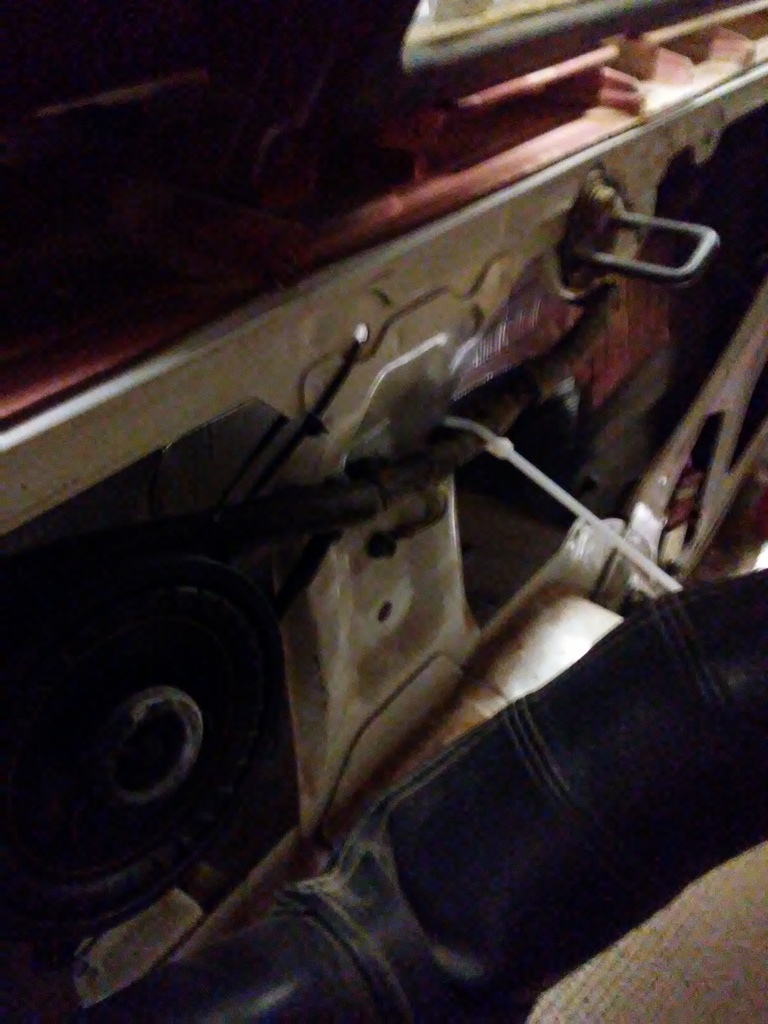
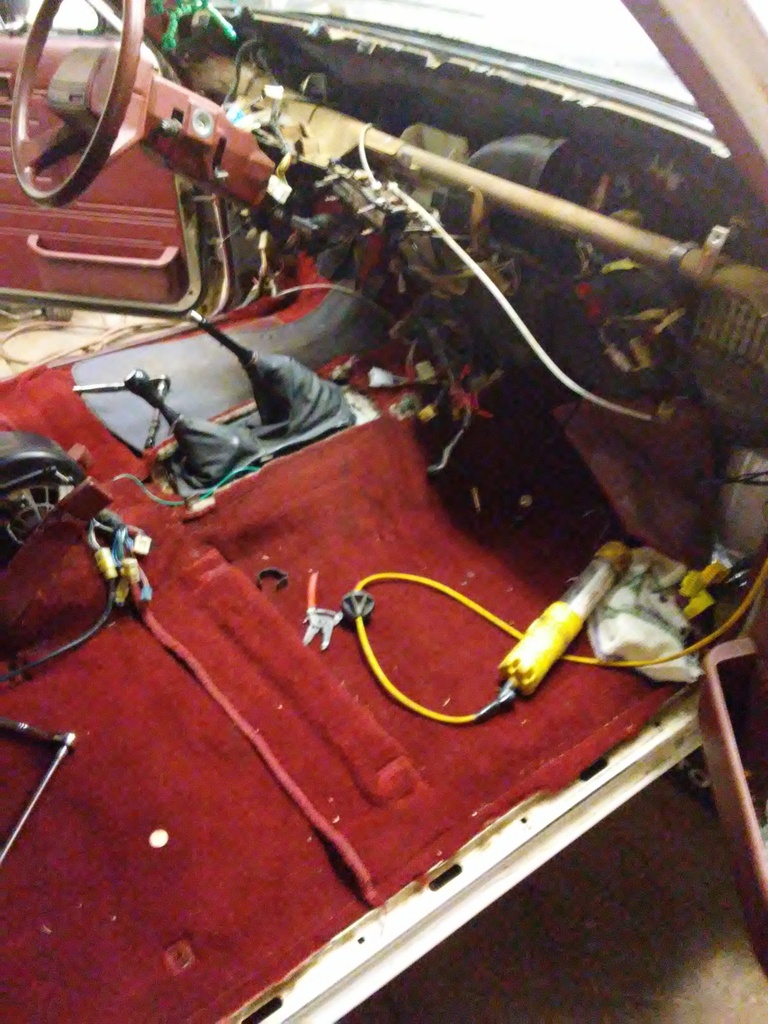
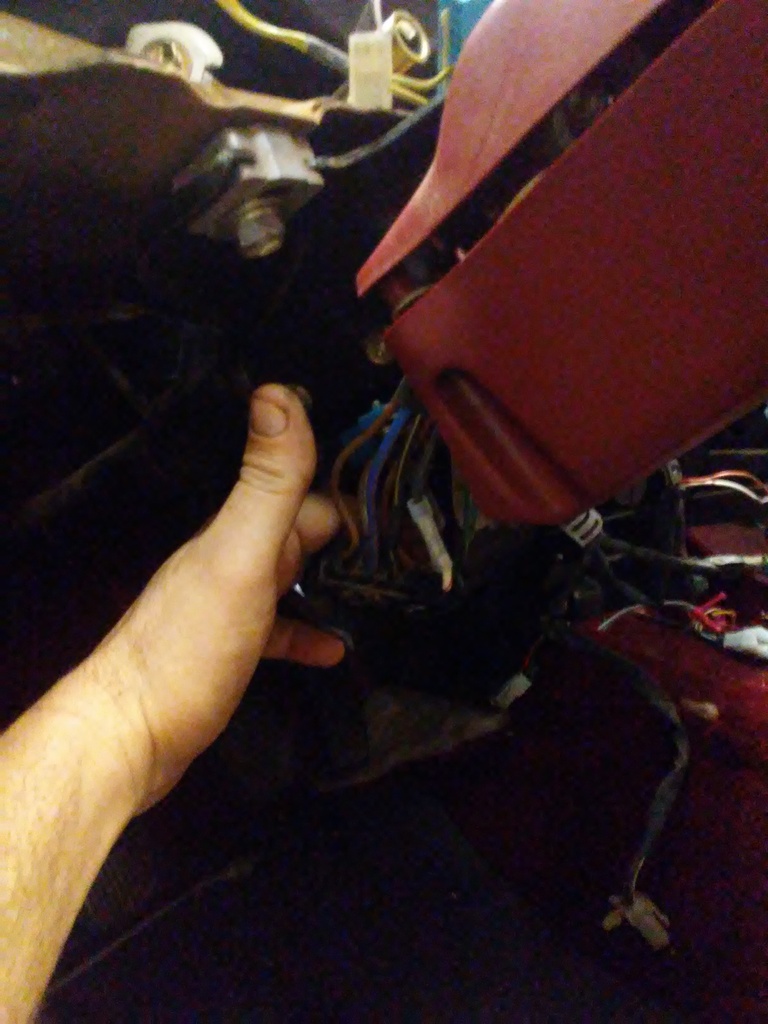
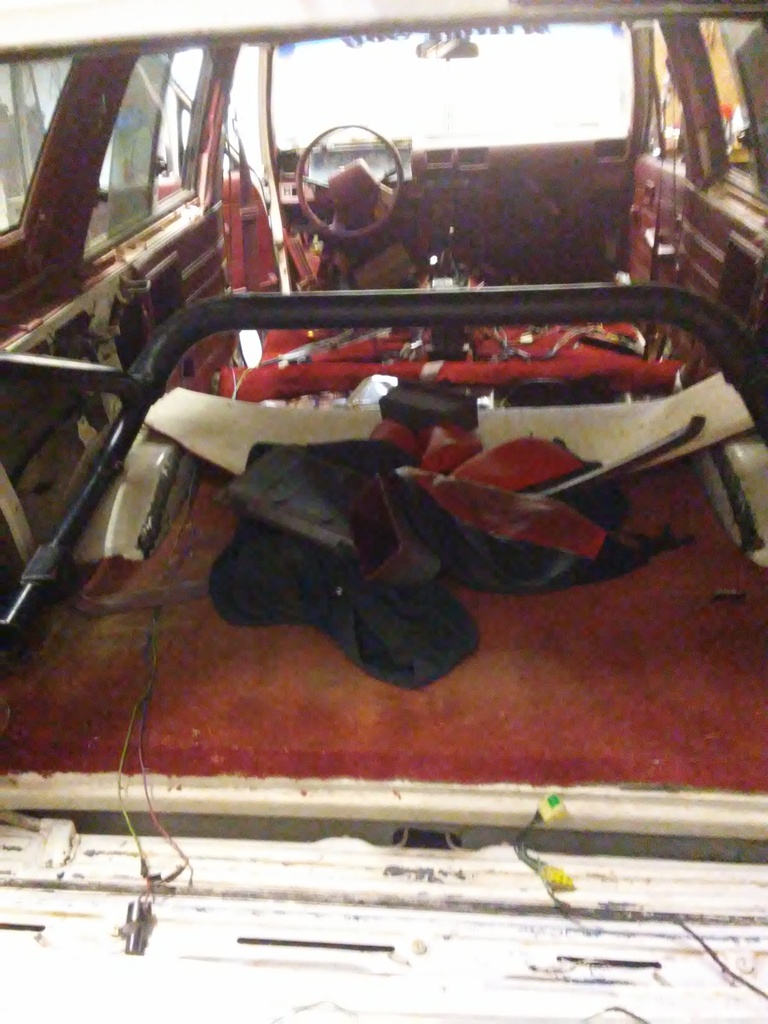
I got the wiring all temporary connections done. I am not sure at this time if I am going to be able to get the rear heater working. I will have to get some help on getting power and the switches to work correctly. Trucks always look like a mess when I have to work on them. I wish I did not have to convert to 22r but could not solve the Cherry Manifold.
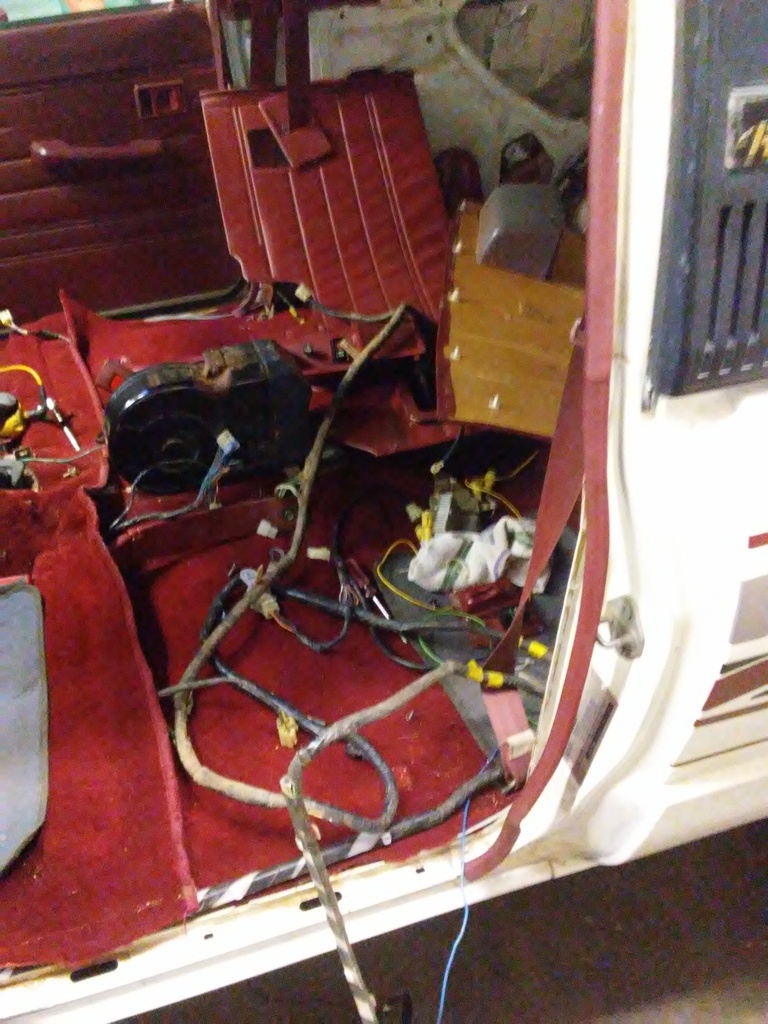
Another view from the rear and some of what is involved.
I have got the headlights, tail lights, horn, blinkers, blower, wiper motor, dome light, dash lights, and clock working. I still need to chase out the reverse lights chased out.

Future reference picture for me.

I got the wiring all temporary connections done. I am not sure at this time if I am going to be able to get the rear heater working. I will have to get some help on getting power and the switches to work correctly. Trucks always look like a mess when I have to work on them. I wish I did not have to convert to 22r but could not solve the Cherry Manifold.

Another view from the rear and some of what is involved.
 12-25-2016, 12:35 PM
#1376
Super Moderator
Staff
Thread Starter
iTrader: (1)
Join Date: Aug 2008
Location: Anderson Missouri
Posts: 11,788
Likes: 0
Received 25 Likes
on
22 Posts
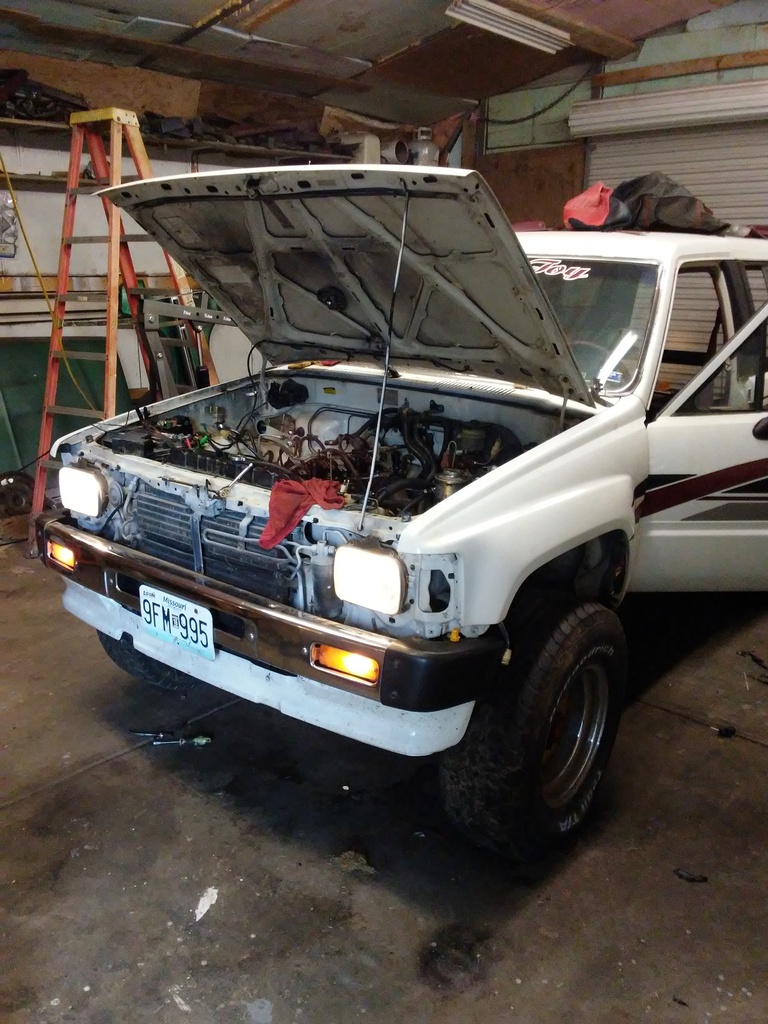
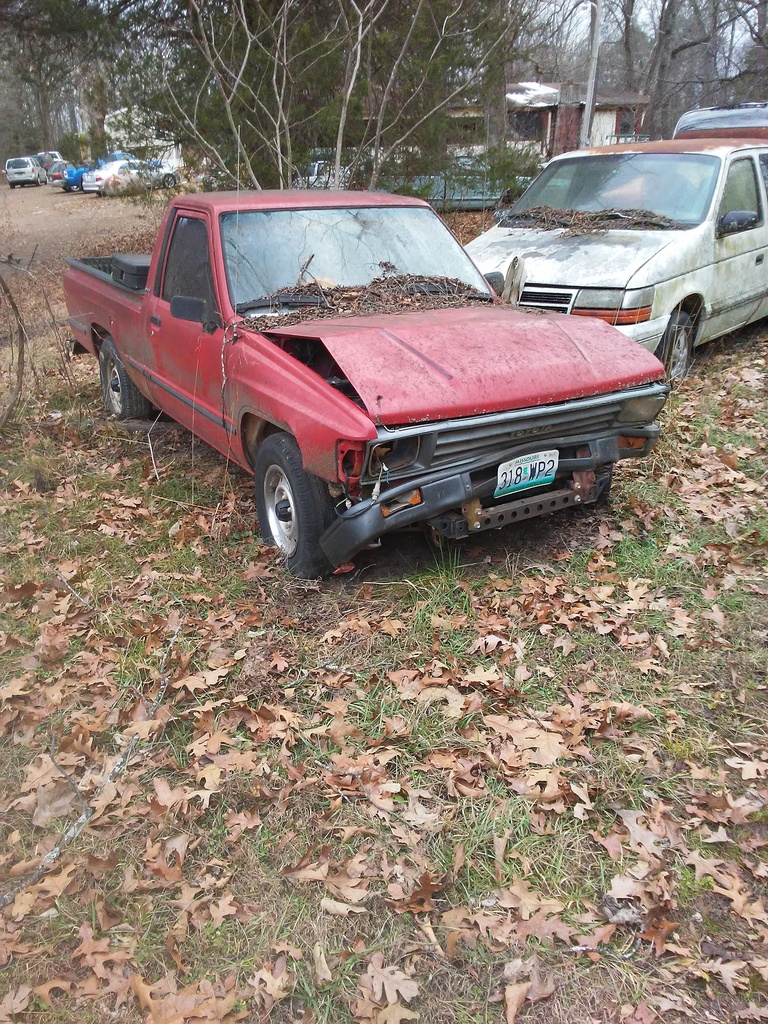
I wanted a break from working on the Runner and have been trying to get a hold of this truck for quite some time. I am now the proud owner of an 88 2 wheel drive Toyota pick up. It is the victim of a drunk driver. It was in great shape and from looking at the damage to it, I think I can fix it for a reasonable amount. I already checked my parts shed and I do have another Core Support if I need it. A new bumper and blinker covers should not be much.
I plan on just fixing it and selling it if it is not going to cost much and if there is no frame damage. I really dont want to part it out but will have to wait until I get it in the shop and see what kind of damage it has. The bed has no rust on the out side but it does have a bed liner. Bed liners can save a bed or ruin a bed. It will be a week or so until I get it home as I want to get Runner out of the shop before bringing it home. Plan fixing it and using it to fund my Ford Build.
I have had about 30 Toyotas and this is the first truck with the latch style tailgate I have owned.

Last edited by Terrys87; 12-25-2016 at 12:38 PM.
12-25-2016, 03:19 PM
#1377
did you get a good deal on the 2WD?
there is a 90-93 2WD that got nailed during our recent snow that I could like to make an offer on.
Working on trucks on CHristmas day has to be be better than what I did, worked..
If it is really warm where you live you should send me that 4Runner rear heater so i could put it in my 94
there is a 90-93 2WD that got nailed during our recent snow that I could like to make an offer on.
Working on trucks on CHristmas day has to be be better than what I did, worked..
If it is really warm where you live you should send me that 4Runner rear heater so i could put it in my 94
12-25-2016, 05:10 PM
#1378
Contributing Member
Nice family teaching and bonding time. Here's to the new pickup being easy peasy as possible and getting you some Ford mad monies. Happy Holidays!
12-26-2016, 04:24 AM
#1379
Super Moderator
Staff
Thread Starter
iTrader: (1)
Join Date: Aug 2008
Location: Anderson Missouri
Posts: 11,788
Likes: 0
Received 25 Likes
on
22 Posts
Hello Robb... I gave $250 for it. The motor, transmission, and bed will triple that easy around here. I really dont want to part it as it is one of the most untouched trucks I have seen other then the custom front end. It has 172k miles on it. I still have not seen if the frame is bent or any rust issues. I could do a frame swap and replace the front clip but I already have a big project that I want to complete before getting into another one. I have Jim Sickles Downey Off Road truck bed so I could use the cab and motor as I have an excellent 4 wheel drive frame. I am hoping it is a quick flip as I dont really need any parts off of this one and I keep every thing, I dont waste anything on these trucks.
I will be out in the storage shed later today and see if I still have a rear heater, the 1st,2nd, and 3rd gen runners in freezing temperture is cold inside these trucks. All of my trucks blow hot out the front heater but just not enough for the entire truck. A rear heater makes a big difference in a runner. My 86 and 01 runner I dont care to drive as the passengers freeze while riding in the back seats and we burn up in the front.
This is the first Christmas I have had off in years. Wife and kids have until January 2nd or 3rd until they go back to school/work. I work tonight. They went to my in laws and wanted to stay until Tuesday or Wednesday. That got me out of going to my in laws, Wahoo!!!! No work, no in laws, and in the shop, I had a GREAT Christmas. lol
Hello Hab... My oldest son is my little shadow every time I have been in the shop lately. He is wanting to learn and he has actually showed me a few tricks lately or made something easier then the way I would of done it. It has slowed me down but I can see he is picking things up. Which ever way I go with the wrecked truck, the brats will be out there helping me on it as they know I will give them part of what it sells for. I will split it evenly or the amount of time and effort that they put into it. They are after the money but I am after the time with them and showing all the cost involved in accidents and giving them experience. I am hoping it pays off in several way other then just money in the future for them. This truck will show several different things for them. I think it will be a fun project for all of us. Hope you had a Merry Christmas and a Great New Years. Did you send the cold and freezing rain down this way last week? lol It was single digits and now we are in the 60's.
12-26-2016, 05:11 AM
#1380
Super Moderator
Staff
Thread Starter
iTrader: (1)
Join Date: Aug 2008
Location: Anderson Missouri
Posts: 11,788
Likes: 0
Received 25 Likes
on
22 Posts
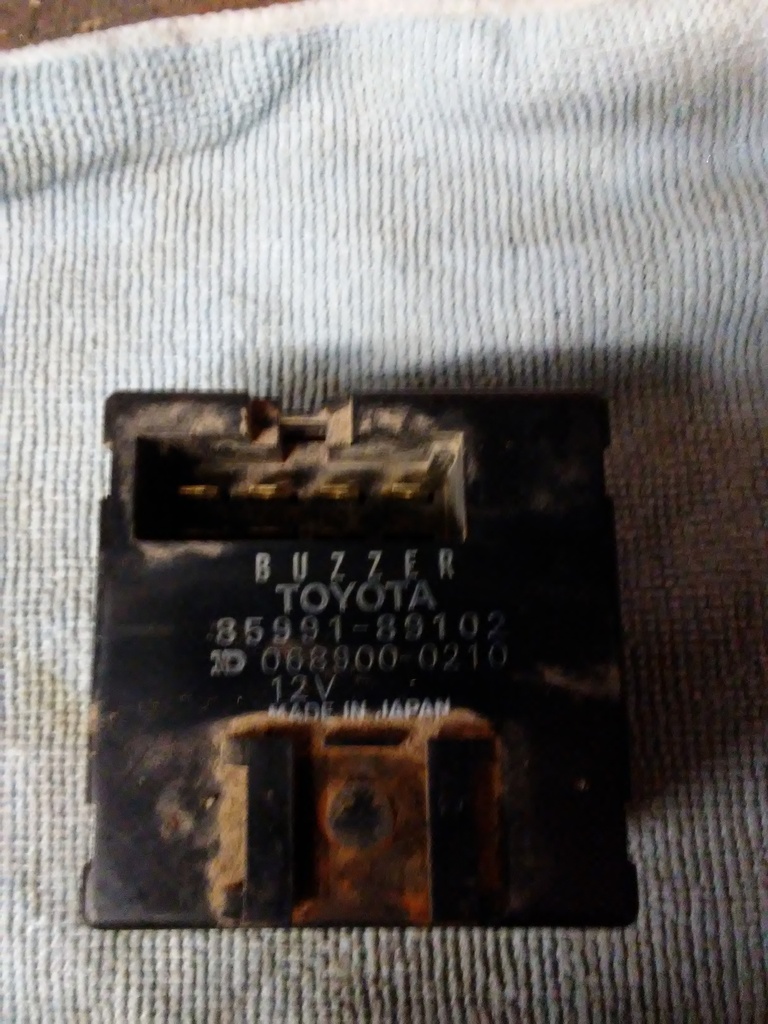
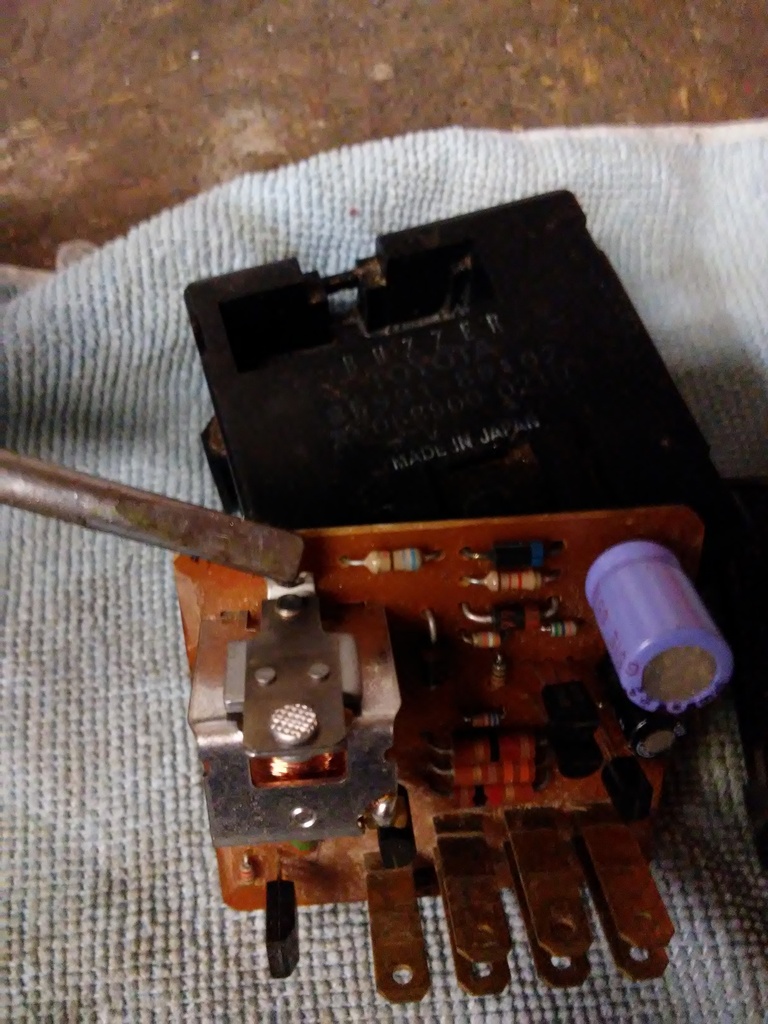
For the trucks that have the Buzzer, you have to have the box installed for the dome light to work from the drivers side. I have seen several trucks with the Buzzer missing to avoid hearing the buzzer going off. People dont realize the circuit flows thru the box to operate the dome light.
Box is located on the Steering Column. It just slide off of a tab.
Separate the cover.
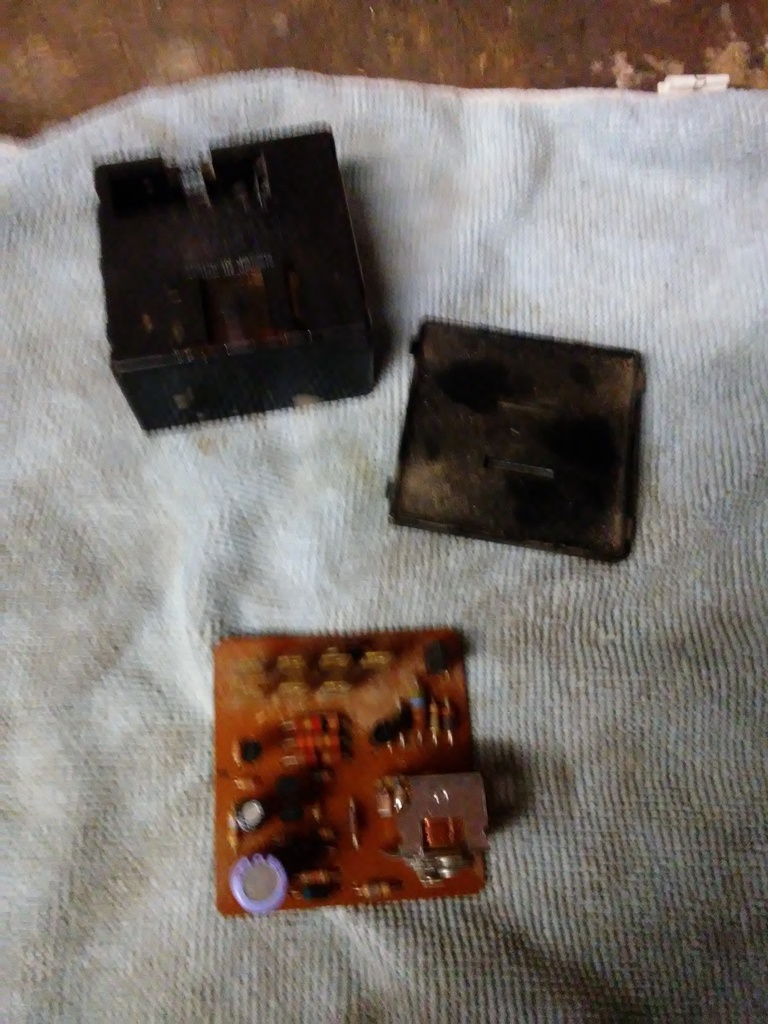
Just bend this tab away from the coil and no more annoying sound.
Box is located on the Steering Column. It just slide off of a tab.

Separate the cover.

Just bend this tab away from the coil and no more annoying sound.


