
Terrys87 88 4Runner Restoration/Build thread
 07-02-2014, 05:57 AM
#1181
Registered User
Join Date: Apr 2014
Posts: 1
Likes: 0
Received 0 Likes
on
0 Posts
need a diagram for rear window
Terry I went throught this exact issue with my 4runner. I trouble shot the rear window untill I was blue in the face and gave up (I hate electrical problems). In the end I rewired the window completely, by passing all of the saftey crap and mine works great now. I made rewiring it more difficult than it had to be since I wanted to keep the factory switch, but you can buy a DPDT switch from Radio Shack and be done with it. You can find out how I did it in my thread and I can make you a diagram if you want.
 07-03-2014, 01:17 AM
#1182
Super Moderator
Staff
Thread Starter
iTrader: (1)
Join Date: Aug 2008
Location: Anderson Missouri
Posts: 11,788
Likes: 0
Received 25 Likes
on
22 Posts
Hello yd68... Welcome to Yotatech. The most common issue besides the safetys will be the switch and the control box behind the drivers seat. Below is some links I have for the backglass.
Link>>> https://www.yotatech.com/forums/f199...l#post51722787
Link>>>https://www.yotatech.com/forums/f199...l#post51723243
I got my rear window working. Wahoo!!
Some quick and easy test are 1. Make sure your rear wiper is in the stowed position. 2.Back gate is shut good, may even want to lean against it and try your key. 3. The plug in the drivers side corner in the back is hooked up good, by your rear windshield washer bottle. 4. That the bolt/pin on drivers side,by the roll bar is all the way in. There is a safety lock located there.
I wanted to see if my Motor was good so I ran 2 connectors right to the motor plug. It is a PITA to get that plug seperated and ran each wire to a battery. Just reverse polarity to control the direction of the window.
I could tell the motor was good right away but it was really struggling to move the window. I thought it was off track, but the metal track with rollers were pretty rusty and I just greased them.
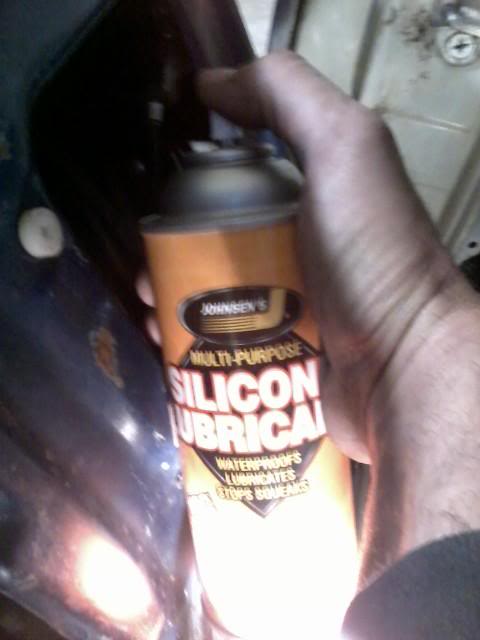
It still was struggling to move up and down, so I took some Silione Spray and got the window tracks. This made a big difference and was the biggest problem. Works great on your door windows too.
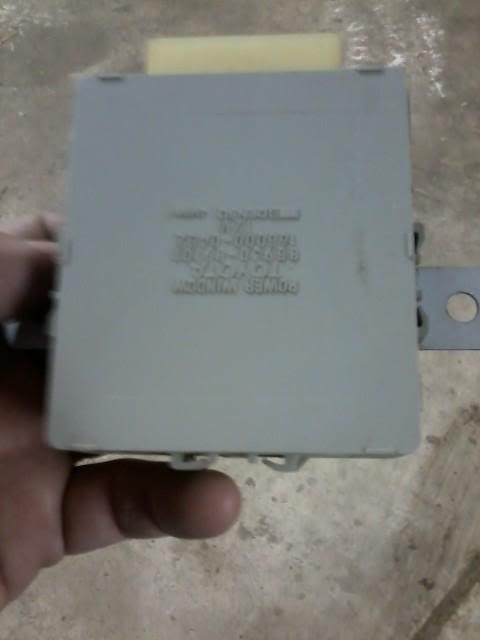
I then replaced the Window Relay Box, I got my Rear Wiper working and Defrost but no window control. Located behind the Drivers seat behind the vinyl panel. If your rear wiper and deforst work this is some indication the box is good, but a relay is in there that operates the window so you cant completely rule it out.
I then took the Switch apart. It comes apart easily if done right. First remove the gray plug. It is the light bulb. Then pull the cover away from 2 tabs on one side and then the 2 tabs on the other side.
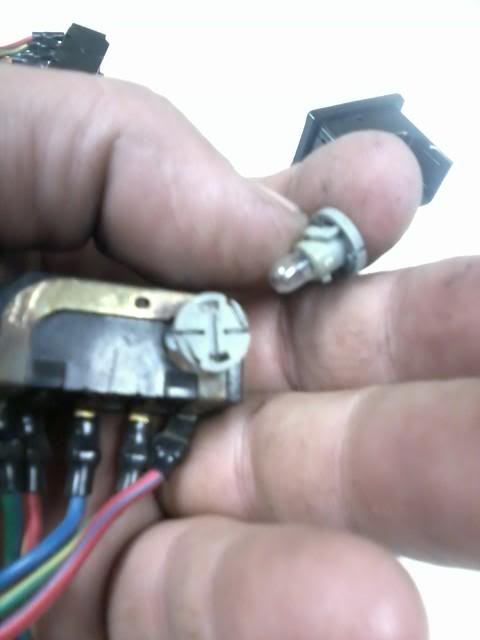
I then washed the button with soap and water and air dried it with air hose and used electrical contact cleaner to get the corrosion, coffe, dirt and who knows what else out of there.
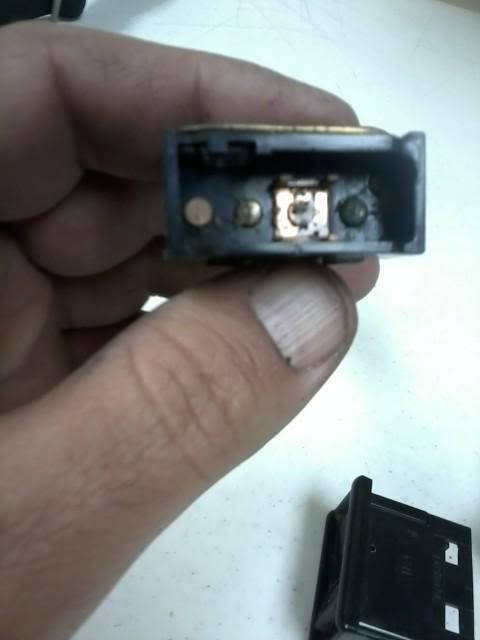
Here is another picture of how it should look before going back together. Make sure you dont lose the little white pin and the metal toggle piece. These are very brittle being 20 plus years old. On the rear wiper and safety lock, they are difficult to get seperated. I just take contact cleaner and hold the switch upside down and spray cleaner in there and blow it out with an air hose.

I put some links that I used to get to this point up in a previous post. The last link says you can use some relays from Radio Shack, but I havent tried it. I will later on with my old/bad relay.
Other things to look for is make sure your rear wiper is in the stow positon, the tail gate is completely closed.
On post #361 I have a ground wire that bypasses the Cover Top Switch and Door Lock Detector Switch. #365 has a better electrical diagram view of the ground wire I by passed theses two switches.
I still havent tried the key. I didnt use my old key lock when I switched tailgates as it looks more involved then I want to get into. I will have a locksmith to make me one.
This is a switch that does give problems. I have cleaned it and it seems to be working better. I will light the Rear Door Ajar light.
Located behind driviers seat.

Running a ground wire from this wire on the plug, the blue wire to the place on the pic below elminates a lot of problems.
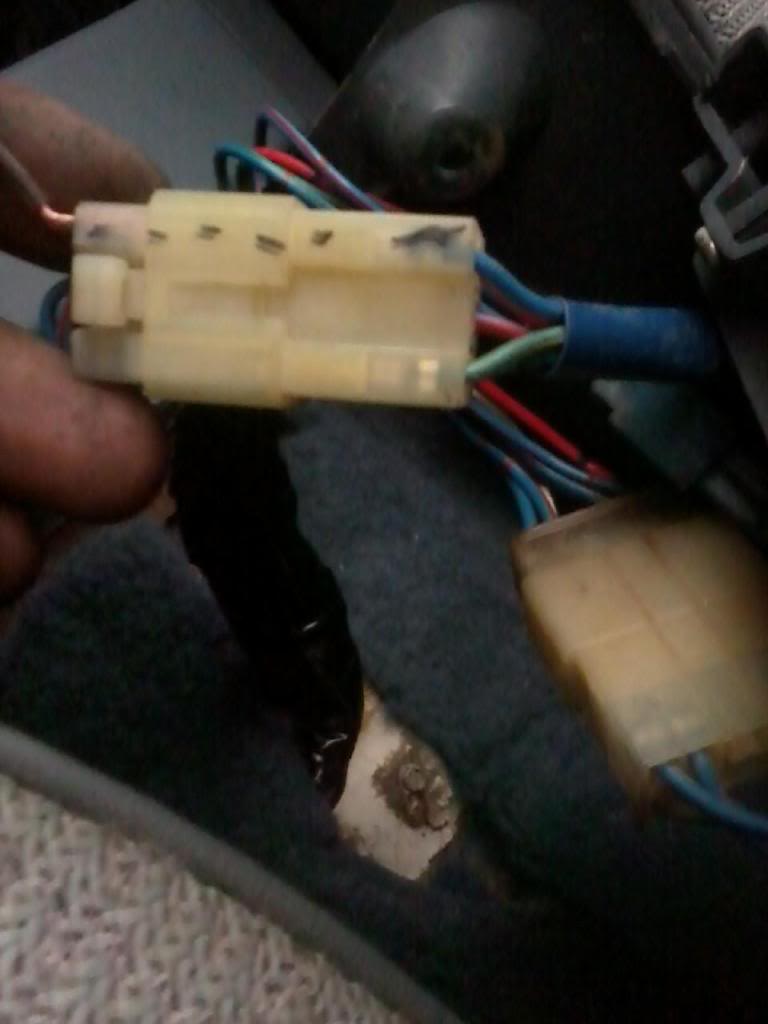
Ground to center consloe mounting tab.
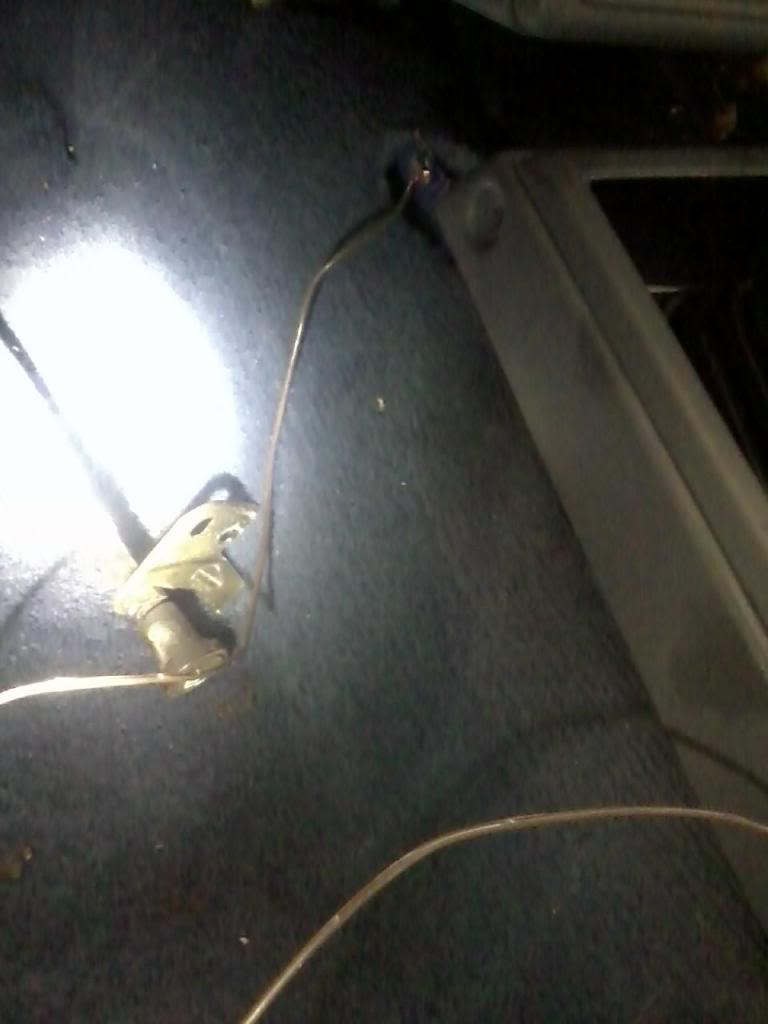
The ground wire bypasses the following safety switches. Cover Top and Door Lock Detections switch. Your window will roll up with top off. This is on Page 12-23 of the Haynes Manual where the key is to the botom of the page.
Haynes "L" for Blue, "R" for Red. Key is pointing to wire.

Link>>> https://www.yotatech.com/forums/f199...l#post51722787
Link>>>https://www.yotatech.com/forums/f199...l#post51723243
I got my rear window working. Wahoo!!
Some quick and easy test are 1. Make sure your rear wiper is in the stowed position. 2.Back gate is shut good, may even want to lean against it and try your key. 3. The plug in the drivers side corner in the back is hooked up good, by your rear windshield washer bottle. 4. That the bolt/pin on drivers side,by the roll bar is all the way in. There is a safety lock located there.
I wanted to see if my Motor was good so I ran 2 connectors right to the motor plug. It is a PITA to get that plug seperated and ran each wire to a battery. Just reverse polarity to control the direction of the window.
I could tell the motor was good right away but it was really struggling to move the window. I thought it was off track, but the metal track with rollers were pretty rusty and I just greased them.
It still was struggling to move up and down, so I took some Silione Spray and got the window tracks. This made a big difference and was the biggest problem. Works great on your door windows too.
I then replaced the Window Relay Box, I got my Rear Wiper working and Defrost but no window control. Located behind the Drivers seat behind the vinyl panel. If your rear wiper and deforst work this is some indication the box is good, but a relay is in there that operates the window so you cant completely rule it out.
I then took the Switch apart. It comes apart easily if done right. First remove the gray plug. It is the light bulb. Then pull the cover away from 2 tabs on one side and then the 2 tabs on the other side.
I then washed the button with soap and water and air dried it with air hose and used electrical contact cleaner to get the corrosion, coffe, dirt and who knows what else out of there.
Here is another picture of how it should look before going back together. Make sure you dont lose the little white pin and the metal toggle piece. These are very brittle being 20 plus years old. On the rear wiper and safety lock, they are difficult to get seperated. I just take contact cleaner and hold the switch upside down and spray cleaner in there and blow it out with an air hose.
I put some links that I used to get to this point up in a previous post. The last link says you can use some relays from Radio Shack, but I havent tried it. I will later on with my old/bad relay.
Other things to look for is make sure your rear wiper is in the stow positon, the tail gate is completely closed.
On post #361 I have a ground wire that bypasses the Cover Top Switch and Door Lock Detector Switch. #365 has a better electrical diagram view of the ground wire I by passed theses two switches.
I still havent tried the key. I didnt use my old key lock when I switched tailgates as it looks more involved then I want to get into. I will have a locksmith to make me one.
This is a switch that does give problems. I have cleaned it and it seems to be working better. I will light the Rear Door Ajar light.
Located behind driviers seat.
Running a ground wire from this wire on the plug, the blue wire to the place on the pic below elminates a lot of problems.
Ground to center consloe mounting tab.
The ground wire bypasses the following safety switches. Cover Top and Door Lock Detections switch. Your window will roll up with top off. This is on Page 12-23 of the Haynes Manual where the key is to the botom of the page.
Haynes "L" for Blue, "R" for Red. Key is pointing to wire.
07-06-2014, 02:54 PM
#1184
Super Moderator
Staff
Thread Starter
iTrader: (1)
Join Date: Aug 2008
Location: Anderson Missouri
Posts: 11,788
Likes: 0
Received 25 Likes
on
22 Posts
Hellokornhuskerwizard... I started to take the tops off of ours and got distracted. Luckily I did, as we got rain to day and some more coming later this week. Wish it would dry out for a while. I am ready to get the tops off.
07-06-2014, 03:11 PM
#1185
Super Moderator
Staff
Thread Starter
iTrader: (1)
Join Date: Aug 2008
Location: Anderson Missouri
Posts: 11,788
Likes: 0
Received 25 Likes
on
22 Posts
I have been repairing the dings in Mistys rims. I thought this color was similar to what was on it. It is a little darker then what I wanted but she likes it so they will be staying this color for now. Still have to do the other side.
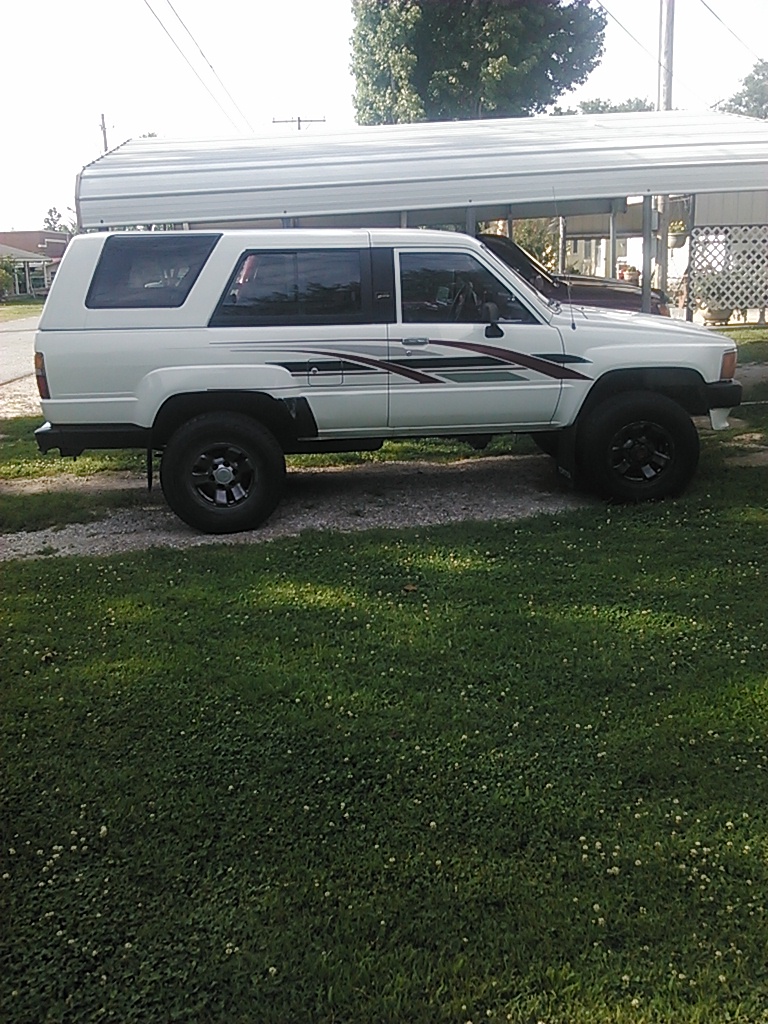
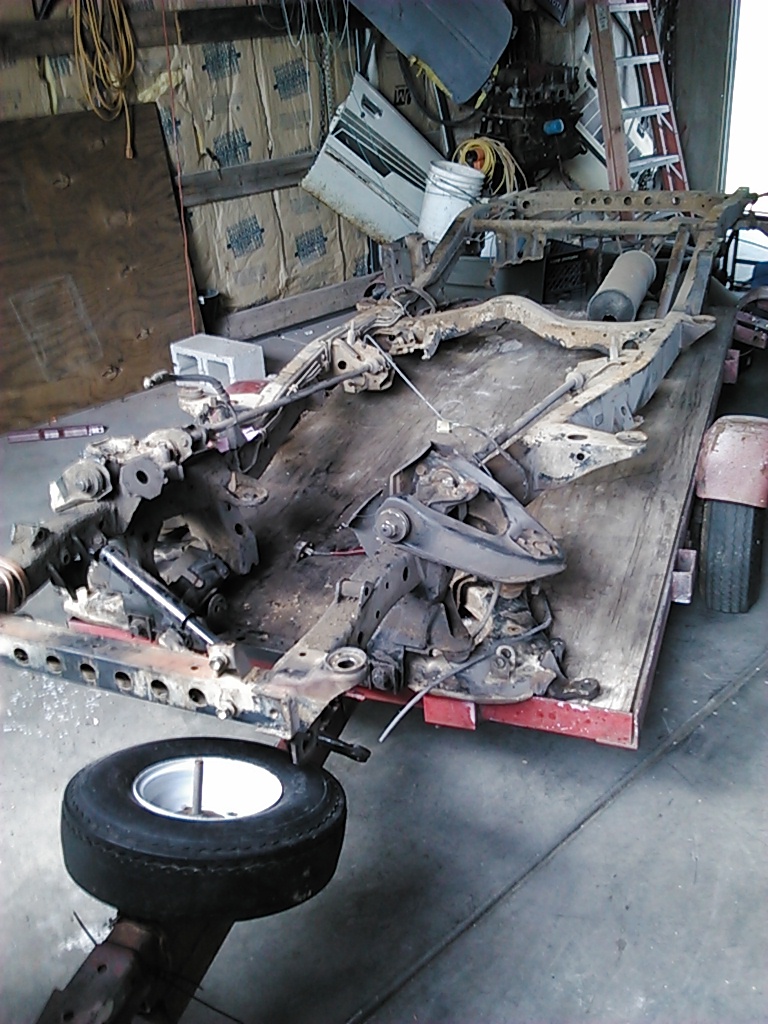
Here is going to be my New truck ( Someday, 2 or 3 more years from now). I am getting some plywood on the walls later this week or next week and getting electric in the shop, so it got moved out side. The boys are going to get the dubious task of cleaning the frame of grease and dirt.
When I do get to this build, it will take 3-5 years to do as I want it as new as when it come out of the factory. I will follow KawaZX636's build https://www.yotatech.com/forums/f197...-build-264229/ and Slacker Build https://www.yotatech.com/forums/f209...thread-131775/
https://www.yotatech.com/forums/f209...thread-131775/ This will be the one that my Downey Bed will be going on and still gathering parts up for the build.
Getting the frame out and getting plywood and electric in the shop soon Wahoo!!!

Last edited by Terrys87; 08-11-2014 at 04:08 PM.
07-06-2014, 04:36 PM
#1186
Hey Terry, nice work on the rims, I like how they turned out! Kinda off the subject, but I was watching "Over the Top" the arm wrestling movie with Slyvester Stallone a couple days ago, anyway there was a scene where Stallone's son steals one of his grandpa's rigs (which just happened to be a topless white 4 runner) I thought to myself "hey he stole Misty's runner"!!!
http://www.imcdb.org/vehicle_56584-T...-N60-1986.html
http://www.imcdb.org/vehicle_56584-T...-N60-1986.html
Last edited by rustED; 07-06-2014 at 06:47 PM.
07-06-2014, 05:31 PM
#1187
Registered User
rims do look good
i got a great deal on couple tires offa CL 20 each with 80% tread on them an im suuure glad my passenger front was slick no sign of tread at all
i got a great deal on couple tires offa CL 20 each with 80% tread on them an im suuure glad my passenger front was slick no sign of tread at all
07-27-2014, 11:56 PM
#1189
Super Moderator
Staff
Thread Starter
iTrader: (1)
Join Date: Aug 2008
Location: Anderson Missouri
Posts: 11,788
Likes: 0
Received 25 Likes
on
22 Posts
Hello Ed... That is a good looking runner. I see several get stolen on here and to see hers disappear, I think I would lose my mind. I have been thru this one from one end to the other and the crooks never think about what all it takes to get one to where I have gotten this one. It is nice seeing one in the movies.
Hello Cyberhorn... Wish I could come across deals like that. Once in a while I stumble into one. Her tires have a little sign of dry rot in places and they will be getting replaced in the near future.
Thanks Gizzler00.. I am happy how they turned out. They are in far better shape then what they were before. She likes the color better, I still kind of like the aluminum look better.
07-28-2014, 12:09 AM
#1190
Super Moderator
Staff
Thread Starter
iTrader: (1)
Join Date: Aug 2008
Location: Anderson Missouri
Posts: 11,788
Likes: 0
Received 25 Likes
on
22 Posts
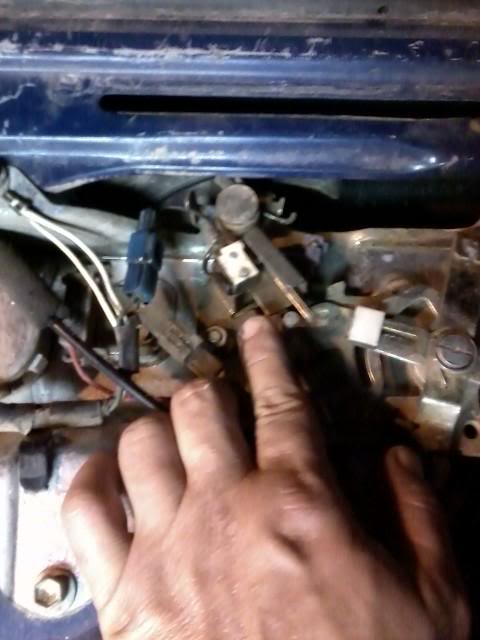
I was driving Mistys today and thought I smelled raw fuel. Still don't know if I did or not so I pulled over to check if I had any leaks. I popped the hood and seen I had the Cherry Manifold. I have dealt with that before and usually the distributor bolt has worked it way loose and let the distributor turn all the way clockwise causing that to cause a Cherry Manifold. I checked the distributor and it was tight.
Started looking on the internet as to what else could cause a Cherry Manifold and found the TPS and O2 sensor could possibly cause that. The truck runs to great, so I don't think it is the TPS, (don't want to deal with that) but one thing I haven't changed on it is the O2 sensor. 88's have the 4 wire sensor that runs under the seat and is in the exhaust pipe. I am suspecting that to be the issue as everything else on the truck seems to be normal. I will double check my timing and make sure it is ok as well.
I will check www.sparkplugs.com for an O2 sensor. Will probably have to take it to an exhaust shop to have them to install it in the exhaust pipe as most are so rusted in the pipe, there is no chance of getting it in.
The other issue that I found that can cause some problems is this problem can clog a converter catalytic converter. One thing I don't have to worry about as I remove mine and don't have to deal with that.
Will be looking into other issues that can cause a Cherry Manifold. http://www.pirate4x4.com/forum/toyot...g-red-hot.html https://www.yotatech.com/forums/f116...nifold-196774/
I took a few days off from work to get several things taken care of around the house and to work on the trucks I will try updating later. So many steps forward and this problem come along. Guess that is how it goes.
07-28-2014, 07:43 AM
#1192
Registered User
Hey Terry, nice work on the rims, I like how they turned out! Kinda off the subject, but I was watching "Over the Top" the arm wrestling movie with Slyvester Stallone a couple days ago, anyway there was a scene where Stallone's son steals one of his grandpa's rigs (which just happened to be a topless white 4 runner) I thought to myself "hey he stole Misty's runner"!!!
http://www.imcdb.org/vehicle_56584-T...-N60-1986.html
http://www.imcdb.org/vehicle_56584-T...-N60-1986.html
08-15-2014, 11:34 PM
#1193
Super Moderator
Staff
Thread Starter
iTrader: (1)
Join Date: Aug 2008
Location: Anderson Missouri
Posts: 11,788
Likes: 0
Received 25 Likes
on
22 Posts
Hello Cyberhorn...I have seen Chevys get hot as well. Never seen them pop bolts and wouldn't want to be in its way of travel.
Thanks kornhuskerwizard... She was just talking today about not only getting some more things done to it cosmetically but some maintenance on it that would just make it that much more enjoyable to drive. Hers is still the one I like to drive as a lot of her suspension parts are in better shape then mine. I have a lot of parts for mine that I just need to get installed and then she will see the difference. I keep telling her she better get on the ball before mine passes hers all the way around.
Thanks kornhuskerwizard... She was just talking today about not only getting some more things done to it cosmetically but some maintenance on it that would just make it that much more enjoyable to drive. Hers is still the one I like to drive as a lot of her suspension parts are in better shape then mine. I have a lot of parts for mine that I just need to get installed and then she will see the difference. I keep telling her she better get on the ball before mine passes hers all the way around.
08-16-2014, 12:01 AM
#1194
Super Moderator
Staff
Thread Starter
iTrader: (1)
Join Date: Aug 2008
Location: Anderson Missouri
Posts: 11,788
Likes: 0
Received 25 Likes
on
22 Posts
Mistys back glass has been having issues again. Sometimes it works and sometimes it doesn't. The rear wiper and washer bottle work so I know it is in the relays. We use the tailgates on our trucks a lot and these switches and relays are just worn. I haven't checked the dealer and that would be the best way to go and just be done with several problems but I have a feeling it will be expensive. I replaced her relays and still haven't gotten them installed yet, but if I have any more issues. The stock setup is going to go away and I will install a basic switch in to completely eliminate any future problems.
I got the idea for replacing the relays from 4Crawler. I will still need to get it into her runner and see how things work out.
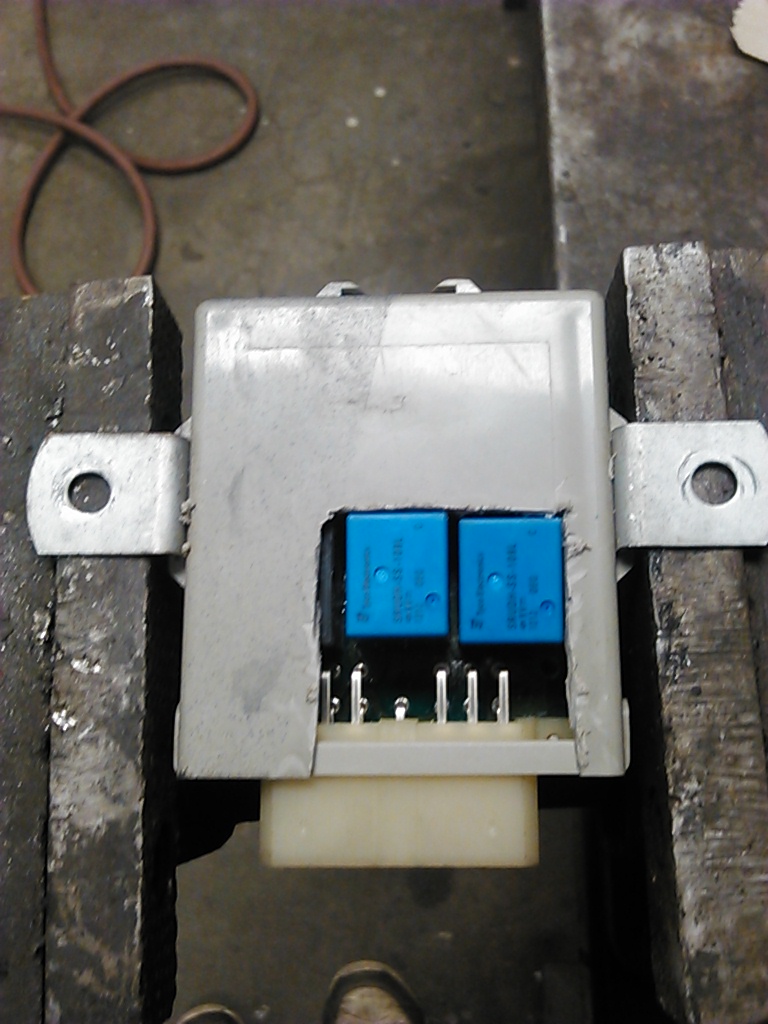
Here is the Relay box located behind the drivers seat with the Radio Shack Relays.
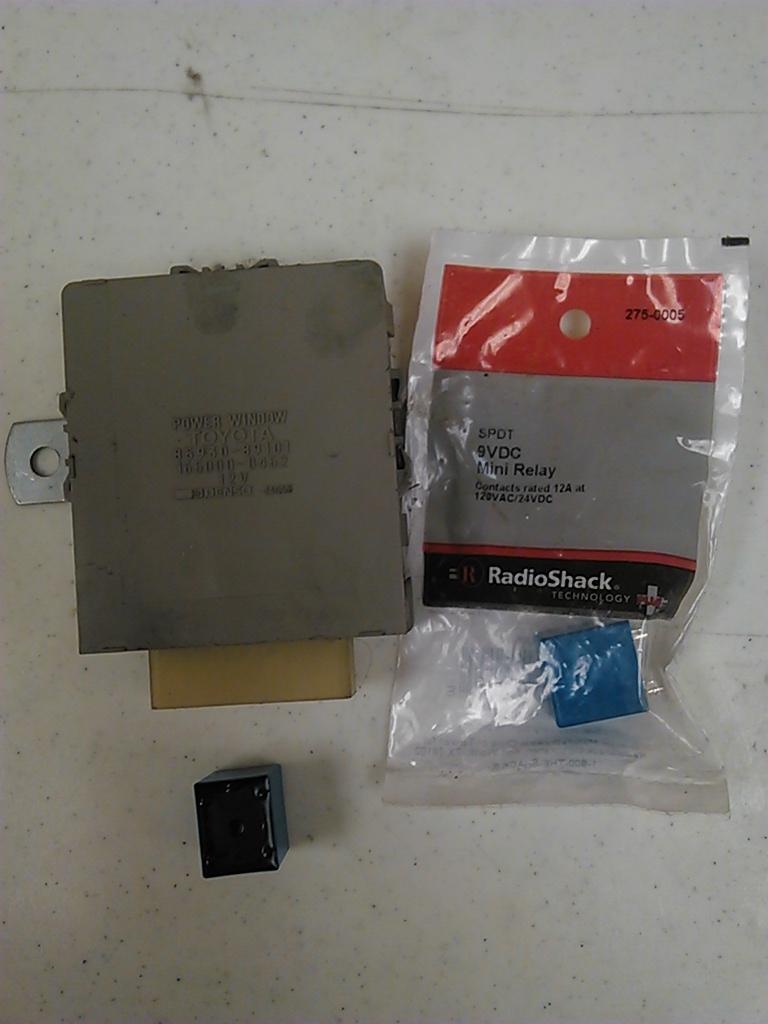
If I understood 4Crawlers thread right, it is these two relays that control Up and Down. The blue ones are the ones I replaced. The black ones are Toyota. I could have/should have replaced all 4 as they are all the same relays.
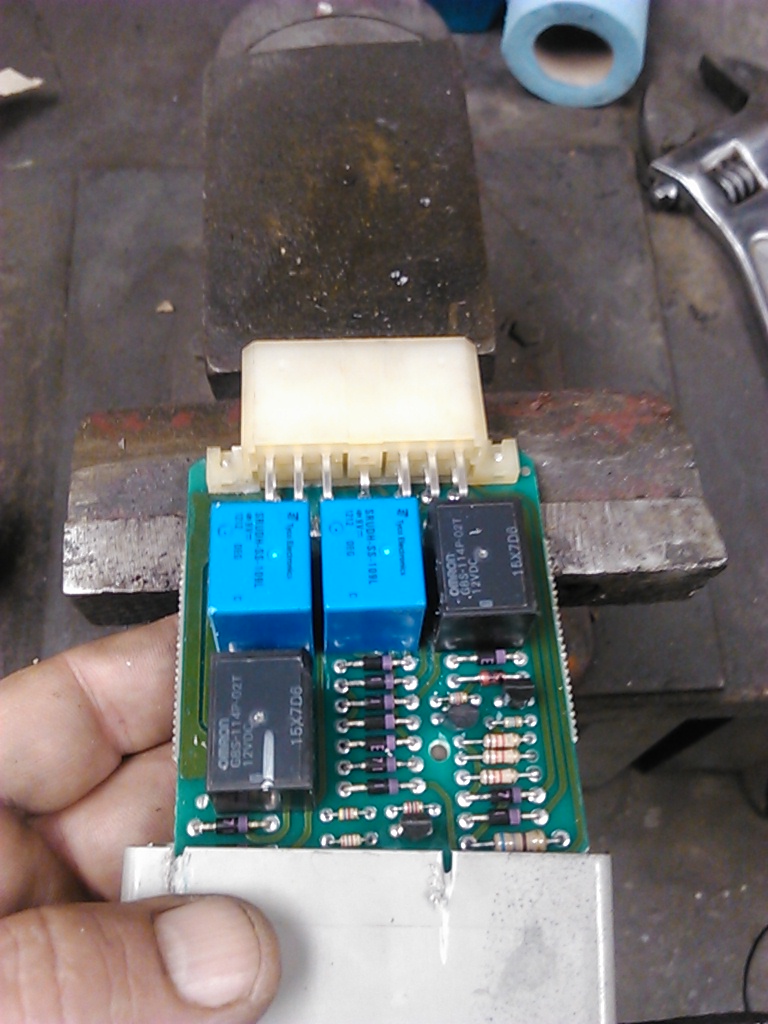
You could press them back into the cover, but it will bulge the cover and put stress on the relays. I just took a Dremel and notched out the cover a little bit.
I got the idea for replacing the relays from 4Crawler. I will still need to get it into her runner and see how things work out.
Here is the Relay box located behind the drivers seat with the Radio Shack Relays.

If I understood 4Crawlers thread right, it is these two relays that control Up and Down. The blue ones are the ones I replaced. The black ones are Toyota. I could have/should have replaced all 4 as they are all the same relays.

You could press them back into the cover, but it will bulge the cover and put stress on the relays. I just took a Dremel and notched out the cover a little bit.

Last edited by Terrys87; 08-16-2014 at 03:01 AM.
08-16-2014, 03:42 AM
#1195
Contributing Member
Misty's wheels look good both ways, I'd have a hard time choosing.
Thanks for the good morning eye candy, and I haven't even had breakfast yet. Loving the tips and tricks and fixes, you've always got something cool going on.
Thanks for the good morning eye candy, and I haven't even had breakfast yet. Loving the tips and tricks and fixes, you've always got something cool going on.
08-21-2014, 07:43 AM
#1196
Super Moderator
Staff
Thread Starter
iTrader: (1)
Join Date: Aug 2008
Location: Anderson Missouri
Posts: 11,788
Likes: 0
Received 25 Likes
on
22 Posts
Hello habanero... I like the silver look better but she has gotten more compliments on the black ones and she likes them better that way. I was really happy for how dinged up that they were that they came out as good as they did. She better like them, that took some work getting them that way, lol.
08-21-2014, 07:46 AM
#1197
Super Moderator
Staff
Thread Starter
iTrader: (1)
Join Date: Aug 2008
Location: Anderson Missouri
Posts: 11,788
Likes: 0
Received 25 Likes
on
22 Posts
On the 88 Runners, the O2 sensor connector is under the seat. I tried to just pull the connector thru the floor board to make the connection. It wasnt going to come out that way and once I pulled the seat I seen why. There is not enough slack in the harness to do that. The seat has to come out to make the connection. She had an exhaust leak and it was one of the manifold nuts that came off. My 85 donated one for it so will be stopping by Toyota and pick up a few spare exhaust nuts this week.
Part number of 88 Runner O2 Sensor is DEN234-4152
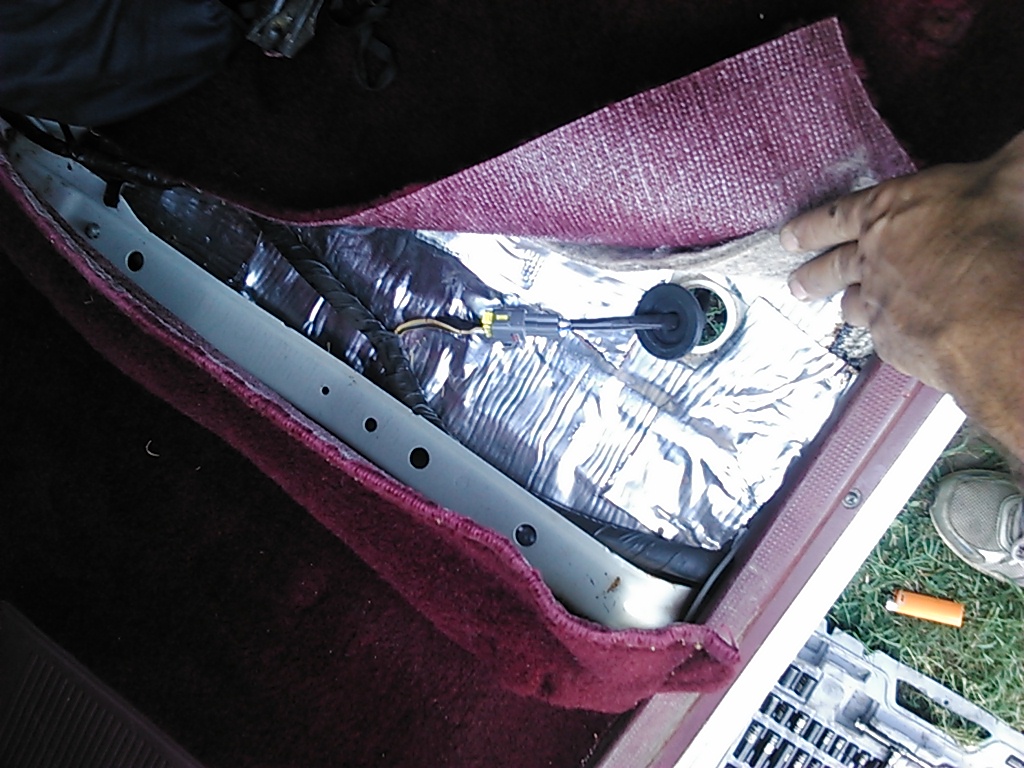
Part number of 88 Runner O2 Sensor is DEN234-4152
 08-21-2014, 09:43 AM
#1198
Registered User
Yes. The 02 sensor comes out underneath the drivers seat and the wires runs across to the catalytic converter. When I first noticed it kind of freaked me out. I was expecting it to go in the manifold. It seems like this would be a potential problem for a serious off road vehicle. Mine hangs just enough to maybe get caught on something. Seems it ought to have a little plate over it or something. I was beginning to think 89 was the only year for the wacky 02 sensor. I guess those universal catalytic converters would require welding a 02 bung onto it? By welding I mean JB Weld 'cause I can't really weld. My 14 year old starts welding in his shop class this year though.
08-21-2014, 11:46 AM
#1199
Mistys back glass has been having issues again. Sometimes it works and sometimes it doesn't. The rear wiper and washer bottle work so I know it is in the relays. We use the tailgates on our trucks a lot and these switches and relays are just worn. I haven't checked the dealer and that would be the best way to go and just be done with several problems but I have a feeling it will be expensive. I replaced her relays and still haven't gotten them installed yet, but if I have any more issues. The stock setup is going to go away and I will install a basic switch in to completely eliminate any future problems.
I got the idea for replacing the relays from 4Crawler. I will still need to get it into her runner and see how things work out.
Here is the Relay box located behind the drivers seat with the Radio Shack Relays.
If I understood 4Crawlers thread right, it is these two relays that control Up and Down. The blue ones are the ones I replaced. The black ones are Toyota. I could have/should have replaced all 4 as they are all the same relays.
You could press them back into the cover, but it will bulge the cover and put stress on the relays. I just took a Dremel and notched out the cover a little bit.
08-24-2014, 01:32 AM
#1200
Super Moderator
Staff
Thread Starter
iTrader: (1)
Join Date: Aug 2008
Location: Anderson Missouri
Posts: 11,788
Likes: 0
Received 25 Likes
on
22 Posts
Hello Nervo19... The 88's and newer are under the seat. I always thought that you could just connect them without pulling the seat. Would be nice if they gave enough slack in the wiring to do that but they couldn't make it that easy. I will be glad the day I get a welder. I always have to go have it done and sometimes it is just a quick tack weld or something that is easy to do. Those days are getting closer. One reason I do like the 87 and older is fewer emissions and some ways easier to work on.
Hello Mark... I would like a link to ebay and if you don't mind I will try one of those relays. I was looking for some parts the other day and found a VSV that I needed for my 85 that you had sent. Really made my day and was a part I needed for my 85. I had checked the local boneyards around here and the only one that would have it is 98 miles from my house. Thanks big time for that.
My 85 runs but doesn't start as quick as it should and I knew if was because of the VSV that operates the Fuel Pressure Regulator. I had it routed temporarily to another vacuum source and sure it will fire up quick now. I am tinkering on a few other things and have it apart but sure it will start quick now. It is getting closer to moving under its own power. No hurry on the shipping things, I have parts and got things working for now.


