
Terrys87 88 4Runner Restoration/Build thread
 12-11-2012, 07:43 AM
#961
Super Moderator
Staff
Thread Starter
iTrader: (1)
Join Date: Aug 2008
Location: Anderson Missouri
Posts: 11,788
Likes: 0
Received 25 Likes
on
22 Posts
Hello Cyberhorn...I didnt know they came apart either,lol, I just happened to have a spare and was determined to see what was in there. Dont think cleaning really did it much good, but it made me feel better.
 12-11-2012, 08:07 AM
#962
Super Moderator
Staff
Thread Starter
iTrader: (1)
Join Date: Aug 2008
Location: Anderson Missouri
Posts: 11,788
Likes: 0
Received 25 Likes
on
22 Posts
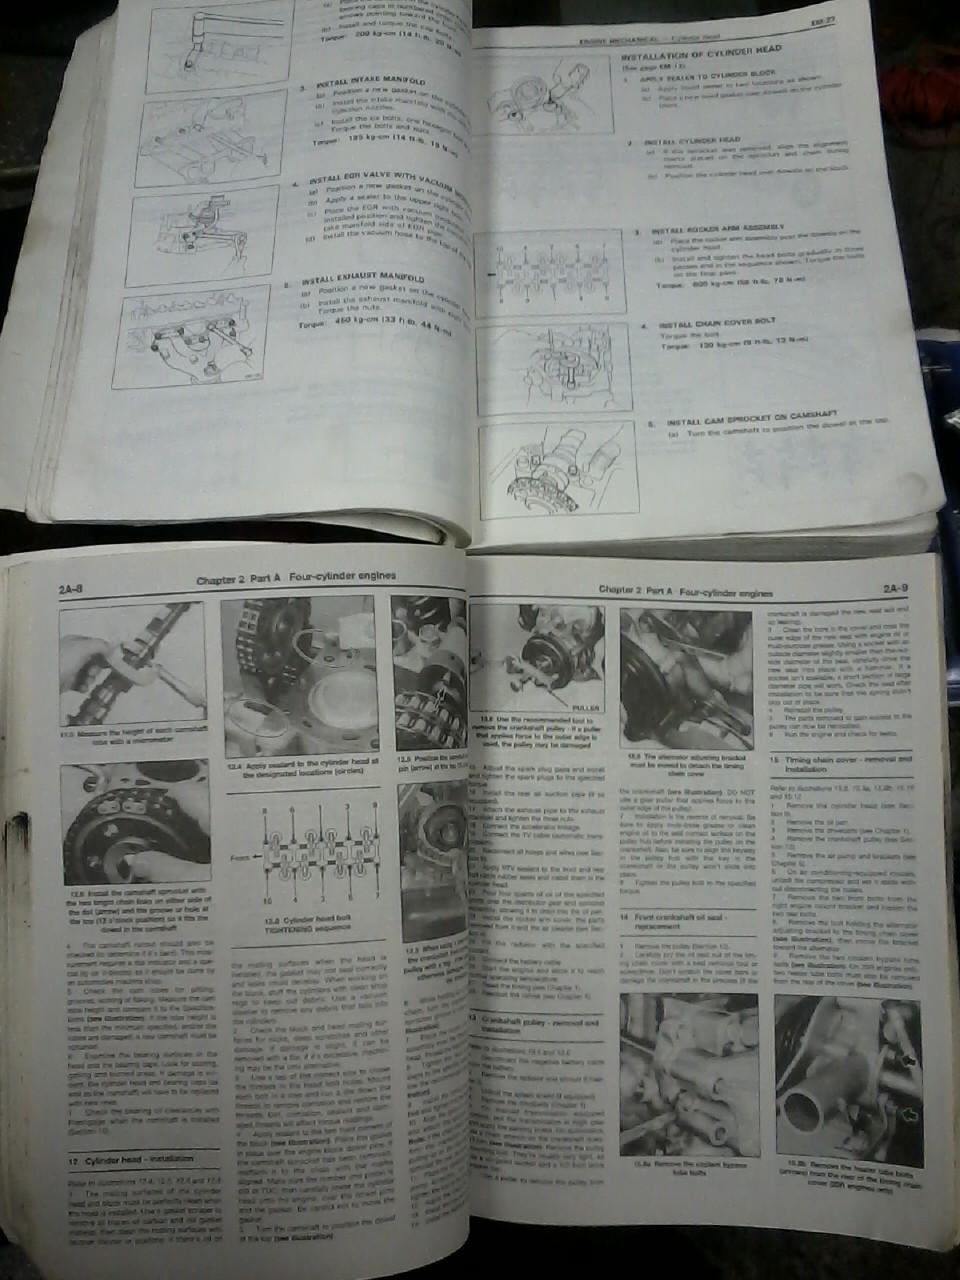
I used my FSM that I got awhile back and it has some good info and I used it to double check some things but in my personal opinion a Haynes is all that is needed and does a better job of explaining things and would suggest a Haynes over a FSM for a beginner.
I do like the FSM better for troubleshooting and exploded diagrams. Either way, the more information you got, the better off you will be.
Sorry Al Bore, I lost my catalytic converter and now my EGR, next is my Air Injection System. I just need to find some blockoff plates for my exhaust manifold. Should make changing the fuel filter and getting to the tranny bolts alot easier and remove some of the clutter out from under neath the hood.
EGR block off plates. Will need to figure out what line to plug to keep from getting the Check Engine Light.

I will go back and retorq all of my bolts just to be on the safe side. I torq mine in 15 pound stages. Each stage I do it twice before I move to the next setting. It says in the manuals to torq to 58 foot pounds, but it has been changed to 64 or 68 pounds as per Toyota. I wasnt sure so I went to 68. I will have to see what the correct setting is.
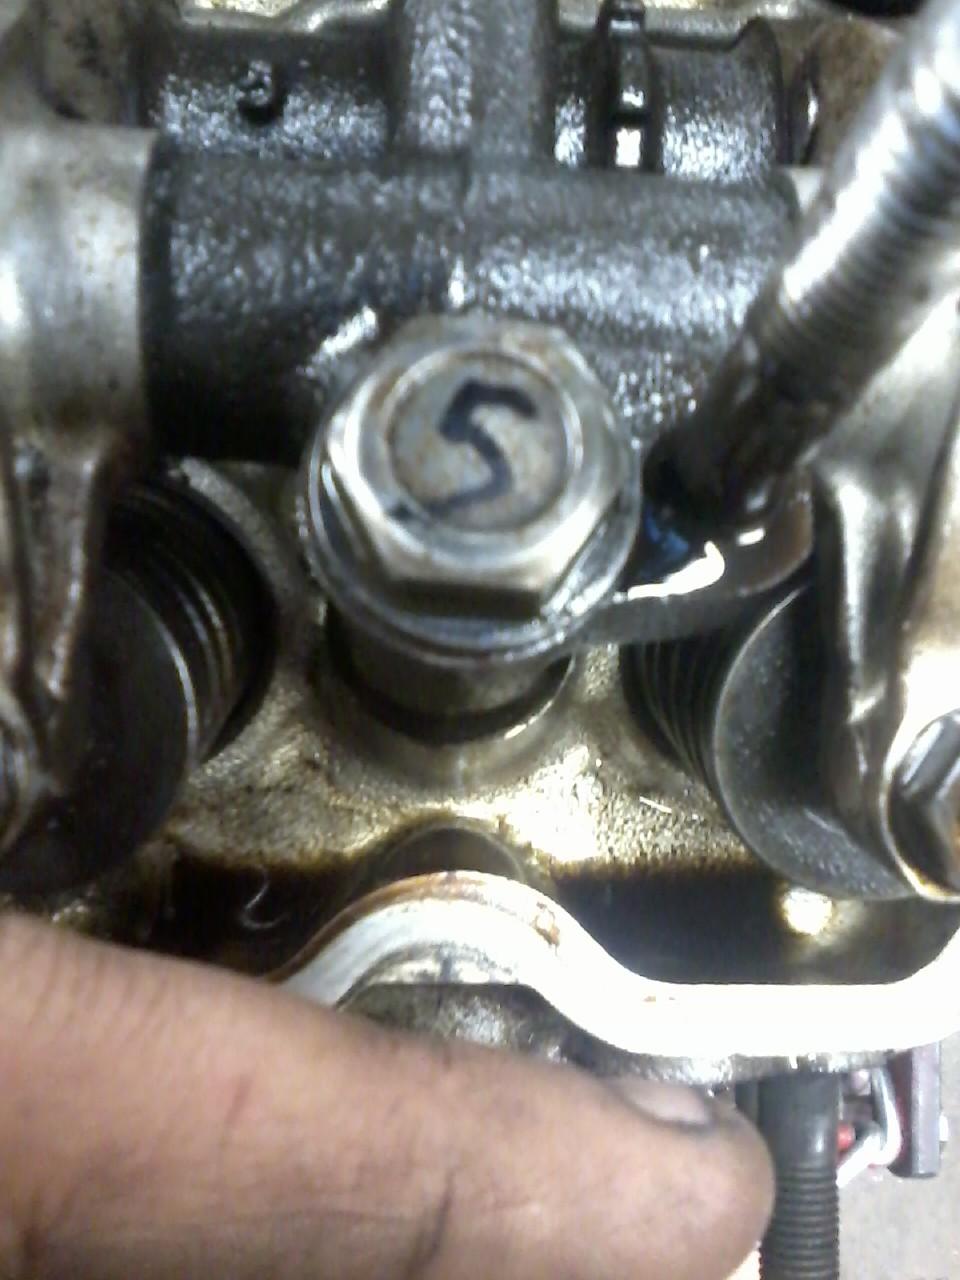
I number my head bolts as per the manual with a magic marker. I really think this little trick will save you some time and keep you from forgetting where you are at. It is easy to "get lost" when torqing in my opinion. Using the "Clicker" type torque wrench is 10 times nicer then the needle type style.
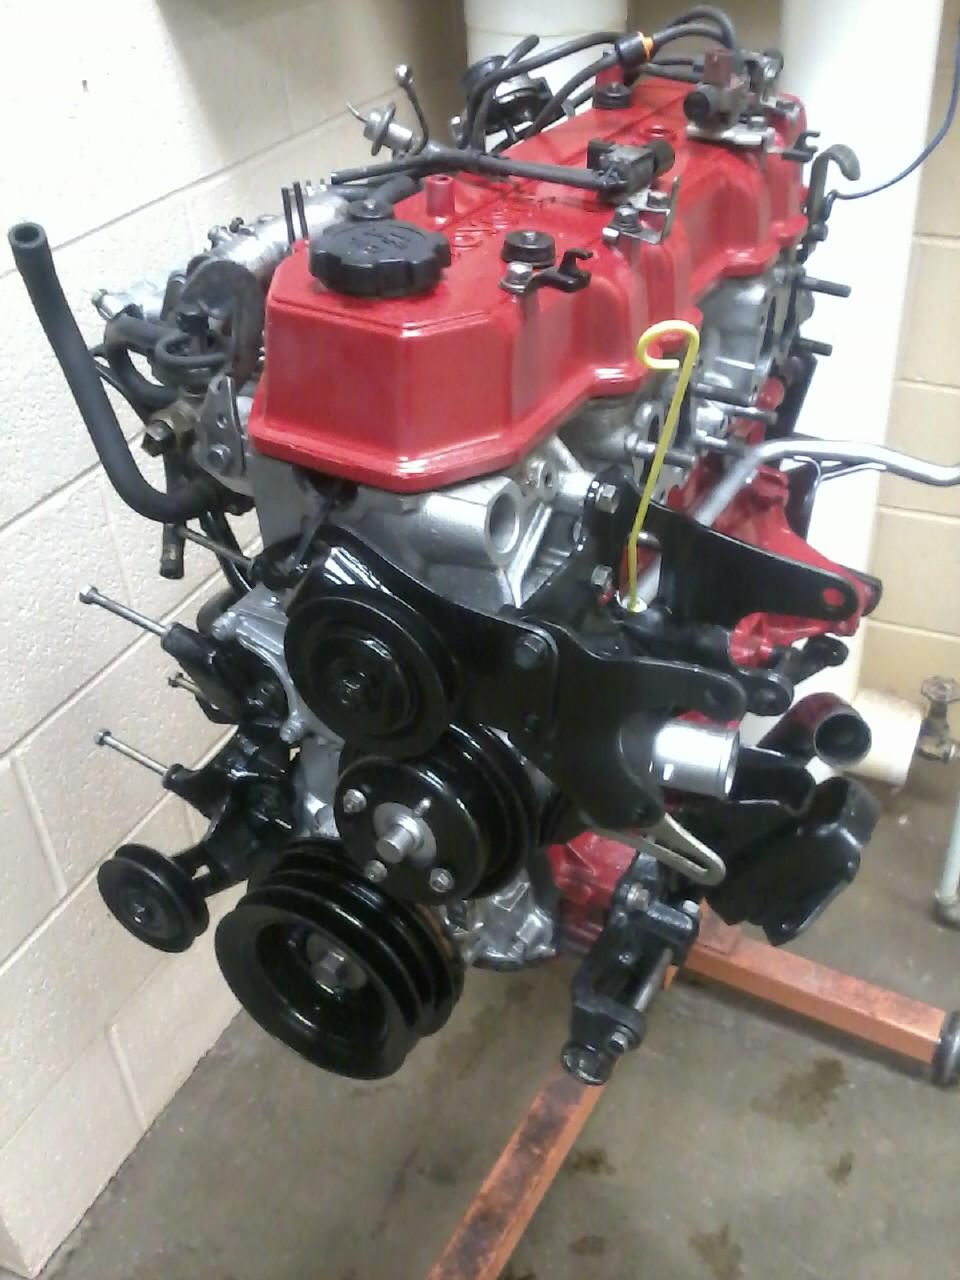
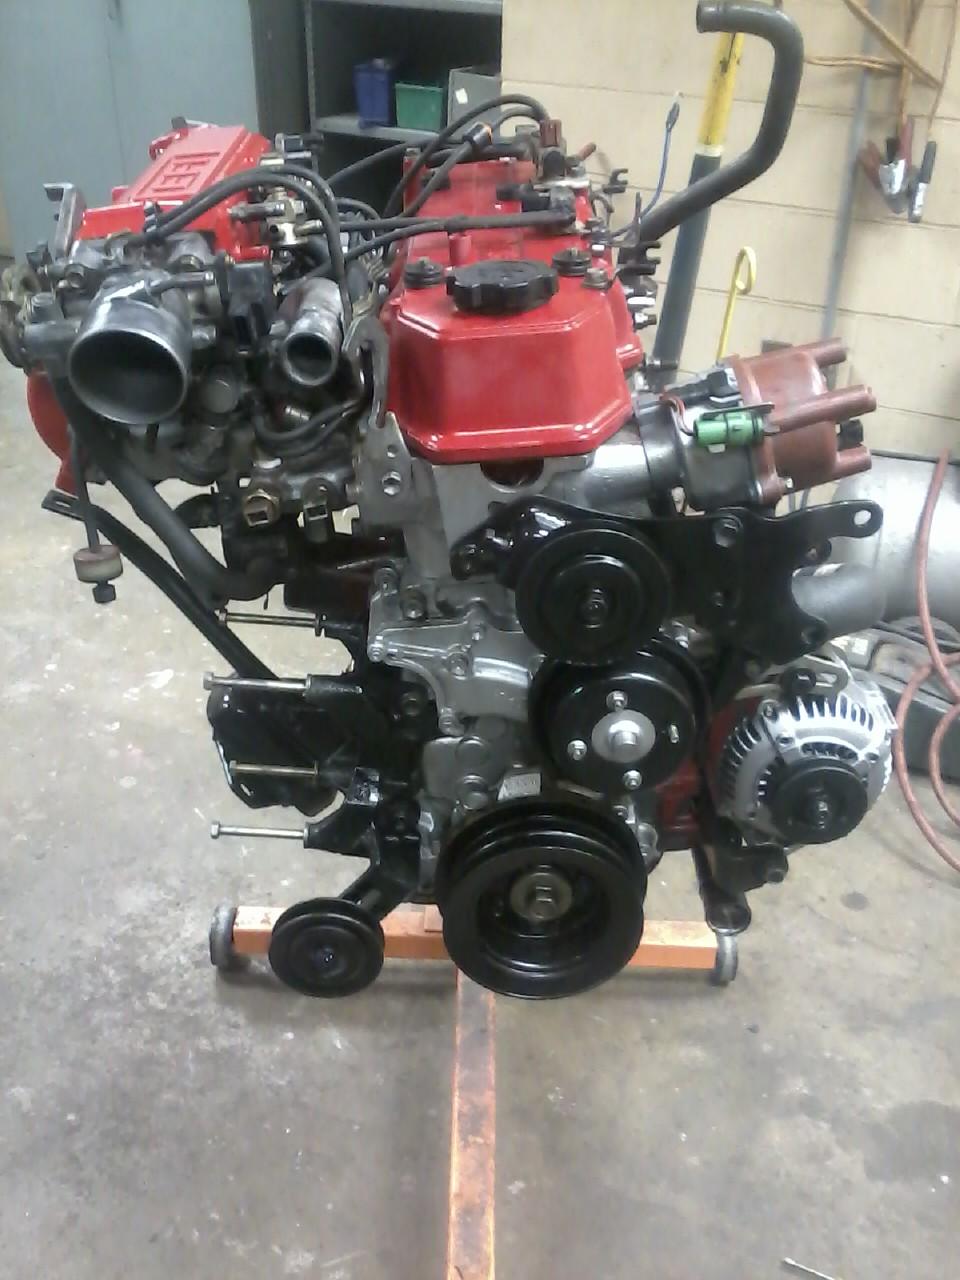
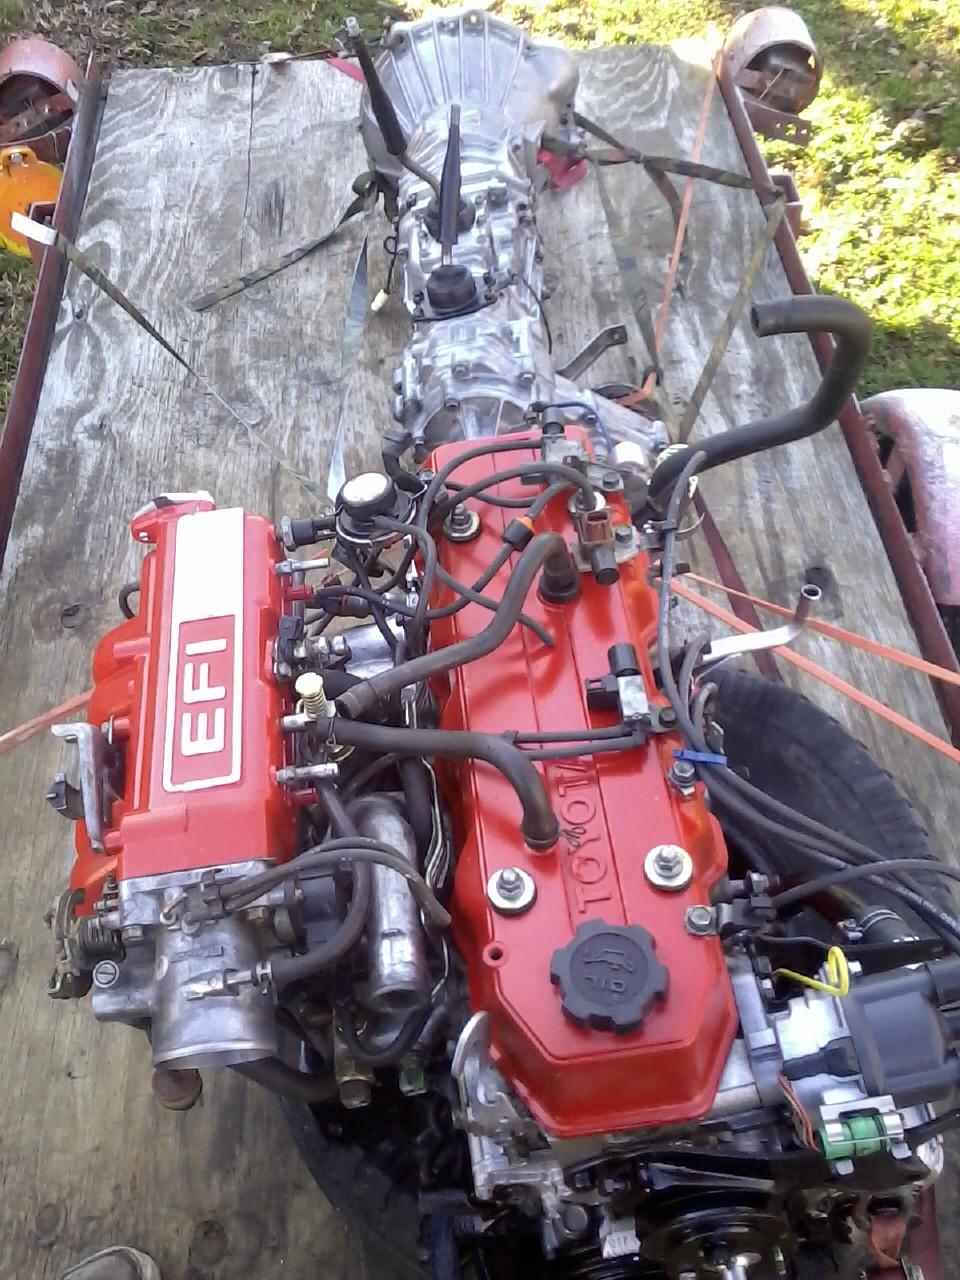
Here it is mostly back together. Still need to add a few things, but am waiting til I retorq and still need to adjust the valves. I will leave the Power Steering and AC off so if I have any leaks or other problems it will be easier to get to. The way that I remember what goes on first is "Necessities first, Luxuries last". Necessities is water pump and alternator. Luxuries is AC and Power Steering.
I do like the FSM better for troubleshooting and exploded diagrams. Either way, the more information you got, the better off you will be.
Sorry Al Bore, I lost my catalytic converter and now my EGR, next is my Air Injection System. I just need to find some blockoff plates for my exhaust manifold. Should make changing the fuel filter and getting to the tranny bolts alot easier and remove some of the clutter out from under neath the hood.
EGR block off plates. Will need to figure out what line to plug to keep from getting the Check Engine Light.
I will go back and retorq all of my bolts just to be on the safe side. I torq mine in 15 pound stages. Each stage I do it twice before I move to the next setting. It says in the manuals to torq to 58 foot pounds, but it has been changed to 64 or 68 pounds as per Toyota. I wasnt sure so I went to 68. I will have to see what the correct setting is.
I number my head bolts as per the manual with a magic marker. I really think this little trick will save you some time and keep you from forgetting where you are at. It is easy to "get lost" when torqing in my opinion. Using the "Clicker" type torque wrench is 10 times nicer then the needle type style.
Here it is mostly back together. Still need to add a few things, but am waiting til I retorq and still need to adjust the valves. I will leave the Power Steering and AC off so if I have any leaks or other problems it will be easier to get to. The way that I remember what goes on first is "Necessities first, Luxuries last". Necessities is water pump and alternator. Luxuries is AC and Power Steering.
Last edited by Terrys87; 02-27-2014 at 08:22 AM.
12-11-2012, 09:08 AM
#963
Don't forget the Steering Mounting Bracket Support Arm... :/ hehe... Maybe it's there, I just can't see it?
And the wrap around pipe on the pass. side? The one that goes up into the middle of the intake? PLEEEEEEEEEEEEASE don't reuse that O-ring? 3.50$ or so at the Dealer... Worth every penny as it CAN leak after cranking it back down... ASK ME HOW I KNOW? LOL. JK, I'm sure you remember, lol. Also, install it now because it is mounted BEHIND the Fuel Pump Bracket I mounted the pipe, then the fuel pump bracket with those two bolts... Then dropped the motor in.
Lube up the Injector o-rings?
IACV cleaning is fruitless, 99% of the time. It's not dirty, most often, as much as it's 'worn out' on the expansion arm that opens and closes things via temp.
WELL greased Front and rear mains?
Primed Oil Pump?
Lube the Dashpot/Verify Throttle Stop Screw setting and double check the TPS specs while it's on the bench?
IACV is 100$ or so at toyotapartszone.com .......... I know, not a logical nor probable 'do' right now.. BUT, just throwing it out there.. Our old buggies need to warm up first, dangit! lol.
Get that Alternator on there lol.
lol.
Put the pass. side rear of timing cover water pipe on now(you probably did) and run the hoses to their locations.... and run IACV vacuum hoses up as well.
Install the 'return', curly coolant hose and run it around the stat housing now.
Install the "Head Block Plate" to Chassis Ground onto back of head now.... then wire it up to the chassis when you-be done! lol.
I used and HIGHLY recommend using "Permatex High Temp Thread Sealant-- Oil and Coolant Resistant" product on ALL the Coolant/tapered thread pieces like the BVSV, CTS and CSI Time Switch.... The washers are supposed to do the job, I know.... But those Crush Washers are not meant to be reused(from what I remember reading in the FSM one time).... Sure, they don't OFTEN leak.. BUT, my CTS did in fact leak... Slapped that stuff in there... buttoned it up.. VOILA! lol. (Even used it on my Self Tapping Oil Plug on both the 'threading' portion and the smaller drain plug threads as well... All I know is, MY RIG DOESN'T LEAK A SINGLE DROP, ANYWHERE!
Lots more tips, ...if I can remember them! lol.
And the wrap around pipe on the pass. side? The one that goes up into the middle of the intake? PLEEEEEEEEEEEEASE don't reuse that O-ring? 3.50$ or so at the Dealer... Worth every penny as it CAN leak after cranking it back down... ASK ME HOW I KNOW? LOL. JK, I'm sure you remember, lol. Also, install it now because it is mounted BEHIND the Fuel Pump Bracket
I mounted the pipe, then the fuel pump bracket with those two bolts... Then dropped the motor in. Lube up the Injector o-rings?
IACV cleaning is fruitless, 99% of the time. It's not dirty, most often, as much as it's 'worn out' on the expansion arm that opens and closes things via temp.
WELL greased Front and rear mains?
Primed Oil Pump?
Lube the Dashpot/Verify Throttle Stop Screw setting and double check the TPS specs while it's on the bench?
IACV is 100$ or so at toyotapartszone.com .......... I know, not a logical nor probable 'do' right now.. BUT, just throwing it out there.. Our old buggies need to warm up first, dangit! lol.
Get that Alternator on there
lol. Put the pass. side rear of timing cover water pipe on now(you probably did) and run the hoses to their locations.... and run IACV vacuum hoses up as well.
Install the 'return', curly coolant hose and run it around the stat housing now.
Install the "Head Block Plate" to Chassis Ground onto back of head now.... then wire it up to the chassis when you-be done! lol.
I used and HIGHLY recommend using "Permatex High Temp Thread Sealant-- Oil and Coolant Resistant" product on ALL the Coolant/tapered thread pieces like the BVSV, CTS and CSI Time Switch.... The washers are supposed to do the job, I know.... But those Crush Washers are not meant to be reused(from what I remember reading in the FSM one time).... Sure, they don't OFTEN leak.. BUT, my CTS did in fact leak... Slapped that stuff in there... buttoned it up.. VOILA! lol. (Even used it on my Self Tapping Oil Plug on both the 'threading' portion and the smaller drain plug threads as well... All I know is, MY RIG DOESN'T LEAK A SINGLE DROP, ANYWHERE!
Lots more tips, ...if I can remember them! lol.
12-11-2012, 09:39 AM
#964
Registered User
Jeez! that thing is beayotaful!!!
Wanna make mine look all purdy like that??? Damn thats really nice! what a huge turn around Terry. Major props. Some day ill be able to do that to mine. Once i get 200 more miles on mine hahaha
Wanna make mine look all purdy like that??? Damn thats really nice! what a huge turn around Terry. Major props. Some day ill be able to do that to mine. Once i get 200 more miles on mine hahaha
12-12-2012, 07:12 AM
#965
Super Moderator
Staff
Thread Starter
iTrader: (1)
Join Date: Aug 2008
Location: Anderson Missouri
Posts: 11,788
Likes: 0
Received 25 Likes
on
22 Posts
Thanks Mark.. I got most of the steps below but you did find a few that I didnt know of. If you have some more tips, let me know. I want this motor leak proof in air, oil and water.
Hello Richard... It is for looks, but more importantly to catch if I have any leaks. It also makes sure it is good and clean before going back together. It is some work involved. Thanks for the compliment, I have a LOT of hours involved up to this point, it would be sometime befroe you got it back.hehe
Don't forget the Steering Mounting Bracket Support Arm... :/ hehe... Maybe it's there, I just can't see it?
Still need to get to that.
And the wrap around pipe on the pass. side? The one that goes up into the middle of the intake? PLEEEEEEEEEEEEASE don't reuse that O-ring? 3.50$ or so at the Dealer... Worth every penny as it CAN leak after cranking it back down... ASK ME HOW I KNOW? LOL. JK, I'm sure you remember, lol. Also, install it now because it is mounted BEHIND the Fuel Pump Bracket I mounted the pipe, then the fuel pump bracket with those two bolts... Then dropped the motor in.
I learned that one hard way as well and it is a Royal PITA to get to when back in the truck.
Lube up the Injector o-rings? I had a major leak at an injector one time. Learned that one the hard way as well. Toyota recommends using gasoline, but anything will work, oil, or anything slippery.
IACV cleaning is fruitless, 99% of the time. It's not dirty, most often, as much as it's 'worn out' on the expansion arm that opens and closes things via temp.
I am going to see if I got a spare to open up and see what it looks like. There is a thread on here somewhere about testing and fixing I think, if I could just find it.
WELL greased Front and rear mains?
WELL GREASED.. That is one thing that started this whole fiasco, I didnt fix the bottom end the first time I got the truck and now I am going thru it good this time. I dont want to have to work on it for another 20 years if possible.
Primed Oil Pump?
How do you prime the oil pump? This is a new one for me. I know how on domestic models.
Lube the Dashpot/Verify Throttle Stop Screw setting and double check the TPS specs while it's on the bench?
Will be checking the TPS, not sure how to lube dashpot. That is just the little air canister at the end isnt it?
Will check Throttle Stop screw. I have experienced that problem before.
IACV is 100$ or so at toyotapartszone.com .......... I know, not a logical nor probable 'do' right now.. BUT, just throwing it out there.. Our old buggies need to warm up first, dangit! lol.
If it needs one, it will get put on the list to be replaced.
Get that Alternator on there lol.
Just picked up some new brushes today. Changing the alternator in the truck is a pain and will have it done before it goes back in.
Put the pass. side rear of timing cover water pipe on now(you probably did) and run the hoses to their locations.... and run IACV vacuum hoses up as well.
Got it,
Install the 'return', curly coolant hose and run it around the stat housing now.
Ordering a hose so it will have to wait another day or so.
Install the "Head Block Plate" to Chassis Ground onto back of head now.... then wire it up to the chassis when you-be done! lol.
Got it as well.
I used and HIGHLY recommend using "Permatex High Temp Thread Sealant-- Oil and Coolant Resistant" product on ALL the Coolant/tapered thread pieces like the BVSV, CTS and CSI Time Switch.... The washers are supposed to do the job, I know.... But those Crush Washers are not meant to be reused(from what I remember reading in the FSM one time).... Sure, they don't OFTEN leak.. BUT, my CTS did in fact leak... Slapped that stuff in there... buttoned it up.. VOILA! lol. (Even used it on my Self Tapping Oil Plug on both the 'threading' portion and the smaller drain plug threads as well... All I know is, MY RIG DOESN'T LEAK A SINGLE DROP, ANYWHERE!
Done most of that as well. I want NO leaks.
Lots more tips, ...if I can remember them! lol.
Still need to get to that.
And the wrap around pipe on the pass. side? The one that goes up into the middle of the intake? PLEEEEEEEEEEEEASE don't reuse that O-ring? 3.50$ or so at the Dealer... Worth every penny as it CAN leak after cranking it back down... ASK ME HOW I KNOW? LOL. JK, I'm sure you remember, lol. Also, install it now because it is mounted BEHIND the Fuel Pump Bracket
I mounted the pipe, then the fuel pump bracket with those two bolts... Then dropped the motor in. I learned that one hard way as well and it is a Royal PITA to get to when back in the truck.
Lube up the Injector o-rings? I had a major leak at an injector one time. Learned that one the hard way as well. Toyota recommends using gasoline, but anything will work, oil, or anything slippery.
IACV cleaning is fruitless, 99% of the time. It's not dirty, most often, as much as it's 'worn out' on the expansion arm that opens and closes things via temp.
I am going to see if I got a spare to open up and see what it looks like. There is a thread on here somewhere about testing and fixing I think, if I could just find it.
WELL greased Front and rear mains?
WELL GREASED.. That is one thing that started this whole fiasco, I didnt fix the bottom end the first time I got the truck and now I am going thru it good this time. I dont want to have to work on it for another 20 years if possible.
Primed Oil Pump?
How do you prime the oil pump? This is a new one for me. I know how on domestic models.
Lube the Dashpot/Verify Throttle Stop Screw setting and double check the TPS specs while it's on the bench?
Will be checking the TPS, not sure how to lube dashpot. That is just the little air canister at the end isnt it?
Will check Throttle Stop screw. I have experienced that problem before.
IACV is 100$ or so at toyotapartszone.com .......... I know, not a logical nor probable 'do' right now.. BUT, just throwing it out there.. Our old buggies need to warm up first, dangit! lol.
If it needs one, it will get put on the list to be replaced.
Get that Alternator on there
lol. Just picked up some new brushes today. Changing the alternator in the truck is a pain and will have it done before it goes back in.
Put the pass. side rear of timing cover water pipe on now(you probably did) and run the hoses to their locations.... and run IACV vacuum hoses up as well.
Got it,
Install the 'return', curly coolant hose and run it around the stat housing now.
Ordering a hose so it will have to wait another day or so.
Install the "Head Block Plate" to Chassis Ground onto back of head now.... then wire it up to the chassis when you-be done! lol.
Got it as well.
I used and HIGHLY recommend using "Permatex High Temp Thread Sealant-- Oil and Coolant Resistant" product on ALL the Coolant/tapered thread pieces like the BVSV, CTS and CSI Time Switch.... The washers are supposed to do the job, I know.... But those Crush Washers are not meant to be reused(from what I remember reading in the FSM one time).... Sure, they don't OFTEN leak.. BUT, my CTS did in fact leak... Slapped that stuff in there... buttoned it up.. VOILA! lol. (Even used it on my Self Tapping Oil Plug on both the 'threading' portion and the smaller drain plug threads as well... All I know is, MY RIG DOESN'T LEAK A SINGLE DROP, ANYWHERE!
Done most of that as well. I want NO leaks.
Lots more tips, ...if I can remember them! lol.
12-12-2012, 07:29 AM
#966
Super Moderator
Staff
Thread Starter
iTrader: (1)
Join Date: Aug 2008
Location: Anderson Missouri
Posts: 11,788
Likes: 0
Received 25 Likes
on
22 Posts
I retorqed evrything, adjusted the valves, more cleaning and still alot more that I want to do.
Like Mark said put the water line on THEN the fuel filter. This is a rookie mistake and I will admit that I have done it in the past as well. You do it one time and have to redo alot of things to do it right and especially after it is in the truck, you wont do it again.
Pipe then Fuel Filter assembly.
I have seen these filters put on backwards. The arrow is fuel flow, the fuel comes from the tank to the front side of the filter and from the back side of the filter to the fuel rail. I have seen different styles of filters, but pay attention to the fuel flow and not necessarily by the lip on the fuel filter.
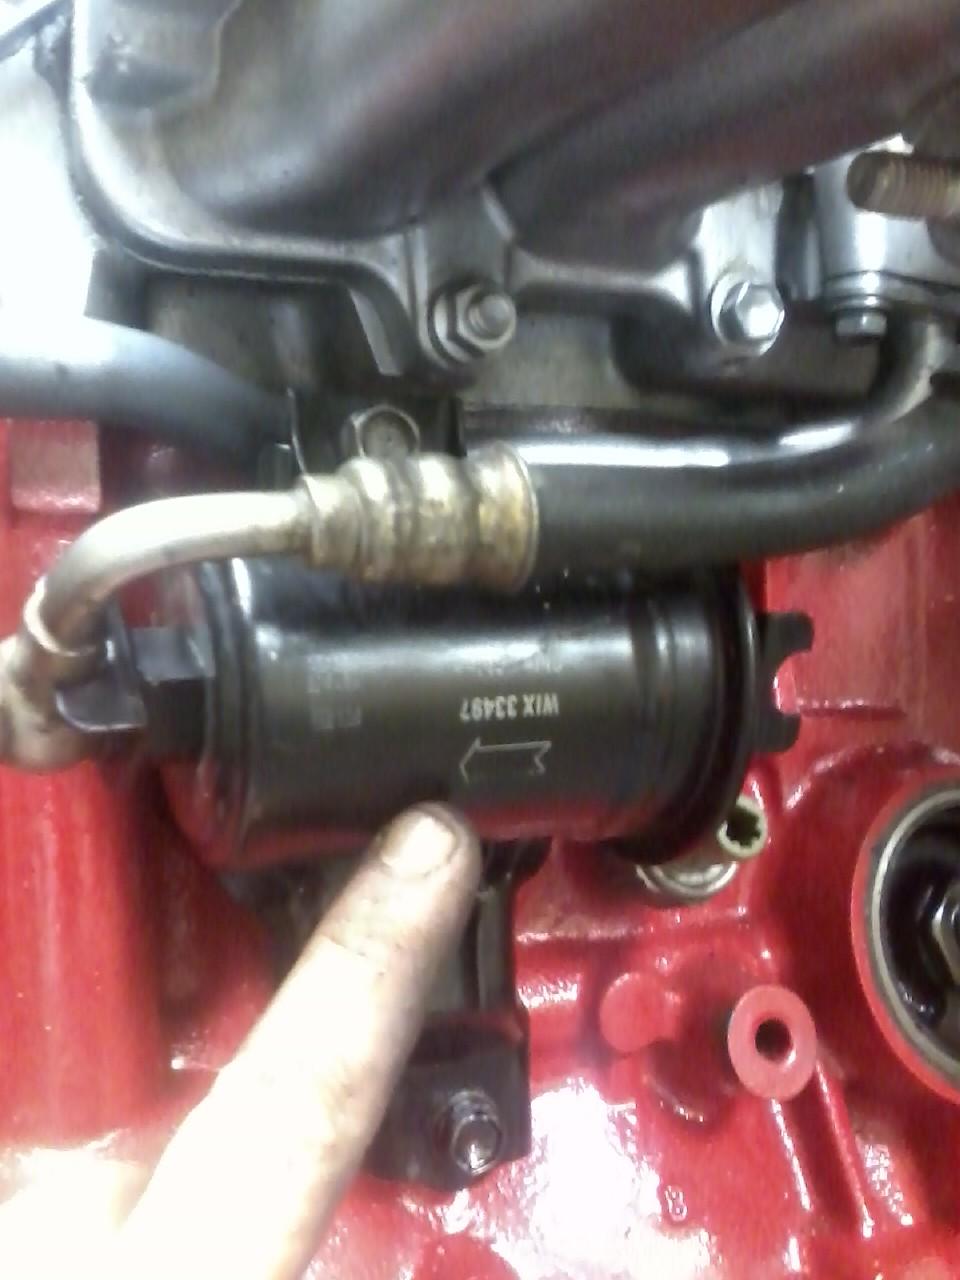
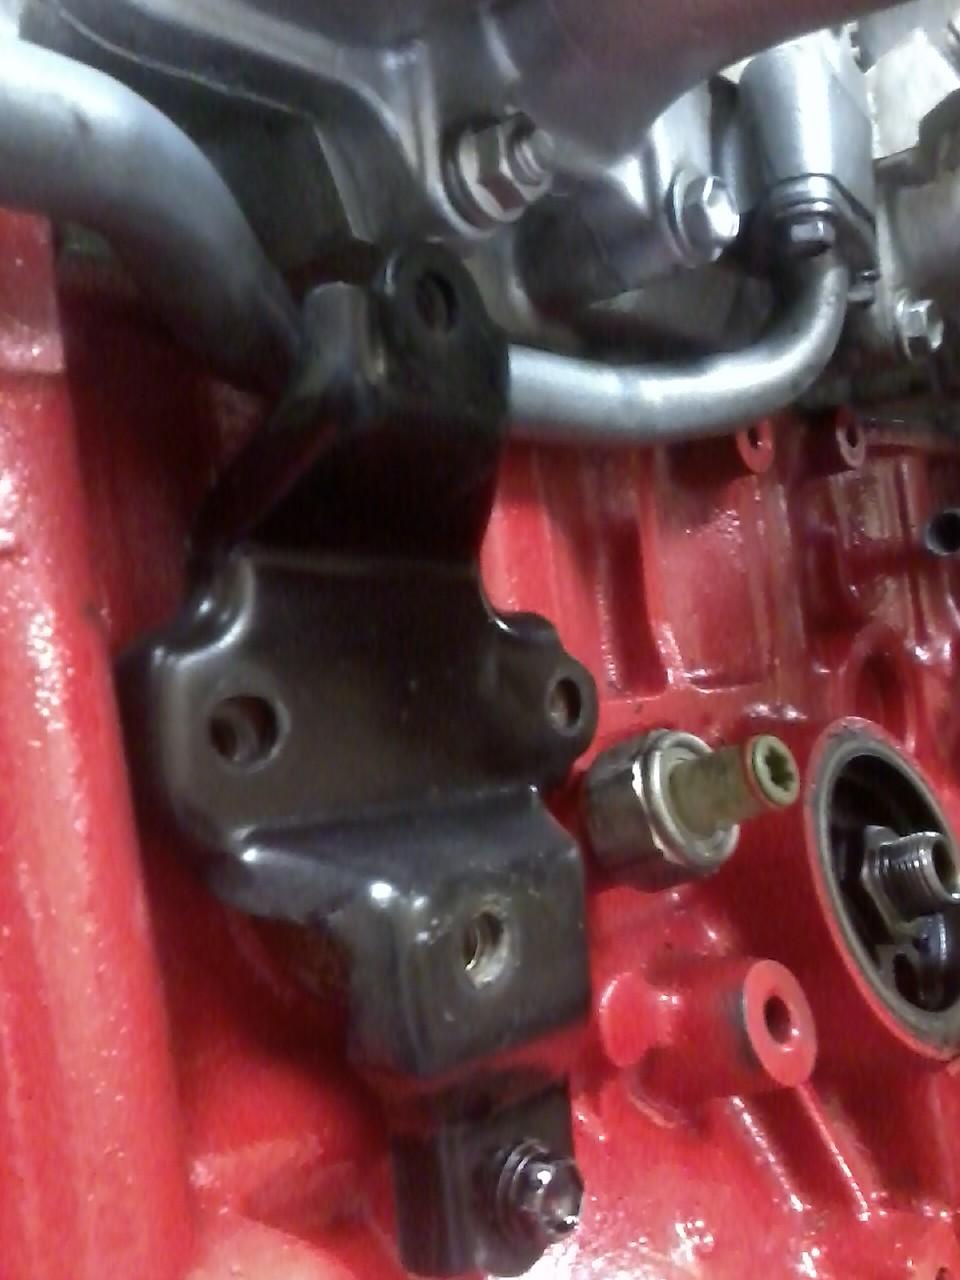
This pipe is such a pain and likes to leak that I even put a little silicone just to try to get a good seal. A big pain to get to when in the truck. Rubber seal is in its cutout in the manifold, just not easily seen.

You are supposed to wrap the Cold Start Injector Timing switch, I did all of mine.

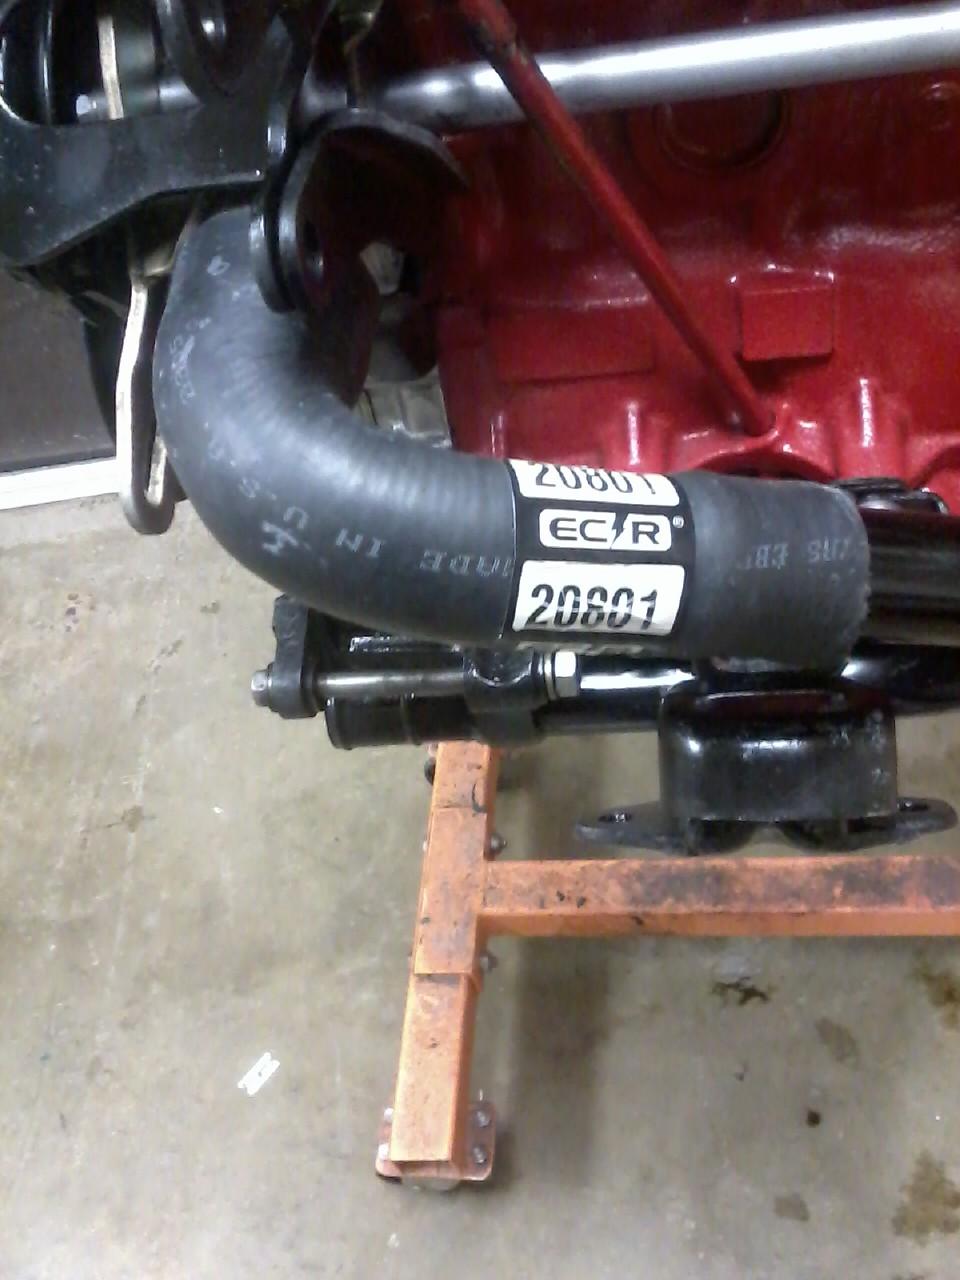
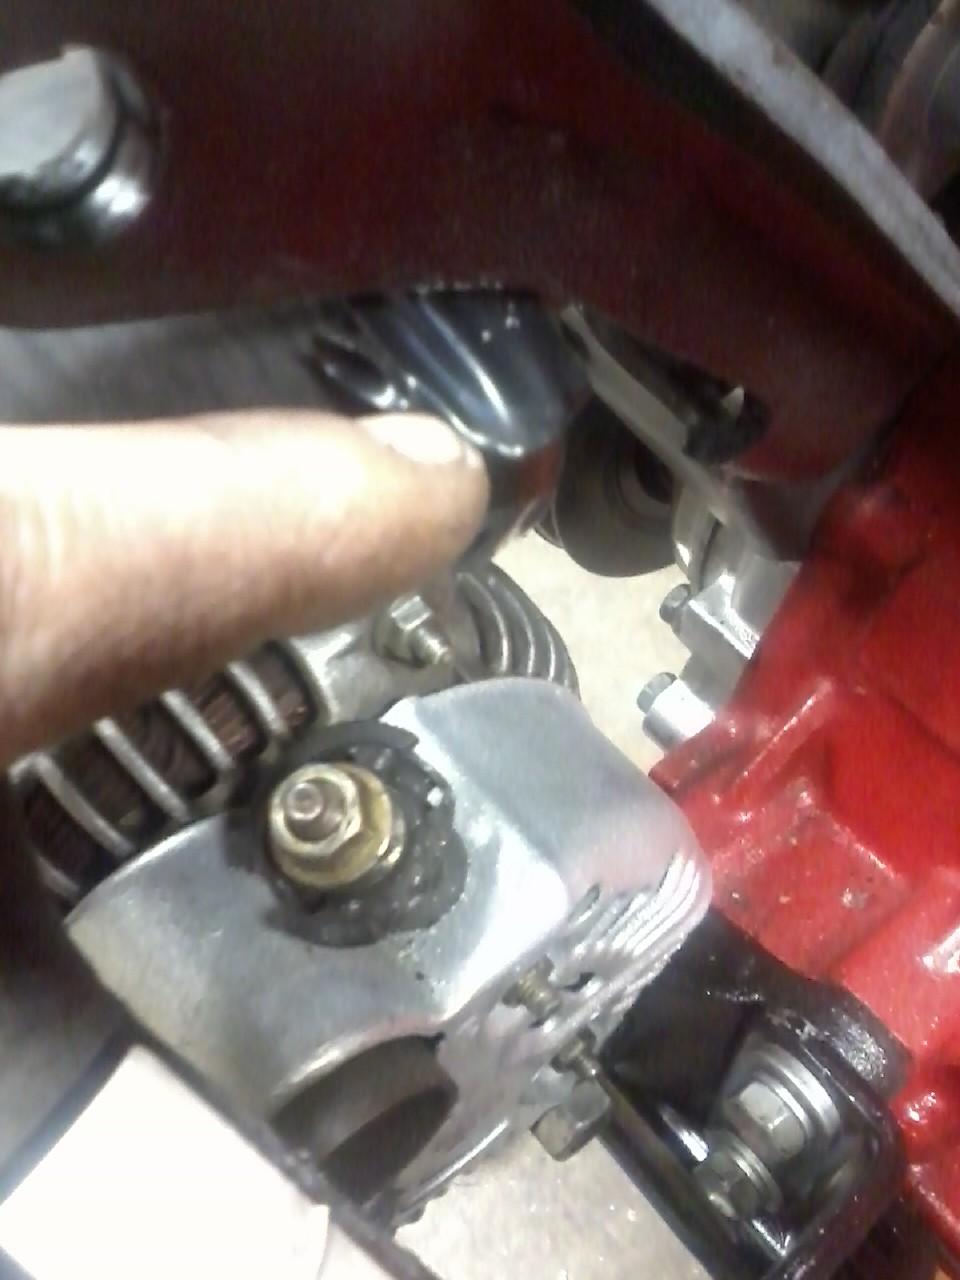
Parts store will tell you this is a dealer item or they dont stock it. This hose likes to leak coming off of the water pump when it pops a hole. Gates PN#20801, just cut off where my finger is at. Alot cheaper then the dealer.
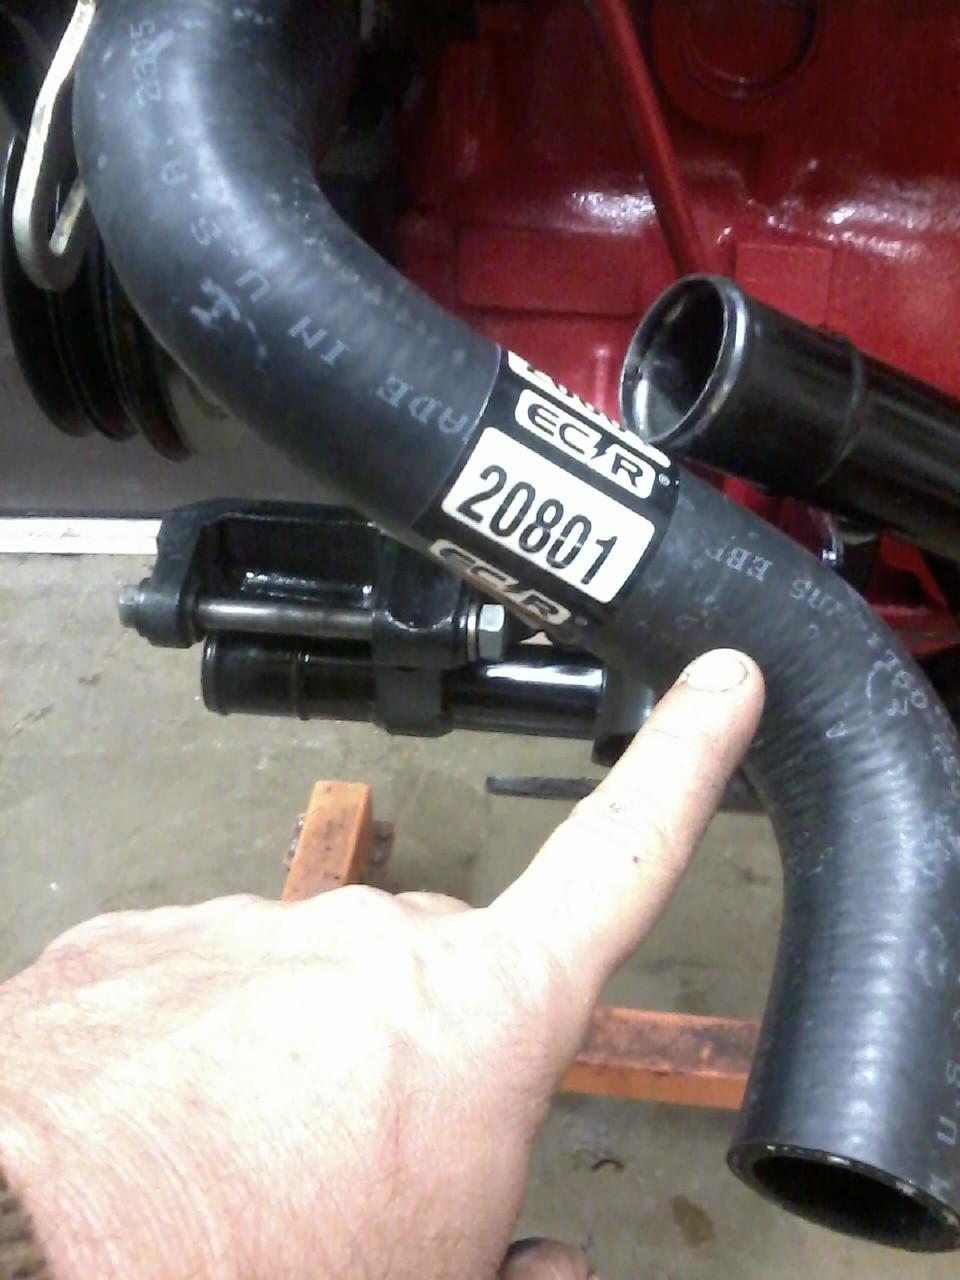
Here it is cut to length and on. I need to get some new hose clamps to finish the job.
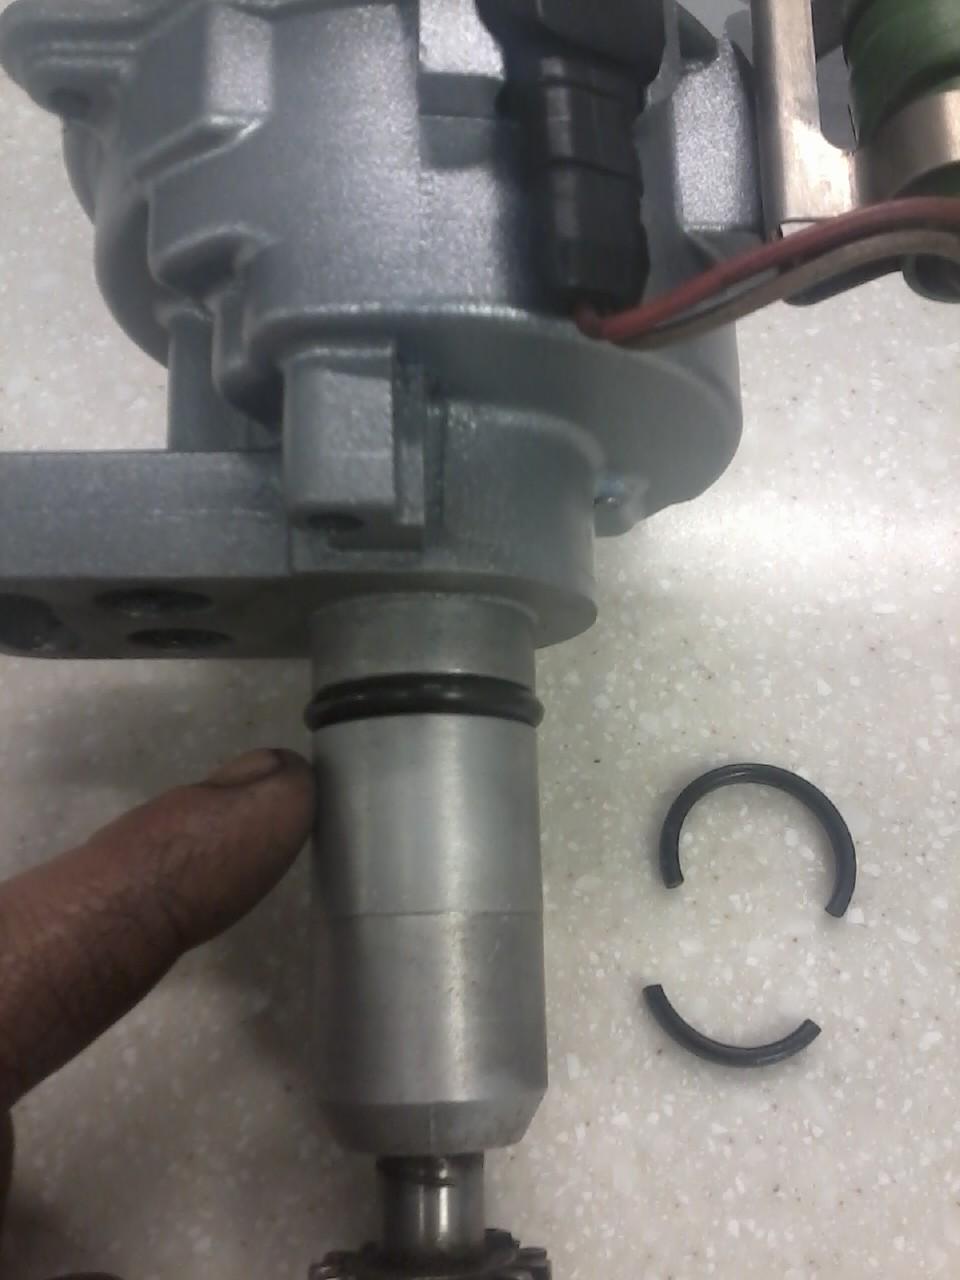
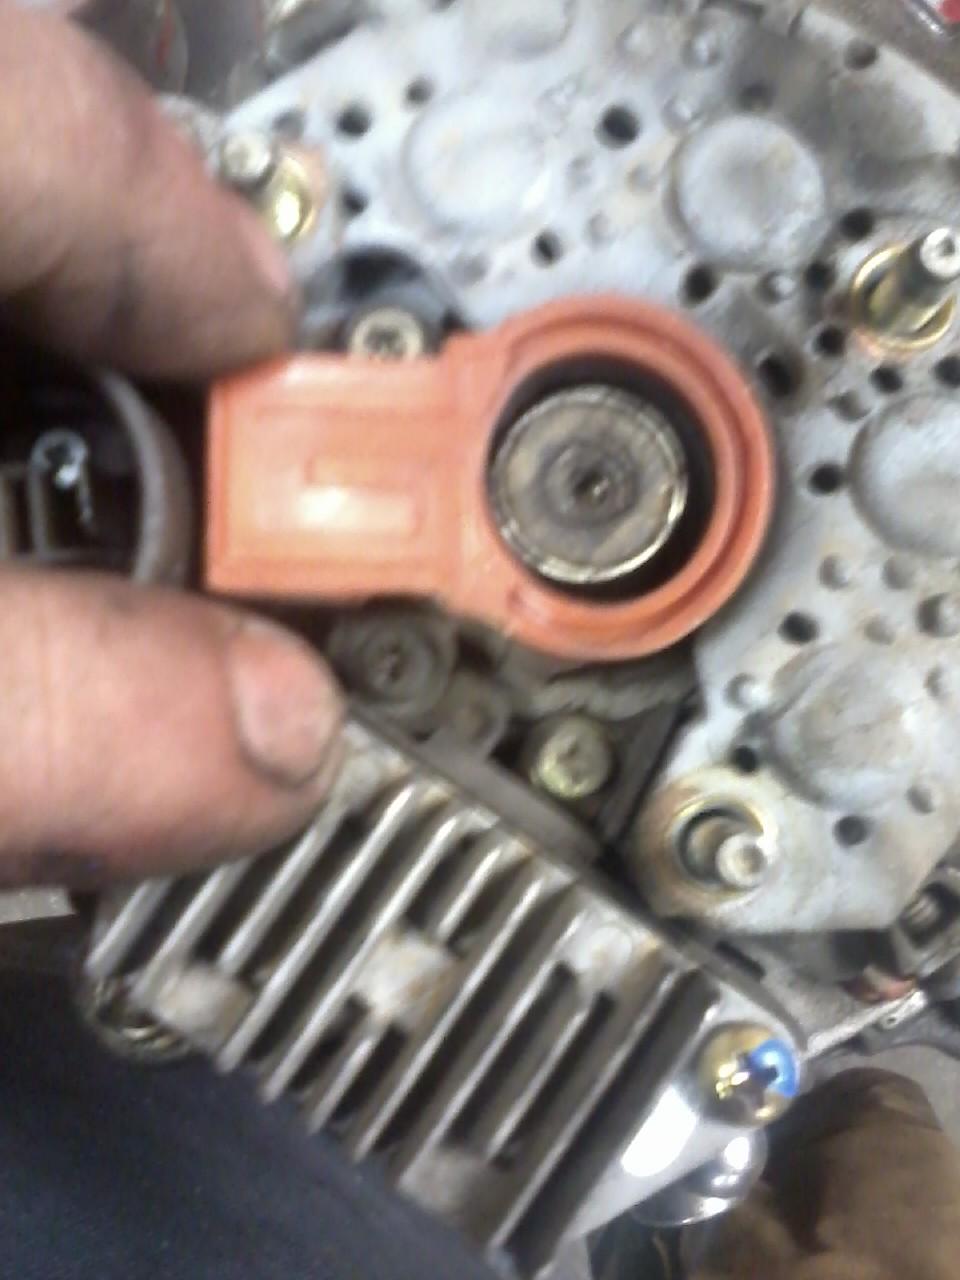
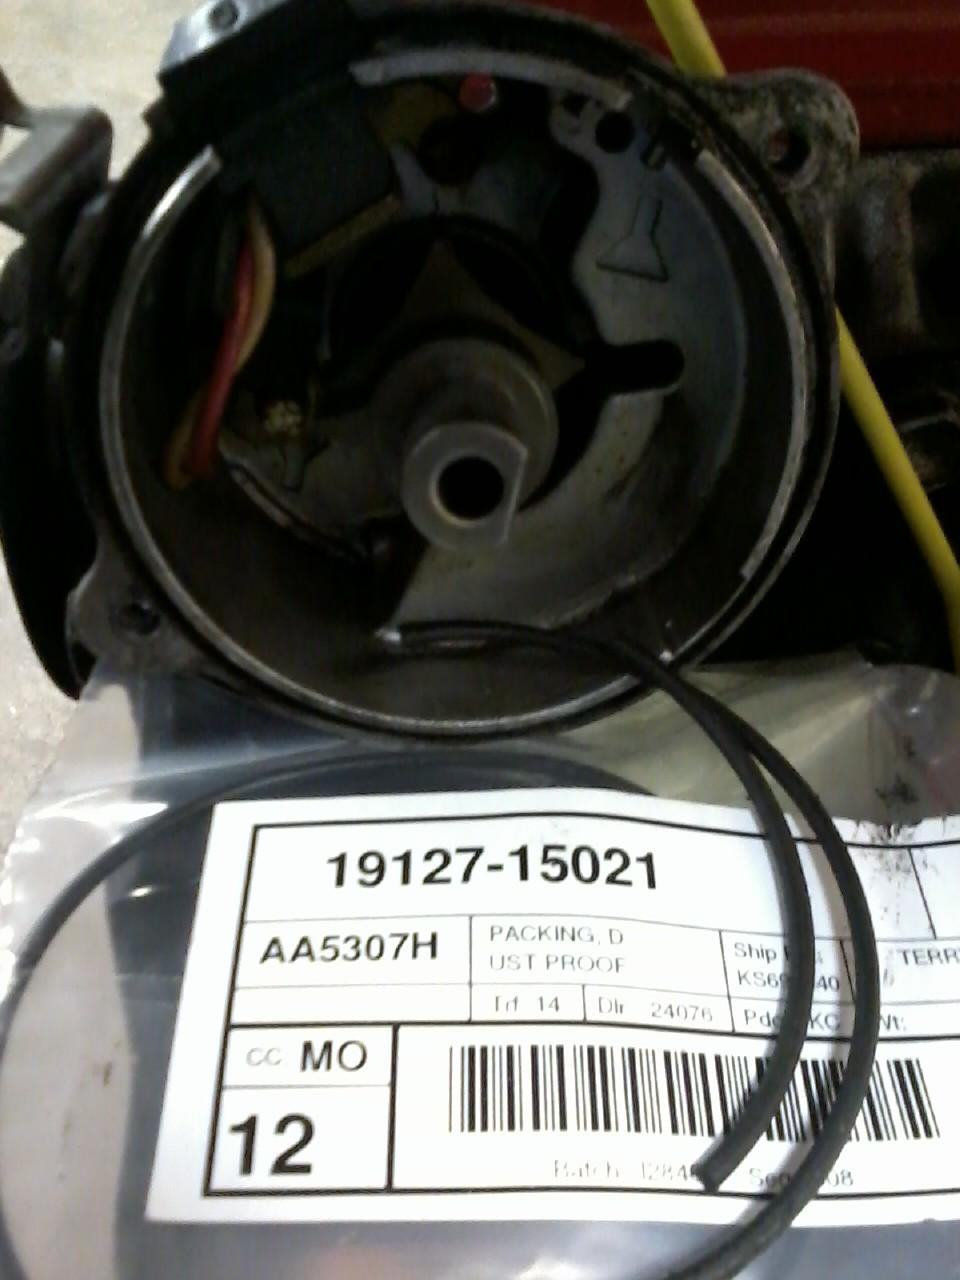
Seal is dry and hardened. Reason for leak. I have a seal for the dizzy cap as well on order for Toyota.
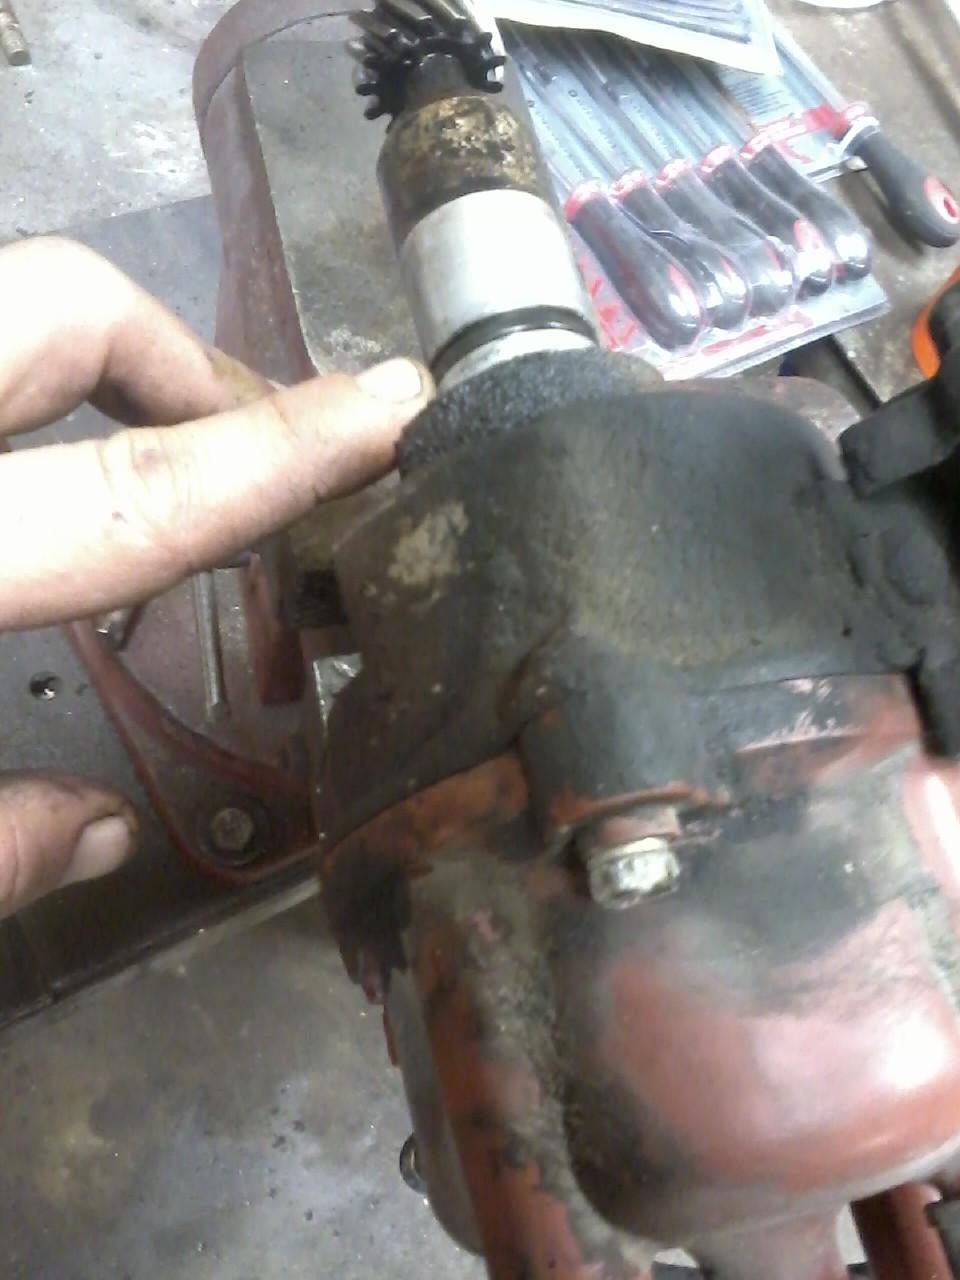
Replaced with a seal from Orielly for .96 cents. The old one will most likely break when you go to remove it. One less oil leak now.
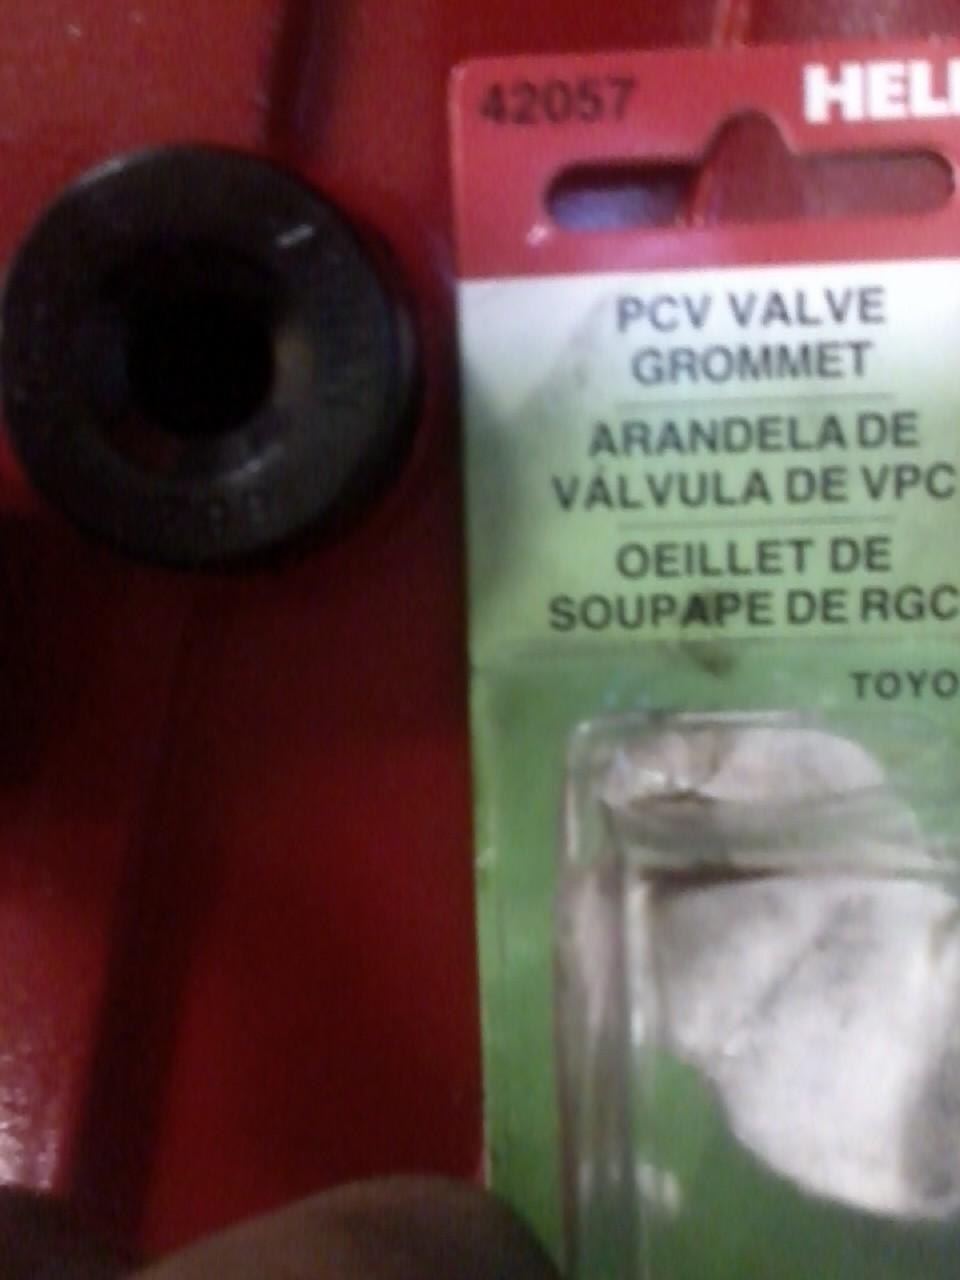
When doing regular maintainace, change the PVC and I change the PVC Grommet as well as it will harden up and wont let the PVC come out or break and fall into the head. I change both out at the same time.
Started cleaning my Alternator. I did get some new brushes for $6 and will be putting them in soon. It looks alot better now and will post some pics when I do the brushes.

Like Mark said put the water line on THEN the fuel filter. This is a rookie mistake and I will admit that I have done it in the past as well. You do it one time and have to redo alot of things to do it right and especially after it is in the truck, you wont do it again.
Pipe then Fuel Filter assembly.
I have seen these filters put on backwards. The arrow is fuel flow, the fuel comes from the tank to the front side of the filter and from the back side of the filter to the fuel rail. I have seen different styles of filters, but pay attention to the fuel flow and not necessarily by the lip on the fuel filter.
This pipe is such a pain and likes to leak that I even put a little silicone just to try to get a good seal. A big pain to get to when in the truck. Rubber seal is in its cutout in the manifold, just not easily seen.
You are supposed to wrap the Cold Start Injector Timing switch, I did all of mine.
Parts store will tell you this is a dealer item or they dont stock it. This hose likes to leak coming off of the water pump when it pops a hole. Gates PN#20801, just cut off where my finger is at. Alot cheaper then the dealer.
Here it is cut to length and on. I need to get some new hose clamps to finish the job.
Seal is dry and hardened. Reason for leak. I have a seal for the dizzy cap as well on order for Toyota.
Replaced with a seal from Orielly for .96 cents. The old one will most likely break when you go to remove it. One less oil leak now.
When doing regular maintainace, change the PVC and I change the PVC Grommet as well as it will harden up and wont let the PVC come out or break and fall into the head. I change both out at the same time.
Started cleaning my Alternator. I did get some new brushes for $6 and will be putting them in soon. It looks alot better now and will post some pics when I do the brushes.
Last edited by Terrys87; 01-05-2014 at 10:25 PM.
12-12-2012, 11:36 AM
#968
12-12-2012, 03:46 PM
#969
Registered User
You know by now where I stand on your work, just get it back in and running already jk. Looking great man I know its been a lot of work for ya but when its all back together and i can talk misty out of it I gonna have a sweet drive train again jk. Hope the weather is holding for you a bit.
12-12-2012, 04:02 PM
#970
Registered User
Looks really nice man. Now Im shamed into going and cleaning some more stuff up. My alternator is dirty, and I should really paint the lower intake up.
12-12-2012, 08:26 PM
#972
WOWIE! lol....
I just RIGHT NOW realized, after reading everything.. You were answering me in the quote of my posting. hahaha....
Far as the priming of the oil pump.... Some use Vaseline, others different things... There's actually a video on this, I THINK, by the Putneys.... (22reperformance.com).... Maybe LCE as well.... But in the spirit of PREJUDICE!!! HEHEHE....>>>
https://www.yotatech.com/forums/f116...priming-78784/
Personally.... I felt much more comfy, especially after all I'd been through with 'THAT' motor, lol...... installing a new oil pump when I did first crank on the 'rebuilt rebuild', haha... I mean.... VERY cheap from engnbldr.com... NOT TOO bad on price for OEM from 22reperformance.com and not TERRIBLY PAINFUL from www.toyotapartszone.com , .... IN THE SCHEME of things, over all, regarding longevity, ya know?
The Dashpot? Yes... it's the diaphragm thingymadoer that has a small vacuum hose and filter on the end of it with a one way gate(IIRC ) ... lubing the dashpot is simple... if your accordion seal around the shaft is busted up....LIKE MOST OF OURS, hehe... then just shoot some 'SILICONE LUBE' in there and nothing else... Lubing it will do NOTHING for it if it's seal inside is perforated, etc... In that case, it will not really slow down the slamming shut of the throttle body gate at all... HOWEVER, if it's fine, like most of ours are... It will keep it from freezing and sticking at 1000rpm and such on occasions?
Dude, ... you know what? I can't be sure... but I will take pics... I THINK my Fuel Filter arrow is pointing toward the radiator... I mean, I can't be sure... and I KNOW it's meant to go with fuel flow... BUT, ... I MIGHT have screwed that up. DANG would that suck! lol. If so... is it possible that this might be my 'wants to die on warm restarts issue'???? C'MONNNNNNNN, JUST SAY YES! hahahaha. JK...
ONLY have around 12K on this fuel filter... but I'd say that's enough of a time, IF IT'S BEEN ON BACKWARD THE ENTIRE TIME, to swap in a new one?
I just RIGHT NOW realized, after reading everything.. You were answering me in the quote of my posting. hahaha....
Far as the priming of the oil pump.... Some use Vaseline, others different things... There's actually a video on this, I THINK, by the Putneys.... (22reperformance.com).... Maybe LCE as well.... But in the spirit of PREJUDICE!!! HEHEHE....>>>
https://www.yotatech.com/forums/f116...priming-78784/
Personally.... I felt much more comfy, especially after all I'd been through with 'THAT' motor, lol...... installing a new oil pump when I did first crank on the 'rebuilt rebuild', haha... I mean.... VERY cheap from engnbldr.com... NOT TOO bad on price for OEM from 22reperformance.com and not TERRIBLY PAINFUL from www.toyotapartszone.com , .... IN THE SCHEME of things, over all, regarding longevity, ya know?
The Dashpot? Yes... it's the diaphragm thingymadoer that has a small vacuum hose and filter on the end of it with a one way gate(IIRC
) ... lubing the dashpot is simple... if your accordion seal around the shaft is busted up....LIKE MOST OF OURS, hehe... then just shoot some 'SILICONE LUBE' in there and nothing else... Lubing it will do NOTHING for it if it's seal inside is perforated, etc... In that case, it will not really slow down the slamming shut of the throttle body gate at all... HOWEVER, if it's fine, like most of ours are... It will keep it from freezing and sticking at 1000rpm and such on occasions? Dude, ... you know what? I can't be sure... but I will take pics... I THINK my Fuel Filter arrow is pointing toward the radiator... I mean, I can't be sure... and I KNOW it's meant to go with fuel flow... BUT, ... I MIGHT have screwed that up. DANG would that suck! lol. If so... is it possible that this might be my 'wants to die on warm restarts issue'???? C'MONNNNNNNN, JUST SAY YES! hahahaha. JK...
ONLY have around 12K on this fuel filter... but I'd say that's enough of a time, IF IT'S BEEN ON BACKWARD THE ENTIRE TIME, to swap in a new one?
12-13-2012, 07:29 AM
#973
Super Moderator
Staff
Thread Starter
iTrader: (1)
Join Date: Aug 2008
Location: Anderson Missouri
Posts: 11,788
Likes: 0
Received 25 Likes
on
22 Posts
It was a junk truck when I got it and I can say it is probably one if not the most favorite that I have ever owned. It is just fun to drive and comfy. The transfer case I knew about and just kept putting it off so now I am getting to go thru it like I should of have when I first did it but the funds were really tight then so I dont have any regrets. Did the best that I could with what I had.
Got it to run good. probably a little to good, the wifey liked so well she stole from me,haha. That is ok, I am working on an 86 Runner as well now. I learned alot of this one that has made it an easier build in some ways.
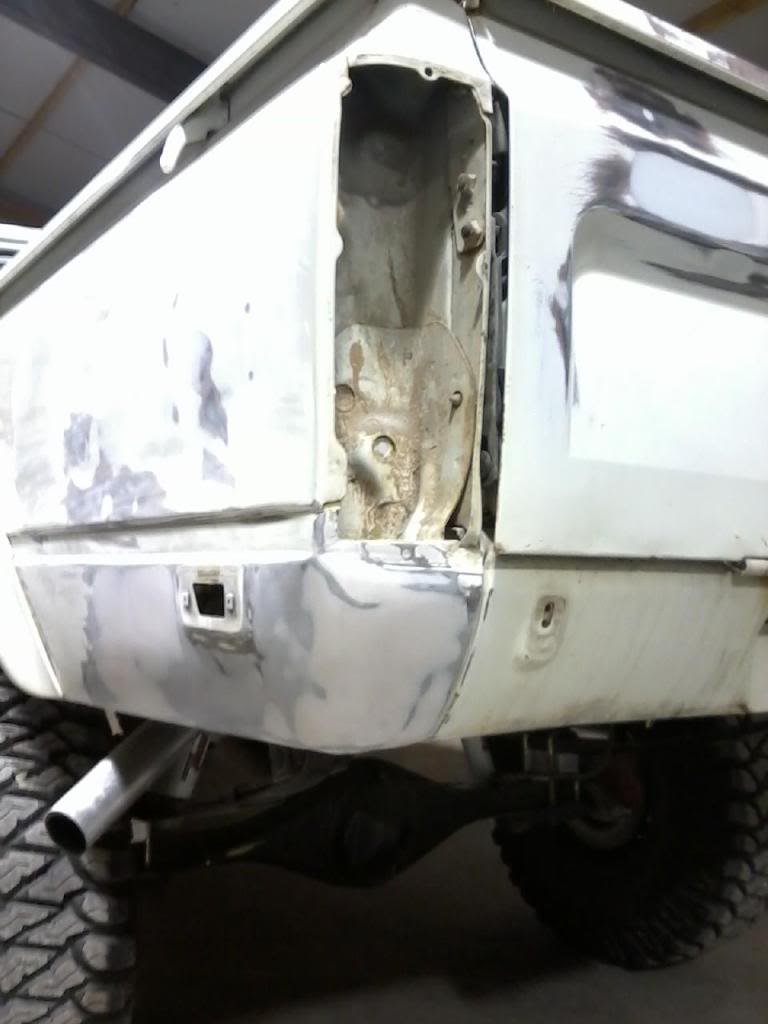
I will post some pics below of a 1st gen truck that I did the bodywork on. It was rufff, but turned out really nice. How is your 1st gen going. Hope your health isnt long term and you can recover soon. Will keep you in thoughts and prayers. Good to hear from you again.
You know by now where I stand on your work, just get it back in and running already jk. Looking great man I know its been a lot of work for ya but when its all back together and i can talk misty out of it I gonna have a sweet drive train again jk. Hope the weather is holding for you a bit.
Repairs that last, fun to drive, dependable,... alot of it can be done cheap or just requires a little time. Probably one reason that I like this runner so much is that it showed me alot that I had never considered before and hope to pass some of that info on. I am hoping the weather goes well, I plan on doing the tranny tonite and start putting it back in the runner Friday and Saturday. It ran great before, so I have some great expectations now. I keep learning on each build, but I still do get nervous after each start up and if everything went together like it should.
WOWIE! lol....
I just RIGHT NOW realized, after reading everything.. You were answering me in the quote of my posting. hahaha....
Hello Mark.. I probably should of mentioned that Mentioning lol
Far as the priming of the oil pump.... Some use Vaseline, others different things... There's actually a video on this, I THINK, by the Putneys.... (22reperformance.com).... Maybe LCE as well.... But in the spirit of PREJUDICE!!! HEHEHE....>>>
Thanks, I hadnt heard of vaseline, but I used red gear grease to help hold the oil pump O ring into place and didnt want the gears to be dry so I went ahead a put alot in there. Guess I was ahead of my time on that one huh???
https://www.yotatech.com/forums/f116...priming-78784/
Personally.... I felt much more comfy, especially after all I'd been through with 'THAT' motor, lol...... installing a new oil pump when I did first crank on the 'rebuilt rebuild', haha... I mean.... VERY cheap from engnbldr.com... NOT TOO bad on price for OEM from 22reperformance.com and not TERRIBLY PAINFUL from www.toyotapartszone.com , .... IN THE SCHEME of things, over all, regarding longevity, ya know?
I actually had a new one setting in the garage that was still in the box so I finally decided to use it. The old one never gave any problems so I will be using it on my 85 truck build that I will be starting next month.
The Dashpot? Yes... it's the diaphragm thingymadoer that has a small vacuum hose and filter on the end of it with a one way gate(IIRC ) ... lubing the dashpot is simple... if your accordion seal around the shaft is busted up....LIKE MOST OF OURS, hehe... then just shoot some 'SILICONE LUBE' in there and nothing else... Lubing it will do NOTHING for it if it's seal inside is perforated, etc... In that case, it will not really slow down the slamming shut of the throttle body gate at all... HOWEVER, if it's fine, like most of ours are... It will keep it from freezing and sticking at 1000rpm and such on occasions?
My Accordion is shot, didnt realize how bad it was. It does seem to work great, but I will just got a call from Toyota that my dizzy seal is in and need to get a water hose so will see what it cost.
Dude, ... you know what? I can't be sure... but I will take pics... I THINK my Fuel Filter arrow is pointing toward the radiator... I mean, I can't be sure... and I KNOW it's meant to go with fuel flow... BUT, ... I MIGHT have screwed that up. DANG would that suck! lol. If so... is it possible that this might be my 'wants to die on warm restarts issue'???? C'MONNNNNNNN, JUST SAY YES! hahahaha. JK...
I have a WIX fuel filter on mine and I am 99% positive I have seem different brands of fuel filters with the flange on opposite ends and the arrows refering to the fuel flow. My thinking is that people think that the flange goes on the same end at all times and dont catch the arrow. I dont think you can see it on my pics, but on the ends of the filter it does say IN and OUT, it is easily missed if you are not looking for it.
I could see it possibly causing a fuel flow issue for you thus maybe having a hard time staying started til the fuel pump is able to hold pressure and keep it running. I bet the way the filter is designed inside that the fuel is suffering alot of restriction so YESSSSSS, just kidding, but it could possibly be it and wouldnt be to expensive to find out.
ONLY have around 12K on this fuel filter... but I'd say that's enough of a time, IF IT'S BEEN ON BACKWARD THE ENTIRE TIME, to swap in a new one?
I just RIGHT NOW realized, after reading everything.. You were answering me in the quote of my posting. hahaha....
Hello Mark.. I probably should of mentioned that
Mentioning lolFar as the priming of the oil pump.... Some use Vaseline, others different things... There's actually a video on this, I THINK, by the Putneys.... (22reperformance.com).... Maybe LCE as well.... But in the spirit of PREJUDICE!!! HEHEHE....>>>
Thanks, I hadnt heard of vaseline, but I used red gear grease to help hold the oil pump O ring into place and didnt want the gears to be dry so I went ahead a put alot in there. Guess I was ahead of my time on that one huh???
https://www.yotatech.com/forums/f116...priming-78784/
Personally.... I felt much more comfy, especially after all I'd been through with 'THAT' motor, lol...... installing a new oil pump when I did first crank on the 'rebuilt rebuild', haha... I mean.... VERY cheap from engnbldr.com... NOT TOO bad on price for OEM from 22reperformance.com and not TERRIBLY PAINFUL from www.toyotapartszone.com , .... IN THE SCHEME of things, over all, regarding longevity, ya know?
I actually had a new one setting in the garage that was still in the box so I finally decided to use it. The old one never gave any problems so I will be using it on my 85 truck build that I will be starting next month.
The Dashpot? Yes... it's the diaphragm thingymadoer that has a small vacuum hose and filter on the end of it with a one way gate(IIRC
) ... lubing the dashpot is simple... if your accordion seal around the shaft is busted up....LIKE MOST OF OURS, hehe... then just shoot some 'SILICONE LUBE' in there and nothing else... Lubing it will do NOTHING for it if it's seal inside is perforated, etc... In that case, it will not really slow down the slamming shut of the throttle body gate at all... HOWEVER, if it's fine, like most of ours are... It will keep it from freezing and sticking at 1000rpm and such on occasions? My Accordion is shot, didnt realize how bad it was. It does seem to work great, but I will just got a call from Toyota that my dizzy seal is in and need to get a water hose so will see what it cost.
Dude, ... you know what? I can't be sure... but I will take pics... I THINK my Fuel Filter arrow is pointing toward the radiator... I mean, I can't be sure... and I KNOW it's meant to go with fuel flow... BUT, ... I MIGHT have screwed that up. DANG would that suck! lol. If so... is it possible that this might be my 'wants to die on warm restarts issue'???? C'MONNNNNNNN, JUST SAY YES! hahahaha. JK...
I have a WIX fuel filter on mine and I am 99% positive I have seem different brands of fuel filters with the flange on opposite ends and the arrows refering to the fuel flow. My thinking is that people think that the flange goes on the same end at all times and dont catch the arrow. I dont think you can see it on my pics, but on the ends of the filter it does say IN and OUT, it is easily missed if you are not looking for it.
I could see it possibly causing a fuel flow issue for you thus maybe having a hard time staying started til the fuel pump is able to hold pressure and keep it running. I bet the way the filter is designed inside that the fuel is suffering alot of restriction so YESSSSSS, just kidding, but it could possibly be it and wouldnt be to expensive to find out.
ONLY have around 12K on this fuel filter... but I'd say that's enough of a time, IF IT'S BEEN ON BACKWARD THE ENTIRE TIME, to swap in a new one?
12-13-2012, 07:37 AM
#974
Super Moderator
Staff
Thread Starter
iTrader: (1)
Join Date: Aug 2008
Location: Anderson Missouri
Posts: 11,788
Likes: 0
Received 25 Likes
on
22 Posts
Tony..Here is one I did the bodywork and paint on. It was in bad shape. It was headed for the crusher. I would of liked to have gotten it, but I found it for my friend and he did the rest of the work on it.

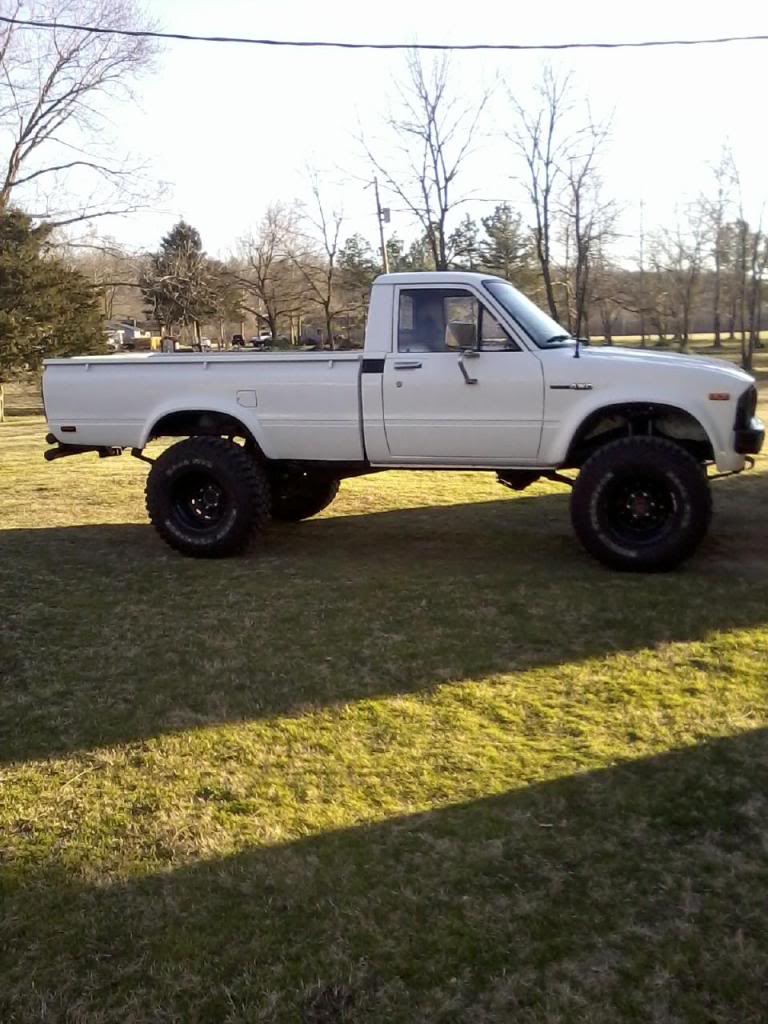
All of the gray spots were dents. The hood when sat on the ground was 6 inches higher on one side then the other.

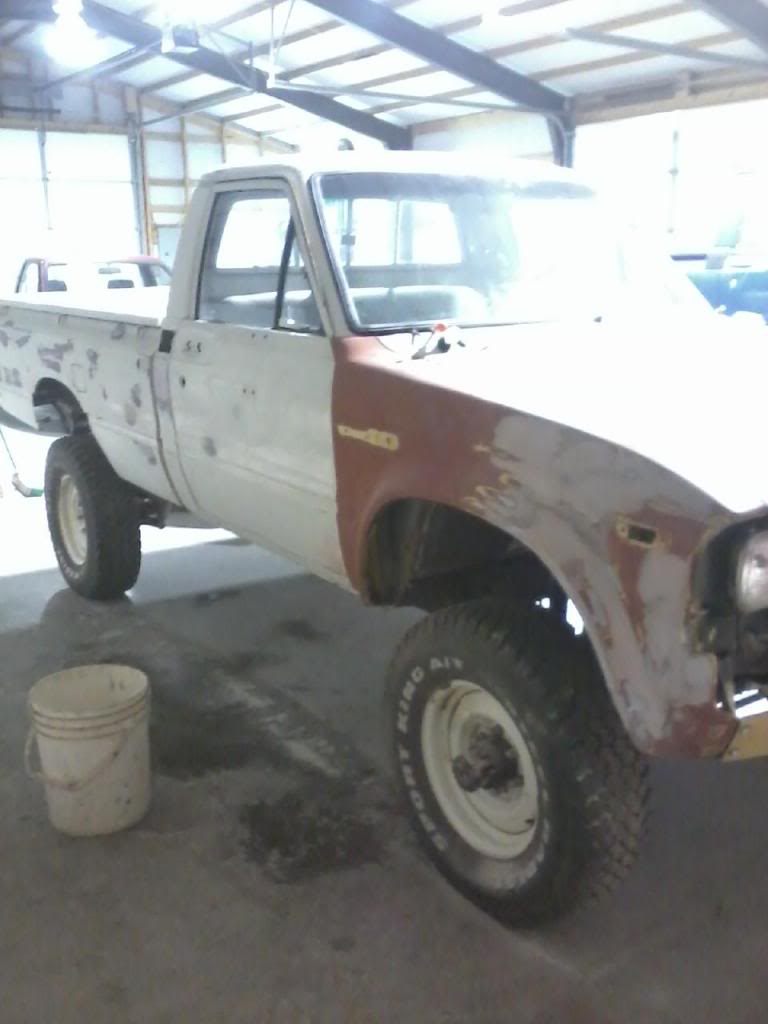
A long crease that I worked out.
All of the gray spots were dents. The hood when sat on the ground was 6 inches higher on one side then the other.
A long crease that I worked out.
Last edited by Terrys87; 12-13-2012 at 07:44 AM.
12-13-2012, 07:51 AM
#975
Super Moderator
Staff
Thread Starter
iTrader: (1)
Join Date: Aug 2008
Location: Anderson Missouri
Posts: 11,788
Likes: 0
Received 25 Likes
on
22 Posts
With the EGR blocked off, changing the fuel filter will be a breeze. Will do all electrical connections with the silicone.

I need the horse shoe hose underneath the Plenum and I think it ready to go bac in the truck. Will change some seals on the tranny. I am hoping for Friday and Saturday to get it running.
I wanted to put brushes in this alternator. It is a Nippon Denso but was rebuilt in Mexico,(Sticker said so). They put two different screws in and I cant get the bottom one out. It started stripping. It hasnt given any problems so will just leave it for now as I dont have a spare alternator. I just wanted to update it but cant. Grrr.
Oil on camera is why blurry.
12-13-2012, 09:37 AM
#976
Registered User
Jeez man. I wish my motor looked as clean and new as yours does when we did my rebuild. IT'S SO SHINEY!!! I wonder what a 3vze would look like if somebody took the time to restore it the way You, Mark, and Grego would go about restoring things so nicely. Now im curious. lol gonna search for some results lol
12-15-2012, 08:19 AM
#978
Super Moderator
Staff
Thread Starter
iTrader: (1)
Join Date: Aug 2008
Location: Anderson Missouri
Posts: 11,788
Likes: 0
Received 25 Likes
on
22 Posts
Hello Richard... I did put alot of work into I and hope it works out and I can kep it shiney.
Hello Cyberhorn... Cutting torch??lo, they did bury it in there.
Hello Cyberhorn... Cutting torch??lo, they did bury it in there.
12-15-2012, 08:35 AM
#979
Super Moderator
Staff
Thread Starter
iTrader: (1)
Join Date: Aug 2008
Location: Anderson Missouri
Posts: 11,788
Likes: 0
Received 25 Likes
on
22 Posts
Got alot done, but no I am waiting for a throw outbearing. Who would of thought that would be a hold up. Only one parts store has it and it is 50 miles away and waiting for an hour to get delivered nearby.
Just some update.
Painted the fill and drain holes plugs for tranny and tcase. Just filled with oil, then painted the plugs. Got it backwards.

Transmission front seal and gasket it. Would suggest doing these when changing clutch. It was needed. Parts from Toyota was less then $20.

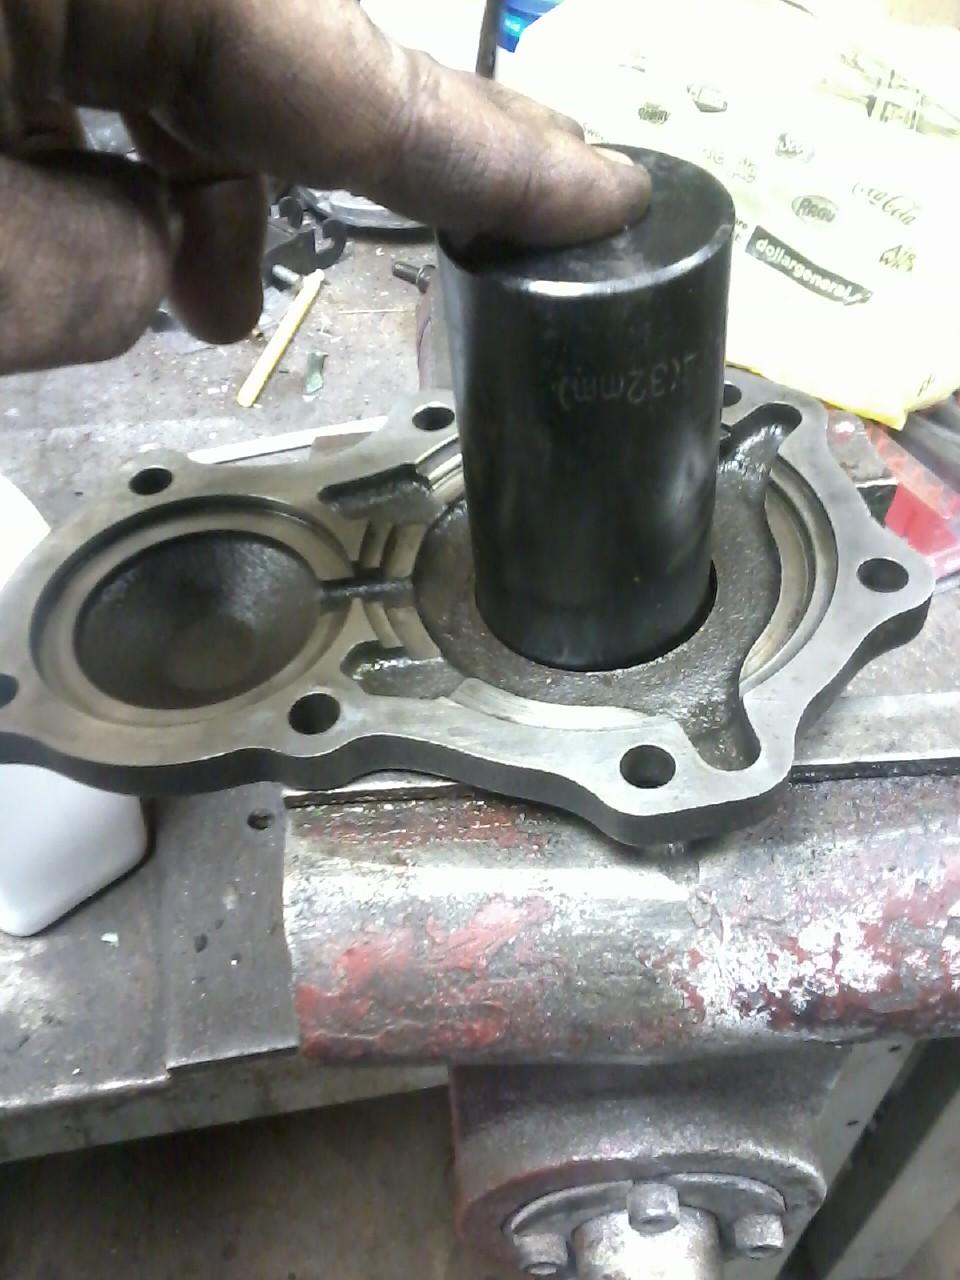
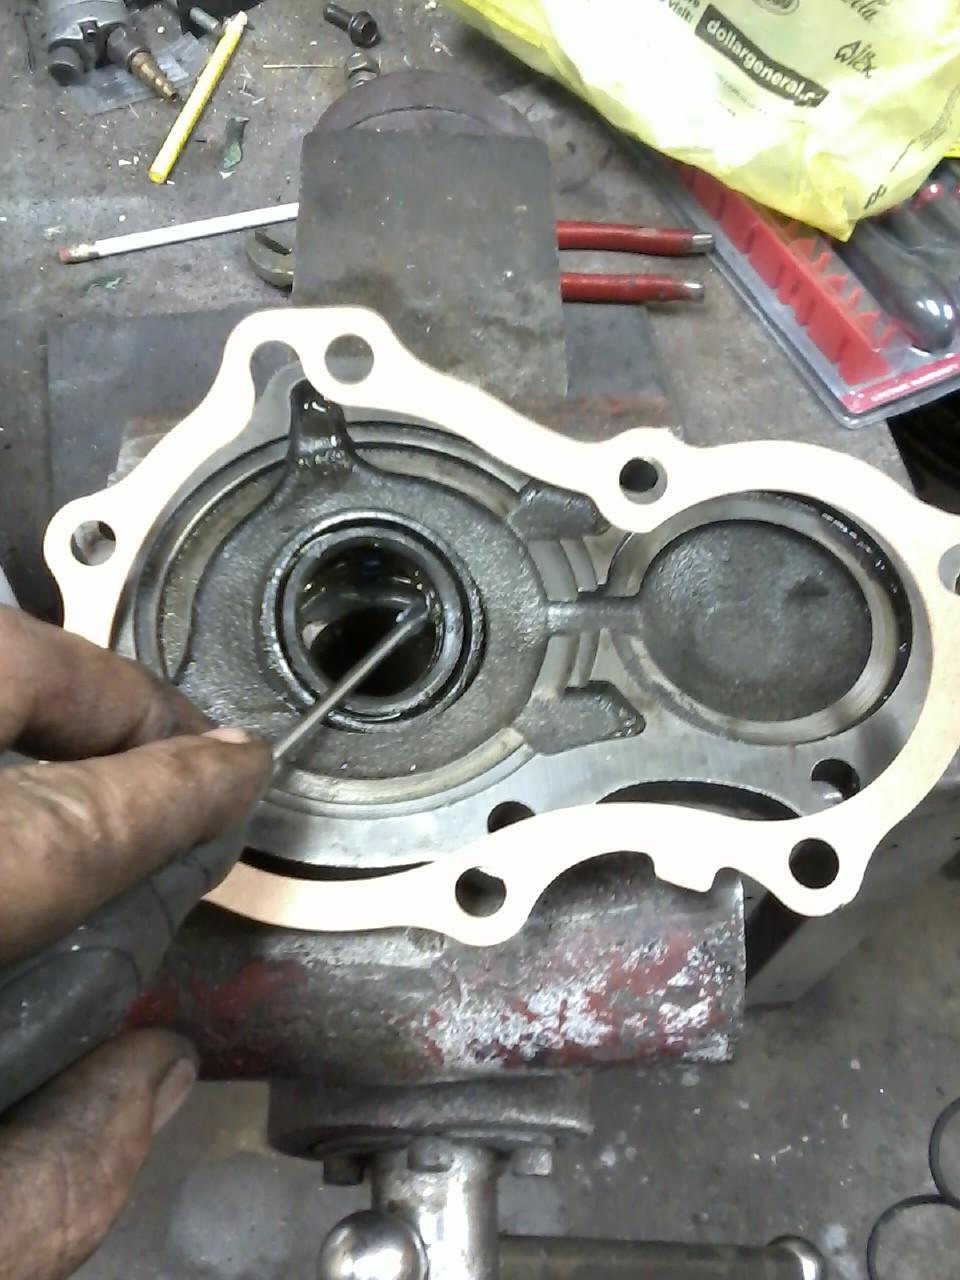
Greased and pressed seal in with 32mm socket.
How I poped it out and with gasket. I used silicon on both sides of gasket. ( Not Showing).
This is the hose that goes under Plenum. Was unable to locate at part store so had to get at Toyota.

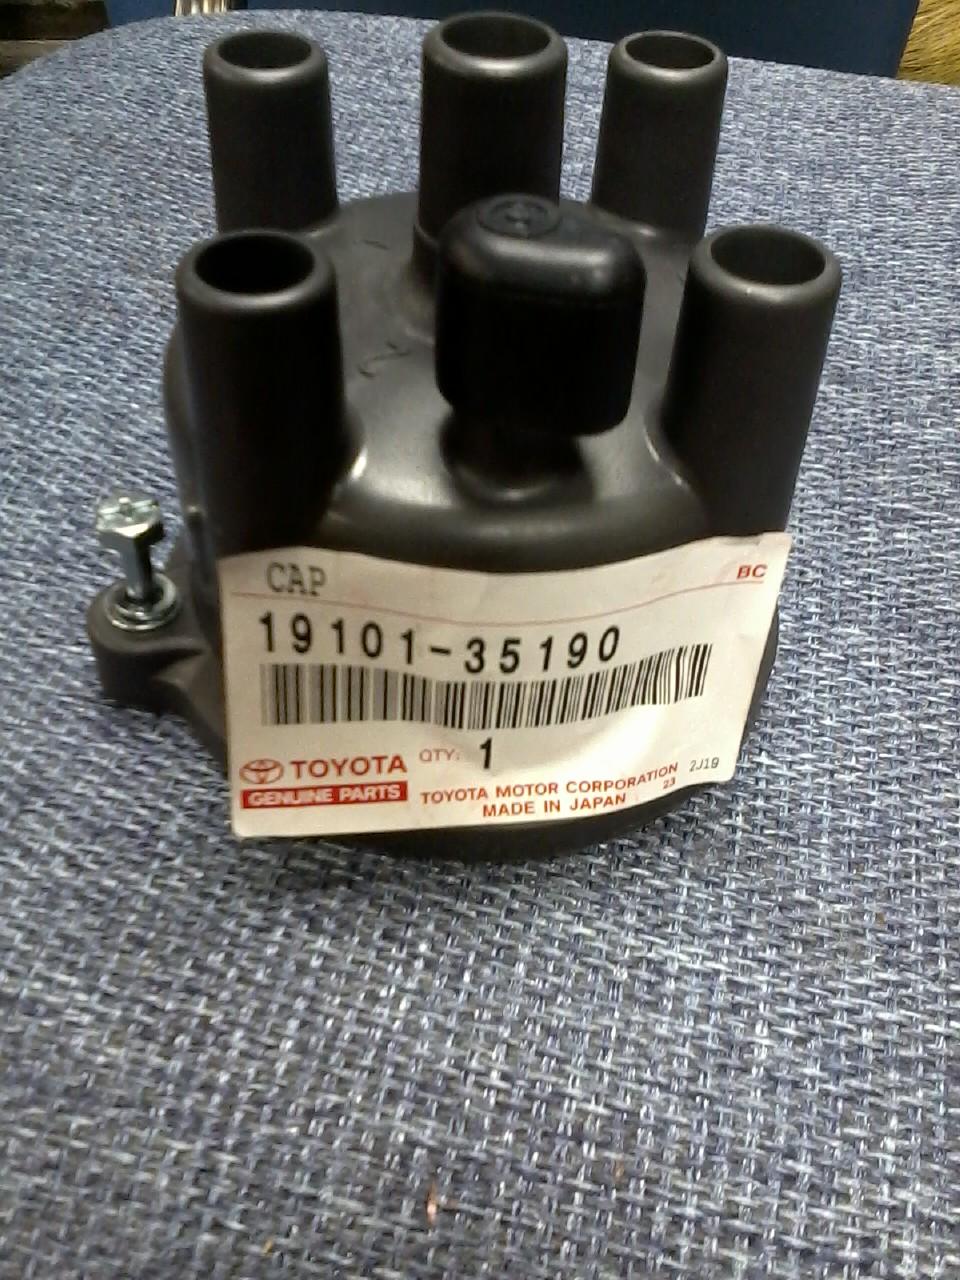
Distributor was just a few dollars more then at a part store. Will use part number and see if I can find it on net cheaper.
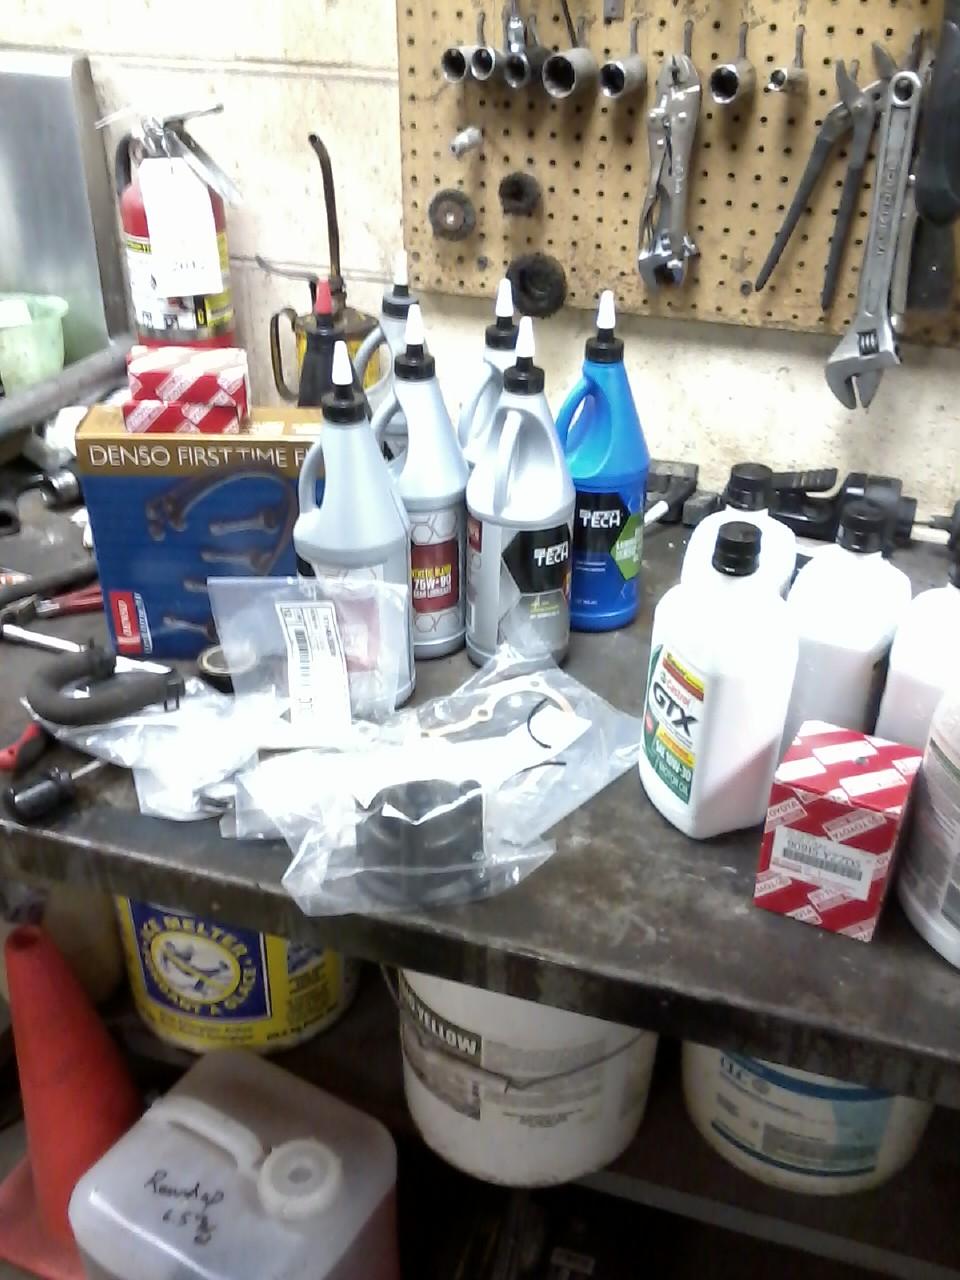
All materials I used today.
I wash my motors and cross alot of low water briges so want to try and keep dizzy dry.
Wrapped hose clamp for safetyof keeping any posible contact with alternator connection. Need to replace alternator black plastic piece.
Got both home from dads. I dont have heat in my shop so had to do it at his house. Weather is great here today, so am trying to get as much accomplished as possible. Waiting on throw out bearing. Should know something in another 30 minutes. grrr.
Just some update.
Painted the fill and drain holes plugs for tranny and tcase. Just filled with oil, then painted the plugs. Got it backwards.
Transmission front seal and gasket it. Would suggest doing these when changing clutch. It was needed. Parts from Toyota was less then $20.
Greased and pressed seal in with 32mm socket.
How I poped it out and with gasket. I used silicon on both sides of gasket. ( Not Showing).
This is the hose that goes under Plenum. Was unable to locate at part store so had to get at Toyota.
Distributor was just a few dollars more then at a part store. Will use part number and see if I can find it on net cheaper.
All materials I used today.
I wash my motors and cross alot of low water briges so want to try and keep dizzy dry.
Wrapped hose clamp for safetyof keeping any posible contact with alternator connection. Need to replace alternator black plastic piece.
Got both home from dads. I dont have heat in my shop so had to do it at his house. Weather is great here today, so am trying to get as much accomplished as possible. Waiting on throw out bearing. Should know something in another 30 minutes. grrr.
Last edited by Terrys87; 07-26-2013 at 07:30 AM.
12-15-2012, 12:44 PM
#980
Super Moderator
Staff
Thread Starter
iTrader: (1)
Join Date: Aug 2008
Location: Anderson Missouri
Posts: 11,788
Likes: 0
Received 25 Likes
on
22 Posts
Wanted to mention that if you do the SR5 guage swap and you get a sending unit with the grounding tab, CUT IT OFF!!!, I had a SR5 Oil guage ruined by a nephew who didnt know a few years ago, or if you have your oil changed by a quick lube shop to avoid getting one ruined.

Last edited by Terrys87; 12-27-2012 at 07:00 AM.


