
Terrys87 88 4Runner Restoration/Build thread


 12-03-2012, 06:54 PM
#922
Registered User
Thanks Jason.. Wish you did live closer, I have to do 99% of the work by myself and another set of eyes and hands would be nice at times. This one being a daily driver and having learned so much on this one, it helps on the speed of it and nuts and bolts arent frozen when pulling it apart. When this truck is in tip top condition, it is just a fun truck to drive.
Thanks Cyberhorn..This runner is probably my all time favorite truck. Have done so much with it with the family and taken it on some long runs by myself and some of the places I have been in it as far as weather wise. A guy ditched his truck in a blizzard and I picked him up to keep him from freezing to death and he was amazed at how well it chugged along on some remote back roads, and hills. I actually enjoyed working on it. I just hope I can get my 86 up to this ones results/enjoyment.
Thanks Cyberhorn..This runner is probably my all time favorite truck. Have done so much with it with the family and taken it on some long runs by myself and some of the places I have been in it as far as weather wise. A guy ditched his truck in a blizzard and I picked him up to keep him from freezing to death and he was amazed at how well it chugged along on some remote back roads, and hills. I actually enjoyed working on it. I just hope I can get my 86 up to this ones results/enjoyment.
Looks like you have made a great deal of progress in a short period of time.
I love working on my Toyota more than my Fords ha ha. Other than a fan replacement recently my rig has been running great. I'll be subscribed here.
12-04-2012, 01:55 AM
#923
Super Moderator
Staff
Thread Starter
iTrader: (1)
Join Date: Aug 2008
Location: Anderson Missouri
Posts: 11,788
Likes: 0
Received 25 Likes
on
22 Posts
Thanks Mark...Glad to see you are getting back after it and things are getting back to normal for you. I replaced the transfer case and knew I had a leak so decided to get it all taken care of at one time.
Thanks brpaul...I try to make it entertaining. I have a dry humor so it may not always comes across as humor but do try. I also try to make this thread where I put alot of my fixes that I find on this and other projects out there on this thread. I remember having to stumble my way thru things and really am trying to make this one something that might help others. Welcome to Yotatech.
Hello ksti... Thanks for subscribing. Working on these trucks isnt bad at all once you learn the ins and outs on them. I sold my last two trucks and now not having a truck is a pain in the rear. I should of taken done all of this when I first started on it, but funds were tight and really I couldnt wait to start driving it, so I am redoing it now. Wanting to get this project wrapped up so I can start on my Extra cab, I want it to be nice, but I really do need a truck. Never going to be without one again.
12-04-2012, 02:17 AM
#924
Super Moderator
Staff
Thread Starter
iTrader: (1)
Join Date: Aug 2008
Location: Anderson Missouri
Posts: 11,788
Likes: 0
Received 25 Likes
on
22 Posts
I was just uable to get out in the shop this weekend and we had some really great weather here for December. Nearly in the 70s. I am really starting to like this global warming thing. Sure beats freezing. I can take the heat, but not the cold. Still need to get the shop insulated.
Then when I did have the time, I had to do some house repairs and that turned into a fiasco. I am not a plumber or carpenter which I have no skills at, and who ever did the plumbing in my house, I am sure they could of made it easier. Started with one drain clogged and before I got it fixed, I clogged a few more drains. I must of pushed the clog into a intersection.
Long story short, after using a snake/clog removing cable and then Drano, I ended up using a ballon like object that connects to a water hose and it cleared the drains. I then followed it with some "Liquid Fire" this stuff is powerful. Drains have never worked so well. Both are some great clog removers just in case you run into drain issues. The Liquid Fire needs good ventilation and says to read its instructions before buying. These two items would of freed up a lot of time.
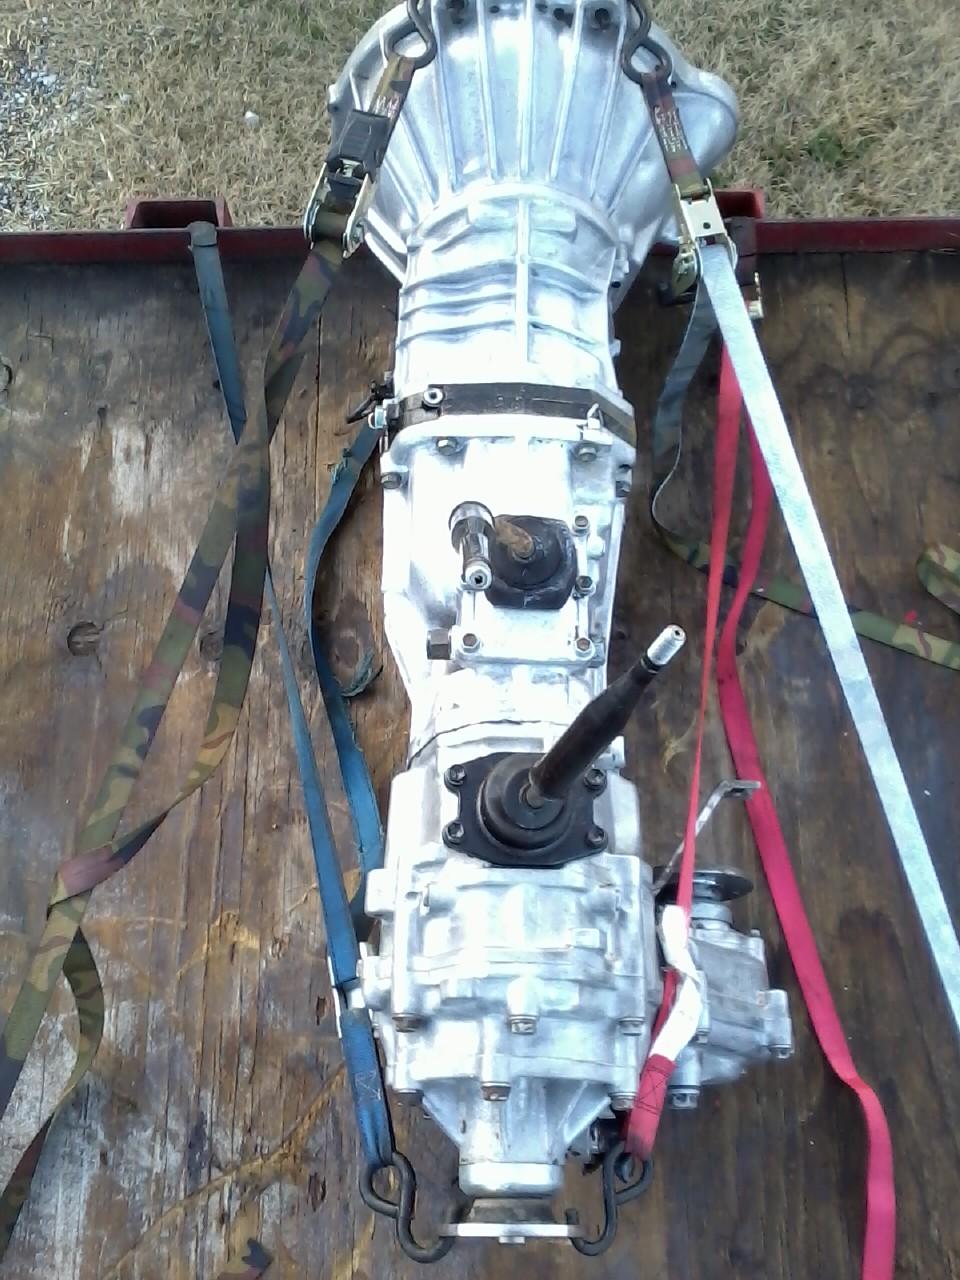
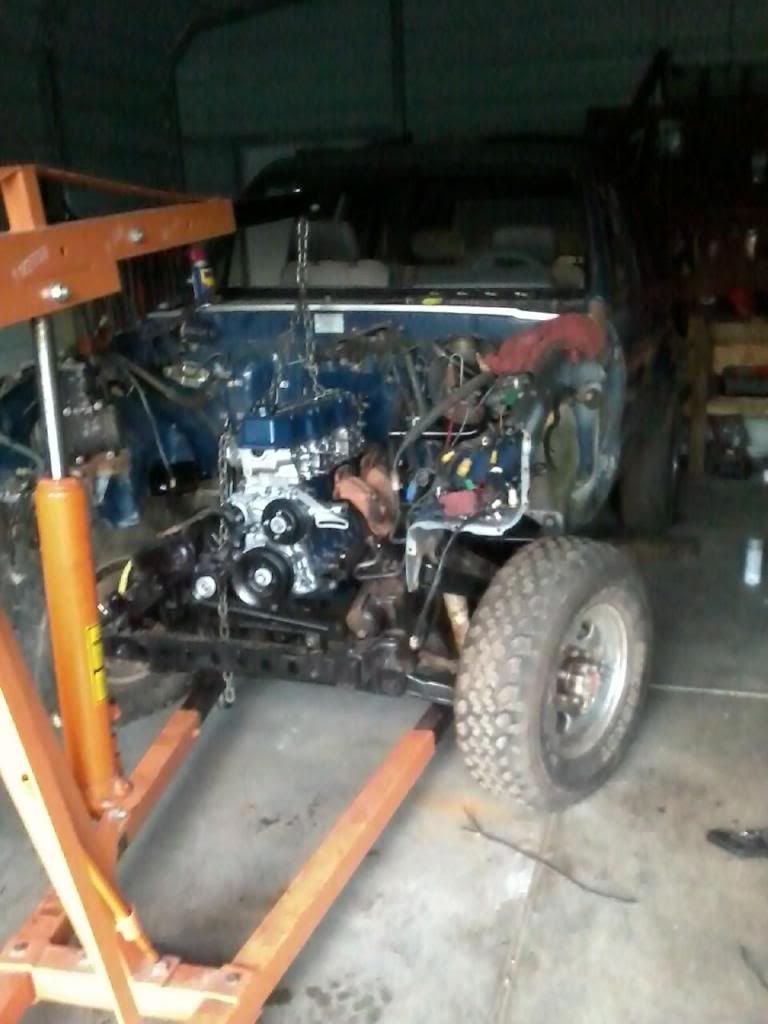
Got my tranny cleaned up and am going to go to Toyota and get new drivshaft seals and front main seal. I think that is all I need. Then will put the tranny on the cherry picker and try to level it as it would be in the truck and see if I have any leaks after filling. I still want to clean the lower part of the engine bay and start on the motor.
For me it is easier to connect a motor with the tranny already in the truck versus putting the tranny to a motor already in the truck. I cant see it taking me to long to get the tranny sealed up and back in the truck. I hear we are only getting good weather for another week and I still have alot to do. Wednesday I will be helping an elder family member for a while and looks like Friday I am getting a reciever hitch for my 86 runner so I know time will slip by fast. Plus the wifey would like her runner back so I am hoping all goes well.
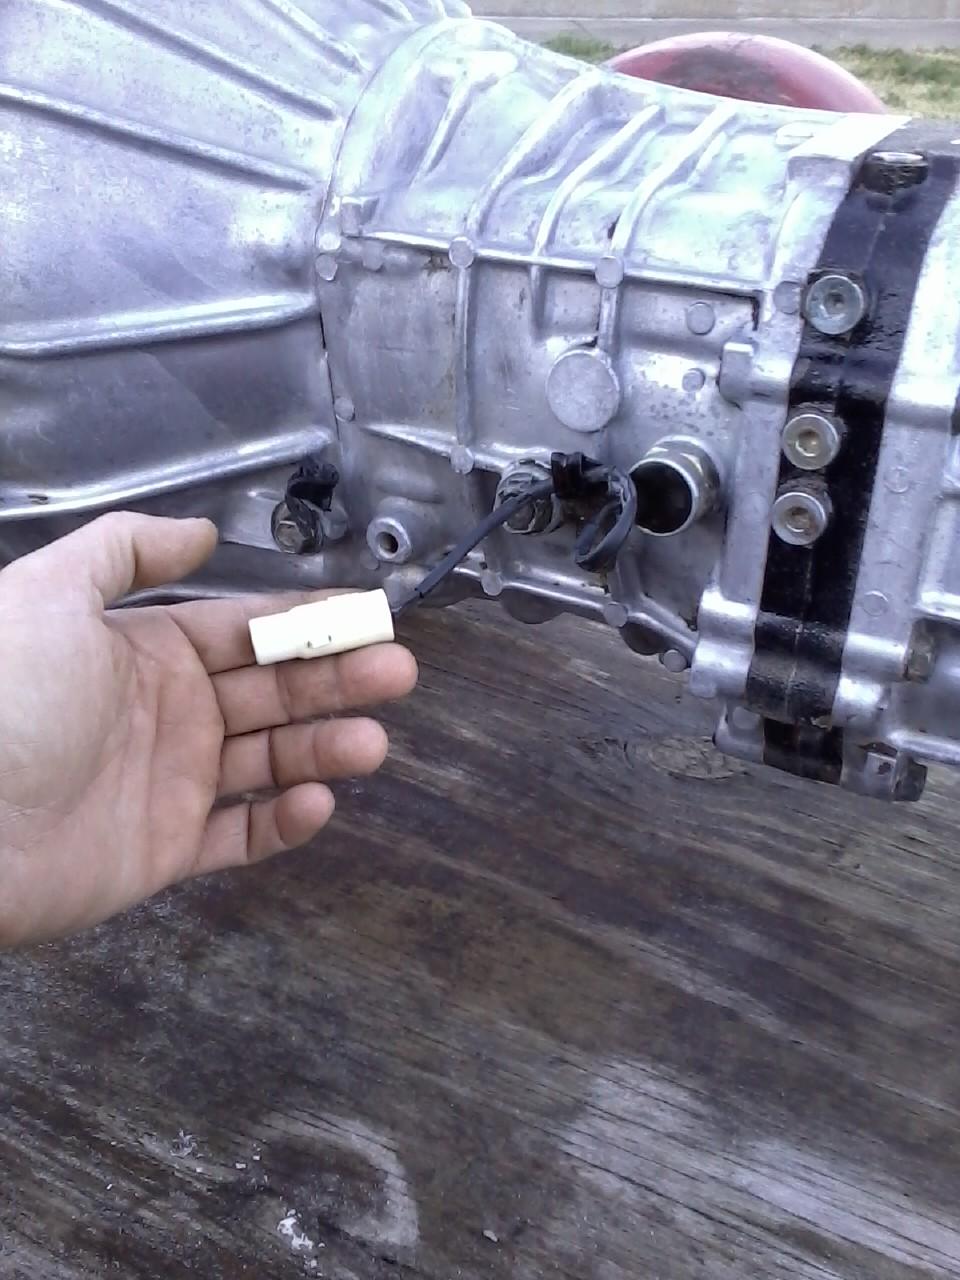
Got tranny cleaned and early on in this build, I had an electrical issue. The Reverse Light switch had rubbed a bare spot on the wire and kept blowing my Eng Fuse. Just a small knick in it. It was a hard find. So wanted to show where to look for it. Have seen this problem two other times since I have had this problem.
Then when I did have the time, I had to do some house repairs and that turned into a fiasco. I am not a plumber or carpenter which I have no skills at, and who ever did the plumbing in my house, I am sure they could of made it easier. Started with one drain clogged and before I got it fixed, I clogged a few more drains. I must of pushed the clog into a intersection.
Long story short, after using a snake/clog removing cable and then Drano, I ended up using a ballon like object that connects to a water hose and it cleared the drains. I then followed it with some "Liquid Fire" this stuff is powerful. Drains have never worked so well. Both are some great clog removers just in case you run into drain issues. The Liquid Fire needs good ventilation and says to read its instructions before buying. These two items would of freed up a lot of time.
Got my tranny cleaned up and am going to go to Toyota and get new drivshaft seals and front main seal. I think that is all I need. Then will put the tranny on the cherry picker and try to level it as it would be in the truck and see if I have any leaks after filling. I still want to clean the lower part of the engine bay and start on the motor.
For me it is easier to connect a motor with the tranny already in the truck versus putting the tranny to a motor already in the truck. I cant see it taking me to long to get the tranny sealed up and back in the truck. I hear we are only getting good weather for another week and I still have alot to do. Wednesday I will be helping an elder family member for a while and looks like Friday I am getting a reciever hitch for my 86 runner so I know time will slip by fast. Plus the wifey would like her runner back so I am hoping all goes well.
Got tranny cleaned and early on in this build, I had an electrical issue. The Reverse Light switch had rubbed a bare spot on the wire and kept blowing my Eng Fuse. Just a small knick in it. It was a hard find. So wanted to show where to look for it. Have seen this problem two other times since I have had this problem.
Last edited by Terrys87; 12-04-2012 at 07:22 AM.
 12-04-2012, 07:48 AM
#926
Super Moderator
Staff
Thread Starter
iTrader: (1)
Join Date: Aug 2008
Location: Anderson Missouri
Posts: 11,788
Likes: 0
Received 25 Likes
on
22 Posts
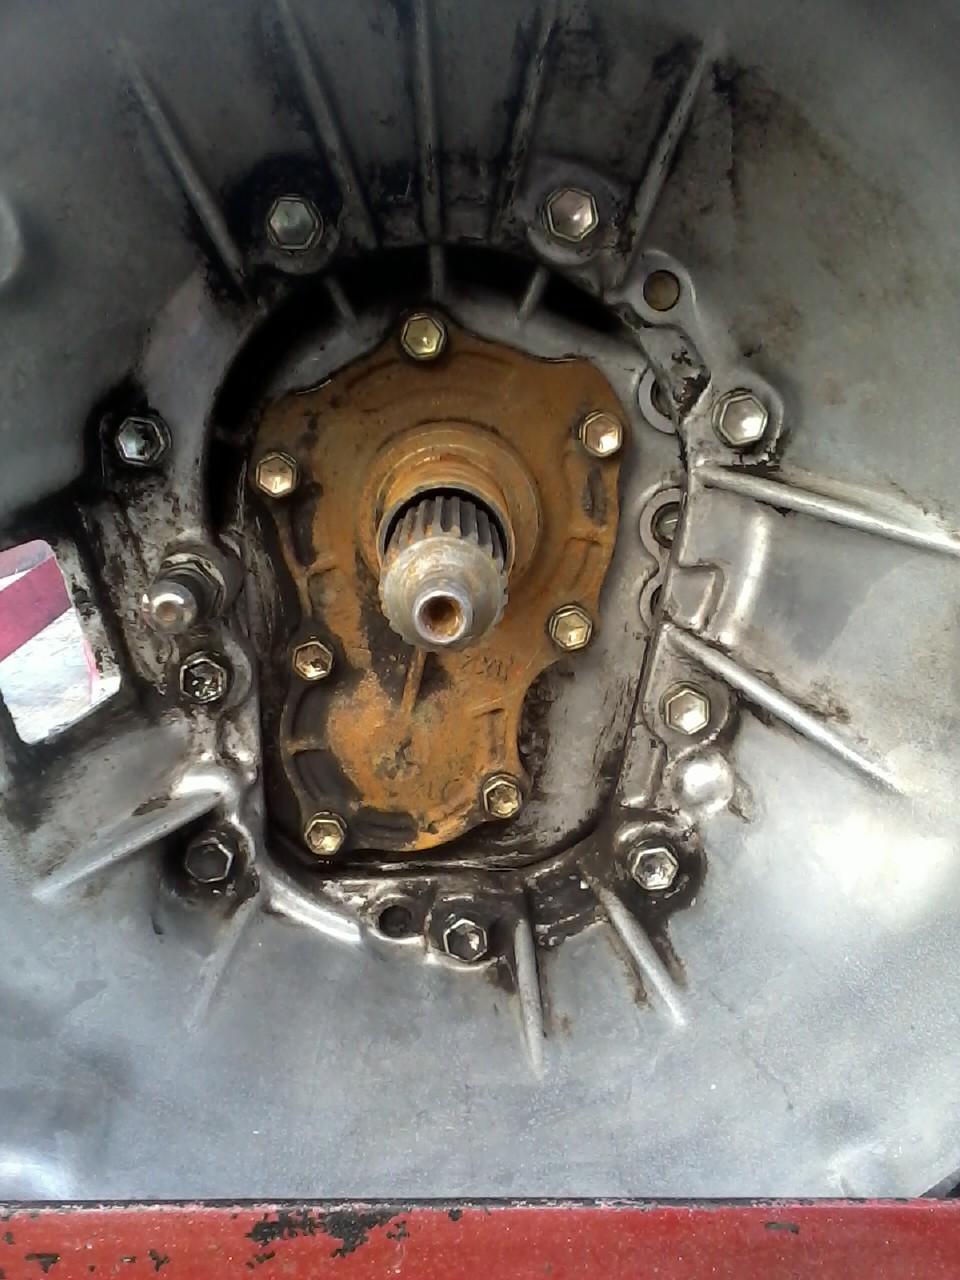
Thanks Grego92...I am hoping to have it back on the road by the weekend if all goes well. I have changed several clutches but doing seals on a tranny is one area that I have some experience on but not my strongest point. Hopefully I can find some thing that might be some useful information.
I went to Toyota and only got one seal today. They got another on order for me and I should get it tomorrow. I did get it alot cleaner.
I got the inside cleaner since I took the picture. It is alot better then what is showing and what it was. Waiting for it to warm up and want to start getting the lower part of engien bay clean and start getting ready to work on the motor.
Last edited by Terrys87; 12-04-2012 at 07:52 AM.
12-04-2012, 09:52 AM
#929
Registered User
HAhahah good one grego! im sure that one of those youd get a LOT more work out of LOL!!
terry good googily moogily did you buff an polish that transmission? wow it shines (o..o) have to squint not to be blinded
terry good googily moogily did you buff an polish that transmission? wow it shines (o..o) have to squint not to be blinded
Last edited by Cyberhorn The Dragon; 12-04-2012 at 09:53 AM.
12-04-2012, 01:24 PM
#930
Super Moderator
Staff
Thread Starter
iTrader: (1)
Join Date: Aug 2008
Location: Anderson Missouri
Posts: 11,788
Likes: 0
Received 25 Likes
on
22 Posts
Hello Grego92..There is ALOT of scrubbing done there. We have places around here that have red mud and that stuff is worse then glue. The bottom side was clean as I spend about as much time cleaning underneath one as I do on the top side.
Thanks Jason...It looks as if it had a new clutch put in it and I really think they just didnt clean it out when they did the clutch. The previous mechanic that did alot of the work on it before I got it was shoddy. I think once I get this part done, the runner should be the way it should of been done the first time.
Hello Cyberhorn..I used diesel fuel and wire brushes to clean it and then used some other degreaser after that. I had thought of clear coating it to hopefully help keep it cleaner. I have spent alot of time detailing a motor and somehow it doesnt take long for it to go down hill from there.
Here is what my 86 motor used to look like, it still looks ok, but not when I first detailed it.

Here is what my 86 motor used to look like, it still looks ok, but not when I first detailed it.
Last edited by Terrys87; 12-04-2012 at 01:32 PM.
12-04-2012, 01:35 PM
#931
Super Moderator
Staff
Thread Starter
iTrader: (1)
Join Date: Aug 2008
Location: Anderson Missouri
Posts: 11,788
Likes: 0
Received 25 Likes
on
22 Posts
I got the engine bay soaking, really wasnt as bad as I thought it was going to be. Also starting to clean the motor.
Here is a place that when you drop a nut or bolt, it will wind up here. I found 2 fuel filter crush washers and a bolt. Also the drain hole was clogged with gravel.

Here is a place that when you drop a nut or bolt, it will wind up here. I found 2 fuel filter crush washers and a bolt. Also the drain hole was clogged with gravel.
12-04-2012, 03:38 PM
#932
Registered User
yup mine were clogged with gravel an crusted thick with rust an dirt when i took the descaler to them i thought id destroyed um from all the stuff that went flying
 12-06-2012, 04:03 PM
#935
Super Moderator
Staff
Thread Starter
iTrader: (1)
Join Date: Aug 2008
Location: Anderson Missouri
Posts: 11,788
Likes: 0
Received 25 Likes
on
22 Posts
Hello Richard.. I did the 86 motor back in March of this year. I have watched how Mark cleans his motor and soon as I get a chance and some warmer weather, I am going to try and get it looking like it did. Here is when I had it looking good. https://www.yotatech.com/forums/f199...86/index7.html
It probably has a lot of sanding dust, sweat and my grubby hands all over it.lol
Thanks Mark..What started as a transfer case has turned into one big project. I am going to replace all of the seals wheather they are leaking or not. When I first did the motor, I thought the machine shop put in the valve guide seals. They didnt and it is really my fault for not checking, so one thing has led to another.
12-06-2012, 04:17 PM
#936
Super Moderator
Staff
Thread Starter
iTrader: (1)
Join Date: Aug 2008
Location: Anderson Missouri
Posts: 11,788
Likes: 0
Received 25 Likes
on
22 Posts
Like I mentioned to Mark, I didnt put in the valve guide seals, it would only have a slight puff of smoke once in a great while, but want to head off as much problems as possible. I want another 20 years and 300k miles out of it. I wish I could kick my own self in the butt for the mistake of not doing the seals then.
When I orginally built it I would of liked to have taken it completely out then and got the bottom end fixed then, but things were financially tight then and I needed it on the road as soon as possible.
Since I got the motor and tranny out, and need to fix the rear main seal, I decided that I would get everything done at once. It still has great compression and will run down the interstate at 80 to 90 miles an hour all day long.
Here head is off. I get my new head gasket tomorrow so I spent alot of time cleaning up the motor and getting it broke down. Had nice weather and took advantage of it as best I could. Really enjoyed the day.

Was a little oily on front, but that was from a leak at the half moon seal. From now on I am putting sealant on those half moons.
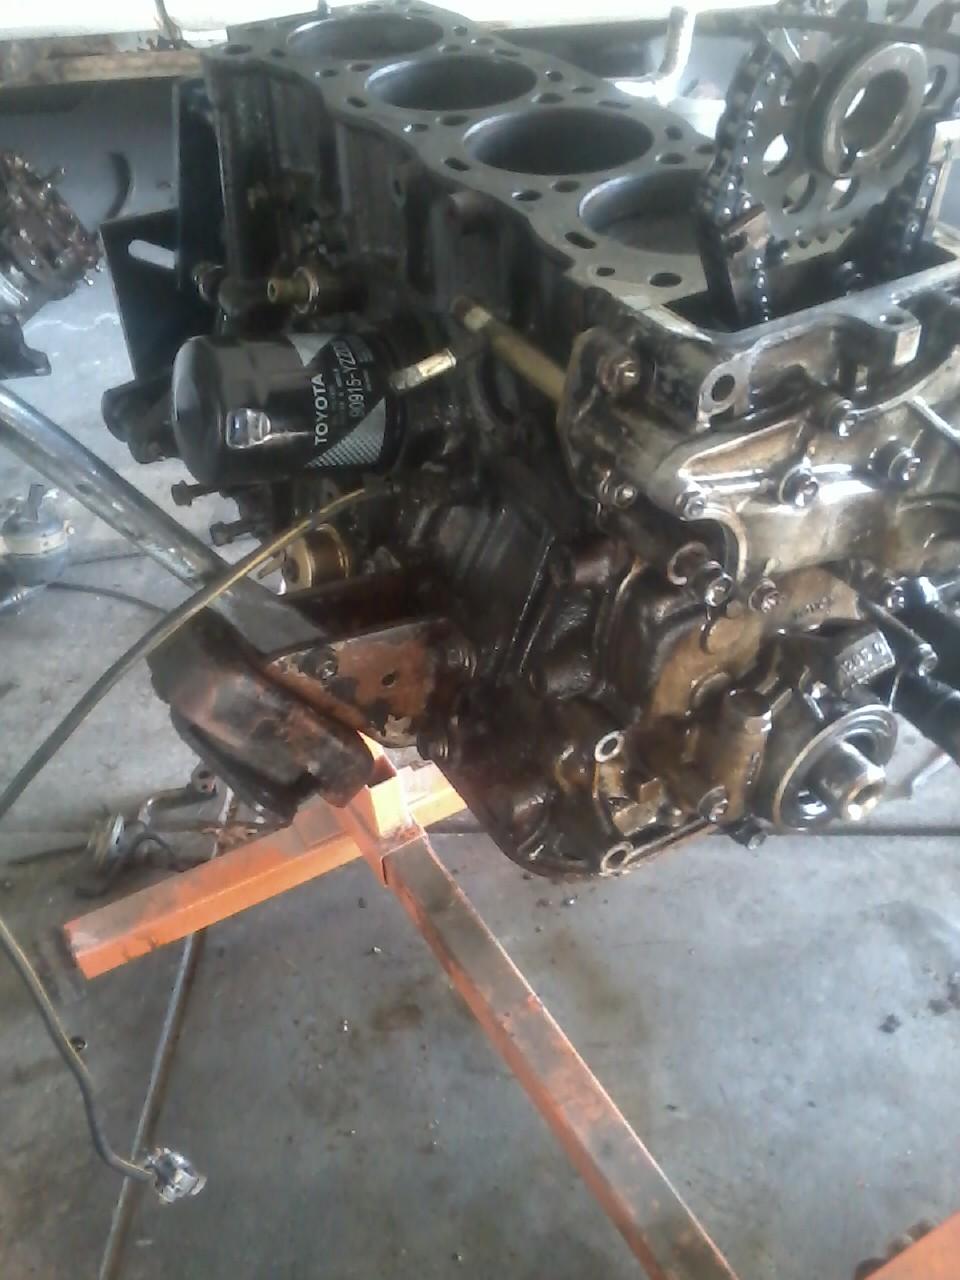
Here it is cleaned. Did get alot of the bolts cleaned, threads chased, holes blown out and a hndful of other parts cleaned and painted.

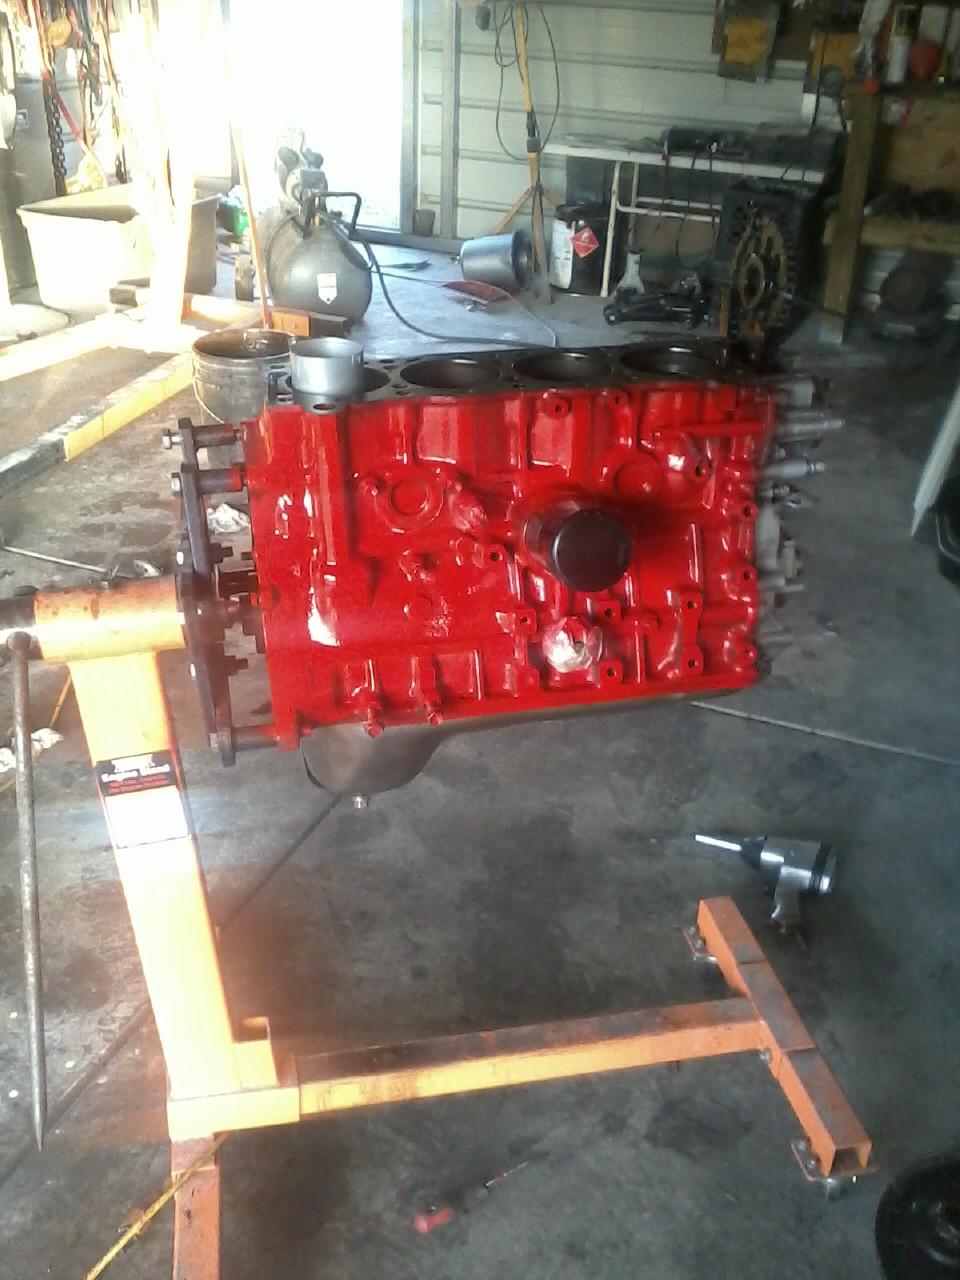
Got the block painted and need to get some more primer to paint the pan. Doesnt look like much, but cleaning, disassembly, and getting things prepped to gog back together took alot of time.
When I orginally built it I would of liked to have taken it completely out then and got the bottom end fixed then, but things were financially tight then and I needed it on the road as soon as possible.
Since I got the motor and tranny out, and need to fix the rear main seal, I decided that I would get everything done at once. It still has great compression and will run down the interstate at 80 to 90 miles an hour all day long.
Here head is off. I get my new head gasket tomorrow so I spent alot of time cleaning up the motor and getting it broke down. Had nice weather and took advantage of it as best I could. Really enjoyed the day.
Was a little oily on front, but that was from a leak at the half moon seal. From now on I am putting sealant on those half moons.
Here it is cleaned. Did get alot of the bolts cleaned, threads chased, holes blown out and a hndful of other parts cleaned and painted.
Got the block painted and need to get some more primer to paint the pan. Doesnt look like much, but cleaning, disassembly, and getting things prepped to gog back together took alot of time.
12-06-2012, 05:02 PM
#937
Registered User
dang Terry. I checked out the link you put and i just kept reading and reading. I know i've gone through your thread once when i first joined. but maybe i wasn't paying attention the first time around. so far i've read a lot of stuff i don't remember lol
I might do what you did with your broken rear L-trims. Also i had no idea you could adjust the odometer! that's crazy. i wonder how many people mess with those things before they sell their cars....
I might do what you did with your broken rear L-trims. Also i had no idea you could adjust the odometer! that's crazy. i wonder how many people mess with those things before they sell their cars....
12-06-2012, 05:06 PM
#938
Registered User
Oh wow Damn something about engine blocks painted RED that i absolutely love. Something about it. I just love the look. Great job dude. Looks like when Mark did his.
12-06-2012, 05:10 PM
#939
Registered User
Wow Terry. It's been a while since I have been able to peruse your thread. I'm just approaching finals so It'll be a few more weeks before I can catch up. But looks like your going hard and cant wait to see all the progress you have been making.
I'm pretty excited to be in my last year of school, because then my runner won't be just for summer projects any more. Next winter I'm hoping for big things a comin.
Peace.
I'm pretty excited to be in my last year of school, because then my runner won't be just for summer projects any more. Next winter I'm hoping for big things a comin.
Peace.


