
Terrys87 88 4Runner Restoration/Build thread
 08-03-2012, 08:39 AM
#781
Super Moderator
Staff
Thread Starter
iTrader: (1)
Join Date: Aug 2008
Location: Anderson Missouri
Posts: 11,788
Likes: 0
Received 25 Likes
on
22 Posts
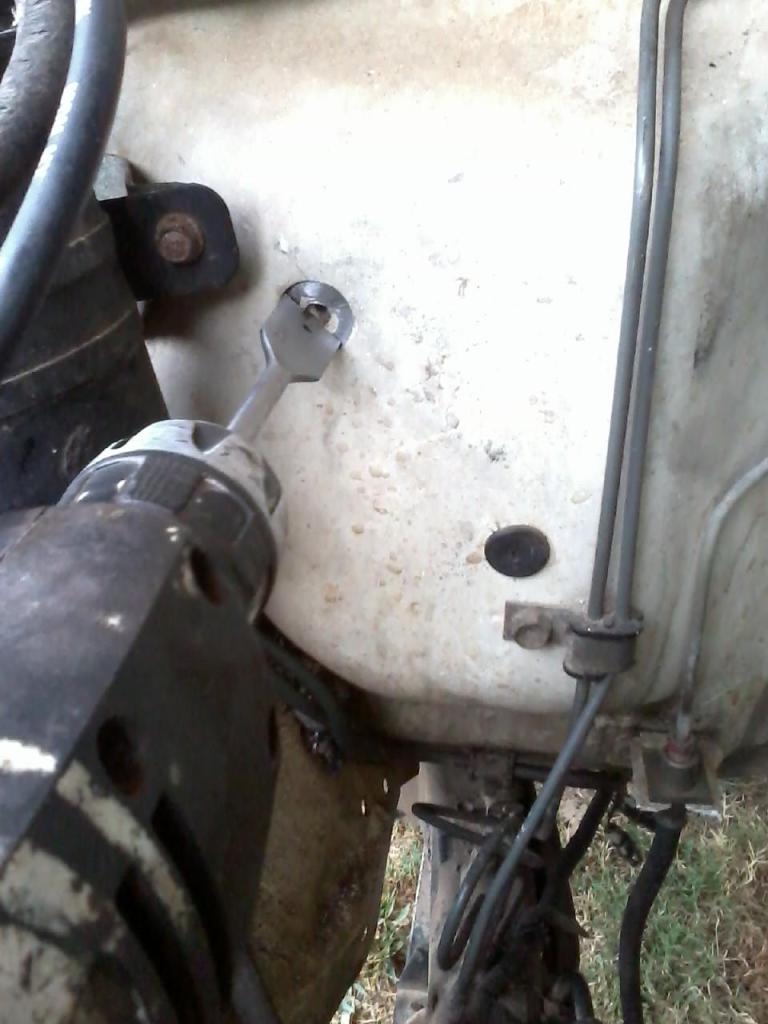
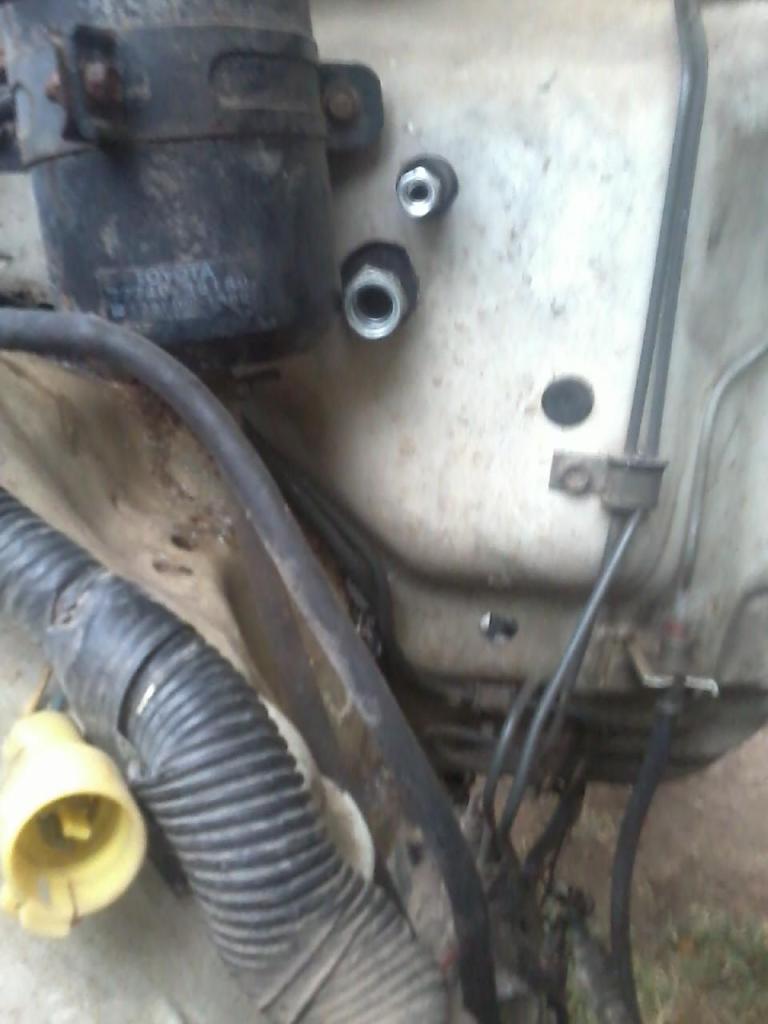
The AC install has gone great. My truck didnt have AC as it didnt even have the holes cut out for the lines. Toyota did have the dimples as to where to cut in the fire wall. That helped alot. Almost looks like a professional did it. Almost!!!
Carpenters are going to scream with me using this tool to cut the holes. But it worked.
Evaporator you will need. Where my finger is pointing is what Mark is talking about on his thread that needs adjusting.
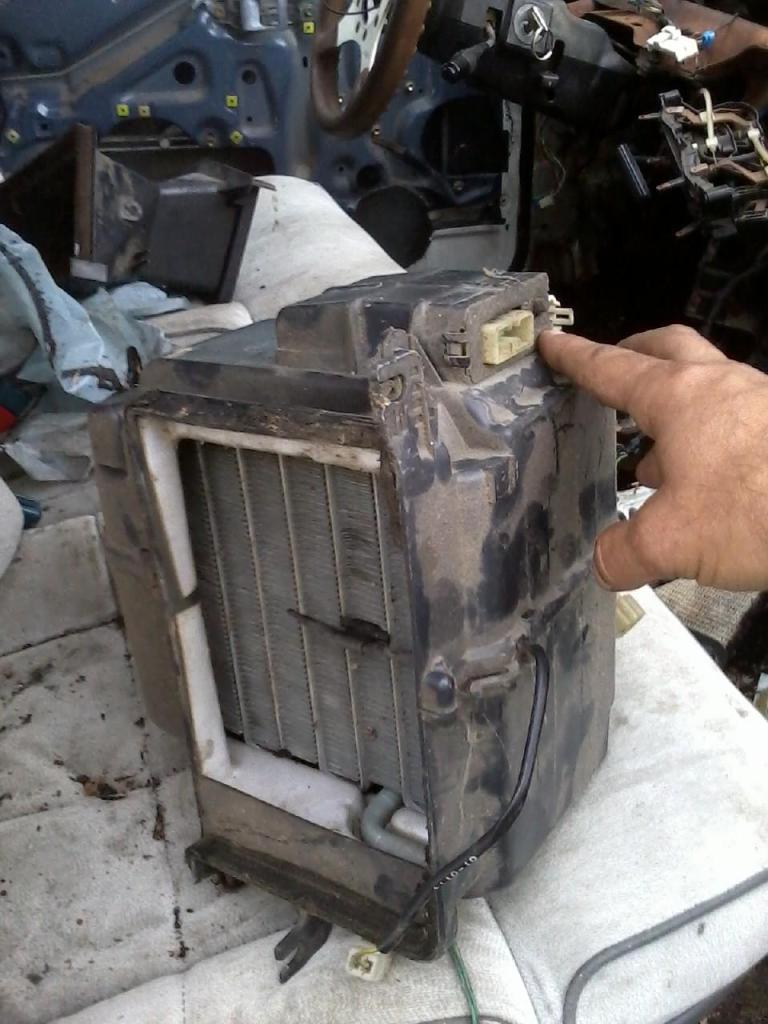
The top piece is basically a pipe that connects the blower to the heater core if you dont have AC. Otherwise the Evaporator sits in its place.

Just above my finger is a dimple I was talking about. This one is for the drain hole for the Evaporator. Makes installing an AC so much easier.
Wiring harness needed to connect to the trucks main harnes. Appears all connections are already installed.
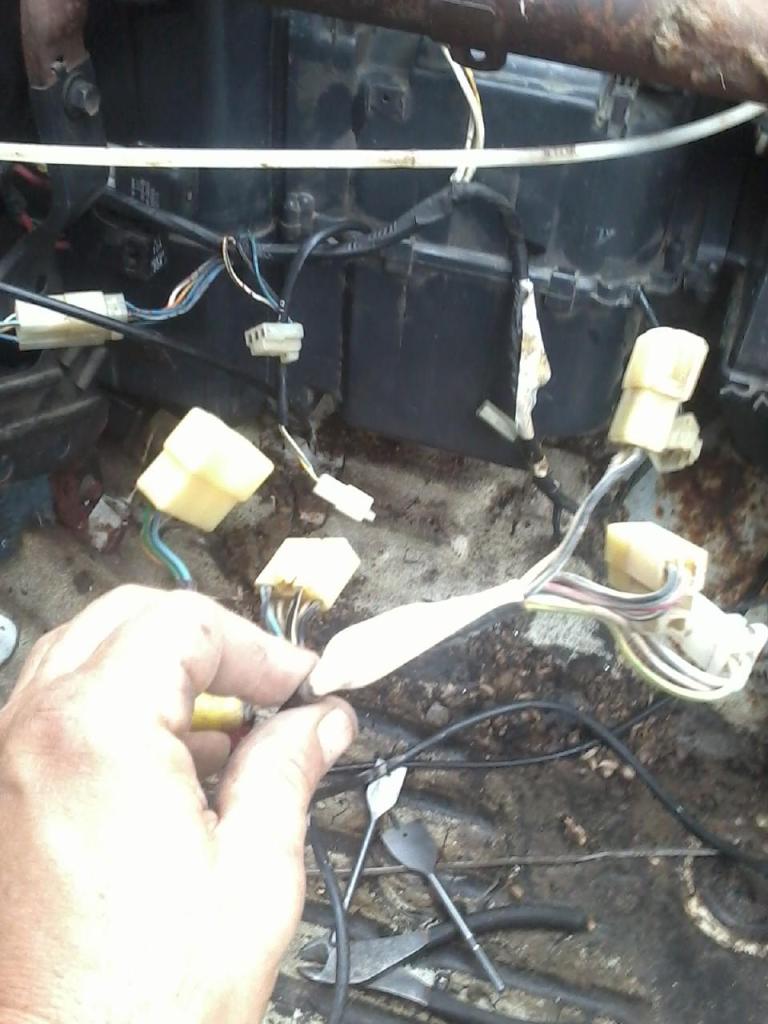
Will get some rubber grommets to seal up the excess hole and for protection of the evaps metal pipes.
Carpenters are going to scream with me using this tool to cut the holes. But it worked.
Evaporator you will need. Where my finger is pointing is what Mark is talking about on his thread that needs adjusting.
The top piece is basically a pipe that connects the blower to the heater core if you dont have AC. Otherwise the Evaporator sits in its place.
Just above my finger is a dimple I was talking about. This one is for the drain hole for the Evaporator. Makes installing an AC so much easier.
Wiring harness needed to connect to the trucks main harnes. Appears all connections are already installed.
Will get some rubber grommets to seal up the excess hole and for protection of the evaps metal pipes.
Last edited by Terrys87; 08-13-2013 at 02:12 AM.
 08-03-2012, 10:52 AM
#783
Wow, great work! Love the bit choice!!! WHATEVER WORKS, MAN! Let's see.... 2$ for a wasted bit.... or 6$ for a hole cutting bit? GOOD CHOICE! HAHAHA.
Richard(Redeth)... Who is this guy that will do the SAS and lift for 600$? I WANT HIS NUMBER! Your buddies? Is that who you're talking about? (BTW, I TOTALLY get it, the idea of saving the money and having the satisfaction of doing it yourself!!! Just curious)
Richard(Redeth)... Who is this guy that will do the SAS and lift for 600$? I WANT HIS NUMBER!
Your buddies? Is that who you're talking about? (BTW, I TOTALLY get it, the idea of saving the money and having the satisfaction of doing it yourself!!! Just curious)
08-03-2012, 11:46 AM
#785
Registered User
that is too fun terry all the connections right there to put ac in AND dimples in the metal to put the fittings in the right places
cringes at using a spade bit on metal BUT if it worked it worked lol!
cringes at using a spade bit on metal BUT if it worked it worked lol!
08-03-2012, 12:17 PM
#786
Registered User
Oh man No no no.... I never got a quote to see what it would cost. sorry I just threw that price out there. For all I know it can be much more or less. My bad I should have specified that. Why, what is it supposed to cost if I provide everything? What the average price I'm looking at if someone was to do it for me? Just curious ya know.
08-03-2012, 04:23 PM
#789
Registered User
Terry don't forget none of the early Toyotas came from the factory with air. It was always a dealer added option. So they all have the electrical harness ready for the option. I think the whole kaboodle came together in a box because I have the installation book for 1989 Toyota trucks and 4Runners. It shows the A/C as a kit and not the individual parts. It tells you to drill the holes at the dimples. I've collected most of what I need to install it in mine except I need to get the O rings, belt and a new dryer. If you look at the plastic directly beneath the steering wheel there's a rectangle ghost there to cut out. A small vent fits in there. Are you going with 134A or R12? I probably won't get this done while it's still hot. I've had many cars that didn't have A/C in the past but this summer really impressed me that I need it. My 1st gen is not getting much love these days.
You can see the black rectangle and two screw holes uncut here:
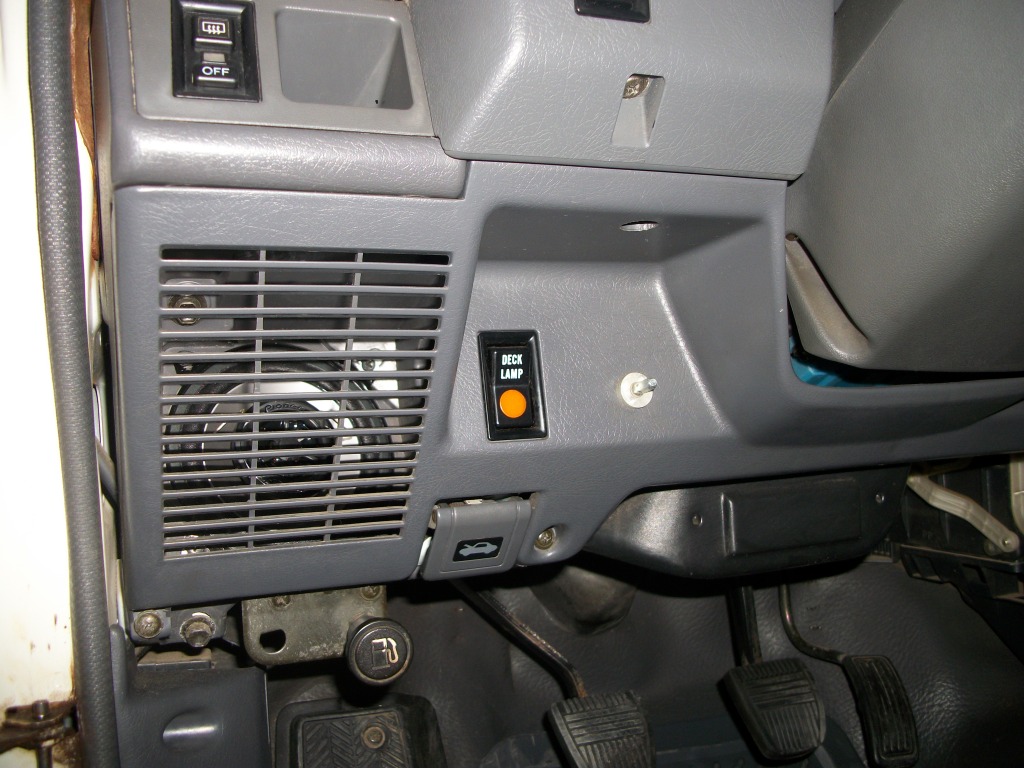
You can see the black rectangle and two screw holes uncut here:
08-04-2012, 02:01 AM
#790
Super Moderator
Staff
Thread Starter
iTrader: (1)
Join Date: Aug 2008
Location: Anderson Missouri
Posts: 11,788
Likes: 0
Received 25 Likes
on
22 Posts
Hello Ed and Cyber The Dragon..We are high tech around here. I am carpentry illiterate and those bits would never get used for their intended purposes. I got a large bit set at a flea market, so I didnt have a lot wrapped up into them. I am not sure I would not of gotten a 4th hole out of them. As far as I would of had to drive to get the correct tool to do it right, it was worth the cost of the bit. Living out in the sticks is a descent drive and I made due with what I had
Hello Waskilly,Redeth005 and Mark...I try to keep my builds cheap, but when it comes to motor swaps like the 3.4 or a solid axle swap. It is far better off to have it done unless you absolutely know what you are doing. If I wanted the 3.4, probably a days drive for me, unrealistic for you guys, I would haul it down to Waskilly as I know he has done several swaps. I dont have the welding abilities or tools. Same for the solid axle. I learned my lesson the hard way when I was younger and it got expensive quick to have to redo and have someone else to do it right and was never quite right. Just didnt feel like it came from the factory that way.
On a solid axle, you really need to have the confidence in your welding. I had some in high school and can make 2 pieces of metal stick together, but would I want to trust it for holding my steering and wheels at 60 mph. Heck noooo.
I am green with envy with some of the fab skills I see on Yotatech, something I wish I could do. When I get a welder I will start on something safe like making my own bumper then work up from there. I know solid axles rule here, but I do know where there is an 87 SR5 Extra Cab that is in far worse shape then mine that I would trade in a heartbeat. The guy just wont sell it. It is rough but not hacked up.
I try to tell a newbie that wants to build the ultimate rig, to make sure they can do the work themselves or it will add up fast. Welding, computers...Urghhh!!!! Either a 3.4 or solid axle can get expensive just by themselves. I plan on having a OM617 put into my runner at a later time. Currently I am waiting to find a deal on a Mercedes and then will start accumilating the parts for it. When it comes time to do the swap, that is going to be done by someone that knows what they are doing, it wont be me, but am hoping to help on it though. I have a 3.4 and it is a fantastic motor, but I do feel it at the gas pump. I am hoping to get 10 plus miles more to the gallon over a 3.4.
08-04-2012, 02:11 AM
#791
Super Moderator
Staff
Thread Starter
iTrader: (1)
Join Date: Aug 2008
Location: Anderson Missouri
Posts: 11,788
Likes: 0
Received 25 Likes
on
22 Posts
Hello Nervo..I didnt know AC wasnt an option on the earlier models. My 86 Runner has it and the parts I am using came off the wrecked 87. Later I was back out and seems I do have an extra plug that I dont have a connection for. I also have another evaporator that has something on the side. I will post pics tomorrow to show what I am talking about. I plan on going back and making the AC install a sticky on my first post of this build, any info you have would be greatly appreciated.
AC is completely out of my league but I am determined to get the main parts in so when I do get around to it, it should cut cost way down. I did install the condenser, a dryer that I will replace at a later time but to keep the system clean and have the metal hoses. I also have a compressor that I will install when I put the motor in. Is there any other pieces I am missing? You dont by chance have the part numbers that are needed in your 89 manual, sure most would interchange.
On the vent, I never noticed it, but it isnt on Mistys truck and it came with AC. The PO must of removed it. I will be getting one for it. I do have the pieces that you posted and did cut out the tab and just need to get a seal for the vent.
I have two other evaporators and they dont have the bright white plug on the top right of the evaporator. Any idea what that would be?
Last edited by Terrys87; 08-04-2012 at 02:42 PM.
08-04-2012, 02:30 AM
#792
Super Moderator
Staff
Thread Starter
iTrader: (1)
Join Date: Aug 2008
Location: Anderson Missouri
Posts: 11,788
Likes: 0
Received 25 Likes
on
22 Posts
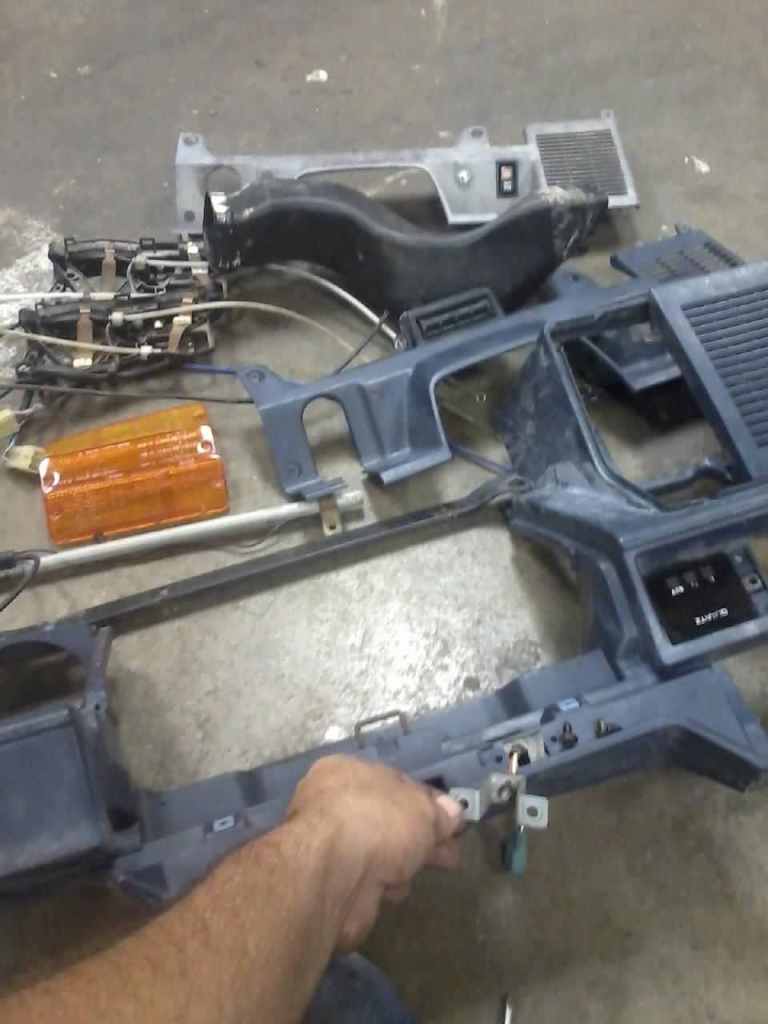
Just starting to get a few parts around to get on the truck. I am having to do a lot of piecing together. It took two heater controls to make one. I got the lenses cleaned and ready for clear coat. Finger is showing what nornally gets broken.

I have showed this before, but just to show others that may not have seen this trick for the antenna. Works great for me. I cut a bolt head off and thread it in. Got this for free from the bone yard as it was broken. These are hard to come by. Did this on the 88 runner and still working great.

I am getting the dash ready for paint. I will be taking the speaker cover into the parts store to have them to mix up some interior paint. Stacey David did this on Gearz for Ted Nuggents truck. I did this on the 88 runner and it is still holding up. Will pick up some paint tomorrow. Prepping takes alot of time. Where my finger is, that is for a glove box light. Dont know if I have any connections for it and need the switch for the bottom of the glove box door, hoping to get it working. Antenna is in one piece now. Blinker lenses are clear coated.
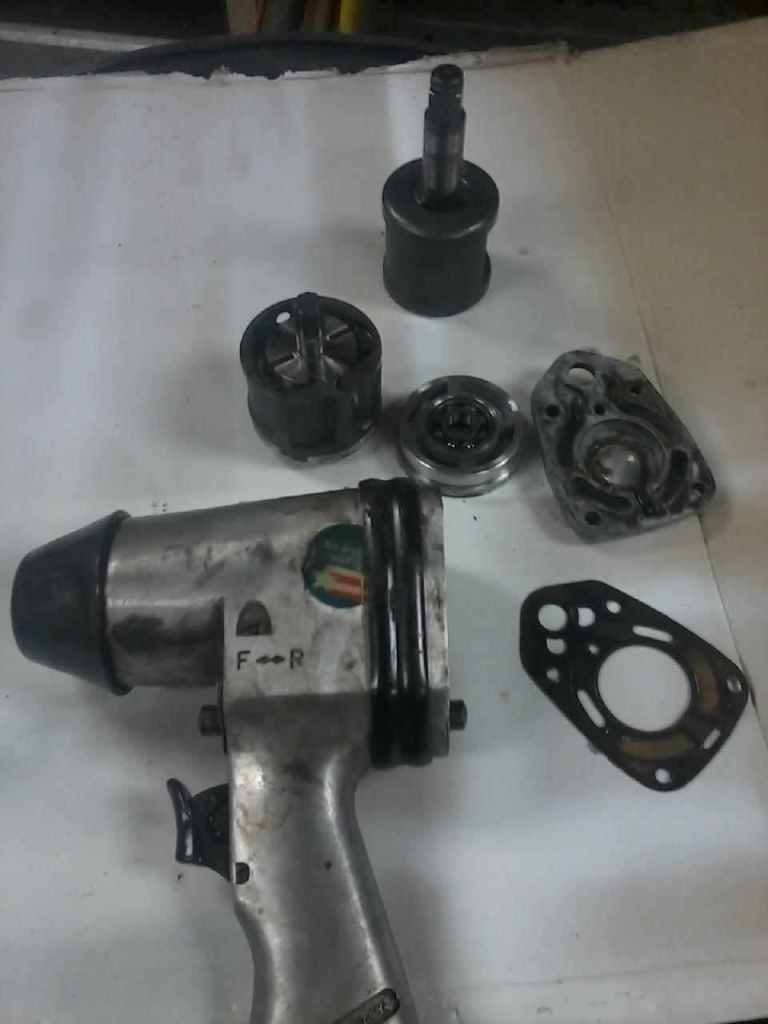
My impact wrench stopped working. It comes apart easily enough. A good cleaning will get it working again.
I have showed this before, but just to show others that may not have seen this trick for the antenna. Works great for me. I cut a bolt head off and thread it in. Got this for free from the bone yard as it was broken. These are hard to come by. Did this on the 88 runner and still working great.
I am getting the dash ready for paint. I will be taking the speaker cover into the parts store to have them to mix up some interior paint. Stacey David did this on Gearz for Ted Nuggents truck. I did this on the 88 runner and it is still holding up. Will pick up some paint tomorrow. Prepping takes alot of time. Where my finger is, that is for a glove box light. Dont know if I have any connections for it and need the switch for the bottom of the glove box door, hoping to get it working. Antenna is in one piece now. Blinker lenses are clear coated.
My impact wrench stopped working. It comes apart easily enough. A good cleaning will get it working again.
Last edited by Terrys87; 02-27-2014 at 08:12 AM.
08-04-2012, 08:22 AM
#793
Super Moderator
Staff
Thread Starter
iTrader: (1)
Join Date: Aug 2008
Location: Anderson Missouri
Posts: 11,788
Likes: 0
Received 25 Likes
on
22 Posts
Tried to work out in the shop for awhile and had to come in. It is just to hotttt. Did get my Impact Gun working. All I did was take the four screws out of the back and watched how it all came apart. Couldnt find anything broken so cleaned it up and put new oil in. Put it on some tough bolts and it torqued them right off. Figured I didnt have anything to lose if I couldnt get it working, so this time it paid off.
It is a Campbell Hausfield gun and I have had it for 15 years. For 10 years it sat and was not used. Probably not the best impact gun but works for me. Hope this might help someone else out there.
It is a Campbell Hausfield gun and I have had it for 15 years. For 10 years it sat and was not used. Probably not the best impact gun but works for me. Hope this might help someone else out there.
08-04-2012, 12:03 PM
#794
Registered User
usually its the resin impregnated vanes that either wear out or get stuck terry on impacts. the valve shop i worked at everyone came to me to fix their impacts an air ratchets oh dont buy craftsman air tools they dont lifetime warranty them learned from experience
what happens to the antennas that needs a bolt? (only one ive replaced was the 90's as it had a broken power mast)
what happens to the antennas that needs a bolt? (only one ive replaced was the 90's as it had a broken power mast)
08-04-2012, 12:46 PM
#795
Super Moderator
Staff
Thread Starter
iTrader: (1)
Join Date: Aug 2008
Location: Anderson Missouri
Posts: 11,788
Likes: 0
Received 25 Likes
on
22 Posts
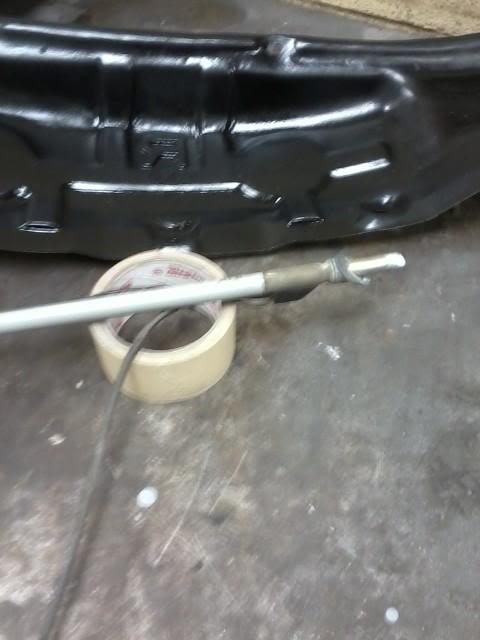
These antennas are known for getting broken. They use a cheap plastic pipe to support it in the upright postion. Trying to find a good one in the salvage yard is next to impossible. Here might be a better explanation.
Not the best picture, but in the top picture you can see the bolt in the top half of the antenna.
I just found a bolt that threaded into the two broken pieces and cut the head off twisted them together. I have done this before and it works great.
Broken

Twisted into one fixed piece.
Not the best picture, but in the top picture you can see the bolt in the top half of the antenna.
I just found a bolt that threaded into the two broken pieces and cut the head off twisted them together. I have done this before and it works great.
Broken
Twisted into one fixed piece.
08-04-2012, 01:25 PM
#796
Nervo, I KNOW, I tripped out on that. My guy, "Charlie Cools", ...he's a famous AC guy here in Torrance, CA? ....He used to install ALL OF THEM, AT THE DEALER, back in the 80's, when the trucks and such first started coming off the line, brand new w/options from dealer. He would go in and do a few in a day, then head back to his shop to make sure all was well. He told me, "WOW, so cool seeing trucks like yours come in here... I used to install ALL of the AC units in them, new, at DCH and Torrance Toyota... You'd be surprised how many of them didn't have air! Sure, they're all Denso parts, etc.,... but the Manfufacturing plants didn't put it in until....." I think he said, 88 or 89? can't remember, sorry ................
Terry, WOW, that Climate control lever assembly... THAT'S ONE OF MY MOST DREADED TASKS AHEAD! hahaha.. If that's an 88, I think it's different... I remember someone telling me that THEY DID NOT have the same lever/cables... But did keep the same Heater Control Valve... I have yet to install my 94 22RE Runner "Heater Control Valve".... So when you do that(weren't you going to?).... could you do good pics? hahaha.
GREAT WORK, MAN! Did you fix the impact?
Terry, WOW, that Climate control lever assembly... THAT'S ONE OF MY MOST DREADED TASKS AHEAD! hahaha.. If that's an 88, I think it's different... I remember someone telling me that THEY DID NOT have the same lever/cables... But did keep the same Heater Control Valve... I have yet to install my 94 22RE Runner "Heater Control Valve".... So when you do that(weren't you going to?).... could you do good pics?
hahaha. GREAT WORK, MAN! Did you fix the impact?
08-04-2012, 01:38 PM
#797
Nice tip on the antenna Terry! Look forward to seeing how your dash comes out, I'm still deciding what color to do mine, I don't care for the brown and tan that much, but the door panels and side panels by the rear seats are in such good shape, I almost hate to change the.color, lol, either way the dash needs repaired and repainted, hope to learn from your experience! I over that show Gears! Stacey David is like my hero, lol, used to watch him when he was on the show Trucks. I really like his Sgt. Rocks Dodge powerwagon monster truck with the replica 50 cal. Machine guns, lol!!!
08-04-2012, 02:06 PM
#798
Registered User
terry I have really fallen behind on keeping up with my favorite threads so sorry I havent comented. I have told you many times how impressed I am with your approach to working on these trucks, from the reserection of mistys truck to what you started with on on your 86 to this current progect. my freind you are an insperation beyond words your knowledge and willingness to share with others should win your an award on this site. you take built not bought to a new level.
I hope the tooth deal is feeling better, glad to hear you got the impact fixed, the spade bit for drill metal glad it worked lol but pick up a set of step drills a harbor freight there cheap and I use mine for everything.
look forward to seeing ya soon maybe I will have time to give you a hand with somthing not like you dont have the ability to do it all yourself.
08-04-2012, 02:22 PM
#799
Super Moderator
Staff
Thread Starter
iTrader: (1)
Join Date: Aug 2008
Location: Anderson Missouri
Posts: 11,788
Likes: 0
Received 25 Likes
on
22 Posts
Hello Mark.. I have heard of using the newer contol valve, never tried it. I just get under the hood and work it and spray it down with WD 40 and they work fine.
I will post some pics of it replacing the heater control valve. It is a tight fit. Pulling the dash pad off makes it alot more easier. I will get some good pics of that when I do as I know alot of people arent sure or are uncomfortable pulling it. Getting the passenger vent off is a little tricky but I got it down. I will make it picture heavy. Let me know if there is something in the process that you would like some good pics of.
I have come across some different levers and cables, but from my experience they all work the same and so far have interchanged. I am thinking the 88 has a better built cable or something about the way it hooked to the control assembly with a loop, something like an electrical connector if I recall right.
The first time I replaced one I didnt pull the dash pad and it was a pain in the rear. It isnt as bad as it is made out to be with the pad off. Tonite I will take a spare dashpad with me and show how to get the vent out and show some pics. I will might try to make a Youtube video of it, but holding the phone camera and doing the vent might not come out so well. Will have to see how that turns out.
Hello Ed..I picked up some blue interior paint and will be getting some of my interior pieces painted as well. I wont have time tonite but tomorrow I am planning on trying to get one of my dash pads filled with bondo and painted.
I have done this in the past as well. I looks alot better then it does with a crack staring right at you but not as good as a perfect one. I have a guy at a bodyshop that I have helped from time to time and he said he would show me how to repair a dash. Just need to get the time to get with him and have him to show me how. I will try and hit him up next week about that.
Another problem I am working on is my tail light covers. I have a couple that is FADED badly. I plan on digging thru the net and Youtube videos and seeing what I can find for a fix for that. I called the parts store and asked if they had any dye or something similar. They dont have. If I cant find anything on the net, I have thought of trying to get some transparent paint in red and yellow and seeing how they turn out. I will be getting them cleaned as well. I think I have a good set but have some that I can experiment on.
08-04-2012, 02:29 PM
#800
Yeah, it's the dreaded "Hot/Cold" lever cable that's all bound up on me!  Was told 88+ are different and FAR LESS likely to bind/snap/fail. I can get down and pull the gate on the box after moving over the cable lever, carefully, as much as it will go... and then the gate on the HOT/COLD box where the heater core is(you know, on the bottom, that lever) moves just fine. That's how I change my AC back to heat... but I have to get under the hood too and manually push in the cable to switch back to heat, too... Cuz the cable from the lever on the dash just wont move it easily enough. I will try WD40'ing it, .... Maybe spray some silicone lube up into the cable tunnel from the engine bay side? Not sure what you mean on the 'wd40 end'...
Was told 88+ are different and FAR LESS likely to bind/snap/fail. I can get down and pull the gate on the box after moving over the cable lever, carefully, as much as it will go... and then the gate on the HOT/COLD box where the heater core is(you know, on the bottom, that lever) moves just fine. That's how I change my AC back to heat... but I have to get under the hood too and manually push in the cable to switch back to heat, too... Cuz the cable from the lever on the dash just wont move it easily enough. I will try WD40'ing it, .... Maybe spray some silicone lube up into the cable tunnel from the engine bay side? Not sure what you mean on the 'wd40 end'...


