Terrys87 88 4Runner Restoration/Build thread
#661
Thread Starter
Joined: Aug 2008
Posts: 11,787
Likes: 25
From: Anderson Missouri
Adding a maplight. Will update when I finish on my 86.
I had the windshield out and so I peeled the headliner back a little and slid it in. Then put the trimming back in to hold the liner back in place.
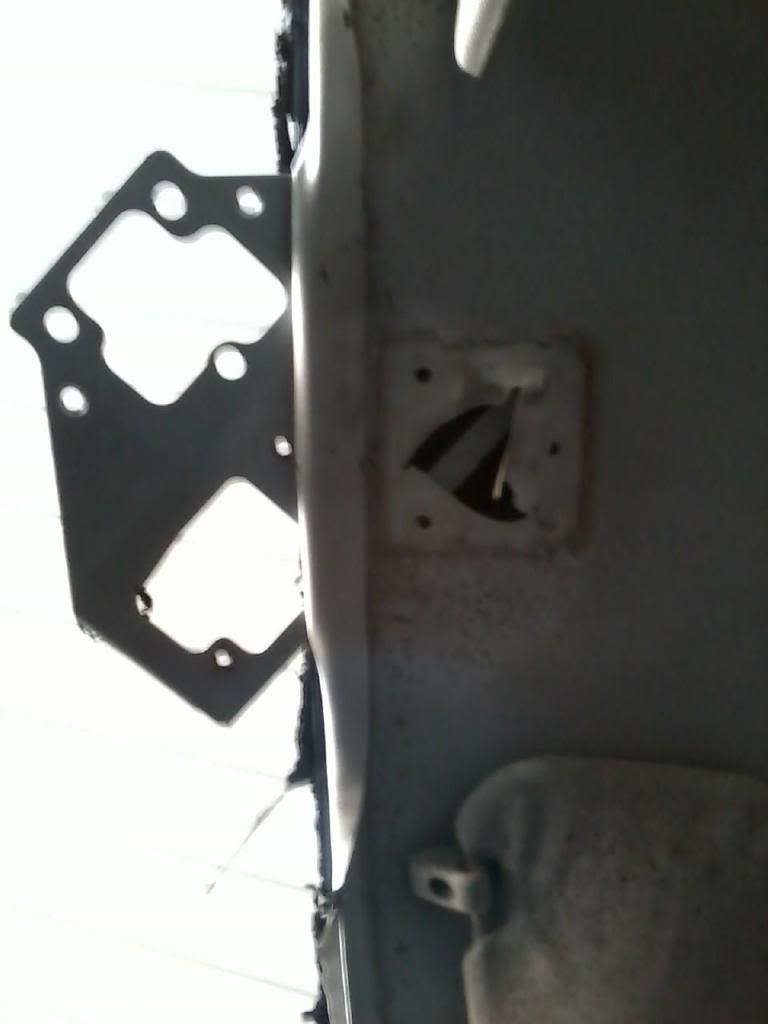
Then where the mirror goes I usd the mirror screws to hold it so I could cut the liner for the recess for the light assembly.
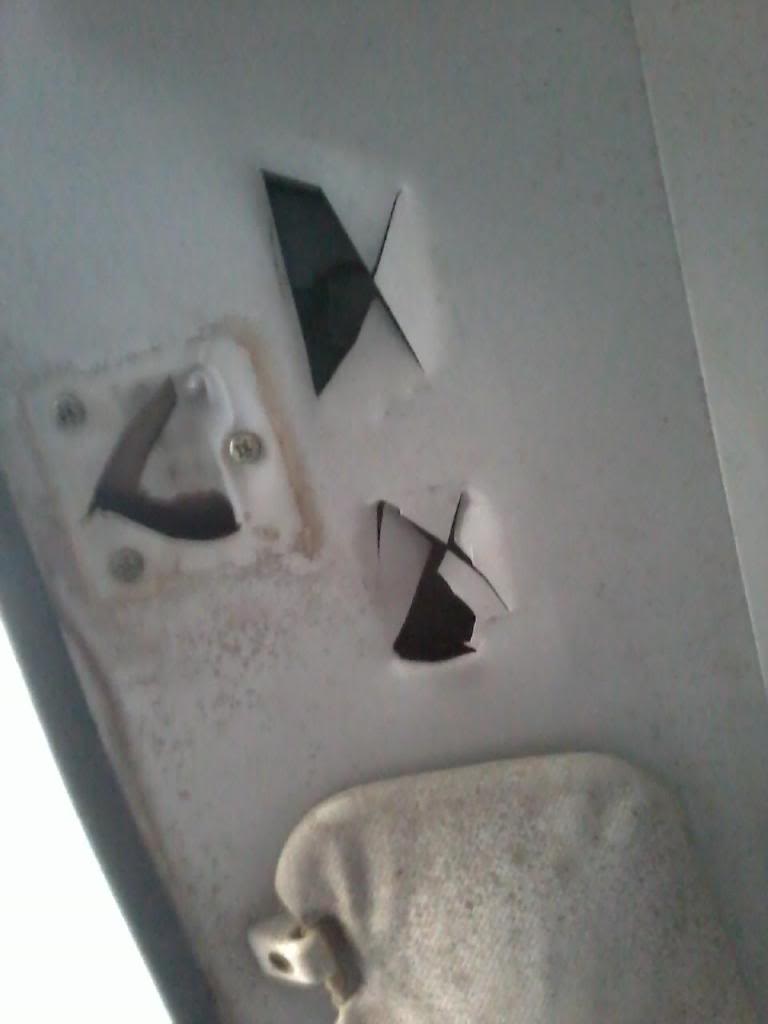
Here it is mounted. I still need to run the wiring. I have always added a standard cab pick up to my 4runners or extended cab trucks as the light that mounts in the center isnt much use for the driver. I run the wire to the top left corner for electrical. I show this in my 88 build and when I do it on this one I will update it. Been cleaning the headliner and have aways to go.
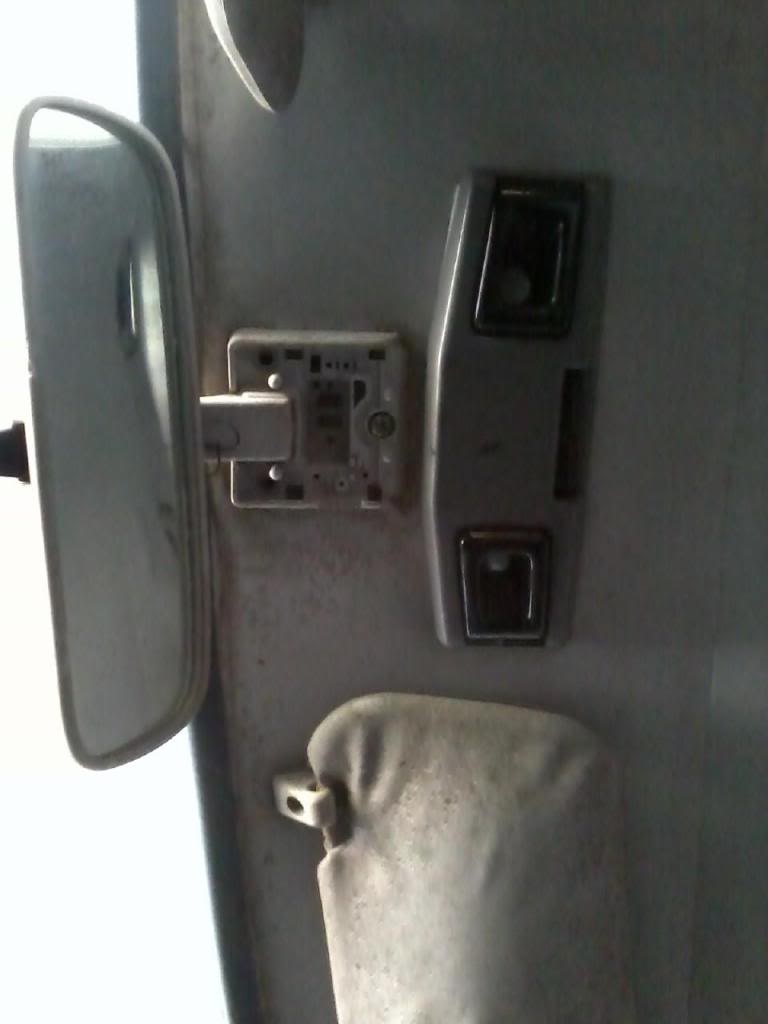
I had the windshield out and so I peeled the headliner back a little and slid it in. Then put the trimming back in to hold the liner back in place.

Then where the mirror goes I usd the mirror screws to hold it so I could cut the liner for the recess for the light assembly.

Here it is mounted. I still need to run the wiring. I have always added a standard cab pick up to my 4runners or extended cab trucks as the light that mounts in the center isnt much use for the driver. I run the wire to the top left corner for electrical. I show this in my 88 build and when I do it on this one I will update it. Been cleaning the headliner and have aways to go.

Last edited by Terrys87; 12-14-2012 at 01:48 AM.
#662
Thread Starter
Joined: Aug 2008
Posts: 11,787
Likes: 25
From: Anderson Missouri
Here is the location of the Ciruit Opening Relay. Best to get it from behind the passenger speaker. Operates fuel pump in tank.
Circuit Open Relay
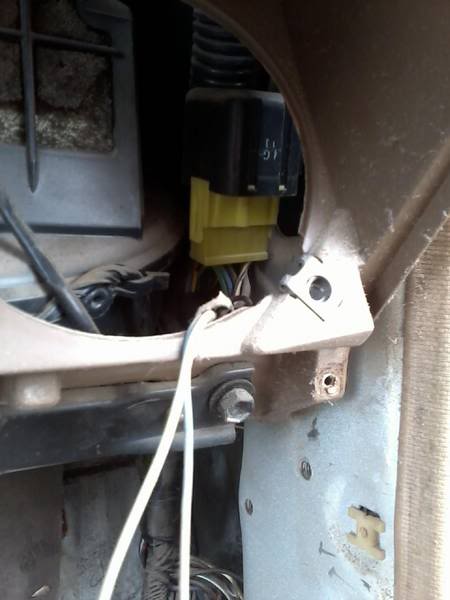
Circuit Open Relay

Last edited by Terrys87; 01-18-2016 at 10:28 PM.
#663
Thread Starter
Joined: Aug 2008
Posts: 11,787
Likes: 25
From: Anderson Missouri
Green Box needed to add wiper delay, and you will need the Combo switch assembly also.
Wiper Delay box. Loacated in Passenger kick panel
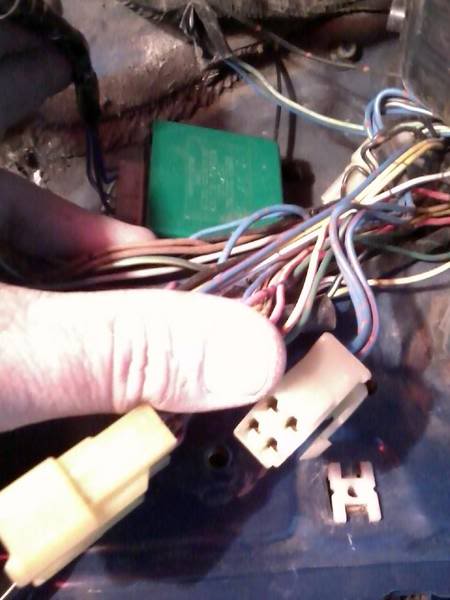
Wiper Delay cable you will need.
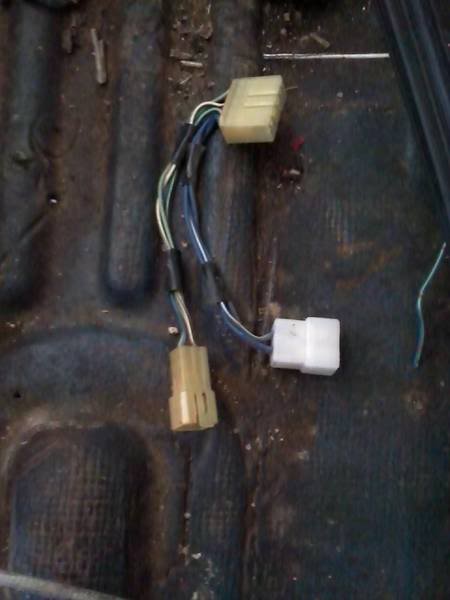
Wiper Delay box. Loacated in Passenger kick panel

Wiper Delay cable you will need.

#664
Thread Starter
Joined: Aug 2008
Posts: 11,787
Likes: 25
From: Anderson Missouri
This is going to be my Fuel Injector notes page. FIXED!!! The connections will pass a resistance check, but wont let voltage fire the injectors. Remove the clips and splice,solder,and shrink wrap wire connection. I then wrapped splice with electrical tape.
Good wiring diagram........... https://www.yotatech.com/forums/f115...e-help-178975/
Different Injectors.............https://www.yotatech.com/forums/f116...ectors-127606/
Correct Ground Locations.... https://www.yotatech.com/forums/f116...-guide-194413/
Pinout for ECU.... .............. http://media.photobucket.com/image/1...outdiagram.jpg
$3 Noid Light Thread... https://www.yotatech.com/forums/f116...t-22re-270857/
Add Ground to ECU by Trailgear.. Link I found on Trailgear no longer works. I just ran a ground wire from the external part of the case to a good ground on the body.
Redo wire connections.
Check all grounds........................................... .................................................. .........................Checked Grounds from above link.
Check wire harness ground on intake manifold.......................................... .......................................Checked Good
Check Solenoid Resistor. Haynes page 4-10 13.22b............................................ .............................Tested Good, supposed to have 2-3 Ohms, I have 3 Ohms.
Check EFI Main Relay Haynes page 4-9................................................. ........................................Tested Good Supposed to have 60-80, I have 71 Ohms.
Ohms for 86 Injectors are 1.5-3.0 all others are listed on Haynes page 4-2................................................. .....All tested 3 Ohms.
Run resistance checks on harness........................................... .................................................. ...Ran resistance test and passed, believe connections wont pass proper voltage.
#10 and #20 are apparently the ground pins on ECU. Hoping not have to go that far.
Injector Connectors 85-87 is EV1 Style. Connector Fast has other styles of connectors as well. http://connectorsfast.net/shop/index...&product_id=50
Here is something I found on Toyota Nation. Sounds alot like my problem.
[quote]I found the problem!!! The ECU and Igniter are not component that fail very often, the problem is the wire. The main engine harness contains two wires from the ECU that are spliced and split into 4 wires at the injectors. For some reason Toyota decided to splice this circuit inside the largest portion of the wire bundle. The problem with this is that where the two wires (white with blue tracer, and white with red tracer) from the ECU are spliced with the four wires from the injectors(same colors as above), the insulation is removed exposing the copper conductor to potential corrosion and breakage. Upon inspection, these wires may appear to be fine, and may even ring out when tested with a continuity meter, but in my case, the corrosion had progressed beneath the wire insulation for 8-10 inches, and compromised the copper and it's ability to carry the pulse signal to ground through the ECU circuit.
The fix is to remove the tape and protective coating from the main harness between the intake manifold and the fuse box under the hood, you may notice green corrosion on the wires in question where the mechanical crimp splice is made. 10-12 inches of these wires may need to be removed and replaced with new copper conductors. Both sets of conductors from the injectors are common, so you'll need to figure out how to properly connect the two leads from the ECU to the 4 leads from the injectors. In my case I trimmed the wire back until I had good continuity to both ends, and soldered new leads on, encasing them in 3M scothcote electrical coating and heat shrink insulated tubing.
My 87 4Runner runs like a charm. I still can't believe Toyota engineered it that way, but this fix is much cheaper than replacing igniters and ECU's. Hope this helps anyone/everyone. [Quote}
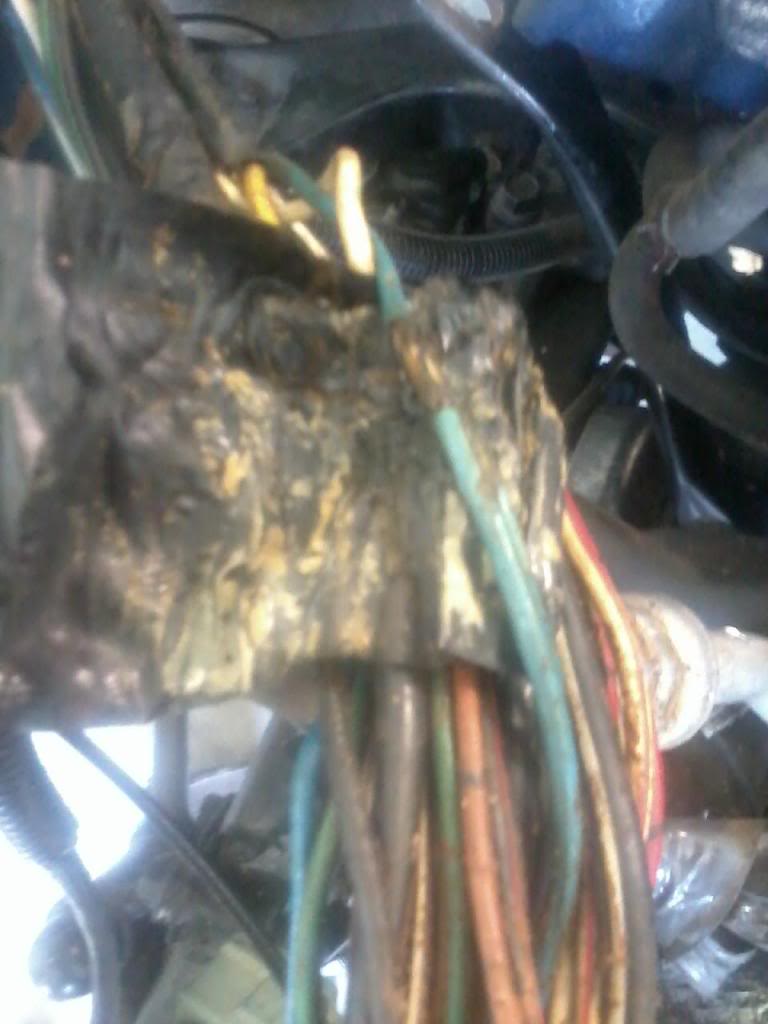
Here is a problem. The crimp can look good but needs replaced.
After suspecting my Injectors not firing. I tried to find a noid light for Toyotas. My local parts store didnt sell or rent a tester. I hear some do but not in my area from my experience. This worked for me and I seen a question recently about someone else asking. Hope this works for them as well.
I disconnected my fuel pump at its electric connection by the fuel tank. I was also checking for fuel flow problems and didnt want fuel everywhere, if fuel lines are connected, you wouldnt need to do this step. I then stuck each lead into the injector connection and while cranking the motor was able to observe the LED flashing.
Edited: Scope103 has a great point in the post below. The LEDs are polarized. If it doesnt work one way, switch the polarity or the leads the oppisite way around. Thanks for Catching that Scope 103.
My $3 noid light. I wasnt able to find one anywhere and this worked great. It flickered each time I cranked it. I just couldnt get any pictures of it lighted.
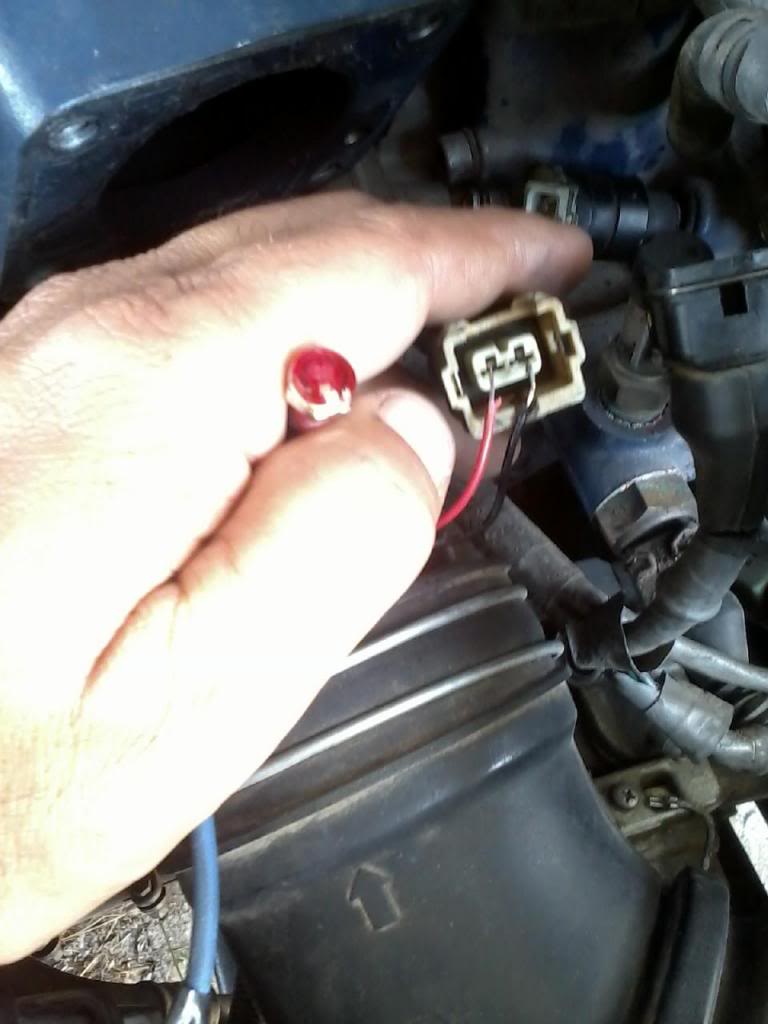
I used the 12 Volt red one. Radio Shack Part Number #276-0270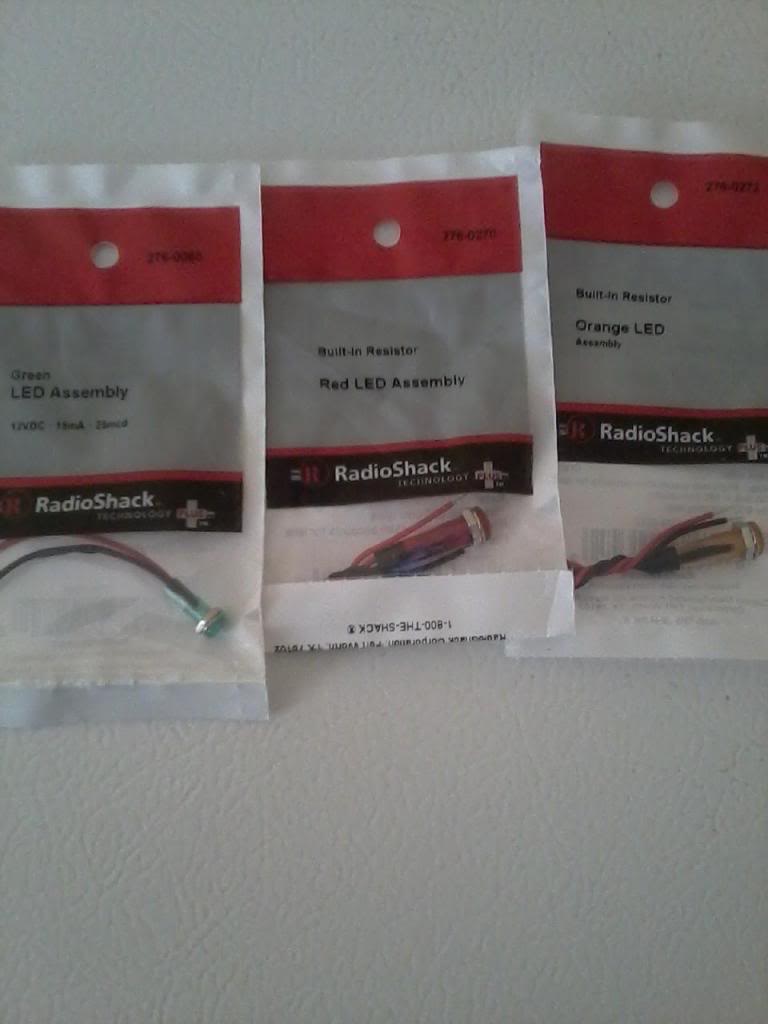
Good wiring diagram........... https://www.yotatech.com/forums/f115...e-help-178975/
Different Injectors.............https://www.yotatech.com/forums/f116...ectors-127606/
Correct Ground Locations.... https://www.yotatech.com/forums/f116...-guide-194413/
Pinout for ECU.... .............. http://media.photobucket.com/image/1...outdiagram.jpg
$3 Noid Light Thread... https://www.yotatech.com/forums/f116...t-22re-270857/
Add Ground to ECU by Trailgear.. Link I found on Trailgear no longer works. I just ran a ground wire from the external part of the case to a good ground on the body.
Redo wire connections.
Check all grounds........................................... .................................................. .........................Checked Grounds from above link.
Check wire harness ground on intake manifold.......................................... .......................................Checked Good
Check Solenoid Resistor. Haynes page 4-10 13.22b............................................ .............................Tested Good, supposed to have 2-3 Ohms, I have 3 Ohms.
Check EFI Main Relay Haynes page 4-9................................................. ........................................Tested Good Supposed to have 60-80, I have 71 Ohms.
Ohms for 86 Injectors are 1.5-3.0 all others are listed on Haynes page 4-2................................................. .....All tested 3 Ohms.
Run resistance checks on harness........................................... .................................................. ...Ran resistance test and passed, believe connections wont pass proper voltage.
#10 and #20 are apparently the ground pins on ECU. Hoping not have to go that far.
Injector Connectors 85-87 is EV1 Style. Connector Fast has other styles of connectors as well. http://connectorsfast.net/shop/index...&product_id=50
Here is something I found on Toyota Nation. Sounds alot like my problem.
[quote]I found the problem!!! The ECU and Igniter are not component that fail very often, the problem is the wire. The main engine harness contains two wires from the ECU that are spliced and split into 4 wires at the injectors. For some reason Toyota decided to splice this circuit inside the largest portion of the wire bundle. The problem with this is that where the two wires (white with blue tracer, and white with red tracer) from the ECU are spliced with the four wires from the injectors(same colors as above), the insulation is removed exposing the copper conductor to potential corrosion and breakage. Upon inspection, these wires may appear to be fine, and may even ring out when tested with a continuity meter, but in my case, the corrosion had progressed beneath the wire insulation for 8-10 inches, and compromised the copper and it's ability to carry the pulse signal to ground through the ECU circuit.
The fix is to remove the tape and protective coating from the main harness between the intake manifold and the fuse box under the hood, you may notice green corrosion on the wires in question where the mechanical crimp splice is made. 10-12 inches of these wires may need to be removed and replaced with new copper conductors. Both sets of conductors from the injectors are common, so you'll need to figure out how to properly connect the two leads from the ECU to the 4 leads from the injectors. In my case I trimmed the wire back until I had good continuity to both ends, and soldered new leads on, encasing them in 3M scothcote electrical coating and heat shrink insulated tubing.
My 87 4Runner runs like a charm. I still can't believe Toyota engineered it that way, but this fix is much cheaper than replacing igniters and ECU's. Hope this helps anyone/everyone. [Quote}
Here is a problem. The crimp can look good but needs replaced.

After suspecting my Injectors not firing. I tried to find a noid light for Toyotas. My local parts store didnt sell or rent a tester. I hear some do but not in my area from my experience. This worked for me and I seen a question recently about someone else asking. Hope this works for them as well.
I disconnected my fuel pump at its electric connection by the fuel tank. I was also checking for fuel flow problems and didnt want fuel everywhere, if fuel lines are connected, you wouldnt need to do this step. I then stuck each lead into the injector connection and while cranking the motor was able to observe the LED flashing.
Edited: Scope103 has a great point in the post below. The LEDs are polarized. If it doesnt work one way, switch the polarity or the leads the oppisite way around. Thanks for Catching that Scope 103.
My $3 noid light. I wasnt able to find one anywhere and this worked great. It flickered each time I cranked it. I just couldnt get any pictures of it lighted.

I used the 12 Volt red one. Radio Shack Part Number #276-0270

Last edited by Terrys87; 08-14-2014 at 08:15 AM.
#665
Thread Starter
Joined: Aug 2008
Posts: 11,787
Likes: 25
From: Anderson Missouri
I added quiet a bit of info that I have learned on the 86 to this build. Keeps it all together without having to jump back and forth. I use this build for myself alot of times for info.
#667
HEY, STOP GETTING SO MUCH DONE! lol... You're really giving me a complex over here, man! lol.
Nice work, Terry... and thanks for the input on the rack.... I didn't even think about it that way/had no idea the differences in aluminum(and what I did I didn't even think out, lol)...
The Suburban rails would be better.. I hear that.. EXCEPT for the fact that they have a TINY lip where the con-ferr would be mounted to them on top... So it's too scetchy IMHO... So I found something that WILL work, .... YEA! lol.... Updated...
Have a good one, brudda...
Mark
#668
#669
Thread Starter
Joined: Aug 2008
Posts: 11,787
Likes: 25
From: Anderson Missouri
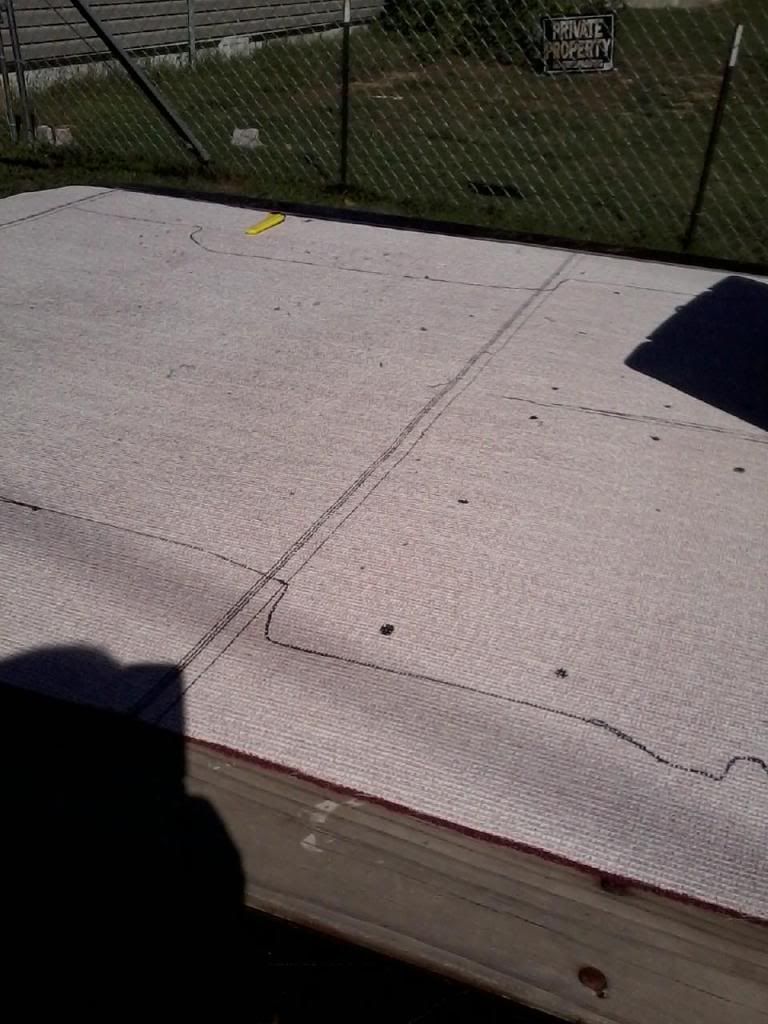
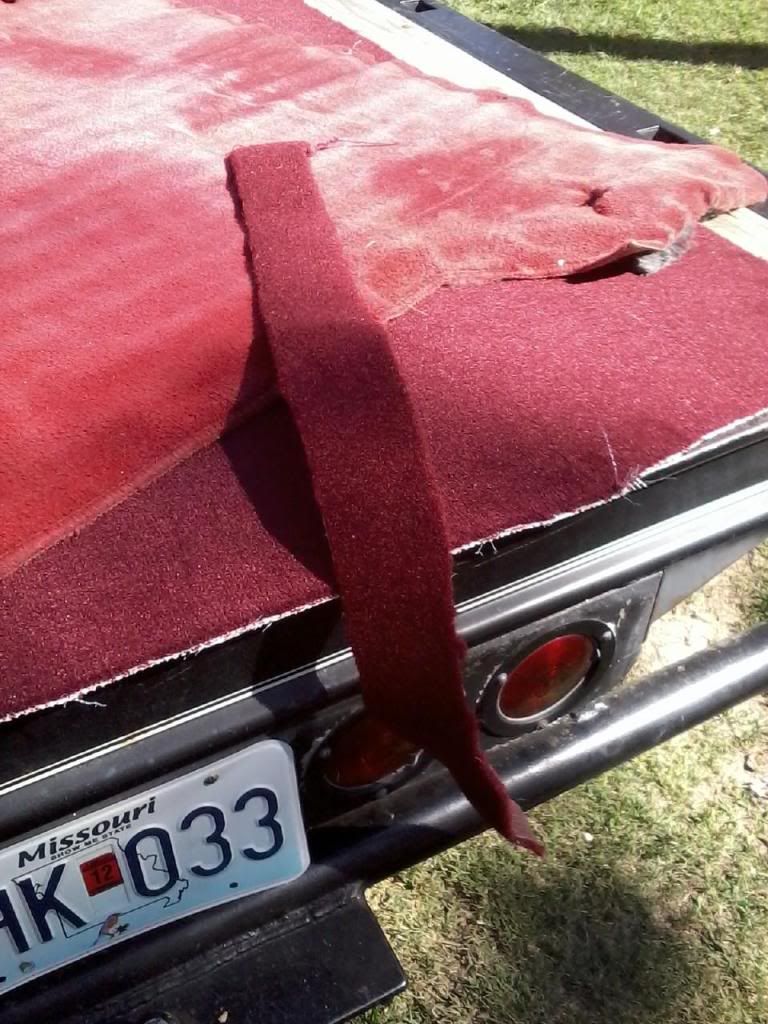
Thanks Redeht005...LOL...alot cheaper too. I spent $20 for the back piece and the factory carpet places wanted abut $140. I really liked the results and made a big improvement.
#670
Thread Starter
Joined: Aug 2008
Posts: 11,787
Likes: 25
From: Anderson Missouri
The wife found the tires and rims I got from Jason in the shop this morning and think they will be going on hers now. I think she will be getting them mounted on here in the next few days. I got one on my runner at my dads place so will need to go get it. Think they will look better on her truck then mine.
#672
Oh Yea dude i did too. I bought my carpet at home depot for about $20 also.
I used this sane method for my old red 86 Toyota pickup. It's definitely a cheap and good way to go that will still make ur truck look decent.
I used this sane method for my old red 86 Toyota pickup. It's definitely a cheap and good way to go that will still make ur truck look decent.
#673
Hey, .... Terry, .... YOUR WIFE STOLEDEDED FROM YA? hehehe. JK, hey, they're gonna get used, and that's good, right?  ... and then, you'll find something else you probably want, right?
 ... and then, you'll find something else you probably want, right?
#675
Thread Starter
Joined: Aug 2008
Posts: 11,787
Likes: 25
From: Anderson Missouri
Hello Outsane..I gotta start keeping her out of the shop. hehe She wants me to make a little corner for her to use. Just got to find a place. If I had a 10 bay shop it wouldnt be big enough.
Hello. Redeth005..I am going to try the same thing for my truck cab and see how it turns out. Did you have much problems with the humps in the floor?
Hello Mark..She got them, I think they look better on hers then on one of my other trucks. Hers were to about 25% tread and these are the ones I got off of Jason. I am really fortunate that she lets me fit some time and funds on my projects.
Hello Redeth005..That is the one area I really am not sure about in picking the correct style of rims that would look good for my trucks. Neither the runner or the pick up have single matched tire on them so her old ones will help get one legal. Just not sure which one to put them on.
Hello Redeth005..That is the one area I really am not sure about in picking the correct style of rims that would look good for my trucks. Neither the runner or the pick up have single matched tire on them so her old ones will help get one legal. Just not sure which one to put them on.
#676
Thread Starter
Joined: Aug 2008
Posts: 11,787
Likes: 25
From: Anderson Missouri
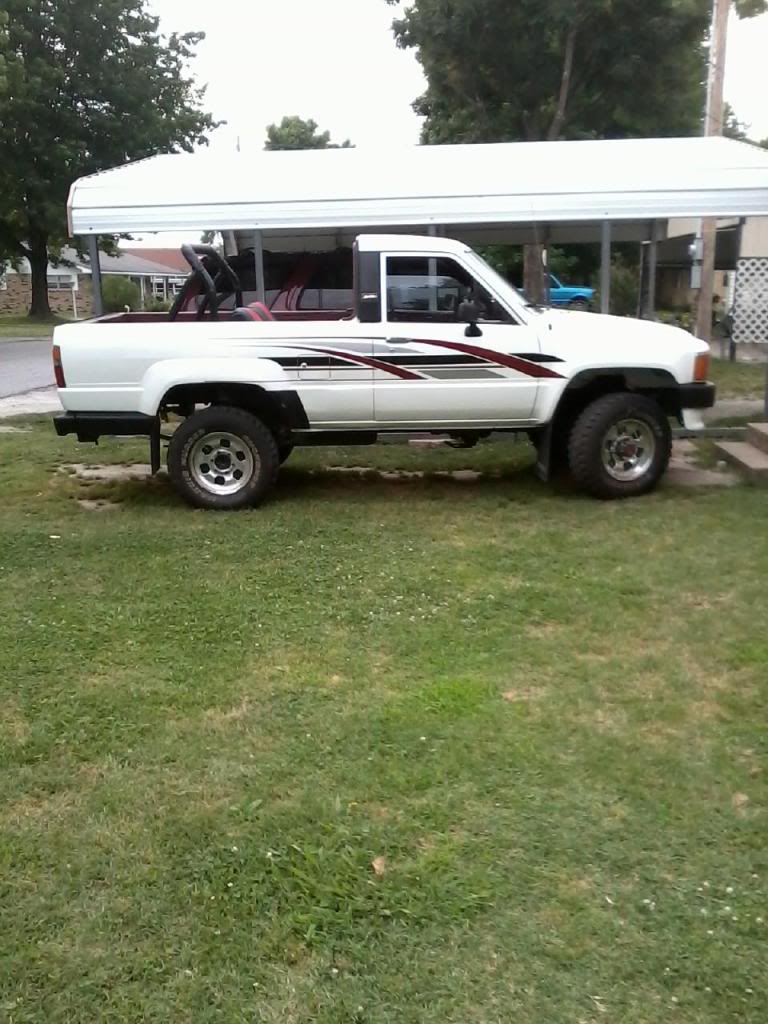
The 88 got new shoes and rims. I like the 31s better, but she doesnt want it sitting so high for her to get in and out of. Her tires were getting on the thin side and these have enough tread to my runner legal and will work until I can get some rims that I do like.
I spent yesterday stripping a 94 runner. A scraper was just hauling it for scrap. I had some scrap metal that I wanted to get rid of so traded him. I only had an hour and a half on it, and dont think he thought I could get off everything I did.
Got the whole front end, whole dash assembly, tailgate, SR5 guage, alot of switches, relays and interior trim, jack and handle, ignitor, afm, front doors,ecu, visors and rims and other odds and ends.
A friend of mine had his truck at a shop and when he stopped by his truck was setting on blocks and his rims and tires were gone. These are the rims he was wanting so it helped some of his situation.
I wanted to get the V6 brakes but didnt have time. I am not a fan of scrapers at all as this stuff can be really hard to come by. They just see the weight and dollar signs.
Got the new shoes on. I like these rims better then what she had.

#678
I DO like the rims, indeed! Just curious, ...being an 'Original Officianado' as you are.... why not the Stock SR5 rims?(I know some don't like em... I always have...just curious... "I go for the best deals and avoid bling style is all" type dealio? lol)
#679
Them rims look much better on yours than they did on mine, compliments the truck nicely,
Mark when I got those wheels I was told they were a stock yota wheel I know now they are not, maybe off a sami or something similar not sure.
Mark when I got those wheels I was told they were a stock yota wheel I know now they are not, maybe off a sami or something similar not sure.
#680
Thread Starter
Joined: Aug 2008
Posts: 11,787
Likes: 25
From: Anderson Missouri
Thanks Kitty...,I think they go good with the truck also. I think I would still like to see 31s on it but once they get polished up. I think it will look alot better and get the tire shining.
Hello Mark.. Like these  ... I like them alot too. I think that is what I want to put on my runner when I get it done. These rims are going to a friend of mine. He has a standard cab that has a buildable motor and transfer case and all of the other things that come with a parted out truck. I will trade him the rims and some work for the truck. I will eventually come across another set, but this benefits us both.
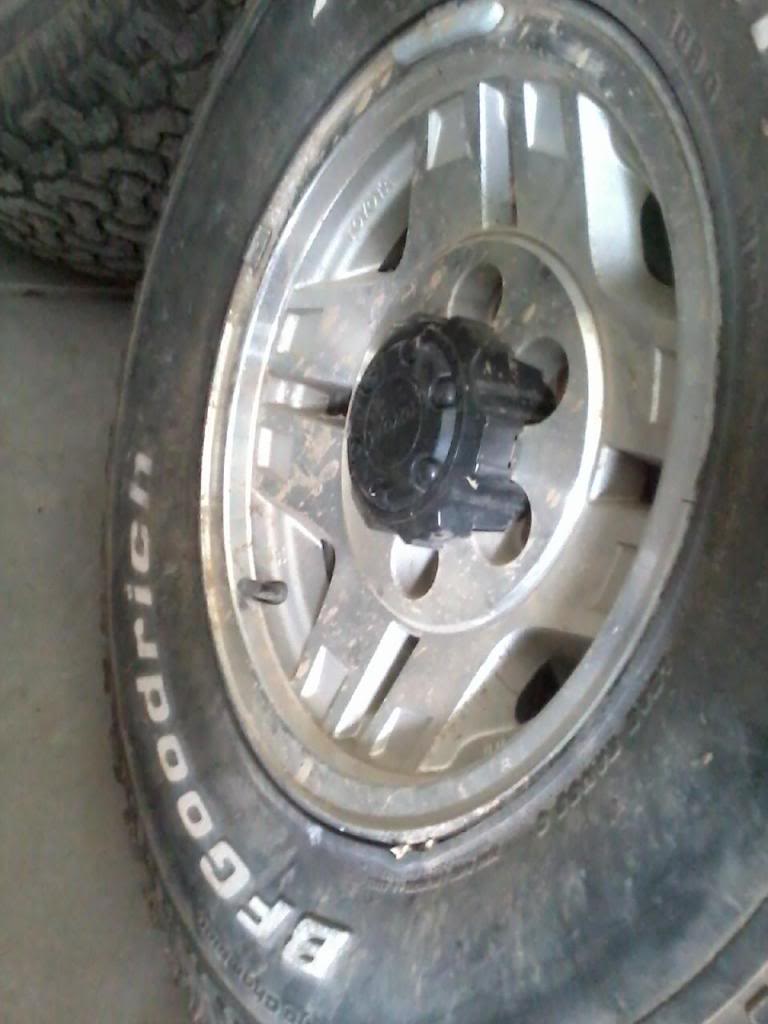
 ... I like them alot too. I think that is what I want to put on my runner when I get it done. These rims are going to a friend of mine. He has a standard cab that has a buildable motor and transfer case and all of the other things that come with a parted out truck. I will trade him the rims and some work for the truck. I will eventually come across another set, but this benefits us both.


