
Terrys87 86 4Runner with a 2nd Chance
 03-25-2014, 11:17 PM
#1861
Awesome reading, as always.
So amazed that no aftermarket kingpin hasn't cornered the Market on dashboards! Wish i had the funds to R&D that one!
I use a small, 45�angled needle nose plier to do the clips.... Works like a charm and I've never lost a single one.
Removing the tabs on the vents DOES make or easier!
Keep Killin it!
 03-26-2014, 05:34 AM
#1862
I hate those little vent tabs. My passenger side vent closest to the door does not like to stay in because the clips are worn out. I have found that if you use a very small and thin thermostat type screwdriver in between the vent and dash, they come out fairly easy with out damage.
You are really coming along with all your projects. I agree with what others have said. You make tearing the dash out look easy.
You are really coming along with all your projects. I agree with what others have said. You make tearing the dash out look easy.
03-26-2014, 11:32 AM
#1863
Super Moderator
Staff
Thread Starter
iTrader: (1)
Join Date: Aug 2008
Location: Anderson Missouri
Posts: 11,788
Likes: 0
Received 25 Likes
on
22 Posts
Thanks Mark...Do you just remove the small part of the tab? I still havent gotten around to getting my new one painted and checked out yet.
Thanks Gizler00... Wish I would of had a thread to follow when I first started doing these. I had to learn the hard way when I first started. I am trying to make it easy for some one who needs to do something like this. My pictures come out grainey but think it is the flourscent light causing it. I wasnt the one who pulled the vent. I have taken 20 minutes just to work it out, but you are right, a small screwdriver does help.
Thanks Gizler00... Wish I would of had a thread to follow when I first started doing these. I had to learn the hard way when I first started. I am trying to make it easy for some one who needs to do something like this. My pictures come out grainey but think it is the flourscent light causing it. I wasnt the one who pulled the vent. I have taken 20 minutes just to work it out, but you are right, a small screwdriver does help.
Last edited by Terrys87; 03-28-2014 at 12:48 PM.
03-26-2014, 11:37 AM
#1864
I removed the Lil tabs, then bent the large ones away from the body of the housing. That helped to retain them. I have seen people in one picture that I can not find, screw little screws up into those holes just a turn or so to actually keep the vents set in their homes
03-26-2014, 11:40 AM
#1865
Super Moderator
Staff
Thread Starter
iTrader: (1)
Join Date: Aug 2008
Location: Anderson Missouri
Posts: 11,788
Likes: 0
Received 25 Likes
on
22 Posts
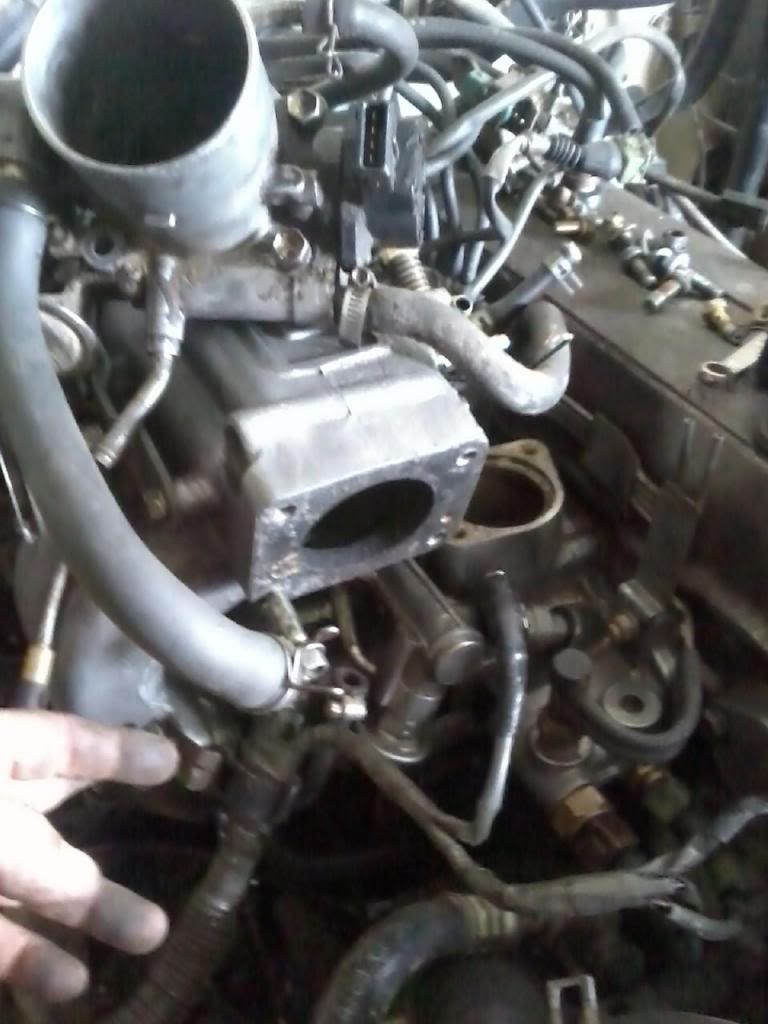
Getting some accomplished. First I will post the EGR block off plate and how I do it. I wont post it on the Conversion thread as some enviromentalist tend to get ticked on the home page. I have yet to see one of these working unless someone has done maintaince on it. This keeps your motor so much cleaner.
First I just take a soda can and run some bolts thru the holes and tap around the edges with a small hammer. Then chase around the edges with the bench grinder.

Here it is completed. (My home made gasket, Oh Crap!!! I forgot to punch out center hole,lol)
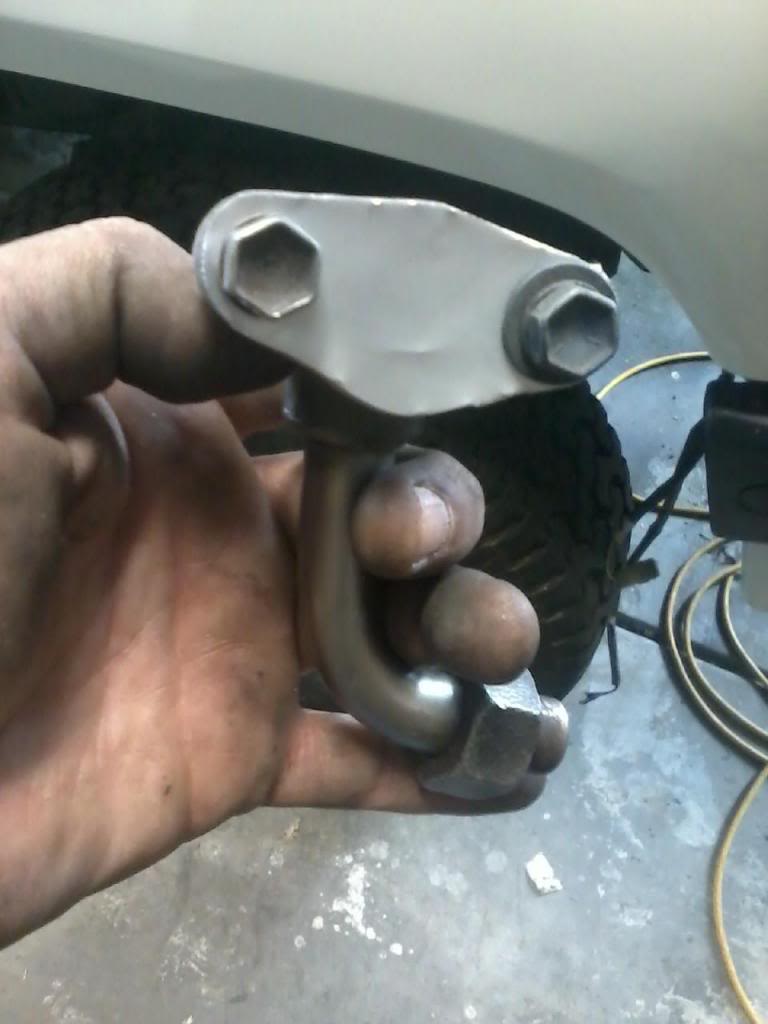
You cant even see it. It is actually a little to the left of my finger a little bit. This would pass a visual test and could easily be removed for the sniff test. Keeps Intake so much cleaner.
 03-26-2014, 11:49 AM
#1866
Super Moderator
Staff
Thread Starter
iTrader: (1)
Join Date: Aug 2008
Location: Anderson Missouri
Posts: 11,788
Likes: 0
Received 25 Likes
on
22 Posts
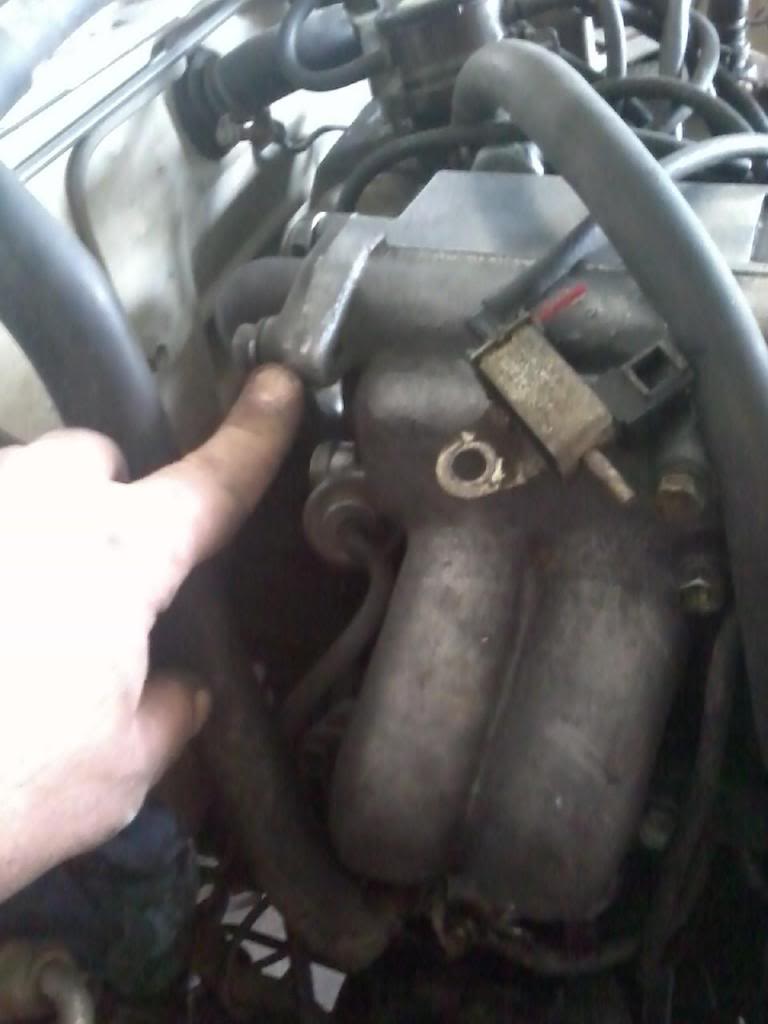
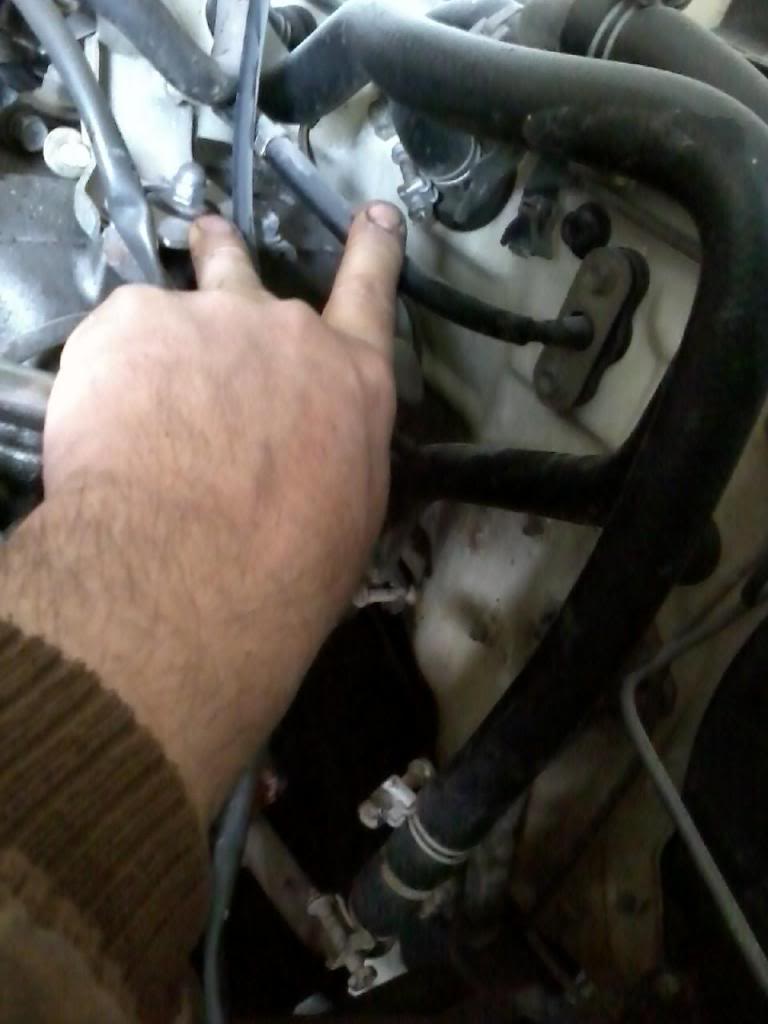
Run Injector Harness thru hole cut in firewall in earlier stage.
All of these connectors go thru the center of the Intake Manifold. Starter, IACV, Knock Sensor, Oil Pressure,Tranny Connector. If I miss some I will edit and add to this at a later time.
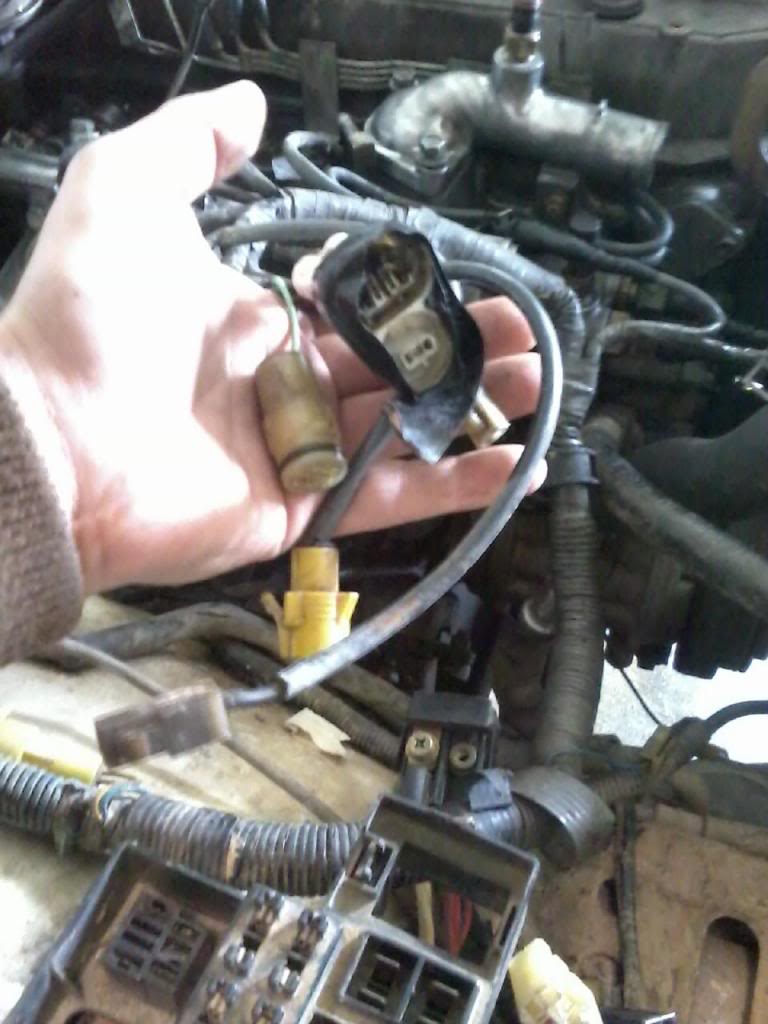
This goes to your Injector Resistor. The yellow and blue wire. Eventually goes to Pins #10 and #20. Is a good test point when trouble shooting Non Firing Injectors.

Before installing Plenum, connect your Injectors. Install Plenum. I find it easier to remove the Throttle Body Assembly and the Thermostat Cover to hook up several hoses and connectors. Each year will vary and I will add some diagrams at a later time.

Last edited by Terrys87; 01-24-2016 at 01:08 PM.
03-26-2014, 01:56 PM
#1870
Super Moderator
Staff
Thread Starter
iTrader: (1)
Join Date: Aug 2008
Location: Anderson Missouri
Posts: 11,788
Likes: 0
Received 25 Likes
on
22 Posts
Thanks Gizler00..The problem I have seen when people try to elminate the EGR, is that they get Code 71 ( I think that is the code), doing it this way the computer will never throw a code this way.
Hello cyberhorn.. Glad to see I am not the only one that does it this way. I would be nice to completely elminate it and I know it can be done, but I do like the factory look.
Thanks kornhuskerwizard... I have been at it most of the day. It is the small stuff that is taking the time. One little hose clamp is holding me up on the Plenum, but I want to make the most of the warm temperture.
03-26-2014, 02:00 PM
#1871
Super Moderator
Staff
Thread Starter
iTrader: (1)
Join Date: Aug 2008
Location: Anderson Missouri
Posts: 11,788
Likes: 0
Received 25 Likes
on
22 Posts
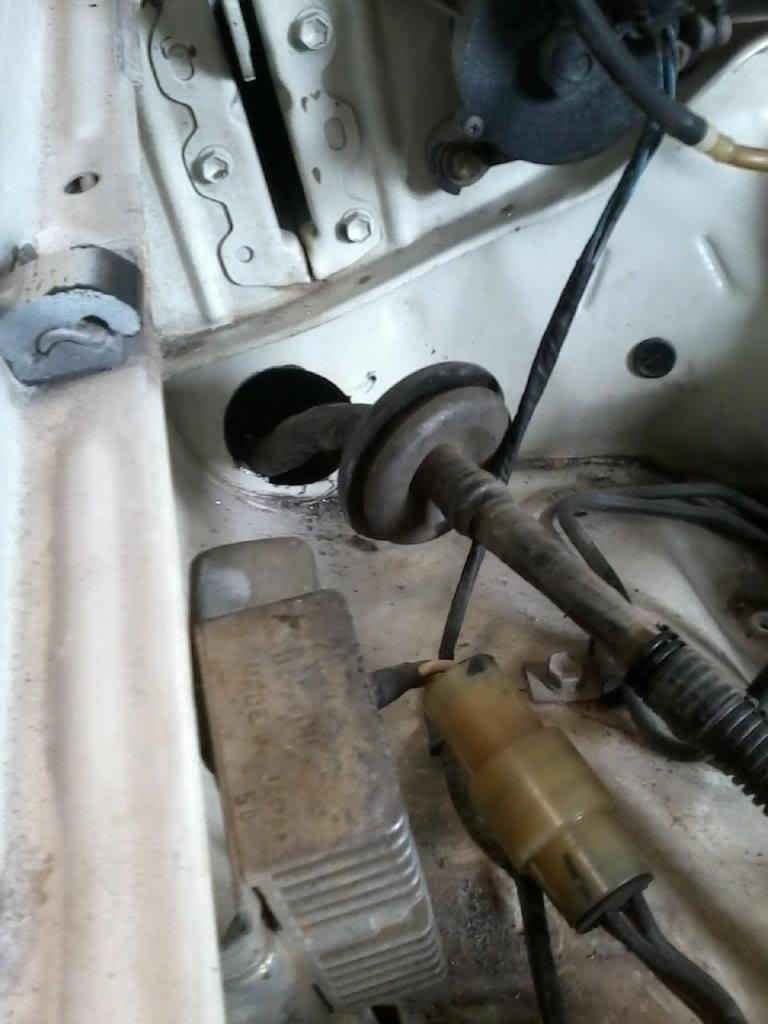
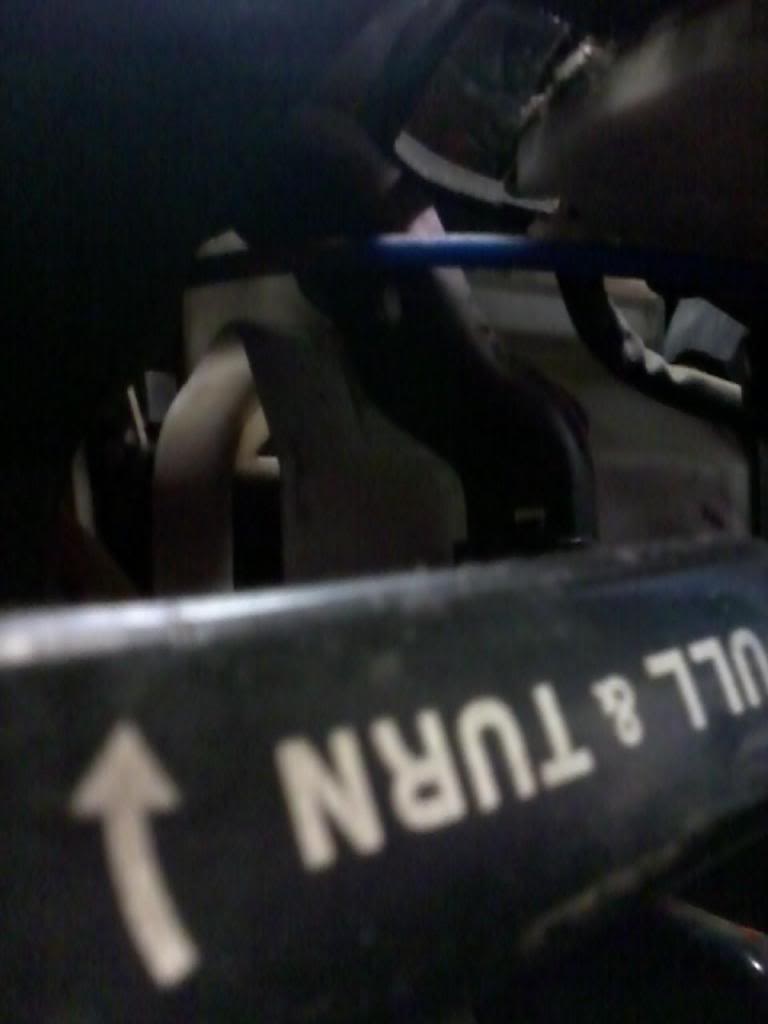
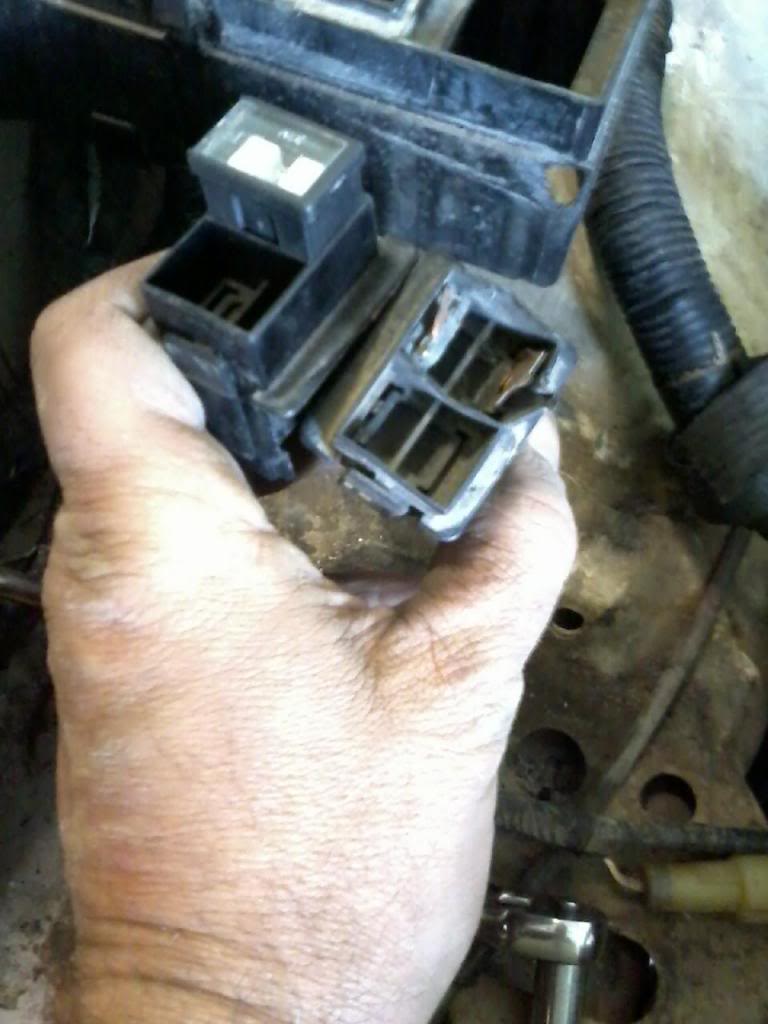
The 22r and 22re Throttle Cables are not interchangable. I swapped out the cables. Photobucket is being difficult so will go back and add some more pics later but what is working I am posting now.
There are two 10mm bolts that hold the Throttle cable to the firewall. On a 22r, the bracket for the cable attaches to the valve cover. On a 22re, it attaches to the Plenum. I suggest attaching it to the Plenum first and that helps get the cable situated.
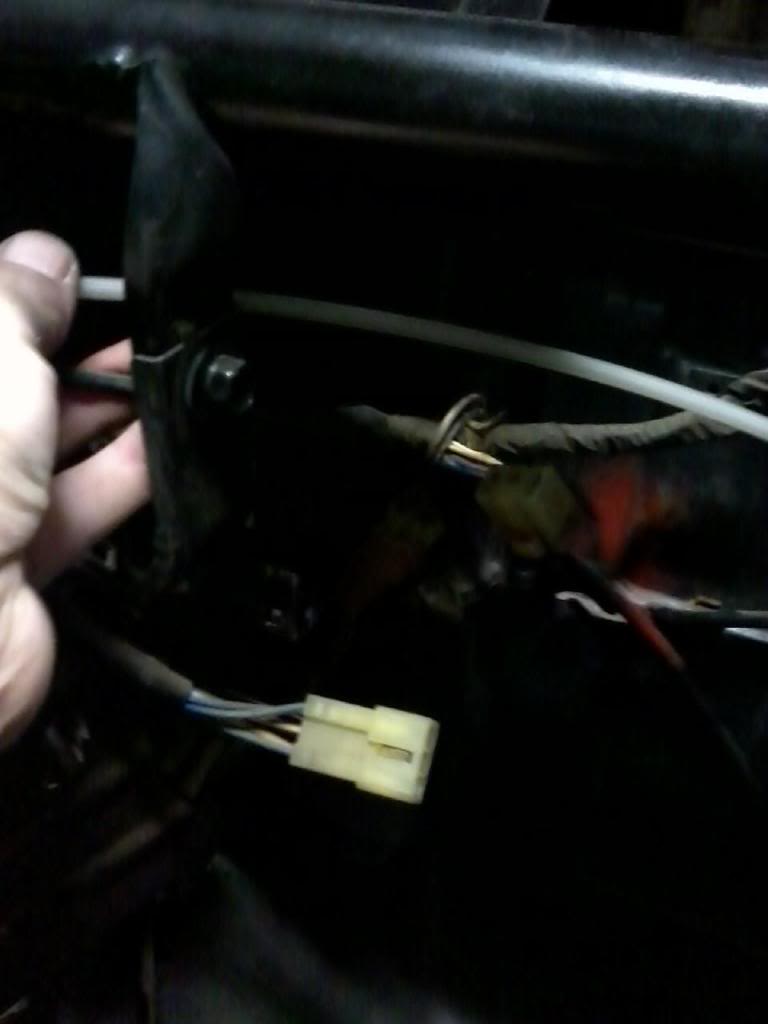
I could not get a good picture of attaching the cable to the pedal assembly. The white clip sits in the pedal bar. Push from the back to the steering wheel and the clip will undo and there is a slot in the side of the pedal bar that lets the cable slide toward the passenger side to release it.

Last edited by Terrys87; 01-24-2016 at 01:11 PM.
03-26-2014, 02:02 PM
#1872
Super Moderator
Staff
Thread Starter
iTrader: (1)
Join Date: Aug 2008
Location: Anderson Missouri
Posts: 11,788
Likes: 0
Received 25 Likes
on
22 Posts
Temperture is starting to drop. Hoping to get the fuel tanks swapped, fuel lines swapped, and still need to remove the mechanical fuel pump assembly on the front of the camshaft and install the distributor. Still need to assemble the dash and have been working on that as well.
03-26-2014, 02:54 PM
#1873
Super Moderator
Staff
Thread Starter
iTrader: (1)
Join Date: Aug 2008
Location: Anderson Missouri
Posts: 11,788
Likes: 0
Received 25 Likes
on
22 Posts
The biggest pain in the rear is the heater assembly and getting the cables routed right. Here is where the paint trick really pays off. I have black paint on top and orange on the bottom.
The blue cable goes on the outside of the bracket and straight to the firewall to the valv under the hood.
Here it is on the valve. You can see where it clamped before and also helps sit the Control Assembly to where it should be. Do not bend cables at sharp angles.
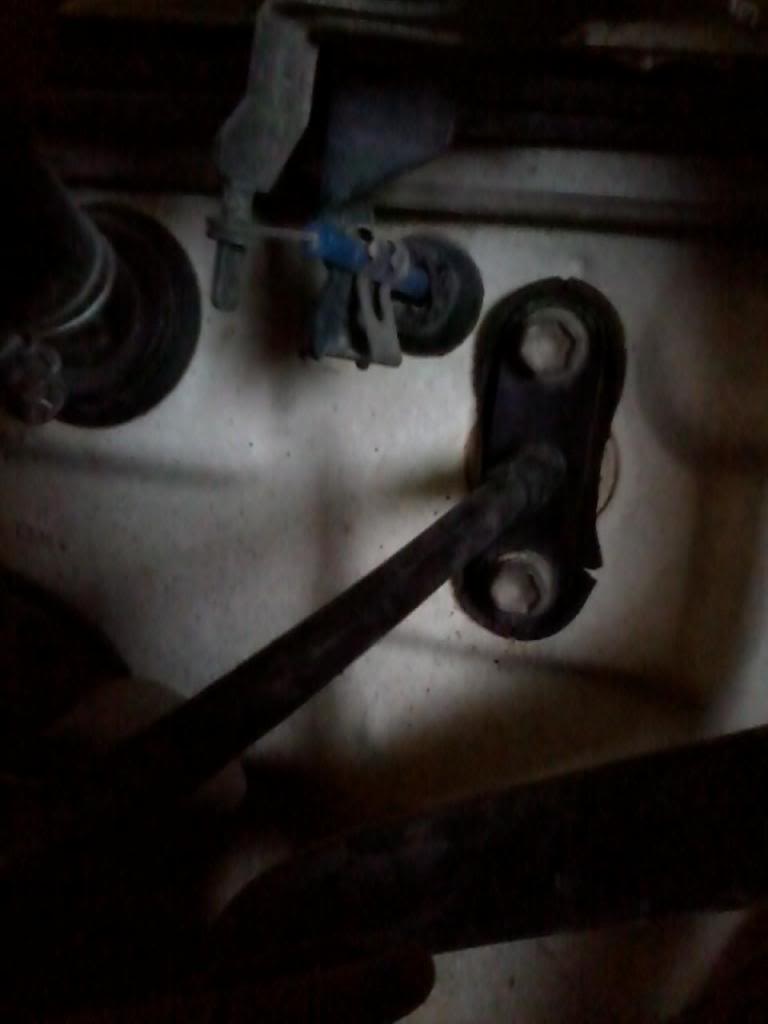
White cable on passenger side goes behind bracket.
The blue cable goes on the outside of the bracket and straight to the firewall to the valv under the hood.

Here it is on the valve. You can see where it clamped before and also helps sit the Control Assembly to where it should be. Do not bend cables at sharp angles.

White cable on passenger side goes behind bracket.
 03-27-2014, 09:30 PM
#1876
Super Moderator
Staff
Thread Starter
iTrader: (1)
Join Date: Aug 2008
Location: Anderson Missouri
Posts: 11,788
Likes: 0
Received 25 Likes
on
22 Posts
Hello Ed.. We had a great day, I did see where several parts of the country did get snow. I hope I have seen the last of snow for this year. In some ways it is starting out better this year then last year, we didnt warm up til Memorial Day or Labor Dya which ever one it is that kicks off summer. I had a good ten hours in the shop and the time just flew by. Felt like I should of got more done. But it was the small things that add up.
Hello cyberhorn... Bet you are sick of winter too. Misty said we were under tornado watch, which is where the conditons are right for a tornado. Yeah for tornado alley!!! Warm weather in spring and summer is not always a good thing at this time of year here.
Hello cyberhorn... Bet you are sick of winter too. Misty said we were under tornado watch, which is where the conditons are right for a tornado. Yeah for tornado alley!!! Warm weather in spring and summer is not always a good thing at this time of year here.
03-27-2014, 09:43 PM
#1877
Super Moderator
Staff
Thread Starter
iTrader: (1)
Join Date: Aug 2008
Location: Anderson Missouri
Posts: 11,788
Likes: 0
Received 25 Likes
on
22 Posts
Got a lot done but nothing really that I could get pictures of. I spent most of the time on the fuel system. I have just swapped out all three of the fuel lines but that is when a cab is off. Today two of the three lines were clogged that I was going to use for replacement. I wound up only using the high pressure supply line. It is the bottom line on the frame and easier to install it from the front of the truck then from the rear.
I tried it several times from the rear and the tank was out and the bed was lifted and just could not get it in there. So I tried it from the front and it went the first time where the motor and axles are in the way. Go figure on that. There is a tall bolt where the Torsion Bar and Parking Brake is and I had to undo some body bolts to lift the truck to get the line over it. Knowing putting it in from the front would of saved me alot of time. You can use the Vaper and Return line so I lucked out on that.
I pulled the tank off of my 85 to use as a reference and that added sometime as well. I need to fix the drain plug on it anyways. Never again will I ever pull the drain plug on one of these tanks. I had pulled the plug on it and it just leaks at the drain bolt. Another lesson learned. I will get it fixed this weekend.
Got most of the Tail Light Harness in since it powers the fuel pump. Got the Fuel Filter in as well. Also had to replace the 80 Amp Fuse. PO tried to pull it out from the top and didnt realize it goes out the bottom and is bolted in.
This is the only one you need to replace and goes on the bottom of the lines on the frame. Other two lines are brake lines. The Return Line and Vapor Line is on the bottom of the cab.
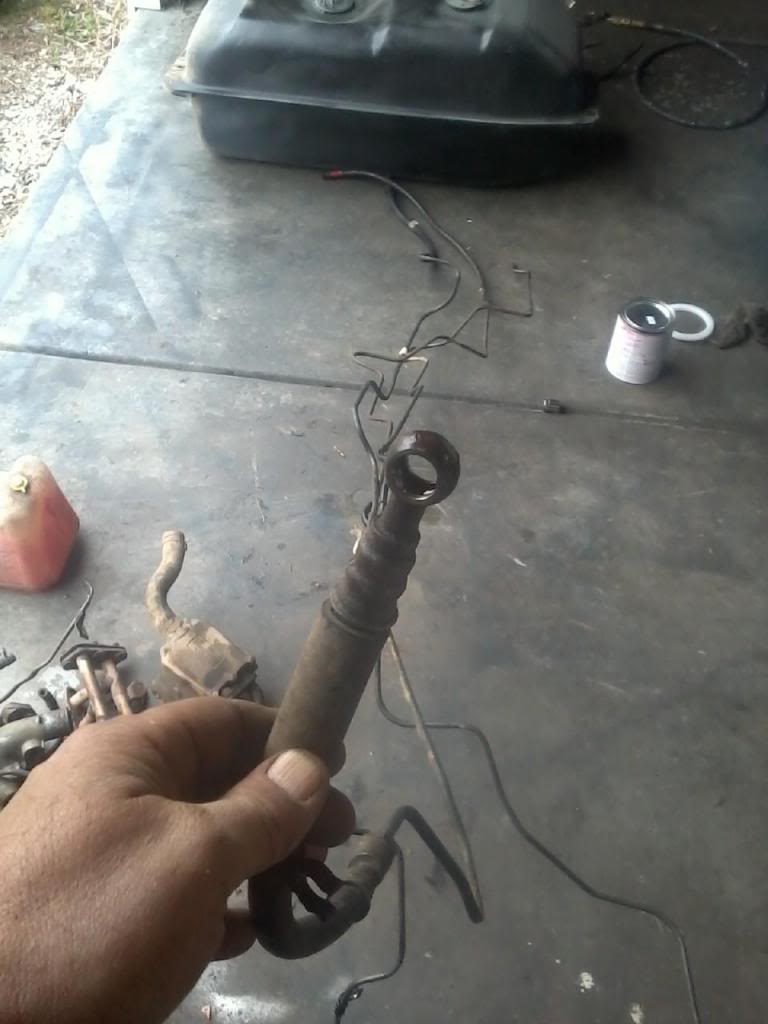
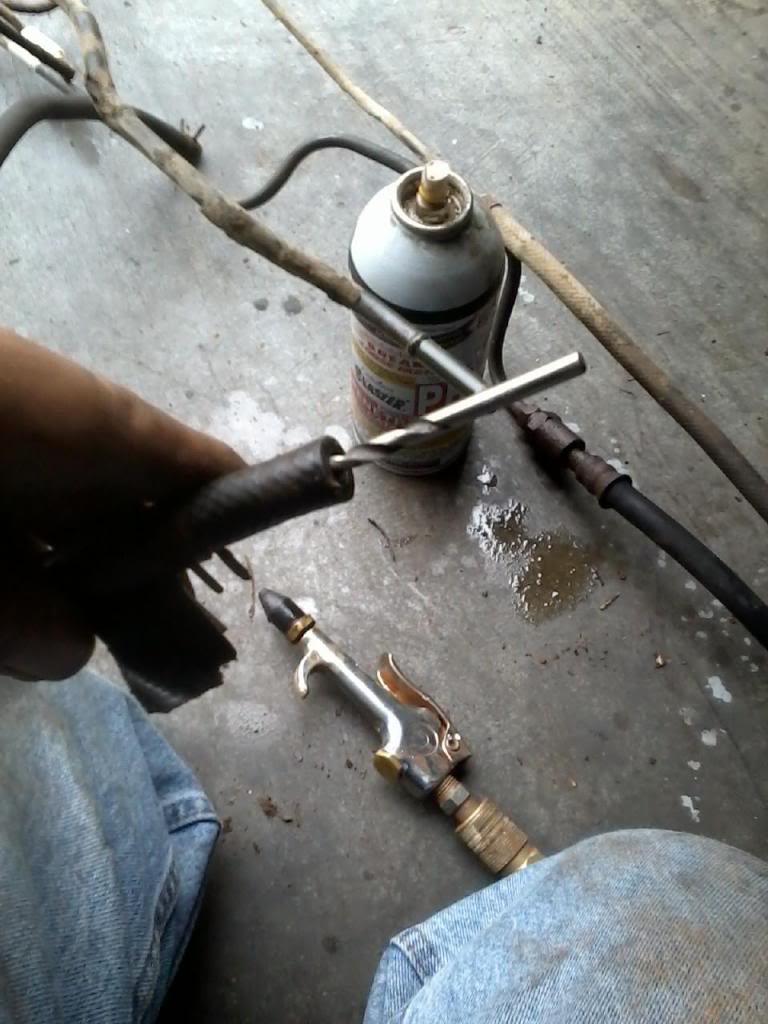
I was able to unclog one line and it took a drill bit to clear it. It had soaked quite awhile.
I tried it several times from the rear and the tank was out and the bed was lifted and just could not get it in there. So I tried it from the front and it went the first time where the motor and axles are in the way. Go figure on that. There is a tall bolt where the Torsion Bar and Parking Brake is and I had to undo some body bolts to lift the truck to get the line over it. Knowing putting it in from the front would of saved me alot of time. You can use the Vaper and Return line so I lucked out on that.
I pulled the tank off of my 85 to use as a reference and that added sometime as well. I need to fix the drain plug on it anyways. Never again will I ever pull the drain plug on one of these tanks. I had pulled the plug on it and it just leaks at the drain bolt. Another lesson learned. I will get it fixed this weekend.
Got most of the Tail Light Harness in since it powers the fuel pump. Got the Fuel Filter in as well. Also had to replace the 80 Amp Fuse. PO tried to pull it out from the top and didnt realize it goes out the bottom and is bolted in.

This is the only one you need to replace and goes on the bottom of the lines on the frame. Other two lines are brake lines. The Return Line and Vapor Line is on the bottom of the cab.

I was able to unclog one line and it took a drill bit to clear it. It had soaked quite awhile.
 03-28-2014, 05:37 AM
#1878
Super Moderator
Staff
Thread Starter
iTrader: (1)
Join Date: Aug 2008
Location: Anderson Missouri
Posts: 11,788
Likes: 0
Received 25 Likes
on
22 Posts
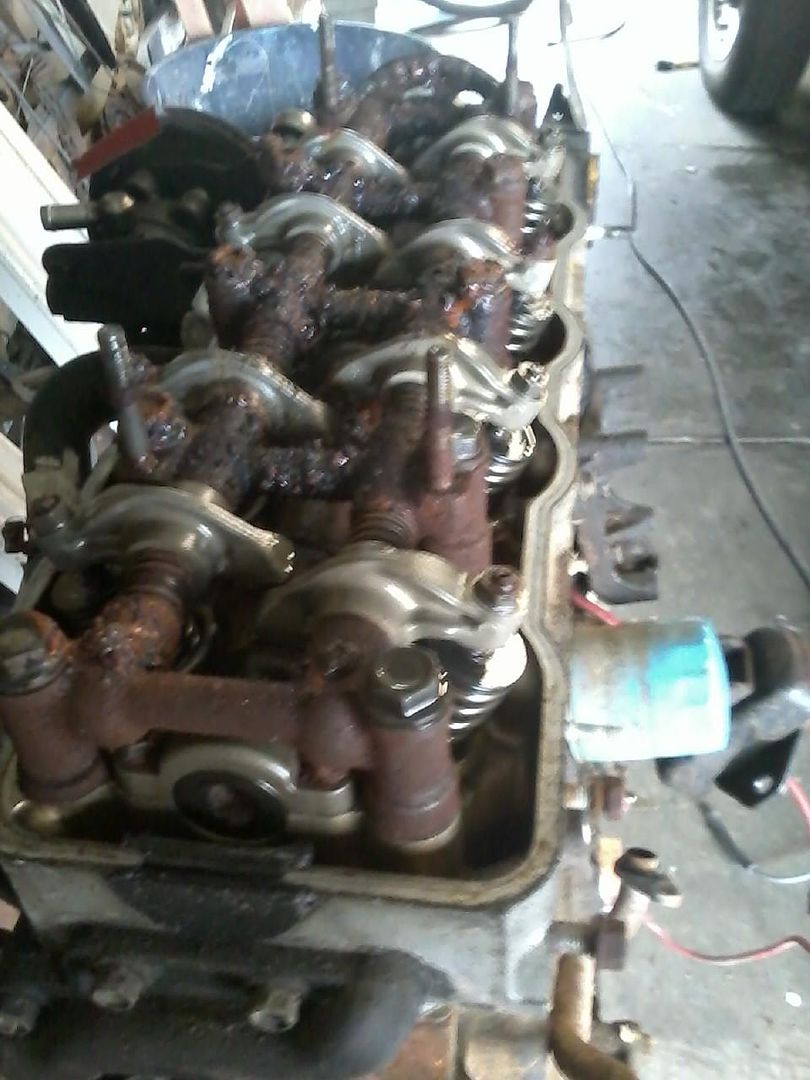
Here is the motor that I am using for the EFI conversion. May look like a junk motor and it most likely is but is valuable for parts. I have been soaking the cylinders with Marvel Mystery Oil for about 3 months and can not get it to turn with a Impact Wrench or a Breaker Bar. The brattos will have fun using a Impact Wrench to break it down. Will be a good learning experience and I will get a nut and bolt box from HF or similar and keep them all together.
The head may be good but the rocker assembly is toast, full of rust. Covers, Oil Pan, Pickup tube, brackets.. Will be a while before I let them break it down but parts I figured I would never need off of something like this has come in handy. I had to pay $60 for oil pan and pickup tube one time to convert a 2wd motor to a 4wd.
To bad it is full of rust. Never seen one this bad as it looked like it had regular oil changes.
 03-28-2014, 05:39 AM
#1879
Great info and pics Terry as always.
I never realized that the throttle cables were different from the two 22r-22re. Thats good to know. I also do not like those heater valves and the cable that operates them. Mine is broken at the heater controls in my dash. So I just leave it open all year long. And move it manually if I have to.
I never realized that the throttle cables were different from the two 22r-22re. Thats good to know. I also do not like those heater valves and the cable that operates them. Mine is broken at the heater controls in my dash. So I just leave it open all year long. And move it manually if I have to.
03-28-2014, 05:44 AM
#1880
Here is the motor that I am using for the EFI conversion. May look like a junk motor and it most likely is but is valuable for parts. I have been soaking the cylinders with Marvel Mystery Oil for about 3 months and can not get it to turn with a Impact Wrench or a Breaker Bar. The brattos will have fun using a Impact Wrench to break it down. Will be a good learning experience and I will get a nut and bolt box from HF or similar and keep them all together.
The head may be good but the rocker assembly is toast, full of rust. Covers, Oil Pan, Pickup tube, brackets.. Will be a while before I let them break it down but parts I figured I would never need off of something like this has come in handy. I had to pay $60 for oil pan and pickup tube one time to convert a 2wd motor to a 4wd.
To bad it is full of rust. Never seen one this bad as it looked like it had regular oil changes.
Its even better that you are going to let your kids tear it down. Definitely a great learning opportunity for them. I can remember tearing stuff down with my Pap as a kid. He gave me an Old CT90 Honda, that he bought new, when I was 5 years old. We tore into that thing and got it running! I still have it today in my garage.


