
Terrys87 86 4Runner with a 2nd Chance
 03-16-2014, 10:44 PM
#1821
Super Moderator
Staff
Thread Starter
iTrader: (1)
Join Date: Aug 2008
Location: Anderson Missouri
Posts: 11,788
Likes: 0
Received 25 Likes
on
22 Posts
Hello kornhuskerwizard...We got snow today as well. Just as soon as I get ready to get started on something, the weather throws a curveball. The fuel systems get pretty bad in these things. I try to mention in all of my builds trying to make people aware of the conditions of them.
Thanks junk4u...The transmission thing is going a lot slower then I would like. Everything is taking a lot longer then what it should, but just got to get back into the groove of things. Seems like everything goes slow for me and then it moves quickly for a few times. Hoping to make some big progress on my days off here soon. Weather is looking promising.
Hello 775Toy...Welcome to my thread. I try to show how to get into these trucks and get things back to normal on them. Some previous owners do some crazy things to them. I have seen your thread and am currently working on 2 white extra cabs myself. Should start to make some progress on them very soon. The BBQ is trying to convince everyone that it is spring and get back on to projects, including myself,hehe.
Thanks Gizler00..The Red Kote has done well for me. It says you can coat over the rust but I clean the tanks. Has worked great every time. Got the snap ring off and now I am trying to find a gear puller that will work to pull the bearing. Any info will help. This is one of those things that should be easy and quick and is going slow. First time is always the slowest.
 03-16-2014, 10:57 PM
#1822
Super Moderator
Staff
Thread Starter
iTrader: (1)
Join Date: Aug 2008
Location: Anderson Missouri
Posts: 11,788
Likes: 0
Received 25 Likes
on
22 Posts
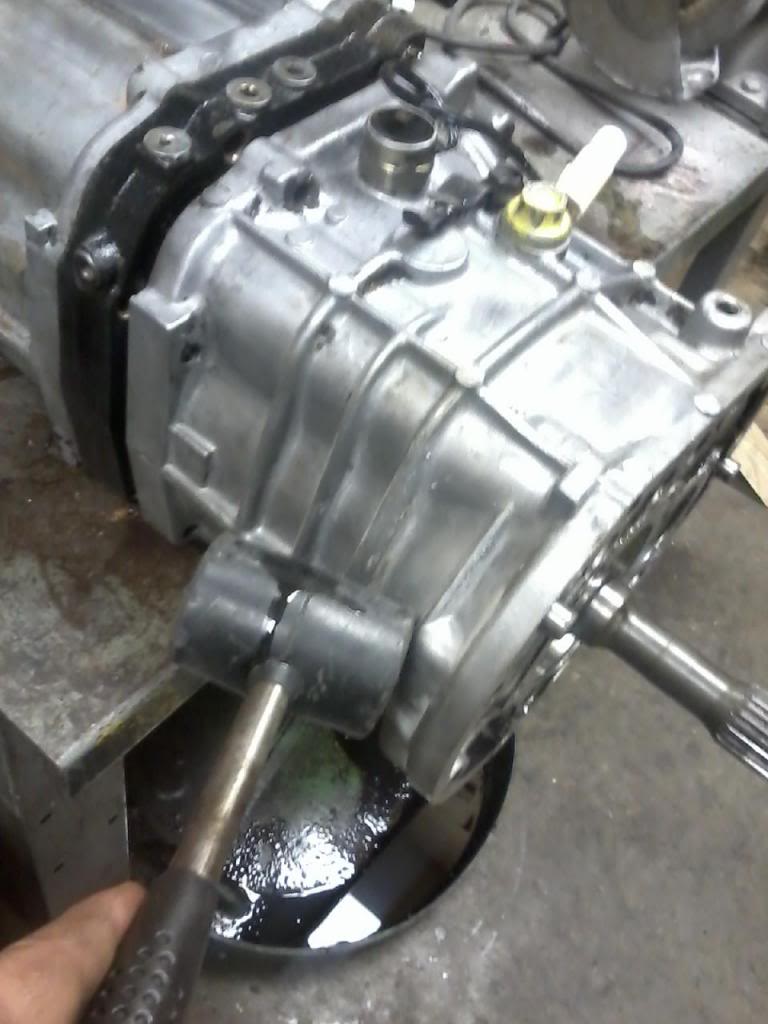
I finally got the snap ring off. That was a royal pain in the rear, but it is off. None of the snap ring pliers I had worked so I had to make due with what I had and used them and a couple of flat blade screw drivers to get the snap ring off.
Got that done and have tried several different gear pullers from my local parts store and I am having trouble finding one with a deep enough reach and hook to grab the edge of the bearing and pull it out. At this it would probably be cheap enough to take it to a tranny shop and have them to just pull it and install the new one. Shouldn't take much time, but I am not giving up in it just yet and going that route. I like to do things myself, but it would be a good way to go if you have the tranny out and the shaft is loose like I see on these a lot of the time.
Trying to find the right gear puller. I will send the original poster of the thread I found this thread on and see if he has any suggestions.
FSM MT-18
http://www.drivetrain.com/parts_cata...ustration.html
http://www.pirate4x4.com/forum/toyot...nny-noise.html
Got that done and have tried several different gear pullers from my local parts store and I am having trouble finding one with a deep enough reach and hook to grab the edge of the bearing and pull it out. At this it would probably be cheap enough to take it to a tranny shop and have them to just pull it and install the new one. Shouldn't take much time, but I am not giving up in it just yet and going that route. I like to do things myself, but it would be a good way to go if you have the tranny out and the shaft is loose like I see on these a lot of the time.
Trying to find the right gear puller. I will send the original poster of the thread I found this thread on and see if he has any suggestions.

FSM MT-18
http://www.drivetrain.com/parts_cata...ustration.html
http://www.pirate4x4.com/forum/toyot...nny-noise.html
Last edited by Terrys87; 03-18-2014 at 01:14 AM.
03-17-2014, 07:28 PM
#1823
Super Moderator
Staff
Thread Starter
iTrader: (1)
Join Date: Aug 2008
Location: Anderson Missouri
Posts: 11,788
Likes: 0
Received 25 Likes
on
22 Posts
When all else fails, read the Factory Service Manual on getting thet transmission apart. I looked in it for the 3rd time since I have owned it and it looks like the front of the case is easily removed. That will be tonights project. I asked some tranny shops and most just dont know about thinking outside of the box. One guy seemed to know but was about useless. I am going to try another guy tomorrow and see what he suggest.
Wednesday evening I will be taking Mistys runner to a friends shop and we will get her clutch swapped out. She is bugging me about not being able to drive her truck. She understood that is was to cold when it went out but now she is ready for it to get fixed. I was hoping to get this bering thing figured out before replacing her clutch but not looking like it is going to happen. I can always do the bearing on it later and need her truck up and running again as soon as possible.
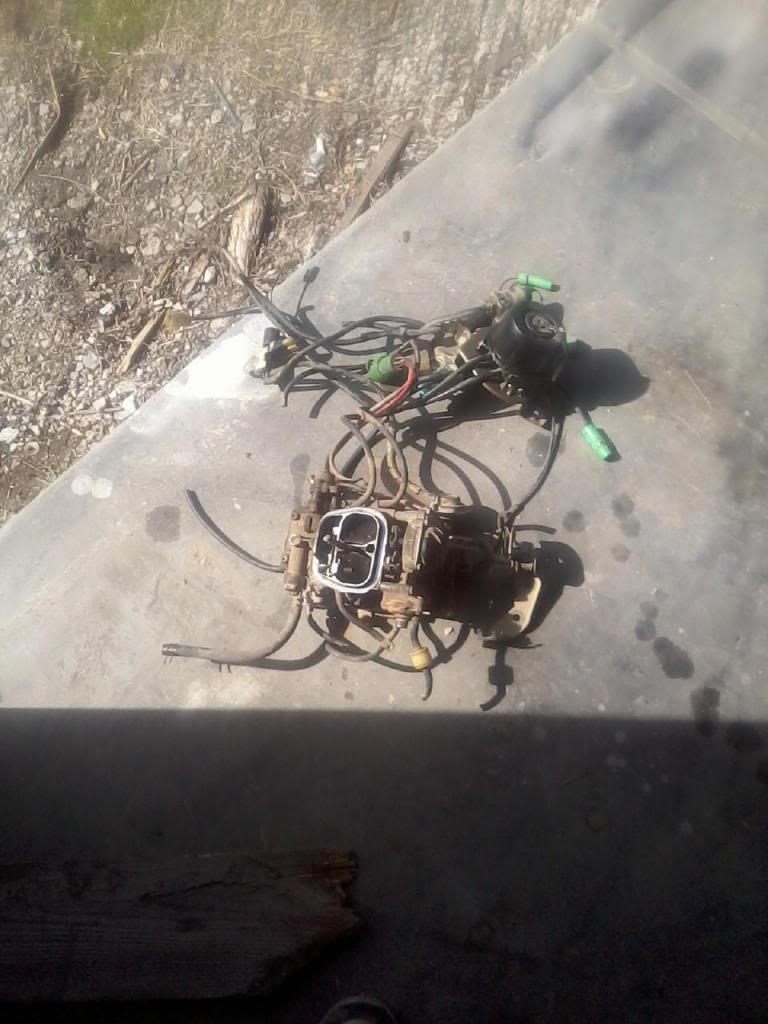
Tuesday and Wednesday morning I will be working on the 22r to 22re conversion. I removed some more of the wiring that someone had for an alarm system on the 86 extra cab. Got the fuel pump removed and the carburator. Toyota carbs have plenty of vacuum lines as it is, and this is a California Emissions truck which has even more.
Remove 2 bolts holding on Fuel Pump.
Here is the Carburator off. I tried to leave as many hoses hooked up so the next guy wont have to figure out what will need to be hooked up. A Webber is just a better carburator all the way around on a 22r truck. Dear Toyota.. Could you possibly added any more lines and made this carburator and intake any more complicated? It isnt quite that bad but it is a slow process to remove. I tried to remove the carburator still mounted on the intake and was unable to get to all of the intake bolts.
Wednesday evening I will be taking Mistys runner to a friends shop and we will get her clutch swapped out. She is bugging me about not being able to drive her truck. She understood that is was to cold when it went out but now she is ready for it to get fixed. I was hoping to get this bering thing figured out before replacing her clutch but not looking like it is going to happen. I can always do the bearing on it later and need her truck up and running again as soon as possible.
Tuesday and Wednesday morning I will be working on the 22r to 22re conversion. I removed some more of the wiring that someone had for an alarm system on the 86 extra cab. Got the fuel pump removed and the carburator. Toyota carbs have plenty of vacuum lines as it is, and this is a California Emissions truck which has even more.
Remove 2 bolts holding on Fuel Pump.

Here is the Carburator off. I tried to leave as many hoses hooked up so the next guy wont have to figure out what will need to be hooked up. A Webber is just a better carburator all the way around on a 22r truck. Dear Toyota.. Could you possibly added any more lines and made this carburator and intake any more complicated? It isnt quite that bad but it is a slow process to remove. I tried to remove the carburator still mounted on the intake and was unable to get to all of the intake bolts.

Last edited by Terrys87; 03-20-2014 at 08:09 AM.
03-18-2014, 12:02 AM
#1824
Super Moderator
Staff
Thread Starter
iTrader: (1)
Join Date: Aug 2008
Location: Anderson Missouri
Posts: 11,788
Likes: 0
Received 25 Likes
on
22 Posts
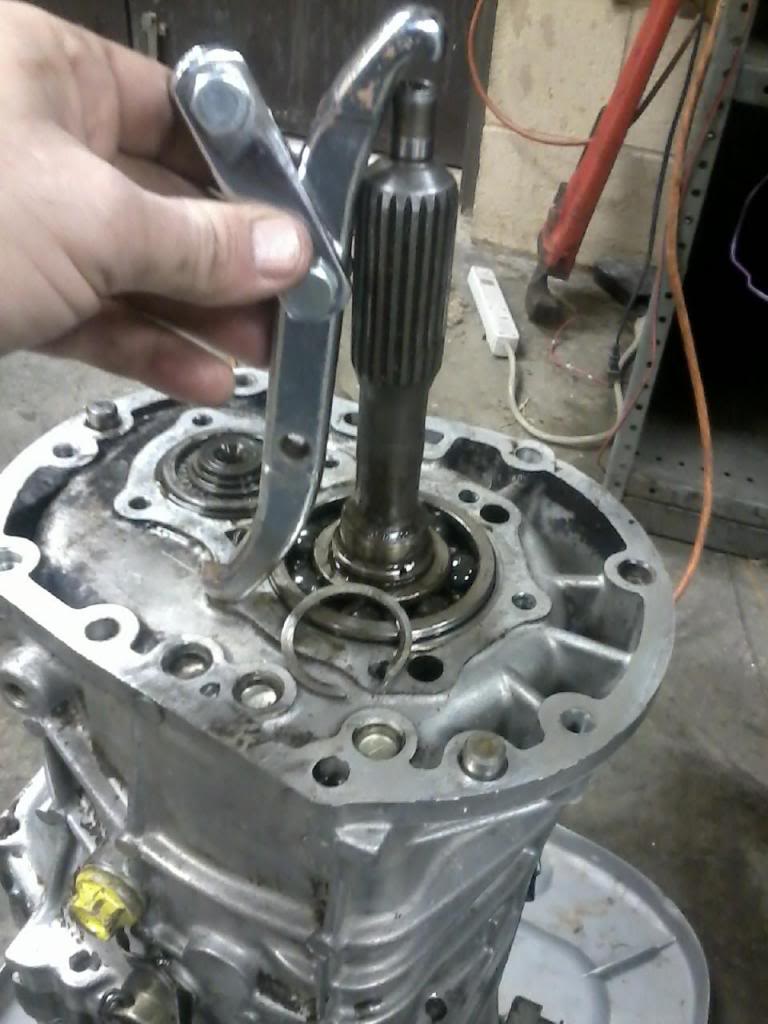
Back on to the Transmission Main Bearing. Up to this point, this job can easily be done and when I get it finished, I will put the pictures in better order instead of going from one project to another. So far this is an easy job.
You will need to remove the other c-clip that is attached to the smaller shaft.
Then remove the nine 14mm bolts that holds the case together.

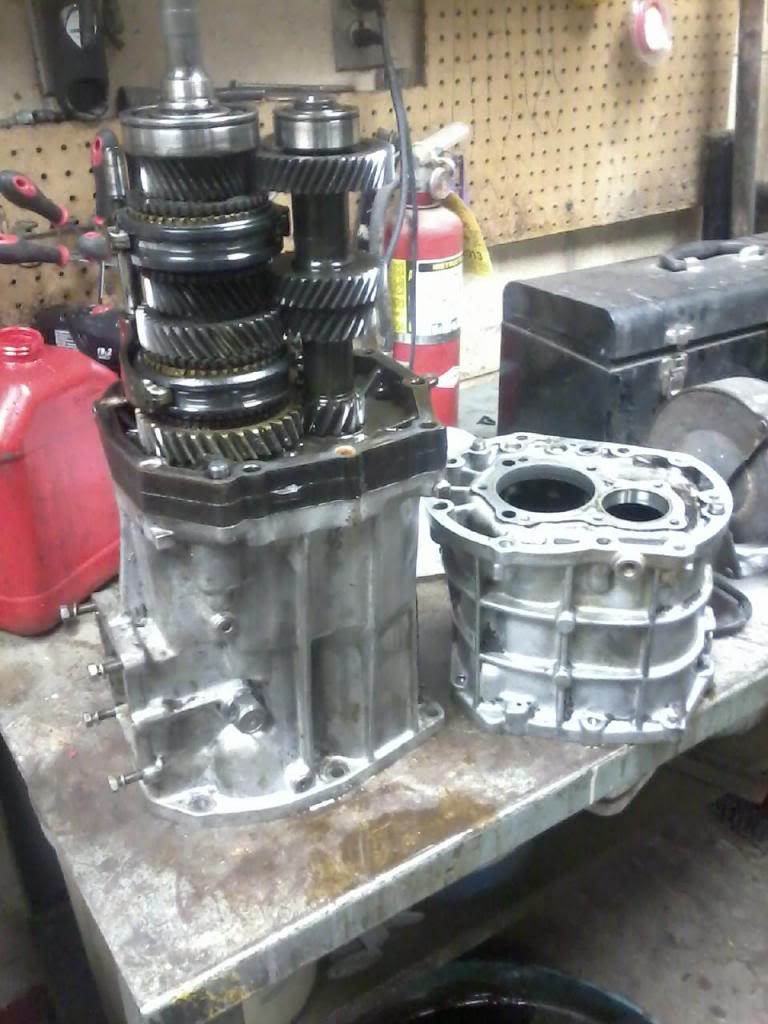
Then Thump it with a rubber hammer as per the Factory Service Manual.
I stood the transmission on its end and it easily lifted off and separated. Really nothing to be concerned with up until now. I have talked to my machine shop that does my engine work and he say he has a press that could press a bearing on. He does not have the ability to pull the bearing.
For that from what I am learning is that you can use a Bearing Separator and a Gear Puller or a Press to pull the bearing off. That is my next learning experience as I have never used a bearing separator and right now don't have access to a press. I hear Harbor Freight has a bearing separator so will check into that.
You will need to remove the other c-clip that is attached to the smaller shaft.

Then remove the nine 14mm bolts that holds the case together.

Then Thump it with a rubber hammer as per the Factory Service Manual.

I stood the transmission on its end and it easily lifted off and separated. Really nothing to be concerned with up until now. I have talked to my machine shop that does my engine work and he say he has a press that could press a bearing on. He does not have the ability to pull the bearing.
For that from what I am learning is that you can use a Bearing Separator and a Gear Puller or a Press to pull the bearing off. That is my next learning experience as I have never used a bearing separator and right now don't have access to a press. I hear Harbor Freight has a bearing separator so will check into that.

Last edited by Terrys87; 03-18-2014 at 01:10 AM.
03-18-2014, 07:23 AM
#1825
Super Moderator
Staff
Thread Starter
iTrader: (1)
Join Date: Aug 2008
Location: Anderson Missouri
Posts: 11,788
Likes: 0
Received 25 Likes
on
22 Posts
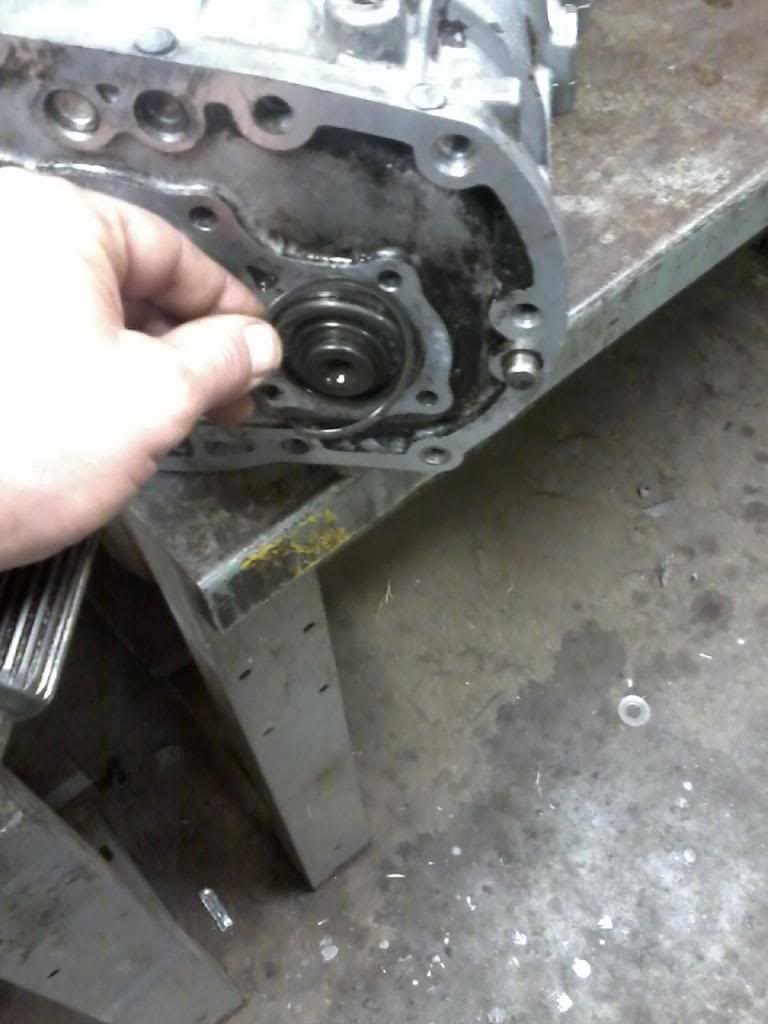
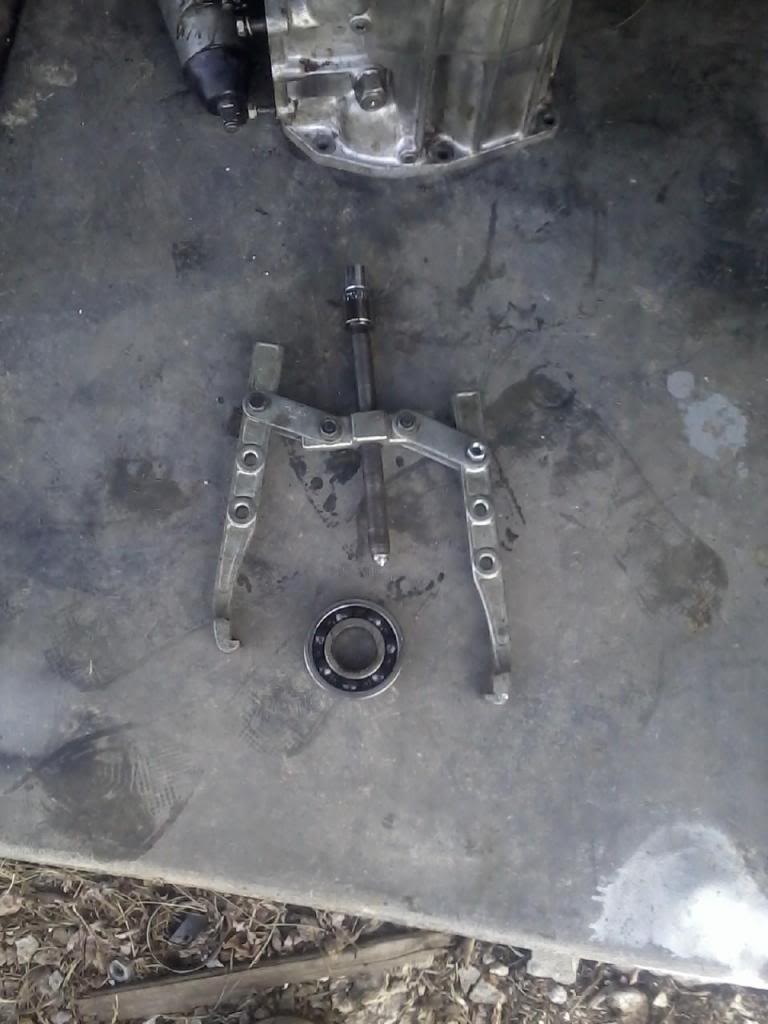
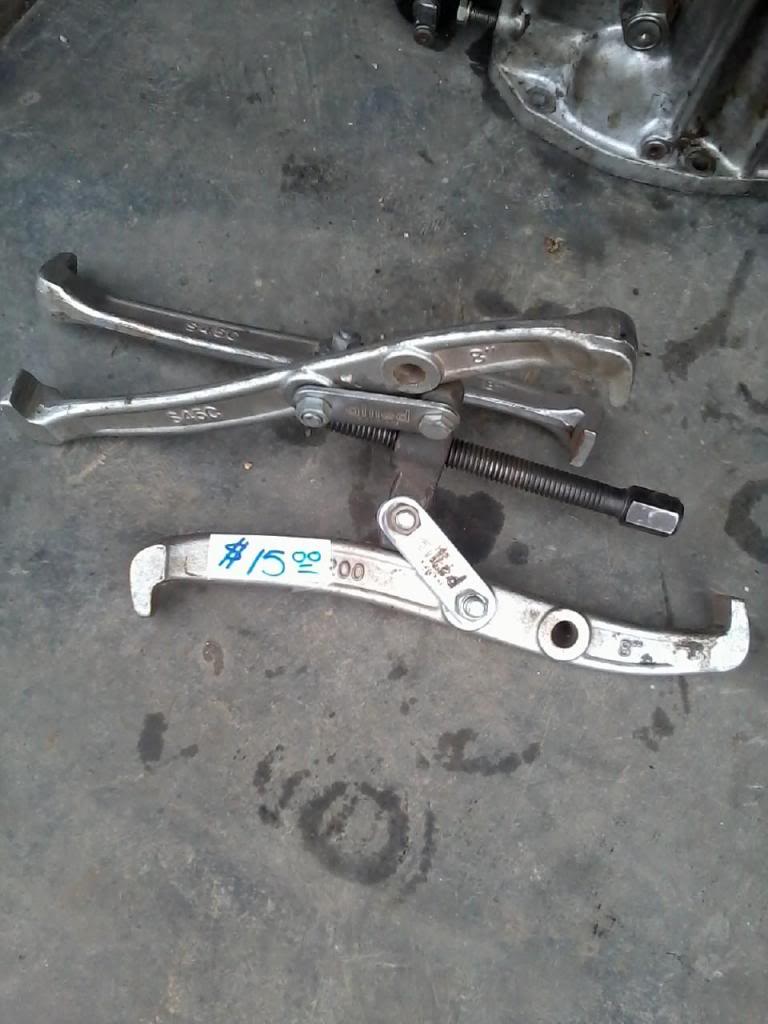
I found a tool rental place and for $10 a day rental. Later I went to a pawn shop and found a 3 prong tool for $15. I suggest using a 3 prong puller, but it worked!! Now I just need to see if my machine shop can press it on for me. Imp[act Wrench made the job so much easier as well. Thanks for the tip Jason, I was just going to wrench it the whole way. It didnt just pop right off like I thought it would.
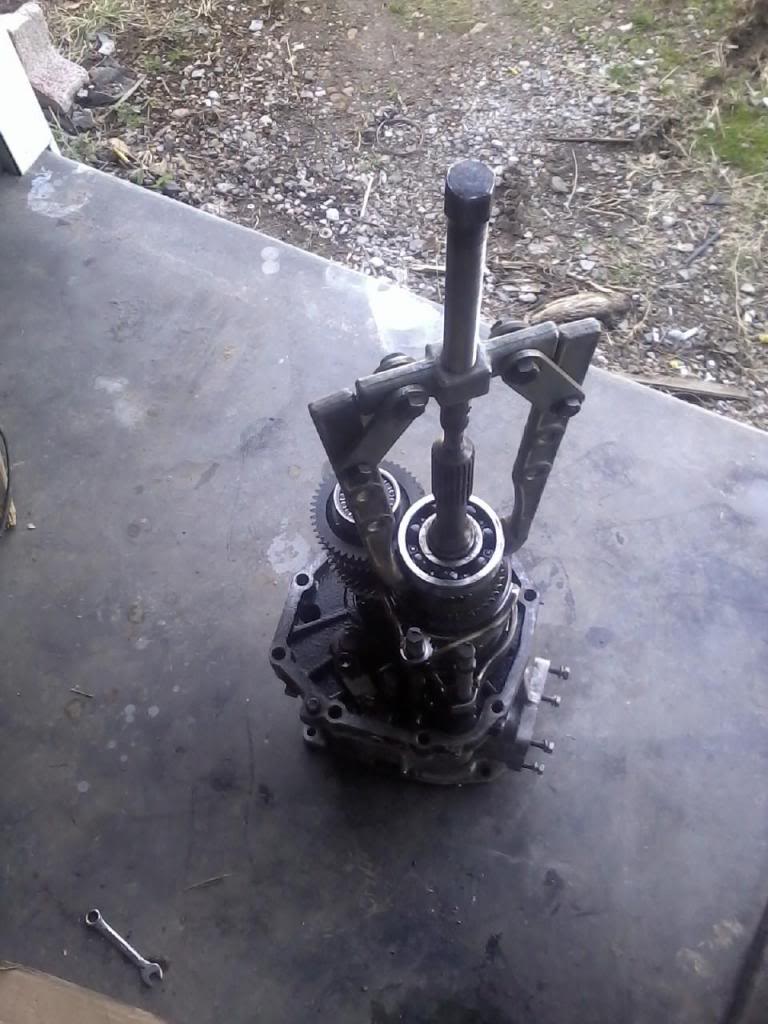
Success, Wahoo!!

Success, Wahoo!!

Last edited by Terrys87; 03-18-2014 at 12:06 PM.
03-18-2014, 08:15 AM
#1827
Registered User
Terry, I never thought of a tool rental place or a pawn shop, both of those are great ideas. Good job getting that bearing off.
03-18-2014, 12:19 PM
#1828
Super Moderator
Staff
Thread Starter
iTrader: (1)
Join Date: Aug 2008
Location: Anderson Missouri
Posts: 11,788
Likes: 0
Received 25 Likes
on
22 Posts
Thanks junk and cory.. Garage Sales and garages going out of business are another great source for name brand tools. Most of my name brand tools come from pawn shops and flea markets. I dont care for how pawn shops make their business but I will get things from them. Flea Markets have tools that are new and never used.
On post 1816 on the previous page, I am keeping it updated with how I go about doing this as well as the thread that I found this on https://www.yotatech.com/forums/f116...eekend-271102/ . I plan on making it a step by step process to do without needing a manual. I will need to get atleast one gasket, but up to this point if you ever had to pull your tranny and have the loose shaft, this is a very doable fix.
On my Tools, Tips and Tricks thread below in my signature I mention the sources for tools. I have several Bubba fixes in it as well that I have found and do. I had a few more that I meant to add to it and will soon, just if I could remember what it was.
03-18-2014, 12:23 PM
#1829
Super Moderator
Staff
Thread Starter
iTrader: (1)
Join Date: Aug 2008
Location: Anderson Missouri
Posts: 11,788
Likes: 0
Received 25 Likes
on
22 Posts
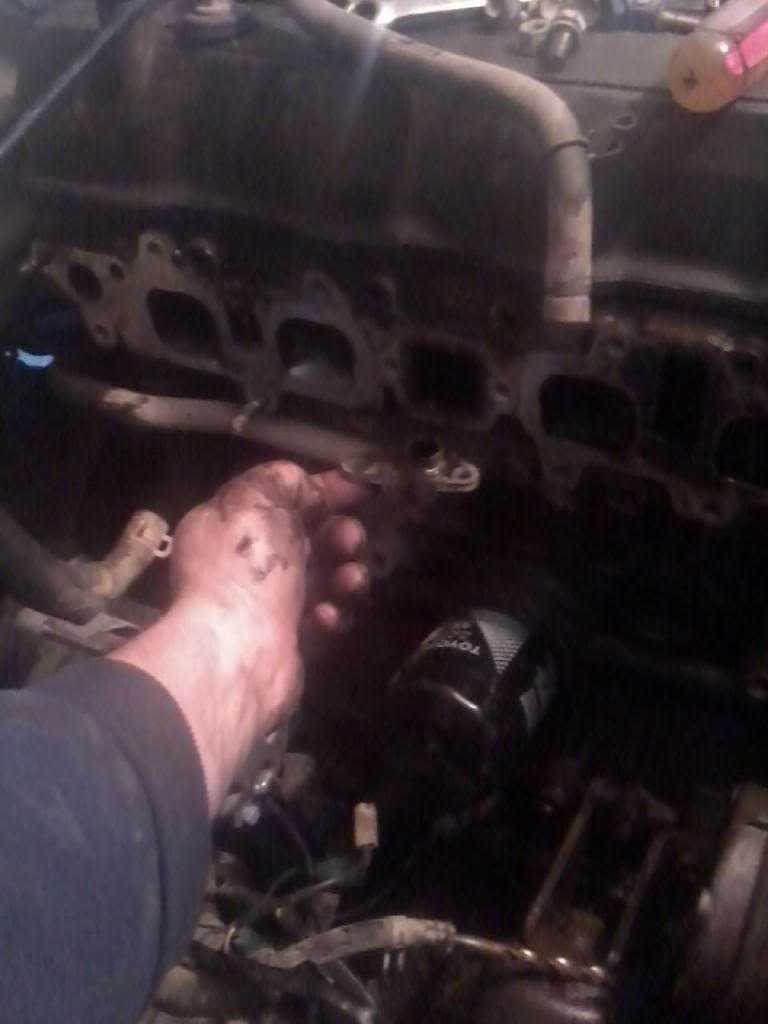
Back to the 22r to 22re Conversion.
Remove the EGR, 2 bolts and 1 nut. The EGRs are different between a 22r and a 22re.
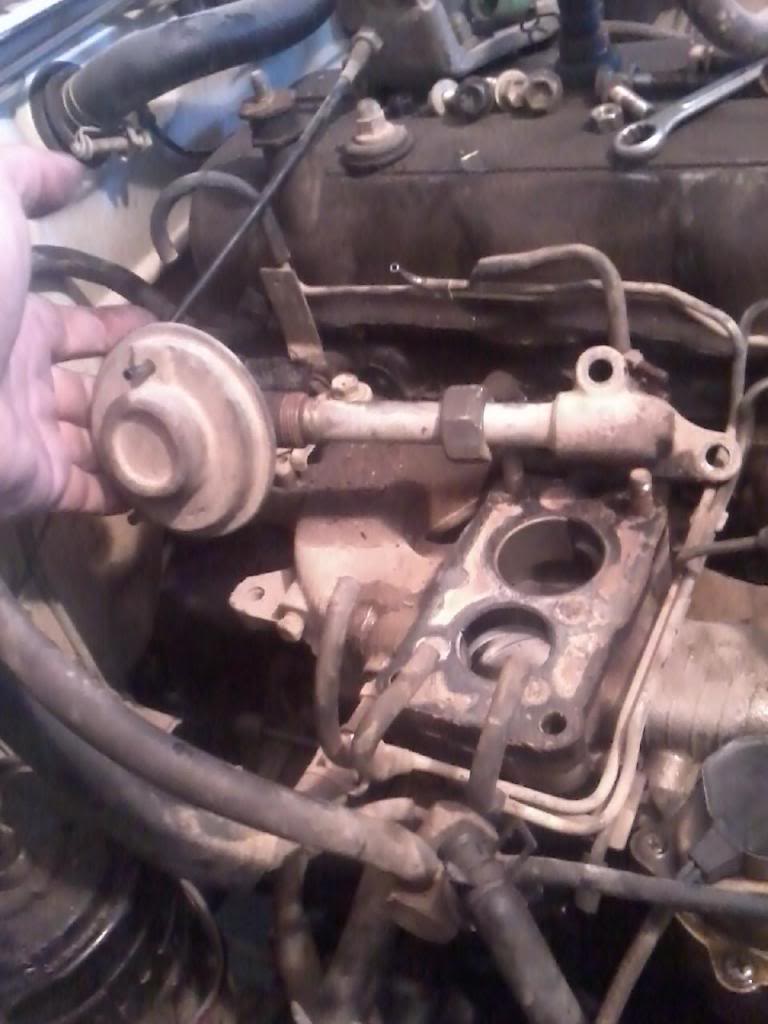
I remove the vacuum lines to the metal pipes. Remove the 10mm bolt. This helps keep the Modulator on the Distributor clean. The Modulator can fail and you just as well to replace the whole Distributor as just the Modulator. (Not Cheap)
Remove Intake Manifold. This can be troublesome with the vacuum lines attached to it.

Remove the EGR, 2 bolts and 1 nut. The EGRs are different between a 22r and a 22re.

I remove the vacuum lines to the metal pipes. Remove the 10mm bolt. This helps keep the Modulator on the Distributor clean. The Modulator can fail and you just as well to replace the whole Distributor as just the Modulator. (Not Cheap)

Remove Intake Manifold. This can be troublesome with the vacuum lines attached to it.

Last edited by Terrys87; 03-20-2014 at 08:09 AM.
03-18-2014, 12:26 PM
#1830
Super Moderator
Staff
Thread Starter
iTrader: (1)
Join Date: Aug 2008
Location: Anderson Missouri
Posts: 11,788
Likes: 0
Received 25 Likes
on
22 Posts
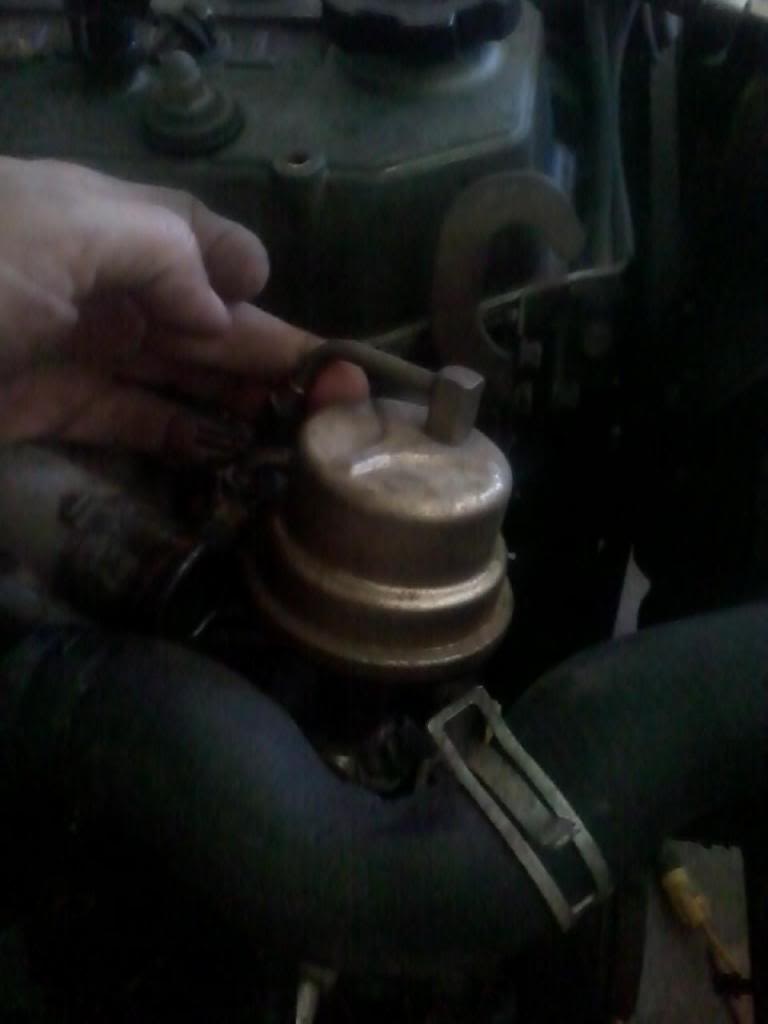
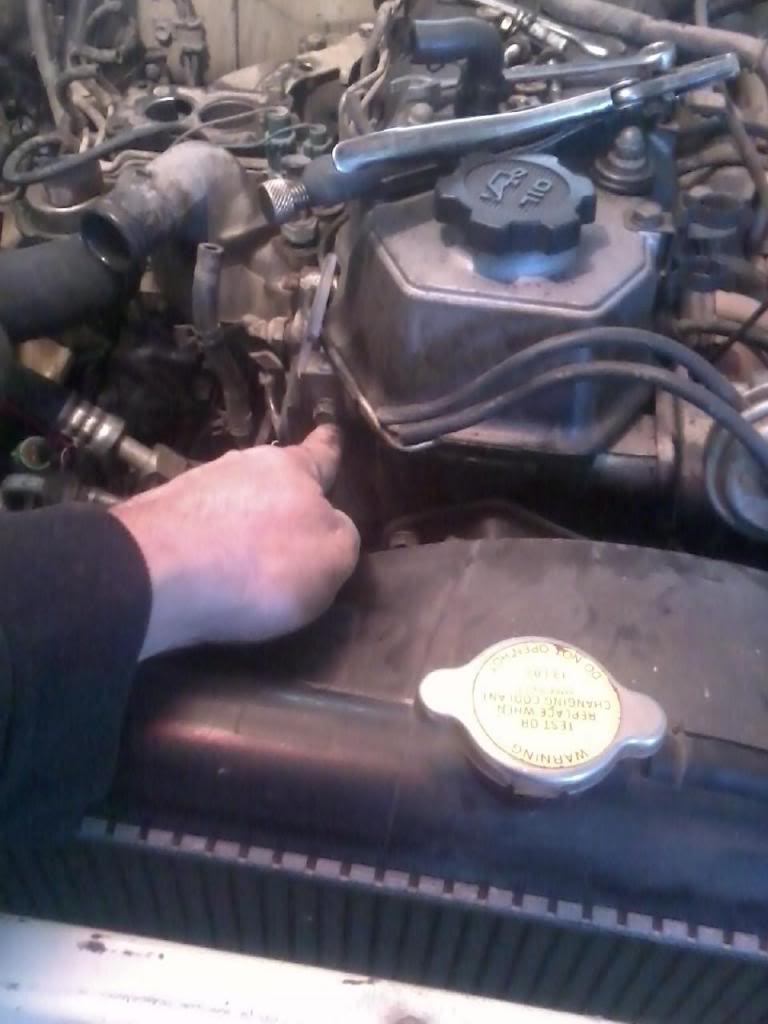
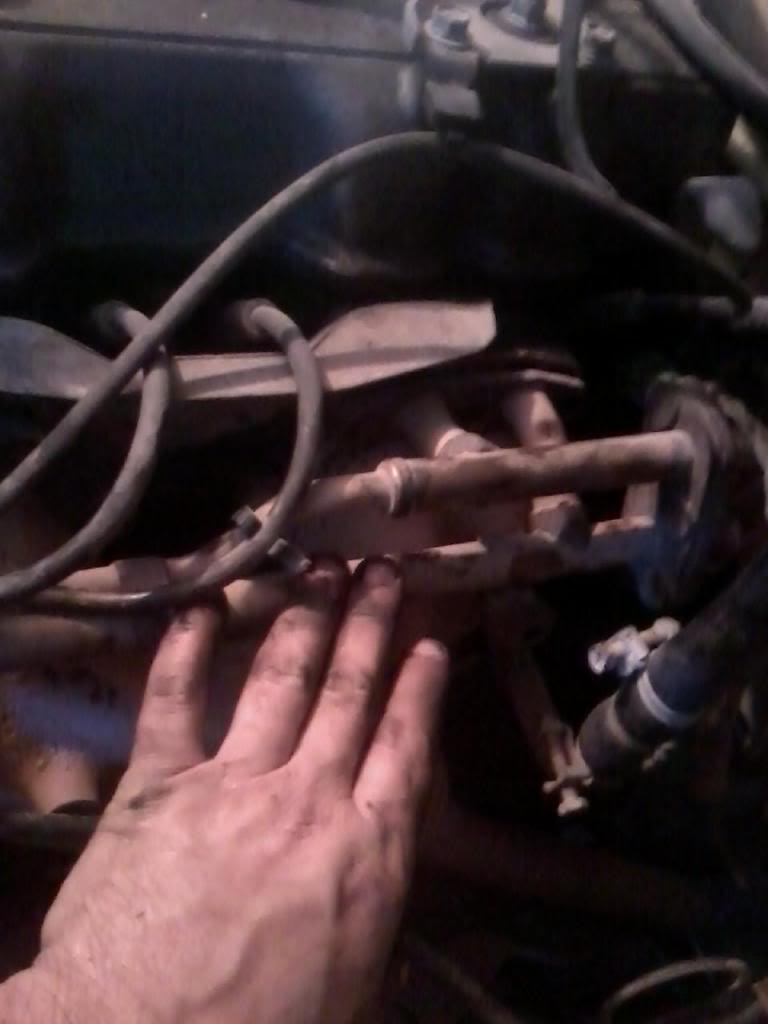
For the 22r guys, this hose was getting weak and would be a real pain to replace on the roadside. I would give it a good look over and replace in driveway instead out elsewhere.
 03-18-2014, 12:29 PM
#1831
Super Moderator
Staff
Thread Starter
iTrader: (1)
Join Date: Aug 2008
Location: Anderson Missouri
Posts: 11,788
Likes: 0
Received 25 Likes
on
22 Posts
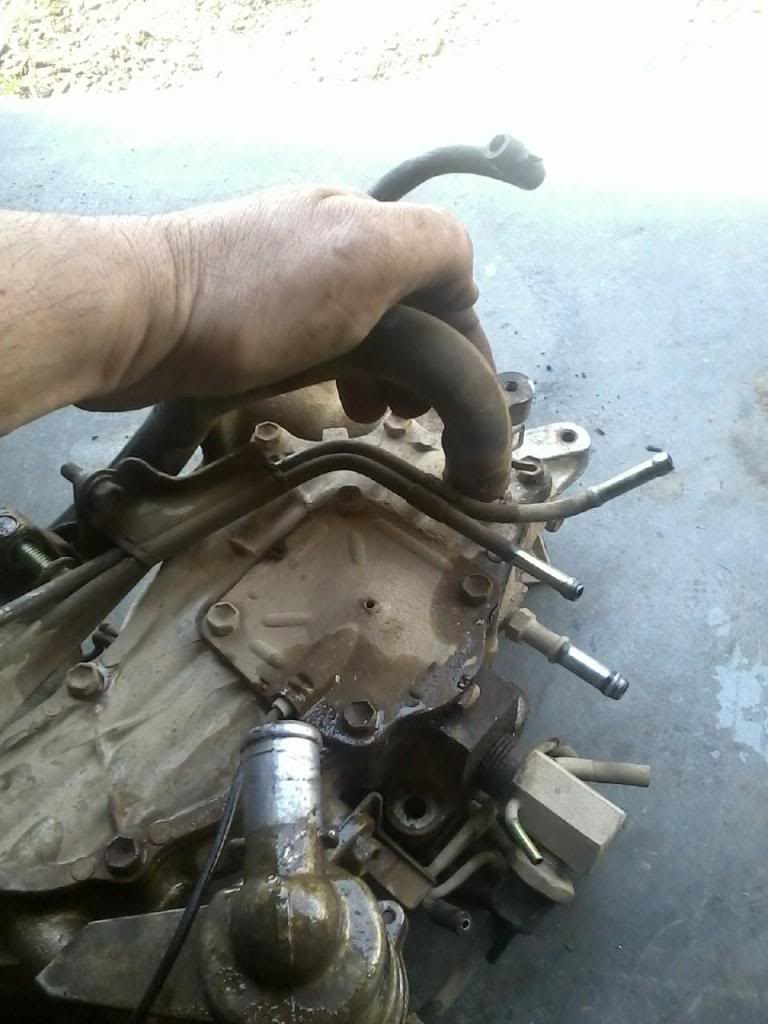
This metal pipe is different from a 22re. It has to be removed as well.
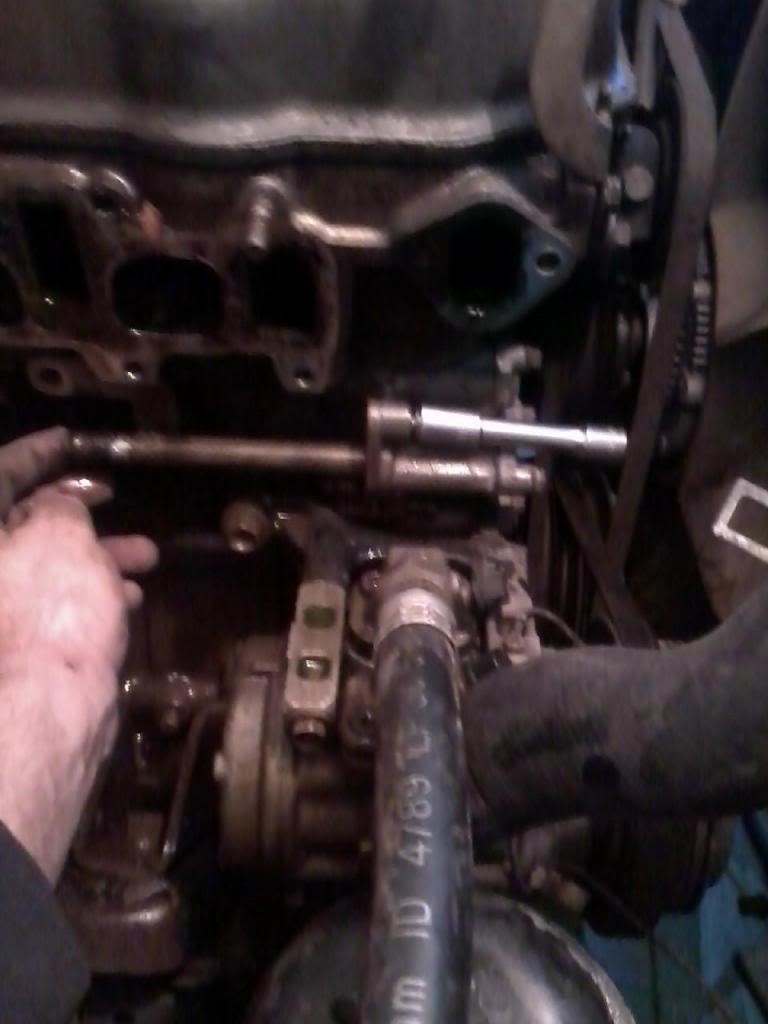
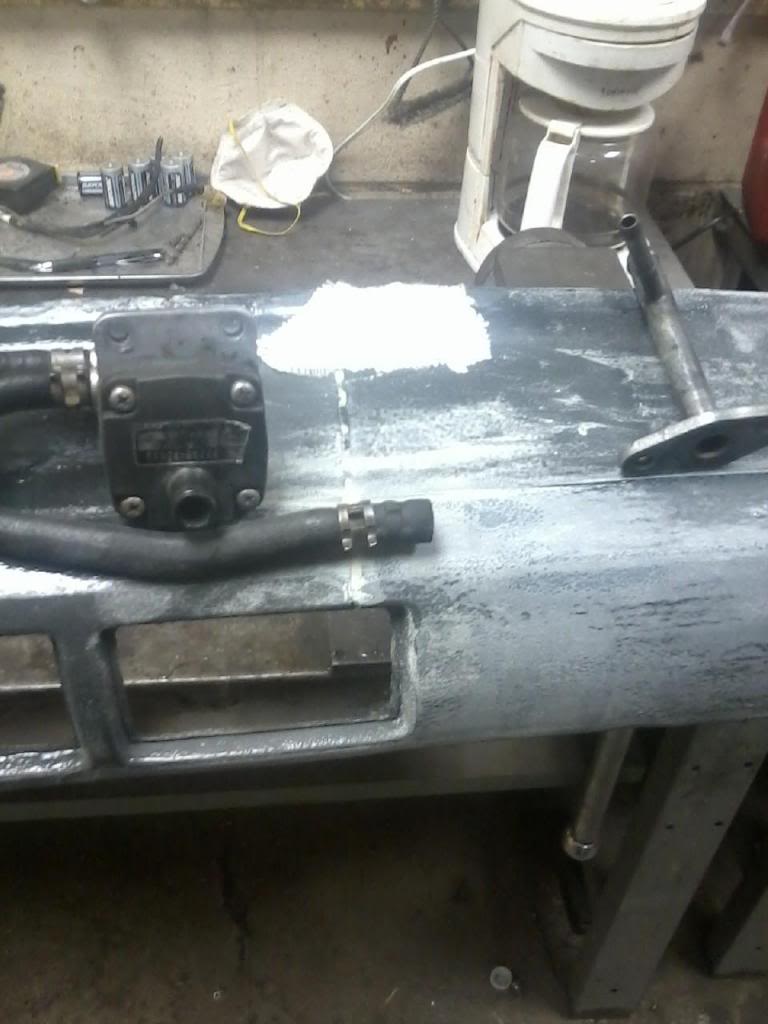
You can use this pipe, but remove the 2 bolts holding the vacuum ports assembly. This is a 22r only part. The lower water pipe can be used for the conversion. (The vacuum port is in the next picture below that has been removed.)
2 bolts hold this to the block and remove the 2 nuts attached to the pipe to make removing this assembly a whole lot easier. Remove the bolt on the top of the exhaust manifold only to get the pipes out.
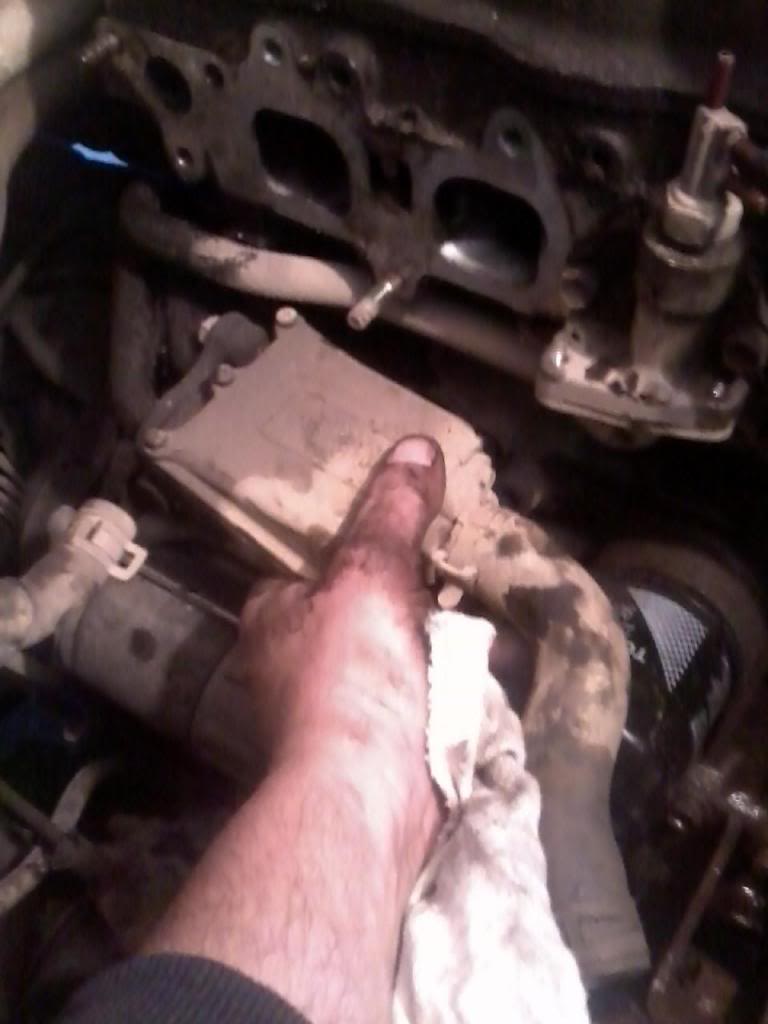
Remove 3 nuts that is connected to the exhaust gas/ egr set up to get the pipes out.

You can use this pipe, but remove the 2 bolts holding the vacuum ports assembly. This is a 22r only part. The lower water pipe can be used for the conversion. (The vacuum port is in the next picture below that has been removed.)

2 bolts hold this to the block and remove the 2 nuts attached to the pipe to make removing this assembly a whole lot easier. Remove the bolt on the top of the exhaust manifold only to get the pipes out.

Remove 3 nuts that is connected to the exhaust gas/ egr set up to get the pipes out.

Last edited by Terrys87; 03-20-2014 at 08:10 AM.
03-18-2014, 11:35 PM
#1832
Super Moderator
Staff
Thread Starter
iTrader: (1)
Join Date: Aug 2008
Location: Anderson Missouri
Posts: 11,788
Likes: 0
Received 25 Likes
on
22 Posts
The machine shop I was going to take the transmission to is going to be closed for the next day or so and it will be next week before I can get back over that way so I worked on some other things.
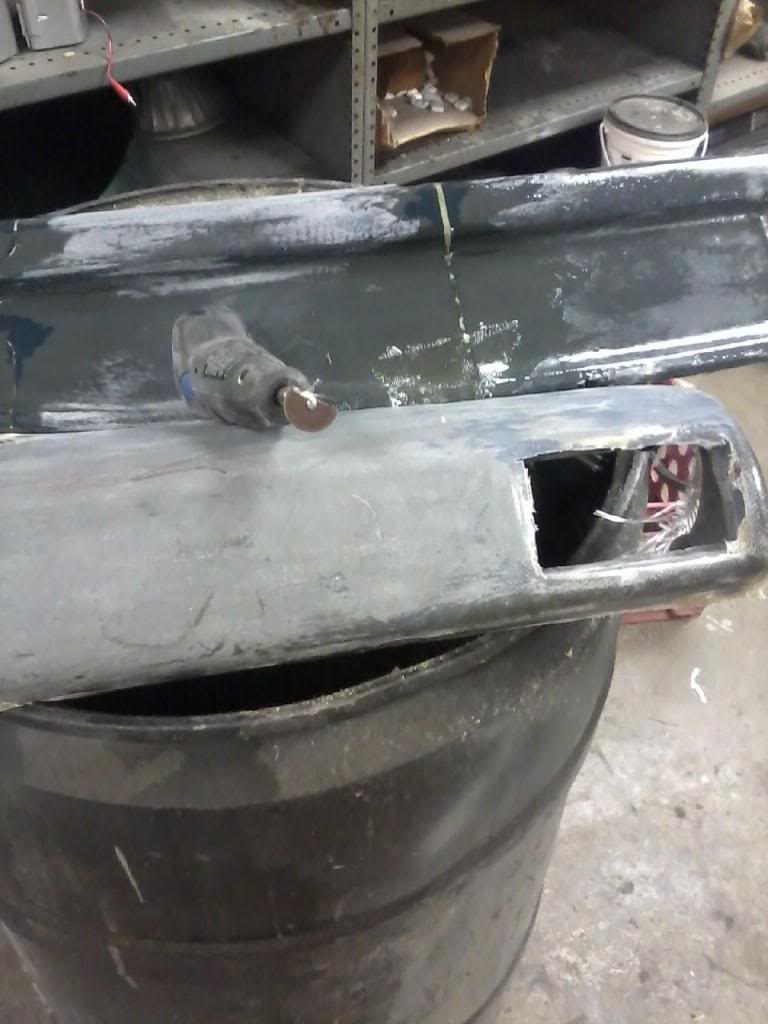
One is getting the IACV cleaned and tested. I put it in the freezer and I could see the valve opening. Then I started to work on one of the broken dashes that I have. Just putting a patch over the big broken area on it.
Luckily I do have a spare dash pad that I will be putting into my 86 runner at a later time. Might get around to it next week.
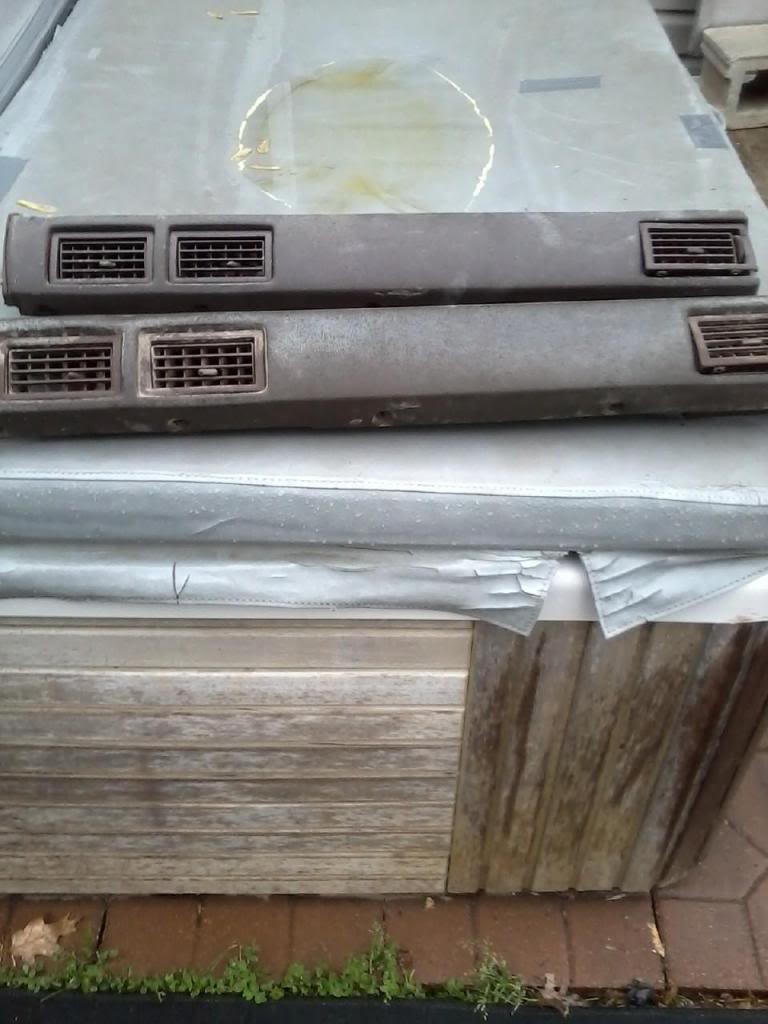
It was fun working with the Dremel until I broke it. grrr..
One is getting the IACV cleaned and tested. I put it in the freezer and I could see the valve opening. Then I started to work on one of the broken dashes that I have. Just putting a patch over the big broken area on it.

Luckily I do have a spare dash pad that I will be putting into my 86 runner at a later time. Might get around to it next week.

It was fun working with the Dremel until I broke it. grrr..
 03-19-2014, 03:31 AM
#1833
Registered User
Major headway!!I figured that bearing wouldnt come off unless you can get on the bottom side of it for leverage.Now we all have a tranny guy!! Ill be bringing a couple W's and G's down for rebuilds at the good guy cost price!!
03-19-2014, 11:17 AM
#1835
Super Moderator
Staff
Thread Starter
iTrader: (1)
Join Date: Aug 2008
Location: Anderson Missouri
Posts: 11,788
Likes: 0
Received 25 Likes
on
22 Posts
LOL kornhuskerwizard... I was intimidated by trannys but this has given me some confidence in working on them a little more then just swapping them out. Still not sure that I would be brave enough to rebuild one. I too have about 4 junk transmissions. One is a G52 and two are W56's and I am not sure about another.
I have been studying the FSM and seeing if there are things that I could go deeper into. I havent trie putting the bearing back on, but what I have done up unto this point is nothing to be concerned about. I just need to post the torque specs on the transmission case bolts and this is an easy task to do. I think you will be quite suprised. I was and glad I have tackled it.
Hello junk4u... Some parts of the dash are coming out great and some are going to take some more work to get it to where I would like. It is going to lose the texture, but with some time and effort, I think it will be far better then having a big crack down the center. Mark was telling me that PepBoys has a carbon fiber like material that might be worth a try as well.
03-19-2014, 11:31 AM
#1836
Super Moderator
Staff
Thread Starter
iTrader: (1)
Join Date: Aug 2008
Location: Anderson Missouri
Posts: 11,788
Likes: 0
Received 25 Likes
on
22 Posts
Was supposed to take Mistys Runner to a friends shop and swap out the clutch. We both have a few things to come up so that is on hold til Saturday.
I did go back and get that 3 prong puller I seen at the pawn shop. Should of checked there before. Had I stopped there first, they probably wouldnt have it. I checked it on the tranny and it has the reach to pull a bearing. I need one anyways so it was a good score for me. Checked parts stores and online and they are not cheap at all.
I did go back and get that 3 prong puller I seen at the pawn shop. Should of checked there before. Had I stopped there first, they probably wouldnt have it. I checked it on the tranny and it has the reach to pull a bearing. I need one anyways so it was a good score for me. Checked parts stores and online and they are not cheap at all.

Last edited by Terrys87; 03-19-2014 at 11:33 AM.
03-20-2014, 03:03 AM
#1837
Was supposed to take Mistys Runner to a friends shop and swap out the clutch. We both have a few things to come up so that is on hold til Saturday.
I did go back and get that 3 prong puller I seen at the pawn shop. Should of checked there before. Had I stopped there first, they probably wouldnt have it. I checked it on the tranny and it has the reach to pull a bearing. I need one anyways so it was a good score for me. Checked parts stores and online and they are not cheap at all.

I did go back and get that 3 prong puller I seen at the pawn shop. Should of checked there before. Had I stopped there first, they probably wouldnt have it. I checked it on the tranny and it has the reach to pull a bearing. I need one anyways so it was a good score for me. Checked parts stores and online and they are not cheap at all.
Nice Score and at a decent price yeah. I check around and they are expensive. Guess if i want to rebuild the tranny I better start looking around for some specialty tools myself. Way to go
03-20-2014, 06:21 AM
#1840
Super Moderator
Staff
Thread Starter
iTrader: (1)
Join Date: Aug 2008
Location: Anderson Missouri
Posts: 11,788
Likes: 0
Received 25 Likes
on
22 Posts
Hello junk4u... I am going to test my new puller later today and see how it works. I was out in the shop a little bit ago as I actually used the cold temps to my advantage. It is supposed to be getting warmer today and am planning on starting to put on the EFI system. I was out there for a little bit and it is colddd!!
Hello cyberhorn.. This is leading up to a conversion from carb to EFI. Myself, I am done with messing with the Aisian Carburators. They are just to complicated and cumbersome. Like you mentioned they are just so old that I think you are the one who has mentioned where all of the pivot points that run thru the body is just wallowed out the holes that you get alot of vaccum leaks. Webber is the only way to go on the 22r in my opinion.
Hello cyberhorn.. This is leading up to a conversion from carb to EFI. Myself, I am done with messing with the Aisian Carburators. They are just to complicated and cumbersome. Like you mentioned they are just so old that I think you are the one who has mentioned where all of the pivot points that run thru the body is just wallowed out the holes that you get alot of vaccum leaks. Webber is the only way to go on the 22r in my opinion.


