
Terrys87 86 4Runner with a 2nd Chance
 03-01-2012, 12:10 PM
#161
Super Moderator
Staff
Thread Starter
iTrader: (1)
Join Date: Aug 2008
Location: Anderson Missouri
Posts: 11,788
Likes: 0
Received 25 Likes
on
22 Posts
Been getting alot done. Nothing really picture worthy, but just to keep track so someday I can go back and see where I was at onetime.
Started with getting the back half back in again with its final color. One more time for it to come out when I put new carpet in.
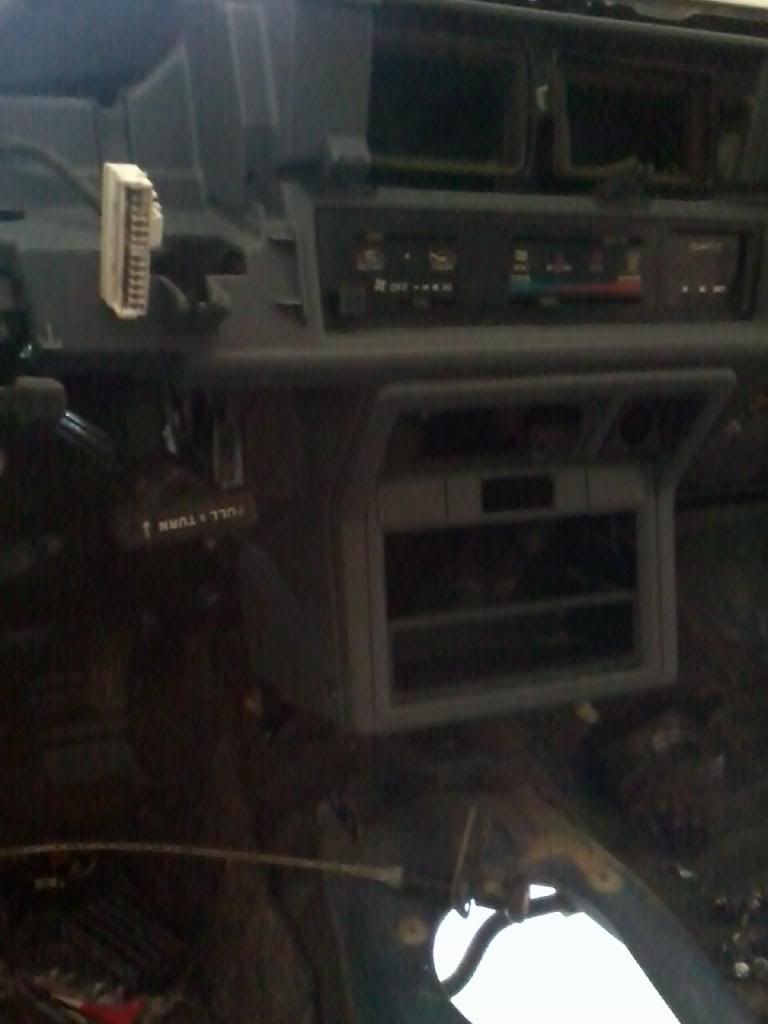
Started putting the dash in and I need more interior paint. Did get the heater assembly in also. That was alot of work involved in itself. Had to take 2 control assemblies and make one. Got the clock in also, will change it later with a clock in better condition. May have gotten more done if someone hadnt forgotten to put the ventilation pipes in on the drivers side.lol. Had to take the dash apart again.
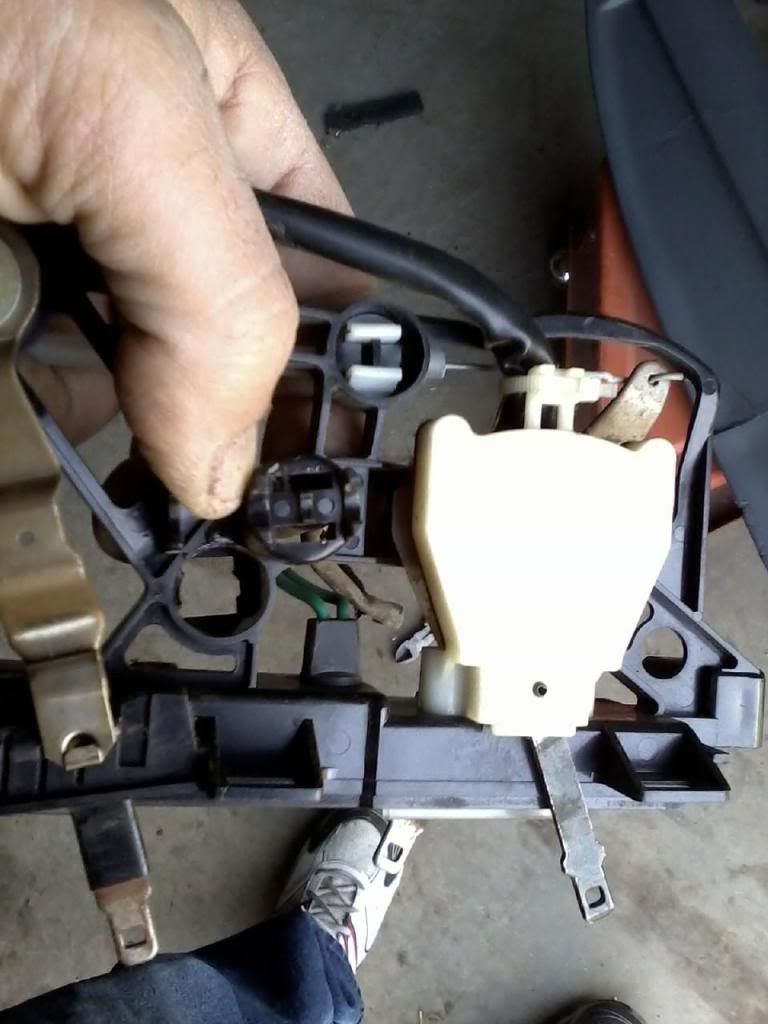
I want to show what get broke on these heater assemblies. The one below my thumb has the center broke out of it. The one beside my thumb is good. I tried to get some pics on getting the tabs loose. It can be a little tricky. Just pull the tab on the square side and use a flat blade screwdriver and push the tabs in. Sounds easy, but it was a little difficult for me.
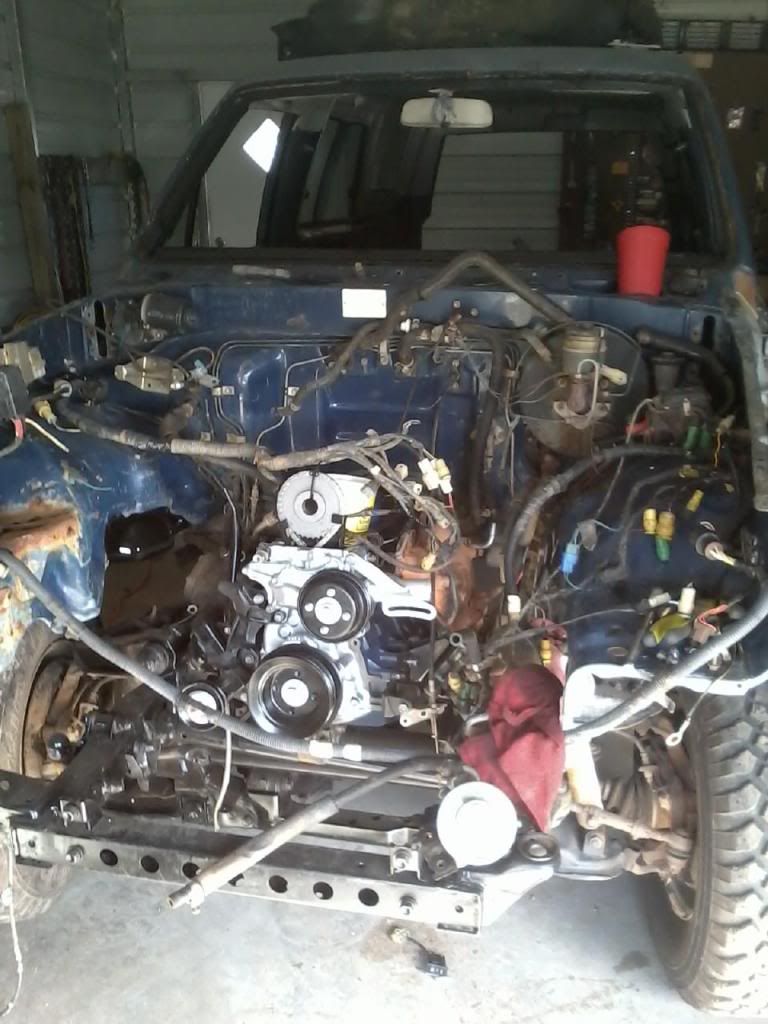
Finally got all of the wiring under the hood done. Installed the Igniter/coil and have a broken bolt to get out. Starting to get as much of the Power Steering put in I am able to and see what is needed. Go my Fuse box in. Really doesnt look like much, but I did start at 9 this morning and am taking break. Seeing what else I can get accomplished. It will get me a little closer on down the road to getting this done.
Started with getting the back half back in again with its final color. One more time for it to come out when I put new carpet in.
Started putting the dash in and I need more interior paint. Did get the heater assembly in also. That was alot of work involved in itself. Had to take 2 control assemblies and make one. Got the clock in also, will change it later with a clock in better condition. May have gotten more done if someone hadnt forgotten to put the ventilation pipes in on the drivers side.lol. Had to take the dash apart again.
I want to show what get broke on these heater assemblies. The one below my thumb has the center broke out of it. The one beside my thumb is good. I tried to get some pics on getting the tabs loose. It can be a little tricky. Just pull the tab on the square side and use a flat blade screwdriver and push the tabs in. Sounds easy, but it was a little difficult for me.
Finally got all of the wiring under the hood done. Installed the Igniter/coil and have a broken bolt to get out. Starting to get as much of the Power Steering put in I am able to and see what is needed. Go my Fuse box in. Really doesnt look like much, but I did start at 9 this morning and am taking break. Seeing what else I can get accomplished. It will get me a little closer on down the road to getting this done.
 03-01-2012, 09:41 PM
#163
Super Moderator
Staff
Thread Starter
iTrader: (1)
Join Date: Aug 2008
Location: Anderson Missouri
Posts: 11,788
Likes: 0
Received 25 Likes
on
22 Posts
Thanks, I put a lot of work into it. Doesnt look like much, but it was alot of time consuming details. I am trying to switch out steering columns and I think I finally got it figured out. I thought the plate on the fire wall could stay on and just remove the smaller one. I will get pics when I get it out. I lost a good hour or so on it alone.
lol on the ventilation.. I noticed my flatbed has some piping missing. Never missed it anyways as it doesnt have ac. Last year I about burnt up without it using my wife truck. It is getting it this year.
lol on the ventilation.. I noticed my flatbed has some piping missing. Never missed it anyways as it doesnt have ac. Last year I about burnt up without it using my wife truck. It is getting it this year.
03-01-2012, 09:49 PM
#164
Super Moderator
Staff
Thread Starter
iTrader: (1)
Join Date: Aug 2008
Location: Anderson Missouri
Posts: 11,788
Likes: 0
Received 25 Likes
on
22 Posts
I started on the back seats. Cant put the bottom part in until I gett he side panels done. No matter how far ahead I try to plan, still miss something. I need more interior paint. I was doing really well until I got to the steering column and hit a snag with it. I think I will be able to get going again now that I got it figured out.
Back seats in.Not the best shape but far better then what I had.
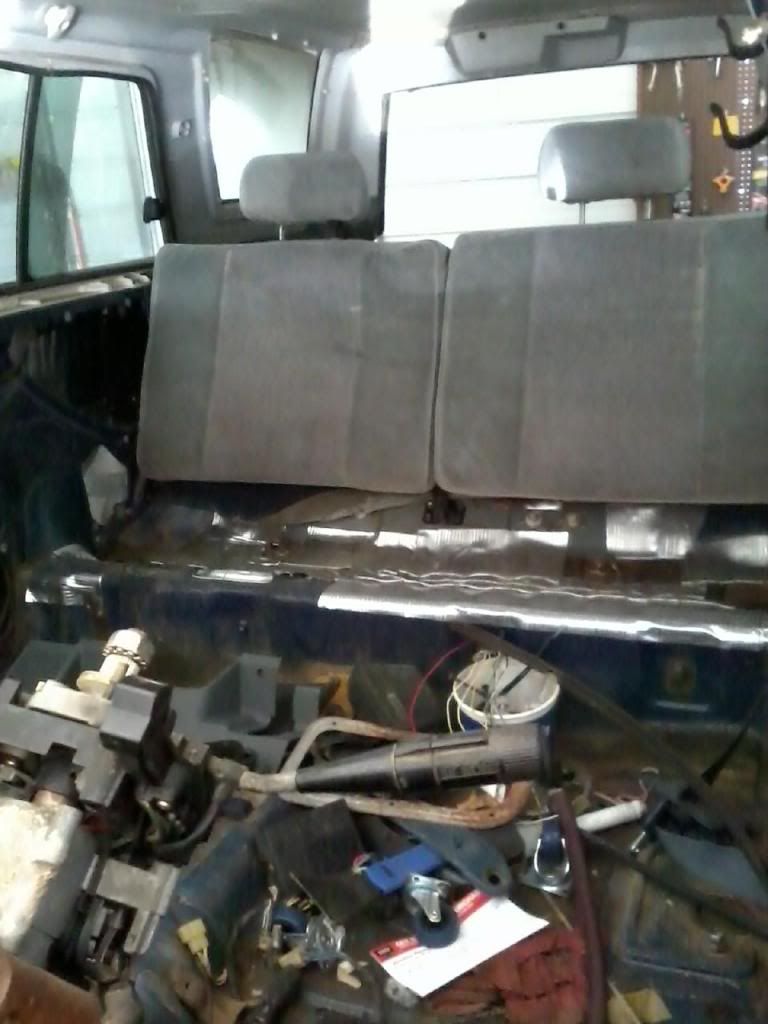
Started getting the legs matched color wise. Not sure the supports are factory but it will have to work for now.
Got one side done and ran out of primer. Had several partial cans of paint left and had been cleaning the frame a little at a time so got rid of some of the half used cans on the frame. Cleared up some shelf space. Then I got tied up on the steering column and this is where I stopped for the day. Got a lot done and was really happy for what was accomplished overall, snags and all.
Back seats in.Not the best shape but far better then what I had.
Started getting the legs matched color wise. Not sure the supports are factory but it will have to work for now.
Got one side done and ran out of primer. Had several partial cans of paint left and had been cleaning the frame a little at a time so got rid of some of the half used cans on the frame. Cleared up some shelf space. Then I got tied up on the steering column and this is where I stopped for the day. Got a lot done and was really happy for what was accomplished overall, snags and all.
03-02-2012, 02:59 AM
#166
Super Moderator
Staff
Thread Starter
iTrader: (1)
Join Date: Aug 2008
Location: Anderson Missouri
Posts: 11,788
Likes: 0
Received 25 Likes
on
22 Posts
Thanks Jason..There was alot not shown. I am taking the best of several pieces and making one out of them. The panel that has the dimmer switch for the dash lights is one, the heater assembly, and the center console.
I was hoping to get the Steering Column in and get the glass that I got from you into the back hatch and start checking light and backhatch and whatever other circuits that I could check.
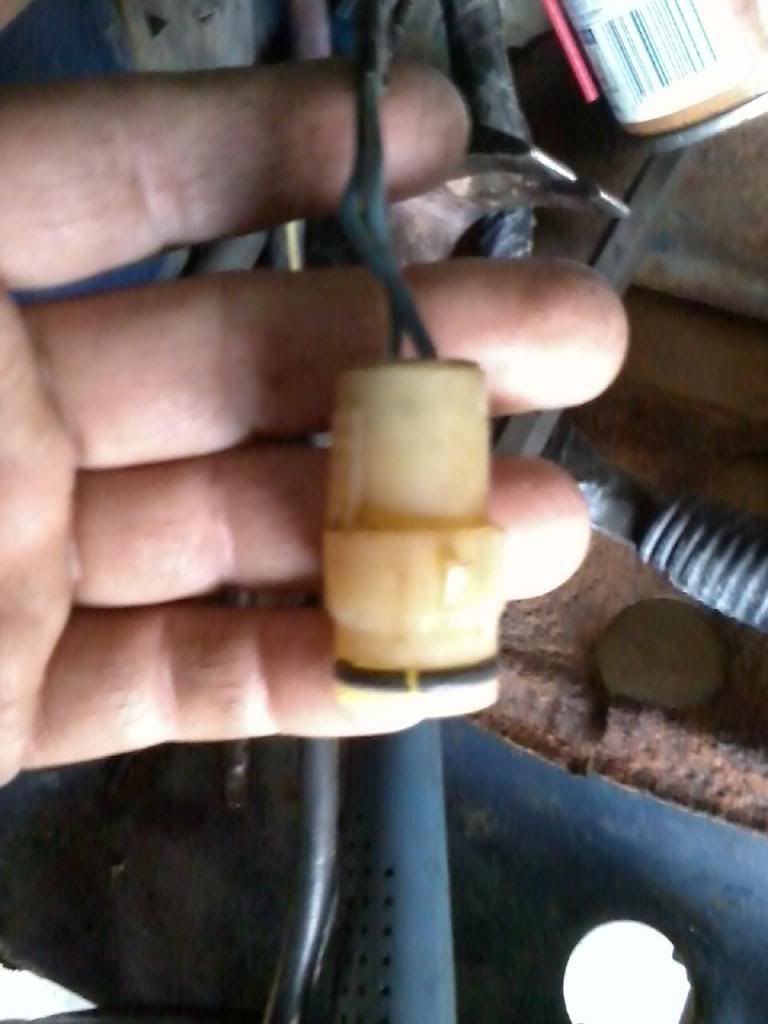
Tinman or Jason.. RMP8080, if you still have your 85. Could you post a pic of your washer fluid bottle electrical connection when you get time. It will be a ways off before I get to install one. But looking at mine it has a round connection with blue wires. I looked at my 87 and 88 they have a flat connection. I am sure it is just a change from the 86 and older to the 87 and newer but would like to make sure. I will post a pic later today when it gets lighter.
I will be getting my SR5 guage today if they still have it. They have a 3.0 in the boneyard and I will do the adjustment on it. Hoping to have my dash all together fairly quick. It will put off the head againnnn, but getting parts while the getting is good.
With the weather warming up, I would like to get it sealed up so as I can start on bodywork soon.
My plans, (mostly a reminder for me) for the next steps are switching backglasses,Steering Column, my domelight upgrade, get the broken screws out of the gas tank and start to get it installed, finish installing dash, fix the dash pad, one more roll of Peel and Seal, tranny in. I want to see about putting a new material over the headliner on the removable top as mine has alot of gashes in it.
I was hoping to get the Steering Column in and get the glass that I got from you into the back hatch and start checking light and backhatch and whatever other circuits that I could check.
Tinman or Jason.. RMP8080, if you still have your 85. Could you post a pic of your washer fluid bottle electrical connection when you get time. It will be a ways off before I get to install one. But looking at mine it has a round connection with blue wires. I looked at my 87 and 88 they have a flat connection. I am sure it is just a change from the 86 and older to the 87 and newer but would like to make sure. I will post a pic later today when it gets lighter.
I will be getting my SR5 guage today if they still have it. They have a 3.0 in the boneyard and I will do the adjustment on it. Hoping to have my dash all together fairly quick. It will put off the head againnnn, but getting parts while the getting is good.
With the weather warming up, I would like to get it sealed up so as I can start on bodywork soon.
My plans, (mostly a reminder for me) for the next steps are switching backglasses,Steering Column, my domelight upgrade, get the broken screws out of the gas tank and start to get it installed, finish installing dash, fix the dash pad, one more roll of Peel and Seal, tranny in. I want to see about putting a new material over the headliner on the removable top as mine has alot of gashes in it.
03-02-2012, 08:28 AM
#167
Super Moderator
Staff
Thread Starter
iTrader: (1)
Join Date: Aug 2008
Location: Anderson Missouri
Posts: 11,788
Likes: 0
Received 25 Likes
on
22 Posts
I got my SR5 guage. It is off of an 88 but should work. While at the bone yard I got a clutch and pressuer plate for the 79/83. I had a used one but really wanted a better one and I got both of the guage and clutch for $50. I am a happy little camper. Got the supplies I need to go quite aways now if I can just get the time. Just wanting to get the 79 movablefor now, cant really fund both projects at the same time. Clutch is practically new.
I had a SHARP 93 pick 4x4 pass me on the road today. Tried to get a picture of it and it didnt turn out. Dont think he was to impressed with my flatbed. I have plans to have my 86 one sharp truck someday.

Here is the plug I am talking about. It is a round connection. I am hoping it is an 86 and older style. If so I have the plugs and water tank to convert it over. It has 2 blue wires. Looks about the same as my other trucks.
I had a SHARP 93 pick 4x4 pass me on the road today. Tried to get a picture of it and it didnt turn out. Dont think he was to impressed with my flatbed. I have plans to have my 86 one sharp truck someday.
Here is the plug I am talking about. It is a round connection. I am hoping it is an 86 and older style. If so I have the plugs and water tank to convert it over. It has 2 blue wires. Looks about the same as my other trucks.
03-02-2012, 11:04 AM
#168
Super Moderator
Staff
Thread Starter
iTrader: (1)
Join Date: Aug 2008
Location: Anderson Missouri
Posts: 11,788
Likes: 0
Received 25 Likes
on
22 Posts
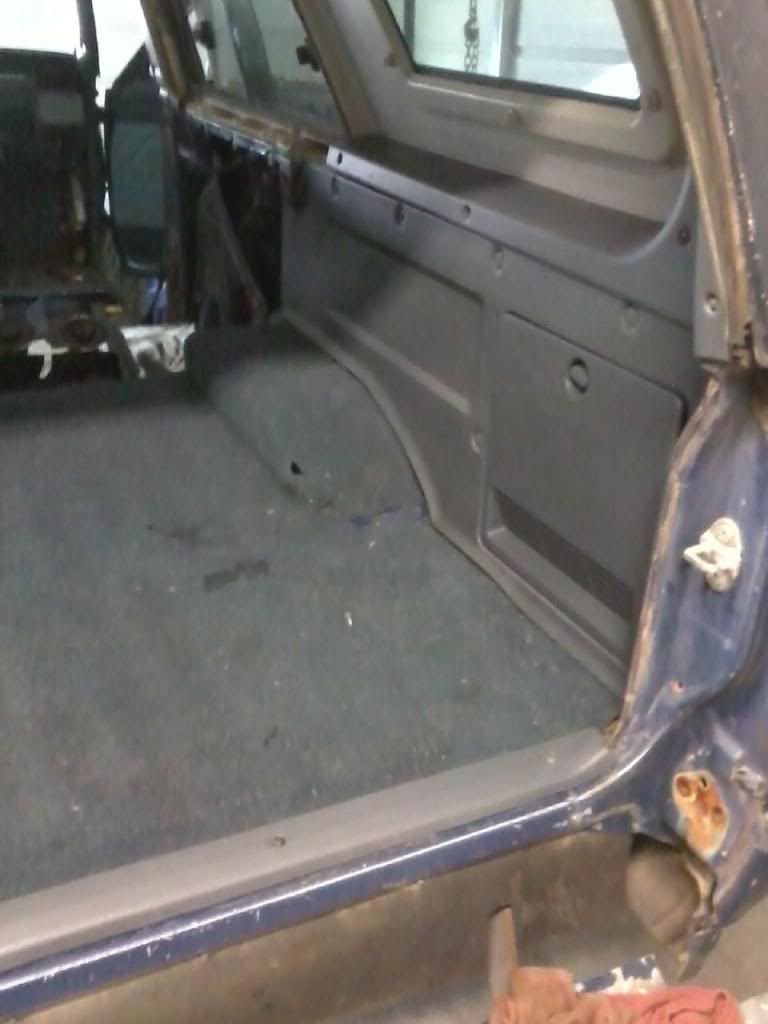
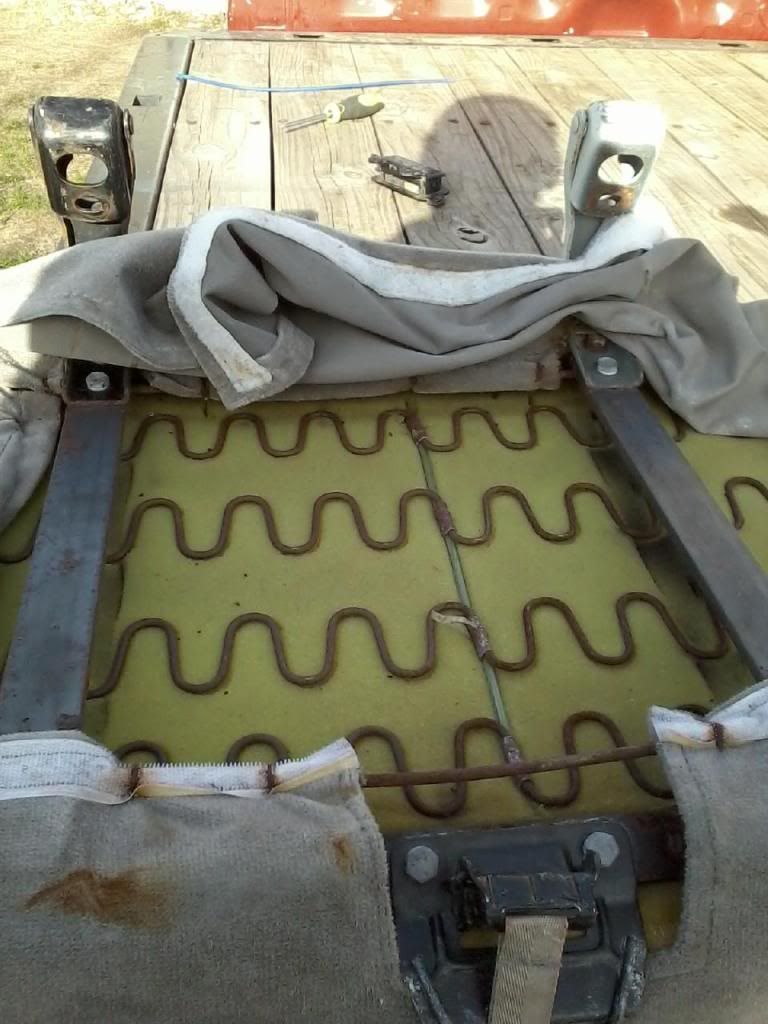
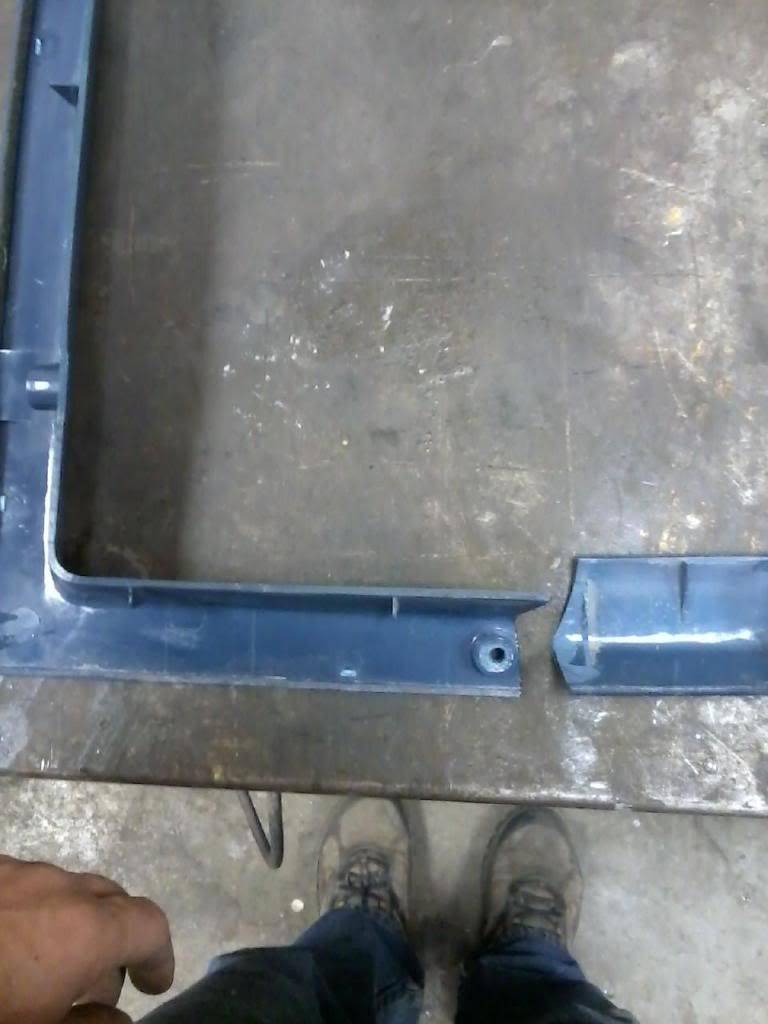
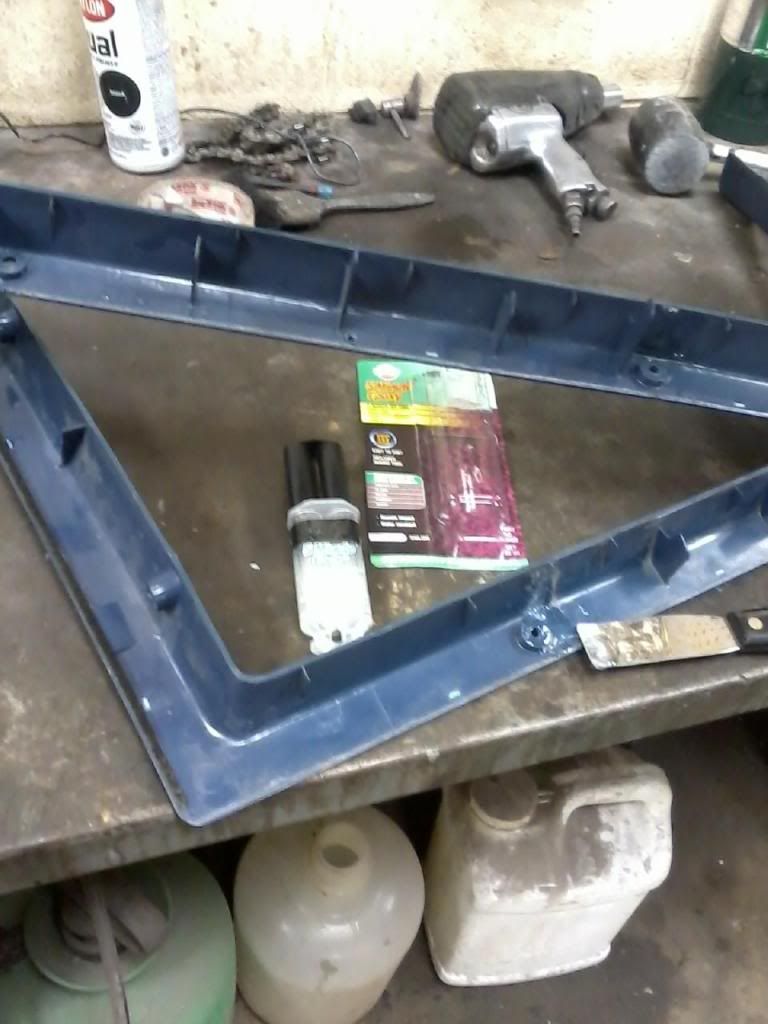
Got a little more done. Got the side panels in. Cant get the seats in because of the bolts that hold the seat down are rusted into their bolt holes. I am afraid of it breaking so I have it soaking in penetrating oil. The bolt shown in the picture.
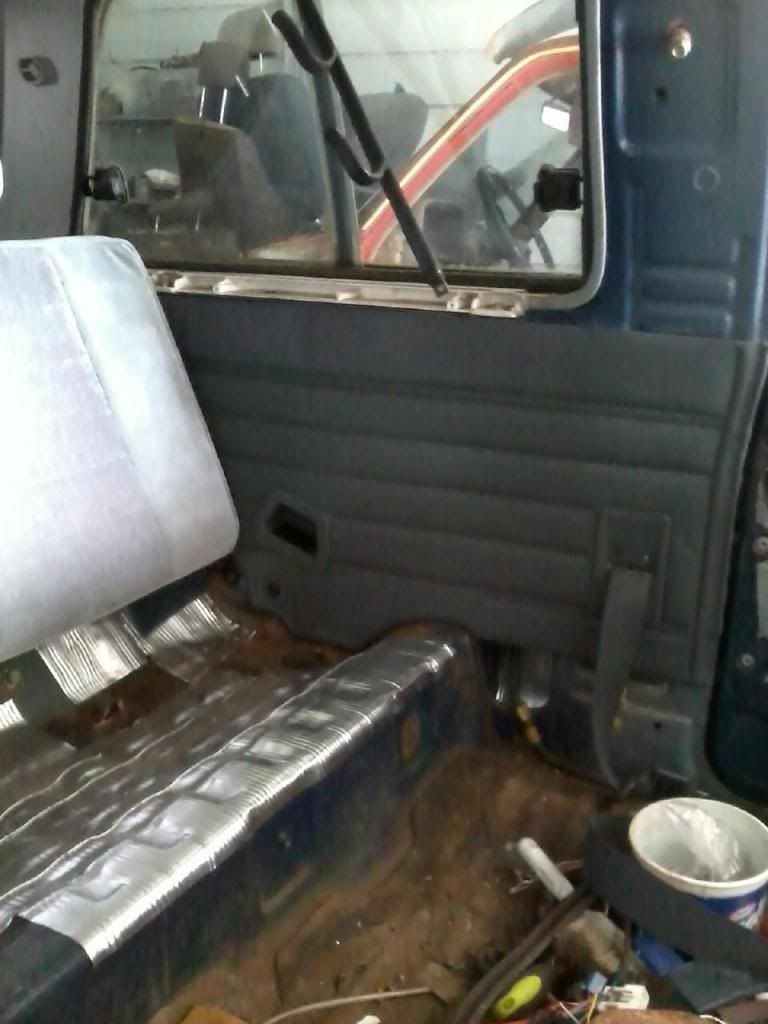
Here is the panels needing cleaned up. They have a few nicks and cuts, but I will replace them at a later day when I find some. It will look ok.
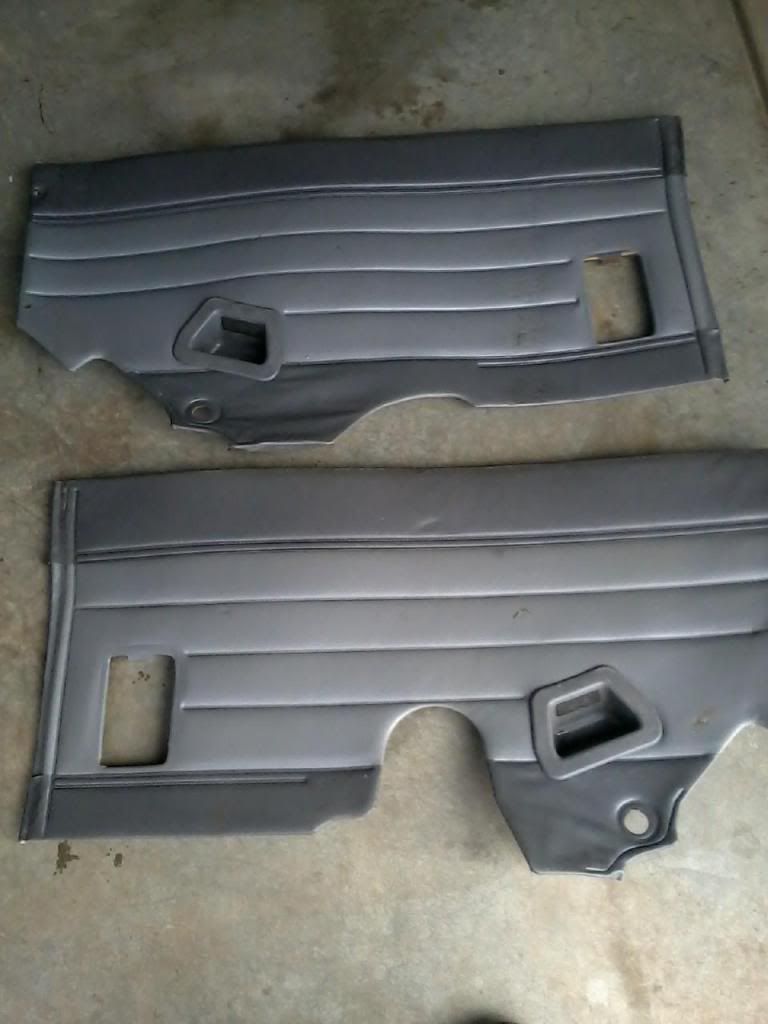
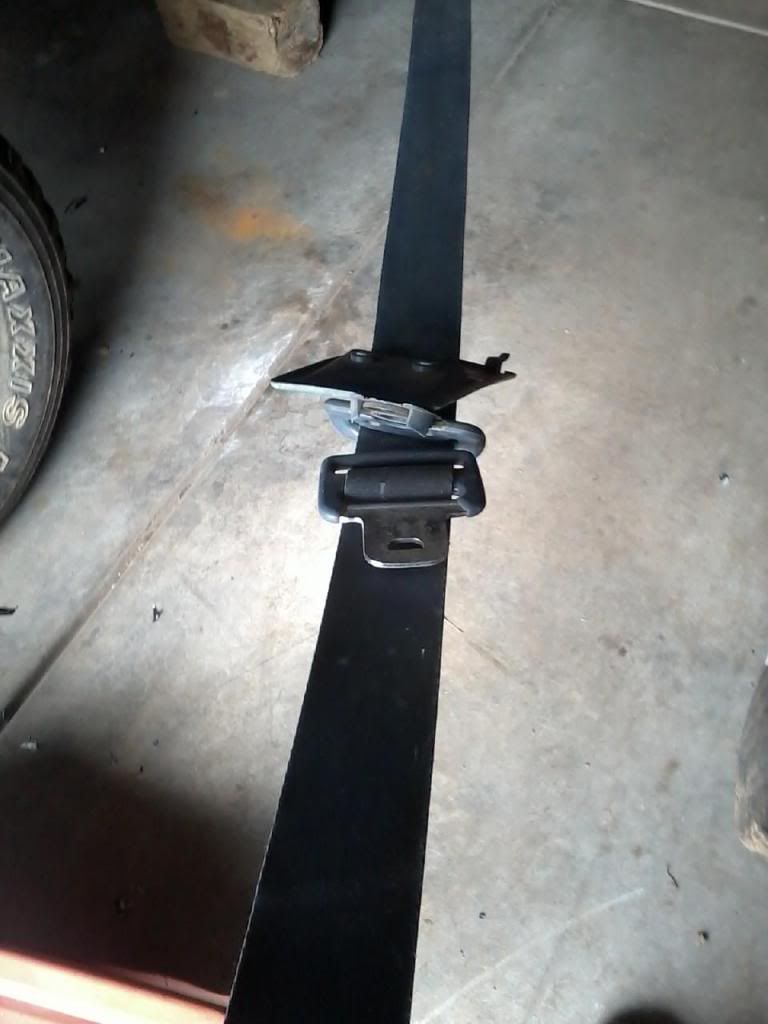
I have some gray seatbelts but they werent working. So I just stretched it out and shot some gray on them. I dont have any lap belts. Starting to think that this truck came with out a back seat as the side panels didnt have the slots and the seat I had is a binch seat some one fabbed up. Seat belts are now gray.
Here is the panels needing cleaned up. They have a few nicks and cuts, but I will replace them at a later day when I find some. It will look ok.
I have some gray seatbelts but they werent working. So I just stretched it out and shot some gray on them. I dont have any lap belts. Starting to think that this truck came with out a back seat as the side panels didnt have the slots and the seat I had is a binch seat some one fabbed up. Seat belts are now gray.
03-02-2012, 11:06 AM
#170
Registered User
Terry, as usual good work, you just plow right thru this stuff. The OP means original poster, meaning you are the thread starter. Nice new feature on here I guess.
03-02-2012, 12:34 PM
#171
Registered User
Join Date: Jul 2009
Location: Eastern NC
Posts: 832
Likes: 0
Received 0 Likes
on
0 Posts
Terry if I remember correctly that is the same electrical connector on the 85 for the washer fluid. 85-86 used predominantly round type connectors. Looking good man. On the interior parts do you spray the interior fabric with the same interior paint you use on the plastics?
03-02-2012, 01:03 PM
#172
Registered User
Join Date: Mar 2009
Location: (LSD) Lower Slower Delaware
Posts: 1,169
Likes: 0
Received 0 Likes
on
0 Posts
Man on a mission...love it.
Terry, like your large work bench, oh and it moves, great....lol
do you need the round connector that come from the windshield washer tank?
Terry, like your large work bench, oh and it moves, great....lol
do you need the round connector that come from the windshield washer tank?
03-03-2012, 06:17 AM
#173
Super Moderator
Staff
Thread Starter
iTrader: (1)
Join Date: Aug 2008
Location: Anderson Missouri
Posts: 11,788
Likes: 0
Received 25 Likes
on
22 Posts
Thanks coryc85...Im glad it is finally turning into build thread instead of how to disassemble a 4Runner.
Thanks Tinman.. I was hoping that is what it is for. I have 2 washer bottles that have the flat connector and will be able to use one. I use the paint on both fabric and plastic. Just make sure it is good and clean and I like to use some Adhesion Promoter. It can be used on carpet also, but usually carpet is so worn I just replace it.
Thanks RMP8080.. I am really trying to get this thing together and running soon. I appreciate the rond connector, but I have some bottles and connectors so will be able to wrap it up when I start doing the front end.
My little flatbed has been used as a work bench many times. Especially when it is nice outside or for July4th or outdoor events. Bought it for gas mileage and not for the flat bed. Cant imagine life without one now. They are handy. It has been a build in itself. Swapped frames, motor, tranny. Did all of that before discovering YT.
03-03-2012, 06:27 AM
#174
Super Moderator
Staff
Thread Starter
iTrader: (1)
Join Date: Aug 2008
Location: Anderson Missouri
Posts: 11,788
Likes: 0
Received 25 Likes
on
22 Posts
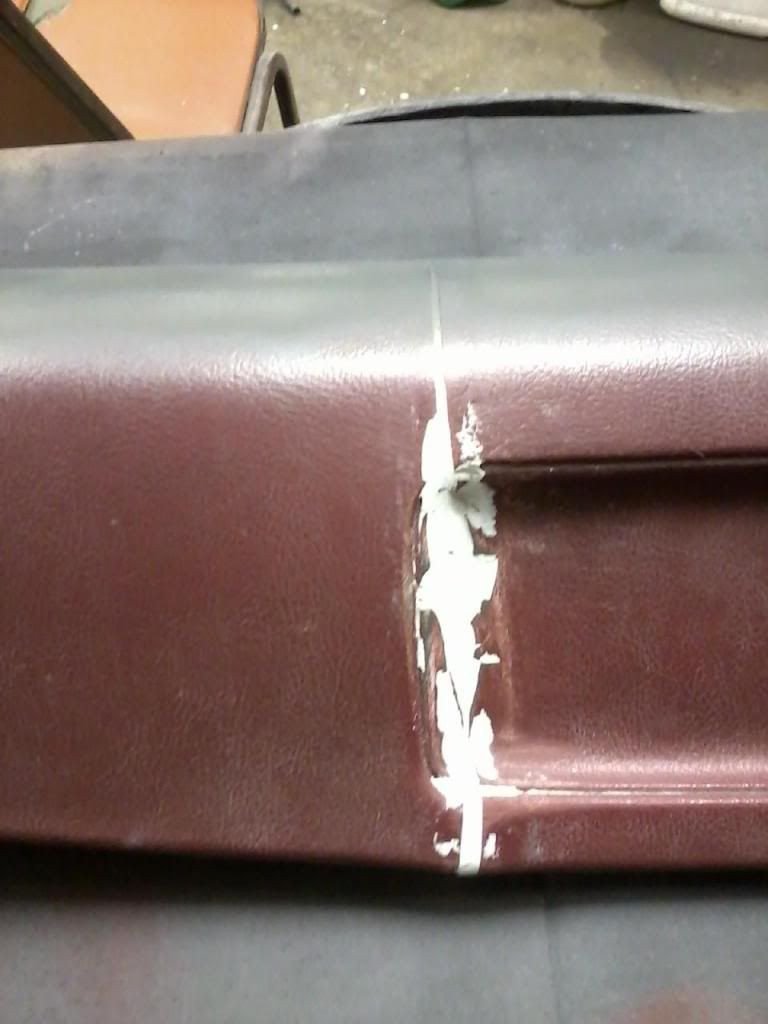
I worked on my side trims. One was broke and another cracked in the same place about to break. I super glued them and then put some 2 part epoxy on the back for more stability.
Here is what I used. I have them painted. It is really solid now. Crack still shows, but it better then it was.
I repaired my dash. I got it half way painted befroe thinking of takeing a picture. It had a crack and a gnarly hole in it. Not perfect but not nearly as bad as it was. I will eventually find something better or get one them dash overlays off of ebay.
For filling a crack, mix up some bondo and while it is still has the texture of cheese, lay a razor across the crack scrap it of. Fills gap nicely. This dash is in better shape then my other one. There are some small cracks I cant even find. I have tried those vinyl repair kits and not had any luck with them.
I will post a picture of it in the truck later.
Last edited by Terrys87; 12-14-2012 at 05:01 AM.
 03-03-2012, 12:52 PM
#176
Super Moderator
Staff
Thread Starter
iTrader: (1)
Join Date: Aug 2008
Location: Anderson Missouri
Posts: 11,788
Likes: 0
Received 25 Likes
on
22 Posts
Thanks Chef.. I am trying to get it as far as I can. Got more done then what it looks like and have been trying to get alot of it the first time without having to redo somethings later on.
She is feeling better. She will still be down a while and that actually works to my advantage. I dont have power running out to the shop so I have extention cords running out there from her hot tub. Left it unplugged for a few days and am sure the water is cold. That is one of her projects. OOPS!!!
She is feeling better. She will still be down a while and that actually works to my advantage. I dont have power running out to the shop so I have extention cords running out there from her hot tub. Left it unplugged for a few days and am sure the water is cold. That is one of her projects. OOPS!!!
03-03-2012, 01:08 PM
#177
Super Moderator
Staff
Thread Starter
iTrader: (1)
Join Date: Aug 2008
Location: Anderson Missouri
Posts: 11,788
Likes: 0
Received 25 Likes
on
22 Posts
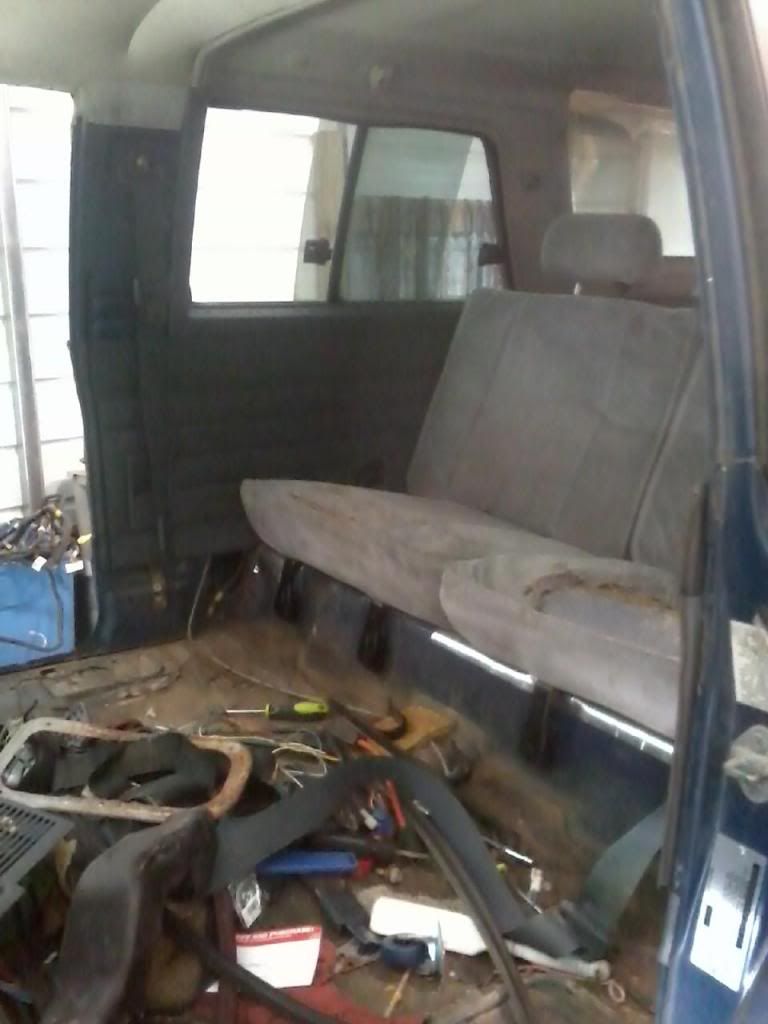
I got my L trims and seats in. I need more Peel and Seal to finish the front half, but it will have to wait awhile. My seats arent the best and interior will be the last of the build, but it is clean and will be usuable. I will eventually get gray carpet in.
Each piece I put in is starting to feel like a truck again. I am getting the top of the roof emptied off and getting to put the old parts in the shed. Each one that gets put on is a little bit of excitement. Starting to have problems finding small things now to keep moving forward on. That is a good thing. My little 79/83 might start getting some attention if this keeps up. I got plenty that I can do on it for no cost.
L trims and seats in.
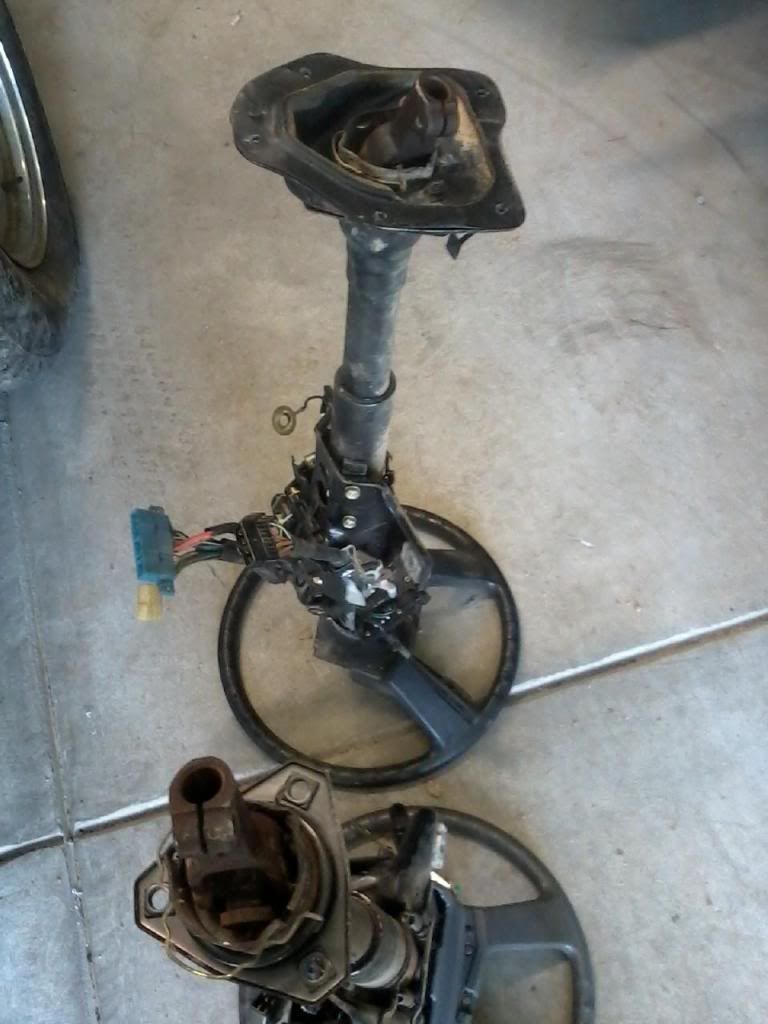
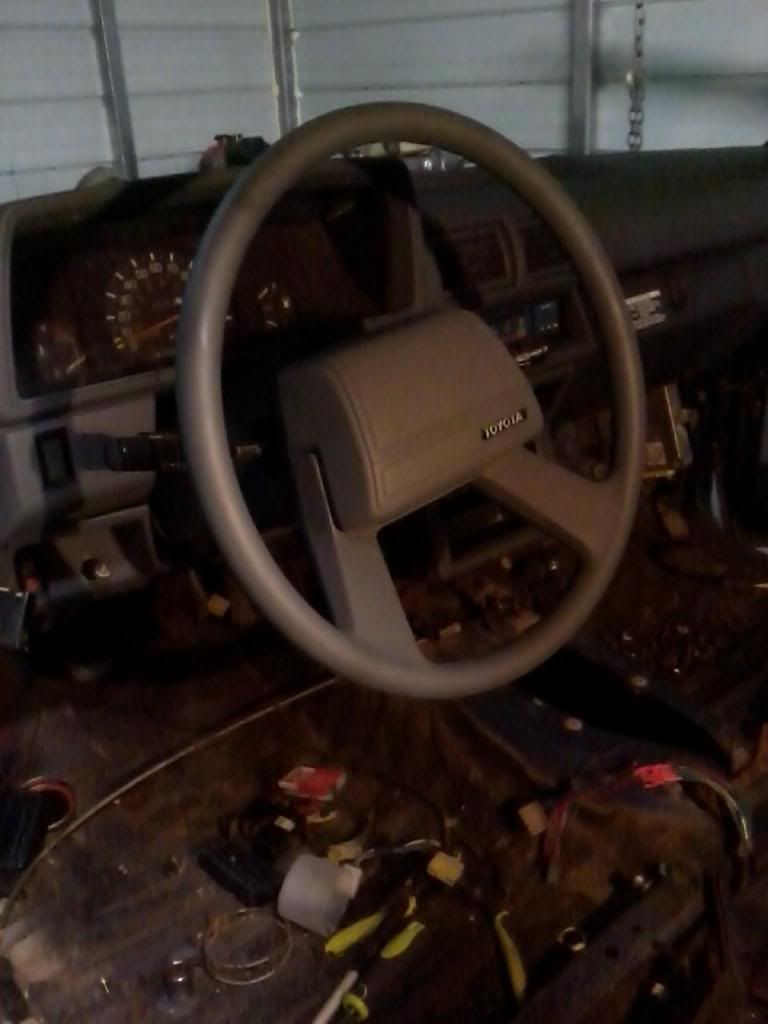
I got alot more done but couldnt get any good pictures without any glare on them. Got the steering column in. If taking the steering column out just pull all 5 bolt to the firewall. There are 3 bolts that attach a triangualr piece to the firewall piece. I didnt see the wire clip and it took alot of time for me to get the column switched out.
I was always told switching steering columns is difficult. It is not by any means. I probably should look at a Haynes Manual next time I go into new territory for me. Steering column is switched out.
I tried removing the steering column by just the 3 bolts on the bottom picture. Big no no. Remove the 5 bolts on the top column first. I learned the hard way.
Each piece I put in is starting to feel like a truck again. I am getting the top of the roof emptied off and getting to put the old parts in the shed. Each one that gets put on is a little bit of excitement. Starting to have problems finding small things now to keep moving forward on. That is a good thing. My little 79/83 might start getting some attention if this keeps up. I got plenty that I can do on it for no cost.
L trims and seats in.
I got alot more done but couldnt get any good pictures without any glare on them. Got the steering column in. If taking the steering column out just pull all 5 bolt to the firewall. There are 3 bolts that attach a triangualr piece to the firewall piece. I didnt see the wire clip and it took alot of time for me to get the column switched out.
I was always told switching steering columns is difficult. It is not by any means. I probably should look at a Haynes Manual next time I go into new territory for me. Steering column is switched out.
I tried removing the steering column by just the 3 bolts on the bottom picture. Big no no. Remove the 5 bolts on the top column first. I learned the hard way.
03-04-2012, 01:59 PM
#178
Super Moderator
Staff
Thread Starter
iTrader: (1)
Join Date: Aug 2008
Location: Anderson Missouri
Posts: 11,788
Likes: 0
Received 25 Likes
on
22 Posts
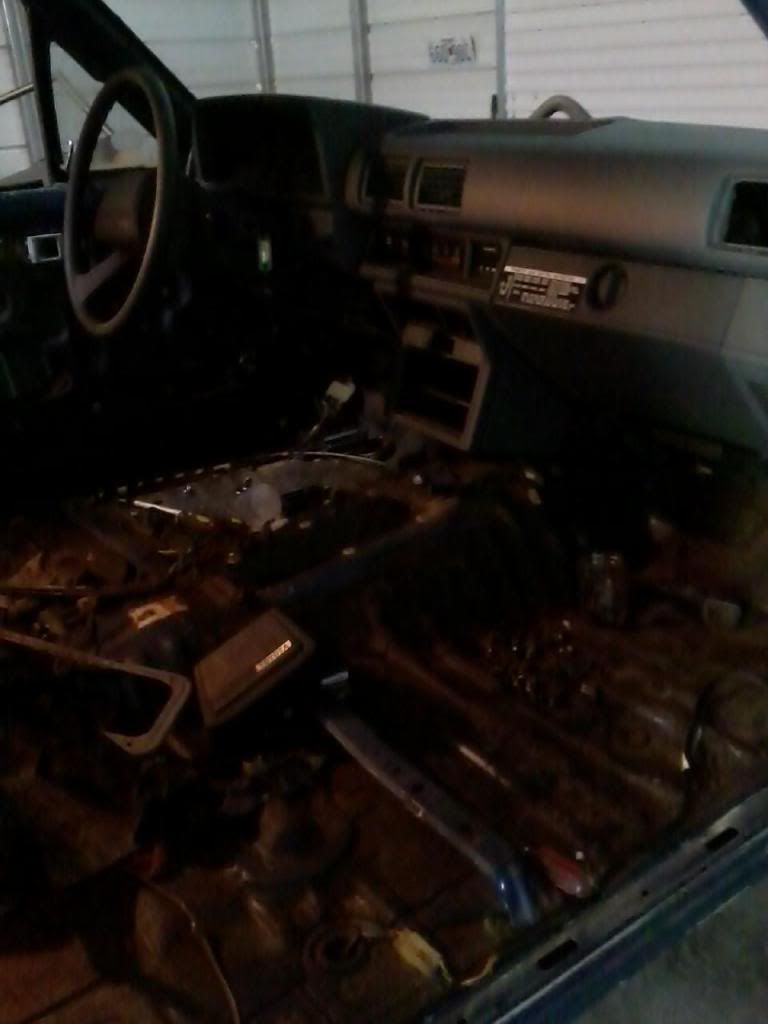
Got my dash together. I got a non SR5 guage for testing electrical. Got to get the hot wire hooked up to start testing what I can.
Steering Column in.
Got passenger side done. I trimmed around the 4x4 instructons on the glove box. Almost looks like somebody knew what they might be doing. I was patient on trying to get maksed off. Would of got some more done, but the wife has decided to keep me for 10 years today (anniversary) so will be going out tonight. Past 10 years has flown by. Wheww!!
03-04-2012, 04:13 PM
#179
Registered User
Join Date: Mar 2009
Location: (LSD) Lower Slower Delaware
Posts: 1,169
Likes: 0
Received 0 Likes
on
0 Posts
Best of luck, Happy anniversary, wow 10 years is almost a life time.
Nice work in the steer wheel, my was a pain switching over to tile wheel.
Nice work in the steer wheel, my was a pain switching over to tile wheel.


