
Terrys87 86 4Runner with a 2nd Chance
 02-19-2014, 04:17 PM
#1741
Super Moderator
Staff
Thread Starter
iTrader: (1)
Join Date: Aug 2008
Location: Anderson Missouri
Posts: 11,788
Likes: 0
Received 25 Likes
on
22 Posts
Hello cyberhorn..I see the warmer weather woke youup from your slumber. Hadnt seen you in awhile.lol
Hello rustedyota83... It is getting better, I am on the down side of it. I have to get another tooth pulled Monday due to it but should be back to normal here shortly. I have several other things I want to accomplish as well. I was disappointed in what I got done this winter and last summer but with insultation now I dont feel the heat will be a problem. I was hoping some one would get a kickout of my pants shrinking comment.lol
http://bondo.com/tips
Last edited by Terrys87; 03-02-2014 at 12:22 AM.
 02-19-2014, 04:24 PM
#1742
Super Moderator
Staff
Thread Starter
iTrader: (1)
Join Date: Aug 2008
Location: Anderson Missouri
Posts: 11,788
Likes: 0
Received 25 Likes
on
22 Posts
I got out in the shop today and started getting a few things done on the conversion. Nothing picture worthy but I will get pics as I want to show a step by step on doing a conversion when it is done.
I have been going thru the fuel system on this truck as well. It had a rusty tank and I cleaned it up during the winter. I will use high pressure water to knock out the dust and then let it dry and Red Kote it. The white vinegar does a great job on it.
The motor I am using for parts for the conversion is locked up. I have had it soaking in Marvel Mystery Oil trying to free the rings up. They are froze!!!! I tried a breaker bar and the impact wrench, it is not budging.
I cleaned the terminals on the main harness as they get a green powder on them that interferes with connectivity. I will coat all of the pins with dielectric grease and getting it ready to install. I think that will be tomorrows project getting the main harness in.
02-19-2014, 04:59 PM
#1743
Super Moderator
Staff
Thread Starter
iTrader: (1)
Join Date: Aug 2008
Location: Anderson Missouri
Posts: 11,788
Likes: 0
Received 25 Likes
on
22 Posts
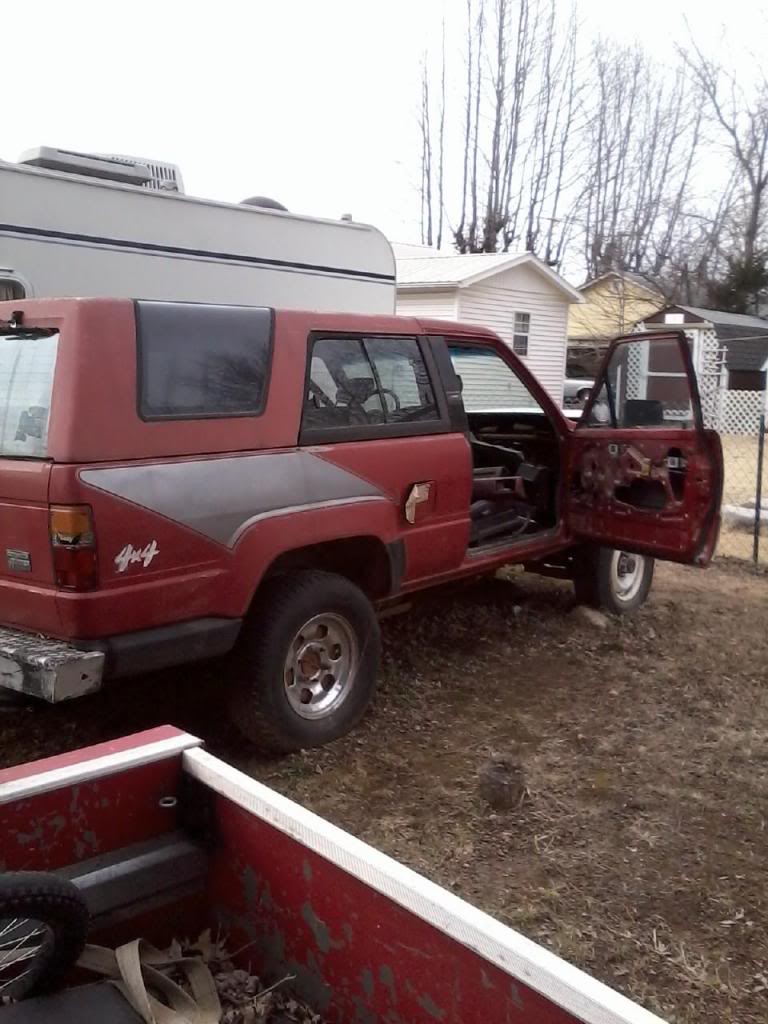
I did run into a bit of a dilema today. I was looking for where the Inclinometer connects to for kornhuskerwizard in the red runner I have out back. Marks runner is the most loaded factory option runner I have seen. I figured it would be hard to find one with all of the options like his. I think this runner is an exact twin to his.
I am a purist/true orginalist car and truck guy. That trumps my building a runner to the way I would buy one. My 86 was junk when I got it so I did not feel bad about changing colors and adding things to it the way that I would of like it to be. Having a rarer truck is over rides the desire of buildiong it to the way I like. An original truck is the hardest to find.
I brought it home and never really thought any more about it as Hunter is wanting to paint it Slimer Green/Incredible Hulk Green with 35s on it. I didnt think it would have as many options on it as it does. Today I seen just how many it has. It is missing the door panels, inclinometer, and SR5 seats. I have everything else to get it running. I would have to use a few parts off of my 86 and that would make it the 4th time it has been used as a parts truck. Two previous owners have used it for parts and I used it for parts for Mistys truck.
The other option would be to take the wiring harness and options off of the red runner and add them to my 86. The red one has a sunroof and getting all of the electric door features to working could be a task. Also 86 has round plugs and 87 has flat plugs. That means changing an entire harness from the headlights all the way to the head lights. This does not concern me as I could do it.
Another option would be to put the red runner body on my 86 frame and use my interior and a handful of other parts to get the red one going. I would really gain anything by doing that, but my 86 frame and drive train look/run great and would save me alot of time getting the red one looking as good. I wouldnt be out alot of cost going either way.
So I am thinking I would keep the red one all together and no way would I slide a 85 frame under it. I would on my 86 since it is pieced together and that would be another way of just making it unique. The 86 wont get junked. I would rather Hunter turn it green instead of one more orginal as the red one. I wont give him my 86. He will have to do all the work to get it back on the road. As of now I am still going to keep building it with the way that I have planned for it.
This is further down the road as of right now my 85 truck is the next project that will get done as I need a truck. I have plans of having the 85 done in the next couple of months. Once I get fire to the plugs, it wont take much to get it finished up.
I am really pleased with how it has started out and where I am at with it and it still brings me alot of enjoyment and satisfaction of what I have done with it. It is a great truck. It is just orginal overides custom builds in my book. Thanks alot kornhuskerwizard, looky at what you started. Just kidding. Either way I go will be enjoyable. Just having fun with you and I will see if I can find where the Inclimeter connects to.
I can only afford for myself one runner and one truck so I am still deciding which way I want to go. It will be awhile before I start anything like the above mentioned.
What I would go for minus the smitty bumpers and non SR5 wheels.
 [/
[/
I am a purist/true orginalist car and truck guy. That trumps my building a runner to the way I would buy one. My 86 was junk when I got it so I did not feel bad about changing colors and adding things to it the way that I would of like it to be. Having a rarer truck is over rides the desire of buildiong it to the way I like. An original truck is the hardest to find.
I brought it home and never really thought any more about it as Hunter is wanting to paint it Slimer Green/Incredible Hulk Green with 35s on it. I didnt think it would have as many options on it as it does. Today I seen just how many it has. It is missing the door panels, inclinometer, and SR5 seats. I have everything else to get it running. I would have to use a few parts off of my 86 and that would make it the 4th time it has been used as a parts truck. Two previous owners have used it for parts and I used it for parts for Mistys truck.
The other option would be to take the wiring harness and options off of the red runner and add them to my 86. The red one has a sunroof and getting all of the electric door features to working could be a task. Also 86 has round plugs and 87 has flat plugs. That means changing an entire harness from the headlights all the way to the head lights. This does not concern me as I could do it.
Another option would be to put the red runner body on my 86 frame and use my interior and a handful of other parts to get the red one going. I would really gain anything by doing that, but my 86 frame and drive train look/run great and would save me alot of time getting the red one looking as good. I wouldnt be out alot of cost going either way.
So I am thinking I would keep the red one all together and no way would I slide a 85 frame under it. I would on my 86 since it is pieced together and that would be another way of just making it unique. The 86 wont get junked. I would rather Hunter turn it green instead of one more orginal as the red one. I wont give him my 86. He will have to do all the work to get it back on the road. As of now I am still going to keep building it with the way that I have planned for it.
This is further down the road as of right now my 85 truck is the next project that will get done as I need a truck. I have plans of having the 85 done in the next couple of months. Once I get fire to the plugs, it wont take much to get it finished up.
I am really pleased with how it has started out and where I am at with it and it still brings me alot of enjoyment and satisfaction of what I have done with it. It is a great truck. It is just orginal overides custom builds in my book. Thanks alot kornhuskerwizard, looky at what you started. Just kidding. Either way I go will be enjoyable. Just having fun with you and I will see if I can find where the Inclimeter connects to.
I can only afford for myself one runner and one truck so I am still deciding which way I want to go. It will be awhile before I start anything like the above mentioned.

What I would go for minus the smitty bumpers and non SR5 wheels.
[/
Last edited by Terrys87; 02-19-2014 at 05:05 PM.
02-19-2014, 10:19 PM
#1744
Registered User
iTrader: (4)
Join Date: May 2010
Location: People's Republic of California
Posts: 720
Likes: 0
Received 15 Likes
on
12 Posts
That's funny about what you said about the smitty bumpers! That looks near identical in condition to the one I picked up off craigslist for my buddy's son..... 88' SR5 fully loaded with options including inclinometer, sunroof,factory alloy wheels, etc...manual trans, silver color, excellent condition inside and out with body stickers in great condition, but it had a blown v6. AND it had black smitty bumpers!!  that was the only thing I didn't like about it.
that was the only thing I didn't like about it.
02-19-2014, 11:21 PM
#1745
02-20-2014, 08:54 AM
#1747
Super Moderator
Staff
Thread Starter
iTrader: (1)
Join Date: Aug 2008
Location: Anderson Missouri
Posts: 11,788
Likes: 0
Received 25 Likes
on
22 Posts
Hello Grego... My brother wants a set of Smittys for his truck. It is one of those things where you like them or you dont. They have to be tougher then the factory bumper. If I had better metal fabbing skills I think I could make a factory bumper out of three beer cans. But I like the looks of the factory bumper better even though they dont protect much.
Hello RAD..In my opinion a stock truck is the best looking truck there is and the hardest to find. Any color as far as that goes. One reason I do like taking a junk truck and doing things a little different. My 85 is one that wont bother me about changing some things on it that didnt come factory.
Hello Mark... It looks rough but what I have seen on it is really solid. After looking at it, I was surprised at how good of a condition it was. I can see past the ugly and can get it back to shape when the time comes. Can you post your trim tag when you get a chance? I am in no hurry. Thanks.
02-20-2014, 09:07 AM
#1748
Super Moderator
Staff
Thread Starter
iTrader: (1)
Join Date: Aug 2008
Location: Anderson Missouri
Posts: 11,788
Likes: 0
Received 25 Likes
on
22 Posts
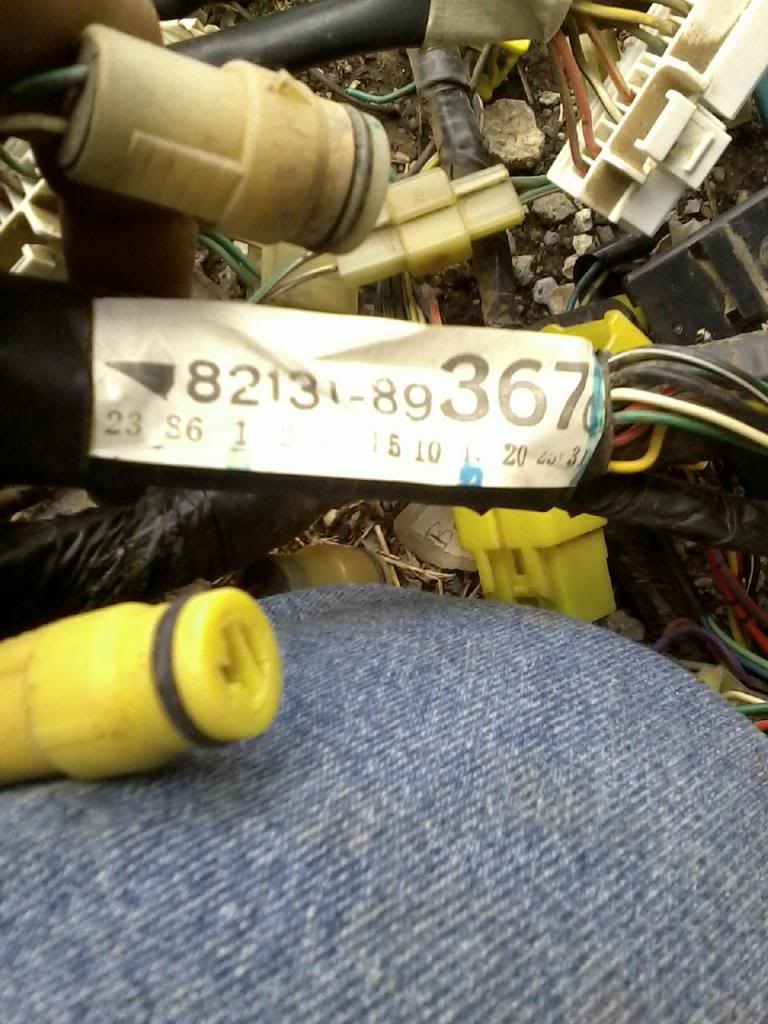
There are 15 different ways to go about and do a conversion. I decided to start installing the main harness. The harness part number is just above the steering column. From what I have seen is each option determines the part number and I have yet to see any two harnesses with the same part number. Here is where I mention about round plugs and flat plugs. 85 and 86 use alot more round plugs.
I started on the drivers side and with the boot I ran the whole harness under the drivers fender up until the boot was reseated to the firewall. Getting all of the plugs thru the hole is a bit of a chore.
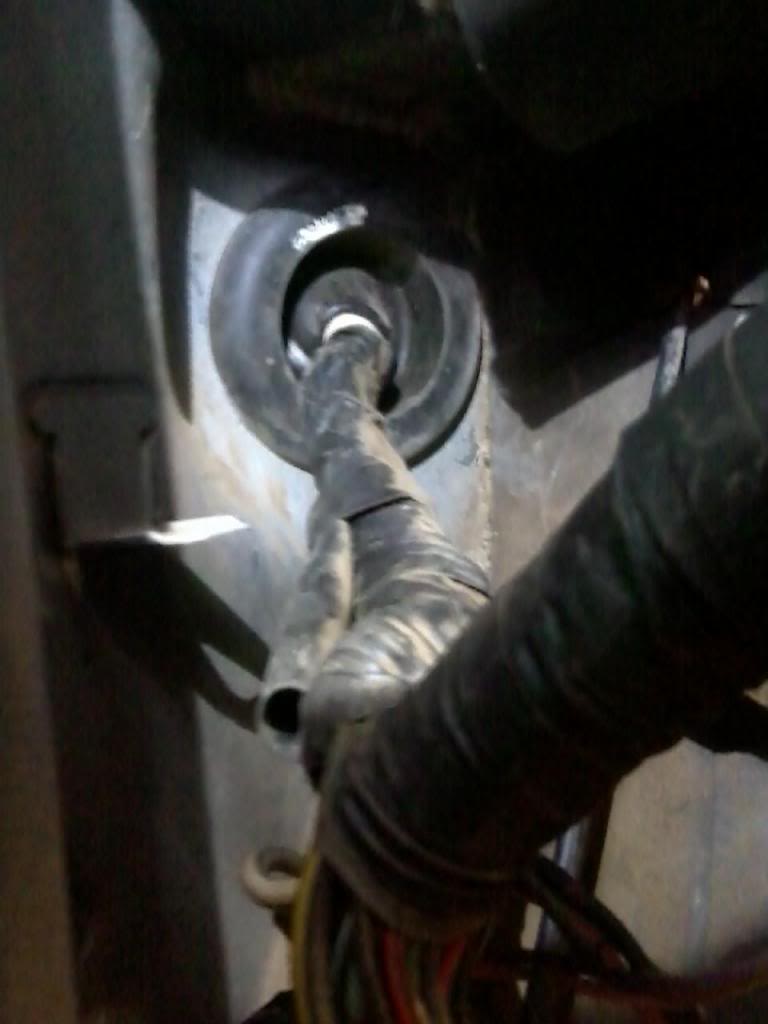
Once you get the boot in, I set the fuse box on it mounting tabs and here you can reuse the dome light plug that Toyota has kept the same thru the years. I didnt have to switch that out.
All of the plugs I mentioned earlier have to go thru this hole on the front of the inner fender. All except the blinker connections.
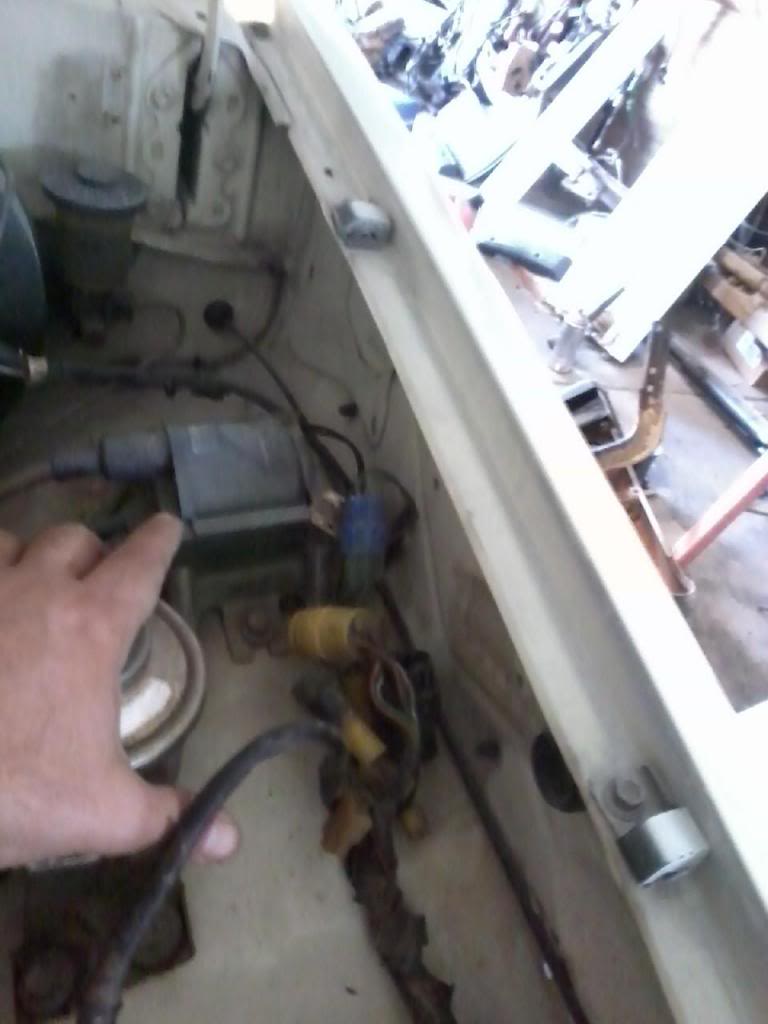
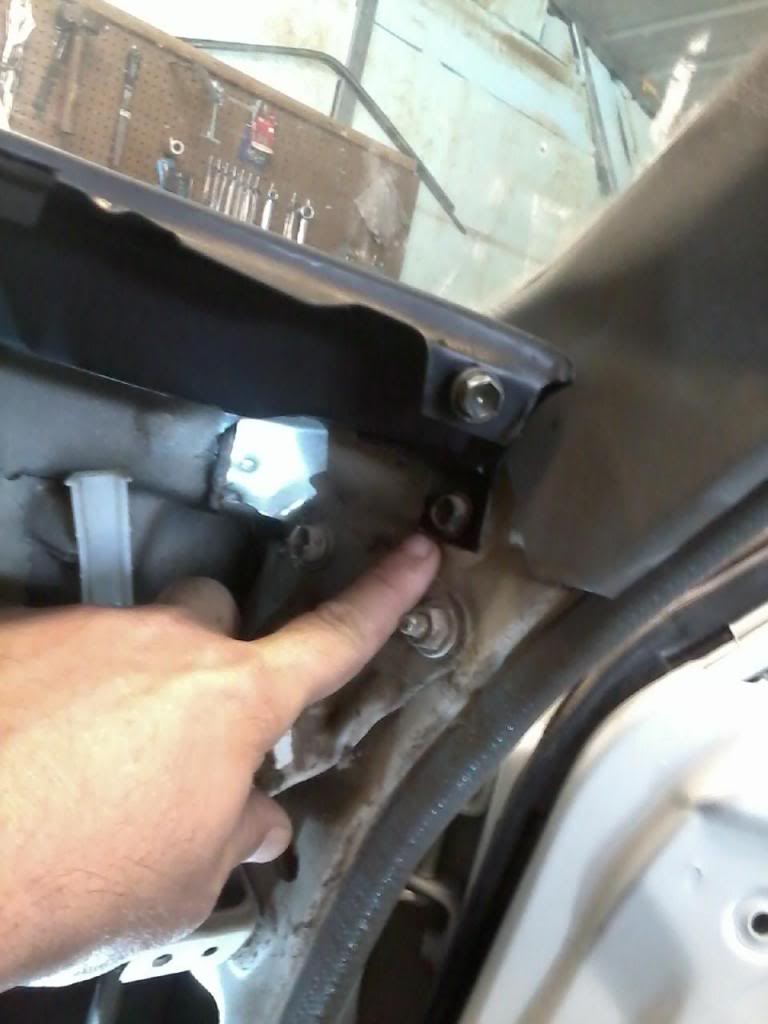
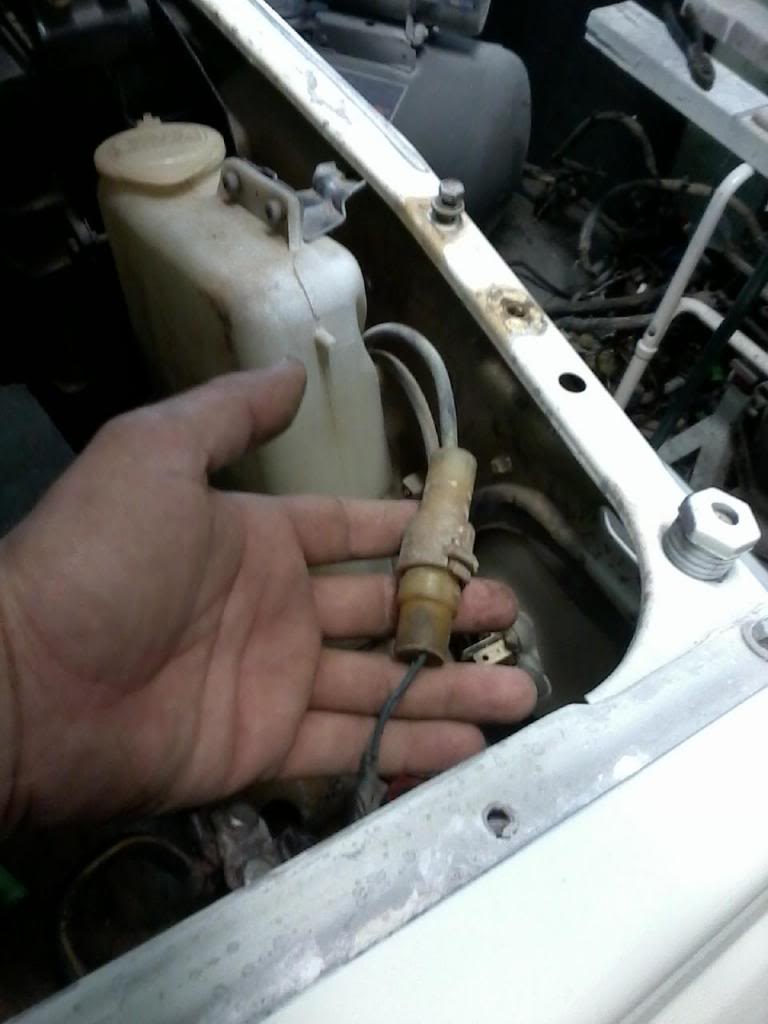
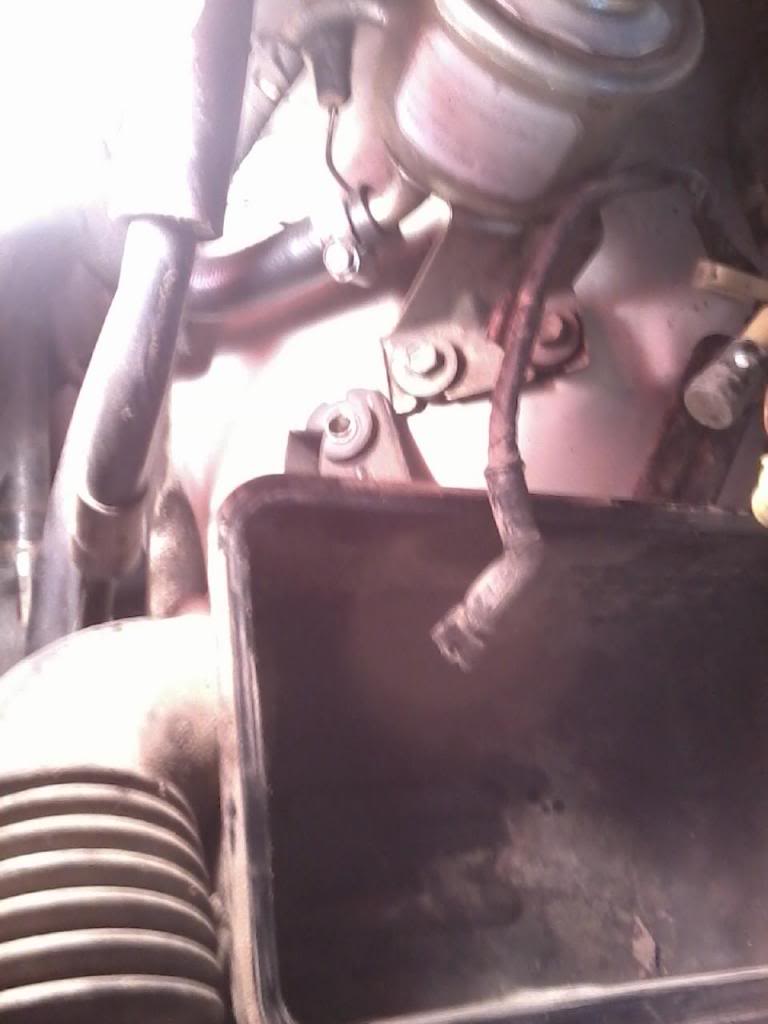
Next I ran the harness along the fender. 86 has the O2 sensor and brake fluid sensor in the same area. This is how to know you have ran it far enough. What I am pointing at is the coil for a 22r. I will swap that out later.
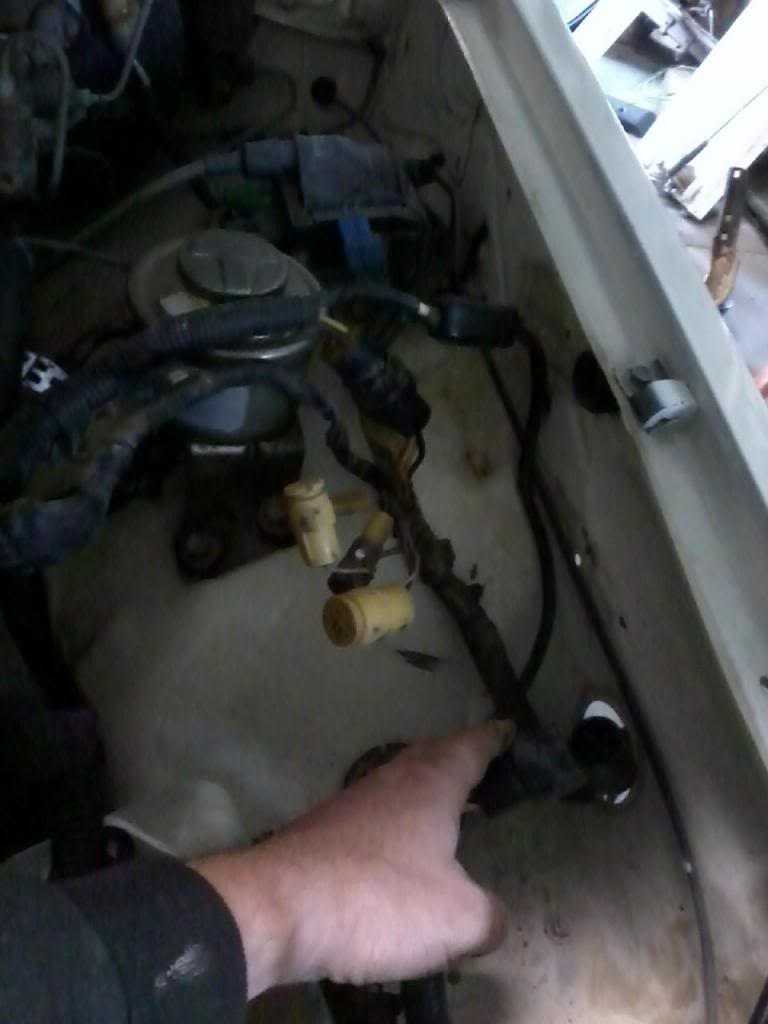
On passenger side, everything forward of the boot goes thru the hole on the right side. That is the one Toyota put in all trucks. The hole on the left is what I made for the injector harness. I cut the hole earlier to prevent me from possibly cutting the harness when installing the harness.

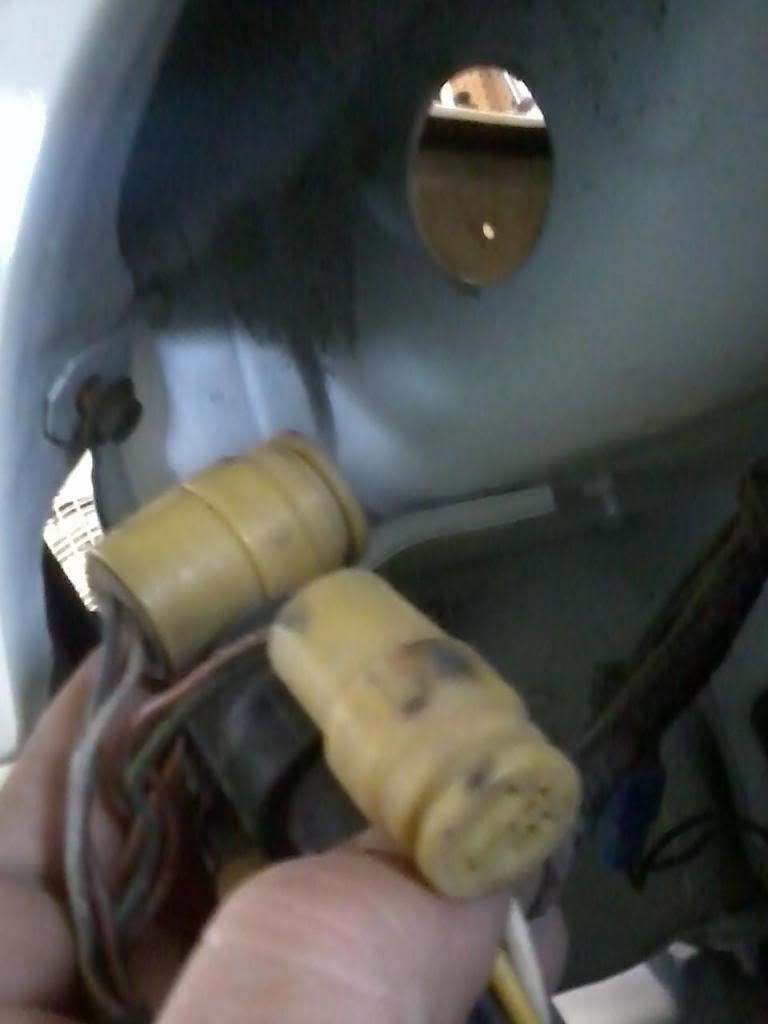
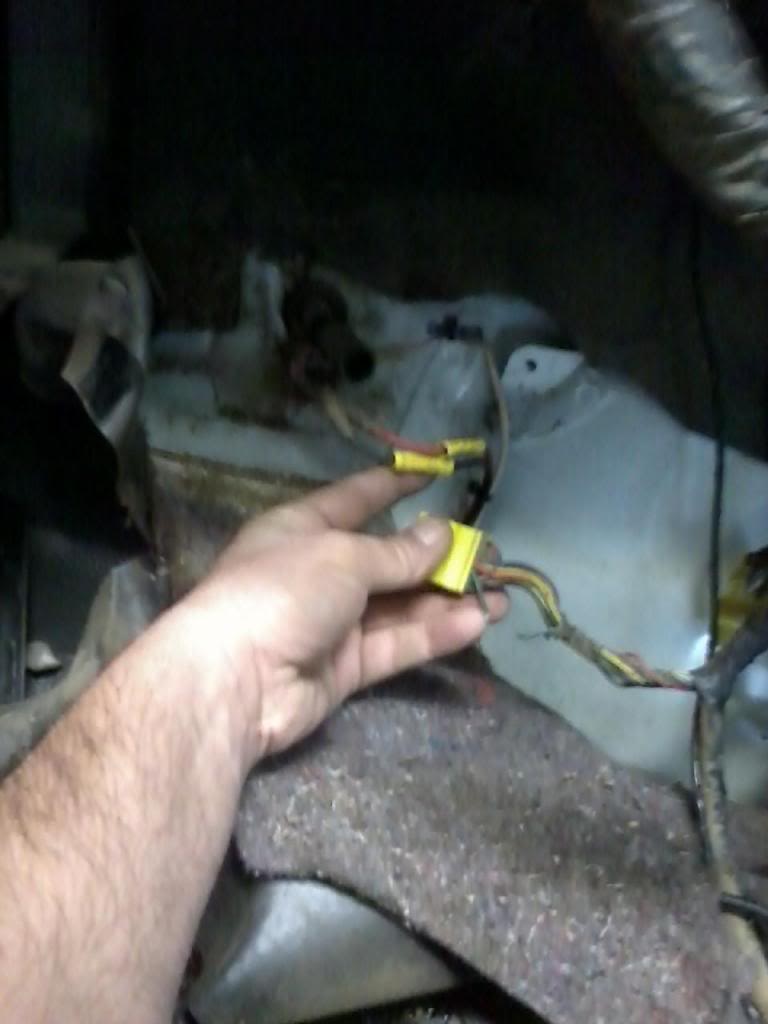
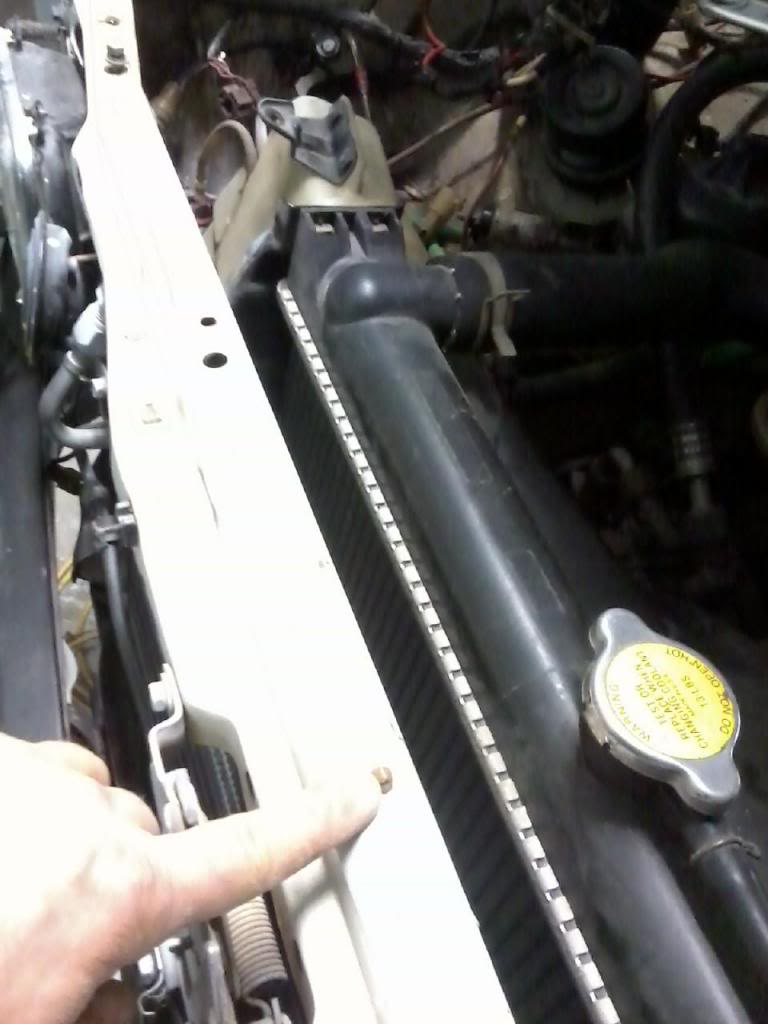
Here is the connection to the tail lights and fuel pump. It will connect but the 22r harness does not have the fuel pump wiring in it so I will have to swap out the tail light and fuel pump harness later on when I get to the fuel system. You have to change from one end of the truck to the next when doing a conversion.

I started on the drivers side and with the boot I ran the whole harness under the drivers fender up until the boot was reseated to the firewall. Getting all of the plugs thru the hole is a bit of a chore.

Once you get the boot in, I set the fuse box on it mounting tabs and here you can reuse the dome light plug that Toyota has kept the same thru the years. I didnt have to switch that out.

All of the plugs I mentioned earlier have to go thru this hole on the front of the inner fender. All except the blinker connections.

Next I ran the harness along the fender. 86 has the O2 sensor and brake fluid sensor in the same area. This is how to know you have ran it far enough. What I am pointing at is the coil for a 22r. I will swap that out later.

On passenger side, everything forward of the boot goes thru the hole on the right side. That is the one Toyota put in all trucks. The hole on the left is what I made for the injector harness. I cut the hole earlier to prevent me from possibly cutting the harness when installing the harness.

Here is the connection to the tail lights and fuel pump. It will connect but the 22r harness does not have the fuel pump wiring in it so I will have to swap out the tail light and fuel pump harness later on when I get to the fuel system. You have to change from one end of the truck to the next when doing a conversion.

Last edited by Terrys87; 03-20-2014 at 08:04 AM.
02-20-2014, 09:08 AM
#1749
Super Moderator
Staff
Thread Starter
iTrader: (1)
Join Date: Aug 2008
Location: Anderson Missouri
Posts: 11,788
Likes: 0
Received 25 Likes
on
22 Posts
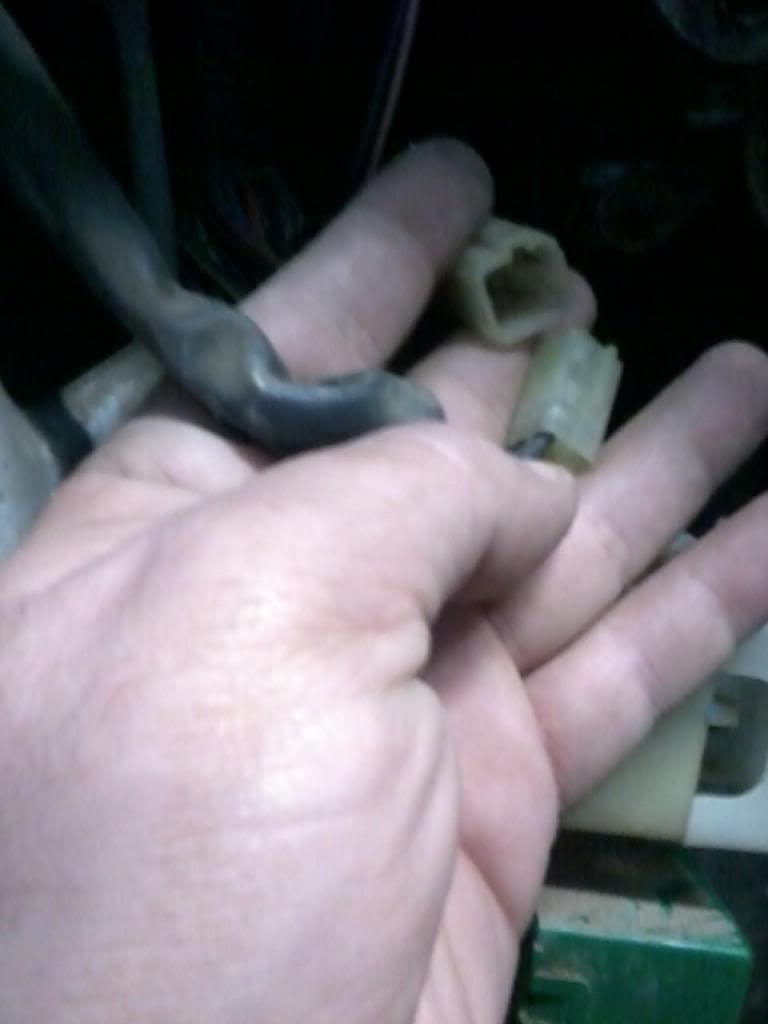
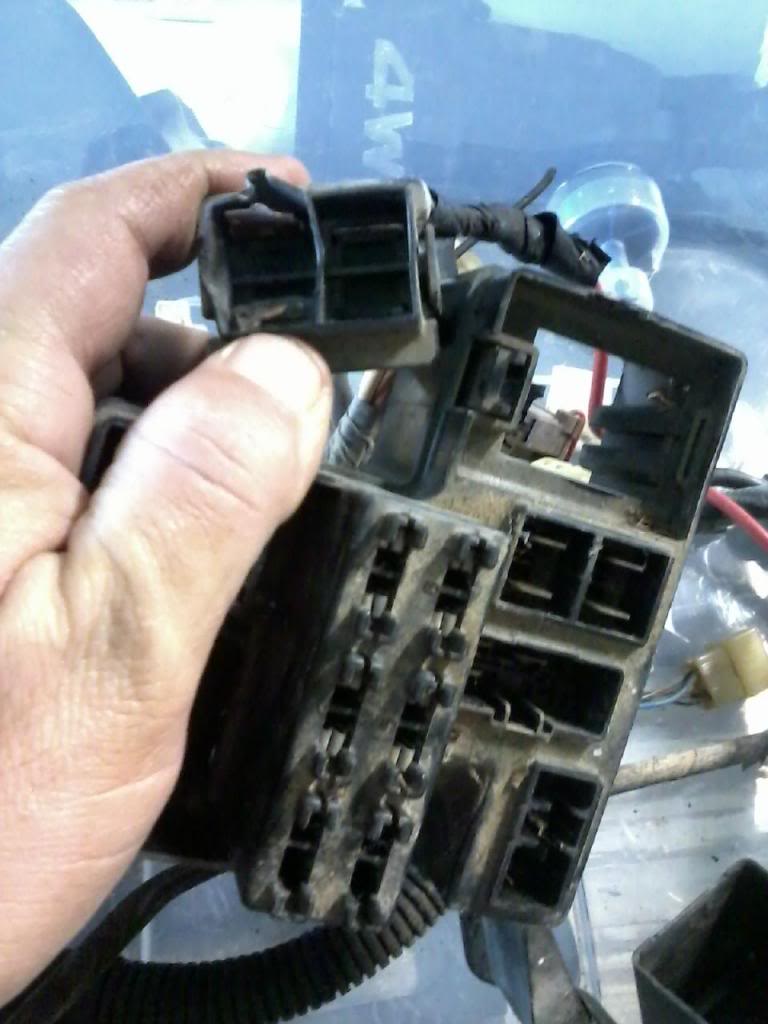
Making this a seperate post as later on I wont add this to the converison thread. Be ready for crap like this. I missed the broken wire to the computer yesterday and will solder it later. You can see some more non factory PO upgrade.
Chop Shop 101 You remove the whole vent and VIN with 3 bolts on top and one bolt on each side. I haven done it but it would be easily done. Sure would make my restores alot easier to do just swapping VINs finding some nice trucks, I need to start scanning the build threads. Just kidding.
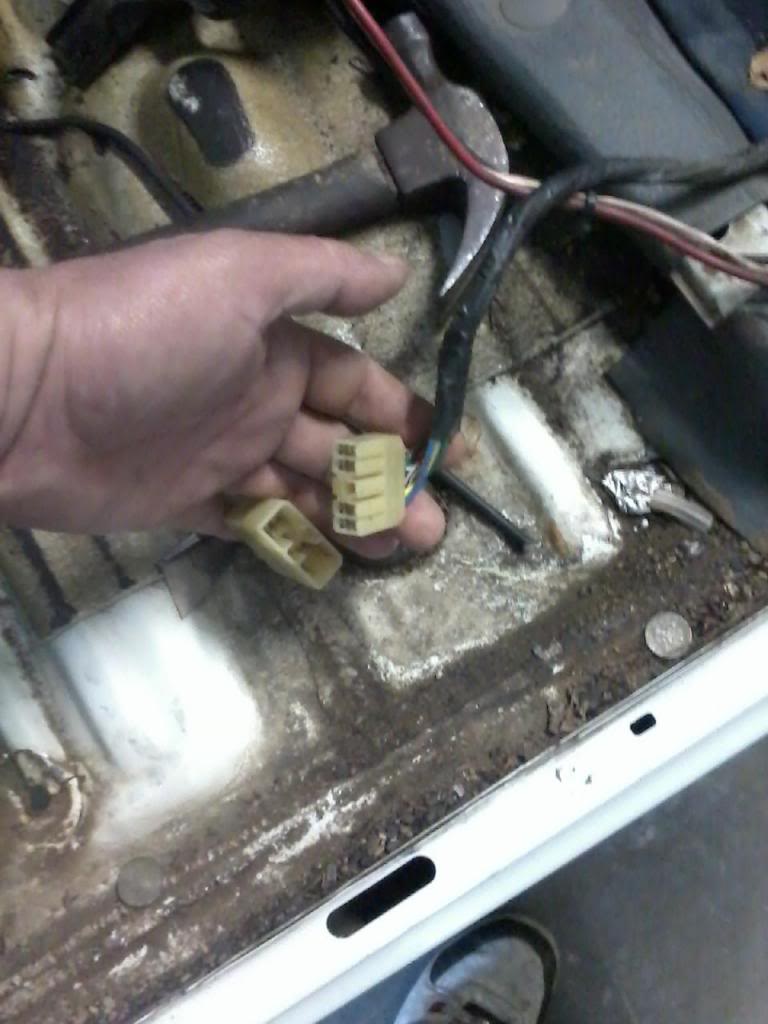
More Crap, someone tried to remove the 80 Amp fuse thru the top. It comes out the bottom. I should have a spare one of these plugs or is easily found at the salvage.

Last edited by Terrys87; 02-20-2014 at 10:48 AM.
02-20-2014, 09:19 AM
#1750
Super Moderator
Staff
Thread Starter
iTrader: (1)
Join Date: Aug 2008
Location: Anderson Missouri
Posts: 11,788
Likes: 0
Received 25 Likes
on
22 Posts
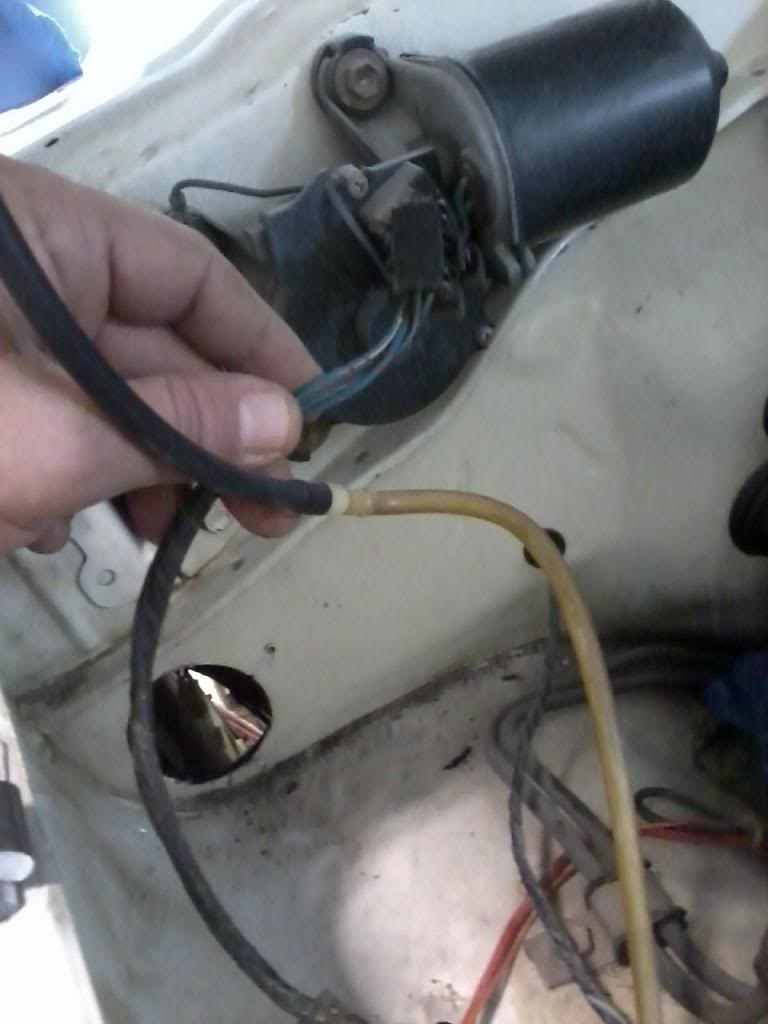
Here I ran the wiring up to the windshield wiper motor. I know the wires are mostly blue and here is a difference between 85 and 86 and newer. The wiper connector is round and the exact same plug as the Starter Relay on an 85. This will get all of the other connections in a place to where they need to be.
I have done alot of this earlier but putting up more just as a reminder that helps these old trucks. Put some dielectric grease on all of your connections when making them.
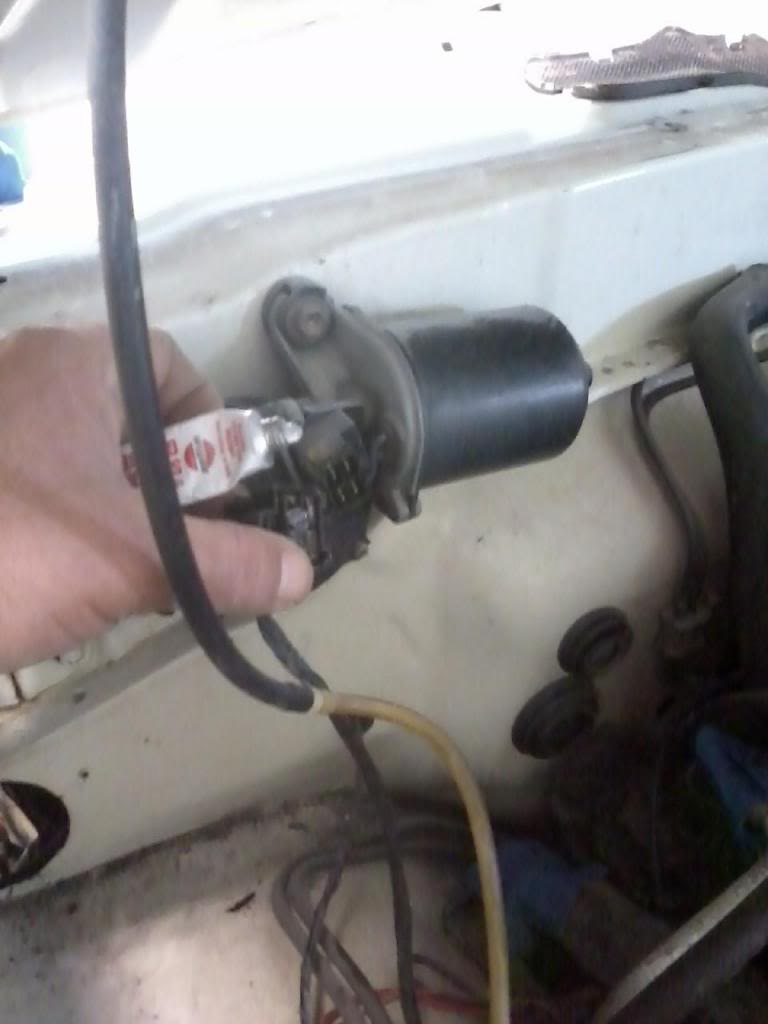
Here I am connecting the washer fluid bottle and plugs are in close proximity to where the need to be. 86 has a round plug for washer bottle, 87 and newer has a flat plug but same wiring color.

Last edited by Terrys87; 03-20-2014 at 08:05 AM.
02-20-2014, 11:00 AM
#1751
Super Moderator
Staff
Thread Starter
iTrader: (1)
Join Date: Aug 2008
Location: Anderson Missouri
Posts: 11,788
Likes: 0
Received 25 Likes
on
22 Posts
I got the head light harness installed. The brown tab goes in the center. You hav to swap the headlight harness as one problem I have seen helping someone else is the way the white wire that goes from the alternator to the fuse box and contiunes on to the heater blower connects in a different area.
Just showing some more connections. They are fool proof.
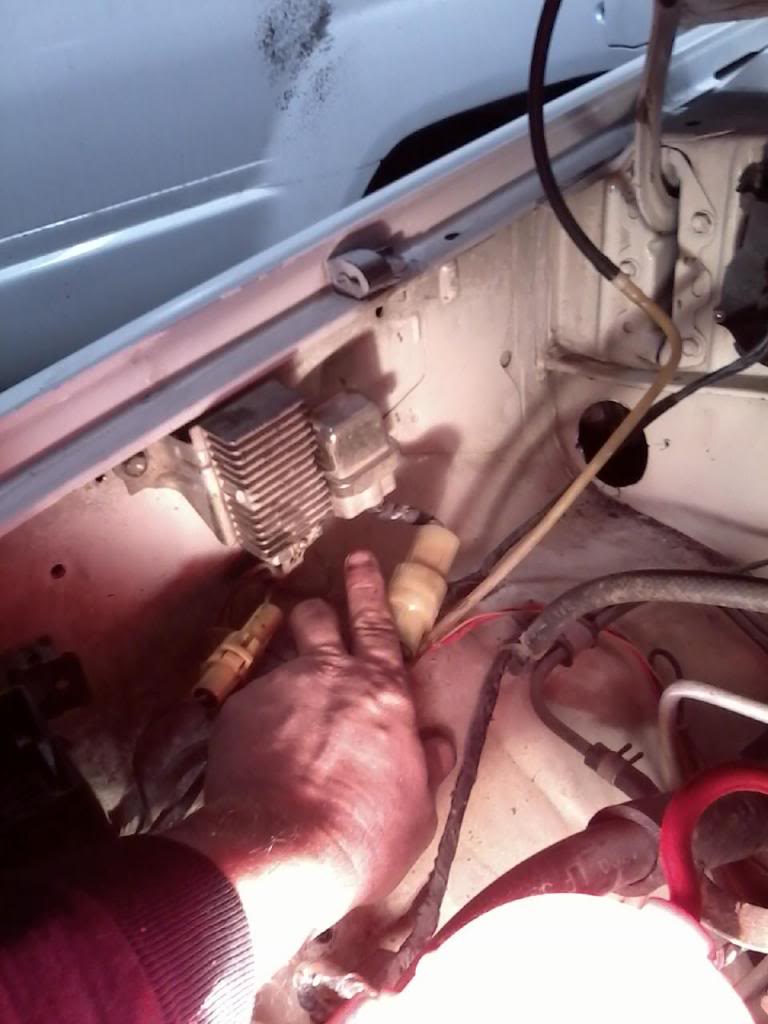
Toyota loves their grounds. I take a wire brush and get all of the corrosion off of the terminals and where they get grounded to. This one is mounted to the inner fender.
Installed Coil and Igniter.

This surprised me. Usually Toyota has all of the screw holes punched out. I will need to drill the holes out for the air box. I also do a test fitting before installing it. I learned something today that not all holes are pre punched. Will clean box up and drill holes later. You cant really see it in picture but the hole for the mounting tabs are there.
I also installed the Starter Relay and the Injector Resistor. Install the Starter Relay first as the Injector Resistor over laps the Relays tab.

Just showing some more connections. They are fool proof.

Toyota loves their grounds. I take a wire brush and get all of the corrosion off of the terminals and where they get grounded to. This one is mounted to the inner fender.

Installed Coil and Igniter.

This surprised me. Usually Toyota has all of the screw holes punched out. I will need to drill the holes out for the air box. I also do a test fitting before installing it. I learned something today that not all holes are pre punched. Will clean box up and drill holes later. You cant really see it in picture but the hole for the mounting tabs are there.

I also installed the Starter Relay and the Injector Resistor. Install the Starter Relay first as the Injector Resistor over laps the Relays tab.

Last edited by Terrys87; 03-20-2014 at 08:06 AM.
02-20-2014, 11:22 AM
#1752
Super Moderator
Staff
Thread Starter
iTrader: (1)
Join Date: Aug 2008
Location: Anderson Missouri
Posts: 11,788
Likes: 0
Received 25 Likes
on
22 Posts
It dropped 20 degrees in one hour. It was nice being out in the shop for the past couple of days.
Things still to do
Swap fuel lines
Swap Tail Light harness
Install Fuel Tank
Swap Dizzys
Remove Carburator System
Install Injector Harness
Install EFI Assembly
Re Install Dash and Seats
Repair some wires
That is a short list in a nutshell but each one is a step closer.
Things still to do
Swap fuel lines
Swap Tail Light harness
Install Fuel Tank
Swap Dizzys
Remove Carburator System
Install Injector Harness
Install EFI Assembly
Re Install Dash and Seats
Repair some wires
That is a short list in a nutshell but each one is a step closer.
02-20-2014, 11:55 AM
#1753
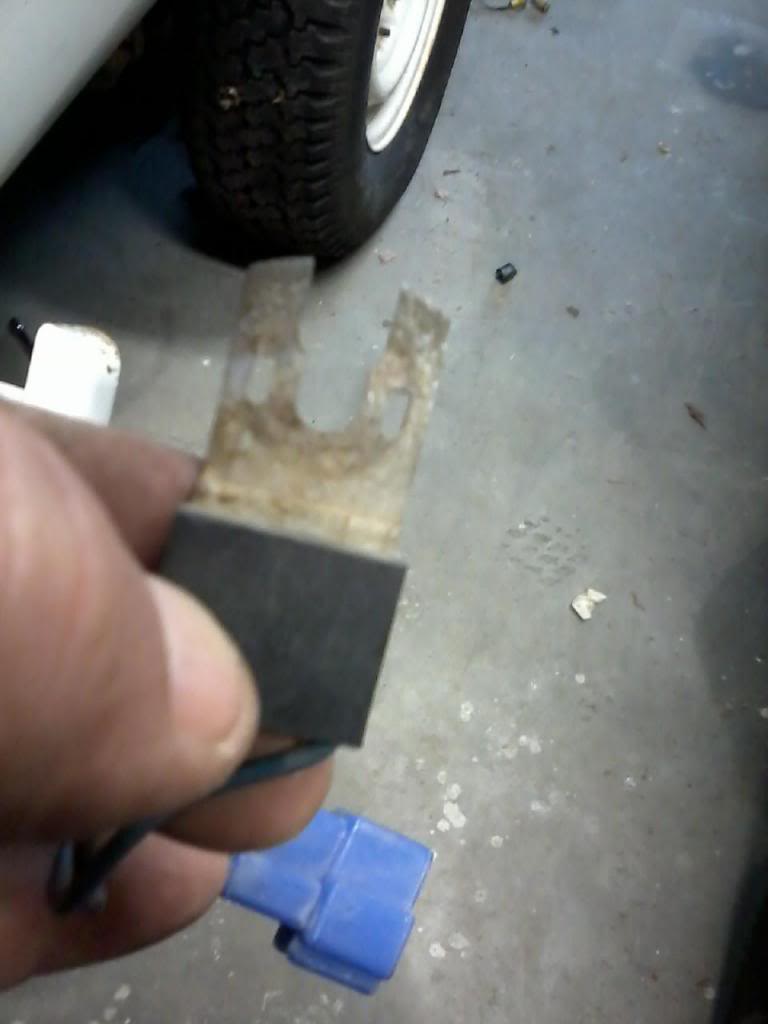
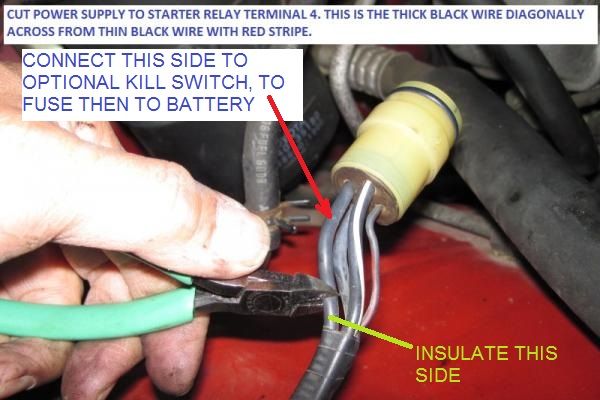
All you need to do is:
Make sure you have the correct wire- Thick, black wire diagonally across the thin black & red wire.
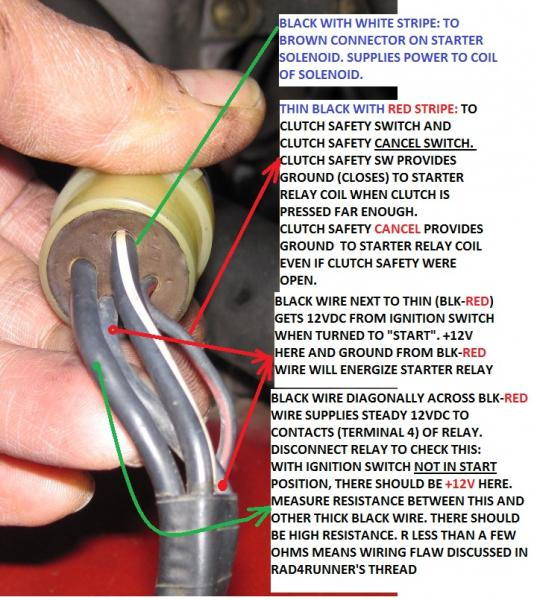
Then snip!

 02-20-2014, 04:58 PM
#1754
Super Moderator
Staff
Thread Starter
iTrader: (1)
Join Date: Aug 2008
Location: Anderson Missouri
Posts: 11,788
Likes: 0
Received 25 Likes
on
22 Posts
Thanks Ray..I have been wanting to do your upgrade. Now that the weather is warming up I will be getting on that soon.
Last edited by Terrys87; 02-20-2014 at 05:02 PM.
02-20-2014, 05:00 PM
#1755
Super Moderator
Staff
Thread Starter
iTrader: (1)
Join Date: Aug 2008
Location: Anderson Missouri
Posts: 11,788
Likes: 0
Received 25 Likes
on
22 Posts
I dont need a dashpad right now but I scanned ebay and found this camper they are parting out. Usually the overhead keeps these in great shape. Not sure if the owner knows what he has, but you can always make an offer. I have gotten parts cheap by making offers on some of things like this. Use interior paint to make it the color you need.
http://www.ebay.com/itm/84-85-86-TOYOTA-PICKUP-R-SIDE-VIEW-MIRROR-MANUAL-386293-/160928588714?pt=Motors_Car_Truck_Parts_Accessories&fits=Year%3A1986%7CMake%3AToyota%7CModel%3A4Runner&hash=item25781763aa&vxp=mtr
Adding to my parts page later.
http://www.ebay.com/itm/84-88-Toyota-4Runner-Pickup-Truck-Rubber-Door-Weatherstrip-Seals-Pair-Set-/130894580598?pt=Motors_Car_Truck_Parts_Accessories&fits=Year%3A1986%7CMake%3AToyota%7CModel%3A4Runner&hash=item1e79eccb76&vxp=mtr
Actually useful and I like better then the long plastic ones.
http://www.ebay.com/itm/Auto-Ventshade-Stainless-Steel-Window-Ventshades-12123-Toyota-Pickup-/390756077628?pt=Motors_Car_Truck_Parts_Accessories&fits=Year%3A1986%7CMake%3AToyota%7CModel%3A4Runner&hash=item5afae0903c&vxp=mtr
Last edited by Terrys87; 12-19-2014 at 03:51 PM.
02-20-2014, 05:01 PM
#1756
Super Moderator
Staff
Thread Starter
iTrader: (1)
Join Date: Aug 2008
Location: Anderson Missouri
Posts: 11,788
Likes: 0
Received 25 Likes
on
22 Posts
Here is the link I scan. I set it to 200 items per page and scan fairly quick. http://www.ebay.com/sch/Car-Truck-Pa..._skc=200&rt=nc
02-21-2014, 06:26 AM
#1758
Registered User
iTrader: (4)
Join Date: May 2010
Location: People's Republic of California
Posts: 720
Likes: 0
Received 15 Likes
on
12 Posts
I do like the rear smitty's ( I have one on mine) but I don't care for the front ones....doesn't look right to me.
02-21-2014, 07:50 PM
#1760
Registered User

Join Date: Aug 2013
Posts: 63
Likes: 0
Received 0 Likes
on
0 Posts
We got down to -10 degrees and had a few small issues. Misty called me and said her runner was blowing steam. I got home and checked it out and it was blowing around the radiator cap. Looked at the cap and the seal is just cracked and dry. Replaced it and so far no other issues. I will be checking it again here soon to make sure all is okay on it. I want to rebuild or swap her motor as it is getting low on compression but am putting it off til spring or summer. I put 400 miles on it last week and no problems but also while checking the radiator, it did the starter clicking. It will start but you have to hit the key several times at times. I will clean the Starter Relay contacts and replace the contacts in the starter as well. That will wait for warmer weather too. This is just to cold to be messing with trucks. I thought while I was working on Mistys I would give mine a quick look over as it had been sitting over nite. I squeezed the radiator hose and could tell there was slush in the hose. It wasn't frozen solid so that was a relief. Now I am concerned about how well Prestone is for cold weather. I have always used Prestone, but I know a few years back they changed to formula so as it does not have a sweet taste to dogs if I understand it right. It had a sweet taste and dogs would drink it and it caused internal bleeding to them. So they switched formulas. I checked all the trucks out a month ago in preparation for cold weather coming and they were testing great for this cold we had. I then checked two different jugs of straight antifreeze I had in the shop and they were not frozen solid but was closer to syrup. I know you don't want straight anti freeze but it shouldn't be that thick in my mind. I might be switching to a different brand or even looking at the red antifreeze. Something I will need to start searching around about for information on. Other news, I have to do a 4 day guard drill starting Thursday. They are expecting a government shut down in February and so we are doing Thursday and Friday for Februarys drill. Guess it is as good of time as any as it is to cold to do anything otherwise.


