
Terrys87 86 4Runner with a 2nd Chance

 12-18-2013, 09:30 AM
#1642
Super Moderator
Staff
Thread Starter
iTrader: (1)
Join Date: Aug 2008
Location: Anderson Missouri
Posts: 11,788
Likes: 0
Received 25 Likes
on
22 Posts
Hello Cyberhorn...I only use the cupholder when on long trips or interstate and it works great for small drinks. Not much useful on short runs.
Thanks brideau... I try to get some information that makes it a little easier then a manual.
Thanks julsruls... Toyota made it where the internet had to take the FSMs down. I have done it befroe using Wayback and it will take a little bit to see if I can remember how I did it. Nervo19 showed how to do it on a thread somewhere. I will see if I can post a link to that thread later on. Supposed to get snow Friday and I will be playing on the computer then as it will be to cold outside.
Thanks kornhuskerwizard... Hoping to make some progress in the next couple of days.
12-18-2013, 09:43 AM
#1643
Super Moderator
Staff
Thread Starter
iTrader: (1)
Join Date: Aug 2008
Location: Anderson Missouri
Posts: 11,788
Likes: 0
Received 25 Likes
on
22 Posts
I am starting the EFI Swap. I will make the post short and add more info later as Iwant to get the most done with descent weather.
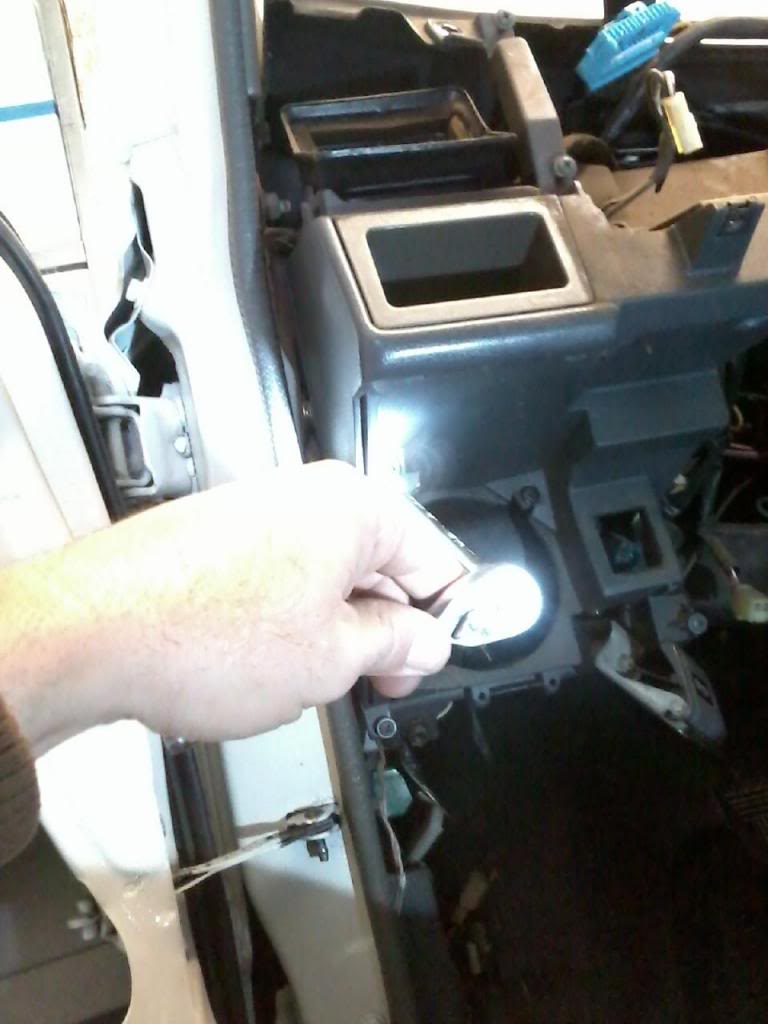
Remove the piece below the Steering Column. 6 Screws if I recall right. Disconnect the 2 plugs.
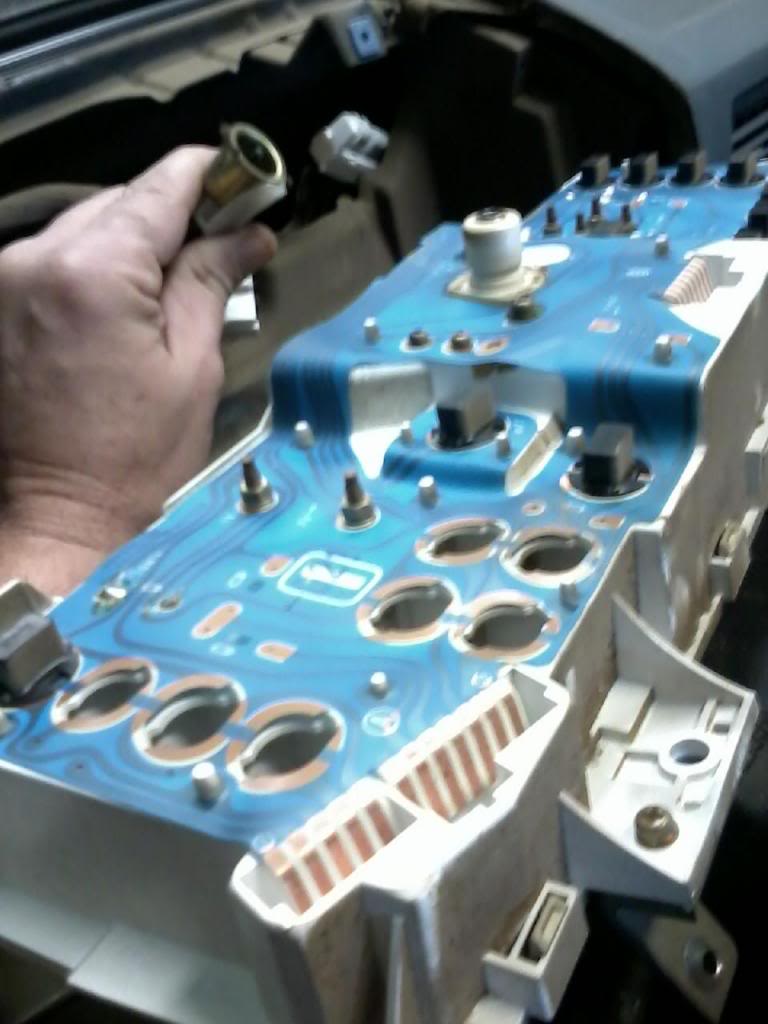
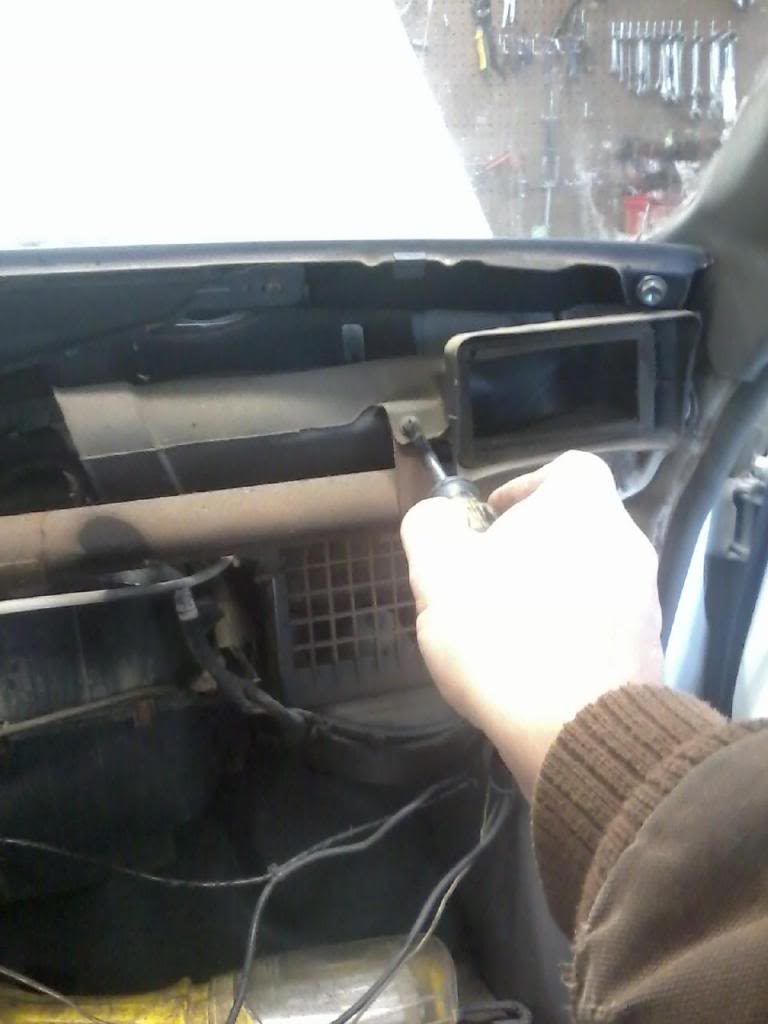
Remove the Speedo Bezel. Remove 2 screws above the gauge closet to the firewall. The plug in my hand to the Cancel Switch, lift up on tab to disconnect it.
Remove 4 screws holding speedometer.

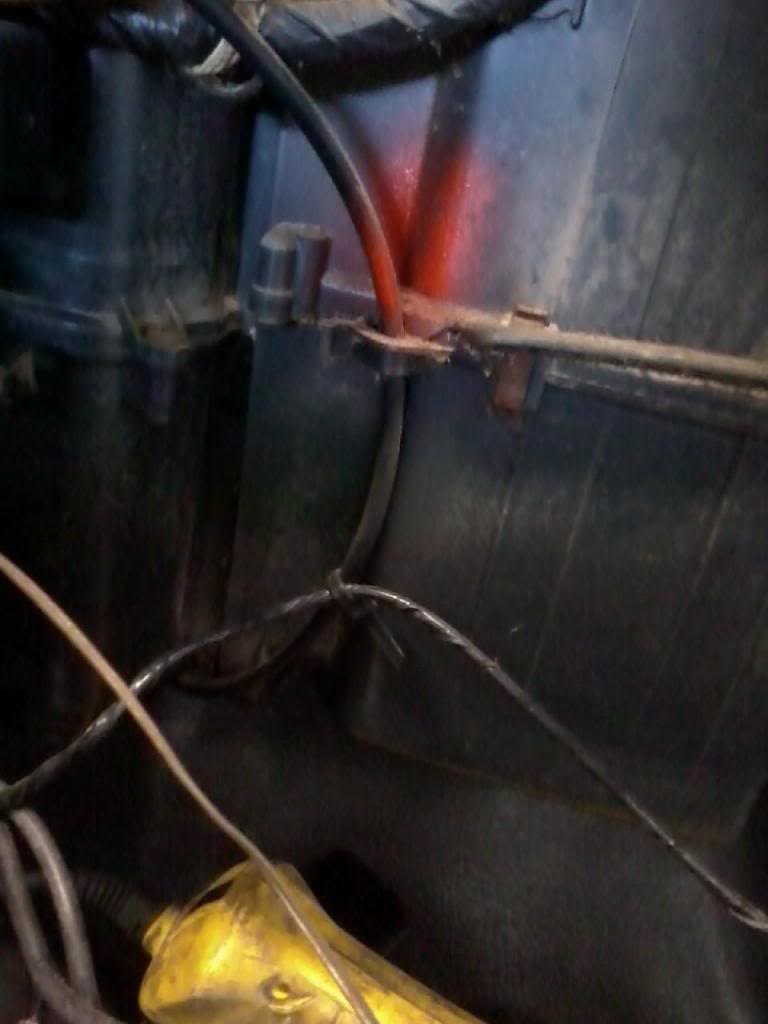
Under the hood on the firewall, remove cable from the clamp holding the cable. This will give slack to pull the speedo out further in cab.

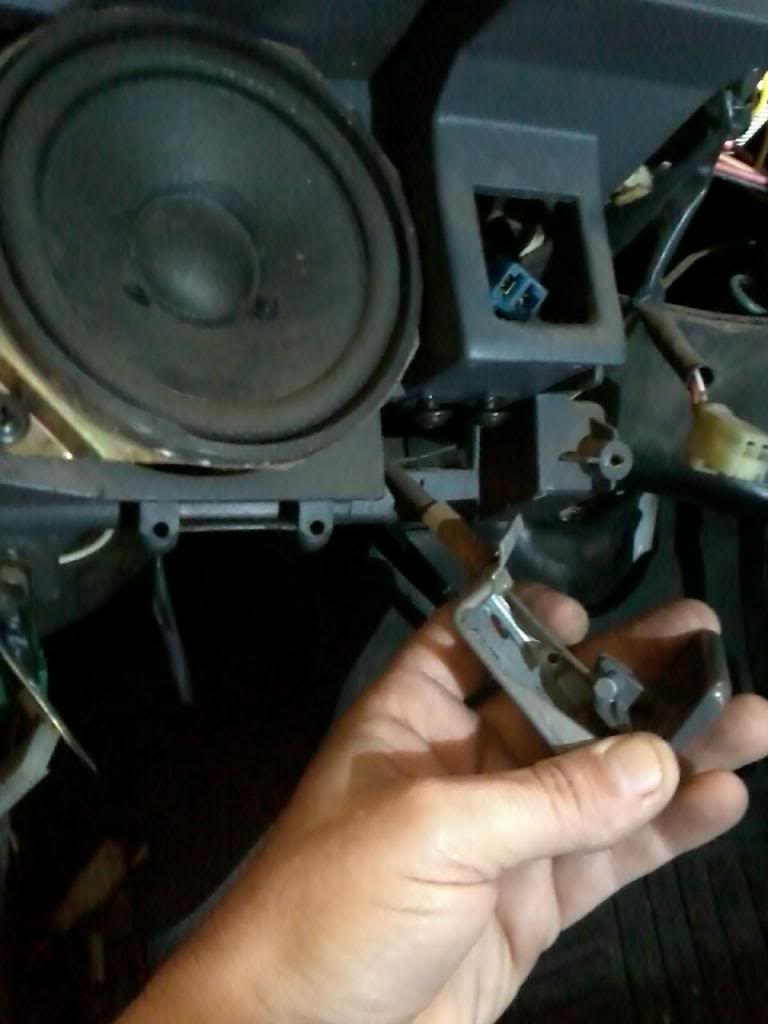
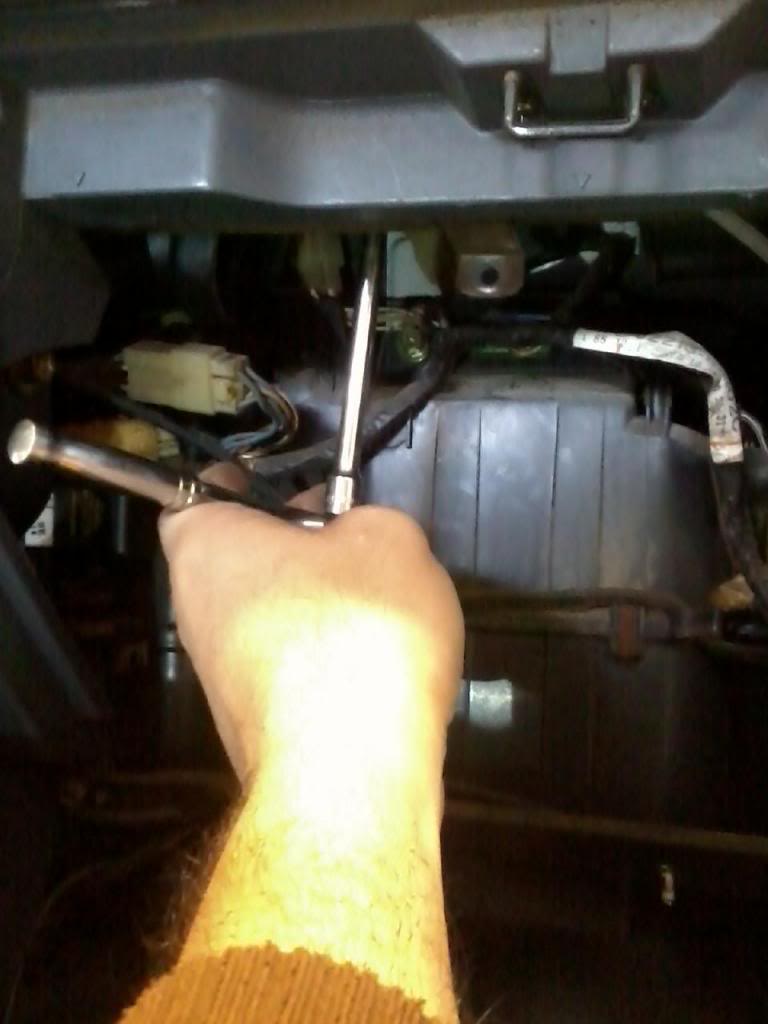
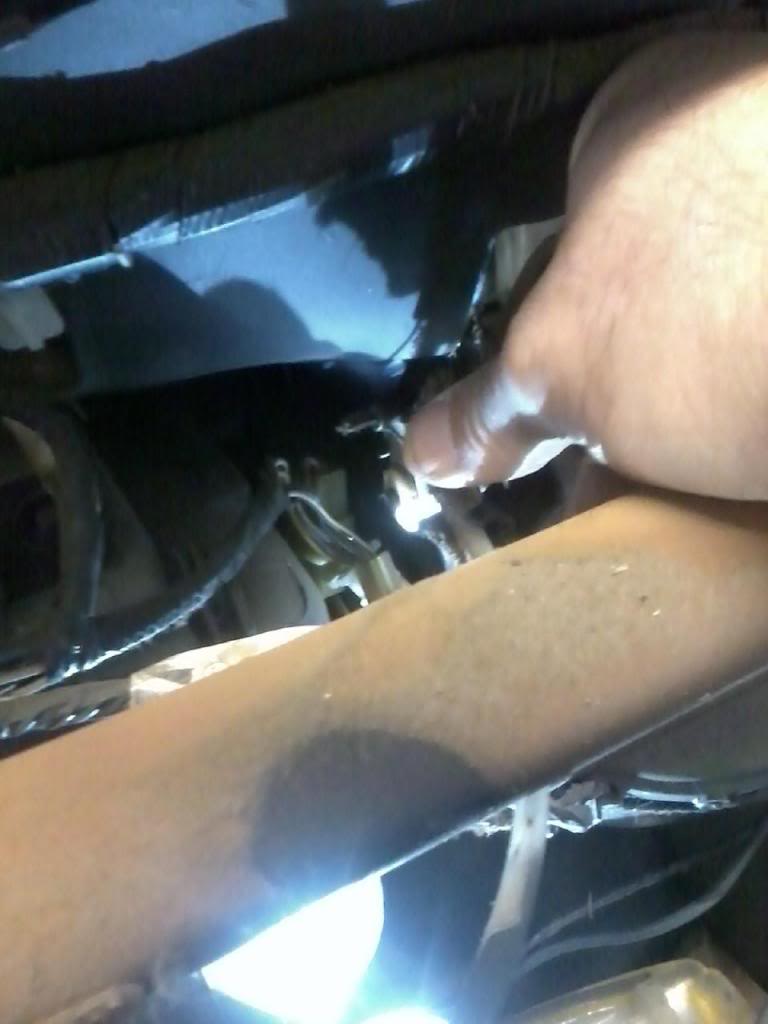
Disconnect 3 electrical plugs. The tab I am holding with my thumb, you just squeeze to release. It can be stubborn. Here is where loosening the cable under the hood makes it so much easier. If you need more room, you can loosen the cable more under the frame.
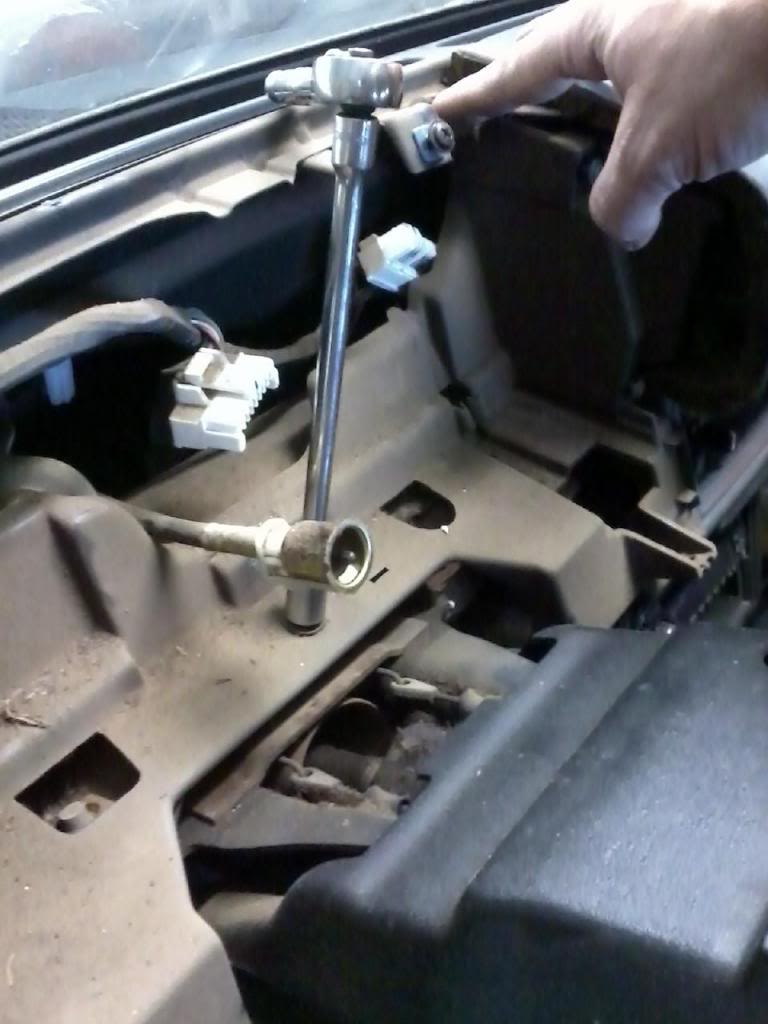
Remove speaker and hood latch screws. The cable is released by extending the cable and tilting the cable to align with slot to get the slug out. In different pictures, you will see I put the screws back in place. Takes a little longer now but save trouble later on.
Remove the three 10mm bolts. 2 in speaker well and 1 up at top by blue plug.
Remove the bolt with ratchet and nut that holds dash pad on. On a 84-88, I work from driver side to passenger side.
Remove the piece below the Steering Column. 6 Screws if I recall right. Disconnect the 2 plugs.

Remove the Speedo Bezel. Remove 2 screws above the gauge closet to the firewall. The plug in my hand to the Cancel Switch, lift up on tab to disconnect it.

Remove 4 screws holding speedometer.

Under the hood on the firewall, remove cable from the clamp holding the cable. This will give slack to pull the speedo out further in cab.

Disconnect 3 electrical plugs. The tab I am holding with my thumb, you just squeeze to release. It can be stubborn. Here is where loosening the cable under the hood makes it so much easier. If you need more room, you can loosen the cable more under the frame.

Remove speaker and hood latch screws. The cable is released by extending the cable and tilting the cable to align with slot to get the slug out. In different pictures, you will see I put the screws back in place. Takes a little longer now but save trouble later on.

Remove the three 10mm bolts. 2 in speaker well and 1 up at top by blue plug.

Remove the bolt with ratchet and nut that holds dash pad on. On a 84-88, I work from driver side to passenger side.

Last edited by Terrys87; 03-20-2014 at 07:47 AM.
12-18-2013, 11:14 AM
#1644
Super Moderator
Staff
Thread Starter
iTrader: (1)
Join Date: Aug 2008
Location: Anderson Missouri
Posts: 11,788
Likes: 0
Received 25 Likes
on
22 Posts
Remove these 2 screws and 3 screws that hold ash tray assembly. One of the ashtray screws is on top at an angle.
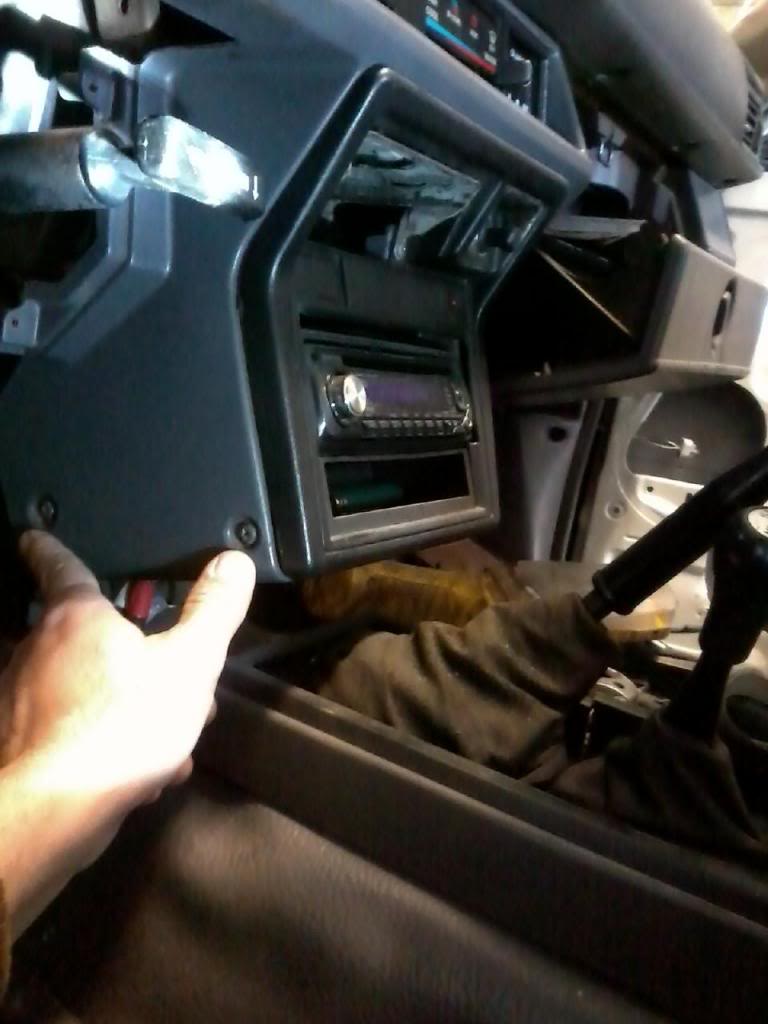
Angle in the ashtray assembly I am talking about.

Remove heater contol knobs. Where my finger is at, pull gently and slide to the left. It should have a small bow in the middle. If you have the orange and red panel, it will be brittle and will want to crack. Be gentle on that color of panel.
Once it is to the left and the tab my finger is at is free. Slide the whole assembly to the right to remove the panel.
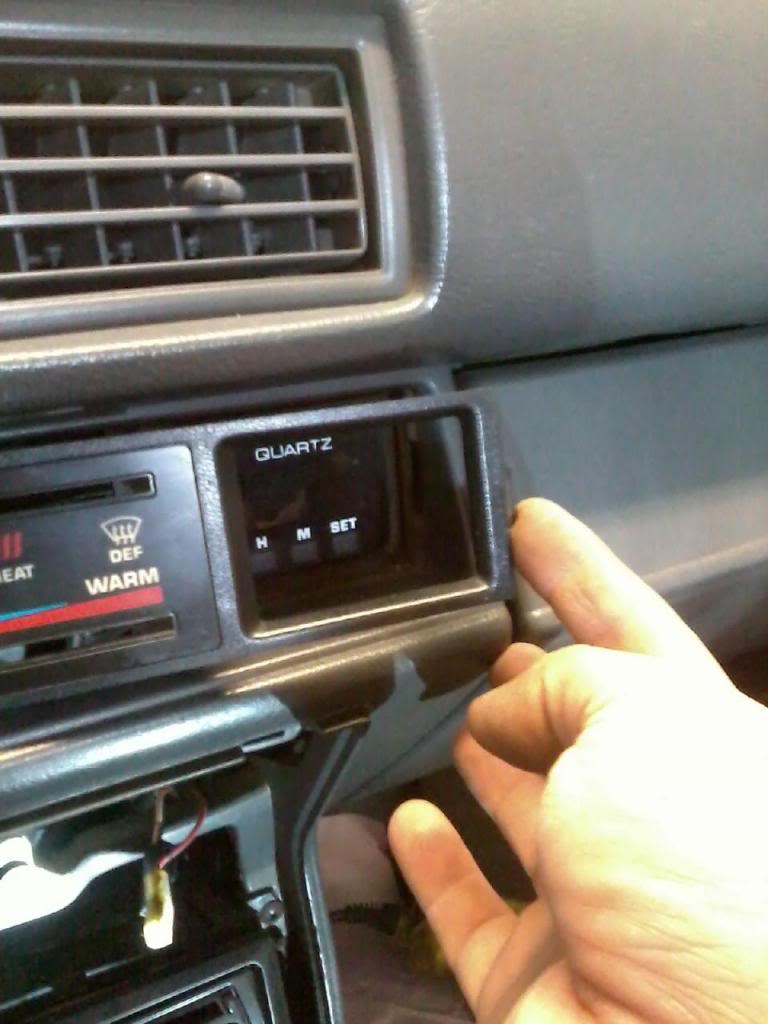
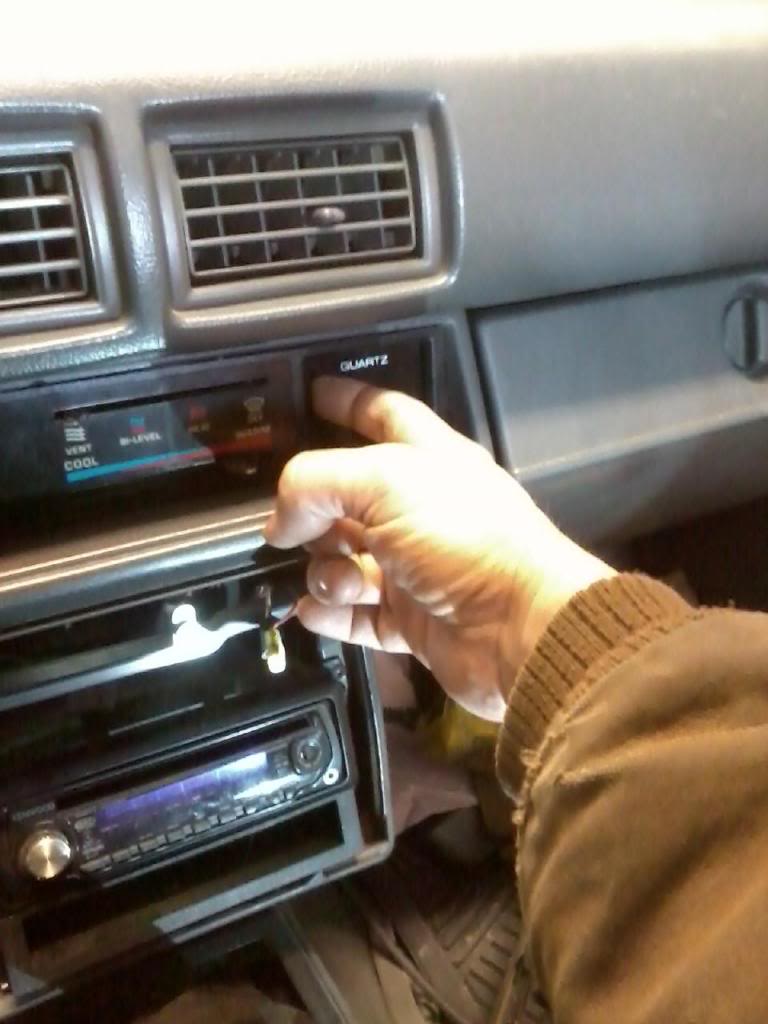
Here I removed the stereo. The PO hardwired in the stereo. Get a kit to install a stereo right. This is a common source of electrical problems on these trucks. Wal Mart sells the kit I think.

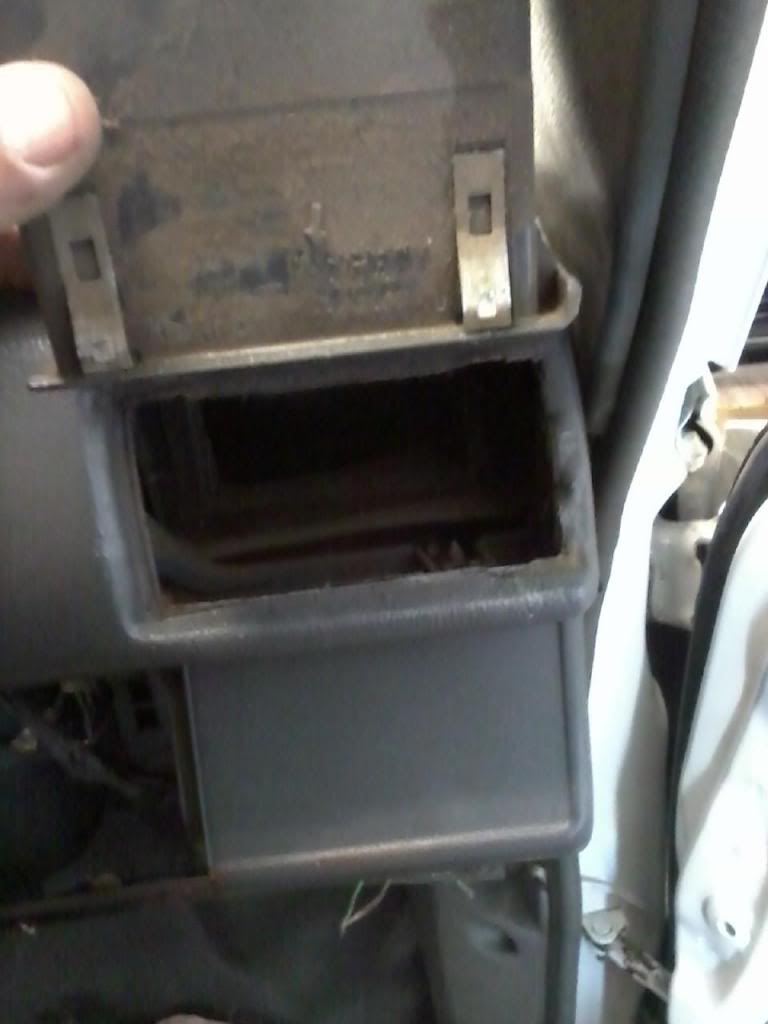
Remove glove box. 2 Screws at bottom. Once the glovebox is out. To get the cover of the glovebox, use a flatblade screw driver at these arrows and it will get the cover out. It hides the PE ppe that you will need to remove in the next few steps.
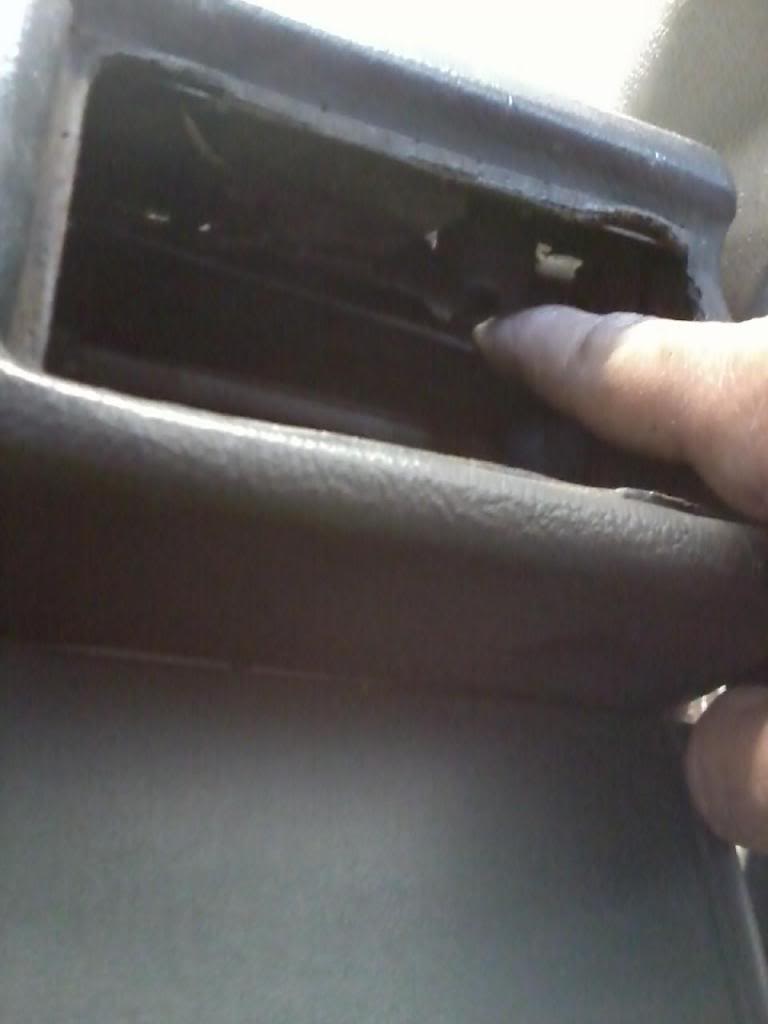
Screw taht holds the PE pipe. You need the PE pipe out of the way to access a nut that holds the center of the dashpad on.
With screw out, slide the PE pipe to the right and tilt down and then slide to the left and downward to get the pipe out. The foam on these can get worn out and cause poor ventilation. I also put the screw back in its hole to help keep up with all the screws. have got most screws back in there spots along the way.
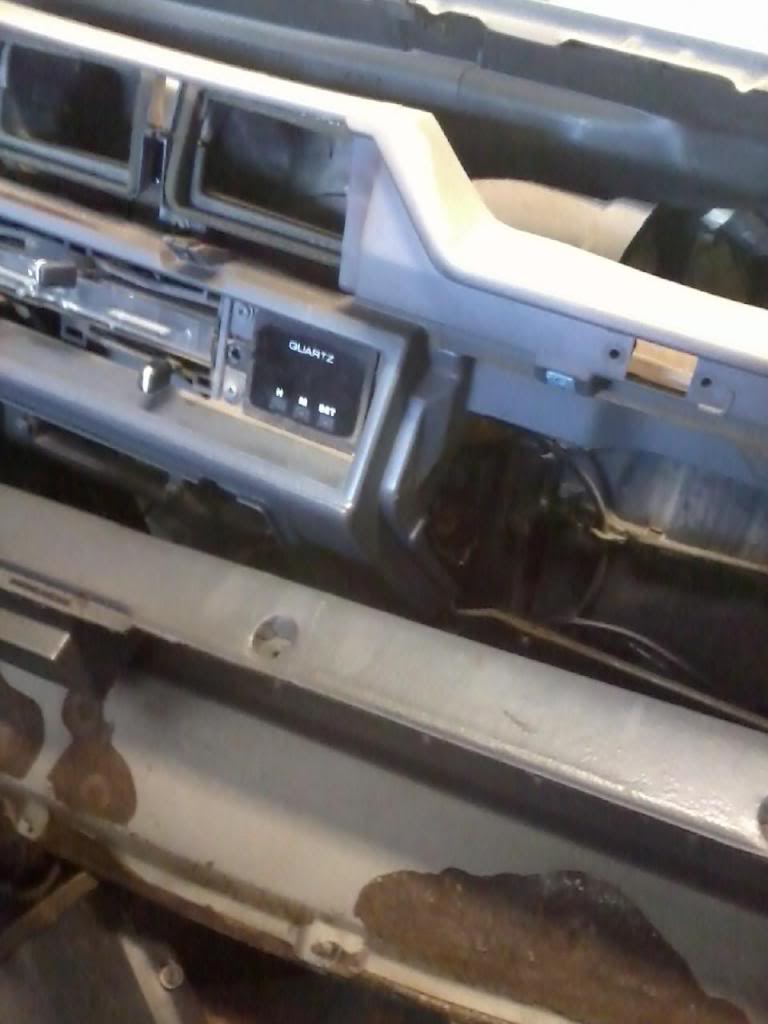
About here, using a 10mm socket and a foot long extention, to get to the nut that holds the dash pad on. It is the only nut that you can see if looking up at it. ot able to get a picture of it at this time.

Angle in the ashtray assembly I am talking about.

Remove heater contol knobs. Where my finger is at, pull gently and slide to the left. It should have a small bow in the middle. If you have the orange and red panel, it will be brittle and will want to crack. Be gentle on that color of panel.

Once it is to the left and the tab my finger is at is free. Slide the whole assembly to the right to remove the panel.

Here I removed the stereo. The PO hardwired in the stereo. Get a kit to install a stereo right. This is a common source of electrical problems on these trucks. Wal Mart sells the kit I think.

Remove glove box. 2 Screws at bottom. Once the glovebox is out. To get the cover of the glovebox, use a flatblade screw driver at these arrows and it will get the cover out. It hides the PE ppe that you will need to remove in the next few steps.

Screw taht holds the PE pipe. You need the PE pipe out of the way to access a nut that holds the center of the dashpad on.

With screw out, slide the PE pipe to the right and tilt down and then slide to the left and downward to get the pipe out. The foam on these can get worn out and cause poor ventilation. I also put the screw back in its hole to help keep up with all the screws. have got most screws back in there spots along the way.

About here, using a 10mm socket and a foot long extention, to get to the nut that holds the dash pad on. It is the only nut that you can see if looking up at it. ot able to get a picture of it at this time.

Last edited by Terrys87; 03-20-2014 at 07:51 AM.
12-18-2013, 11:24 AM
#1645
Holy Smackerel! You are amazing, man!
This stuff will, I predict, wind up in the inevitable "Toyota 101 Bible".... So helpful! I just learned around 4 different things in one post and 2 more in the next. If I can ever get to my motor swap, I know where I'll be coming to for great, well documented instruction!
Thanks for all you do Terry.....TONS of props!
Merry Christmas and Happy New Year as well!
12-18-2013, 11:25 AM
#1646
Super Moderator
Staff
Thread Starter
iTrader: (1)
Join Date: Aug 2008
Location: Anderson Missouri
Posts: 11,788
Likes: 0
Received 25 Likes
on
22 Posts
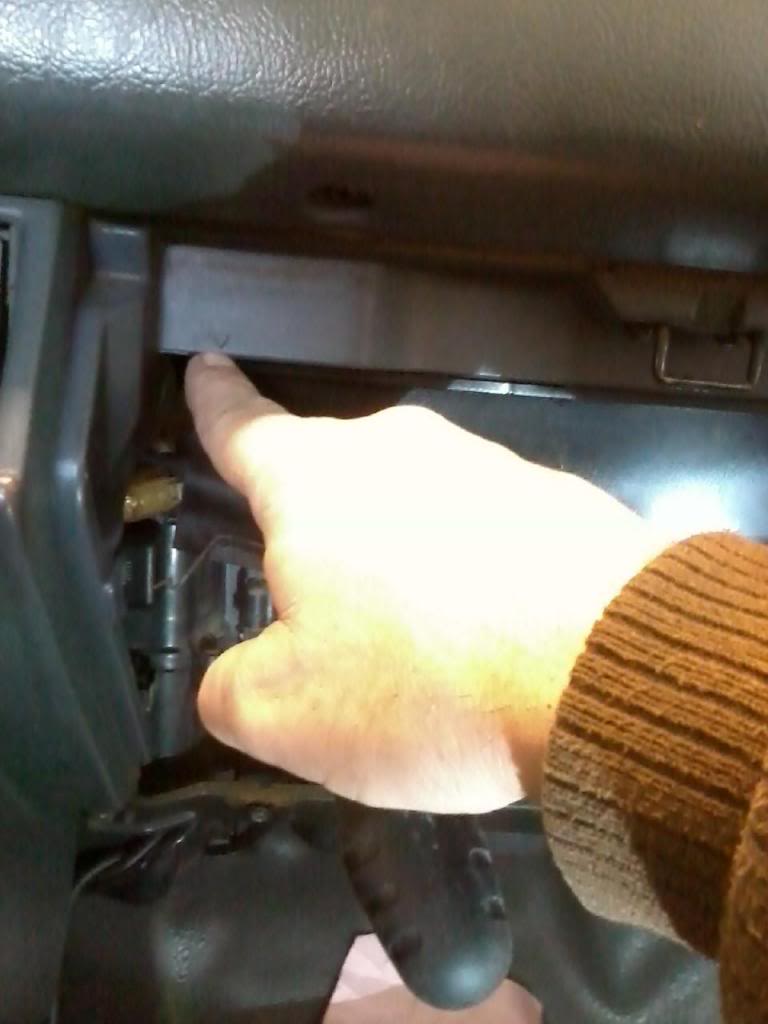
You need to remove the far passenger vent to get to the bolt that holds it in. Getting the vent out is something that I spent about 15 minutes gently working out to keep from cracking. I have a video I will add to this later and the FSM on how to get it out. These can crack easily. I have a 50/50 chance of getting one out and have done several and know how they come out. If you get one out without cracking, this is a cause for celebration.
Here is where the bolt is that holds the top one on. There are 5 or 6 screws on the bottom of the pad that need to be removed as well.
Showing the stud that the nut goes on to at bottom of picture to get the pad off. Also you can see where the screws are located at as well.
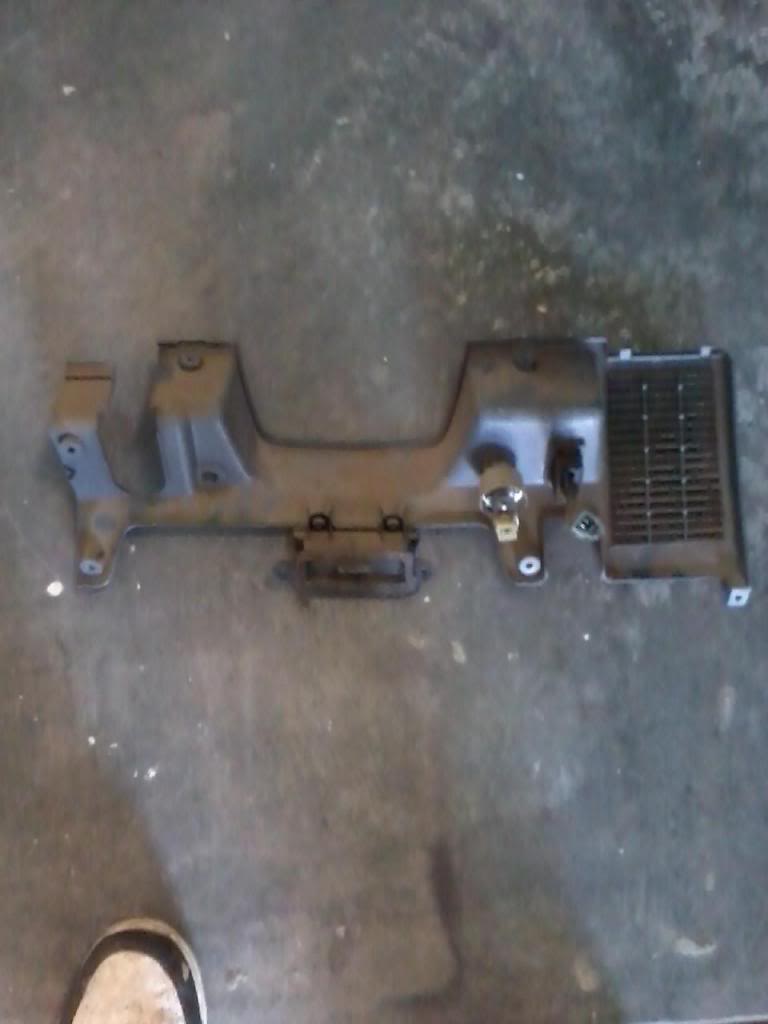
Remove these 2 bolts and 1 near the stereo to remove the Main Dash Support.

I went to remove the Main Dash Support and for got to get the Hood Release Cable freed. Remove it by sliding it off of the nipple and thru the slot.
Main Supoort out.

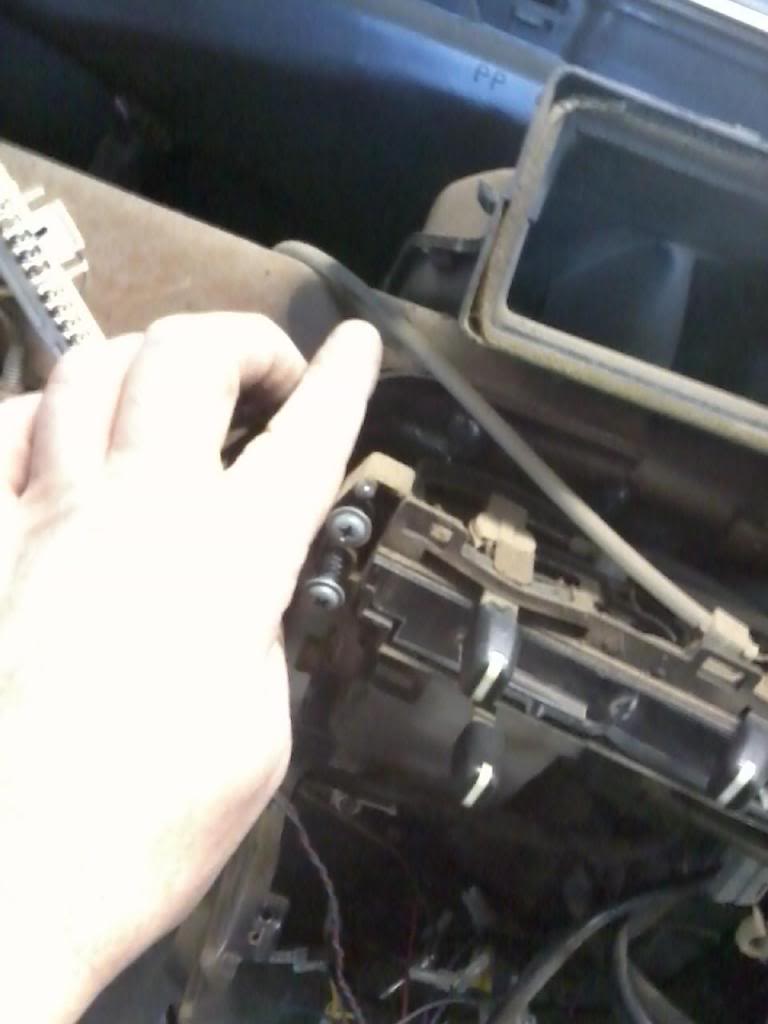
I left the Heater Control Assembly in when I took out the Main Dash. Here I spray some paint on the cables and where they route when I put it back to gether. This is top passenger side. I got black on top and orange for the bottom ones. This will help when putting Heater Controls back in and is probably the most difficult part.
Drivers Top.
Passenger Bottom. I can touch up with black paint after install, but it should not show anyways when done.

Orange is Drivers Bottom.

Here is where the bolt is that holds the top one on. There are 5 or 6 screws on the bottom of the pad that need to be removed as well.

Showing the stud that the nut goes on to at bottom of picture to get the pad off. Also you can see where the screws are located at as well.

Remove these 2 bolts and 1 near the stereo to remove the Main Dash Support.

I went to remove the Main Dash Support and for got to get the Hood Release Cable freed. Remove it by sliding it off of the nipple and thru the slot.

Main Supoort out.

I left the Heater Control Assembly in when I took out the Main Dash. Here I spray some paint on the cables and where they route when I put it back to gether. This is top passenger side. I got black on top and orange for the bottom ones. This will help when putting Heater Controls back in and is probably the most difficult part.

Drivers Top.

Passenger Bottom. I can touch up with black paint after install, but it should not show anyways when done.

Orange is Drivers Bottom.

Last edited by Terrys87; 03-20-2014 at 07:52 AM.
12-18-2013, 11:33 AM
#1647
Registered User
so thorough! I have only ever removed a dash, never put it back in, now i can just revert back to here and do reverse of what your doing now!
12-18-2013, 12:07 PM
#1648
Nice work Terry! I always appreciate how you post pics and give us all a step by step of what your doing, it's always so helpful! I have never pulled my dash, but will eventually to fix my cracked dash pad, and to free up one of my stuck heater cables, I've already book marked this page into my "favorites" because I know I'll be looking back through it when the time comes. Keep up the good work!
12-18-2013, 01:03 PM
#1649
Super Moderator
Staff
Thread Starter
iTrader: (1)
Join Date: Aug 2008
Location: Anderson Missouri
Posts: 11,788
Likes: 0
Received 25 Likes
on
22 Posts
Thanks Mark...I am eventually going to have a build thread on the 86Extra cab and will post it all from where the body work started to where it finished. I see several threads on what all is needed to convert one from a 22r to a 22re. No real threads showing step by step that I know of so want to create one.
Thanks bbrideau... I will do my best to show how to do it. At its worse, there will be trucks in the salvage that will look better then this but is what has to be done to do it.
Hello Ed..I plan on catching up on threads Friday as we get cold then and yours is one I have been wanting to check in on. I got an email of some updates on yours. Hope the paint trick helps with the cables. I am adding some more info that hope will help in the following post.
12-18-2013, 01:20 PM
#1650
Super Moderator
Staff
Thread Starter
iTrader: (1)
Join Date: Aug 2008
Location: Anderson Missouri
Posts: 11,788
Likes: 0
Received 25 Likes
on
22 Posts
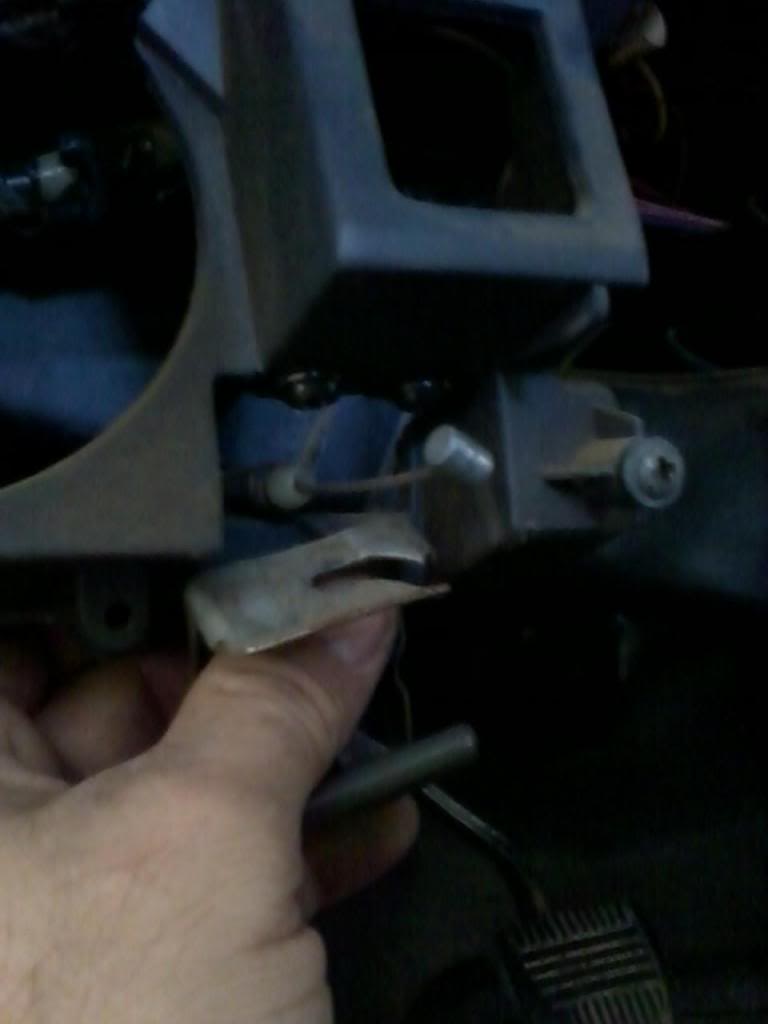
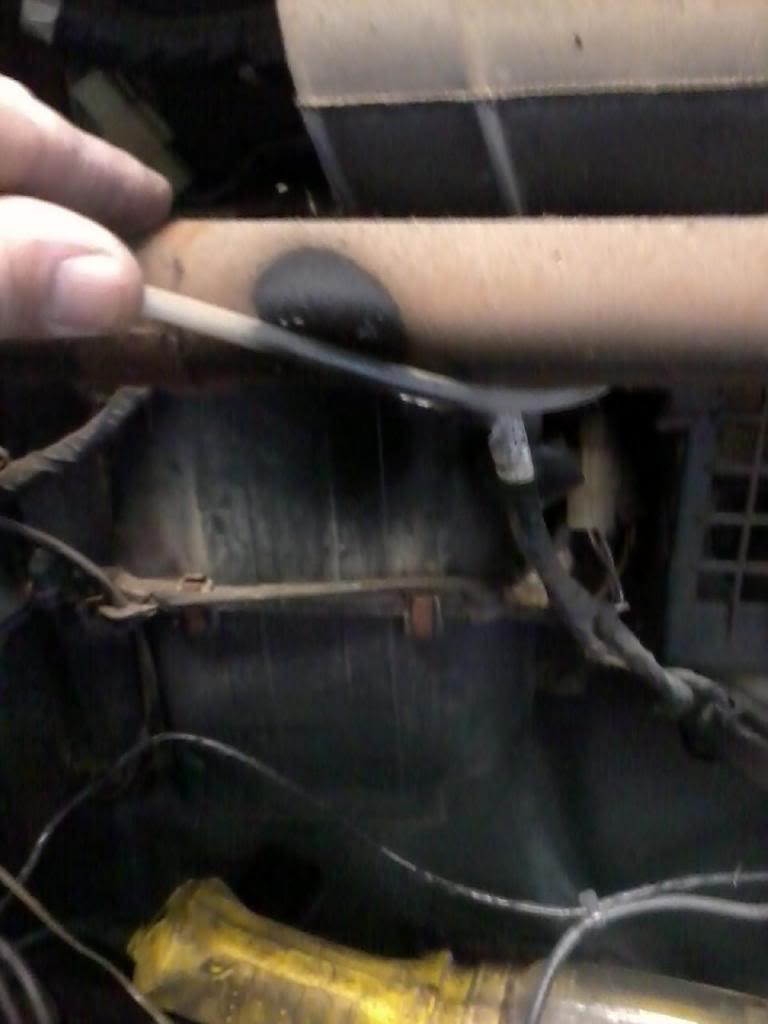
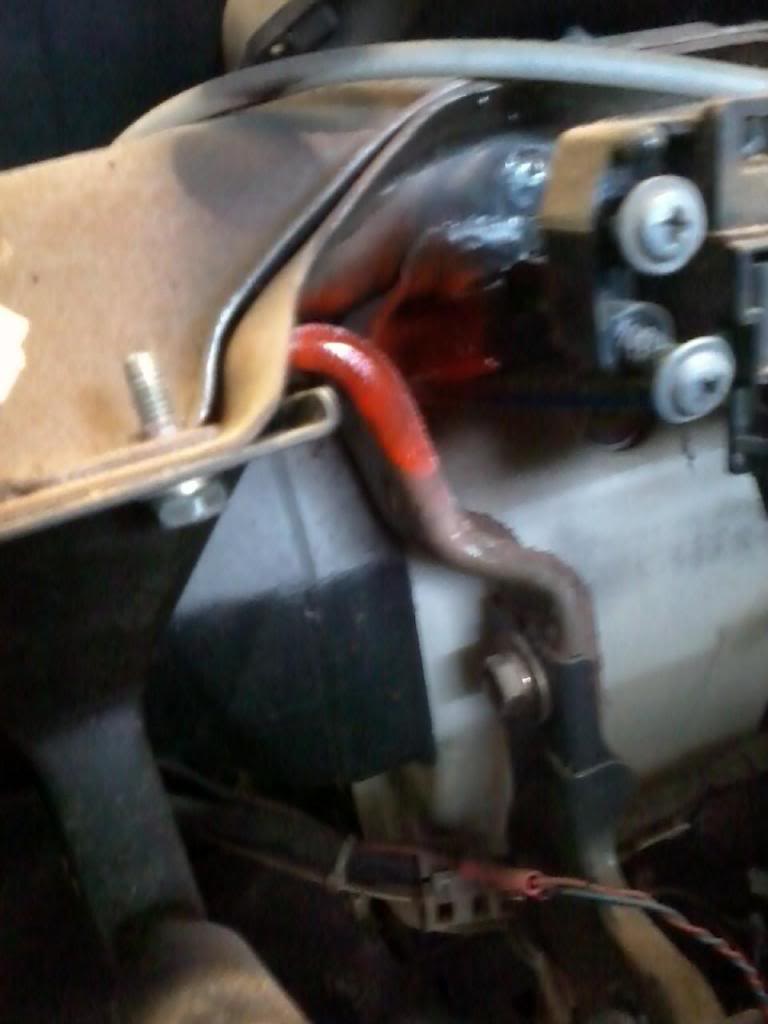
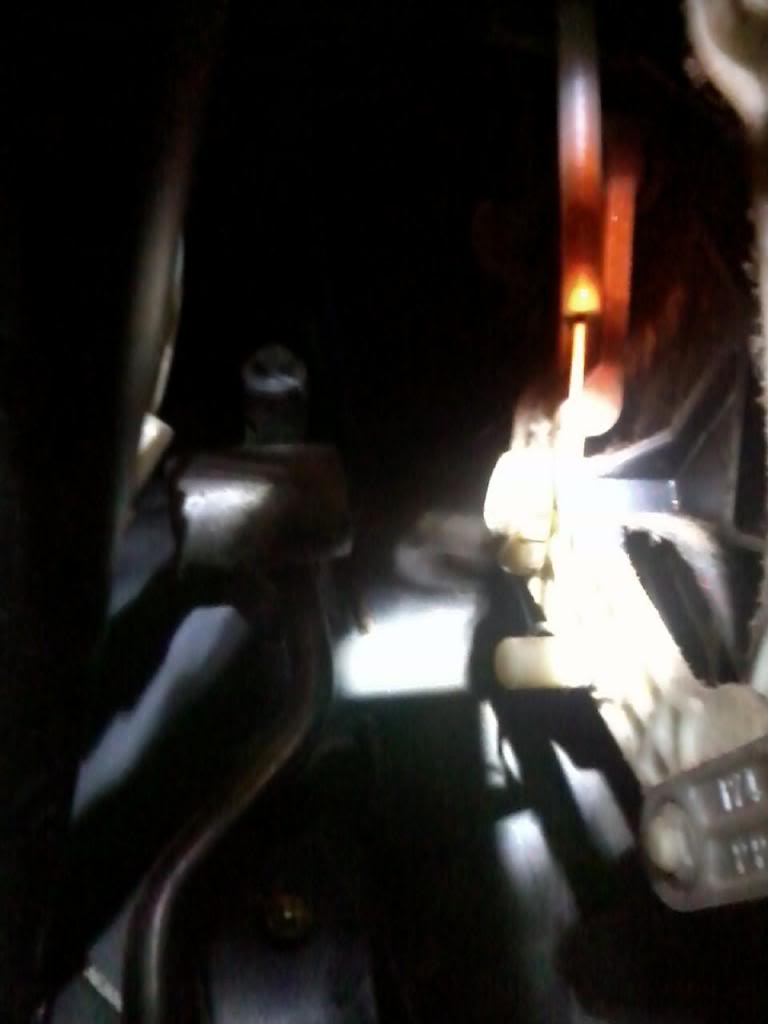
On the bottom of this cable there is a clip that holds the black cable. I shot some orange paint on it to show where it needs to sit in the clip.
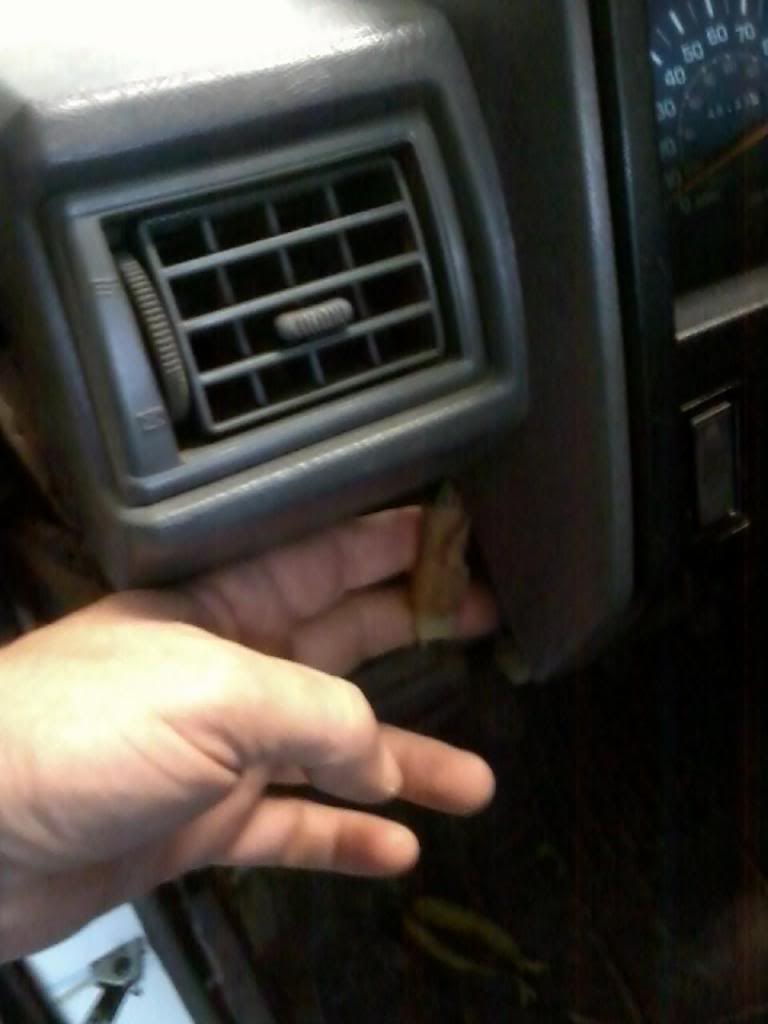
Remove the Passenger Vent and you will need to work it side to side and work it up. All of these vents are dirty and you would be suprised at the mud that comes out of these.
Remove Center Vents. All vents will need removed to get the harness out.

With the Center and Passenger Vents out, You can get access to the top cable on the passenger side and release the clip that is holding the cable and the end of the cable that slides over a post.
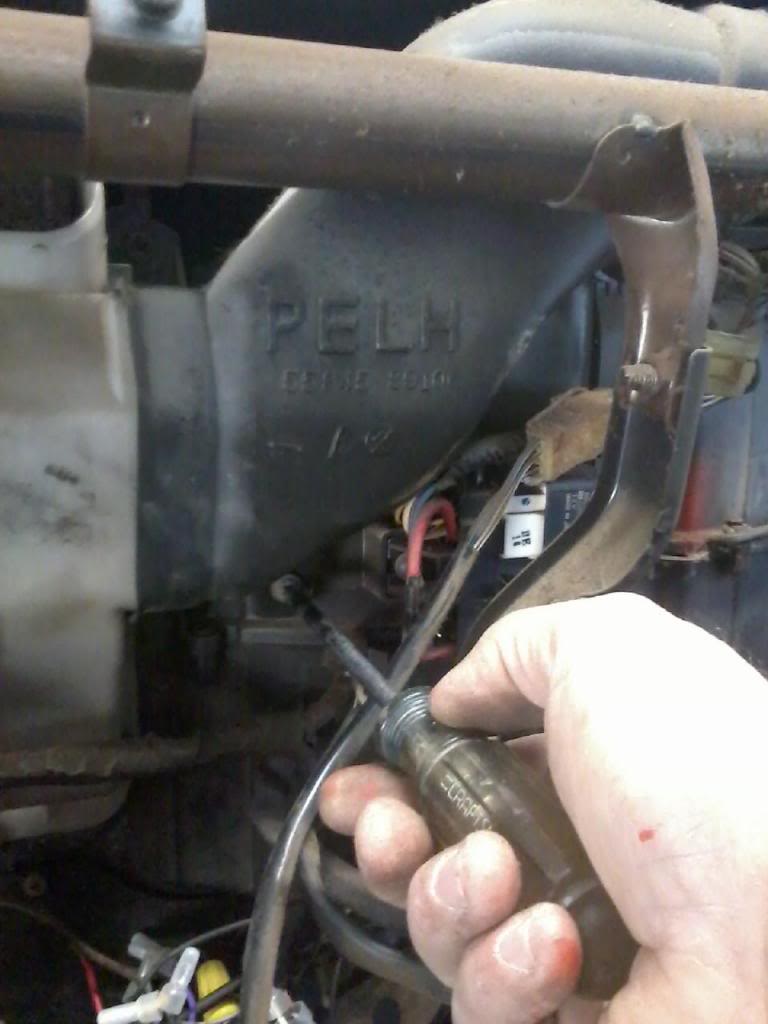
Here is the Blue Cable that is under the hood. Just pull down on the little clip that is clamping the cable and remove it from its post.
This one can be a pain in the butt to get installed correctly. It is located near your foot or the gas pedal area. I tried to mark it for easier installation.
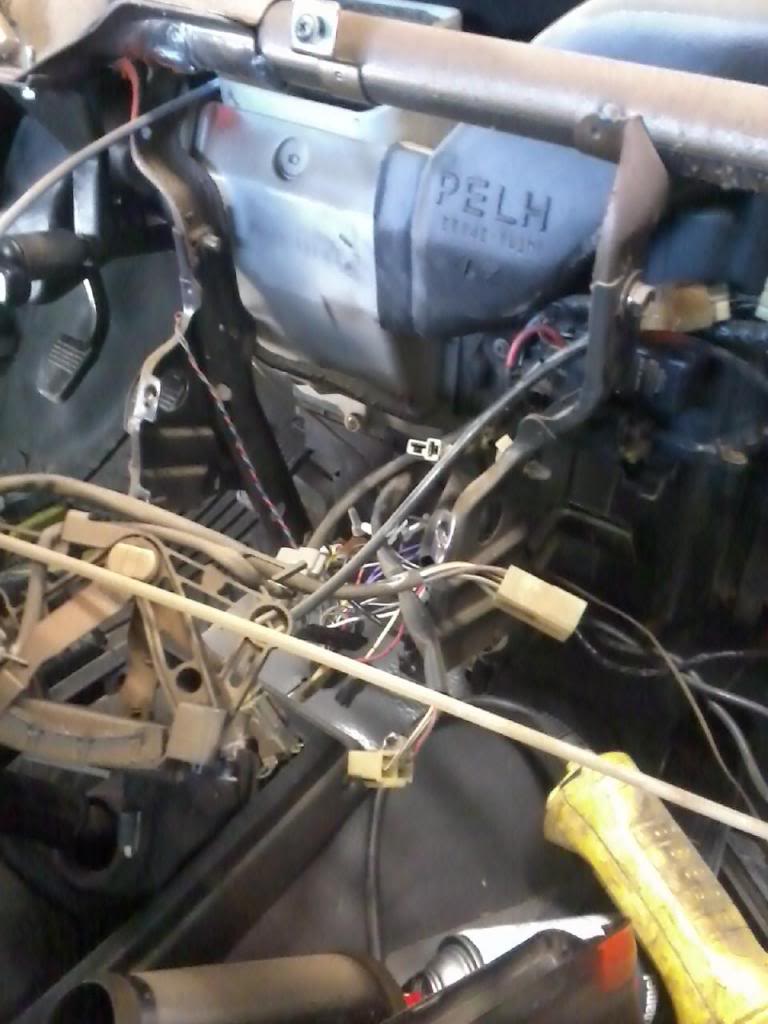
Notice that the Blue and Black cable run thru the inside of the black brackets that support the main dash frame.

The Black Cable and electrical connections run behind the bracket on the passenger side. White cable is in front.
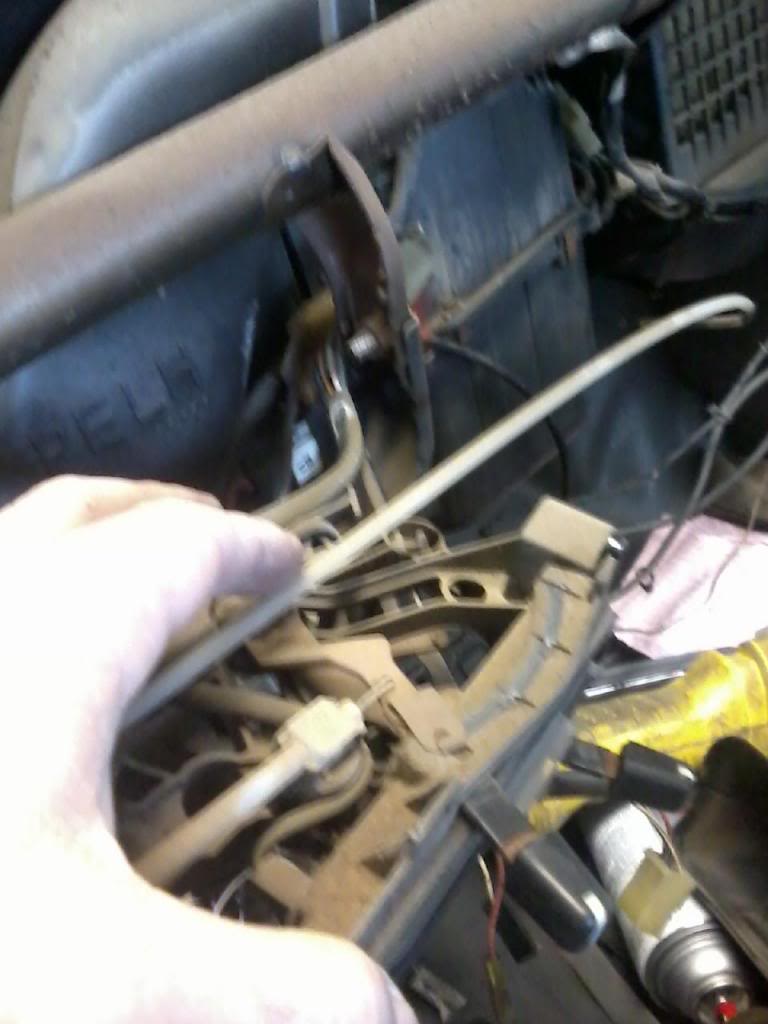
Another view of how cables were routed when coming out.
Screw that holds vent on Passenger side that connects to the PE pipe.
Remove the Passenger Vent and you will need to work it side to side and work it up. All of these vents are dirty and you would be suprised at the mud that comes out of these.

Remove Center Vents. All vents will need removed to get the harness out.

With the Center and Passenger Vents out, You can get access to the top cable on the passenger side and release the clip that is holding the cable and the end of the cable that slides over a post.

Here is the Blue Cable that is under the hood. Just pull down on the little clip that is clamping the cable and remove it from its post.

This one can be a pain in the butt to get installed correctly. It is located near your foot or the gas pedal area. I tried to mark it for easier installation.

Notice that the Blue and Black cable run thru the inside of the black brackets that support the main dash frame.

The Black Cable and electrical connections run behind the bracket on the passenger side. White cable is in front.

Another view of how cables were routed when coming out.

Screw that holds vent on Passenger side that connects to the PE pipe.

Last edited by Terrys87; 03-20-2014 at 07:54 AM.
12-18-2013, 01:21 PM
#1651
Super Moderator
Staff
Thread Starter
iTrader: (1)
Join Date: Aug 2008
Location: Anderson Missouri
Posts: 11,788
Likes: 0
Received 25 Likes
on
22 Posts
This post here will not be added to the 86 build later on. Just showing some mighty fine crap wiring. It was a Security Sytem gone wrong.

More fine crap work. Notice how they just wrapped around a bare section wire.
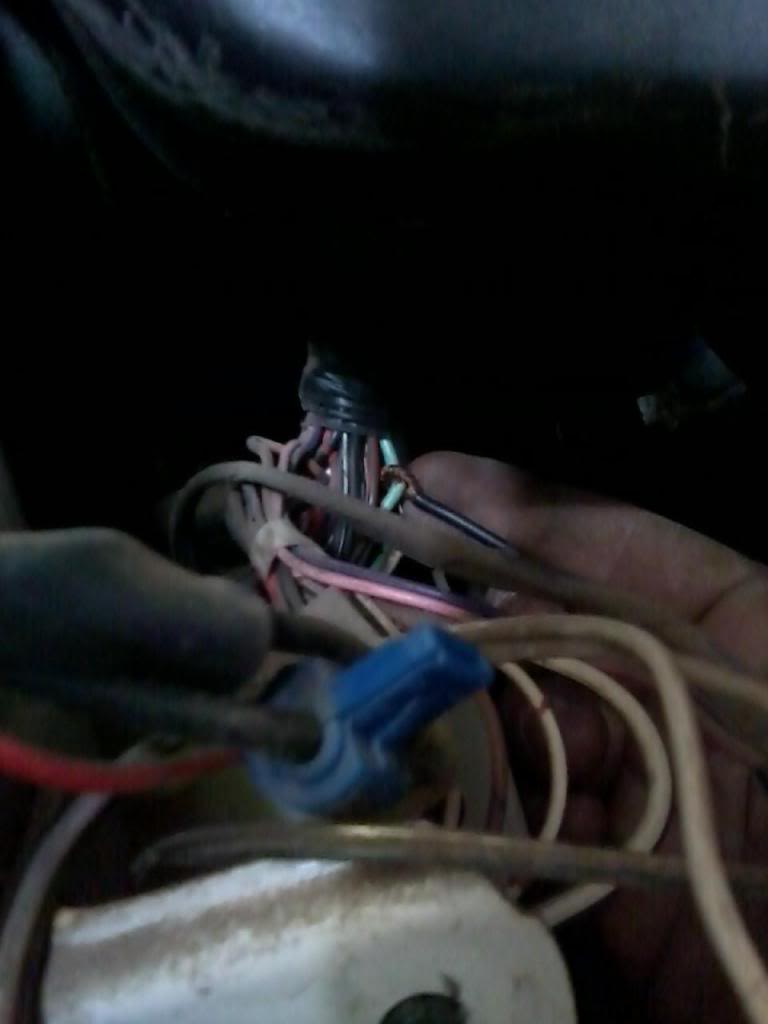
More unplugged and bare wires. I knew there was a few under the hood that went inside the cab. Didnt think it was this much. More not showing in pictures.


More fine crap work. Notice how they just wrapped around a bare section wire.

More unplugged and bare wires. I knew there was a few under the hood that went inside the cab. Didnt think it was this much. More not showing in pictures.

Last edited by Terrys87; 12-18-2013 at 01:53 PM.
12-18-2013, 01:30 PM
#1652
Super Moderator
Staff
Thread Starter
iTrader: (1)
Join Date: Aug 2008
Location: Anderson Missouri
Posts: 11,788
Likes: 0
Received 25 Likes
on
22 Posts
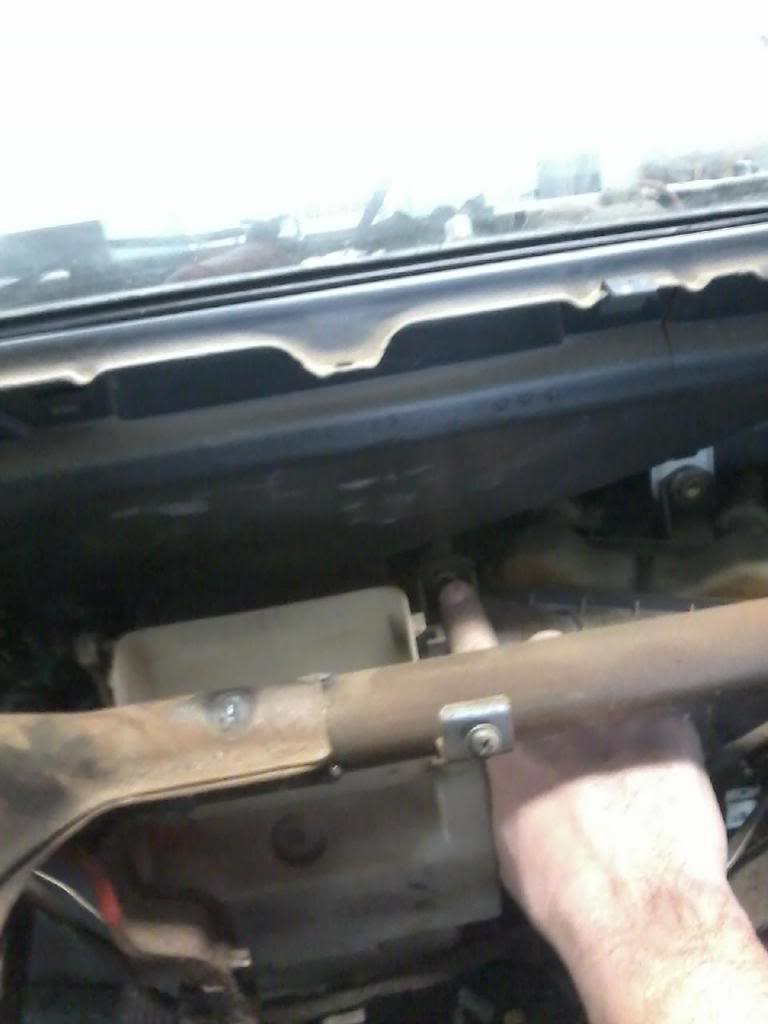
This vent pipe is the one that would be by your right knee if you were sitting in the driver seat.

These 2 screws are the far left side on the drivers side. It takes a little manuvering to get it out but not bad at all.

Two of the vent pipes out. This can be typical of the dust that gets trapped behind the dash.

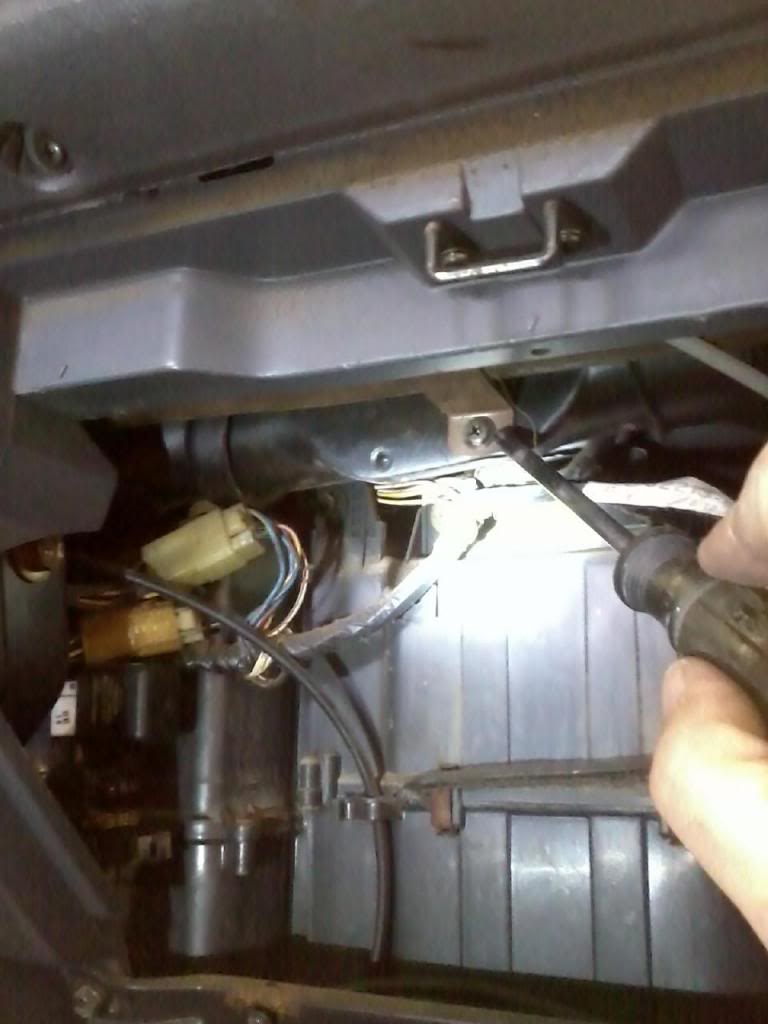
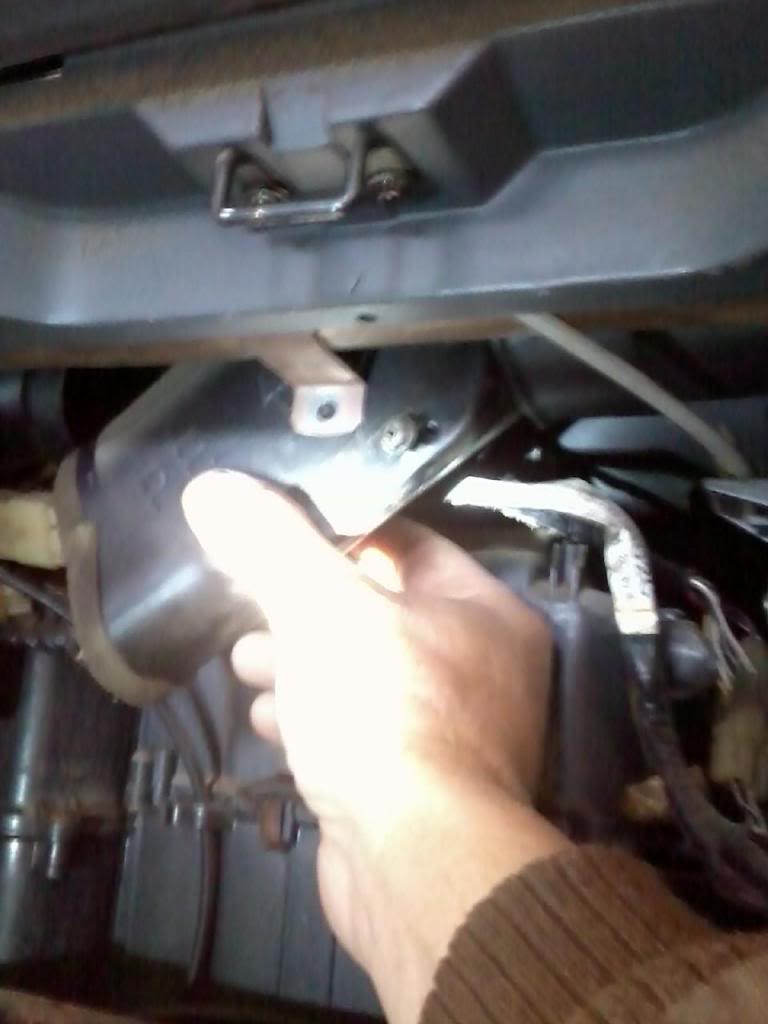
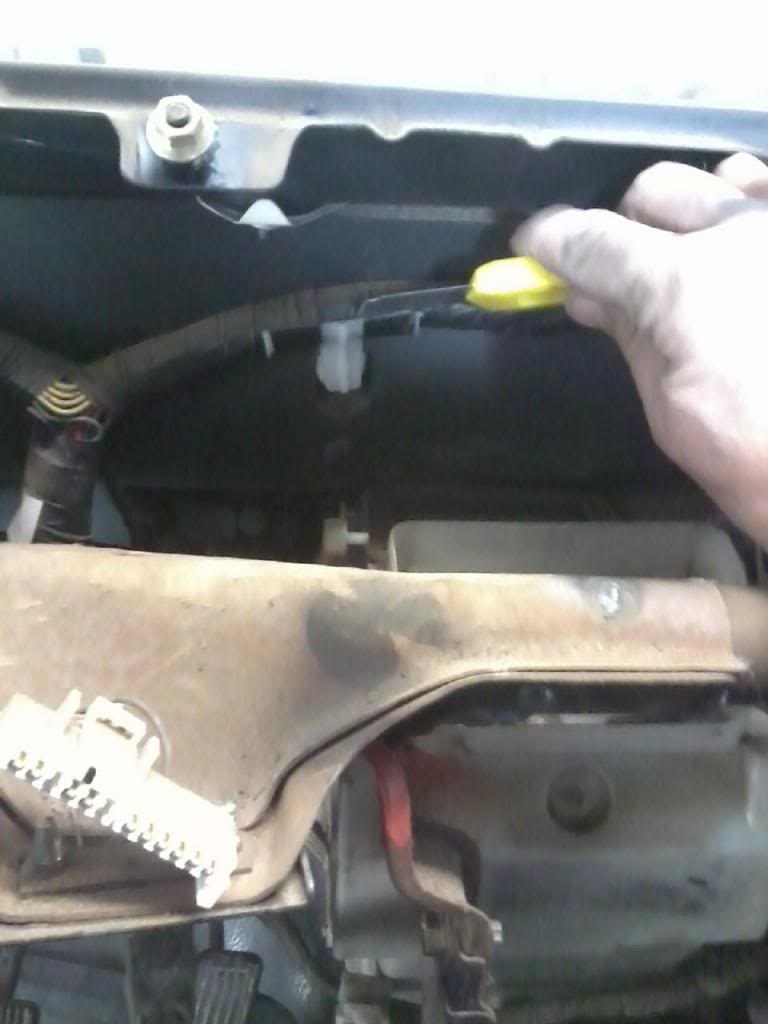
This is the big defrost vent that can be a pain to get out. You have a big screw on the bottom and 3 screws that hold it on top. When removing it, slide it to the left to clear the white vent in front of it, but watch the lever that operates the white vent assembly.
Getting the white clips out of the firewall is difficult. Usually they want to break. I just cut the tape and then I will use zip ties to install the new one. The white clips like to break is why I just cut the tape.
Finish disconnecting any electric plugs that may have been missed. May not show in the picture, but more poor wiring was spliced in.
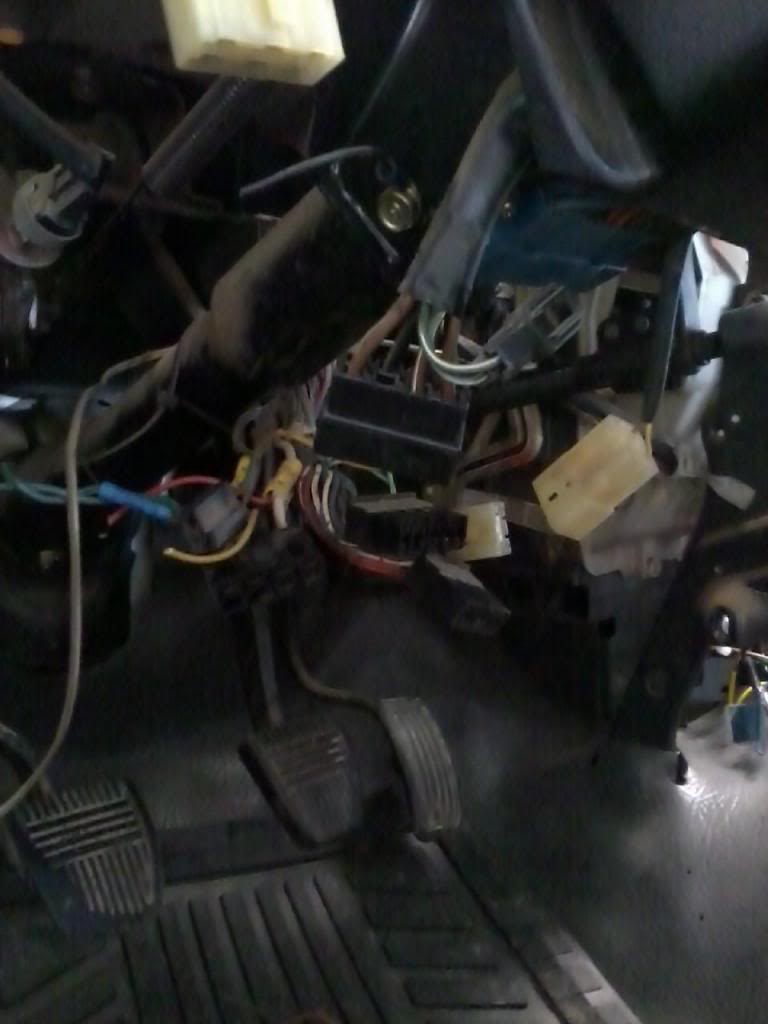
You will need to remove these 4 bolts/nuts to get the harness to clear the fire wall and the cross bar. Still need to disconnect the harness from the front of the truck.

These 2 screws are the far left side on the drivers side. It takes a little manuvering to get it out but not bad at all.

Two of the vent pipes out. This can be typical of the dust that gets trapped behind the dash.

This is the big defrost vent that can be a pain to get out. You have a big screw on the bottom and 3 screws that hold it on top. When removing it, slide it to the left to clear the white vent in front of it, but watch the lever that operates the white vent assembly.

Getting the white clips out of the firewall is difficult. Usually they want to break. I just cut the tape and then I will use zip ties to install the new one. The white clips like to break is why I just cut the tape.

Finish disconnecting any electric plugs that may have been missed. May not show in the picture, but more poor wiring was spliced in.
You will need to remove these 4 bolts/nuts to get the harness to clear the fire wall and the cross bar. Still need to disconnect the harness from the front of the truck.

Last edited by Terrys87; 03-20-2014 at 07:55 AM.
12-18-2013, 01:47 PM
#1653
Super Moderator
Staff
Thread Starter
iTrader: (1)
Join Date: Aug 2008
Location: Anderson Missouri
Posts: 11,788
Likes: 0
Received 25 Likes
on
22 Posts
Here I am removing the fuse box under the hood. A friend of mine swapped one from 22re to 22r. When done the heater blower would not work. We eventually found that the boxes are wired different. It may look tempting to not swap the fuse boxes but it is not hard.
Remove these 2 plugs from the Fusebox. Just press tabs.
There is a little plastic clip that holds the 2 cables on back of the fusebox. Just unbolt three bolts that hold the box for access.
I removed the Postive terminal so as not to have to remove cable from Starter. It should be ok, if there is a problem I will mention when I go to install it. This is a California Emissions truck. It has alot more vacuum lines attached. If doing a 22r, a Webber is so much cleaner looking. I will post the differences between a Webber and a California truck. I dont have a picture to show what a Federal Emission truck looks like.
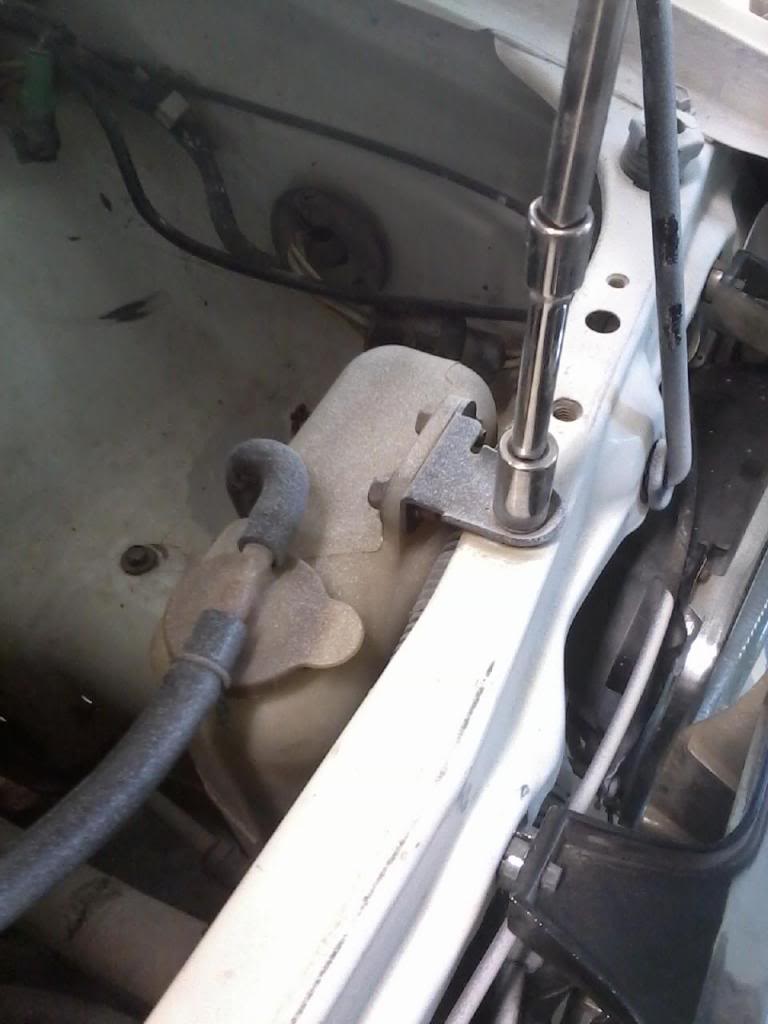
With fuse box unbolted, disconnect passenger side headlight, unbolt the windshield washer bottle. There is a squeeze tab behind the headlights that hold the harness in. I can usually squeeze with my fingers to get them to release.
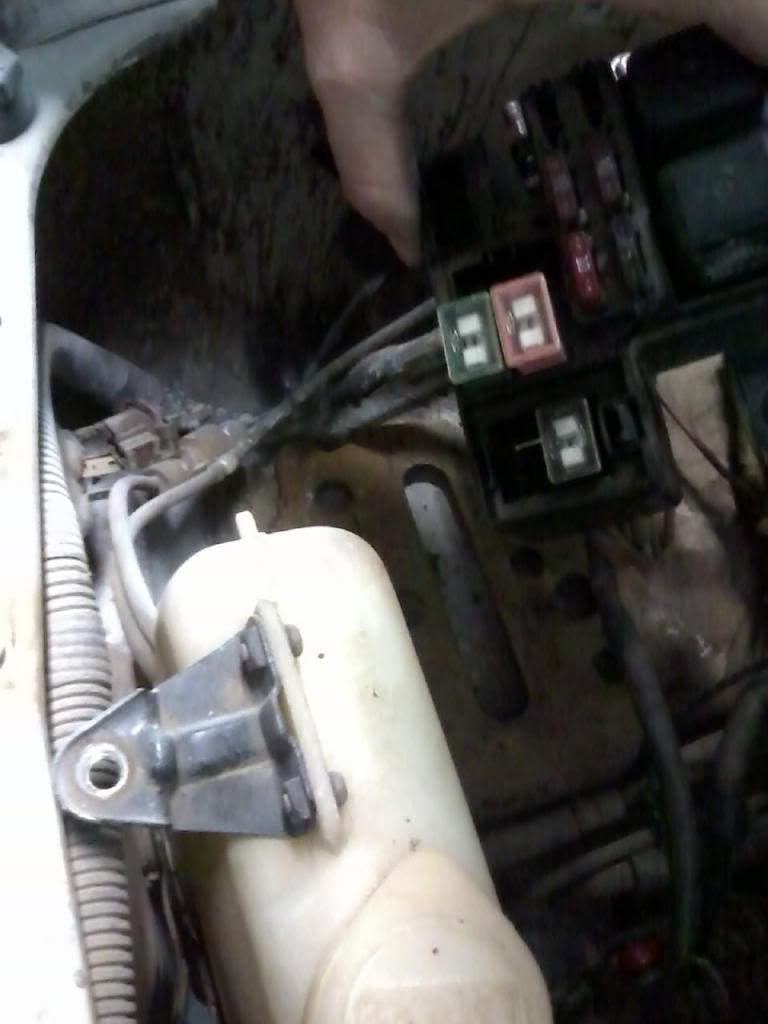
Here is the squeeze tabs. I think there are 5 total. This truck has an aftermarket radiator. A factory radiator is a tighter fit and you may need to loosen the radiator to get the cable out.

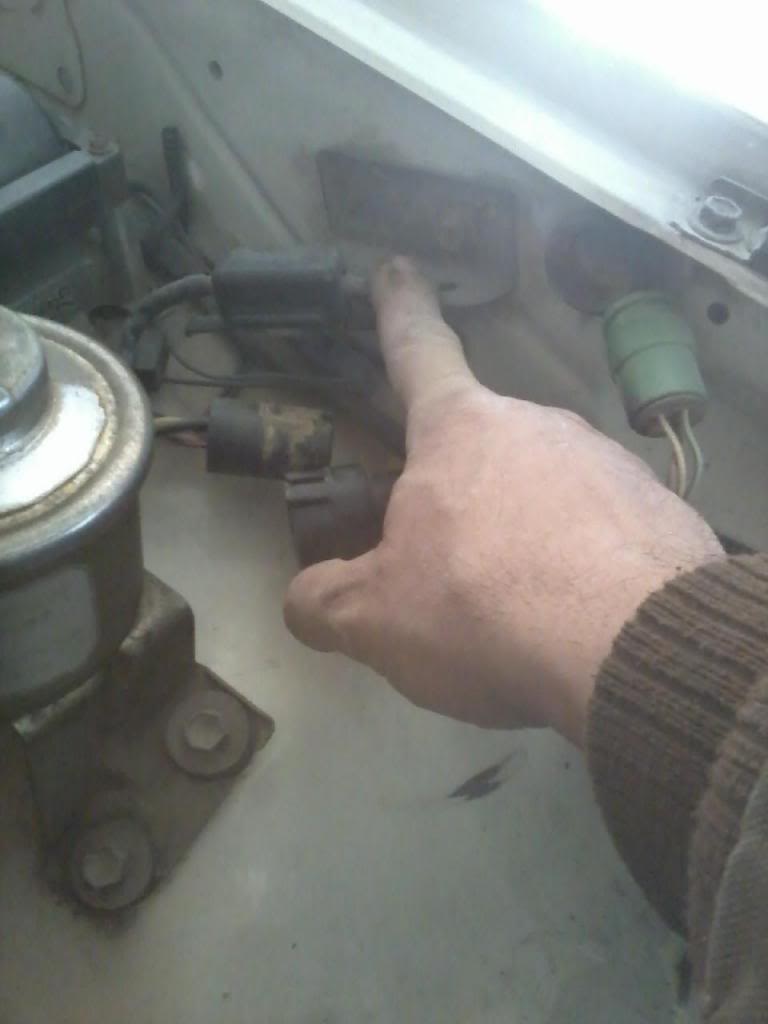
Remove the Overflow Bottle as harness runs behind it. Disconnect the black plugs.
One of the black plugs I was mentioning.

You can open this box and it is just a factory connection that is connected by a nut and bolt. I just follow it all the way to the alternator and remove the entire assembly as one piece. The bblack ground wire that goes to the alternator is damaged so I just took the whole assembly as one piece.
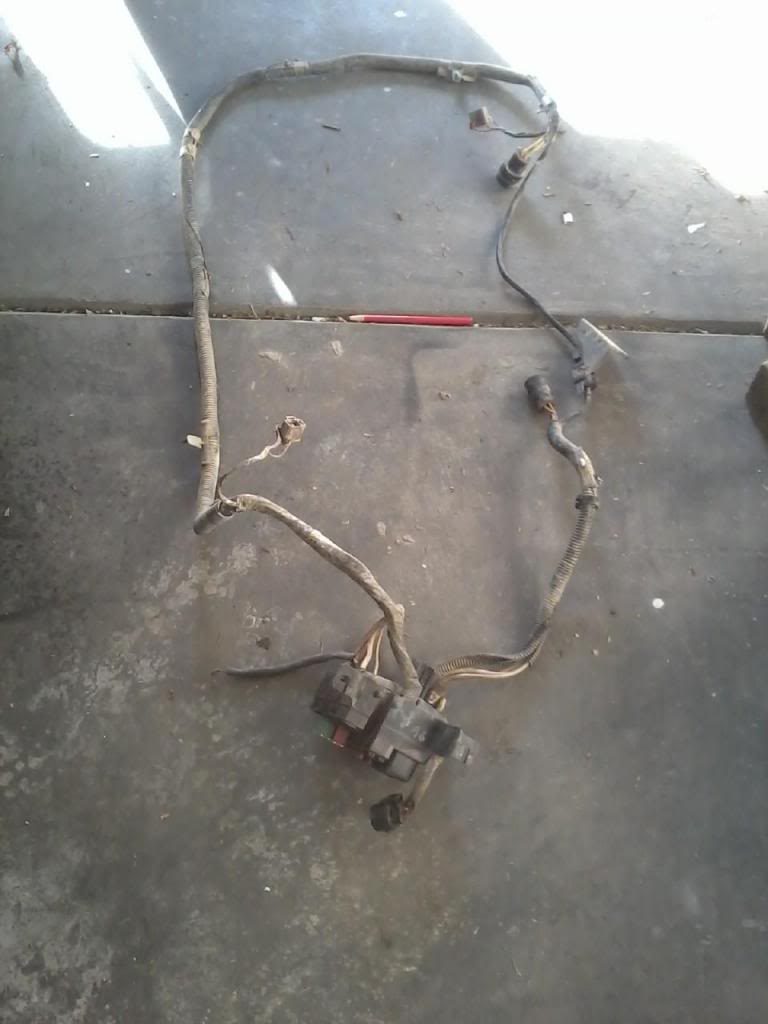
Here is the Fuse Box Harness. Not hard to remove. May not show, but I did mark this as a 86 22r part.
Remove these 2 plugs from the Fusebox. Just press tabs.

There is a little plastic clip that holds the 2 cables on back of the fusebox. Just unbolt three bolts that hold the box for access.

I removed the Postive terminal so as not to have to remove cable from Starter. It should be ok, if there is a problem I will mention when I go to install it. This is a California Emissions truck. It has alot more vacuum lines attached. If doing a 22r, a Webber is so much cleaner looking. I will post the differences between a Webber and a California truck. I dont have a picture to show what a Federal Emission truck looks like.

With fuse box unbolted, disconnect passenger side headlight, unbolt the windshield washer bottle. There is a squeeze tab behind the headlights that hold the harness in. I can usually squeeze with my fingers to get them to release.

Here is the squeeze tabs. I think there are 5 total. This truck has an aftermarket radiator. A factory radiator is a tighter fit and you may need to loosen the radiator to get the cable out.

Remove the Overflow Bottle as harness runs behind it. Disconnect the black plugs.

One of the black plugs I was mentioning.

You can open this box and it is just a factory connection that is connected by a nut and bolt. I just follow it all the way to the alternator and remove the entire assembly as one piece. The bblack ground wire that goes to the alternator is damaged so I just took the whole assembly as one piece.

Here is the Fuse Box Harness. Not hard to remove. May not show, but I did mark this as a 86 22r part.

Last edited by Terrys87; 03-20-2014 at 07:55 AM.
12-18-2013, 01:48 PM
#1654
Super Moderator
Staff
Thread Starter
iTrader: (1)
Join Date: Aug 2008
Location: Anderson Missouri
Posts: 11,788
Likes: 0
Received 25 Likes
on
22 Posts
Temperture is dropping. Supposed to have another nice day tomorrow and have plans of hitting it early in the am. Friday it get cold again. I wont get it finishe, but should get a big jump on it.
12-18-2013, 03:44 PM
#1657
Registered User
thumbs up terry major neurological surgery for trucks
i think i found out why my drivers mirror keeps flopping out of adjustment when the door is closed no spring on the adjuster screw its got a nut an lock washer instead i tightened it a bit more but dont think it helped much
i think i found out why my drivers mirror keeps flopping out of adjustment when the door is closed no spring on the adjuster screw its got a nut an lock washer instead i tightened it a bit more but dont think it helped much
12-18-2013, 04:31 PM
#1658
Registered User
thumbs up terry major neurological surgery for trucks
i think i found out why my drivers mirror keeps flopping out of adjustment when the door is closed no spring on the adjuster screw its got a nut an lock washer instead i tightened it a bit more but dont think it helped much
i think i found out why my drivers mirror keeps flopping out of adjustment when the door is closed no spring on the adjuster screw its got a nut an lock washer instead i tightened it a bit more but dont think it helped much
Take a break Terry, youve accomplished more in the past few days than i do in a month.lol
12-18-2013, 04:56 PM
#1660
Registered User
sure looks like thats whats SUPPOSED to be in there means im gona hve to get one of them replacement ones offa ebay an pull the spring lol


