
Terrys87 86 4Runner with a 2nd Chance
 10-07-2013, 01:20 PM
#1501
Registered User
id say if you remove the positive from the harness which is what would be feeding the coil its still 12 volts shouldnt hurt things just bypassing the issues in the harness to kill the engine you'd have to pull the wire off the coil of course
 10-07-2013, 05:09 PM
#1502
Registered User
Wow. Thanks for the run down on how you paint. I did find that Toyota Overstock sells the rock guards (quarter panel wheelhouse covers) in several colors for about $34 plus shipping.
Not sure what I'll do yet. My 4Runner really isn't getting the attention it deserves.
http://www.toyotapartsoverstock.com/...ssembly=491443
Not sure what I'll do yet. My 4Runner really isn't getting the attention it deserves.
http://www.toyotapartsoverstock.com/...ssembly=491443
10-10-2013, 03:26 PM
#1503
Super Moderator
Staff
Thread Starter
iTrader: (1)
Join Date: Aug 2008
Location: Anderson Missouri
Posts: 11,788
Likes: 0
Received 25 Likes
on
22 Posts
Thanks Waterbottom... It is always intresting to see how one turns out when done. One reason I like to take junk trucks and see what I can come up with. The ones I work on usually dont have much of a chance so it isnt like I am ruining a good one when I get done.
Thanks Cyberhorn... I have put alot of thought into your suggestion and it is most lilely going to happen. I do have another steering column that I want to just do the electrical connections and see if it tells me if it is in the column.
Your Welcome Nervo19... I will try to add any tips that I can think of along the way. Some I kind of learned along the way or didnt really catch on to the first few times I painted. I have a few more in the post below. Any questions that come up, let me know and I will try and fit them in at the stage I am at so it makes understanding better.
10-10-2013, 03:49 PM
#1504
Super Moderator
Staff
Thread Starter
iTrader: (1)
Join Date: Aug 2008
Location: Anderson Missouri
Posts: 11,788
Likes: 0
Received 25 Likes
on
22 Posts
Got quite a bit done today. Was wanting to get it into sealer but the mosquitos ran me out. Will be painting sometime tomorrow. Fuigure I have 3 hours to go. A few finishing touches, clean the shop and sure there will be something else.
Here is how I get bugs off when they land in paint. It takes a steady hand.
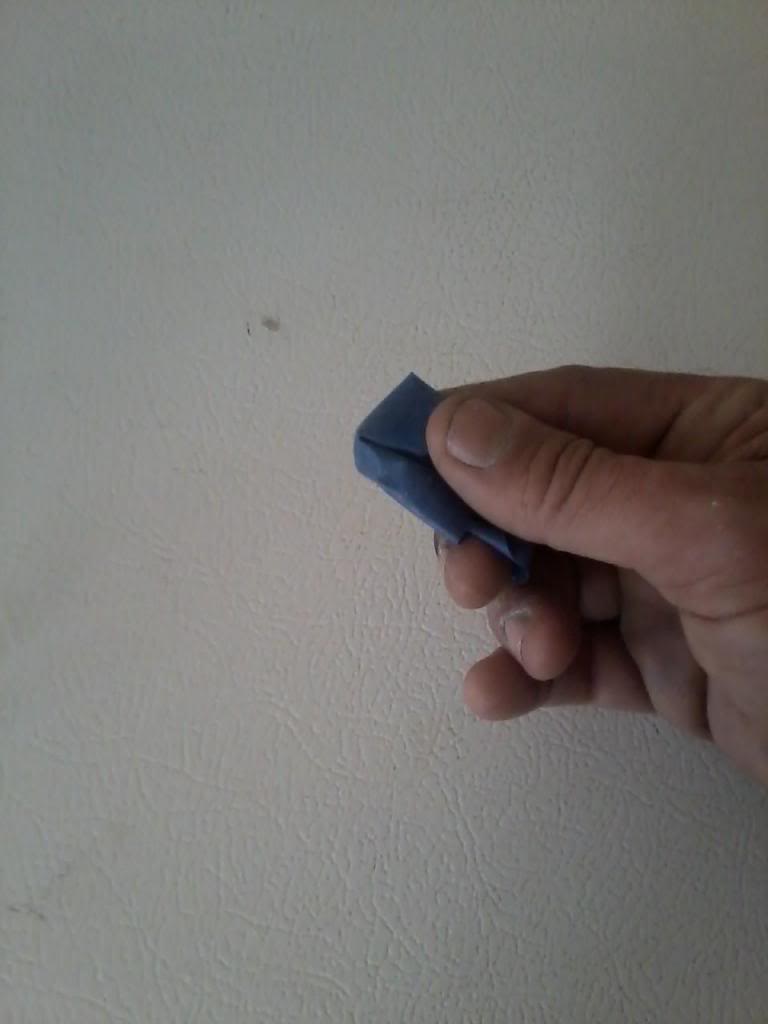
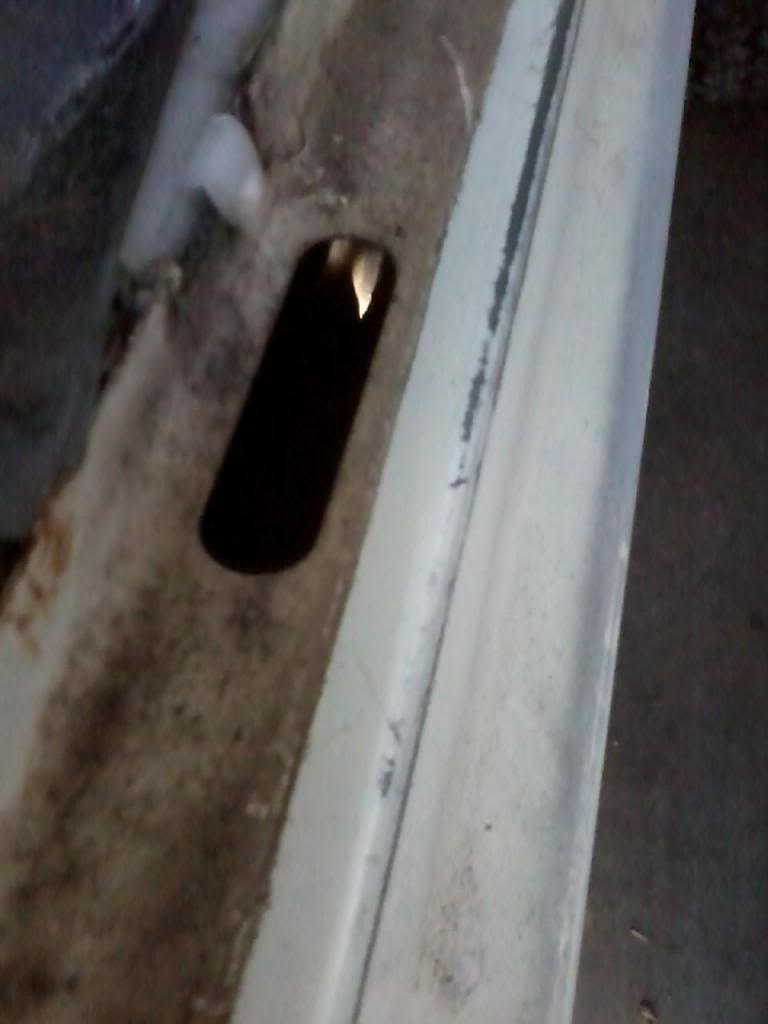
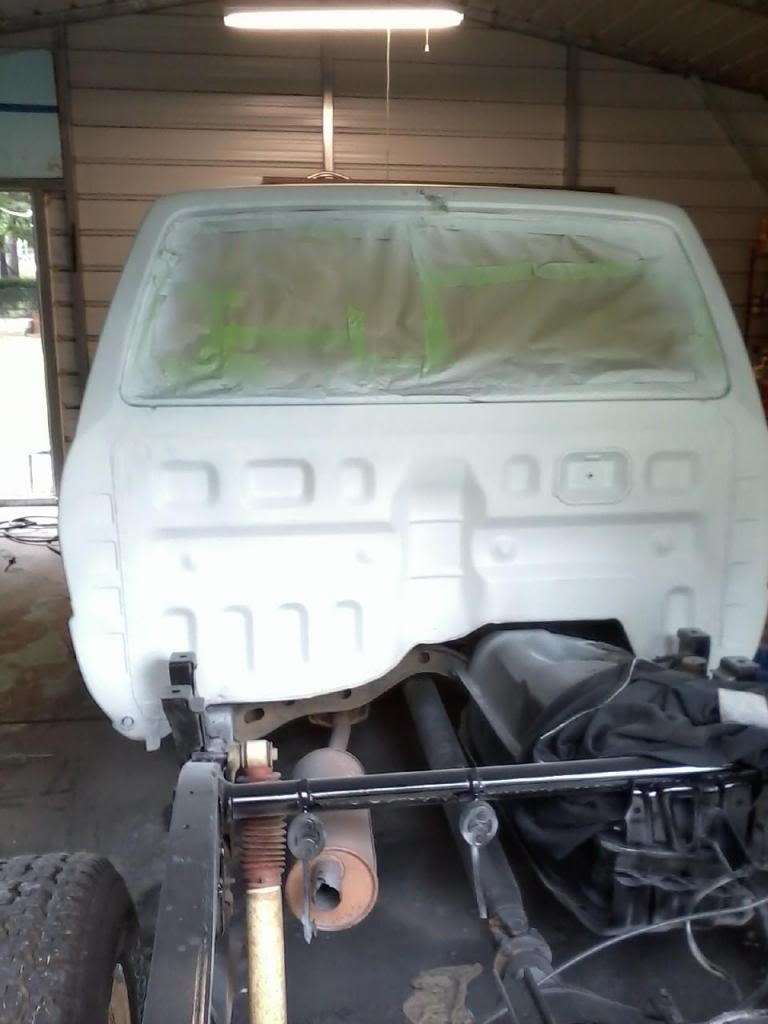
I prepping for paint the jams, I cleared the drain holes. Just remove the door sill and a clothes hanger and an air gun works great. Also there is a hole in the back of the cab for pickups that works great. I will post a pic of it tomorrow. The light at the bottom is the drain holes that tend to get clogged. There are 3 or 4 of these holes on each side. You can tell by the little "v" notch on the rocker.
I remove the door seals to save on masking and a better coverage.

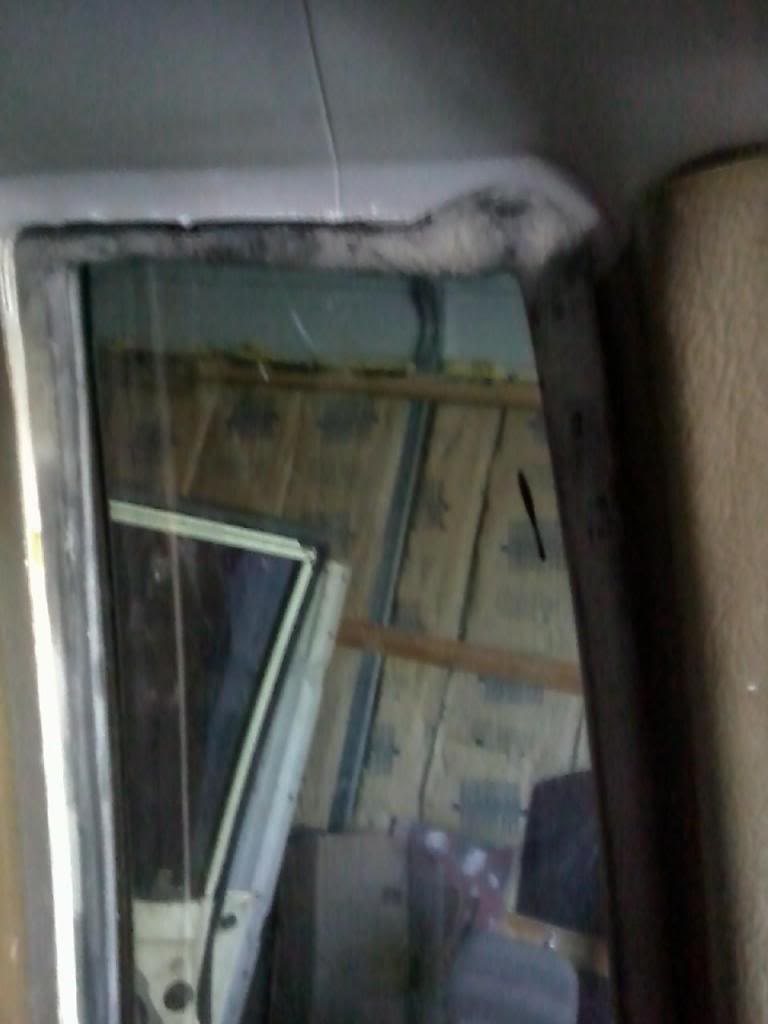
Side windows remove just like the back glass. From the inside lift up on the rubber seal and start pushing it out.
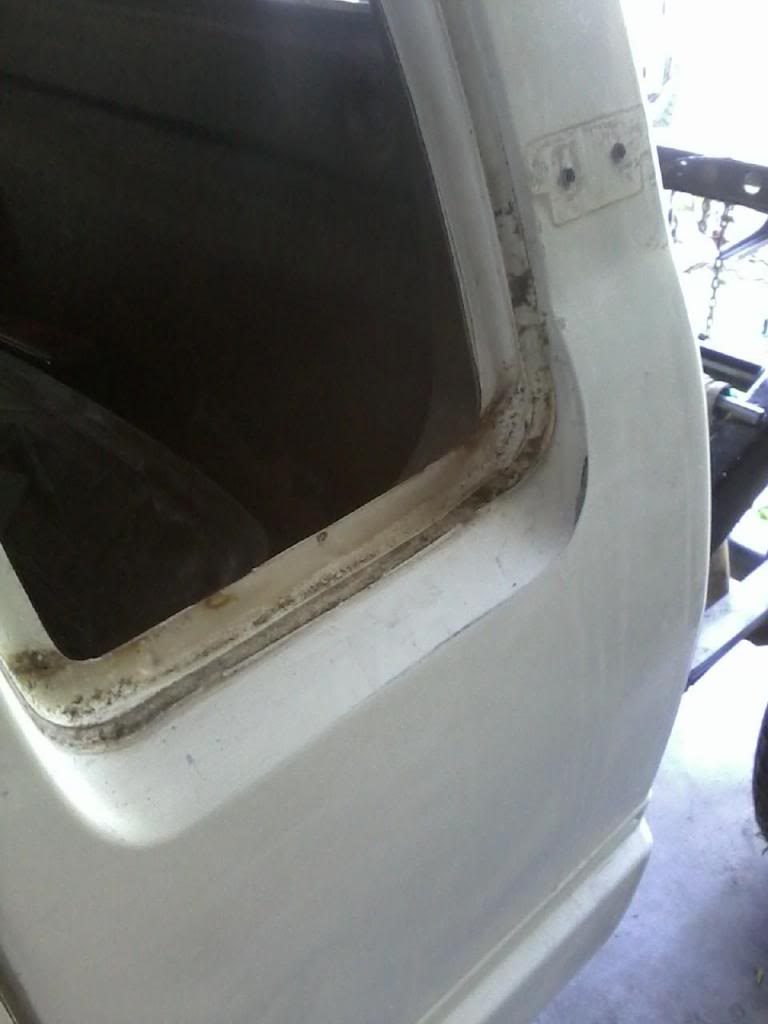
Trying to show what I am talking about in the post above.
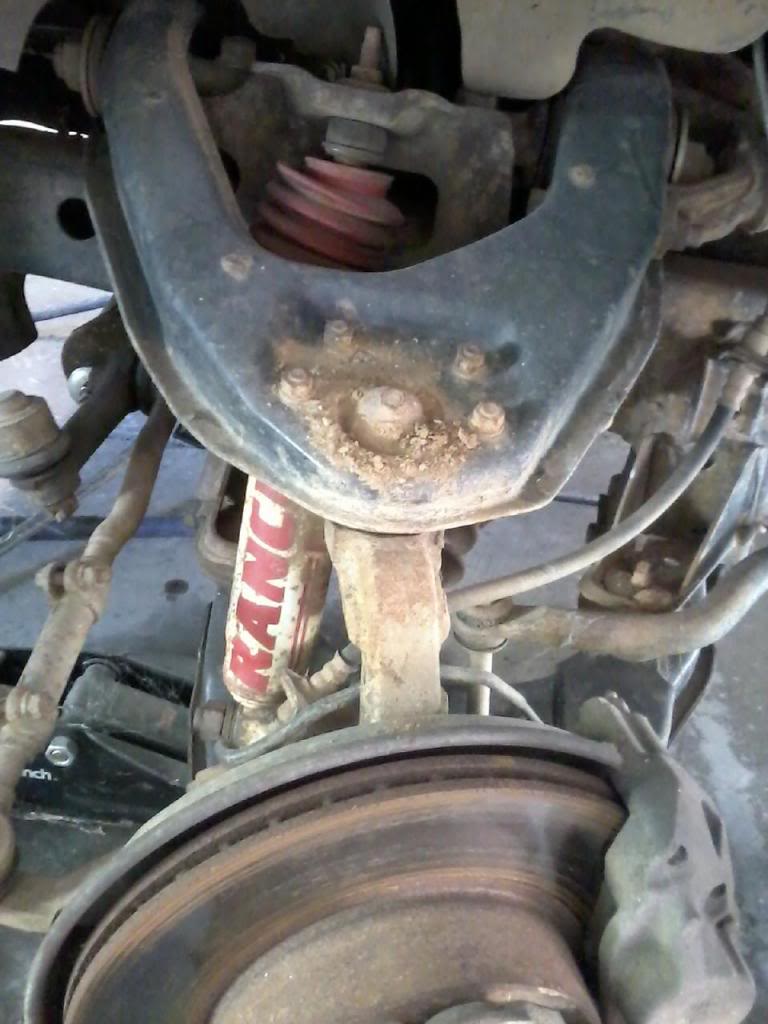
Something that probably doesnt get thought of and I meant to mention in the earlier post on tips on painting. I wash, use an air hose and anything else I can to get the underside of the truck clean to avoid dust from blowing out when painting. I have washed this truck several times, but not with the wheels off. Alot of brake dust and mud was on top of the ball joint. Especially get from the frame to the rocker panels and the spare tire area if doing a runner or with the bed on.
Also they sell tire covers for painting. In my opinion they are only good for painting one or two trucks. After that, they are just a big dust magnet. If you want to paint with the tires on, I suggest using paper. I like to lower mine to make it easier to paint the hood. The cab top, I still use a milk crate.
I paint the body and jams all at once. It prevents overspray from the body gaps and gives a cleaner look. Also doing it this way, you can do a complete color change and not have any signs of a previous color with the exception of the engine bay.
When painting, I will open the door with my finger. What I touch is covered by the door handle and will never show. It is actually on the inside of the door. When I close the door, I will actually push on the glass where it is papered.
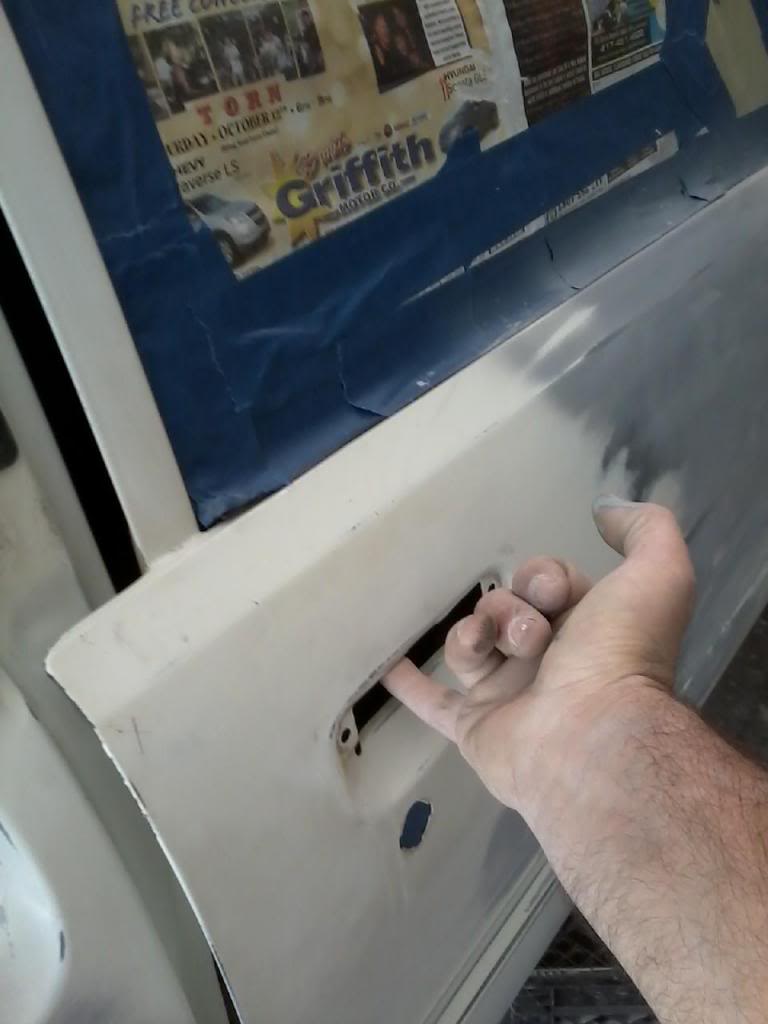
This picture is the reason I paint jams and body all at once. I had the door closed when I primed this area at an earlier time. You can see the primer made its way past the door gap. If this was paint, it would do the same only have an overspray look to it.

It is nearly ready for paint. It is happening tomorrow. Just ran out of time today and the mosquitos just ran me out. Hoping to start around noon. Another tip I meant to meantion, I remove the door handles, this one will be getting chrome. I store them on the inside of the doors until I reassemble. It keeps them all together and not getting confused as to where they go. The clips that hold them are color coded, but this saves that confusion.

Here is how I get bugs off when they land in paint. It takes a steady hand.

I prepping for paint the jams, I cleared the drain holes. Just remove the door sill and a clothes hanger and an air gun works great. Also there is a hole in the back of the cab for pickups that works great. I will post a pic of it tomorrow. The light at the bottom is the drain holes that tend to get clogged. There are 3 or 4 of these holes on each side. You can tell by the little "v" notch on the rocker.

I remove the door seals to save on masking and a better coverage.

Side windows remove just like the back glass. From the inside lift up on the rubber seal and start pushing it out.

Trying to show what I am talking about in the post above.

Something that probably doesnt get thought of and I meant to mention in the earlier post on tips on painting. I wash, use an air hose and anything else I can to get the underside of the truck clean to avoid dust from blowing out when painting. I have washed this truck several times, but not with the wheels off. Alot of brake dust and mud was on top of the ball joint. Especially get from the frame to the rocker panels and the spare tire area if doing a runner or with the bed on.
Also they sell tire covers for painting. In my opinion they are only good for painting one or two trucks. After that, they are just a big dust magnet. If you want to paint with the tires on, I suggest using paper. I like to lower mine to make it easier to paint the hood. The cab top, I still use a milk crate.

I paint the body and jams all at once. It prevents overspray from the body gaps and gives a cleaner look. Also doing it this way, you can do a complete color change and not have any signs of a previous color with the exception of the engine bay.
When painting, I will open the door with my finger. What I touch is covered by the door handle and will never show. It is actually on the inside of the door. When I close the door, I will actually push on the glass where it is papered.

This picture is the reason I paint jams and body all at once. I had the door closed when I primed this area at an earlier time. You can see the primer made its way past the door gap. If this was paint, it would do the same only have an overspray look to it.

It is nearly ready for paint. It is happening tomorrow. Just ran out of time today and the mosquitos just ran me out. Hoping to start around noon. Another tip I meant to meantion, I remove the door handles, this one will be getting chrome. I store them on the inside of the doors until I reassemble. It keeps them all together and not getting confused as to where they go. The clips that hold them are color coded, but this saves that confusion.
 10-10-2013, 04:40 PM
#1505
Super Moderator
Staff
Thread Starter
iTrader: (1)
Join Date: Aug 2008
Location: Anderson Missouri
Posts: 11,788
Likes: 0
Received 25 Likes
on
22 Posts
My laptop was down so I have been a little behind on posting as much as I would like. Got it back up and running so maybe I will get a little bit better at it. Also have been doing some overtime lately. I am helping a few others on the phone or at there house and thought I would pass on a few more tips.
I can afford nicer trucks, but hopefully I am in the top 10% of the junk truck restorers. haha.. I am not talking about the 86 that I am getting ready to paint, but the other trucks in general. My 85 is a basket case. If you have the time and paitience, and the biggest one, funds, you would be suprised at what you can do on $25 a week and a little planning ahead of time. $25 really doesnt get much in life now a days, but it can be a cheap form of entertainment with some planning.
My all time best was a new Alternator at the parts store is about $100. Brake Calipers are $30 each with exchange. I got new brushes for $7 for my alternator and new caliper rebuild kit $13 if I recall right. Instead of spending $160, I did both jobs for $20 total.
I have other things to take care of besides the trucks, but it doesnt take long to accumilate some things that will keep you busy and get a junk truck back on the road. Cleaners, a wire brush on a drill, bondo, rattle can paint,waxes, interiror paint, alot of automotive parts can be had for less then $25.
The bone yards are a goldmine. When taking parts off of their trucks, disassemble them without destruction and that will help get a good deal on parts. Get to know the guys as well. I was checking out other makes for ideas to add to mine. I just got done looking at Explores, Chevy Vans, Corollas, and anything else that I could find hoping to find something to add to mine to make it more useful. No such luck this time, but maybe next time.
Finding that hard to find part adds to the challenge. I came across two nearly perfect dashpads for $20 each. If I have a bad part, I make the best of it until something better comes along. I took Mistys old bumper which is damaged and put on mine since I didnt have one. It still counts as an improvement in my book. One will come along eventually. I banged it out the best as I could and it doesnt look bad.
There is alot that can be done to these trucks that really doesnt cost much. When they are in a project stage, there isnt any rush on getting it fixed. I dont mind working on one when they are in bad shape. Let a daily driver go down, and even if it is something I have done a hundered times, I still frown on that. To me projects are just funner then daily drivers. Also a good way to learn on these and see what you can create.
I have alot of cheap and sometimes necessary fixes on my 88 Runner build. One I like was how I got a scratched up SR5 Guage lense looking great with a Turtle Wax Headlight Lense Restore kit. Follow the directions on the kit. It is scary as you really scratch it up until you put the liquid on it in the last step. Whew!!! Looks great now.
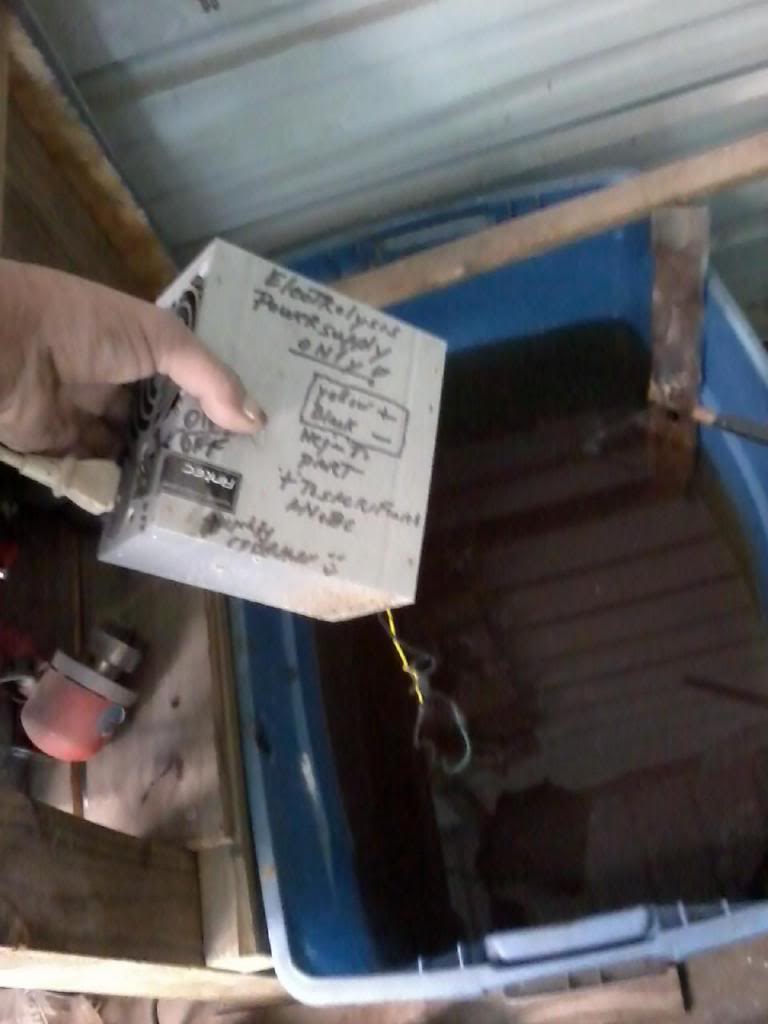
Here is a cheap Electrolis Cleaner that makes life so much easier. Cyberhorn has it listed on his thread on how to make one. Works Great!!!
I can afford nicer trucks, but hopefully I am in the top 10% of the junk truck restorers. haha.. I am not talking about the 86 that I am getting ready to paint, but the other trucks in general. My 85 is a basket case. If you have the time and paitience, and the biggest one, funds, you would be suprised at what you can do on $25 a week and a little planning ahead of time. $25 really doesnt get much in life now a days, but it can be a cheap form of entertainment with some planning.
My all time best was a new Alternator at the parts store is about $100. Brake Calipers are $30 each with exchange. I got new brushes for $7 for my alternator and new caliper rebuild kit $13 if I recall right. Instead of spending $160, I did both jobs for $20 total.
I have other things to take care of besides the trucks, but it doesnt take long to accumilate some things that will keep you busy and get a junk truck back on the road. Cleaners, a wire brush on a drill, bondo, rattle can paint,waxes, interiror paint, alot of automotive parts can be had for less then $25.
The bone yards are a goldmine. When taking parts off of their trucks, disassemble them without destruction and that will help get a good deal on parts. Get to know the guys as well. I was checking out other makes for ideas to add to mine. I just got done looking at Explores, Chevy Vans, Corollas, and anything else that I could find hoping to find something to add to mine to make it more useful. No such luck this time, but maybe next time.
Finding that hard to find part adds to the challenge. I came across two nearly perfect dashpads for $20 each. If I have a bad part, I make the best of it until something better comes along. I took Mistys old bumper which is damaged and put on mine since I didnt have one. It still counts as an improvement in my book. One will come along eventually. I banged it out the best as I could and it doesnt look bad.
There is alot that can be done to these trucks that really doesnt cost much. When they are in a project stage, there isnt any rush on getting it fixed. I dont mind working on one when they are in bad shape. Let a daily driver go down, and even if it is something I have done a hundered times, I still frown on that. To me projects are just funner then daily drivers. Also a good way to learn on these and see what you can create.
I have alot of cheap and sometimes necessary fixes on my 88 Runner build. One I like was how I got a scratched up SR5 Guage lense looking great with a Turtle Wax Headlight Lense Restore kit. Follow the directions on the kit. It is scary as you really scratch it up until you put the liquid on it in the last step. Whew!!! Looks great now.
Here is a cheap Electrolis Cleaner that makes life so much easier. Cyberhorn has it listed on his thread on how to make one. Works Great!!!

Last edited by Terrys87; 03-06-2014 at 02:01 AM.
10-11-2013, 06:46 AM
#1508
Super Moderator
Staff
Thread Starter
iTrader: (1)
Join Date: Aug 2008
Location: Anderson Missouri
Posts: 11,788
Likes: 0
Received 25 Likes
on
22 Posts
Hello Cyberhorn.. You should recoginze the writing as well.lol
Thanks kornhuskerwizard.. It is getting done here sometime today. Sometimes it goes faster then what I think, other times not.
Thanks kornhuskerwizard.. It is getting done here sometime today. Sometimes it goes faster then what I think, other times not.
10-11-2013, 06:52 AM
#1509
Super Moderator
Staff
Thread Starter
iTrader: (1)
Join Date: Aug 2008
Location: Anderson Missouri
Posts: 11,788
Likes: 0
Received 25 Likes
on
22 Posts
I am getting coffee'd up and waiting for it to warm up a bit more, but supposed to be a great day for painting. I still need to pull the front mudflaps, a few finishing touches, a quick once over.
Tip** I will take a water soaked rag with a tablespoon of thinner on it to remove any oils from my hands and give it a good wipe down. To strong and it will blister the primer. After I degrease it, I will take a Tack Cloth to remove any dust before applying Sealer. Probablynot the most recommend, but I wipe my hands down with a watered rag and thinner just as well. Other then the full body twitches I am having, no problems, Just kidding.
I still need to prep the air compressor and give my paint gun a good cleaning as well. Will try to post some pics of that later as well. Clean the shop again of any dust and such so is going to take a couple of hours.
10-11-2013, 09:38 AM
#1510
Super Moderator
Staff
Thread Starter
iTrader: (1)
Join Date: Aug 2008
Location: Anderson Missouri
Posts: 11,788
Likes: 0
Received 25 Likes
on
22 Posts
Waiting on the dust to settle and the truck to dry from where I went over it. My post will be short.
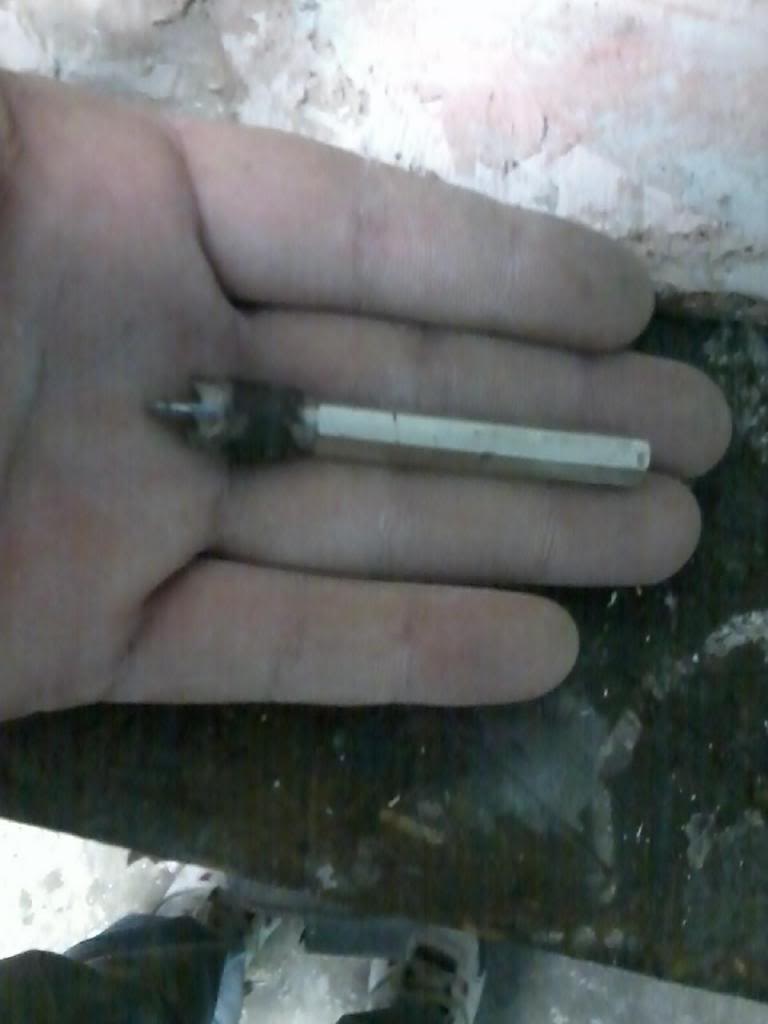
Someone was asking for a picture of a Spot Weld Cutter. These are ten times better then using drill bits and I got this at Harbor Freight for about $7. Saves alot of time when cutting spot welds over drill bits. I had to replace the Core Support on my 86 and it is just bolted on. I have no intentions of evr having it welded back on. Makes removing the entire drive train a piece of cake and I can have it out or in within 3 minutes once everything is disconnected.
I have mentioned in my builds before. There is alot of debri that gets trapped behind the mudflap. This isnt from the tires, but actually from the cowl infront of the windshield. Most of this debri is leaves and such.
Easy to clean by removing the mudflaps and a few other screws that hold the back half of the inner fender on and blow out with air gun or remove with your fingers. You can see the day light that if I had painted with this on, when painting the jam, it would of blown dust every where.

This truck came from the factory with it blacked out. Trucks with chrome usually have the metal painted to the body color. I am removing the black trim and installing chrome later on, so I am painting the inner fenders white. I washed it and just wiped it down with a thinner soaked rag and hit it with primer.

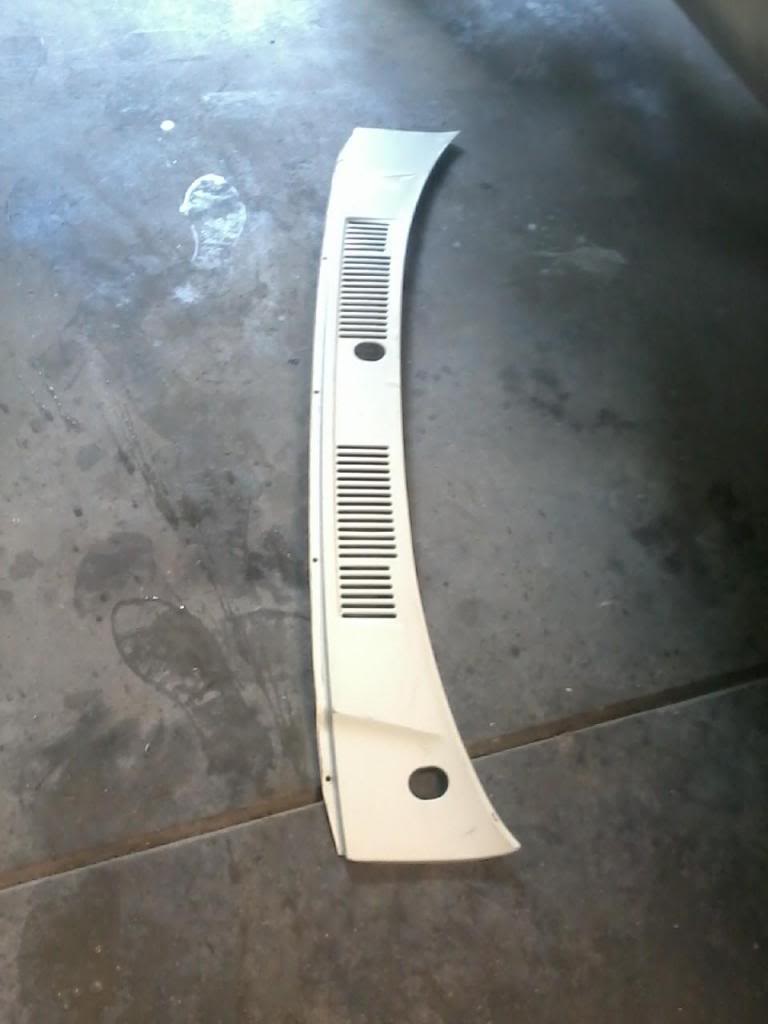
Something most people wouldnt keep when parting a truck. I keep everything. You will see the frame from a truck I parted leaning on my wall from time to time. This is a part off of it. The orginal had a few dings in it so I am just replacing it with one with no damage. Tom, you are getting some of your old truck back.hehe
Cant really show in picture, but I wipe the whole truck down with the air hose on high pressure with a clean lint free cloth. You will feel it snag or things that may need attention when doing this. It gets off any dirt, dust and mud like stuff from primer and water residue left behind. Works great for giving a good cleaning. Also while doing this. I put the air pressure to 40 lbs as that is about the pressure I will be using for painting and trying to see if any of my paper or tape is going to break loose. I keep the air hose about 6 inches from the rag when doing this.

Someone was asking for a picture of a Spot Weld Cutter. These are ten times better then using drill bits and I got this at Harbor Freight for about $7. Saves alot of time when cutting spot welds over drill bits. I had to replace the Core Support on my 86 and it is just bolted on. I have no intentions of evr having it welded back on. Makes removing the entire drive train a piece of cake and I can have it out or in within 3 minutes once everything is disconnected.

I have mentioned in my builds before. There is alot of debri that gets trapped behind the mudflap. This isnt from the tires, but actually from the cowl infront of the windshield. Most of this debri is leaves and such.
Easy to clean by removing the mudflaps and a few other screws that hold the back half of the inner fender on and blow out with air gun or remove with your fingers. You can see the day light that if I had painted with this on, when painting the jam, it would of blown dust every where.

This truck came from the factory with it blacked out. Trucks with chrome usually have the metal painted to the body color. I am removing the black trim and installing chrome later on, so I am painting the inner fenders white. I washed it and just wiped it down with a thinner soaked rag and hit it with primer.

Something most people wouldnt keep when parting a truck. I keep everything. You will see the frame from a truck I parted leaning on my wall from time to time. This is a part off of it. The orginal had a few dings in it so I am just replacing it with one with no damage. Tom, you are getting some of your old truck back.hehe

Cant really show in picture, but I wipe the whole truck down with the air hose on high pressure with a clean lint free cloth. You will feel it snag or things that may need attention when doing this. It gets off any dirt, dust and mud like stuff from primer and water residue left behind. Works great for giving a good cleaning. Also while doing this. I put the air pressure to 40 lbs as that is about the pressure I will be using for painting and trying to see if any of my paper or tape is going to break loose. I keep the air hose about 6 inches from the rag when doing this.

Last edited by Terrys87; 03-04-2014 at 04:54 AM.
10-11-2013, 11:11 AM
#1511
Awesome posts, and tips, as usual!
I have to really again around the fender wells and so forth to try and clean every bit of sand from his mouth and so forth out of their. A lot of it went down and those friends and and many other places that are hard to get all of it out of. I still have sand falling out of my fender wells .... I know everyone thinks then California no one has any rust. It's just not the case. I have managed, however, through a lot of work at maintaining a good coat and thoroughly detailing things when I detail things, to keep this thing for lyrics free. Well, a gang of salty sand is not going to help me in this endeavor in any way. Lol.
I'm going to get my air gun out here soon. Washing does quite a bit with a high pressure hose.... But I think need to be a combination. I thought about doing what I saw one member do... You remove those rock panels in the back and simply put about three coats of bed liner on there to match that look. I just don't think they look right without it. Not a big fan of the same color either. By the way, all of my fender wells are red. And, it is, in fact, a full chrome package.
I have to really again around the fender wells and so forth to try and clean every bit of sand from his mouth and so forth out of their. A lot of it went down and those friends and and many other places that are hard to get all of it out of. I still have sand falling out of my fender wells
.... I know everyone thinks then California no one has any rust. It's just not the case. I have managed, however, through a lot of work at maintaining a good coat and thoroughly detailing things when I detail things, to keep this thing for lyrics free. Well, a gang of salty sand is not going to help me in this endeavor in any way. Lol.I'm going to get my air gun out here soon. Washing does quite a bit with a high pressure hose.... But I think need to be a combination. I thought about doing what I saw one member do... You remove those rock panels in the back and simply put about three coats of bed liner on there to match that look. I just don't think they look right without it. Not a big fan of the same color either. By the way, all of my fender wells are red. And, it is, in fact, a full chrome package.
10-11-2013, 01:25 PM
#1512
Super Moderator
Staff
Thread Starter
iTrader: (1)
Join Date: Aug 2008
Location: Anderson Missouri
Posts: 11,788
Likes: 0
Received 25 Likes
on
22 Posts
Hello Mark...I just found a text from you last nite about an ECU Part Number. I dont have any 87s but have a couple of 85 and 86s and can look at their part number.
My truck came out of Florida and the sand was everywhere. Since you dont have IFS, there are probably fewer places for it to get into, but in some ways can be more expensive on a solid axle. I would suggest getting a high pressure air hose and clean out the frame and then follow it with high pressure water. That sand is a nite mare. I have since replaced the carpet in my truck, but I took my old carpet out and washed it several times, air hose, and beating it with a broom and still never got it out.
My truck came out of Florida and the sand was everywhere. Since you dont have IFS, there are probably fewer places for it to get into, but in some ways can be more expensive on a solid axle. I would suggest getting a high pressure air hose and clean out the frame and then follow it with high pressure water. That sand is a nite mare. I have since replaced the carpet in my truck, but I took my old carpet out and washed it several times, air hose, and beating it with a broom and still never got it out.
10-11-2013, 01:42 PM
#1513
Super Moderator
Staff
Thread Starter
iTrader: (1)
Join Date: Aug 2008
Location: Anderson Missouri
Posts: 11,788
Likes: 0
Received 25 Likes
on
22 Posts
Today wasnt what I expected. I ran out of sealer and had to go get some more. By the time I got back from the store, it is just later then what I want to start painting. I have got it in sealer so when conditions are right, which is looking like Sunday afternoon after church. Then possibly more rain on Monday.grr. It worked out as the painted probably needed to be reshaken anyways.
If I started painting, besides the humidity, the bugs would just be to much to mess with. It is in sealer completely and I did have a couple of spots to rework. All work is now completed so literally, I just need to mix paint and spray.
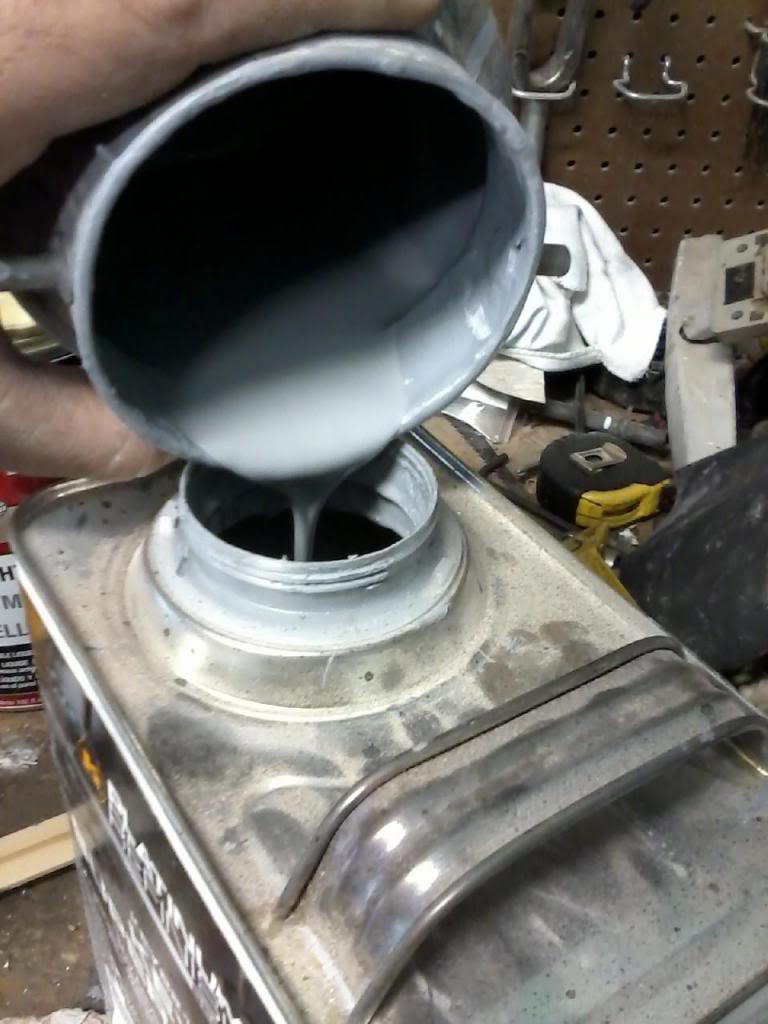
I used to use or waste any excess primer I had left over. A nephews teacher told me to just add it back into the can instead of wasting it. Just something I never thought of.
Before I start, I always clean the gun. This needle will come out, but it messes up my spray settings, so I dont take it apart unless just absolutley necessary. Getting the spray pattern is a little more difficult then what it should be to me it seems.
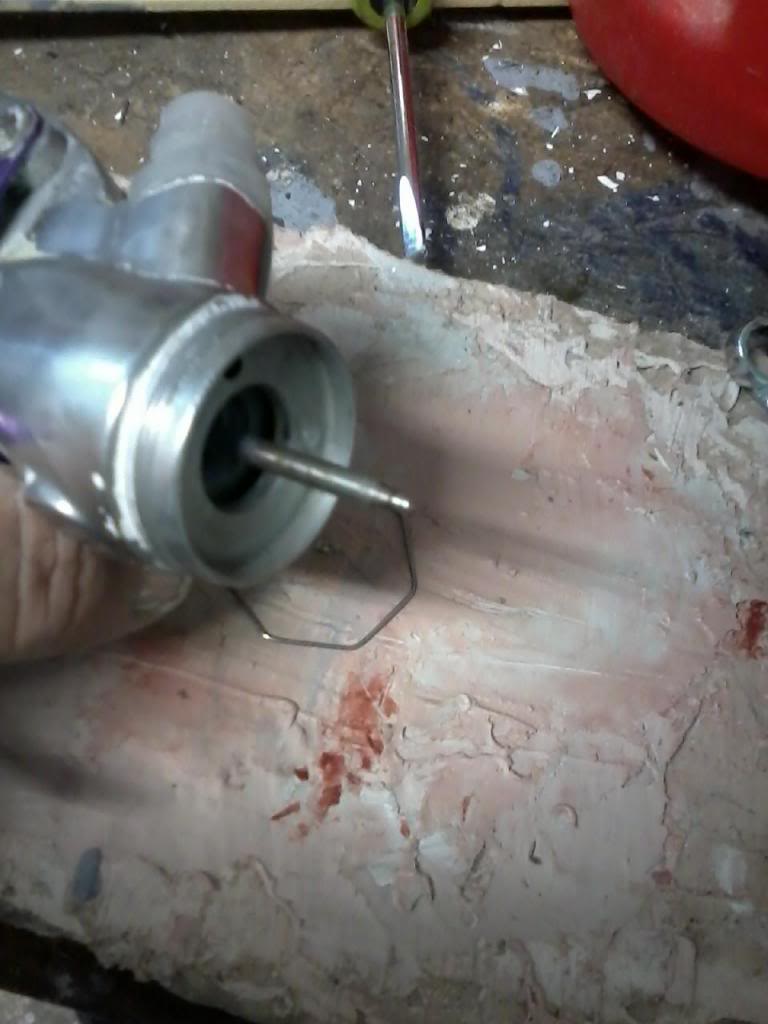
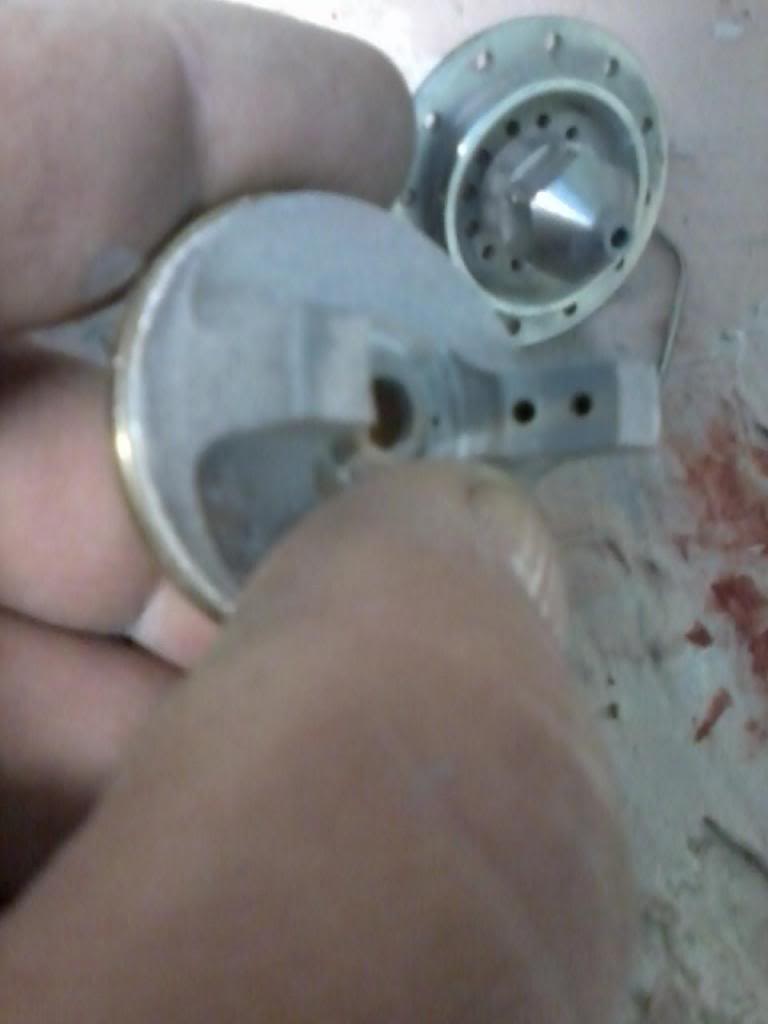
The spray nozzle come off, the part that is attached to the gun with a 10mm wrench, and the other piece where my finger is at likes to get clogged. I soak these two parts in a can of thinner. I need to get a welders cleaning kit to clean the holes out that would work for cleaning as well.
It is in Sealer.


If I started painting, besides the humidity, the bugs would just be to much to mess with. It is in sealer completely and I did have a couple of spots to rework. All work is now completed so literally, I just need to mix paint and spray.
I used to use or waste any excess primer I had left over. A nephews teacher told me to just add it back into the can instead of wasting it. Just something I never thought of.

Before I start, I always clean the gun. This needle will come out, but it messes up my spray settings, so I dont take it apart unless just absolutley necessary. Getting the spray pattern is a little more difficult then what it should be to me it seems.

The spray nozzle come off, the part that is attached to the gun with a 10mm wrench, and the other piece where my finger is at likes to get clogged. I soak these two parts in a can of thinner. I need to get a welders cleaning kit to clean the holes out that would work for cleaning as well.

It is in Sealer.


 10-11-2013, 01:44 PM
#1514
Super Moderator
Staff
Thread Starter
iTrader: (1)
Join Date: Aug 2008
Location: Anderson Missouri
Posts: 11,788
Likes: 0
Received 25 Likes
on
22 Posts
Now all I need to do is just wet the floor and shoot the paint. It is tempting, but the bugs and tempertures are going to be a problem by the time I got to the completion stage.
10-13-2013, 02:37 PM
#1516
10-13-2013, 02:47 PM
#1517
Super Moderator
Staff
Thread Starter
iTrader: (1)
Join Date: Aug 2008
Location: Anderson Missouri
Posts: 11,788
Likes: 0
Received 25 Likes
on
22 Posts
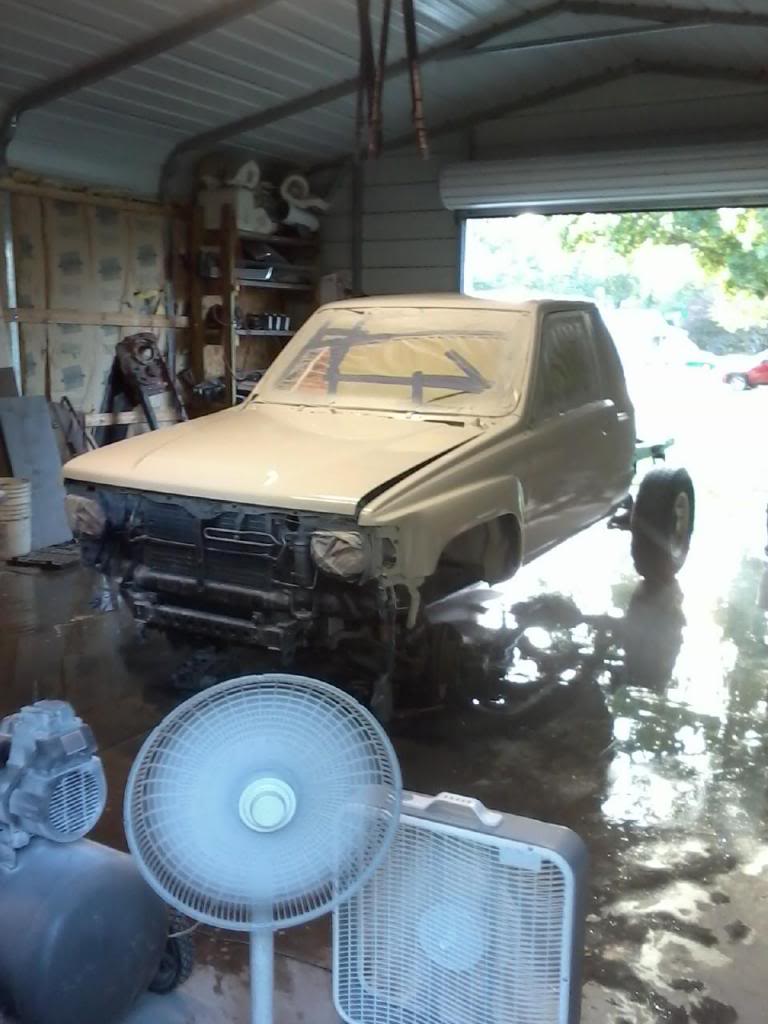
Had changed my mind several times today and got to paint today. Weather was finicky. Before it looked like a salvage truck getting ready for paint. Now it is a shiney looking salvage truck. I have already started working on the mudflaps so hopefully it will start looking like a Toyota soon.
After a day or so I can start putting all of the pieces on. That doenst take long, so maybe tomorrow nite it will look more like a truck again. My biggest concern is hoping there is minimal orange peel. Paint always goes great for me, it is the clear coat that is the biggest problem.
So much for the painting the rear of the frame. I got quite a bit of over spray on it, but it will clean up fast as well. Dont have pictures of the rear or passenger side yet.
My laptop is down so not able to post as much as I would like. Hope to have it working Tuesday and maybe I can add more on it later.
 10-18-2013, 05:41 AM
#1520
Super Moderator
Staff
Thread Starter
iTrader: (1)
Join Date: Aug 2008
Location: Anderson Missouri
Posts: 11,788
Likes: 0
Received 25 Likes
on
22 Posts
Thank Cyberhorn...I did make a little more progress on it. My computer was all screwed up and finally getting to get some things posted.
Thanks mark...It is starting to look like a truck again. These are some great looking trucks when they are all beat to death.
Thanks mark...It is starting to look like a truck again. These are some great looking trucks when they are all beat to death.


