
Terrys87 86 4Runner with a 2nd Chance
 08-28-2013, 01:45 AM
#1441
Super Moderator
Staff
Thread Starter
iTrader: (1)
Join Date: Aug 2008
Location: Anderson Missouri
Posts: 11,788
Likes: 0
Received 25 Likes
on
22 Posts
Nothing really picture worthy at this time, but I am getting all of my trim in the passenger compartment in. Each piece is starting to make a difference. Getting all of the screws and trim is going slower then I would like, but it is going forward.
I do have a setback. A few days ago, I really wanted to see how my Flamethrower injectors would do at higher speeds and just to see what this runner would do as I have never really pushed it to its limits on the top end or speed wise. I dont know if running at higher speeds created more vaccum on my brake booster but I could tell the truck started acting sluggish. I could tell the motor was running great but it would not get up to speed like it should. So I pulled over and both brakes were smoking.
I have replaced my Master Cylinder and the calipers I rebuilt and was fairly certain they were not the problem. Besides both brakes smoking usually means something else. I was suspecting my booster and was talking to Jason and he had just heard on a cartalk show about boosters acting up. He suggeseted to remove the vaccum line from my booster and plug it up to see if my brake problem went away. No more smoking brakes. I really have to stand on the brakes to get them to work, but now I am sure my booster is bad.
I was in the boneyard the other day and what few trucks they do have ( two 2nd gen runners, two 3rd gen runners and a T100) all of the boosters were gone. I pulled the booster from the red runner I have sitting out back and it looks to be failing the test of holding a vaccum on it as well. I have never had brake booster problems in any cars I have owned, so this is a first for me. Apparently Toyota brake boosters are a weak link. I priced a new booster and they run $130 to $150 depending on which part store you check.
The next couple of days are my days off and I know where an 84 truck is sitting that there is nothing left of it but the dashpad. The last time I seen the pad it was perfect. I paid the guy for the pad and hopefully the booster is still on it and I will grab it while getting the pad.
The Flamethrowers make a big difference on the lower gears. Finding out at the higher speeds are going to have to wait. Misty calls me a grandpa driver and usually I dont ever get into a hurry, but I was wanting to see just what my truck had in it and now it will have to wait awhile til I get to find out.
I was driving her runner the other day and shortly there after I was back in mine. Her runner is still alot more pleasure to drive just for the overall comfort, but I definitly like my seats alot better. The guy I got the seats from had just had them reupholstered and the new foam is so much more comfortable since it hasnt lost its springiness. I still need shocks and maybe suspenion work. It will get there eventually.
 08-28-2013, 10:40 AM
#1443
Nice...
It's so funny that you said mouse pad and I kept thinking about the sticky mouse trap pads ... I was just bottled... But I started thinking mouse popping for the cage... Kind of like that mesh, fine filter type material that you find in some fish tank systems... the kind ppl put in cages. Yes, I can feel someone like a moron... But then again at least I'm humble enough to acknowledge it, right? Hahahahaha.... I scrolled down to see that mouse pad and just about cried I was laughing so hard. I could not understand why you would do something so cheesy... No pun intended. Hahahahaha. Thanks, I needed a good laugh at myself!
It's so funny that you said mouse pad and I kept thinking about the sticky mouse trap pads ... I was just bottled... But I started thinking mouse popping for the cage... Kind of like that mesh, fine filter type material that you find in some fish tank systems... the kind ppl put in cages. Yes, I can feel someone like a moron... But then again at least I'm humble enough to acknowledge it, right? Hahahahaha.... I scrolled down to see that mouse pad and just about cried I was laughing so hard. I could not understand why you would do something so cheesy... No pun intended. Hahahahaha. Thanks, I needed a good laugh at myself!
08-28-2013, 07:47 PM
#1445
Registered User
Ha Ha Chef! Mouse pads are probably a dying product. I have not used one in years, since I made the switch to a lap top. We have a ton of promo ones around the house and I know they are something I see often at the $1 store. I'm all about the Big Lots/Dollar Store adaptive reuse of stuff when possible.
08-29-2013, 01:43 PM
#1446
Super Moderator
Staff
Thread Starter
iTrader: (1)
Join Date: Aug 2008
Location: Anderson Missouri
Posts: 11,788
Likes: 0
Received 25 Likes
on
22 Posts
Hello Cyberhorn...I have the ability to get the oddball problems somehow. I dont even have to try, it just happens,lol.
LOL Mark...I have misread things too and it is good to get a laugh at myself every now and then. I found a 4 cylinder booster in the shed and it seems to be good. If you have a V6 booster, I would be intrested in it.
Hello Nervo19...I could see them not being used anymore. I still have the mouse and wire attached for my home computer. I am slow to keep up with technology. I might ought to stock up on a few. I will need a few more as when I do one thing to one of the runners, I do it to the other as well.
08-29-2013, 02:04 PM
#1447
Super Moderator
Staff
Thread Starter
iTrader: (1)
Join Date: Aug 2008
Location: Anderson Missouri
Posts: 11,788
Likes: 0
Received 25 Likes
on
22 Posts
Scored a perfect dashpad. I bought it and the guy now wants the whole truck gone. It will be awhile before I get this truck. To many wasp and sure there is a snake hanging around the area. It is beyond fixing. Rusted frame and wrecked cab. A few parts I will need for my 85 on it, but I will pull all of the good parts off of it and scrap the frame and cab. About the only good parts on it is the main dash support, condenser, coil, leaf springs, wiring harness (22r, carbed) sliding backglass, A-pillar trim, windshield (going on the 85), windshield trim, front core support,booster,heater contol assembly,steering column, relays, and a few other odds and ends.
Things I am keeping is Ignition Switch, windshield, heater controls. I have plenty of these parts, so really dont need these. I dont throw any good parts away will eventually post them in the parts section. It will be awhile before I post them but if you want first dibs let me know.
Perfect dashpad and heater bezel. In storage already. Will put it in Mistys or the 85.
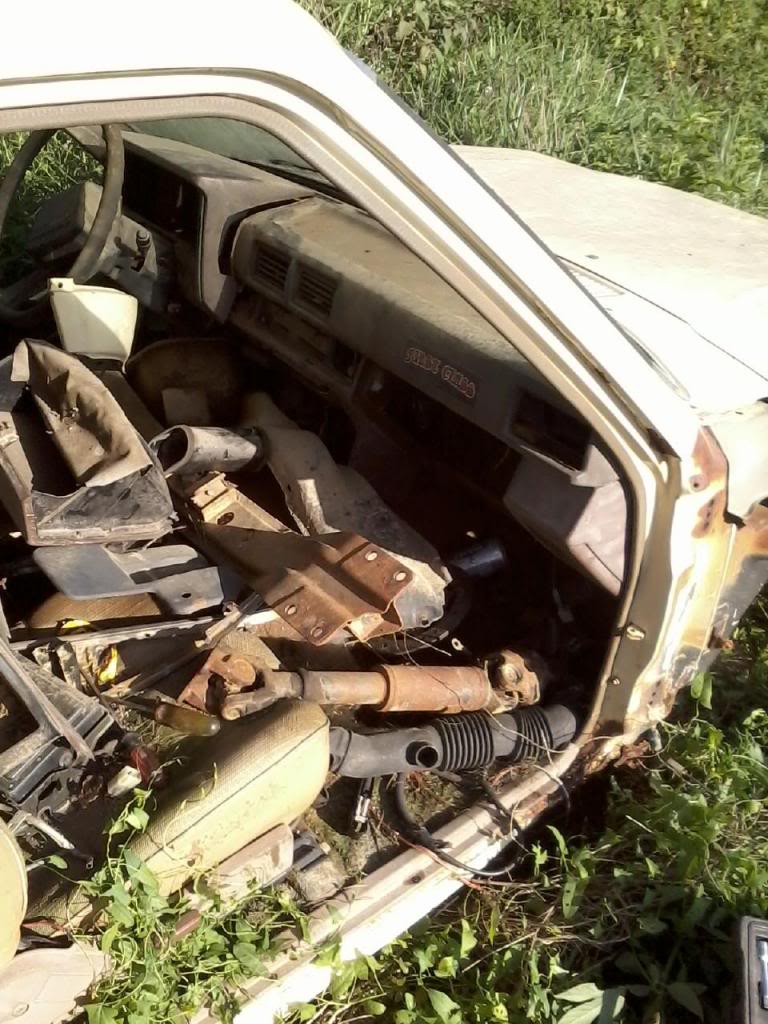
It is pretty well stripped.
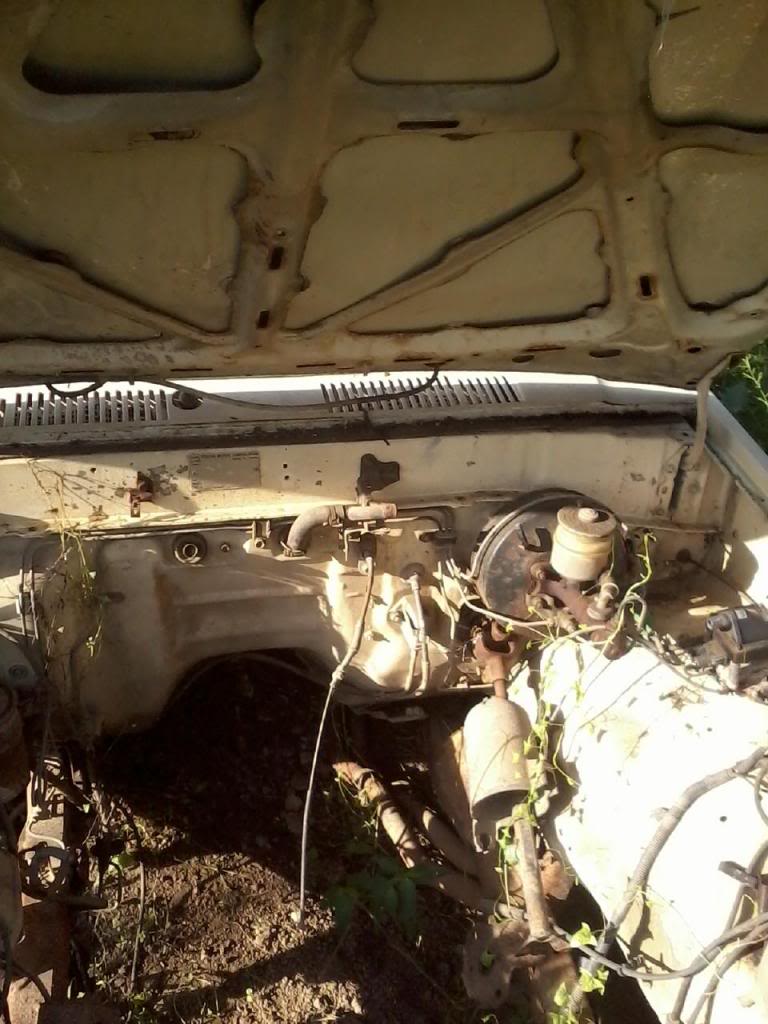
Another view. The rear part of the frame is gone.
 09-03-2013, 08:07 PM
#1449
Terry, I was wondering if you could do me a favor and take a snap shot of the AC air duct and how it sits under the dash. I am hoping I can work on the AC ducts without taking out the dash board. I want to see if I can seal up some of the connecting joints with some new foam seal. With that R152a working so well, I noticed under the dash it was freezing cold and that could only be if air is leaking down there. thanks
09-04-2013, 02:43 AM
#1450
Super Moderator
Staff
Thread Starter
iTrader: (1)
Join Date: Aug 2008
Location: Anderson Missouri
Posts: 11,788
Likes: 0
Received 25 Likes
on
22 Posts
Hello Cyberhorn.. Part is always nice. When I strip a truck nothing goes to waste and more times then not it is me using them. Things I thought I would never need have come in handy.
Hello junk4u.. I posted a link in your thread and will post it here as well https://www.yotatech.com/forums/f199...l#post51778558 Post #451. Other then the PE pipe there isnt anyway of getting the pipes sealed without removing the pad. It isnt hard at all other then the passenger vent, it can be brittle so be careful, but it isnt to hard to get out. Watch the videos that say "Video I made" which looks like pictures but are actually videos. Watch them first and then when you go to do yours it will make sense. My videos arent the best but it will be clear when you do start on yours.
The "Youtube video" is one I found and just helps to explain it in another way but I like mine a little better for a clearer explanation.
Dont mess with the center vents until you have the pad off and then that is only if you want to pull them off and give them a good cleaning, otherwise no need to pull them out. With the pad off, you can easily get to the backside and get to the tabs/clips.
Once I have the passenger vent out, there are some smaller tabs inside the larger tabs that I break off, just to make removing the vent again easier the next time. I have even thought of breaking off the larger tabs on bottom to make it a easier yet, just havent done it so cant say for sure.
I occasionally mention about how dirty the ventilation system gets and when you pull the pad off and get to your pipes, I imagine you will be surprised at how dirty they get. Kind of curious of your reaction when you see yours. Make sure your "PE" pipe isnt missing behind the glovebox and underneath the steering column. I have seen that a fair amount of time of them just missing.
09-04-2013, 03:02 AM
#1451
Super Moderator
Staff
Thread Starter
iTrader: (1)
Join Date: Aug 2008
Location: Anderson Missouri
Posts: 11,788
Likes: 0
Received 25 Likes
on
22 Posts
I have been working on my 85 for an hour or so after work before it gets to hot and trying to get the motor started, so have been putting my build funds towards it for now.
As far as my runner, I am tinkering with it on my lunch break and have just about got the seating area all completed. Mostly just fine tuning the interior. Trimming aftermarket carpet is a Royal Pain in the Rear, but other then one area under the dash that I will need to sew up with a needle and thread, I like the way it is turning out. The whole interior almost looks like what the factory would of done and is what I am hoping for in the end.
About the only other thing I need to do as far as dashwise is to correct the mileage on the odometer, but I have the SR5 guage that I least desire. The guage with the cross hatch lines, the speedometer needle is harder, or most likely to break over the guage that just has horizontal lines. I eventually will use the Turtlewax Headlight Restorer on my guage lense to get it crystal clear.
As far as interior, my next step will be to get a piece of carpet from a regular carpet outlet and replace the section in the trunk. After that, I will start on my shocks, suspension and alighnment. I intentionally used doors that have the special mirror brackets that stick further out. Kind of wishing I had used doors that had just the sport mirrors but I will eventually find the mirror mounts that I want. Just have to be patient.
Pictures wouldnt really show anything different then what I have posted as far as I already have posted. I am going to replace my horn as I nearly got Tboned by a guy running a stop sign and when I hit the horn, it sounded like a sick duck and I doubt that you could hear it to well at that.
After the above things get done, I want to focus on working on the suspension and steering. My brother is done alot with the stepside truck that I sold him and what a difference it is now as far as how it handles. It steers and rides probably as nice as it did when it was new. He has done all of the steering and new tires. I want mine to handle as well as his does.
09-04-2013, 05:56 AM
#1452
Registered User
About the only other thing I need to do as far as dashwise is to correct the mileage on the odometer, but I have the SR5 guage that I least desire. The guage with the cross hatch lines, the speedometer needle is harder, or most likely to break over the guage that just has horizontal lines. I eventually will use the Turtlewax Headlight Restorer on my guage lense to get it crystal clear.
As far as interior, my next step will be to get a piece of carpet from a regular carpet outlet and replace the section in the trunk.
As far as interior, my next step will be to get a piece of carpet from a regular carpet outlet and replace the section in the trunk.
As for the carpet for the rear. Thats not a bad idea. I did mine like that on pg1 of my thread.
Hey you mentioned switching tovan SR5 gauge. Is that easily replaceable? Like do the same wires in the back of a simple dlx cluster power the sr5 one with an RPM meter and gauges. My friend only has the speedometer gauge and he wanted to switch to the one like mine with the rpm meter and other gauges. If it is possible then would you mind showing exactly how you adjust the mileage like you mentioned before?
 .... haha
09-11-2013, 03:45 AM
.... haha
09-11-2013, 03:45 AM
#1454
Super Moderator
Staff
Thread Starter
iTrader: (1)
Join Date: Aug 2008
Location: Anderson Missouri
Posts: 11,788
Likes: 0
Received 25 Likes
on
22 Posts
Hello Richard... I normally dont take this long to get back on questions. I was out of town for 3 days and then had several things to come up and just now starting to get caught up.
On the SR5 Guages they will interchange with the non SR5 Guages. I have had some that the tachometer will not work, but all you need to do is to run a wire from the negative side of the coil to the backside of the guage. I will have to dig that picture up somewhere later today.
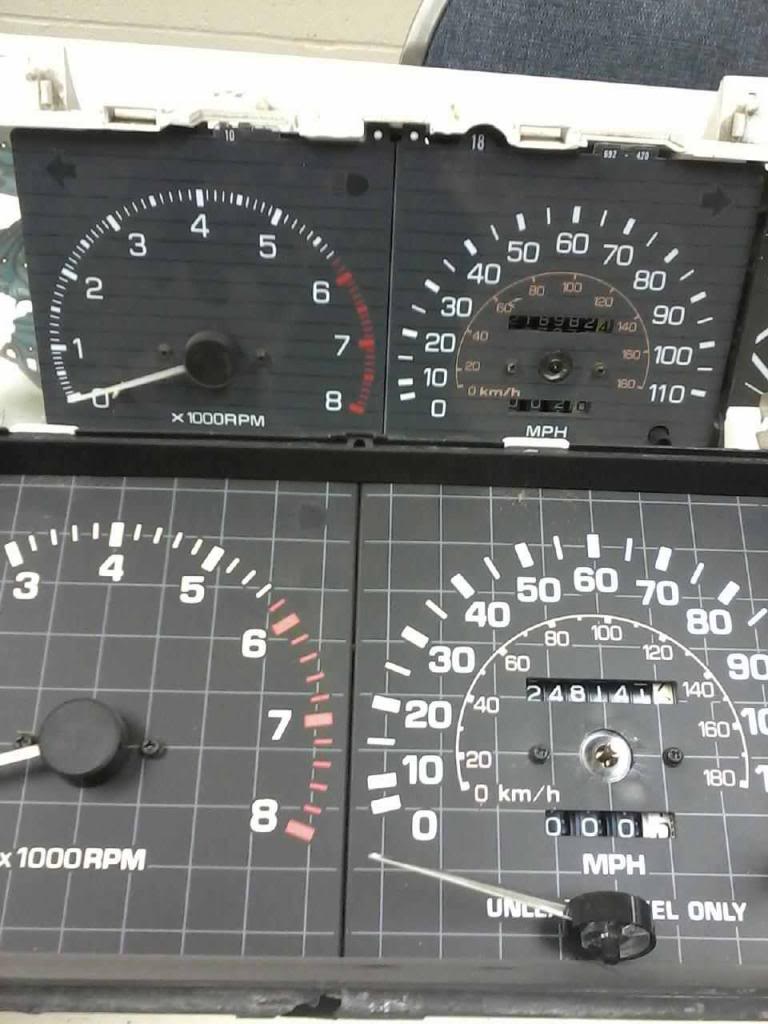
I prefer to use the top guage that just has horizontal lines. The needle will come off easily as the shaft is just smooth. The bottom guage has splines on its shaft and I have broken two of the needles in the past on the bottom guage. The needles are not interchangeable from one guage to another. I already tried that. I also tried taking two non SR5 guages needles to fix it and that wont work either.
If your friend is going to upgrade, try to get the top guage. Pull the needle off and then remove the two little black screws and then I work from left to right, or the largest numbers to the smallest, by holding the numbers and twisting the numbers to the correct mileage one row at a time. It can be difficult to get each one to turn, just have to be patient and persistant.
There is a difference between 4 cylinder and 6 cylinder guages. The tachometer is not set the same on them. There is a screw in the back of the tachometer on the top that needs to be adjusted if not using the correct guage. Either one can be made to work right.
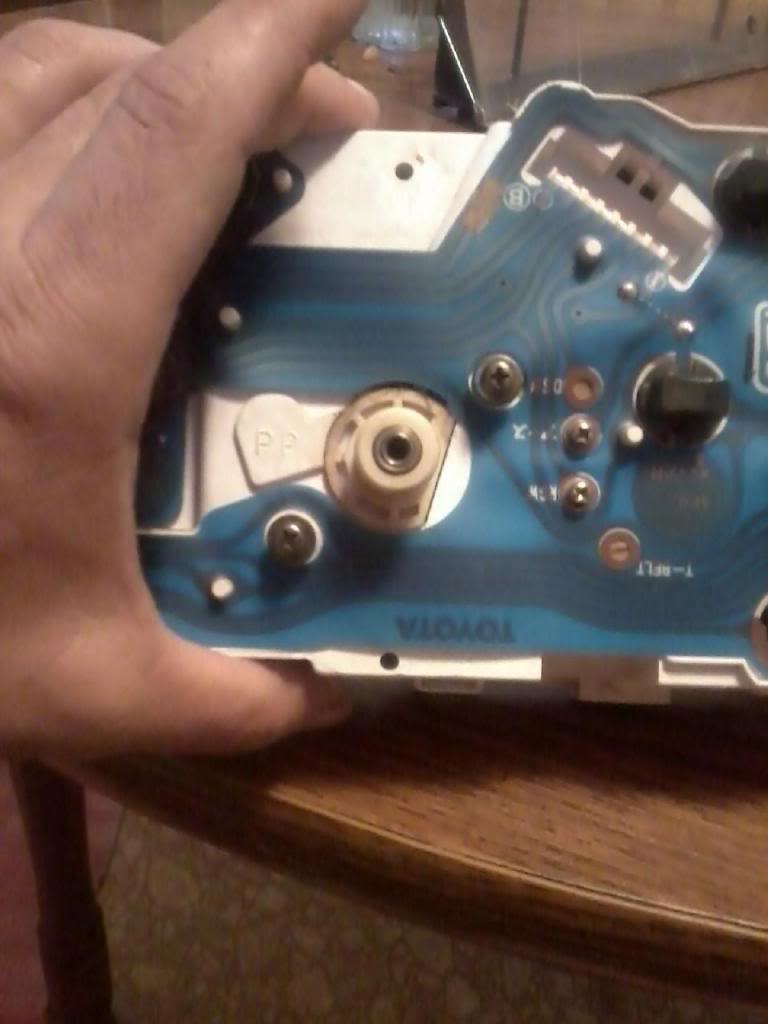
This truck didnt come with the SR5 guage so I added it. If your truck is not Plug and Play like some are, you need to run a wire from the negative side of the coil to the little "p" to make the tach work.
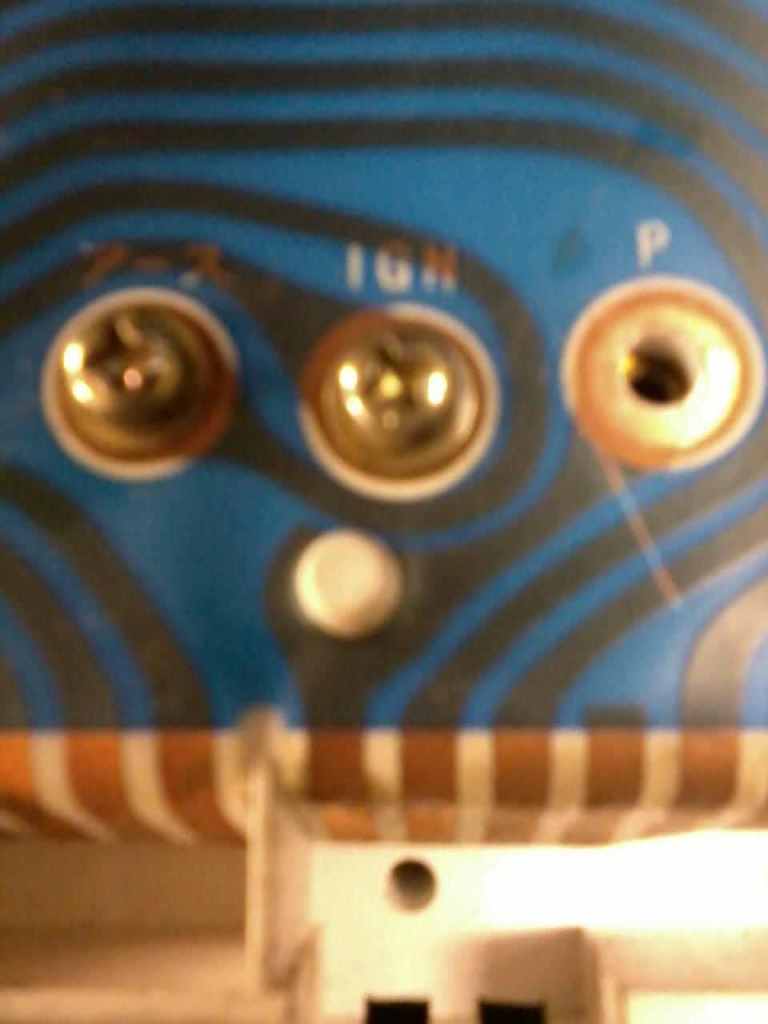
Then what I did so as not to short out the electrical run beside it. I placed a piece of electrical tape over the little "p" and crimped a wire to the smallest connector that I could find.

I then ran a wire to the negative side of the coil, on a carburator coil it is a little different then a standard coil you are most used to seeing. This is a temporary connection til I can come up with a better connection for it later on.

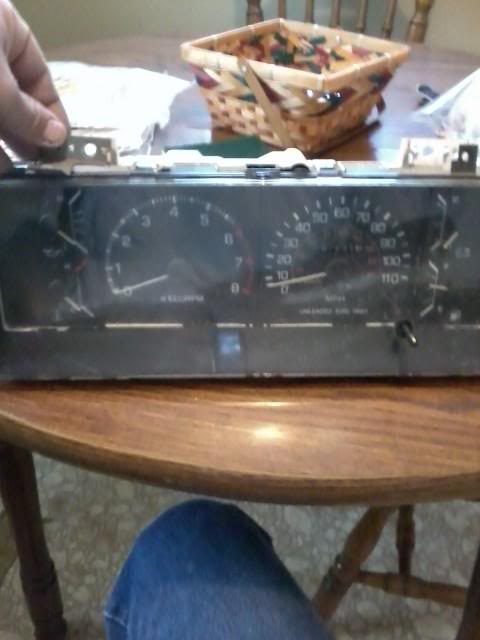
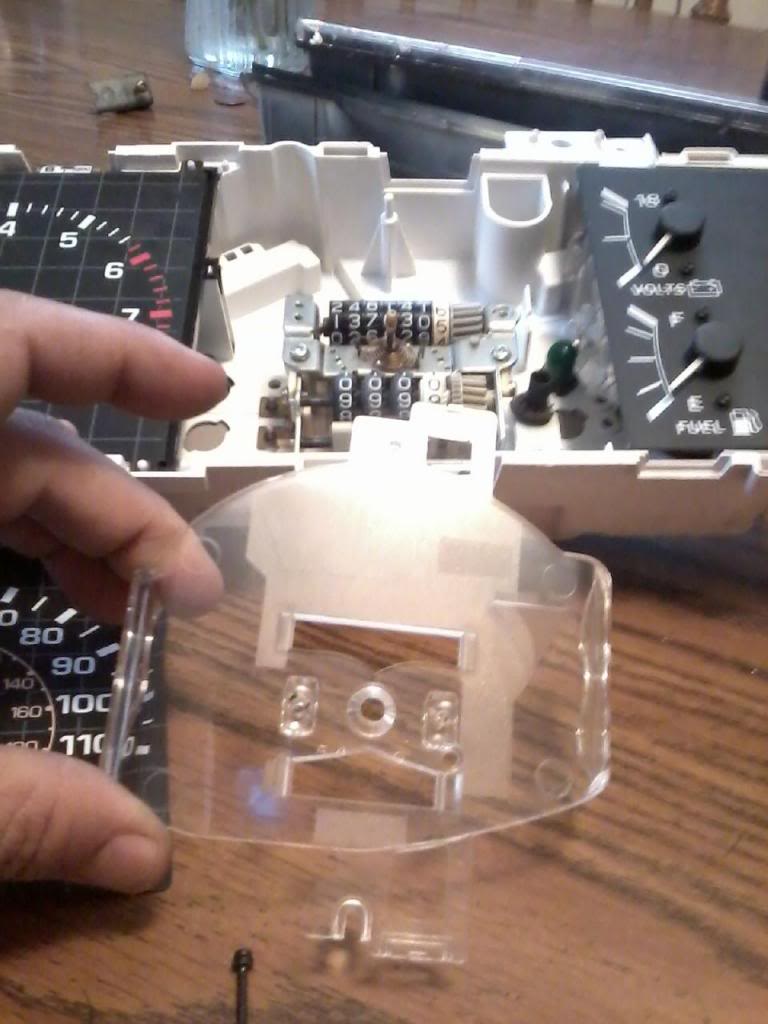
I wanted to put my SR5 Guage in and got to looking at it and wanted it cleaner. Remove the tabs that screw the cluster to the dash to get the lense off.
SR5 Guage Swap info.. https://www.yotatech.com/forums/f116...06/index2.html
I used a lense cleaner to clean it up.
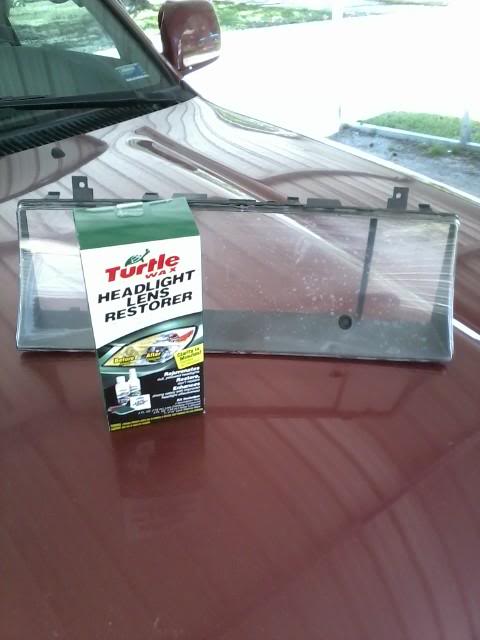
I am quite happy with the results. The label says to allow up to 24 hours for the lense coating to dry. Will have to wait and see final results. Either way I am stuck with it. I have it tilted to avoid a glare while taking the picture. No matter how hard I tried, just couldnt get a good pic without the glare.

SR5 Guage Swap
Here is the Guage. I will address the cracks later.

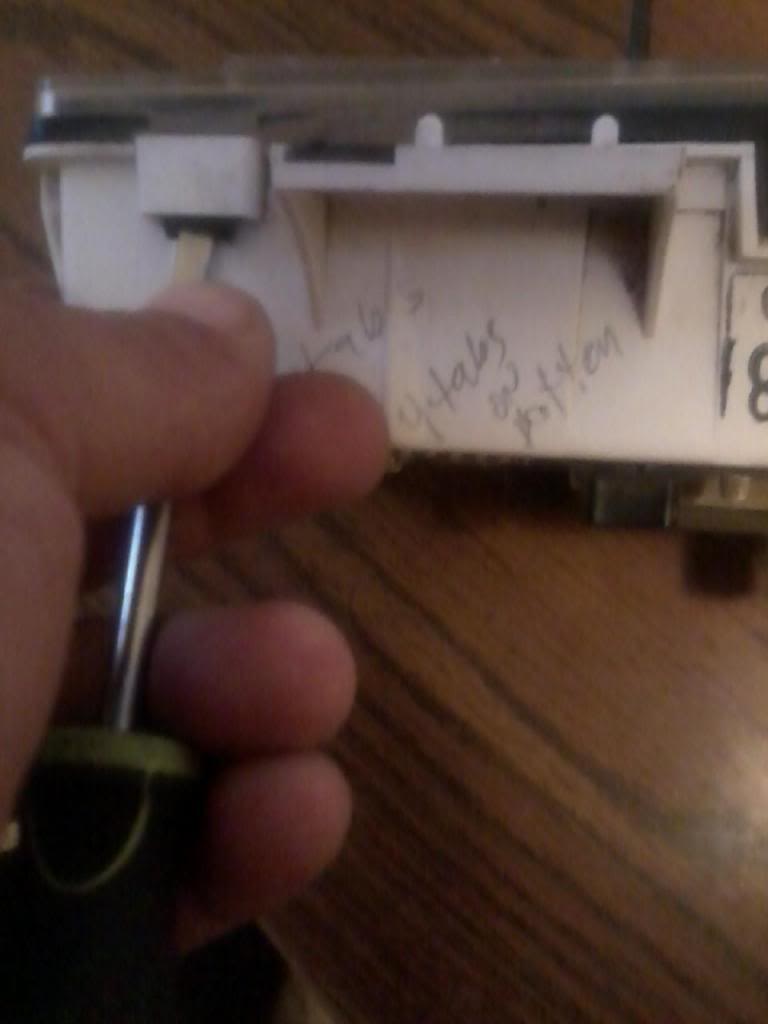
Remove this screw and the bracket faces forward and same for other side.

You have 4 tabs on top and 4 on bottom. I find it easier to start on one end and get the first one loose and then pry it slightly with a flat blade and then do the next tab. Same for the bottom.
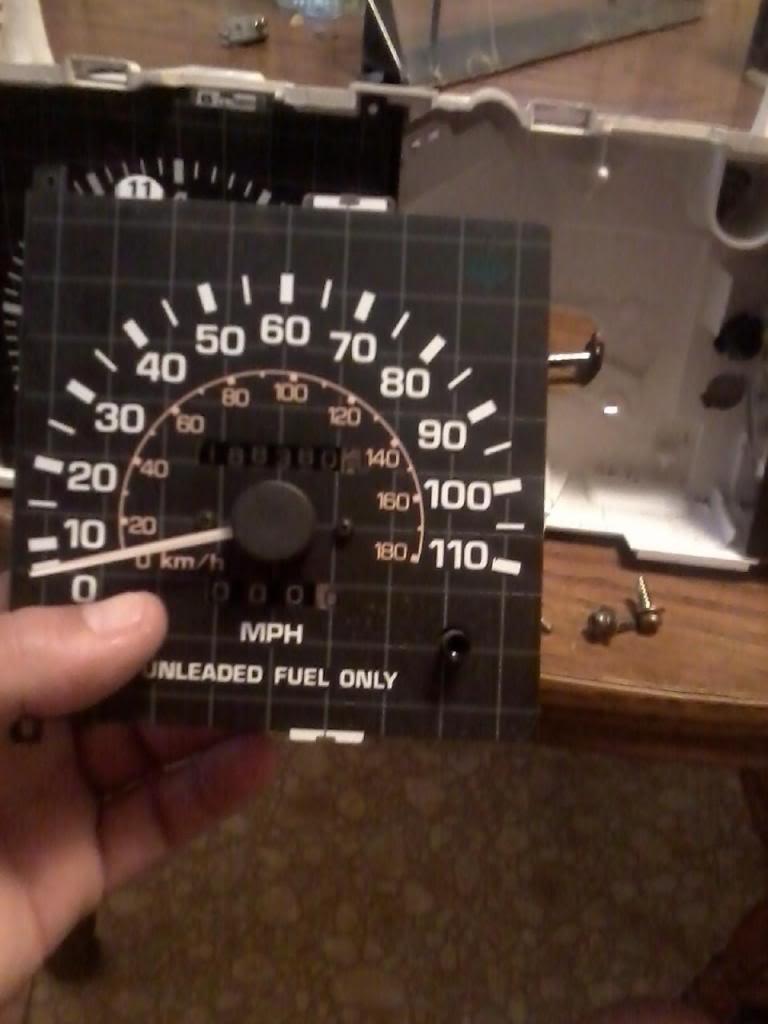
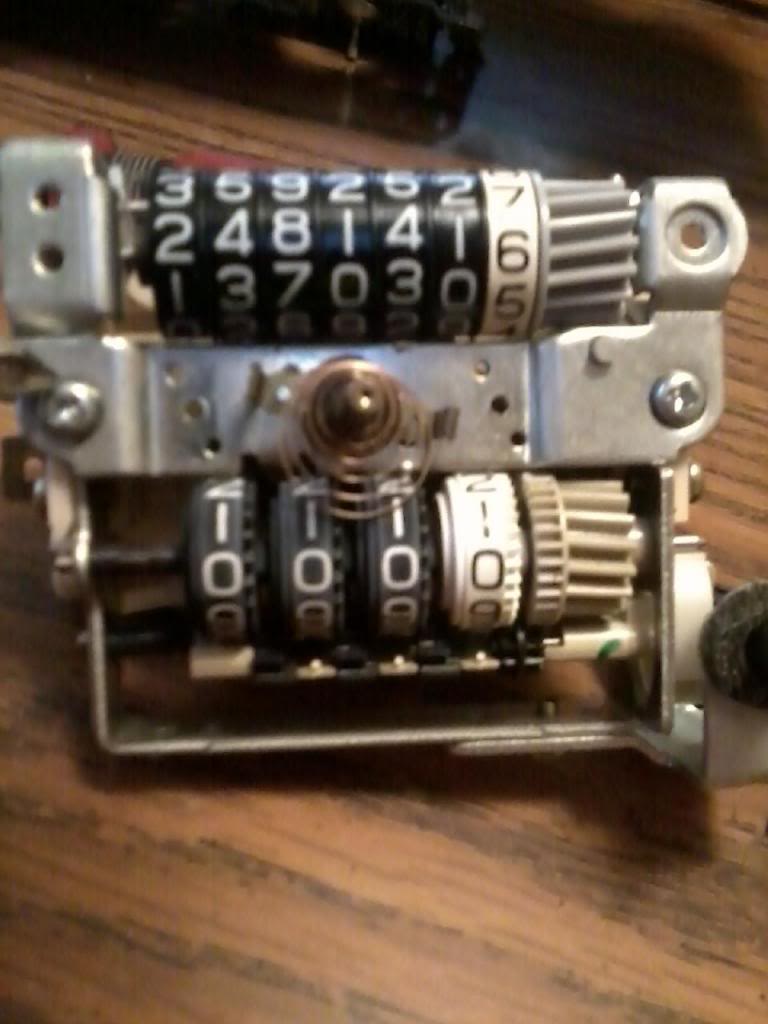
These 4 screws hold the Speedometer in the cluster. Will need to remove cluster to correct the mileage.
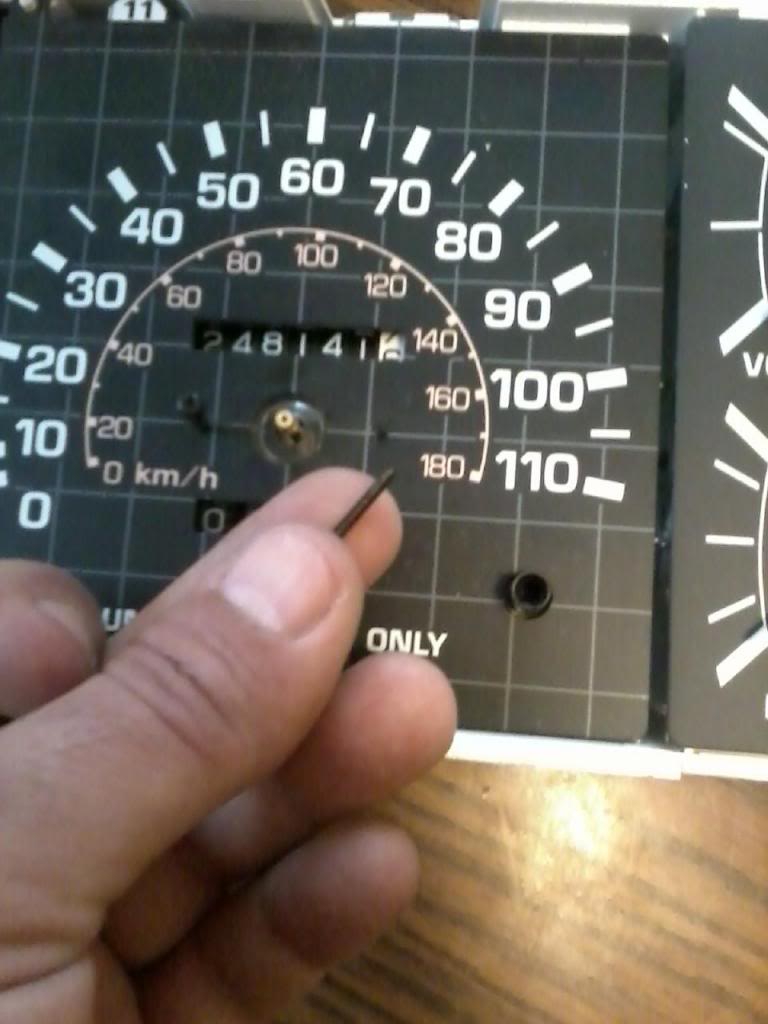
Here is whole assembly out. Also the Tripometer needle is taken out by spinning the whole handle to the left.
On this style of needle the round cover over the needle can and will pop off. It is just pushed back on.
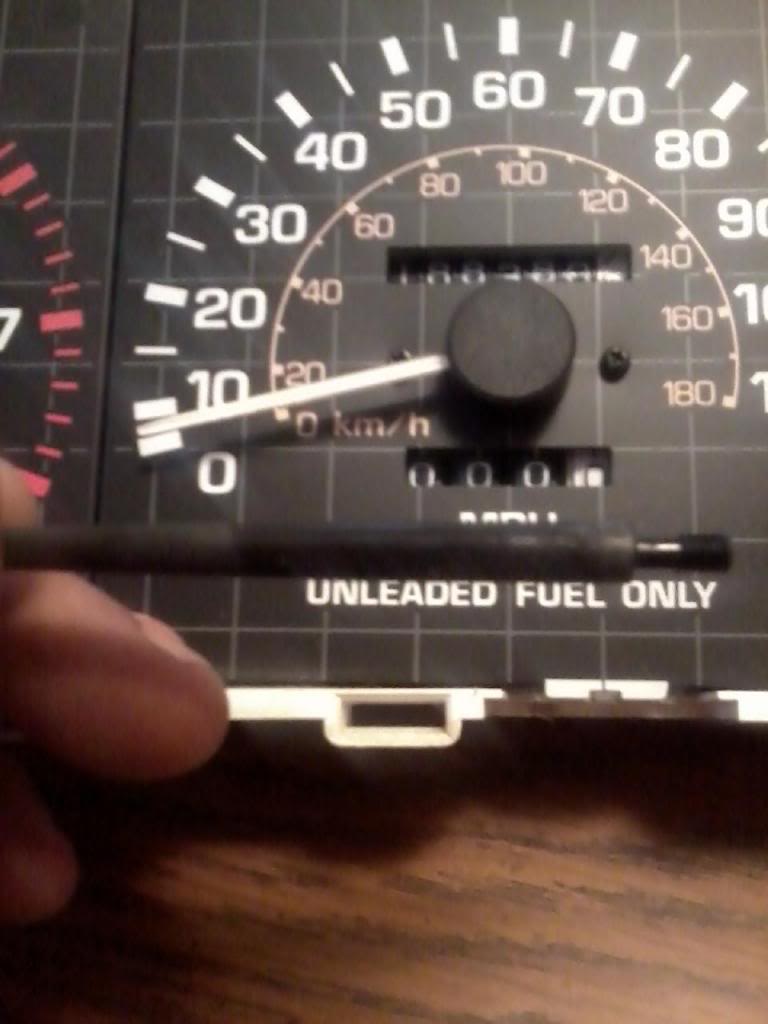
Here is cover I am talking about.
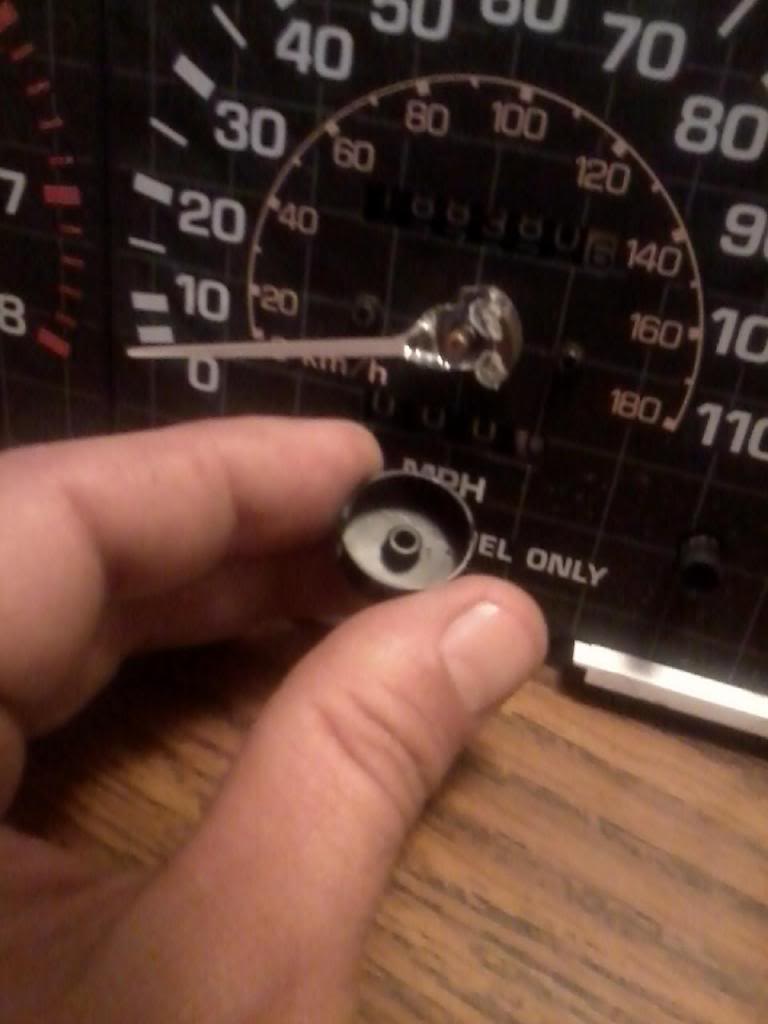
I loosen the two screws showing just a little to make it easier to correct the mileage. Start at the far right or the lowest number and work your way to the highest number and then retighten the screws.
Reinstall the plastic cover.
Then the faceplate and the two screws holding it.
FIXING CRACKED FACEPLATE
I got Toms SR5 guage from him yesterday and wanted to get the mileage corrected and the face plate is cracked. Figured it would be something that I could do inside the house. Besides the wife doesnt mind and care when she is at work and doesnt know I am doing it inside the house
Here is his SR5 Guage. Has three cracks in it. The clock below is one I got from him as well and will see if I can install it at a later time. I have seen a clock in a truck before and always thought that someone took it from another Toyota model and put it in. But Tom had this in a parts truck and now I am wondering if it wasnt an option. I seen the same clock as well. I figured that since the clock option was always by the heater control, Toyota wouldnt offer it elsewhere.
Cracked faceplate.
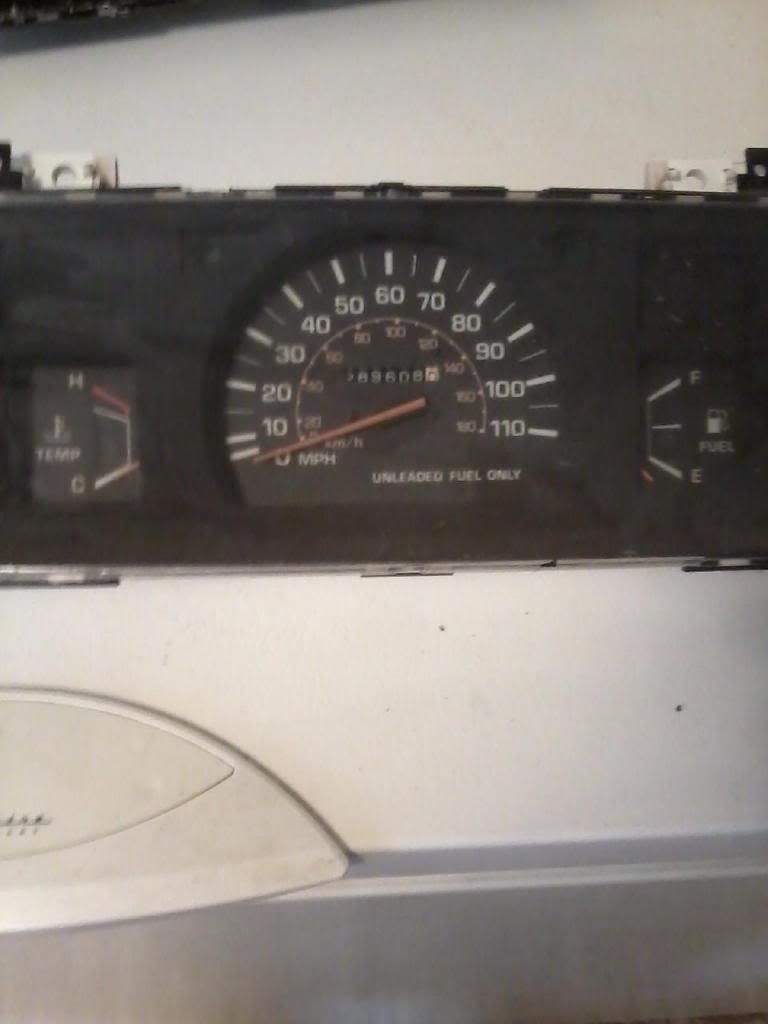
Standard guage.
The SR5 Guage just has two lines that run on the ends of it. I gently took a flat blade screwdriver and seperated the plastic from the black part on both covers. The SR5 plastic has a little rubber grommet and the hole for the tripometer is quite large. I just put the two covers on top each other and used the grommet as a guide and drilled the hole.
The two covers are stacked on top of each other with the SR5 on top. Doesnt look like it but it is there. I then drilled the hole and when I got the hole I did several test fits and seeing which way I needed to enlarge the hole for the tripometer handle to reconnect and have plenty of room to operate.
Here it is with the Standard Cover on a SR5 Gauge. I just used Super Glue to reseat the cover on. I also got the mileage corrected while working on the guage assembly. One set back is while trying to get the needle off, it broke. It was being stubborn. I worked it gently for 30 minutes and it still wouldnt come until SNAP. I am not worried. I do have another guage, but Jason is sending me one that is bad but the speedometer is good. One small setback.
On the SR5 Guages they will interchange with the non SR5 Guages. I have had some that the tachometer will not work, but all you need to do is to run a wire from the negative side of the coil to the backside of the guage. I will have to dig that picture up somewhere later today.
I prefer to use the top guage that just has horizontal lines. The needle will come off easily as the shaft is just smooth. The bottom guage has splines on its shaft and I have broken two of the needles in the past on the bottom guage. The needles are not interchangeable from one guage to another. I already tried that. I also tried taking two non SR5 guages needles to fix it and that wont work either.
If your friend is going to upgrade, try to get the top guage. Pull the needle off and then remove the two little black screws and then I work from left to right, or the largest numbers to the smallest, by holding the numbers and twisting the numbers to the correct mileage one row at a time. It can be difficult to get each one to turn, just have to be patient and persistant.
There is a difference between 4 cylinder and 6 cylinder guages. The tachometer is not set the same on them. There is a screw in the back of the tachometer on the top that needs to be adjusted if not using the correct guage. Either one can be made to work right.

This truck didnt come with the SR5 guage so I added it. If your truck is not Plug and Play like some are, you need to run a wire from the negative side of the coil to the little "p" to make the tach work.
Then what I did so as not to short out the electrical run beside it. I placed a piece of electrical tape over the little "p" and crimped a wire to the smallest connector that I could find.
I then ran a wire to the negative side of the coil, on a carburator coil it is a little different then a standard coil you are most used to seeing. This is a temporary connection til I can come up with a better connection for it later on.
I wanted to put my SR5 Guage in and got to looking at it and wanted it cleaner. Remove the tabs that screw the cluster to the dash to get the lense off.
SR5 Guage Swap info.. https://www.yotatech.com/forums/f116...06/index2.html
I used a lense cleaner to clean it up.
I am quite happy with the results. The label says to allow up to 24 hours for the lense coating to dry. Will have to wait and see final results. Either way I am stuck with it. I have it tilted to avoid a glare while taking the picture. No matter how hard I tried, just couldnt get a good pic without the glare.
SR5 Guage Swap
Here is the Guage. I will address the cracks later.

Remove this screw and the bracket faces forward and same for other side.

You have 4 tabs on top and 4 on bottom. I find it easier to start on one end and get the first one loose and then pry it slightly with a flat blade and then do the next tab. Same for the bottom.

These 4 screws hold the Speedometer in the cluster. Will need to remove cluster to correct the mileage.

Here is whole assembly out. Also the Tripometer needle is taken out by spinning the whole handle to the left.

On this style of needle the round cover over the needle can and will pop off. It is just pushed back on.

Here is cover I am talking about.

I loosen the two screws showing just a little to make it easier to correct the mileage. Start at the far right or the lowest number and work your way to the highest number and then retighten the screws.

Reinstall the plastic cover.

Then the faceplate and the two screws holding it.

FIXING CRACKED FACEPLATE
I got Toms SR5 guage from him yesterday and wanted to get the mileage corrected and the face plate is cracked. Figured it would be something that I could do inside the house. Besides the wife doesnt mind and care when she is at work and doesnt know I am doing it inside the house
Here is his SR5 Guage. Has three cracks in it. The clock below is one I got from him as well and will see if I can install it at a later time. I have seen a clock in a truck before and always thought that someone took it from another Toyota model and put it in. But Tom had this in a parts truck and now I am wondering if it wasnt an option. I seen the same clock as well. I figured that since the clock option was always by the heater control, Toyota wouldnt offer it elsewhere.
Cracked faceplate.
Standard guage.

The SR5 Guage just has two lines that run on the ends of it. I gently took a flat blade screwdriver and seperated the plastic from the black part on both covers. The SR5 plastic has a little rubber grommet and the hole for the tripometer is quite large. I just put the two covers on top each other and used the grommet as a guide and drilled the hole.

The two covers are stacked on top of each other with the SR5 on top. Doesnt look like it but it is there. I then drilled the hole and when I got the hole I did several test fits and seeing which way I needed to enlarge the hole for the tripometer handle to reconnect and have plenty of room to operate.

Here it is with the Standard Cover on a SR5 Gauge. I just used Super Glue to reseat the cover on. I also got the mileage corrected while working on the guage assembly. One set back is while trying to get the needle off, it broke. It was being stubborn. I worked it gently for 30 minutes and it still wouldnt come until SNAP. I am not worried. I do have another guage, but Jason is sending me one that is bad but the speedometer is good. One small setback.

Last edited by Terrys87; 09-14-2013 at 12:19 AM.
09-16-2013, 12:06 PM
#1455
Super Moderator
Staff
Thread Starter
iTrader: (1)
Join Date: Aug 2008
Location: Anderson Missouri
Posts: 11,788
Likes: 0
Received 25 Likes
on
22 Posts
I was getting supplies for bodywork today and the owners were renting an old shop and then moved to a new shop that they bought. I was their second customer, I didnt think they opened til 9 or I would of been the first customer. I get a T shirt out of the deal. I dont do much shopping in Joplin and sure enough one of the old places that I liked to do business with was a body supply shop that burnt down. I was glad to see a new business take it place.
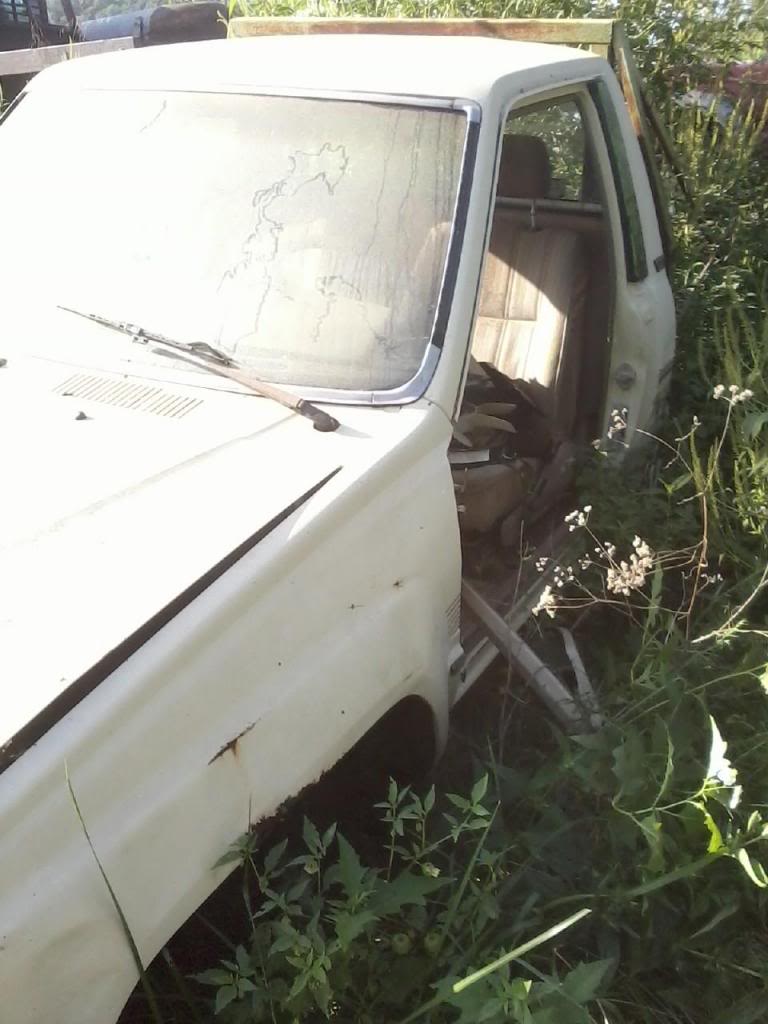
With the wife and kids back at school and work, that is going to free up alot of time to get back on to trucks. Got plenty that I want to do. While coming home from work, I seen this truck for sale. You just dont see these around here and was actually in great shape. If I didnt have my 85, I would get this one, but I like the idea of making mine the way that I want it and it will have a few more options on it when I do get it done.
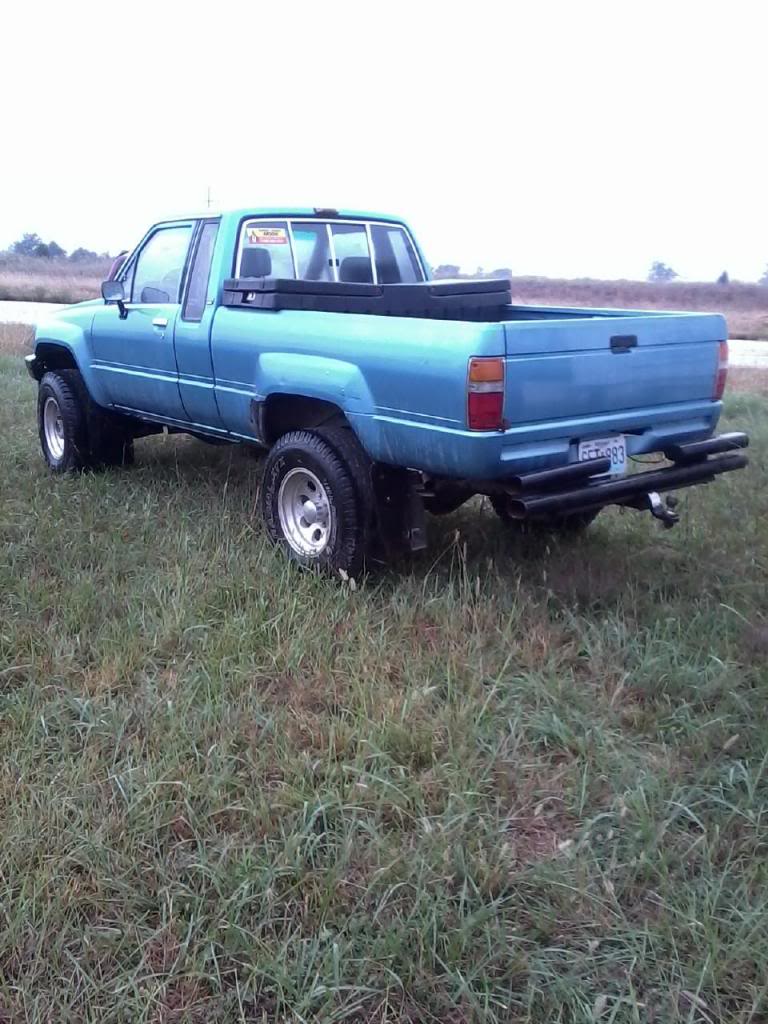
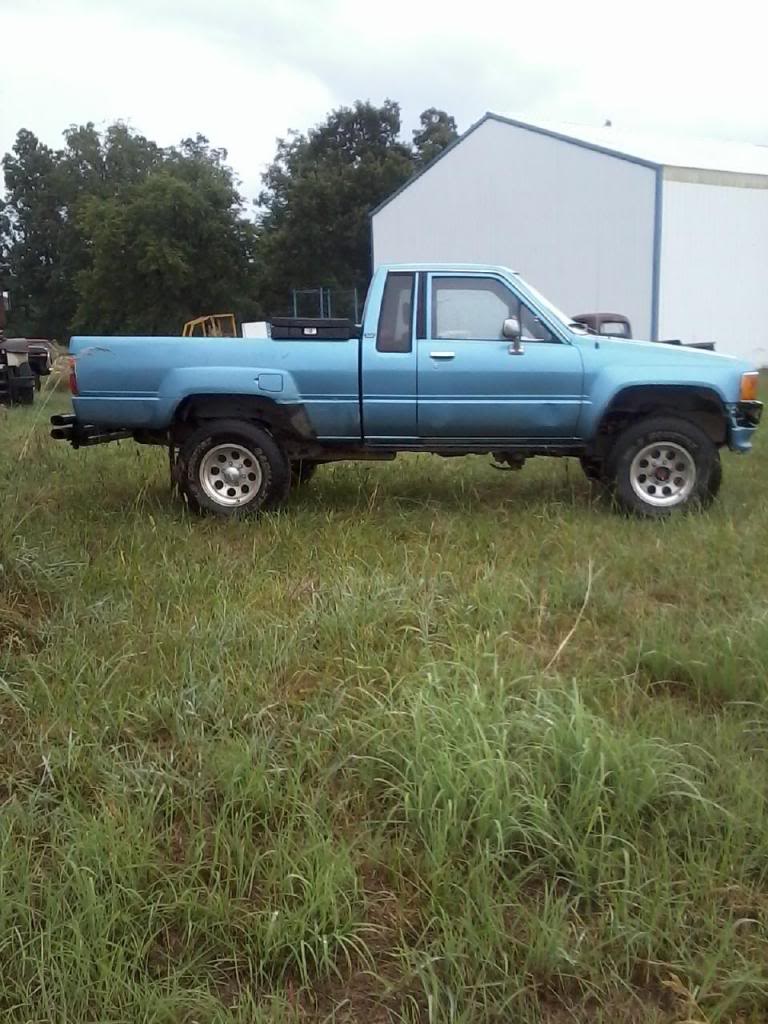
With the wife and kids back at school and work, that is going to free up alot of time to get back on to trucks. Got plenty that I want to do. While coming home from work, I seen this truck for sale. You just dont see these around here and was actually in great shape. If I didnt have my 85, I would get this one, but I like the idea of making mine the way that I want it and it will have a few more options on it when I do get it done.


 09-16-2013, 12:18 PM
#1456
Super Moderator
Staff
Thread Starter
iTrader: (1)
Join Date: Aug 2008
Location: Anderson Missouri
Posts: 11,788
Likes: 0
Received 25 Likes
on
22 Posts
Misty stubbed her toe and may have sprained,cracked, or broke her little toe so I have gotten to drive hers lately as the clutch is to much for her foot, that she is driving the 3rd gen as it is automatic. It has been a long time since I have got to drive the 88 that I forgot how much fun it is to drive hers.
I cant wait to get my 86 to run and drive as nice as hers. The motor has 312,000 miles on it and it still gets up and runs but you can tell it has lost some compression. She says it isnt as fast as it used to be and is saving for a new motor for her 88. Mine just needs shocks and some front end work and I think that is the difference. I will get it there. She is envious of my interior just because I have upholstered seats and she has seat covers. I have left it up to her to what she does to her runner and she keeps putting it on the back burner. I will eventually catch up to her and pass it build wise, slow and steady. I am getting closer to it.hehehe
I cant wait to get my 86 to run and drive as nice as hers. The motor has 312,000 miles on it and it still gets up and runs but you can tell it has lost some compression. She says it isnt as fast as it used to be and is saving for a new motor for her 88. Mine just needs shocks and some front end work and I think that is the difference. I will get it there. She is envious of my interior just because I have upholstered seats and she has seat covers. I have left it up to her to what she does to her runner and she keeps putting it on the back burner. I will eventually catch up to her and pass it build wise, slow and steady. I am getting closer to it.hehehe
Last edited by Terrys87; 09-16-2013 at 12:19 PM.
09-16-2013, 01:40 PM
#1457
Dang, I'm really sorry to hear that about her foot or should I say toe. That's terrible! I gotta say, a broken big toe is awfully painful! I wish her the best and I hope she heals quickly!
Wow on all the things you find man! Seriously, you're like the project Santa Claus! Lol. Sorry about all the exclamation points! Haha
Wow on all the things you find man! Seriously, you're like the project Santa Claus! Lol. Sorry about all the exclamation points! Haha
09-16-2013, 05:50 PM
#1459
Registered User
sorry to hear about mistys toe hope it gets better! My brother ripped his fingernail off today trying to help someone he never met before in his life to help unload a generator (thats what ya get tryin to help someone out!) By the way that extra cab looks nice!
09-17-2013, 10:25 AM
#1460
Super Moderator
Staff
Thread Starter
iTrader: (1)
Join Date: Aug 2008
Location: Anderson Missouri
Posts: 11,788
Likes: 0
Received 25 Likes
on
22 Posts
Hello Mark... Now she cant kick my butt for awhile, the swelling is going down. Can you post a pic of your exhaust manifold for me? I am thinking 87 is when they started the Air Injection but not 100% sure. I looked thru your build and couldnt see any good pics. I found some with the header but I want a pic of the factory manifold. Thanks
Hello cyberhorn...If I didnt have my 85 it would be mine. Misty has some intrest in it but I am not going to push her on it. It is a good solid truck and for around here it is nice. She is wanting a truck but I want to finish my trucks before starting another one for her.
Hello kornhuskerwizard... Things do go wrong with the best of intentions sometimes, just doesnt seem fair. I actually know where another 85 cab and chasis is that is enough for me to work with and an 87 SR5 that would be nice to have, but it is tied up in a divorce that is a one owner. I stumble across things occasionally.


