
Terrys87 86 4Runner with a 2nd Chance
 07-12-2013, 04:24 PM
#1321
Super Moderator
Staff
Thread Starter
iTrader: (1)
Join Date: Aug 2008
Location: Anderson Missouri
Posts: 11,788
Likes: 0
Received 25 Likes
on
22 Posts
Hello Cyberhorn.. I am going to come up with a quicker way of diagnosing injectors. The very first time I had to work on these a year ago, I was petrified. Not no more. I should be able to come up with some test and explantions to keep it simple. One reason I combined all of the previous post I had done for ease of finding it.
 07-13-2013, 06:54 AM
#1325
Super Moderator
Staff
Thread Starter
iTrader: (1)
Join Date: Aug 2008
Location: Anderson Missouri
Posts: 11,788
Likes: 0
Received 25 Likes
on
22 Posts
Thanks guys... It will probably be needed by me when it is needed.lol, It really was a good learning experience and I think it will help others.
Got the front piece of carpet in. I am letting it warm up in the sun and start getting the wrinkles out.
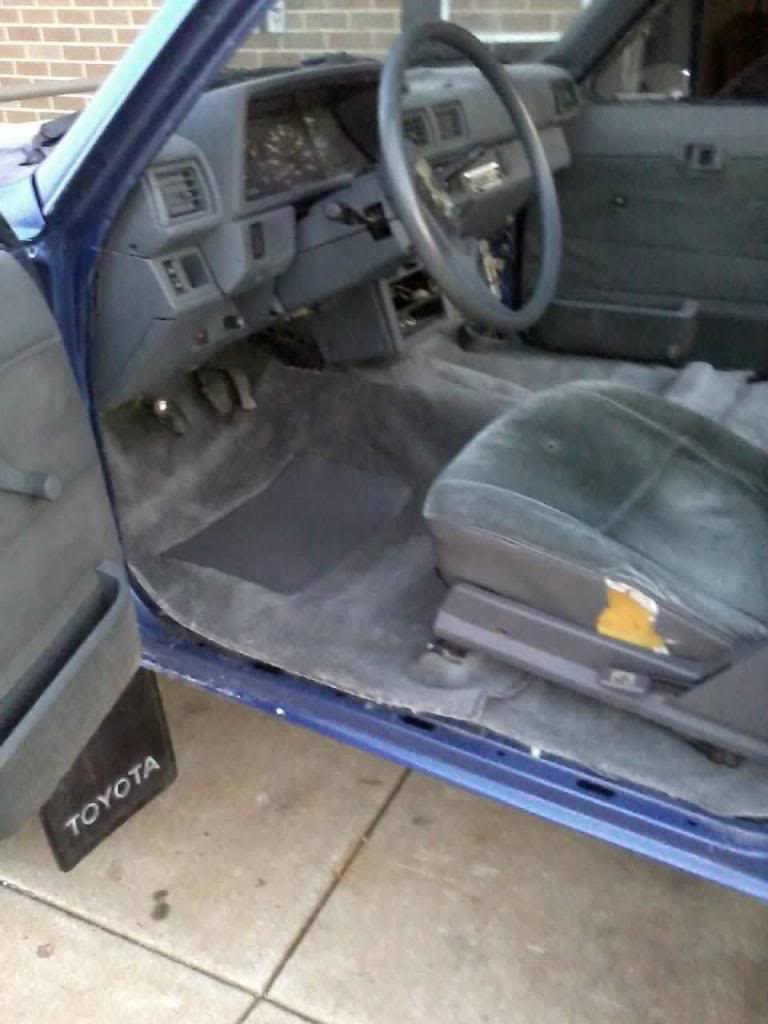
Also got the back piece working into shape. It is being a little more difficult. Got my drivers side mudflap back on, and the rear sealt belts on the sides installed, ( Thanks Tom) as mine was a Back Seat Delete Truck. The kids have only been in it around the block or off of the highways.

 07-13-2013, 04:26 PM
#1328
Super Moderator
Staff
Thread Starter
iTrader: (1)
Join Date: Aug 2008
Location: Anderson Missouri
Posts: 11,788
Likes: 0
Received 25 Likes
on
22 Posts
Hello Cyberhorn...I am not 100% positive, but it didnt have any seatbelts, but the other big sign and I kick myself in the butt for, is my rear panels did not have the cutout for the back seat latch, and I cut them the way the factory suggested. It is marked on the back side of where to cut them out. I looked all over my threads and photobucket account as I remember taking a picture of them and meant to post the back side but apparently didnt.
I didnt get the rear seat delete panel if that is what you are talking about. The rear panels were on the truck and looked as if they had never been removed until I got a hold of it.
Thanks Mark...The rear carpet is putting up a good fight. I used the same brand of carpet on Mistys truck and it went so much smoother. I think once I repaint my interior and get my new to me dash pad in, get everything buttoned up, it will make a huge difference. I am drawing a blank on the U seal and Frost King Deading. I did do the Peel and Seal for the back half and when I removed m old carpet seen I hadnt completed the fron half. That will be happening a little further down the road as I do want mine quite. Is that the same brand of stuff you used on yours?
Road noises or noise in general take the fun out of driving for me so I will chase down any rattles. I still have some rattles and noises I need to fix but until I get it buttoned up it is pointless at this stage of the game. I can start more sound deading again though. I will put it further down the list as this is bodywork season and still havent got a truck painted this year. Will be starting on that soon.
07-13-2013, 04:48 PM
#1329
Super Moderator
Staff
Thread Starter
iTrader: (1)
Join Date: Aug 2008
Location: Anderson Missouri
Posts: 11,788
Likes: 0
Received 25 Likes
on
22 Posts
I have a few things to finish up on my runner and this build will slow down for a little bit. I have a complete rebuild kit for the 85 motor and I will be getting the pistons that I need for it this week.
I am wanting to get both of the Extra Cabs ready for paint here soon. The 86 I am shooting for at the end of this coming week or maybe the next week. I still need to pull the cab off of my 85s frame and get it painted up and then start the bodywork on it in the next couple of weeks. The wiring was really hacked up and I was concerened about the injector circuit on it, but after what I have been thru on my 86, Pfftt!!! That doesnt even concern me now.lol
When I do get back to my runner, The Zuk Mod is in the works, getting interior paint, some more sound insulation, and just a lot of small detail work which is a real time killer but adds up when doing a build, like checking for loose bolts, interior and exterior adjustments. ( Like having a headlight in upside down and wondering why my light beams dont match, Doh!!!) just alot of odds and ends in general.
To do list:
Install my rear light divider light
Zuk
Interior
Shocks
Adjust milage on odometer
Install stereo
Fix rattle in front bumper filler pad
Install trailer light harness
Insulation
Detail Exterior
Everything on the tailgate
07-13-2013, 05:14 PM
#1330
Registered User
i look forward to the painting jobs terry and also the sound deadening to see the various tools an details i dont have the press an seal here but somethin called quick roof a lot like the press and seal
i dont want to strip my interior but will pull the seats carpets door panels to do the insulation/ sound deadening the side panels will be coming off when get into fixing the rear quarters THOSE will get extensive sound deadening and sealing to prevent any further rusting and to help the truck sound better ive driven it an get tire growl quite noticeably likely from the huge holes in the fenders
lol after the recent problem terry a few wire issues Pha nothing to worry bout! lol
again i look forward to it all
07-14-2013, 12:24 AM
#1331
Hey Terry, I wound up with useal from I believe Home Depot... or maybe it was Lowes. one of them carries the peel and seal brand and the other carries the u seal. To be honest, I really felt like the you seal had less odor.. It's not exactly the same I think in the layers that they use or something. anyway, I didn't completely carpet my entire interior with it... I did more of us wheel wells and strips of it down the side panels and then I completely covered it with the closed cell foam sticky back with aluminum outside stuff from Frost King, which is usually used for insulating ducts for air conditioning and heating( I believe this was at Lowes but I think in this case its at either store... maybe not as I seem to remember one of the stores having no clue what I was talking about. I just can't remember... You could easily find out online ) .... I've been in my panels several times and throughout this weather, getting over a hundred degrees at times and definitely hotter inside the truck... Not a single wiff of the stuff! It definitely helps with the temperature because before my hands would completely stalled just touching the fenders after an hour in the Sun... touching the fenders from the inside of course is what I mean. after doing that stuff I can hold my hand there as long as I want I could barely feel the heat. I'm sure it helps with sound insulation is well.
Please remind me, ASAP, with a text message about the coils? Sorry buddy, I just probably wouldn't remember with all I have going on.
Please remind me, ASAP, with a text message about the coils? Sorry buddy, I just probably wouldn't remember with all I have going on.
Last edited by ChefYota4x4; 07-14-2013 at 12:26 AM.
07-15-2013, 11:57 AM
#1332
Super Moderator
Staff
Thread Starter
iTrader: (1)
Join Date: Aug 2008
Location: Anderson Missouri
Posts: 11,788
Likes: 0
Received 25 Likes
on
22 Posts
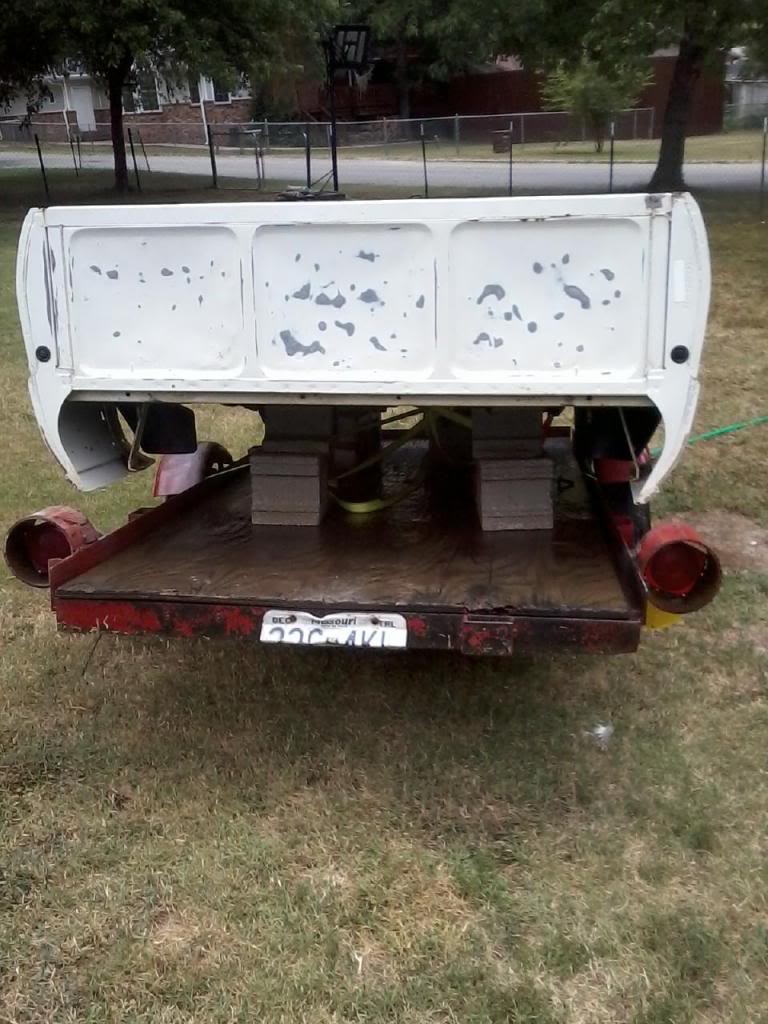
I will respond to your post later today. I have a few things to take care of. On the far side to the center is where I got alot of the pitted rust off. Any suggestions on how to get the rest off? It is going slow. Doesnt have to be perfect, but I want to get the build up off and a little smoother.

The outside squares were pushed toward the cab. I got them back in to the way they should be and alot of little dings a little flatter. Alot better then before. Scuffed and cleaned the underneath to keep dirt from blowing into the paint. High pressure air and water hose wont knock the dirt out, but you get a low pressure paint gun and it will come out in a hurry. The trailer has held alot of beds that got painted. It has been several different colors over the years. It gets a good cleaning as well. Might be painting this Friday if all goes well. Dont have much left left to finish on the body work. Still have a lot of block sanding left to do, but that will go quick. Strapped down and lifted to get underneath to paint as well. Gives a cleaner look in my opinion.

The outside squares were pushed toward the cab. I got them back in to the way they should be and alot of little dings a little flatter. Alot better then before. Scuffed and cleaned the underneath to keep dirt from blowing into the paint. High pressure air and water hose wont knock the dirt out, but you get a low pressure paint gun and it will come out in a hurry. The trailer has held alot of beds that got painted. It has been several different colors over the years. It gets a good cleaning as well. Might be painting this Friday if all goes well. Dont have much left left to finish on the body work. Still have a lot of block sanding left to do, but that will go quick. Strapped down and lifted to get underneath to paint as well. Gives a cleaner look in my opinion.
 07-16-2013, 12:34 AM
#1334
Super Moderator
Staff
Thread Starter
iTrader: (1)
Join Date: Aug 2008
Location: Anderson Missouri
Posts: 11,788
Likes: 0
Received 25 Likes
on
22 Posts
Hello Mark...I am going to check out that insulation. Just what I did to the 88 made a big difference in noise and I noticed it these past winters as the runner stays heated in cold weather. I got your text. I had the phone charging and didnt find it til later. Appreciate it.
Hello Cyberhorn...I am glad that I can do mechanical work and on a project or when it is out of the truck I dont mind it so much, but once it is driving, I dont care for it so much. I would much rather do bodywork. I always like to see how much different they look when done. You really dont get that effect doing mechanical work.
Pulling the interior out of these really isnt that bad at all but I have had the interior out of my runner so many times, i could probably do it blind folded. The sound deading makes a difference even with the top off. These trucks are loud without it. I didnt realize how much noise comes in thru the rear quarter panels.
LOL...I got the injectors down. I am going to add to a thread that I created. https://www.yotatech.com/forums/f116...t-22re-270857/ Try and make it a thread on what to look for and how to go about it. You can go by the book, but it tends to take you thru some unneccesary steps and I will try to point out some quick checks. I know when I first started on this circuit, it was a little confusing.
I always like to paint the inside of a bed. Even if it is just going to get used to haul things again. You see a truck that looks great and then the bed was not painted, it just gives a lesser look to me. Same way with the wheel wells. I seen a nice Chevy truck the other day but then you see the wheel wells and it doesnt take but a few moments. Also a good way to use up any excess paint.
Sandblasting is probably about the only way to get a bed like it should be. I will atleast get the scaly rust off of it. That is where a good roll in bed liner would give the bed a cleaner look.
07-16-2013, 02:00 AM
#1335
Registered User
im going to be looking at soda blasting harbor freight has a portable blaster that can be loaded with baking soda cheaply for blasting the SR5 rims ive got with their bad stains an corrosion then work on polishing them up on the machined areas painting the cast parts to keep them cleaner
its also safe on chrome an glass since the windshield trim is naturally stainless or chromed then painted im thinking of cleaning the failing black off them for chrome trim
its also safe on chrome an glass since the windshield trim is naturally stainless or chromed then painted im thinking of cleaning the failing black off them for chrome trim
07-16-2013, 09:32 AM
#1336
Peel & Seal, Thermo-Shield And Anti-Fatigue Mat
Hi guys,
I used this combo, and am very happy with it (Still need to do my front doors and tailgate):
Peel & Seal from Lowes - to deaden vibration of floor and wide metal panels. Need about 4 rolls.
1/8-inch Ensolite foam - on top of the Feel & seal. From RAMAudio. This will add insulation of remaining vibration from panel, seal off any outgassing from P&S, and aid in keeping P&S from peeling of panels. (I wish I had discovered Frost King like Mark did earlier.)
Thermo-Shield from Pep Boys - For thermal insulation on firewall, floor above exhaust pip, shifter cover and tranny hump. One roll was enough.
Anti-Fatigue Mat - To insulate (prevent remaining vibration of panels from going through), and to replace the stock fuzzy padding under carpet. For rear deck, and whole floor it took:
1) one diamond-plate patterned one from Sears, plus
2) A standard width, 3/8-inch thick yoga mat from Big Lots
I think yoga mat is denser and insulates sound better. So I used that on firewall, tranny hump and above exhaust pipe.
A final touch would be IF re-building engine, apply Thermo-shield on firewall inside engine compartment.
For a truck that's could get wet/muddy inside, I would use:
Same peel & seal on side panels
NO carpet,
Bed liner/sound-deadening paint on whole floor,
Anti-fatigue mats trimmed to shape for easy removal and replacement
Last edited by RAD4Runner; 07-16-2013 at 09:35 AM.
07-17-2013, 03:14 PM
#1337
Super Moderator
Staff
Thread Starter
iTrader: (1)
Join Date: Aug 2008
Location: Anderson Missouri
Posts: 11,788
Likes: 0
Received 25 Likes
on
22 Posts
Hello Cyberhorn...I would like to try that blaster that HF has. I am sure it would come in useful. Plain old drinking water will bleach the SR5 rims, I learned the hard way. I now have an SR5 rim as a spare,lol.
The trm around the windshield can cause rust and these trucks are known for leaking windshields. I had my windshield shop to put in the rubber gasket. It is a generic, one size fits all, but I like the results.
THanks RAD...I book marked this thread to myfavorites. I still need to do my doors and tailgate. I do like mine quite as it can be. I still need to to do the firewall on mine, and I will do it from the inside. I will be pulling the dash out of mine to get the interior pieces to match to the seats vinyl colors for painting and will see if I can get the firewall insulated a little better. My long term goal is to get the engine bay looking nice inside as well. I have bed liner the floors and that makes a difference as well. Thanks for the info.!!!
07-17-2013, 03:52 PM
#1338
Registered User
mines got a replacement windsheild via safelight i found that out when i took the a pillar trim off
i dont see any corrosion around it so im counting my blessings
i dont see any corrosion around it so im counting my blessings
07-17-2013, 05:02 PM
#1339
Super Moderator
Staff
Thread Starter
iTrader: (1)
Join Date: Aug 2008
Location: Anderson Missouri
Posts: 11,788
Likes: 0
Received 25 Likes
on
22 Posts
Been doing bodywork on the 86 Extra Cab but it pretty much looks the same. Hoping tomorrow to have all of the bodywrok completed and shoud be ready for paint if all goes as planned. Mostly just down to block sanding it and getting the finer sandpaper scratches out of the bodywork.
I have been working on my 86 Runner on my lunch break, I nearly have the carpet in, it is mostly just trimming in small pieces so as to get a clean fi. That is going slow and finally got my tail light divider in. I grab those out of the yard each time I come across and have a few laying around, just never got to putting it in.
Planning on getting some interior paint in the next couple of days to match the passenger area up and will worry about the trunk area later. Should be a fresh looking interior fairly quickly. It is a long ways from when my mouse friend was living in there and all the damages he did while it was his home. Might even get one of my new to me dash pads in and that is going to make a difference as well.
07-17-2013, 08:07 PM
#1340


