
Terrys87 86 4Runner with a 2nd Chance

 05-31-2013, 08:09 PM
#1203
Registered User
[url]http://t1.gstatic.com/images?q=tbn:ANd9GcSefheHnw3lYtxATj6H120GXj_H0qDfg MxmrEXWMXf7Xp0-mbzCWw[/url
^^^^^ (I tried to insert a pic of a church key. I give up. Click link)
A couple of days ago you asked about taking trim off the windshield. (I'm not sure why I don't always get timely notification on threads I've subscribed to.) Anyway, the square side of an old "church key" bottle opener is what they use to take the windshield trim off classic Mustangs. I don't know if it would work with a 4Runner but I thought I'd throw you the idea and let you do the research...
Last edited by Nervo19; 05-31-2013 at 08:17 PM.
06-02-2013, 02:39 PM
#1204
Super Moderator
Staff
Thread Starter
iTrader: (1)
Join Date: Aug 2008
Location: Anderson Missouri
Posts: 11,788
Likes: 0
Received 25 Likes
on
22 Posts
Thanks Jason..They will look better if I ever get the front ones put in. It shouldnt be much longer. I had to move the passenger release cable over from my old one to the new one.
Thanks junk4u..I hope to get the front ones in tomorrow if all goes well.
Hello Mark... There wont be much resistance at all if the core is clean when flushing it. To get the cooling fins cleaned you will need to pull the core. Since yours has AC, I really wouldnt suspect your cooling fins being clogged with dirt. The AC condenser will usually catch the dust. My brother truck doesnt have AC so the dust goes straight to the heater core. If you are getting the sloshing sound in your truck, I raise the front of the truck to where the top of my radiator is over shoulder high. I have a picture somewhere of it being raised high, just cant find it right now.
Hello secondhandsmoke..Welcome to Yotatech. We were all newbies at one time so dont worry about asking questions there. A basic tool set and a little patience and these trucks are easy to work on. On my 88 Runner thread >>> https://www.yotatech.com/forums/f199...thread-227399/ On the first page, I have listed alot of the common problems I have found that come along on these trucks that should help you quite a bit for some that arent not quite as easily found in the manual.
The 84-89 Runners are all basically the same with no major changes. Your 86 Runner surely isnt as bad as what I have started with and hopefully it will give you some confidence that you can get your truck to where you would like it to be. You will see alot of people mention the Factory Service Manual (FSM), but even in the FSM you will see that it is suggested for the more experinced mechanic. I have the FSM, Haynes, and a Chilton Manual. The Haynes is what I use most of the time. I suggest just getting one of those and not worry about a Chiltons or the FSM. I least like the Chiltons manual.
You will find these trucks are really easy to work on, mostly just need the confidence an ambition to jump right in and do it. We are lucky to have Yotatech and several other sources of information available to us and there are plenty of people that are willing to give you the encouragement and help you will need along the way.
Your tranny takes
API GL-4 SAE 75W90 or 80W90 gear oil.
Your Transfercase takes
API GL-4 or GL-5 SAE 75W90 gear oil.
There isnt a dipstick to fill these to a line with like your engine oil. What you do is fill them to the level of the Fill Plug until the oil runs out and that is when it is full enough.
I agree with Mark/Chef on the synthetic. Some like one and others like the other. My opinion is that they have gone several thousands of miles on non synthetic so should go another thousands of miles but synthetic could only help. Welcome to Yotatech again and looking forward to seeing some pics of your rig and maybe build thread on it.
Hello Nervo19... I took the truck to a windshield shop and watched how they do it. They did have some special tools and the guy that has done several windshields for me and he even has a truggle with them. One thing I have seen him have to order for mine and will need to order for this truck that I am working on as well is a little plastc clip set. These get so dry and brittle that they crack on removing the trim. The top and bottom are the most difficult. The sides just pop right off. I will post a picture of the clips when I have the trim reinstalled. My shop just charges $10 to remove the trim and the clip set is not much and will only charge $10 to install it. It is something I would suggest letting the pros do.
06-02-2013, 02:55 PM
#1205
Super Moderator
Staff
Thread Starter
iTrader: (1)
Join Date: Aug 2008
Location: Anderson Missouri
Posts: 11,788
Likes: 0
Received 25 Likes
on
22 Posts
I got my seat cable moved over and hope to get the front seats installed tomorrow. Been tied up on doing some repairs on the 3rd Gen runner and a few other things. I also want to try to get caught up on some others threads later tonite and see what all is getting done out there. I removed the cable and should of paid more attention when I removed it and installed it the next day and wasnt quite sure I got it on right. I will compare it to Misty truck and double check to see I did it right. Doh!!!
This part is right, will need to check the bottom part in the morning.
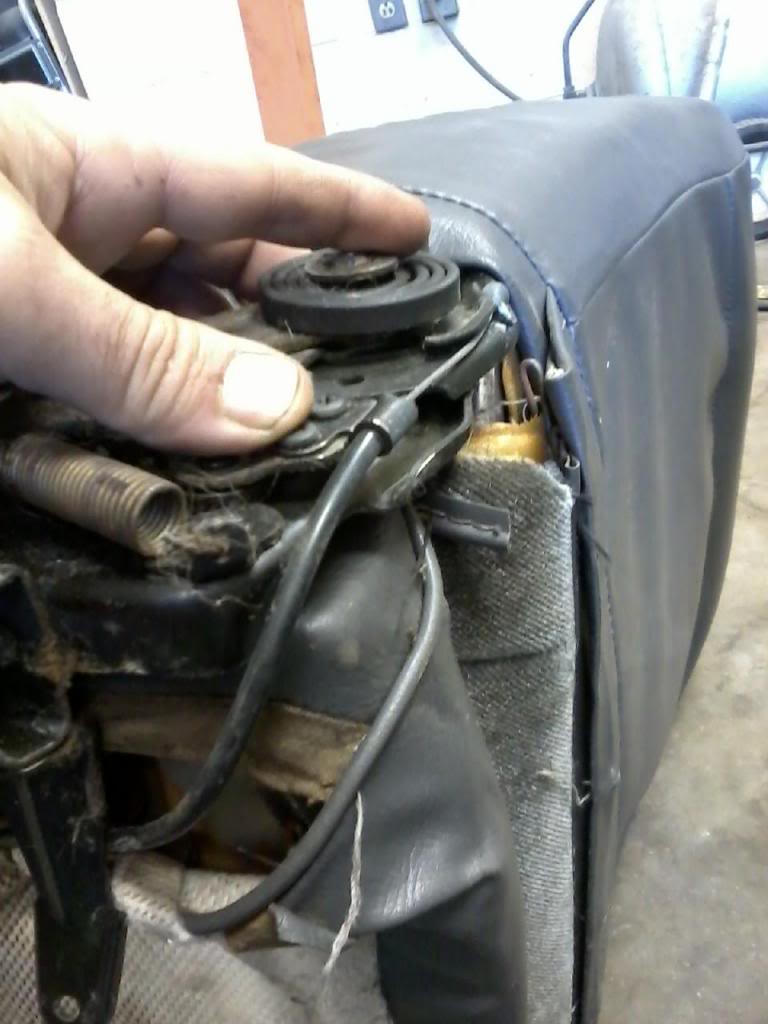
Here is the bottom side. I wasnt sure how it actually routed the cable.
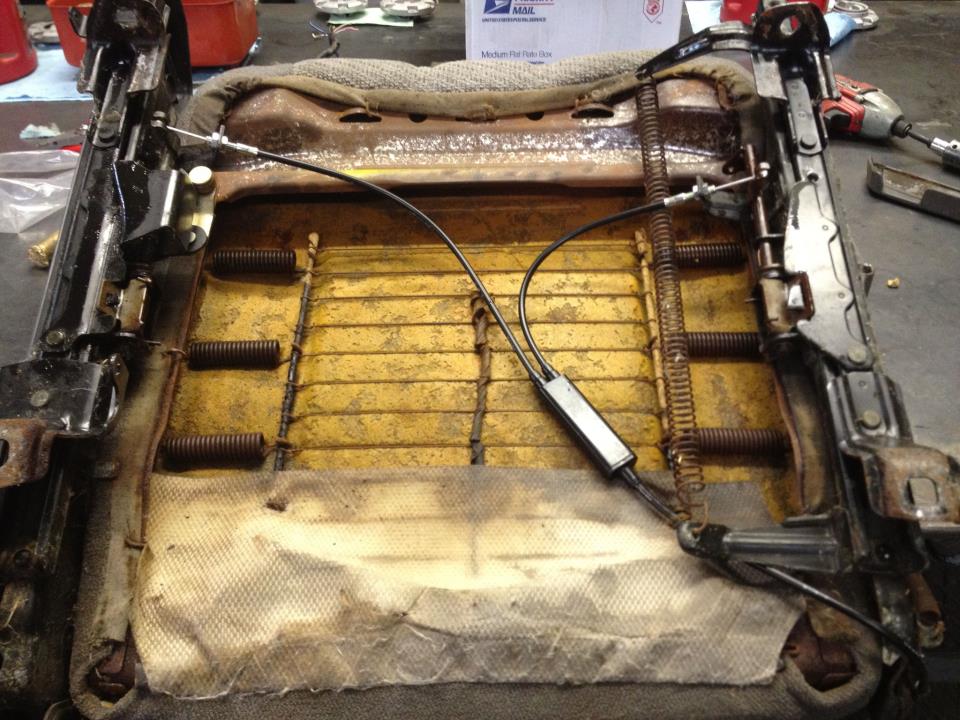
This part is right, will need to check the bottom part in the morning.

Here is the bottom side. I wasnt sure how it actually routed the cable.

Last edited by Terrys87; 06-03-2013 at 11:23 PM.
06-02-2013, 07:57 PM
#1206
Registered User
hey terry
box should be there soon sent out tues any questions give me a call ok
i need to repaint my windsheild trim its either black or going chrome from erosion of the paint
box should be there soon sent out tues any questions give me a call ok
i need to repaint my windsheild trim its either black or going chrome from erosion of the paint
06-03-2013, 12:47 AM
#1207
Super Moderator
Staff
Thread Starter
iTrader: (1)
Join Date: Aug 2008
Location: Anderson Missouri
Posts: 11,788
Likes: 0
Received 25 Likes
on
22 Posts
Hello cyberhorn..I got the Power Supply a couple of days ago and even as I am typing this out, I have some parts cooking. Just checked a few and they are looking great. Thanksss!!!
06-03-2013, 01:02 AM
#1208
Super Moderator
Staff
Thread Starter
iTrader: (1)
Join Date: Aug 2008
Location: Anderson Missouri
Posts: 11,788
Likes: 0
Received 25 Likes
on
22 Posts
I am doing cyberhorns electrolis cleaning and the parts are that I have put in are getting de rusted and is doing a great job of cleaning them up as well. I should of gotten some before pictures but they are coming along nicely.
I dont want to post any picture of my tank just yet as there are a few things I need to get to hold the metal pieces that the power supply hooks up to. I am using some zip ties and probably not the safest way to set it up so will post some pictures when I have it set up correctly. This is going to make cleaning parts so much easier and quicker when you have the parts done ahead of time with some planning.
I have to go to summer camp for the Guards on June 8th to the 24th and wont have a whole lot of access to the internet as I am sure they will keep us busy.
I also have a family member on her final days and that has been keeping me at the hospital for alot of time lately. We have been expecting it for sometime now and she is ready to go, it wont come as any suprise for us and she is tired of fighting it as well, just one of those things that comes along and have to take care of.
Things should settle back down here in a few more weeks and I have alot of things that I really want to get done. This past winter was along one and now we are getting alot of rain and everything else going on, maybe I can get back to doing what I enjoy doing. The 3rd Gen Runner has been getting alot of attention lately. On the way to the hospital, I got the dreaded metal to metal sound. Brake pads were worn and I suspected they were getting thin but was something I was holding off on doing. I really like how Toyota does their brakes. A quick and easy fix. They are some of the easiet brakes to pull a part and have the rotors turned and new pads on in no time at all.
06-03-2013, 01:14 AM
#1209
Registered User
just look up home zinc plating on youtube easy stuff great results
06-03-2013, 05:28 AM
#1210
Registered User
My god Terry. So let's see, Misty's truck done, the 86 4Runner done, plowing right on through the 85 Xtra Cab, and now you have your next victim already on deck. I'm not sure if there is anyone on Yotatech (at least the non-professionals) who has laid their hands on more Toyotas than you. It's really amazing to see the before and after on your trucks.
06-03-2013, 09:49 AM
#1211
I second Cory's sentiment! .....
I have been a lil down and mildly suffering from "stuckitus"..... so I hit ur thread here and now have received my proverbial dose of the toyotaticulitus-stuckitus anti-depressant, "Vitamin Terry"! Haha. Just awesome!
So what is it u think might be the cause of lack of quick-heat/hot-hot-hot heat?
And: you're thinking my sloshing is likely air trapped?
06-03-2013, 09:56 AM
#1212
Super Moderator
Staff
Thread Starter
iTrader: (1)
Join Date: Aug 2008
Location: Anderson Missouri
Posts: 11,788
Likes: 0
Received 25 Likes
on
22 Posts
Hello cyberhorn..I will have to look the plating up. Would be nice to get some great looks on some of these parts.
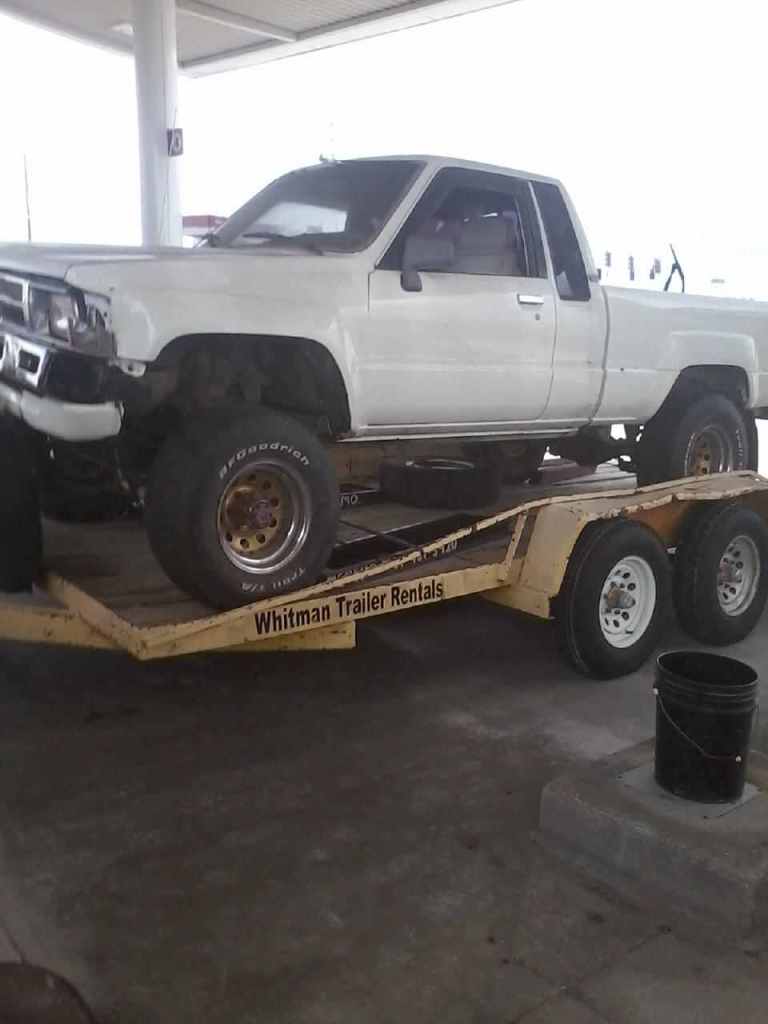
Thanks Cory...I appreciate the compliment. The Red Runner I have out back, I will fix it up as a nice base model at a later time as I have most of the parts to get it put back together, all I really need is a motor and a little time to work on it. I have a silver 86 Runner, a tan 86 extra cab, a 90 burgandy standard cab, to paint and a 92 red 2 wheel drive pickup that needs timing chain and front end replaced from a collision that is on the list as well to do that people are wanting to have done.
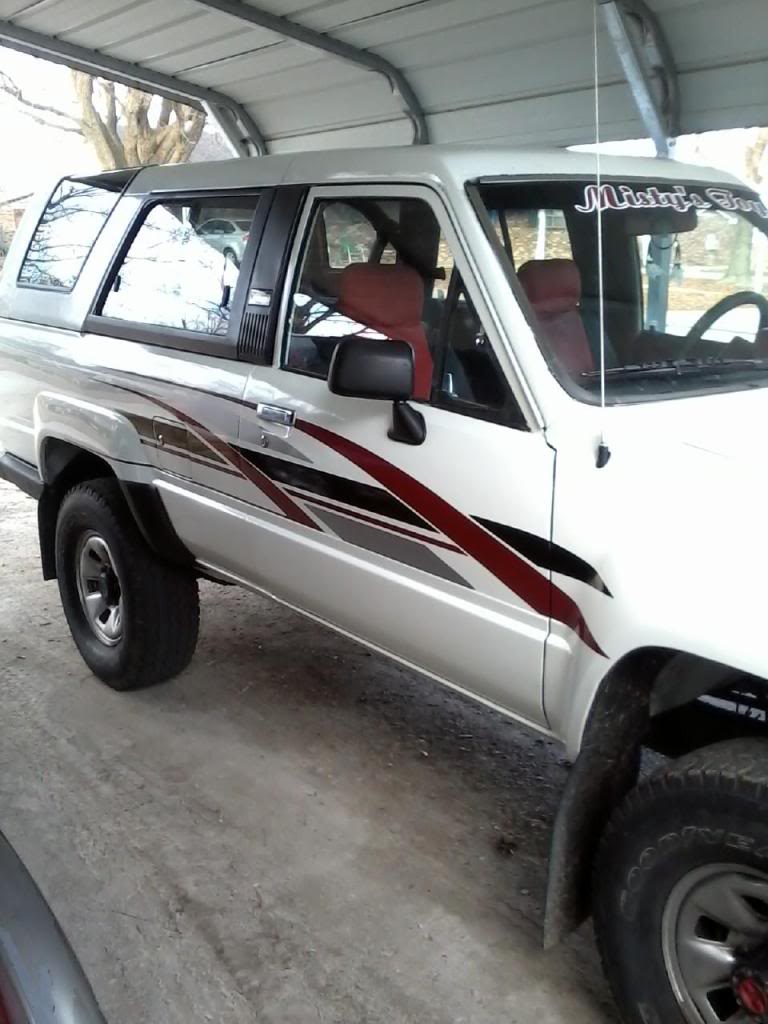
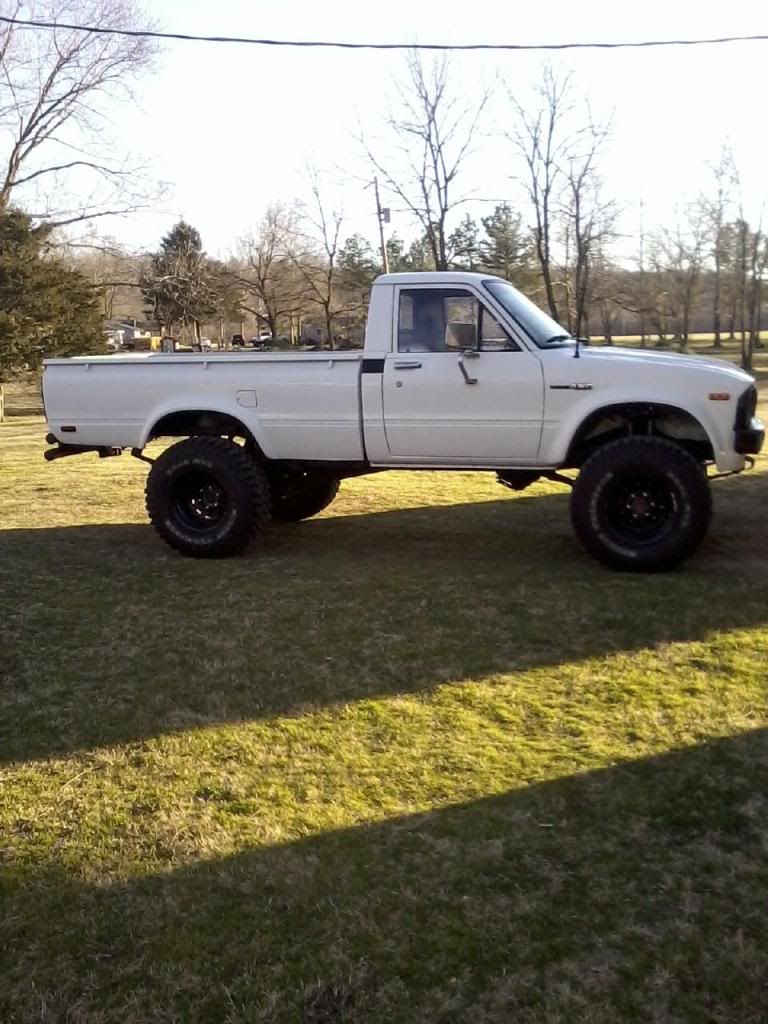
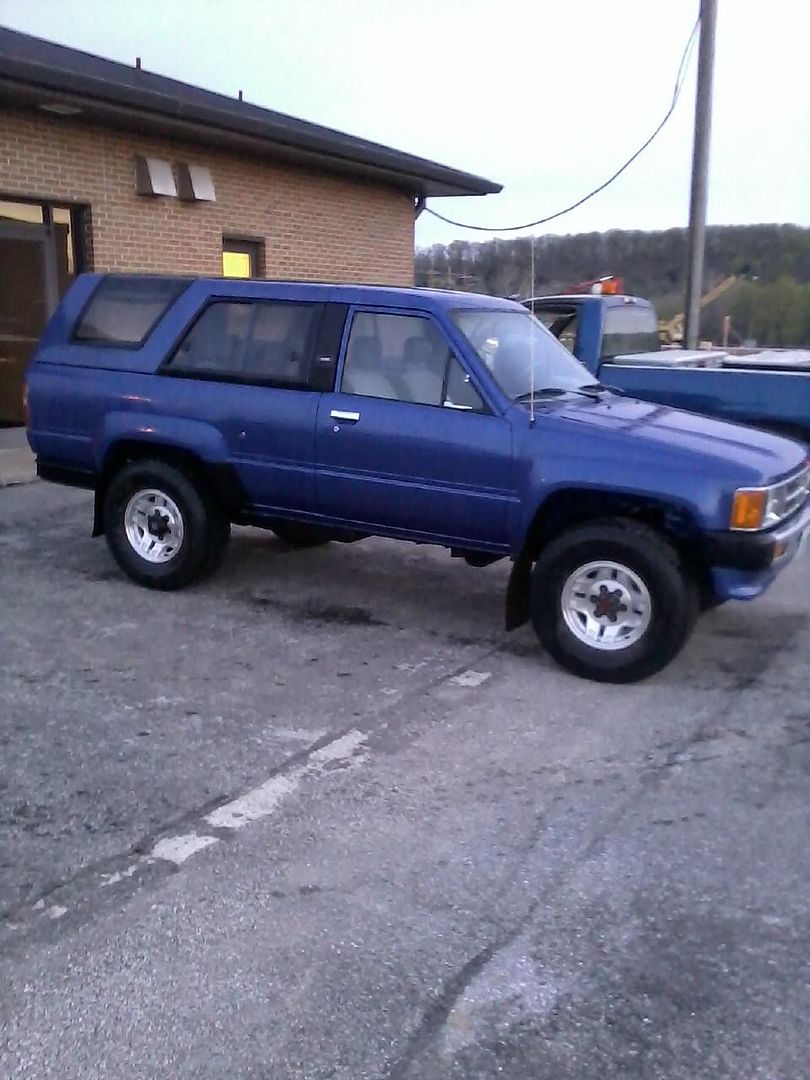
Here are the trucks that I have painted and most were in bad condition. There have been some new people to come to this thread so wanted to show them that eventually you can get one done. Post by post, each step is a little closer to being done. It doesnt happen overnite, just a slow steady pace.
Other trucks I have done. All were in worse shape then this one except for the two extended cabs and Jason had his truck in good shape when I helped him. Hunter still wanted to make a bet after seeing these and he has seen me work on most of these trucks.
Wifes truck.
3rd truck I did. Motor, SR5 guage, seats, paint.

2nd truck. Was abused and beaten. Motor and body work

Did the body work for a friend. It was rough.
1st truck. Frame swap, motor and SR5 guage

My other project that is nearing completion.Body work, interior, paint and motor work.
Jasons Truck that I helped on. https://www.yotatech.com/forums/f199...l#post51987044
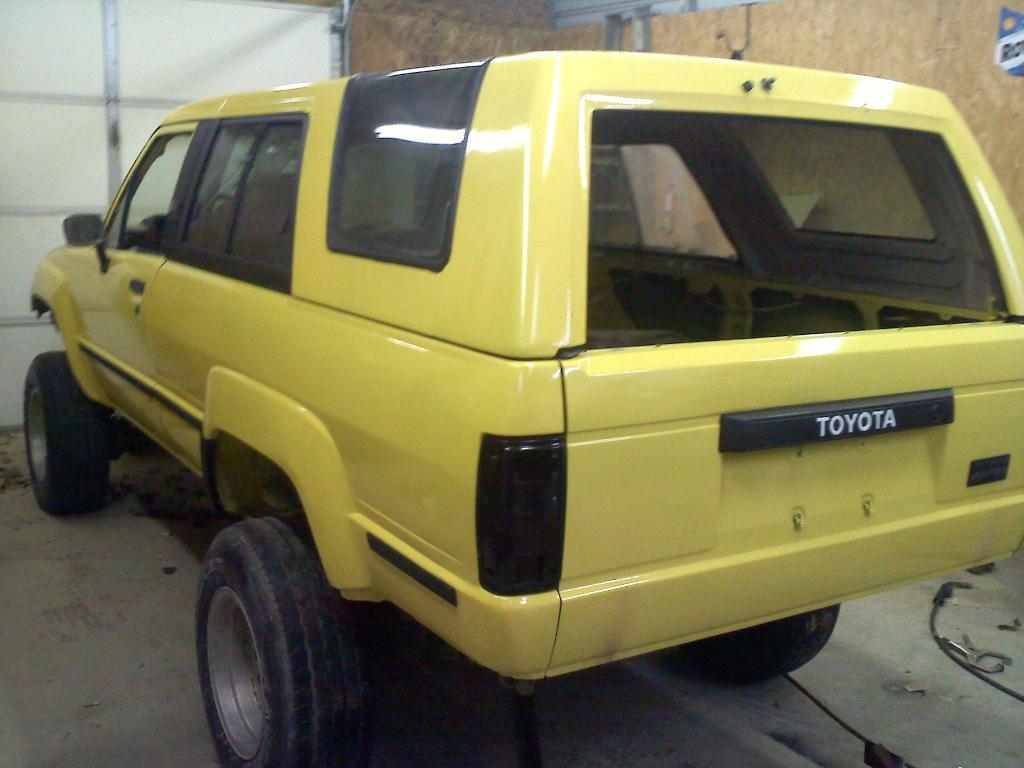
This is not my 85 but is a friends 86 that I am working on. Doing bodywork at this time.
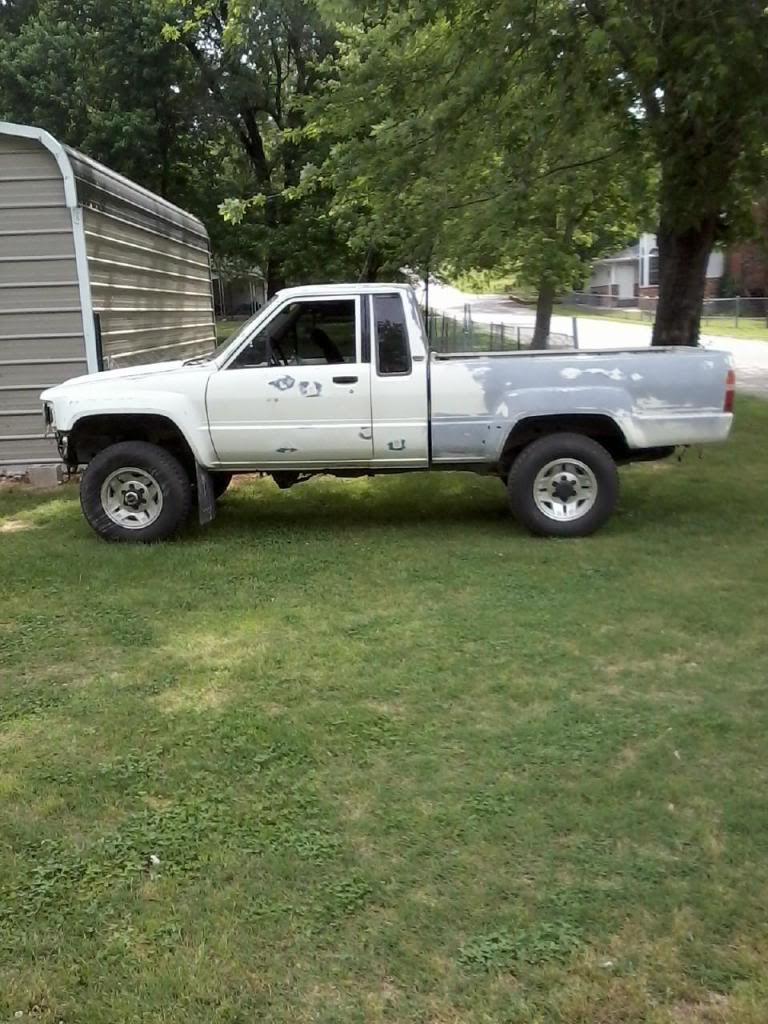
This is the truck I was building for myself until I found my 85 extra cab. Mostly body work and interior work. My brother bought it from me and it is further along then what it is showing.
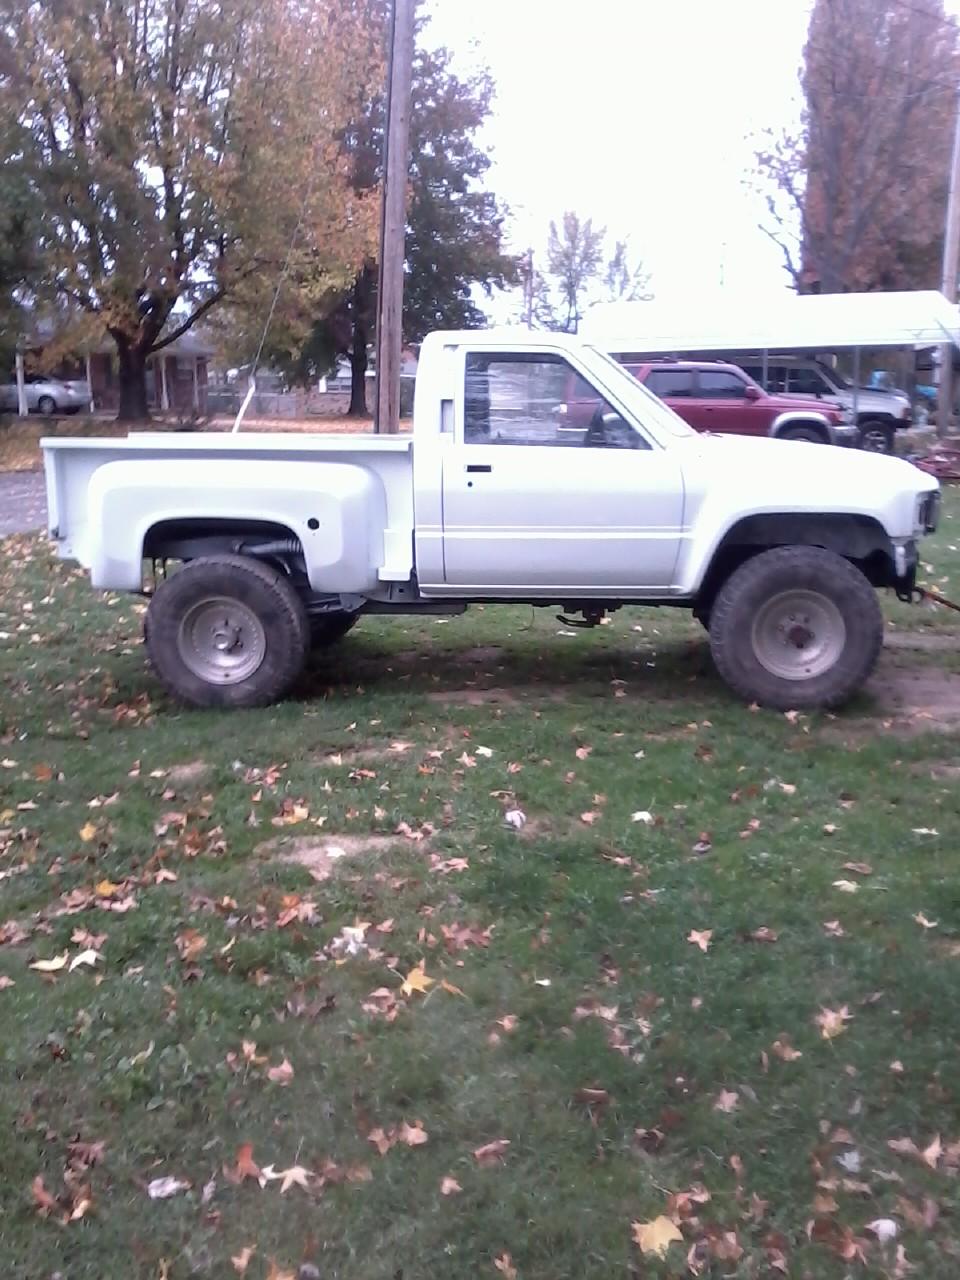
Here is my 85 that I am working on as well. Body and Frame is about all that is good on it. Everything else is in bad shape.
Thanks Cory...I appreciate the compliment. The Red Runner I have out back, I will fix it up as a nice base model at a later time as I have most of the parts to get it put back together, all I really need is a motor and a little time to work on it. I have a silver 86 Runner, a tan 86 extra cab, a 90 burgandy standard cab, to paint and a 92 red 2 wheel drive pickup that needs timing chain and front end replaced from a collision that is on the list as well to do that people are wanting to have done.
Here are the trucks that I have painted and most were in bad condition. There have been some new people to come to this thread so wanted to show them that eventually you can get one done. Post by post, each step is a little closer to being done. It doesnt happen overnite, just a slow steady pace.
Other trucks I have done. All were in worse shape then this one except for the two extended cabs and Jason had his truck in good shape when I helped him. Hunter still wanted to make a bet after seeing these and he has seen me work on most of these trucks.
Wifes truck.
3rd truck I did. Motor, SR5 guage, seats, paint.
2nd truck. Was abused and beaten. Motor and body work
Did the body work for a friend. It was rough.
1st truck. Frame swap, motor and SR5 guage
My other project that is nearing completion.Body work, interior, paint and motor work.

Jasons Truck that I helped on. https://www.yotatech.com/forums/f199...l#post51987044
This is not my 85 but is a friends 86 that I am working on. Doing bodywork at this time.

This is the truck I was building for myself until I found my 85 extra cab. Mostly body work and interior work. My brother bought it from me and it is further along then what it is showing.
Here is my 85 that I am working on as well. Body and Frame is about all that is good on it. Everything else is in bad shape.
06-03-2013, 10:03 AM
#1213
Super Moderator
Staff
Thread Starter
iTrader: (1)
Join Date: Aug 2008
Location: Anderson Missouri
Posts: 11,788
Likes: 0
Received 25 Likes
on
22 Posts
I got my seats in. I will need to pull the whole interior for the 50th and last time as I want to get some interior paint to match the vinyl on the seats. I am not going to install all of the trim until I get new carpet on order which will probably be in the next couple of weeks.
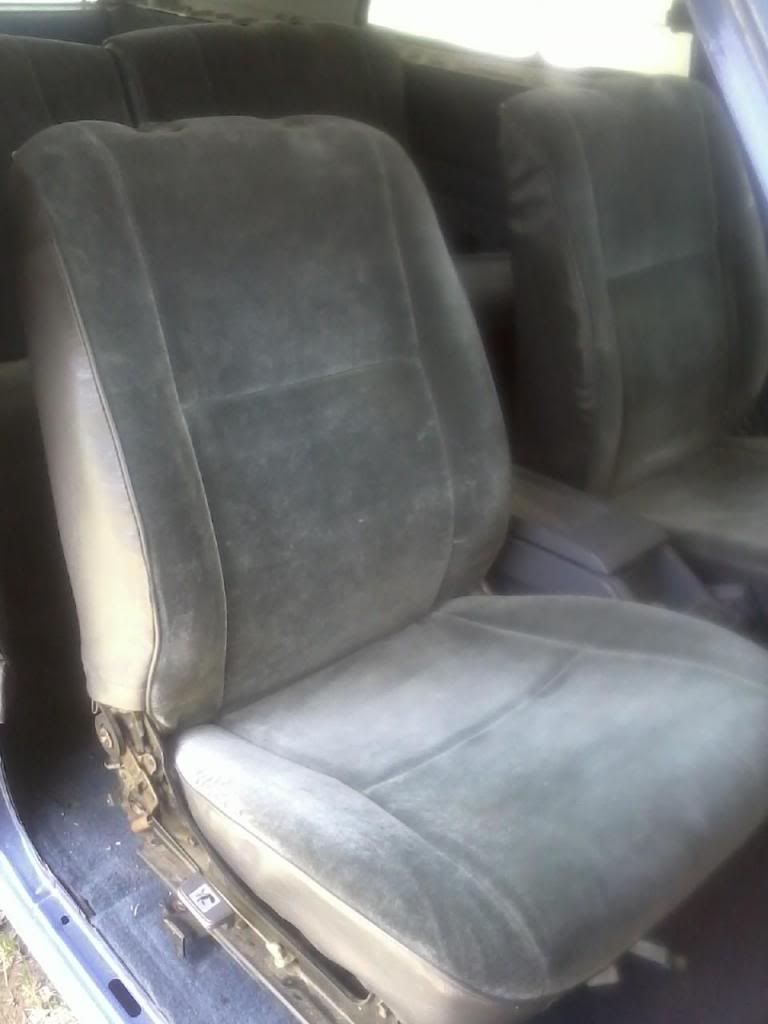
I will install gray carpet when I do. This carpet is beat down and even if I was going to stay with blue, I would replace it. I will keep this carpet as I am sure there will be another truck in my future that will need some descent blue carpet. Making due with what I have. The old bucket seats that I did have will be going into the red runner as they are gray as its interior. If nothing else they are in good enough condition to be reupholstered.
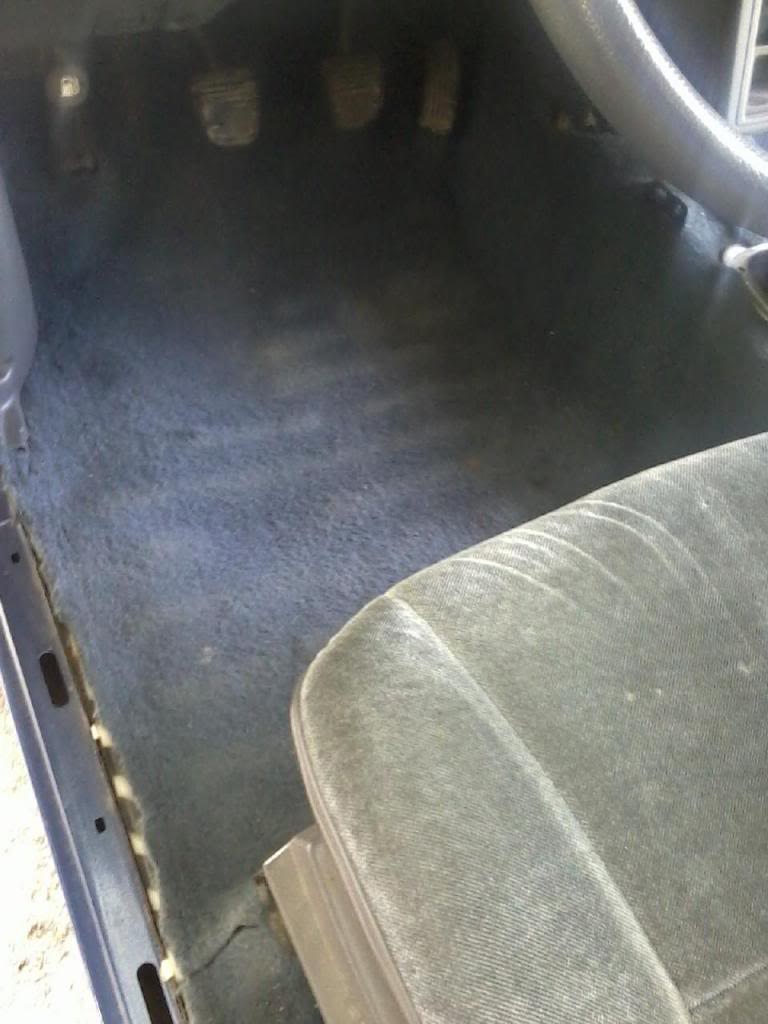

I will install gray carpet when I do. This carpet is beat down and even if I was going to stay with blue, I would replace it. I will keep this carpet as I am sure there will be another truck in my future that will need some descent blue carpet. Making due with what I have. The old bucket seats that I did have will be going into the red runner as they are gray as its interior. If nothing else they are in good enough condition to be reupholstered.
 06-03-2013, 10:16 AM
#1214
Super Moderator
Staff
Thread Starter
iTrader: (1)
Join Date: Aug 2008
Location: Anderson Missouri
Posts: 11,788
Likes: 0
Received 25 Likes
on
22 Posts
Hello Nervo19..I was able to get the picture to my photobucket account but I cant find a way to get to the IMG part as well. I appreciate the picture. I wasnt able to do it on my laptop at work.
http://t1.gstatic.com/images?q=tbn:A...MXf7Xp0-mbzCWw
Hello Mark...The sloshing sound I would say it just needs the front lifted way high. I will see if I can find a picture of how high I have mine lifted and I let it run for 15- 30 minutes to let it cycle the thermostat several times.
If it still isnt getting hot, I would suspect that your cooling fins are just loaded with dirt if your thermostat is operating correctly. Are the hoses in the engine compartment on the firewall extremely hot? If so and everything else is working properly, it definietly suspect the heater core. I know you upgraded to the 2nd Gen valve and that would be about the only thing left.
Maybe your blower door isnt functioning properly as well. I would check that before pulling the heater core. It isnt the nightmare that it is let on to be, but I can say that just because I have done it numerous times. I do remember the first time I got into removing the dash how long it did take me to do it. But since then I have tried to make a few videos and steps to take the fear out of it. I think if I would of had that information available to me it would not have taken me so long to get the dash apart.
06-03-2013, 10:29 AM
#1215
Super Moderator
Staff
Thread Starter
iTrader: (1)
Join Date: Aug 2008
Location: Anderson Missouri
Posts: 11,788
Likes: 0
Received 25 Likes
on
22 Posts
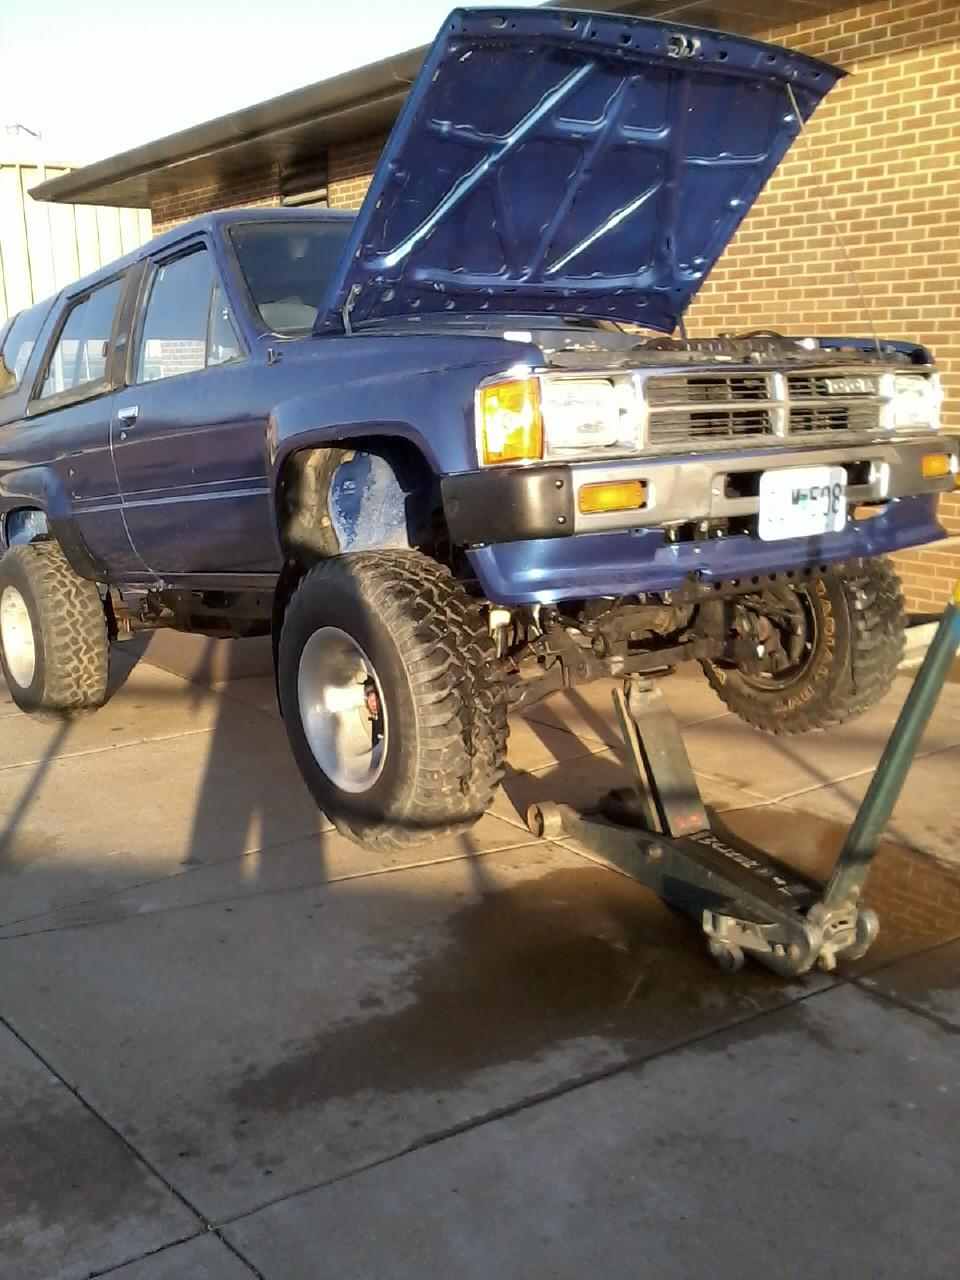
Hello Mark...The picture may not show it as well, but this floor jack I got will raise the topr of my trucks radiator up to my chin. I am 6 feet tall it is high. I let it run for up to 30 minutes to cycle the thermostat several times. If you got a air bubble trapped inside, you need to be careful. The first couple of cycles the water wont be to hot, after the 3rd one or so, it will be steaming and can burn you.
It wont give a warning when it is going to open the thermostat. You will know when it opens as it will blow alot of water out. After it quits blowing water, I just add more antifreeze back into it. I use a funnel to add it while it is running as the fan will blow the antifreeze around without using a funnel. You will have about 5 minutes or so to add the antifreeze to it before it cycles again.
I wear safety glasses and check that I can see the antifreeze in the radiator while it is running just incase it was to cycle and I am not expecting it to. All of this time leave the radiator cap off of it so it can cycle and let the air and water that is trapping the air out of the radiator out. What I am calling antifreeze is probably better off being called coolant, but you dont have to worry about freezing in southern California, lucky you
Here is how I burp the cooling system. It gets alot of the air out. I raise it in the air as high as I can get it and let the thermostat cycle 3 or 4 times or about 15 minutes or so. A steep incline works well too.
Last edited by Terrys87; 06-03-2013 at 10:30 AM.
 06-03-2013, 07:53 PM
#1217
Nice,....yeah, I've always done the same. .... but I think I've had a tiny leak for a while now. I don't think it leaks fluid as much as it pulls in the air. I can't be sure of this for us I do see a little residue of crystallized coolant around that weird lower clamp... The one going to the hose that is furthest to the driver side that one's up in the heater core.
I have all new hoses as well as the 2nd Gen heater control valve... But I never changed either over the last few months, which I did plan to do and which is why we suggested that. I'm going to have to get on that as I need to start fishing for that gremlin that causes that rough idle that warm restarts after sitting little while. Oh, my thermostat is Toyota and is probably around 8000 miles old.
Thanks for putting all that down for me buddy!... You da man!
06-03-2013, 10:41 PM
#1218
Super Moderator
Staff
Thread Starter
iTrader: (1)
Join Date: Aug 2008
Location: Anderson Missouri
Posts: 11,788
Likes: 0
Received 25 Likes
on
22 Posts
Your welcome secondhandsmoke.
Hello Mark...I didnt quiet understand which hose you are talking about as far as the clamp. But I would suspect the crystalized fluid you are talking about. The clamps that connect the hose to the heater core, which I dont think you have seen unless it was in a junk yard, those are some cheezy clamps. Those are a poor design. If you do get into changing the heater core, let me know and I will post some pics of those little pain in the rear C-clips I am talking about. Those you will want a heads up on. I wish I had known the first time about them when I changed my first heater core.
Hello Mark...I didnt quiet understand which hose you are talking about as far as the clamp. But I would suspect the crystalized fluid you are talking about. The clamps that connect the hose to the heater core, which I dont think you have seen unless it was in a junk yard, those are some cheezy clamps. Those are a poor design. If you do get into changing the heater core, let me know and I will post some pics of those little pain in the rear C-clips I am talking about. Those you will want a heads up on. I wish I had known the first time about them when I changed my first heater core.
06-03-2013, 10:58 PM
#1219
Super Moderator
Staff
Thread Starter
iTrader: (1)
Join Date: Aug 2008
Location: Anderson Missouri
Posts: 11,788
Likes: 0
Received 25 Likes
on
22 Posts
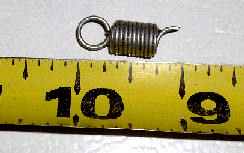
I know this is a fairly common problem and I have been looking all over the internet looking for a solution to it. ( It would take me a month to find the time of day on the internet,lol) On my 85s drivers inside door handle and on Mistys Passenger door front handle, it will not open the door. On Mistys if you use the rear door handle it will open. I have seen this problem on trucks in the bone yard and a friend of mine has seen this problem several times as well.
Suprisingly, I dont see it on any of the Toyota sites and here on Yotatech as well. It is like the inside door handles are not pulling the rod far enough to release the latch. I am suspecting that maybe one of the plastic clips that connects the door rods is just so far worn that it cant release.
With the door panel off. I can pull the rod forward to release the latch or open it from the outside. This is something I plan on seeing if I can find the fix for.
Ebay link for clips.>> http://www.ebay.com/sch/Car-Truck-Pa...p2045653.m1774
Here is one of the clips I am suspecting to be worn down. Even though it is electric, the clip is similar.
http://api.viglink.com/api/click?for...37032840973610
Possibly a spring, but I doubt it, it might help someone else on their door problem later on down the road so will add it to my Fix It page later on.
is it a small spring on the latch mechanism that broke? from what you are describing, that is the problem i experienced a while back. i rigged up a pull wire to actuate the mechanism until i was able to get a new spring. ill try and attach a pic of the offending little beastie.


Last edited by Terrys87; 06-03-2013 at 11:51 PM.
06-03-2013, 11:04 PM
#1220
Its the weird clamp where the tiny leak is, below the plastic line tap/flush kit piece in the pic. Its like a round clamp with a perpendicular rod that tightens the strip?
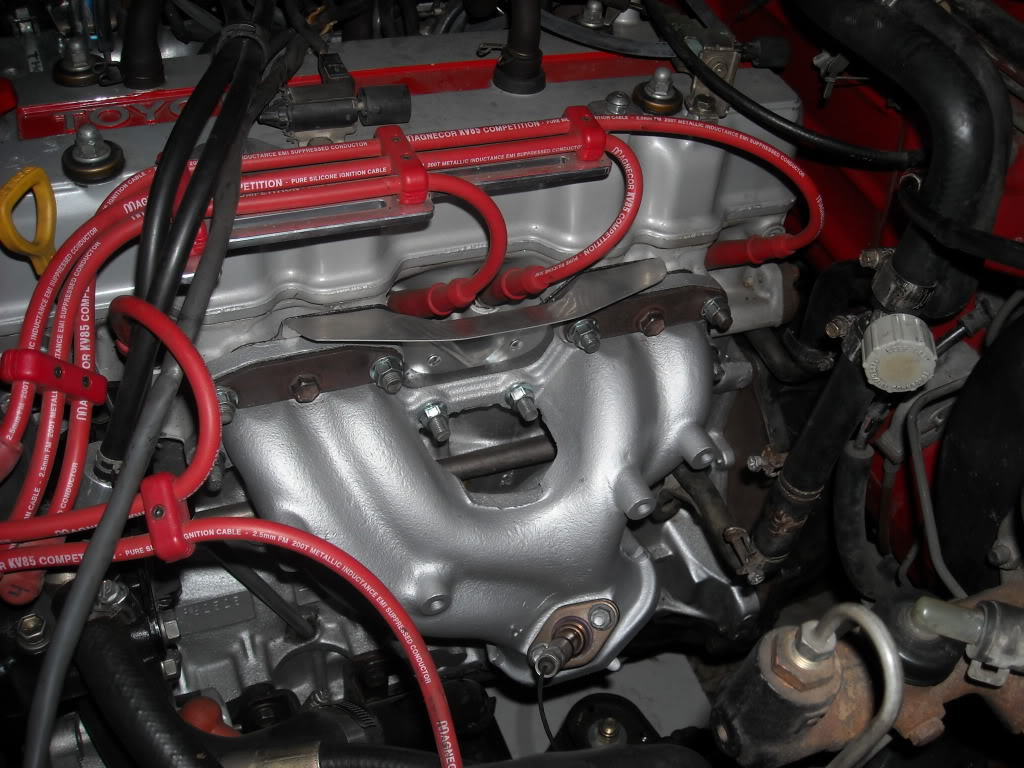
.......It's factory.... And its just a hose that goes TO the heater core inlet, not the clamp style inside. BUT I WILL DEFINITELY hit you up when "THE CORE" miniseries begins! Lol.
.......It's factory.... And its just a hose that goes TO the heater core inlet, not the clamp style inside. BUT I WILL DEFINITELY hit you up when "THE CORE" miniseries begins! Lol.
Last edited by ChefYota4x4; 06-03-2013 at 11:08 PM.


